
01Who this is for
- Course creators who need a clear overview while building lessons, the map keeps the structure visible.
- Membership site owners who want to quickly change the order of modules without leaving the editor.
02Membership courses, explained
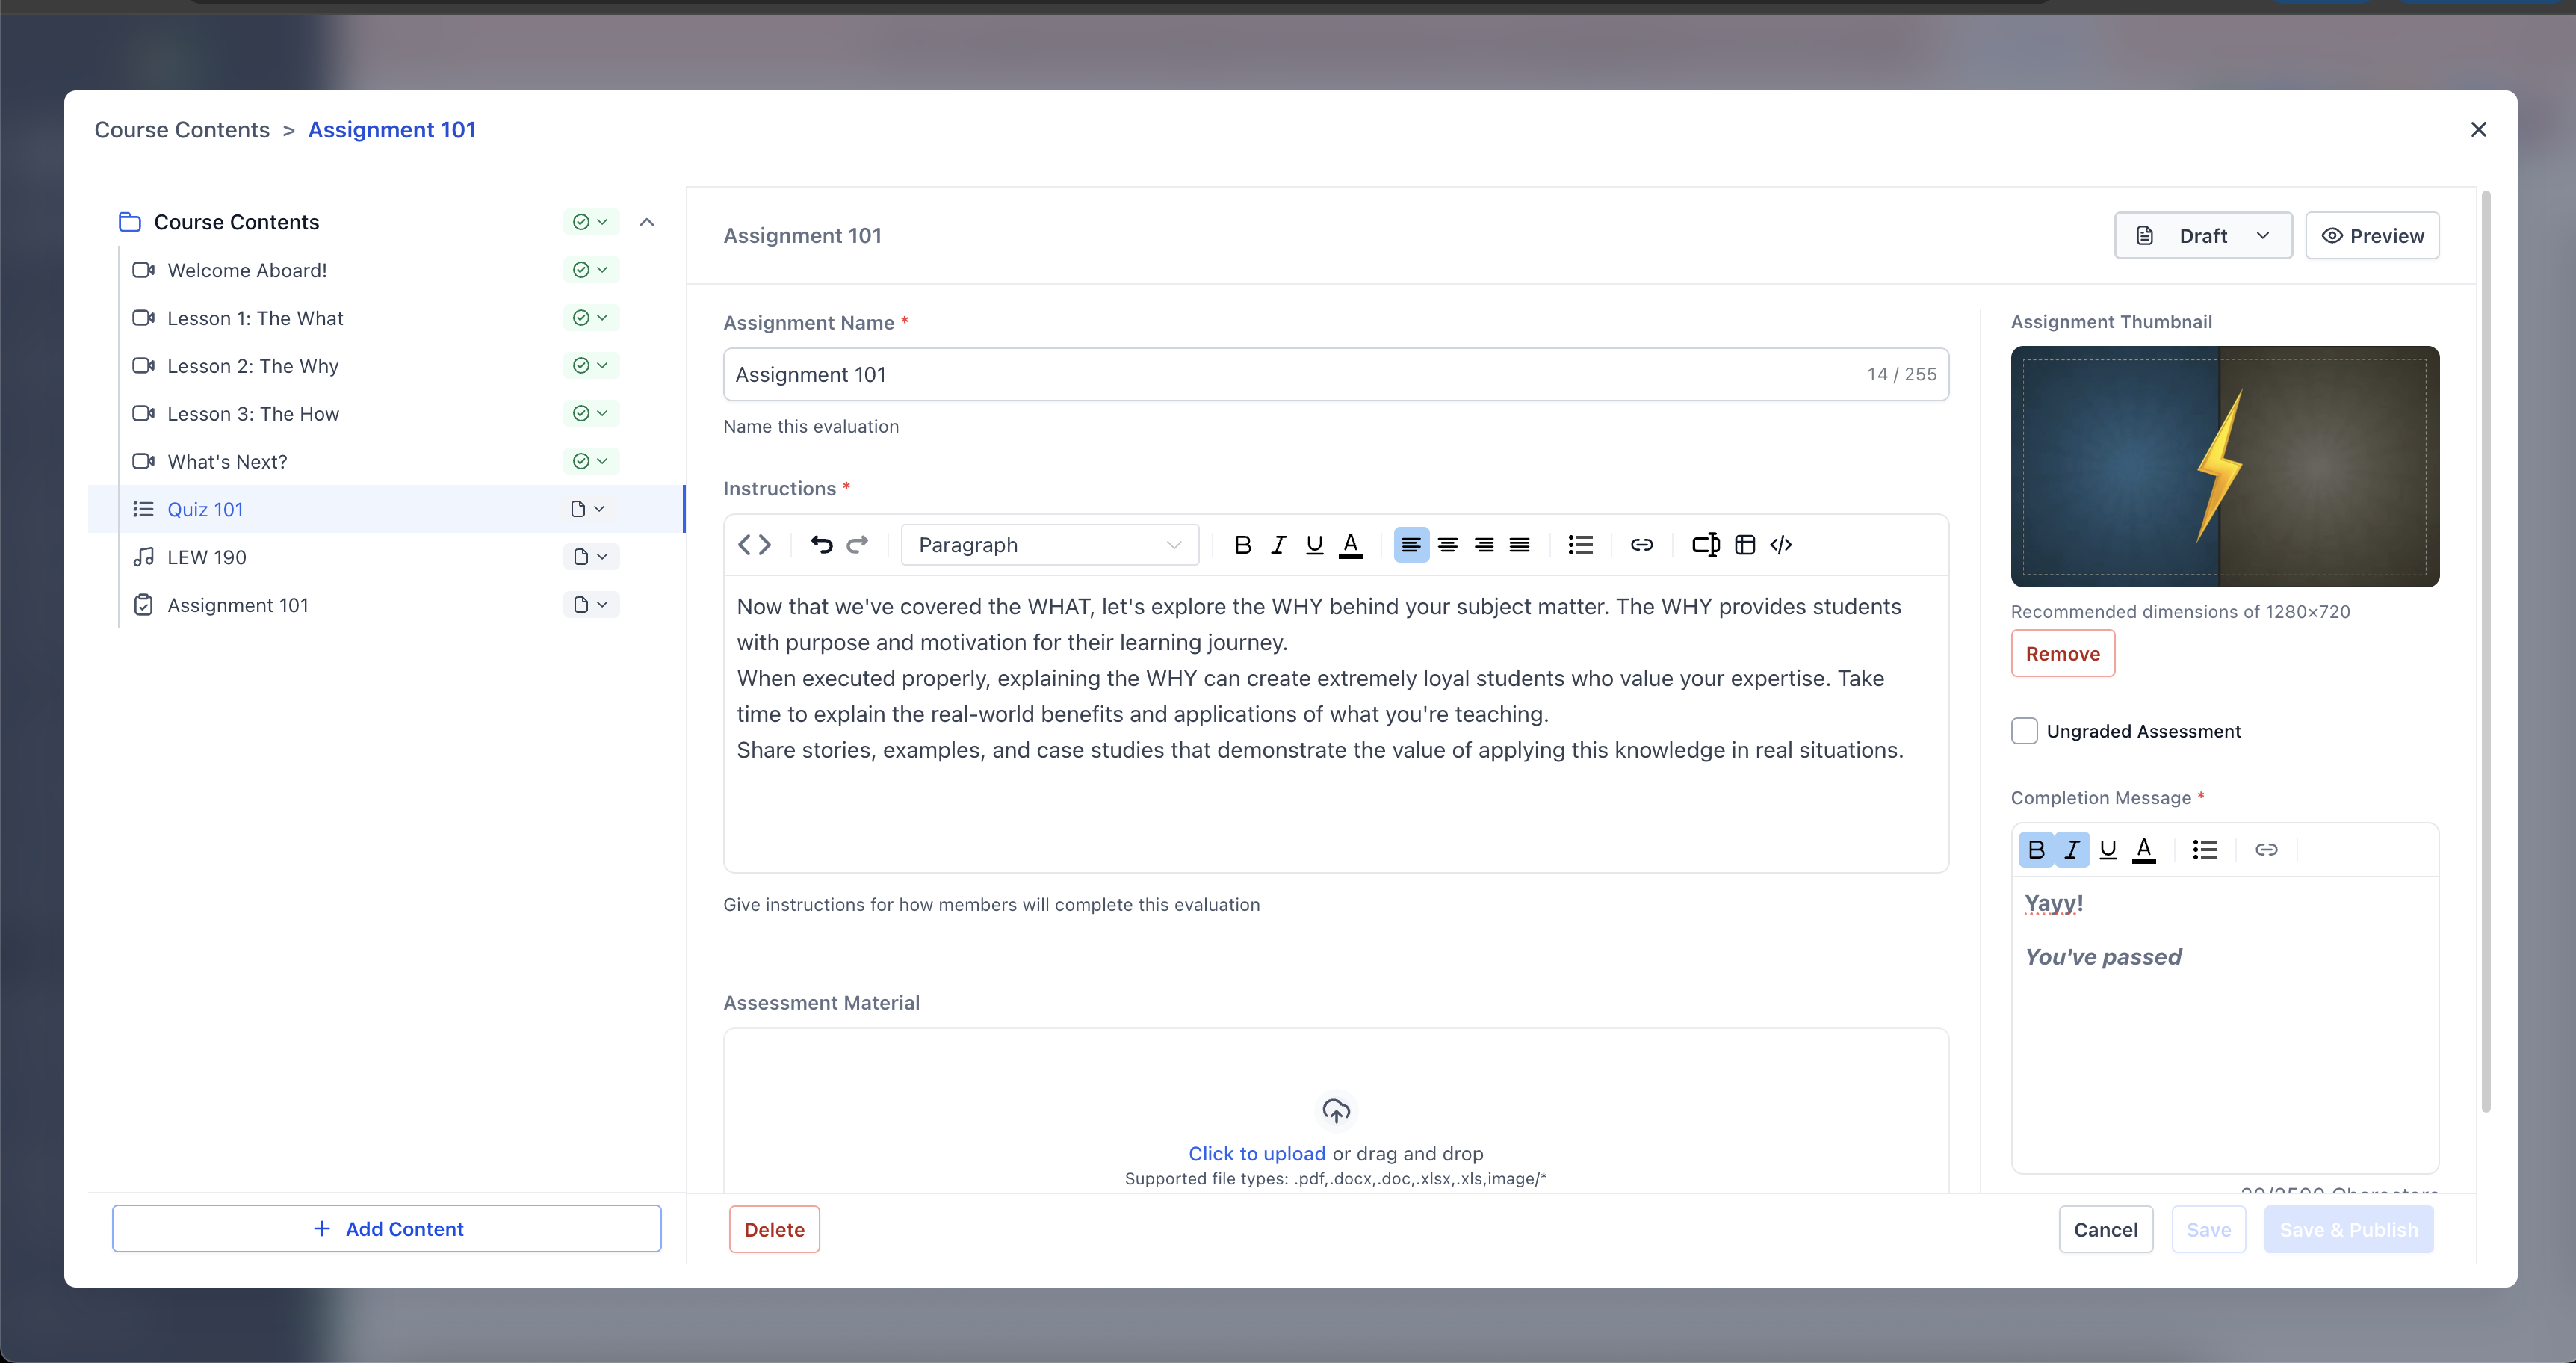
The new editor opens in a large window that occupies most of the screen, removing distractions from other parts of the platform. A left hand course map displays the complete hierarchy of modules, lessons, and quizzes, acting like a table of contents.
Breadcrumbs sit at the top of the window, always indicating the current item being edited. When you select an item in the map, its details appear in the main editor area where you can edit content, settings, or media.
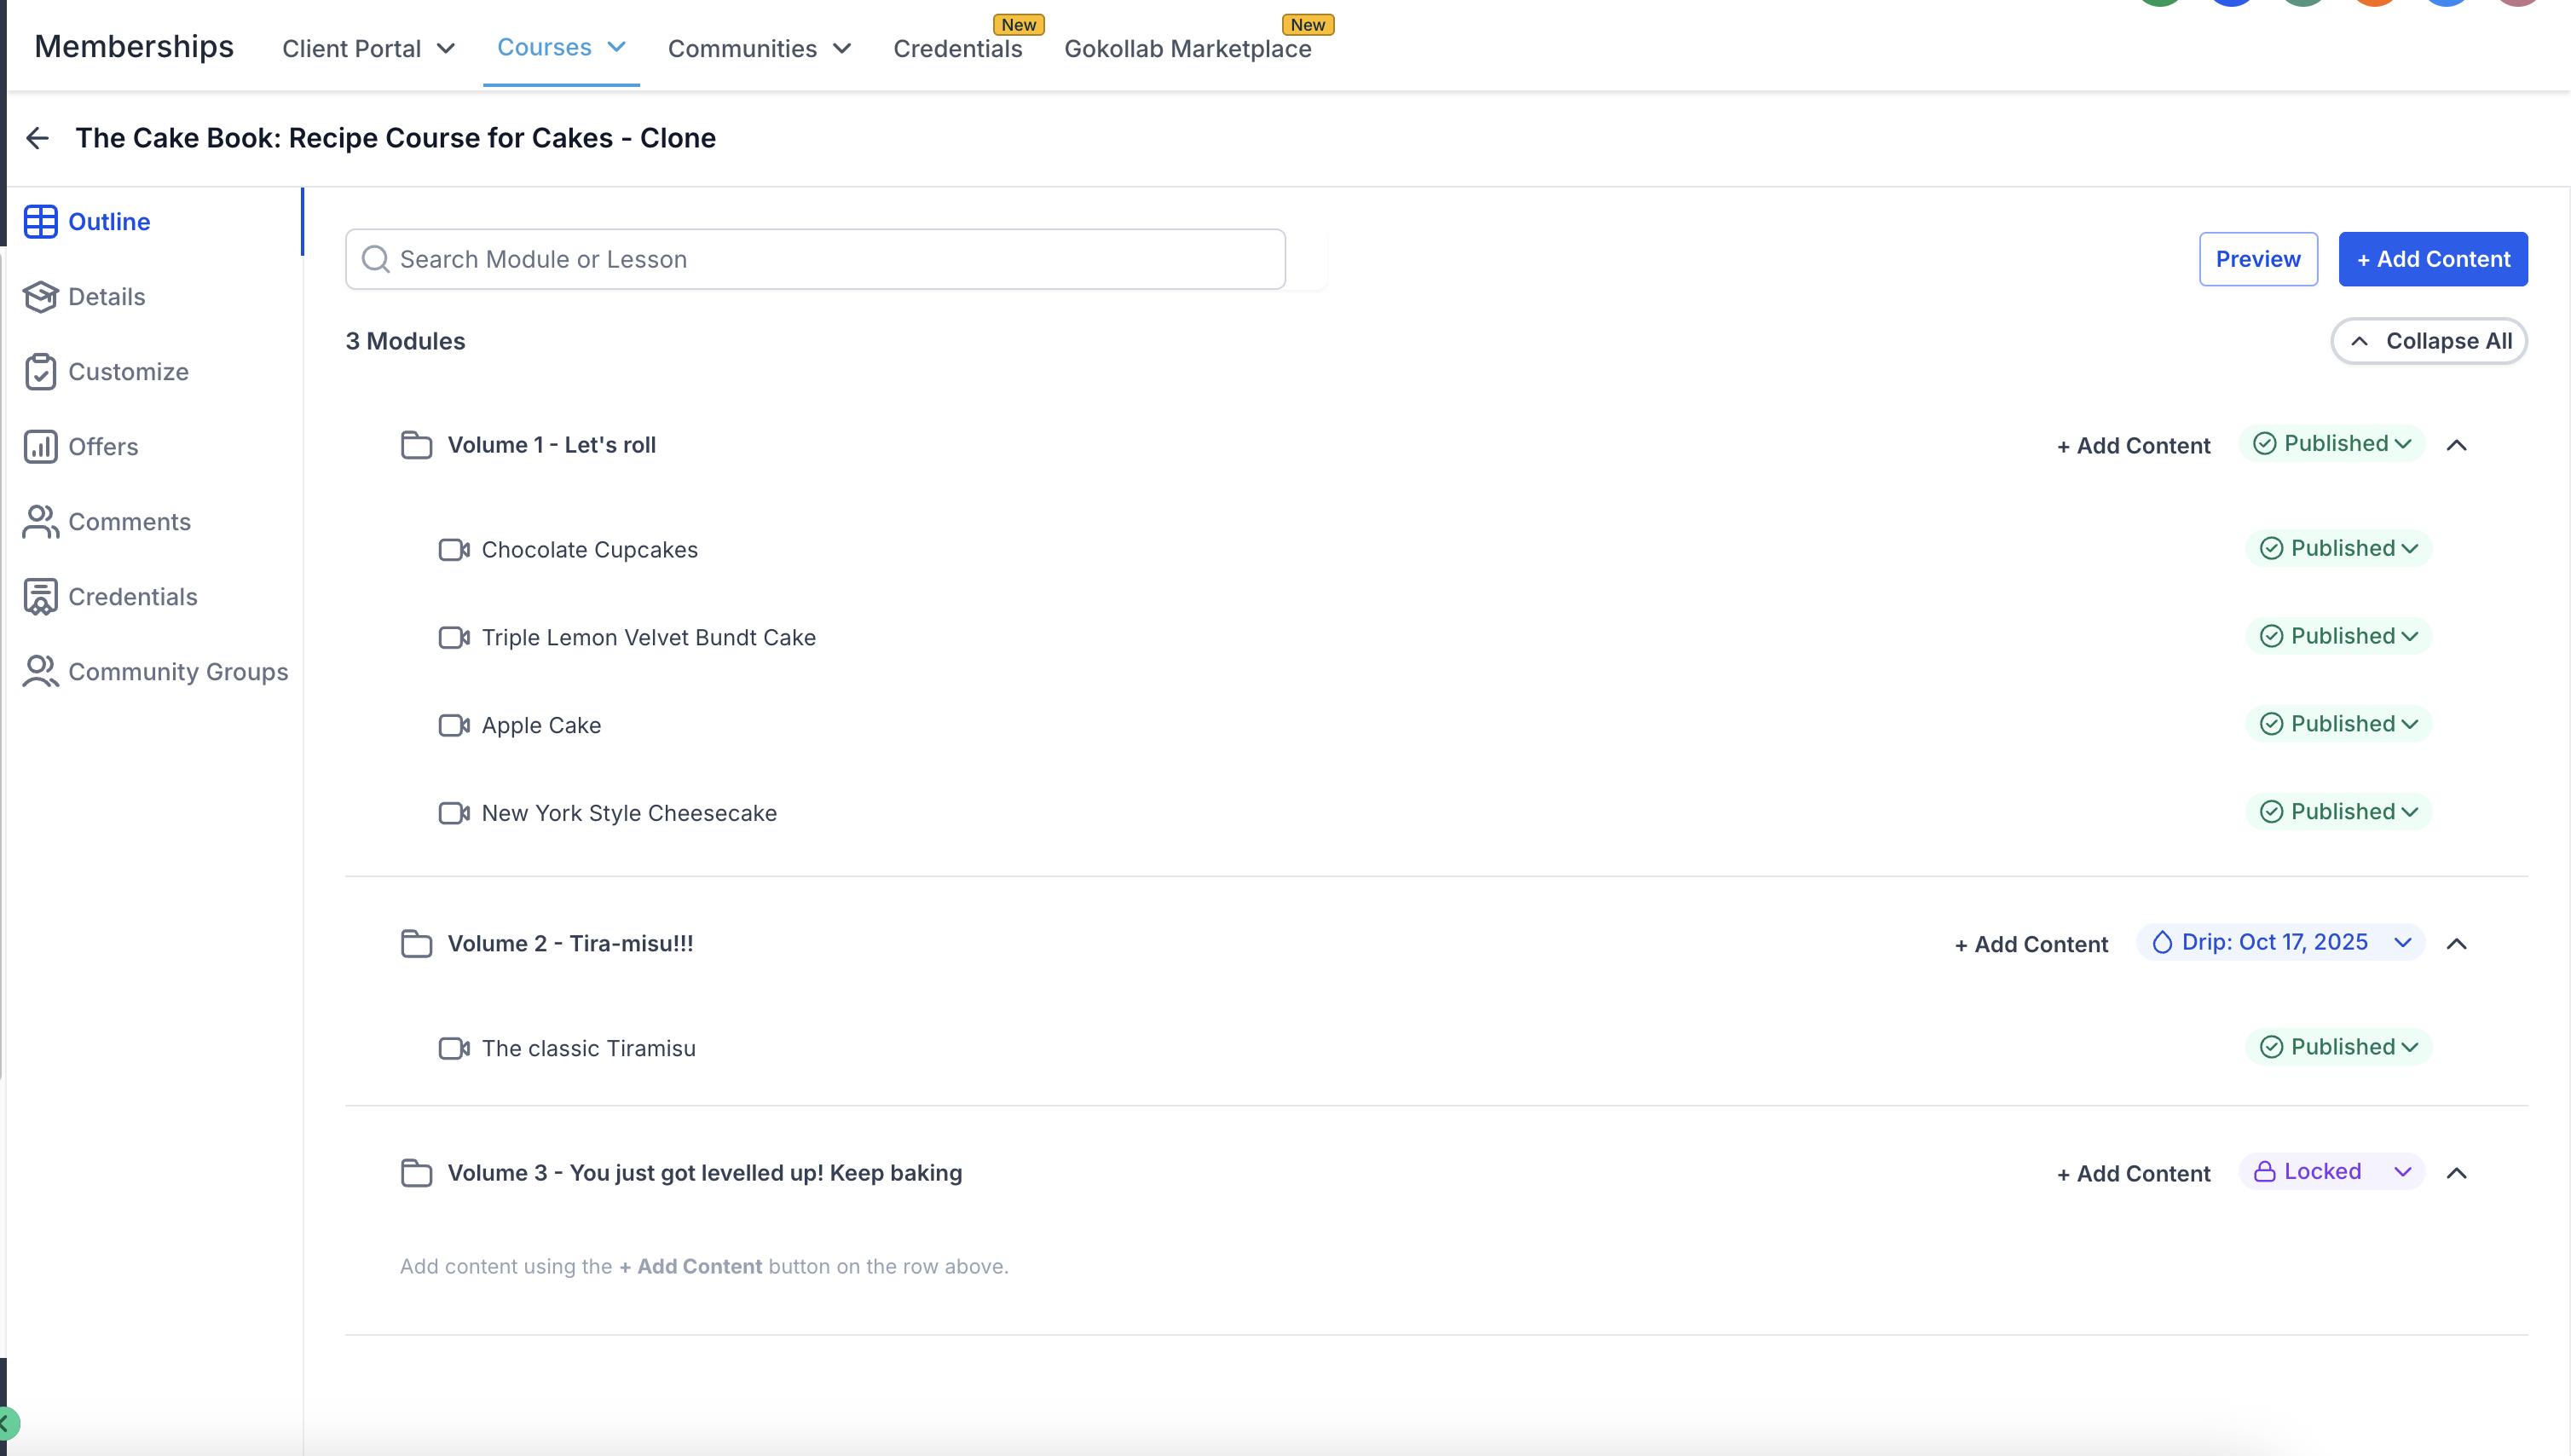
The editor lets you drag items in the course map to new positions, collapse or expand sections to focus on a specific area, and view status icons that show whether content is published, a draft, or locked. Quick actions in the map let you edit, delete, or change visibility with a single click.
03How businesses use edit membership courses
- Online coaching business. Open the editor to view the entire coaching curriculum, drag and drop lessons to match a new training sequence, collapse completed modules while working on upcoming content, and use the status icons to publish or lock sessions.
- Fitness membership site. Navigate the course map to locate workout videos, reorder the modules so newer programs appear first, collapse sections that are under development, and toggle visibility through quick actions to control member access.
- Art tutorial platform. Use the large editor window to edit drawing lessons, rearrange tutorial steps by dragging them in the map, collapse completed chapters for a cleaner view, and mark lessons as draft or published using the status indicators.
04The numbers and rules that matter
- Quick actions include edit, delete, and change visibility.
05How to set up and use edit membership courses in HighLevel
Open the course editor
- Navigate to Memberships and select the Courses option.
- Choose the specific course you want to modify.
- Launch the editor, which opens in a large workspace.
Understand the layout
- Look at the left panel to see the course map with the full structure.
- Observe the main editor area where the selected lesson or quiz loads for editing.
Reorder your course content
- In the course map, click an item and drag it to the desired new position.
- Release the mouse button to drop the item into its new spot.
Collapse and expand sections
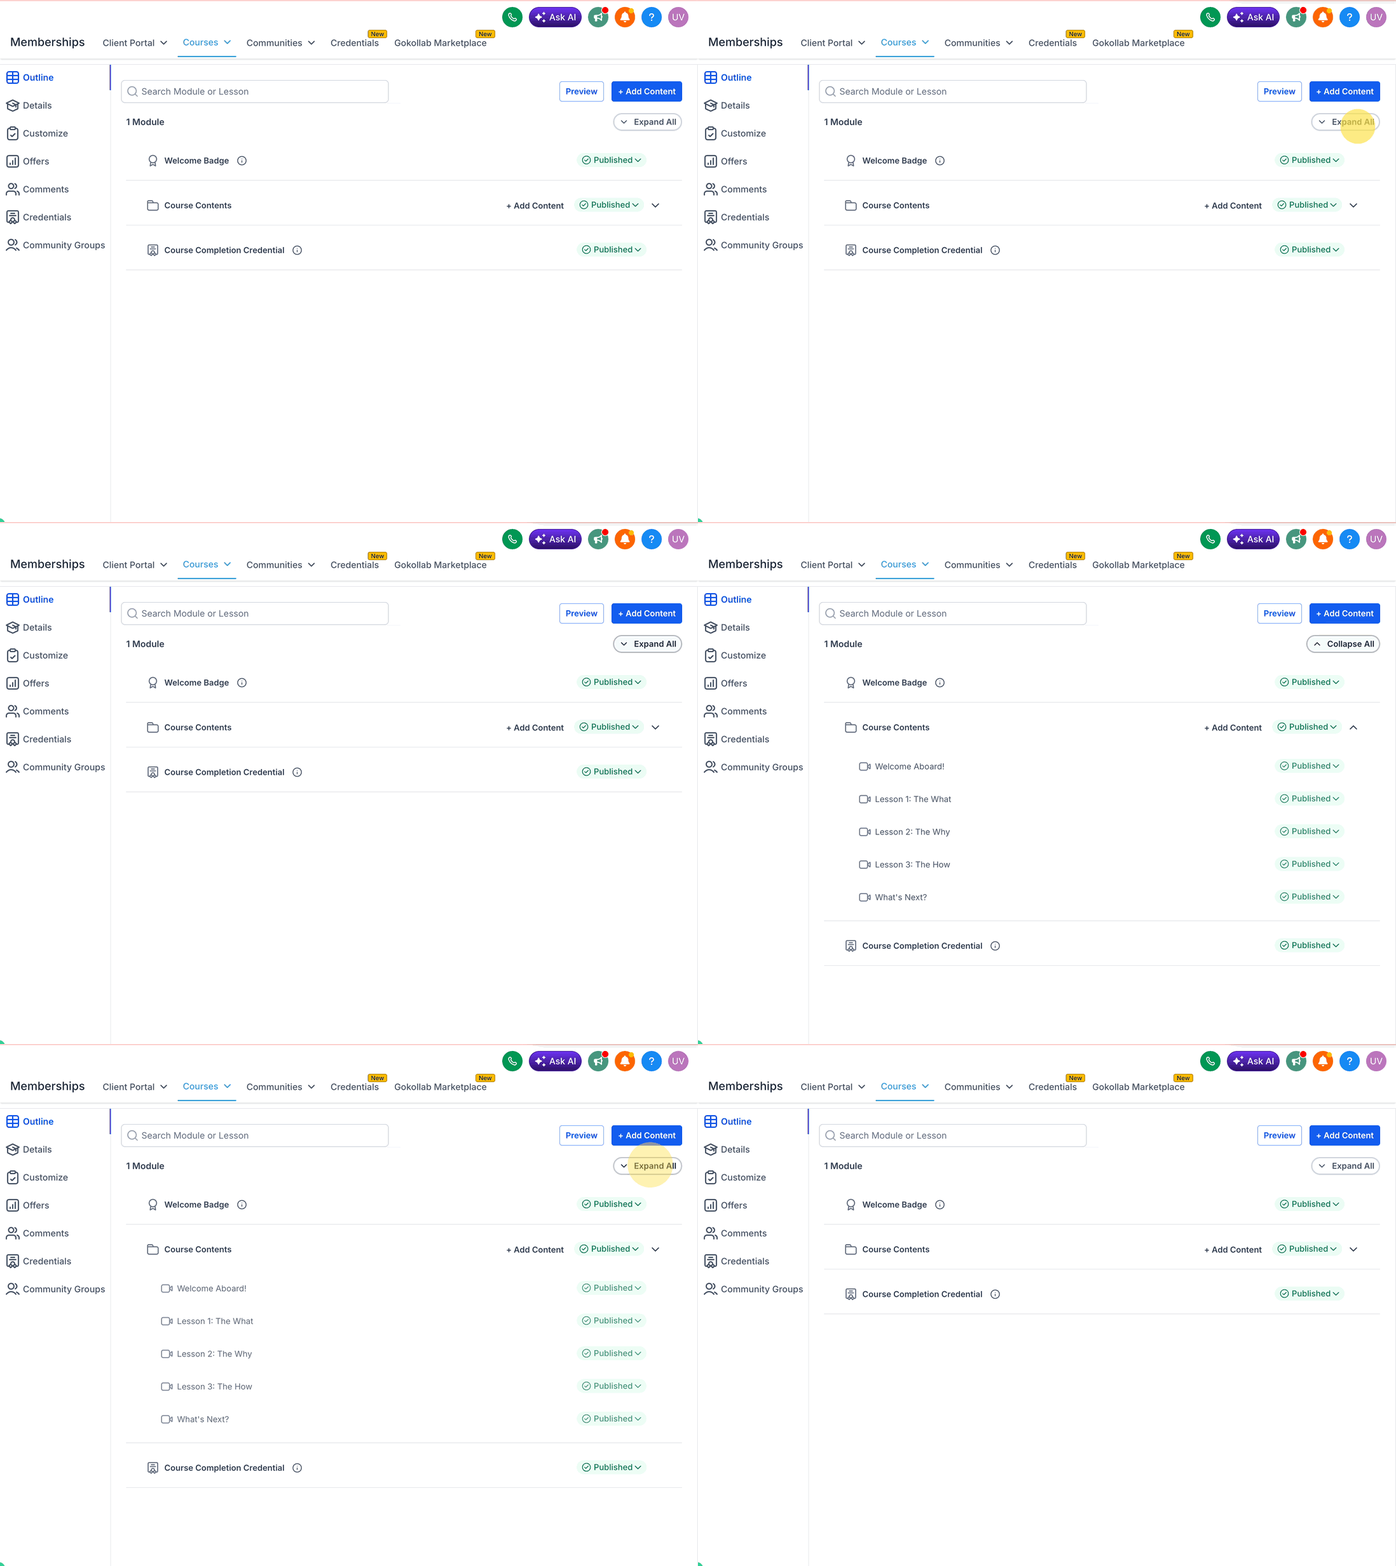
- Collapse a module or sub section to hide its inner items and focus on a single area.
- Expand the collapsed section again when you need to view the full list.
Use status indicators and quick actions
- Check the status symbol next to each item in the course map to see if it is published, a draft, or locked.
- Select a quick action such as edit, delete, or change visibility directly from the course map.
06What it looks like in HighLevel
07How it connects to the rest of HighLevel
- HighLevel course builder: set up, organize content and launch Course builder guide
- Getting started: Create & sell products Product creation
- How to create and manage a HighLevel community Community setup
Michael's take

I would dive straight into rearranging my modules with drag and drop to see how the layout feels. After that, I’d test the status icons and quick actions to make sure I can publish or hide lessons without opening a separate window.