
01Who this is for
- Coaches who need to sell membership subscriptions and recurring training packages.
- Ecommerce retailers that require inventory tracking and SEO friendly product pages.
- Service providers who want to offer one time consultations or digital downloads via invoices or payment links.
02Products, explained
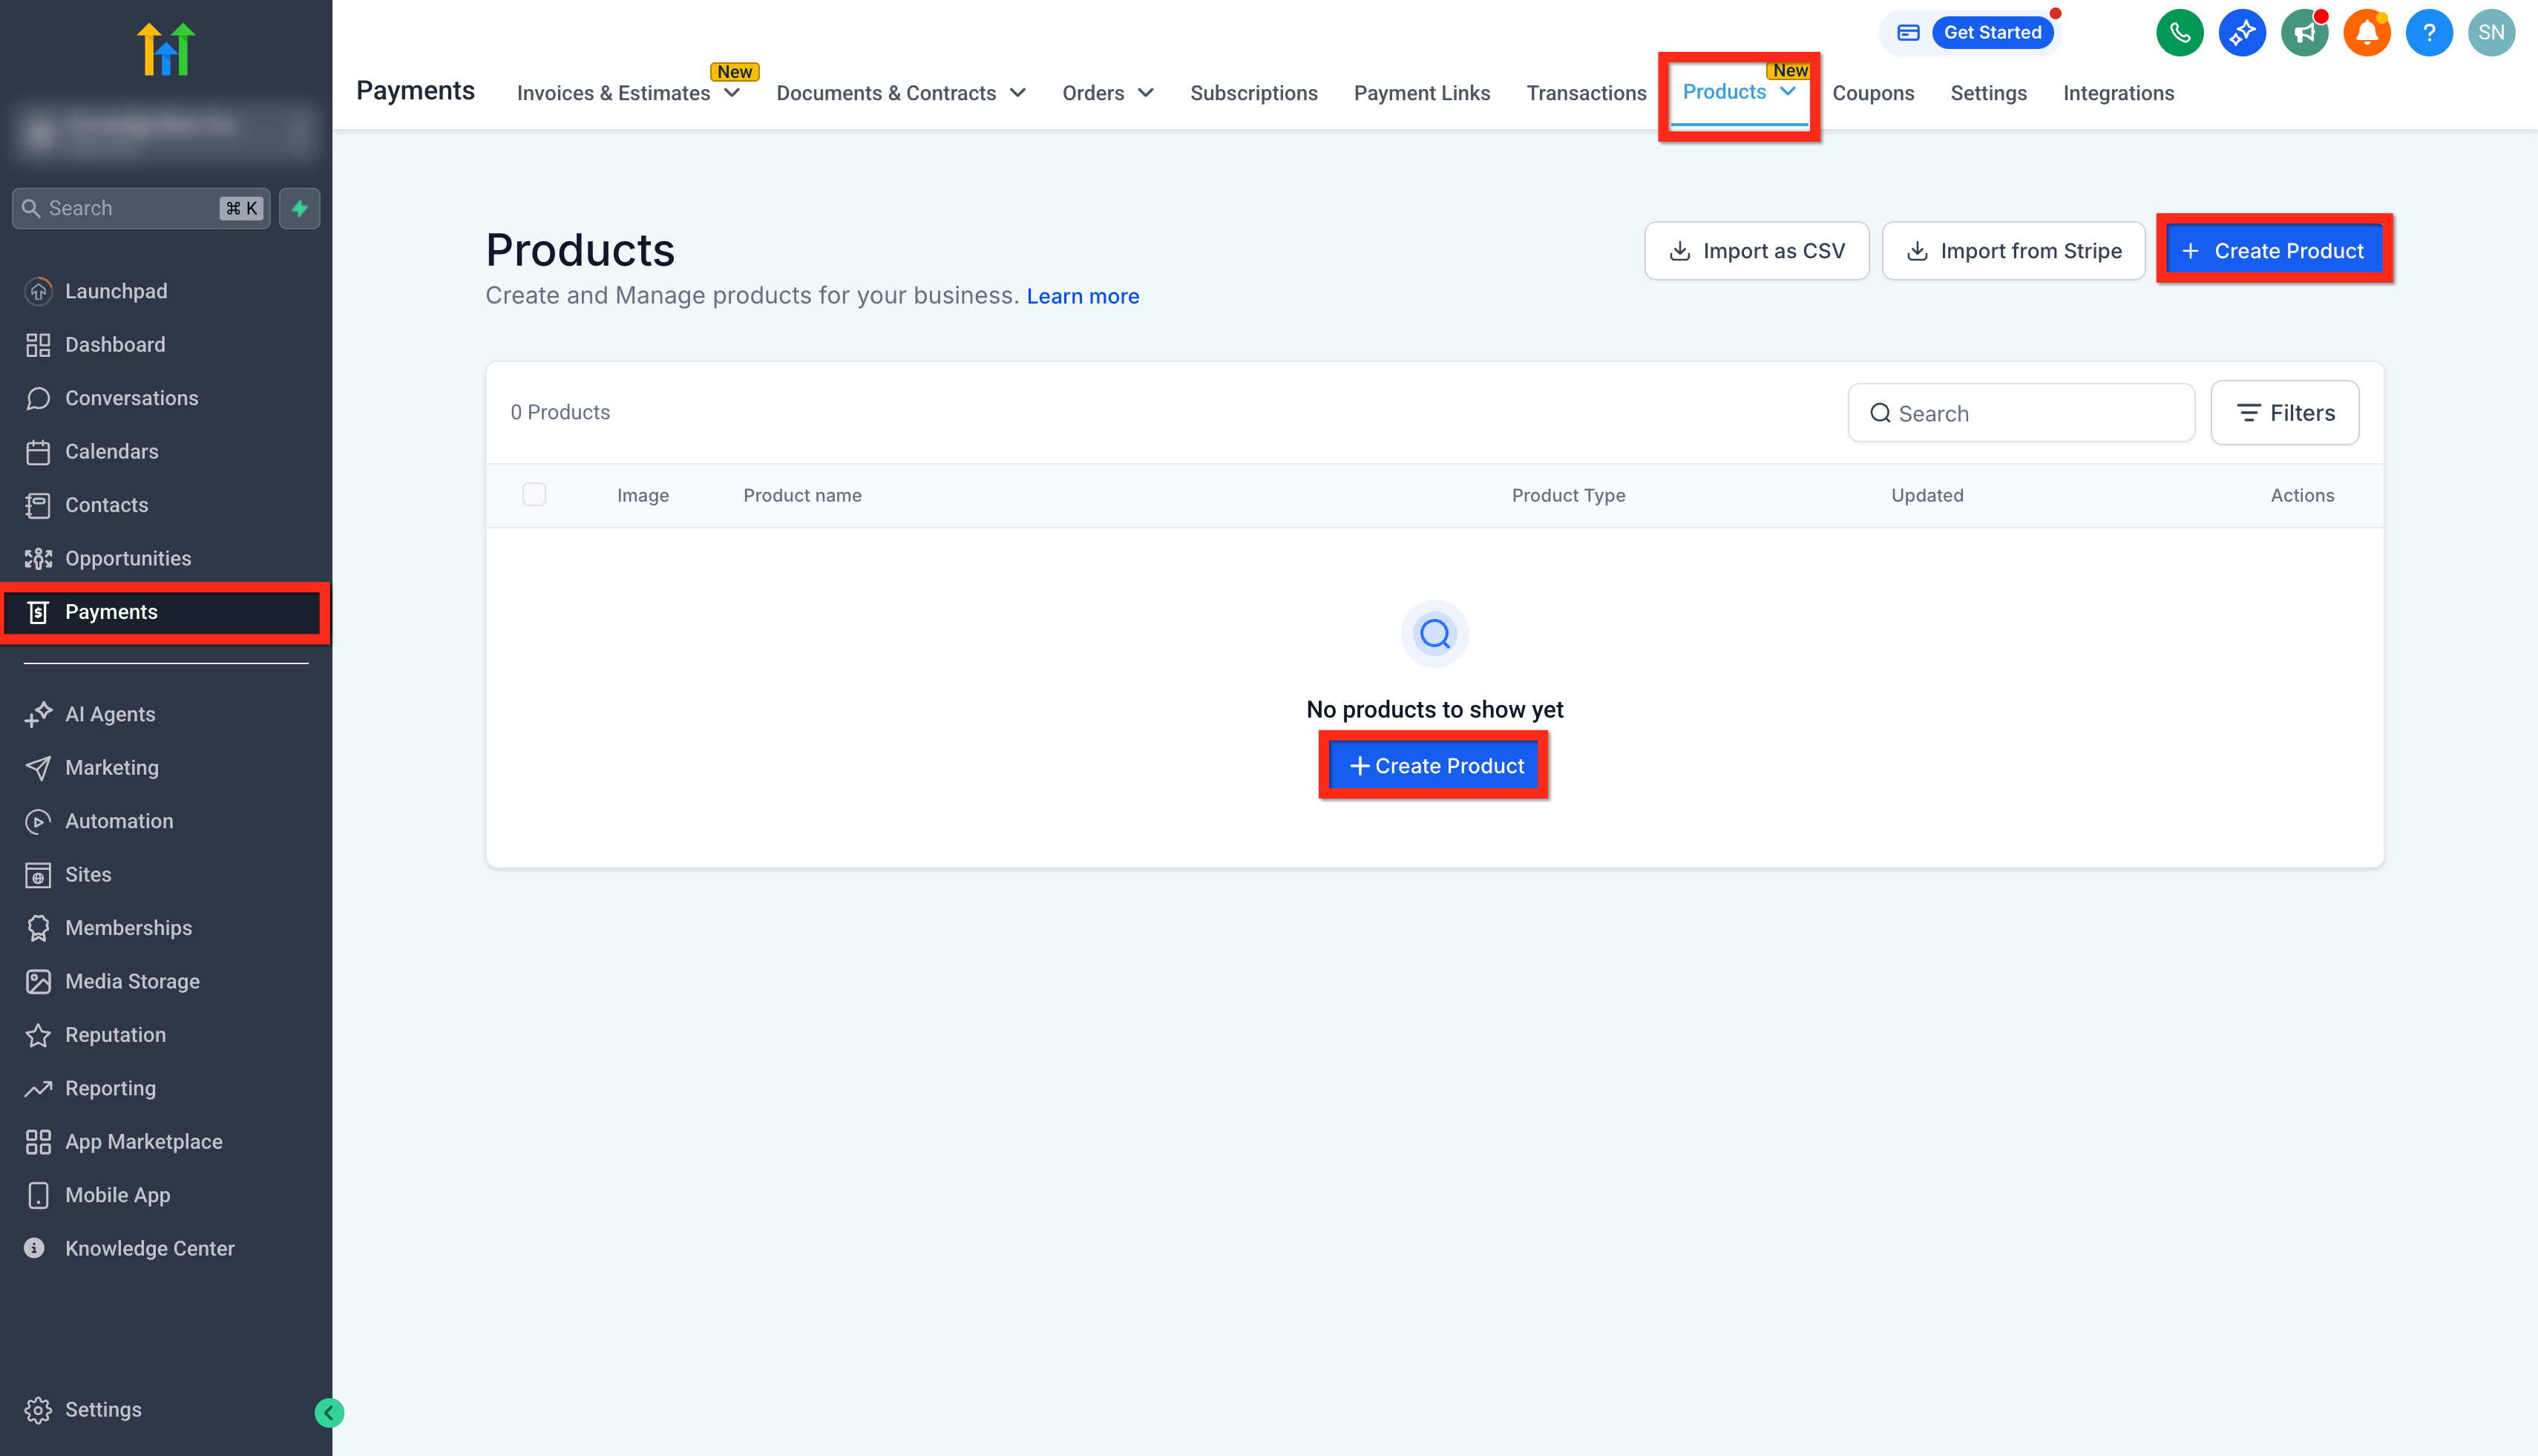
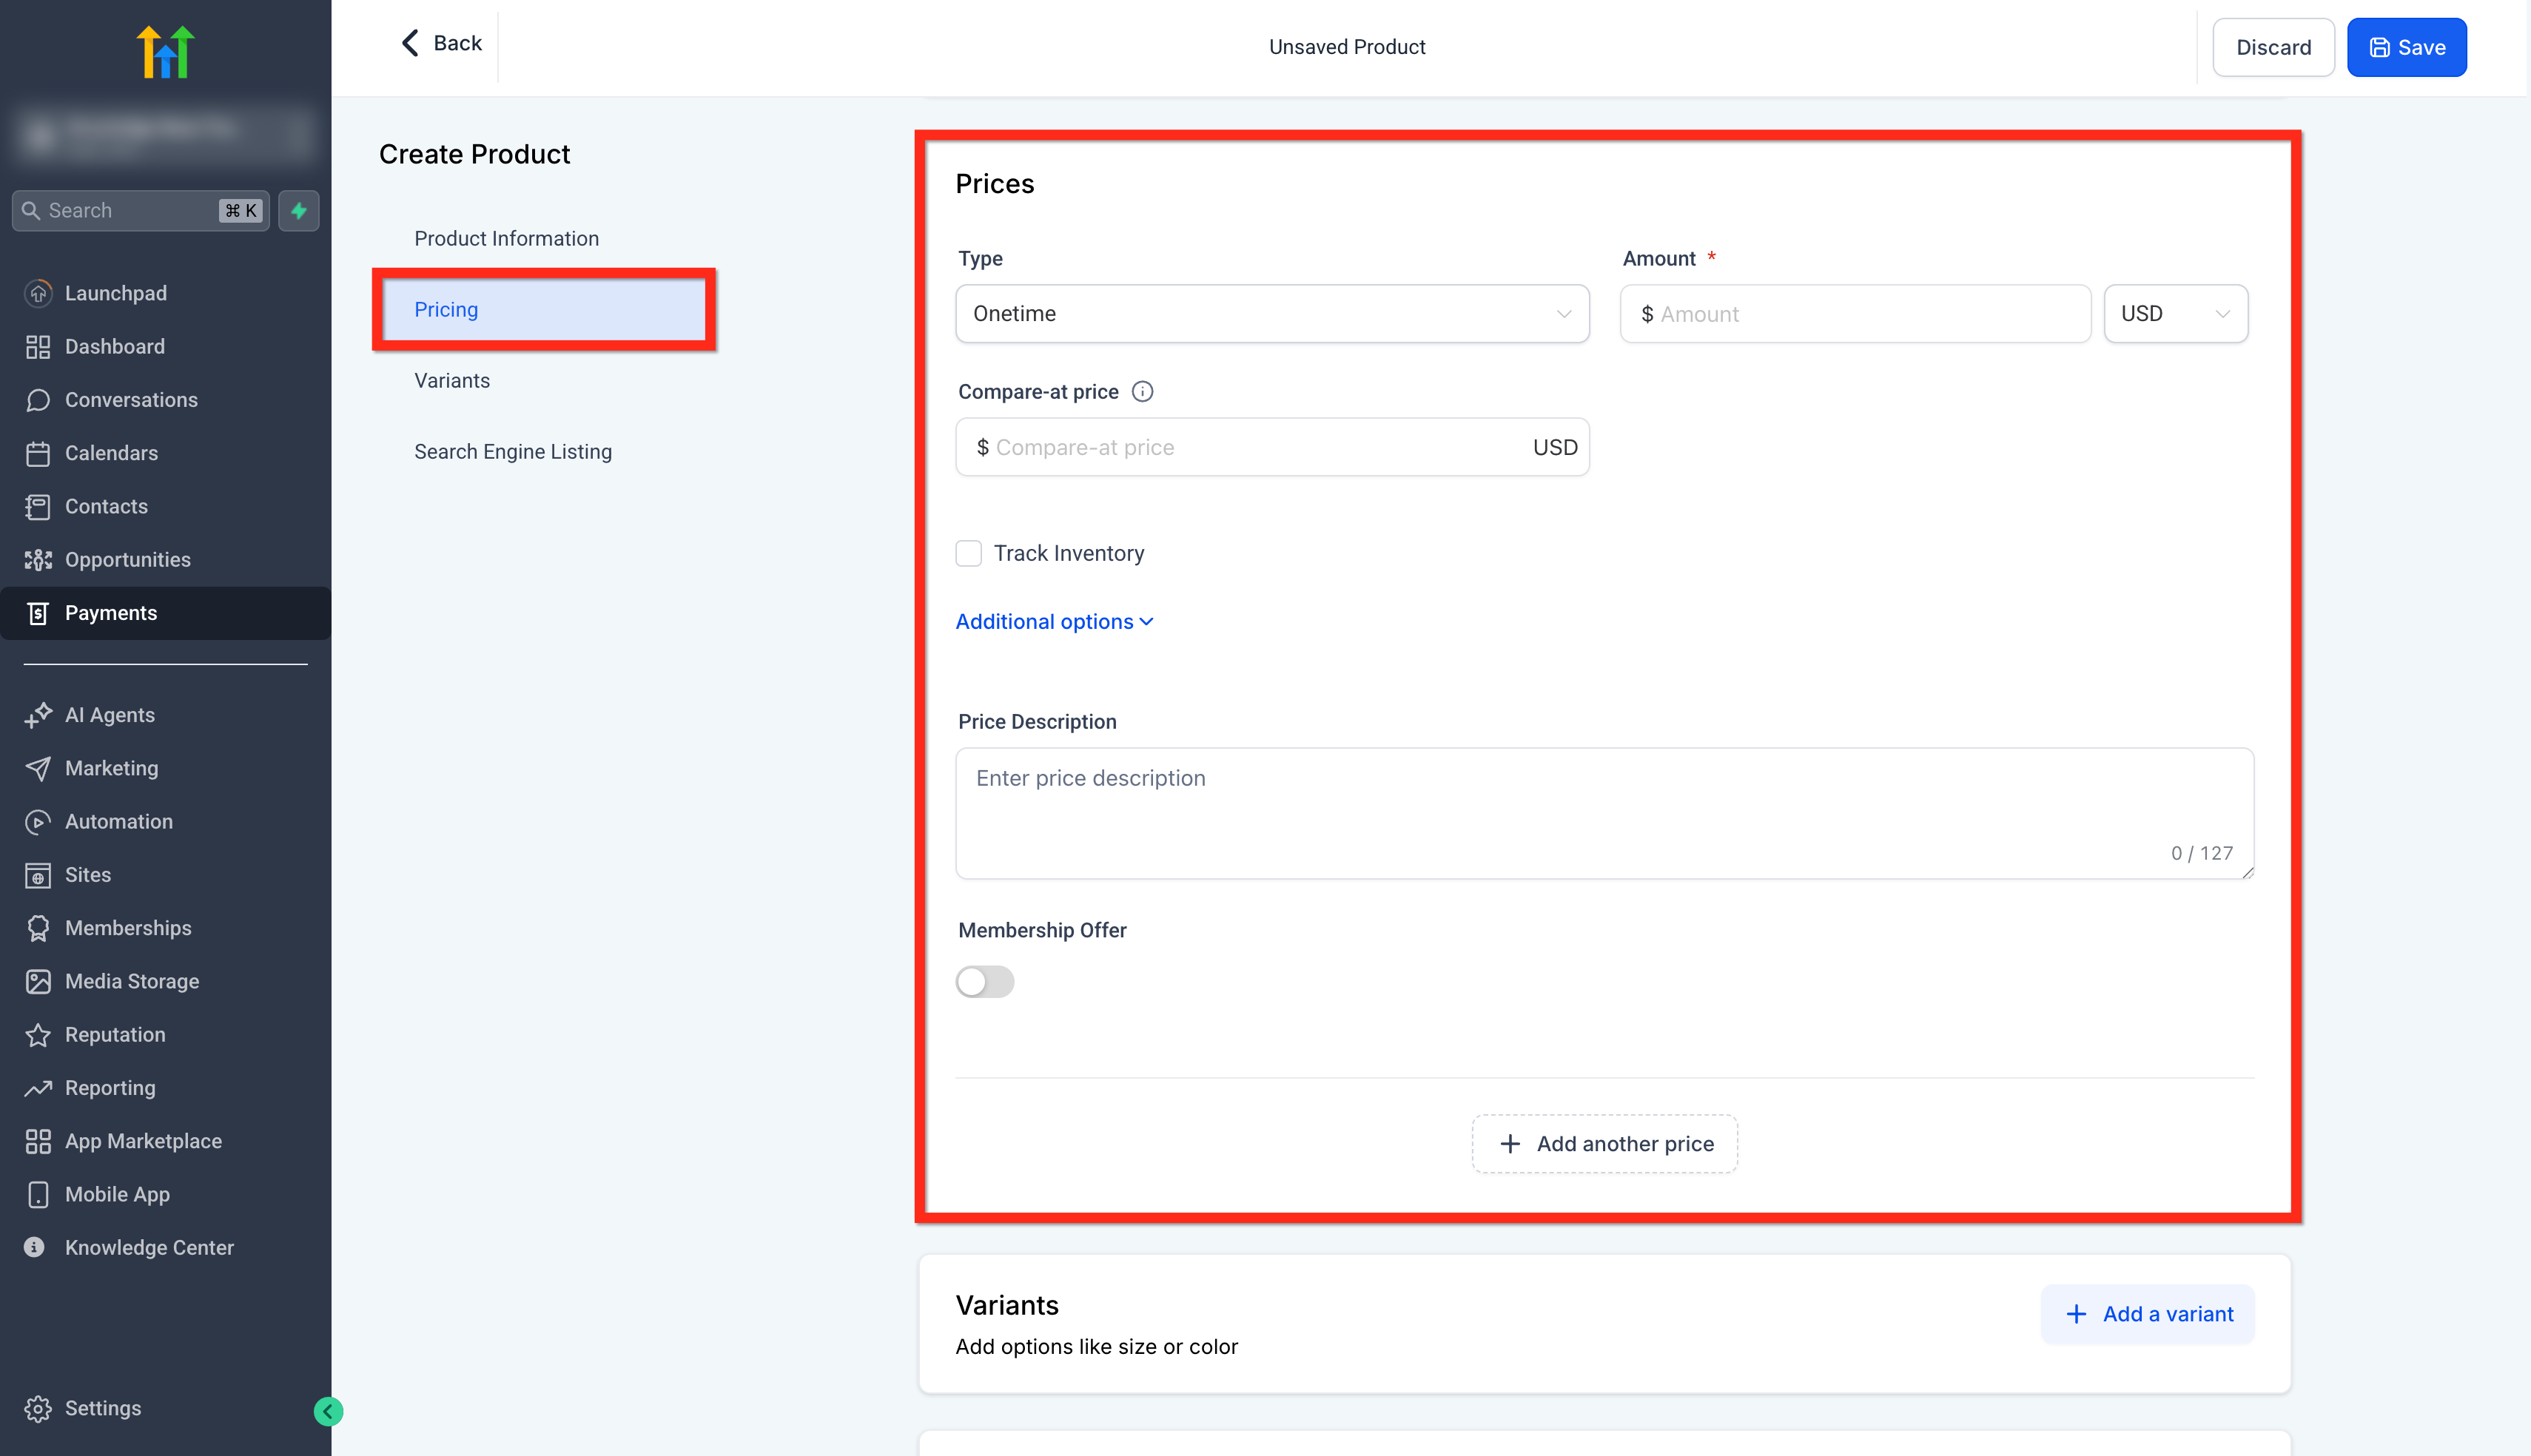
The product feature lives under Payments > Products. From there you can add a new product, define its title, description, media, collections, tax settings and pricing. Pricing can be one time or recurring, with options for compare at price, currency, inventory tracking and additional metadata.
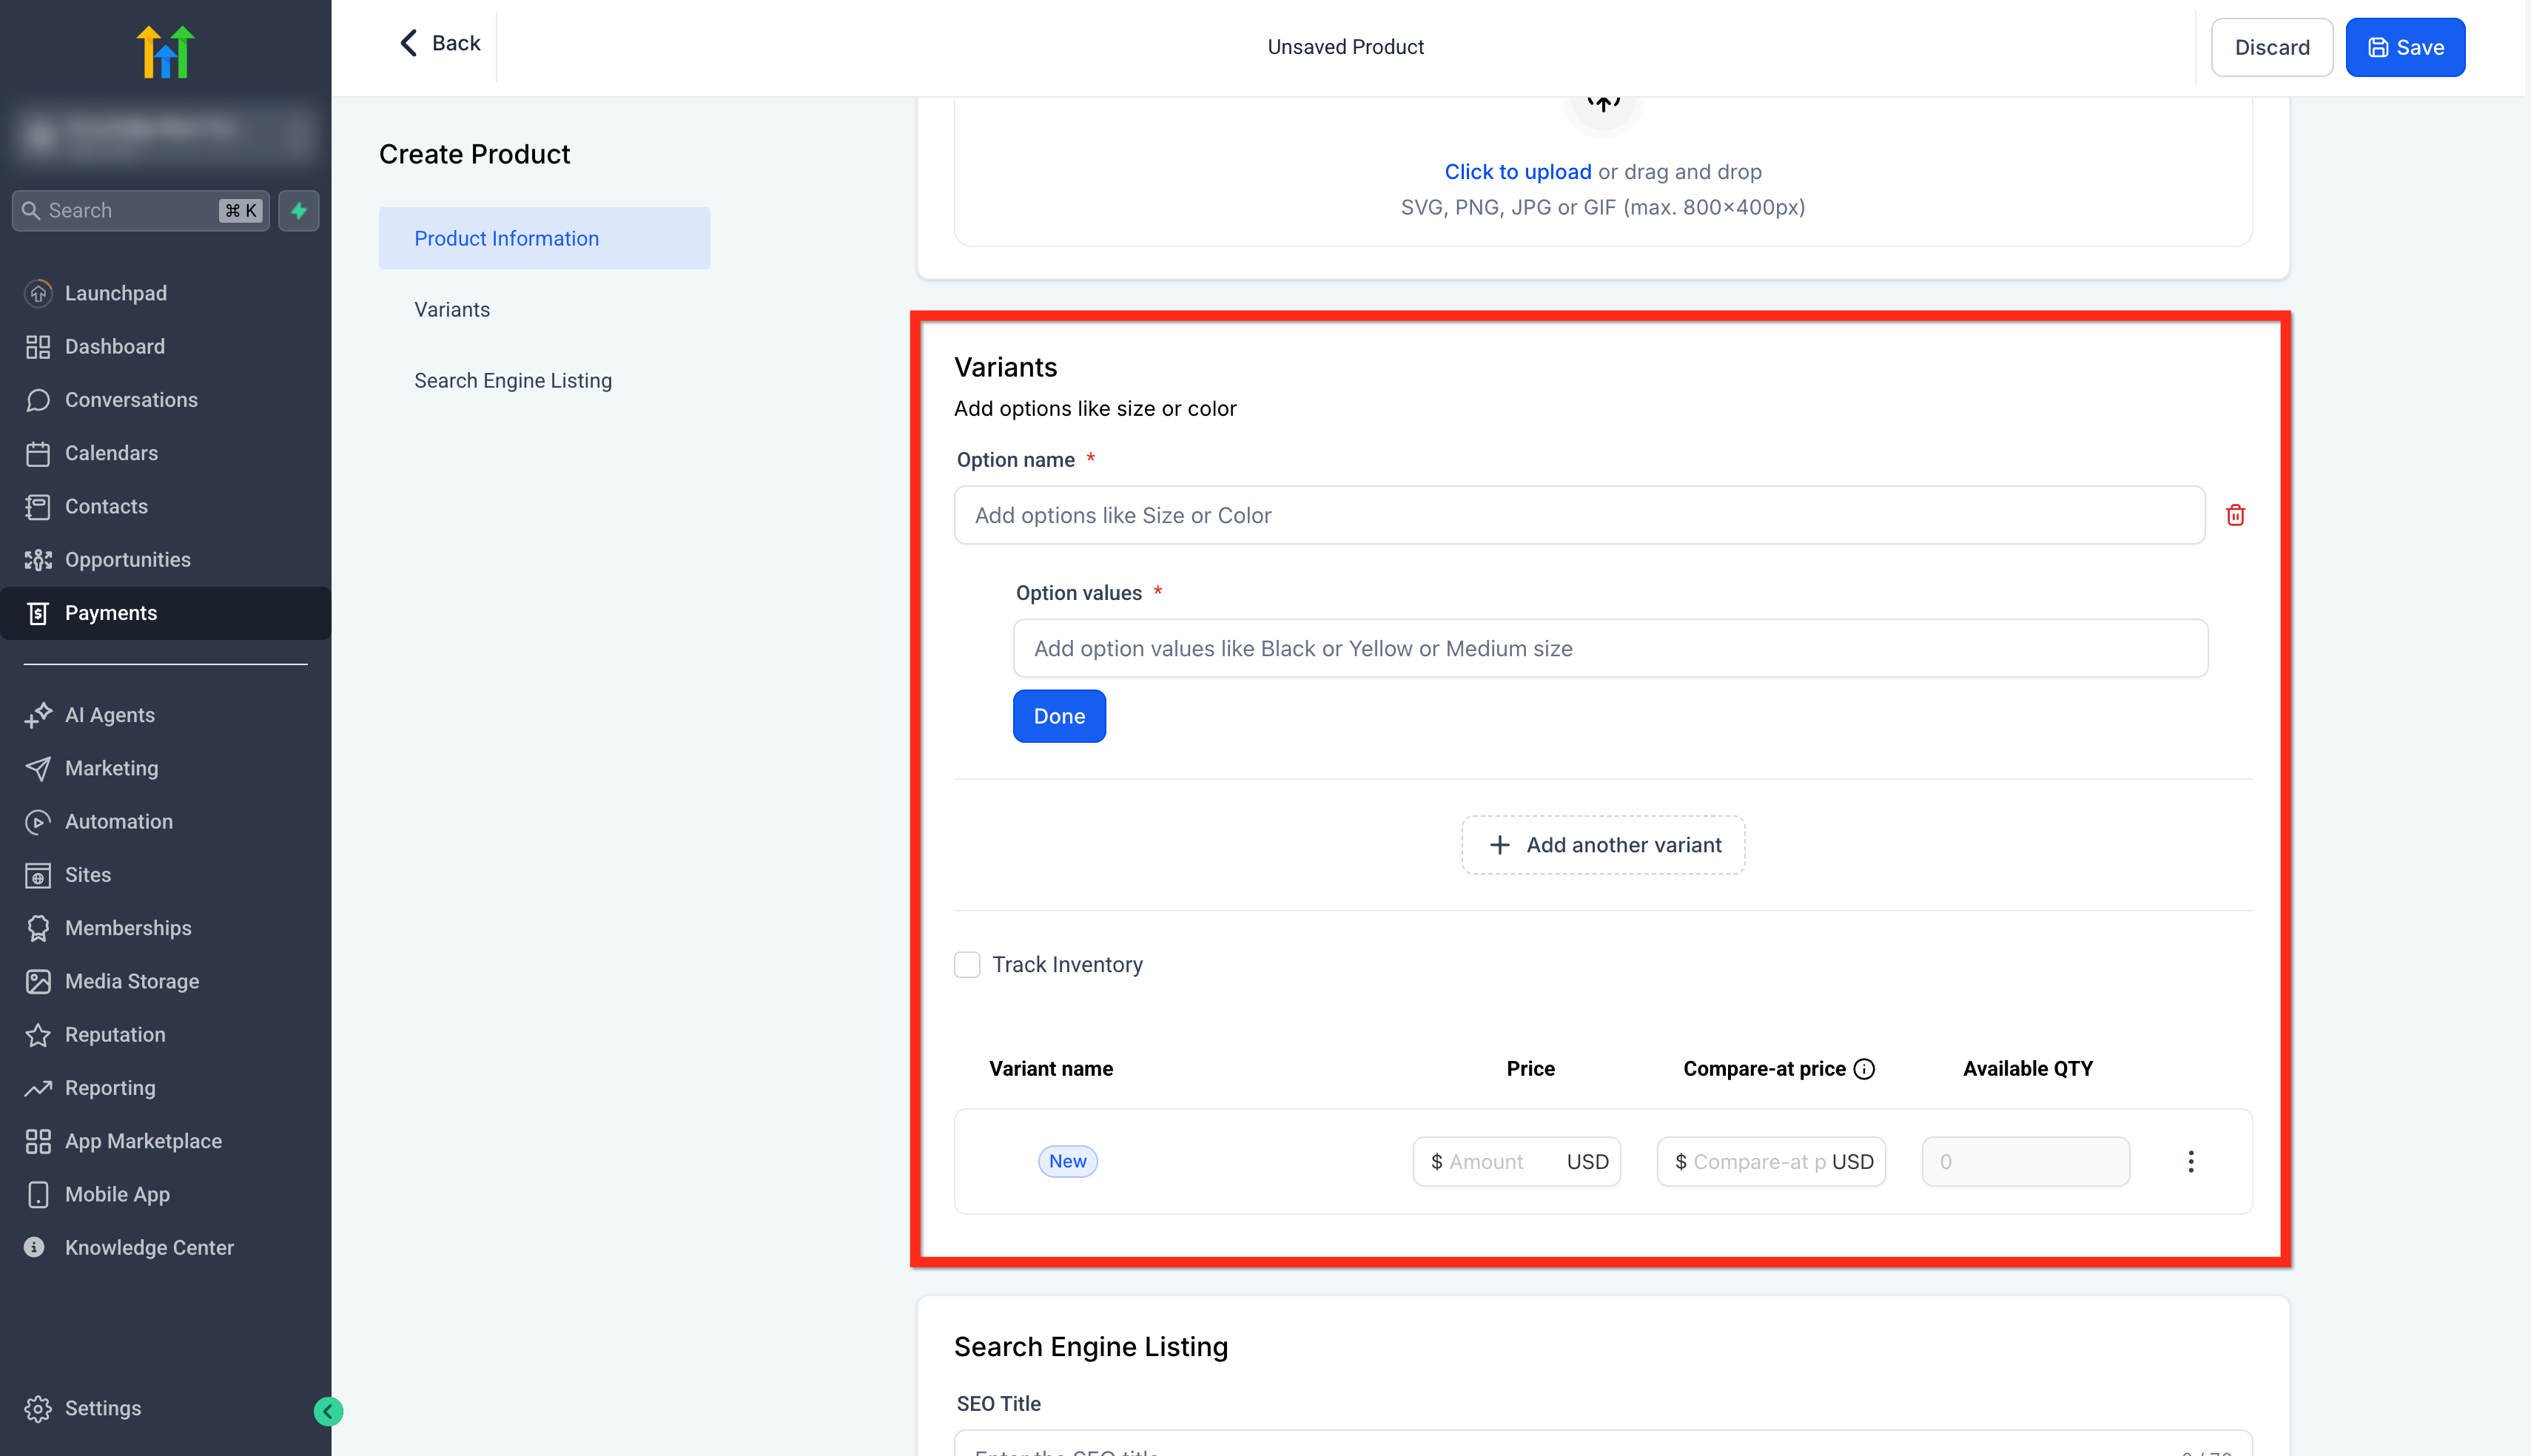
After a product is saved you can enable it for the online store, attach it to a funnel, create a direct payment link, add it to an invoice, or embed it in a form. Variants let you offer multiple versions of the same item, each with its own price and stock level. SEO fields let you control the page title, description and URL slug for better discoverability.
03How businesses use products
- Coaching business. Create a recurring subscription product for monthly coaching sessions, set a trial period of 7 days, then add the product to a funnel checkout page. The funnel captures leads and processes the subscription automatically.
- Online retailer. Add a physical product, enable inventory tracking, upload a product image, and publish it in the online store. Customers can browse the store and purchase the item using the built in checkout.
- Digital content creator. Upload a video file to a digital product variant, ensure the file is attached, and then generate a payment link. Share the link via email or SMS so buyers receive immediate download access after purchase.
04The numbers and rules that matter
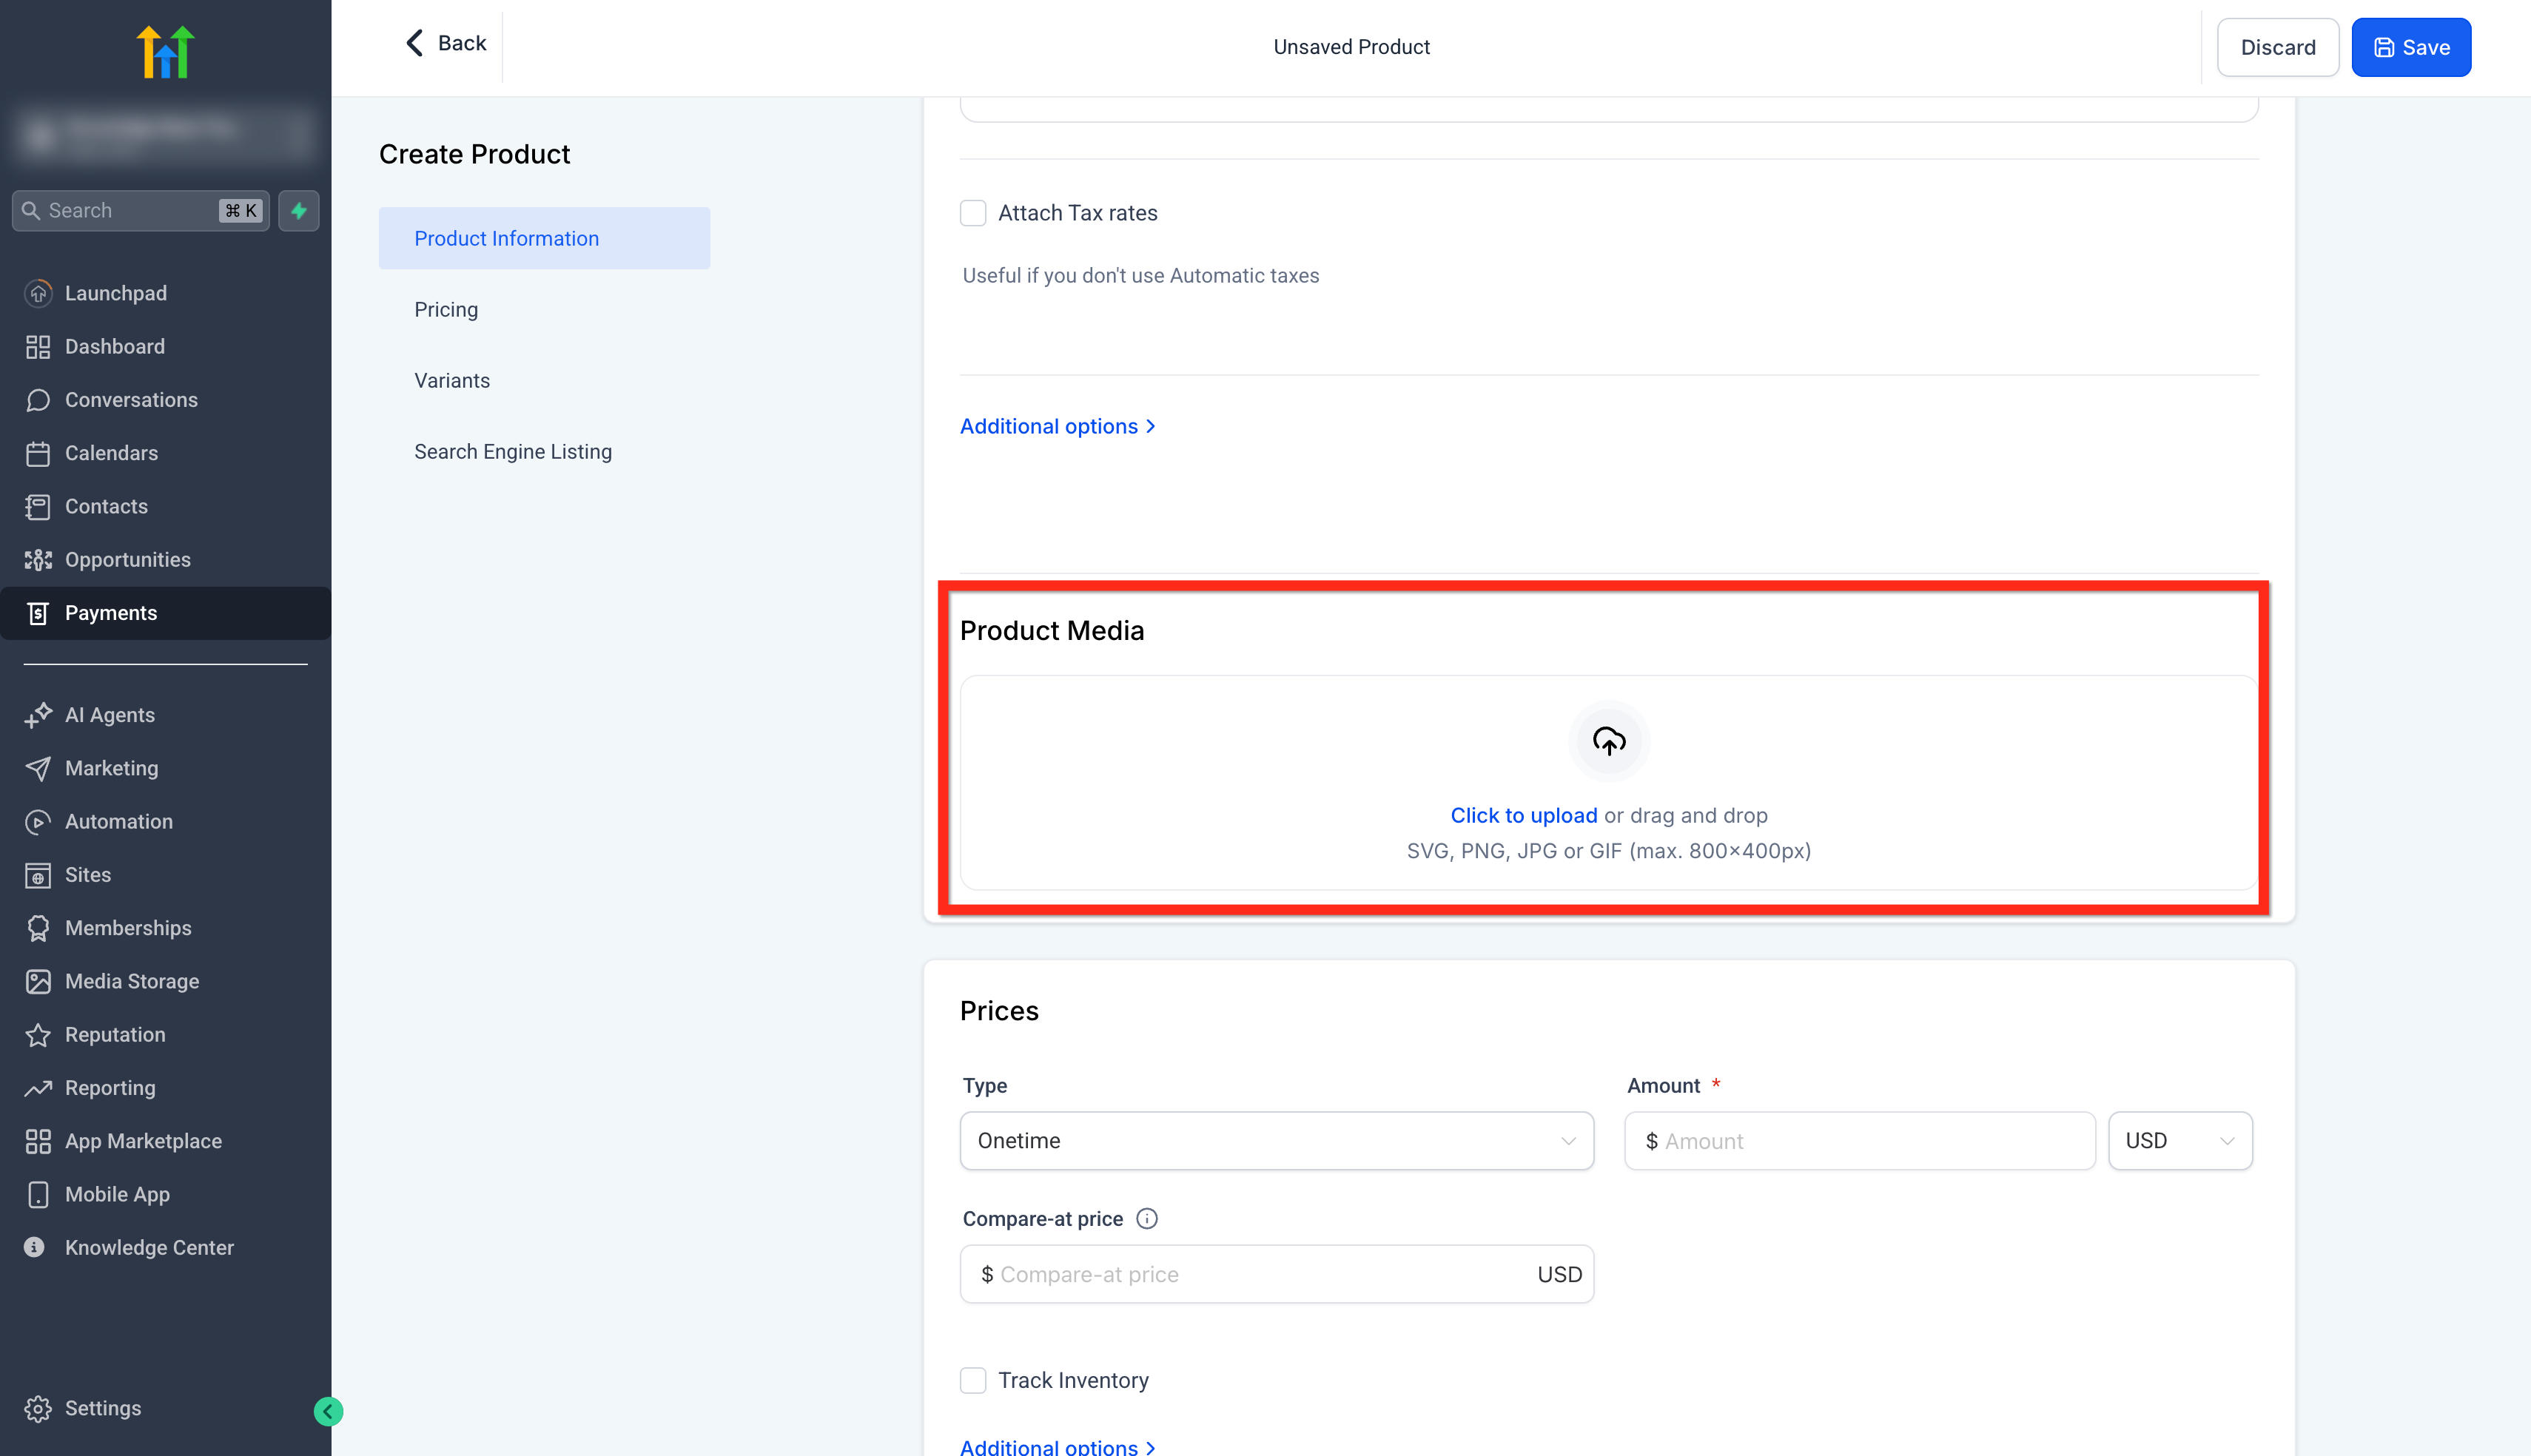
- Recommended media resolution is 1024×1024 and file size not exceeding 10MB.
05Before you start
- A product must be created and saved before it can be added to a funnel or order form.
06How to set up and use products in HighLevel
Create a product
- Open Payments > Products.
- Click the + Create Product button.
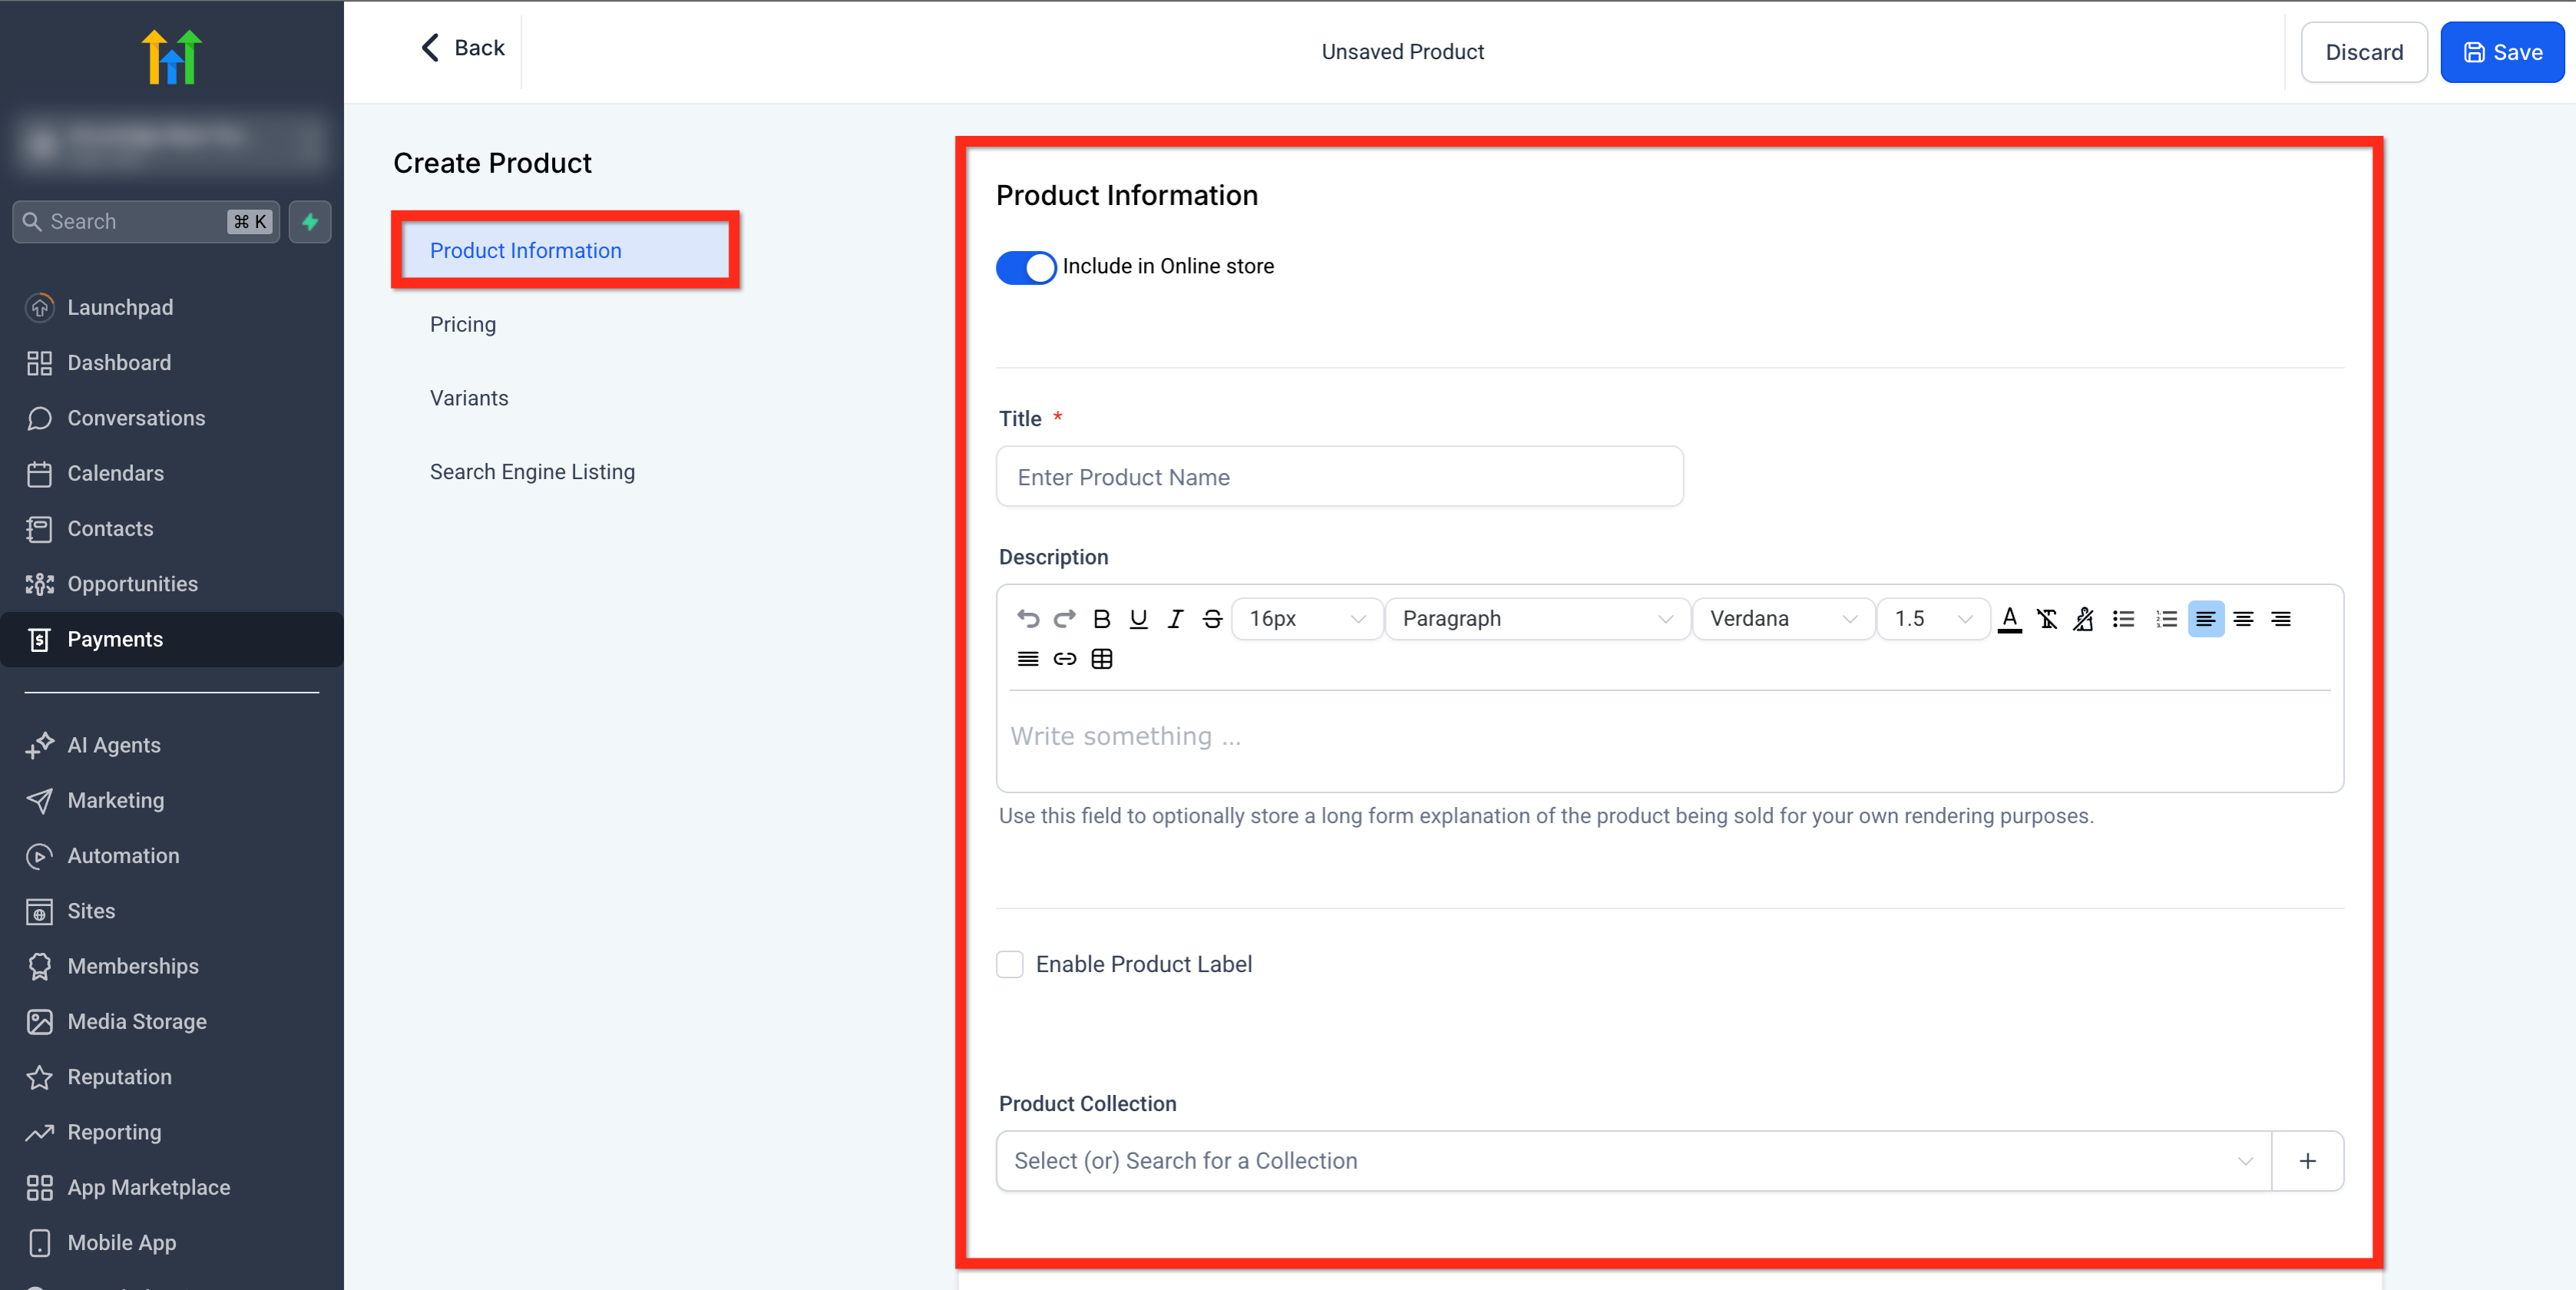
- Turn on the Include in Online Store toggle if you want the product visible in the storefront.
- Enter the product Title.
- Write a Description using the rich text editor.
- Upload an image or video in the Media section (max 10 MB, 1024 × 1024).
- Select a Product Collection from the dropdown.
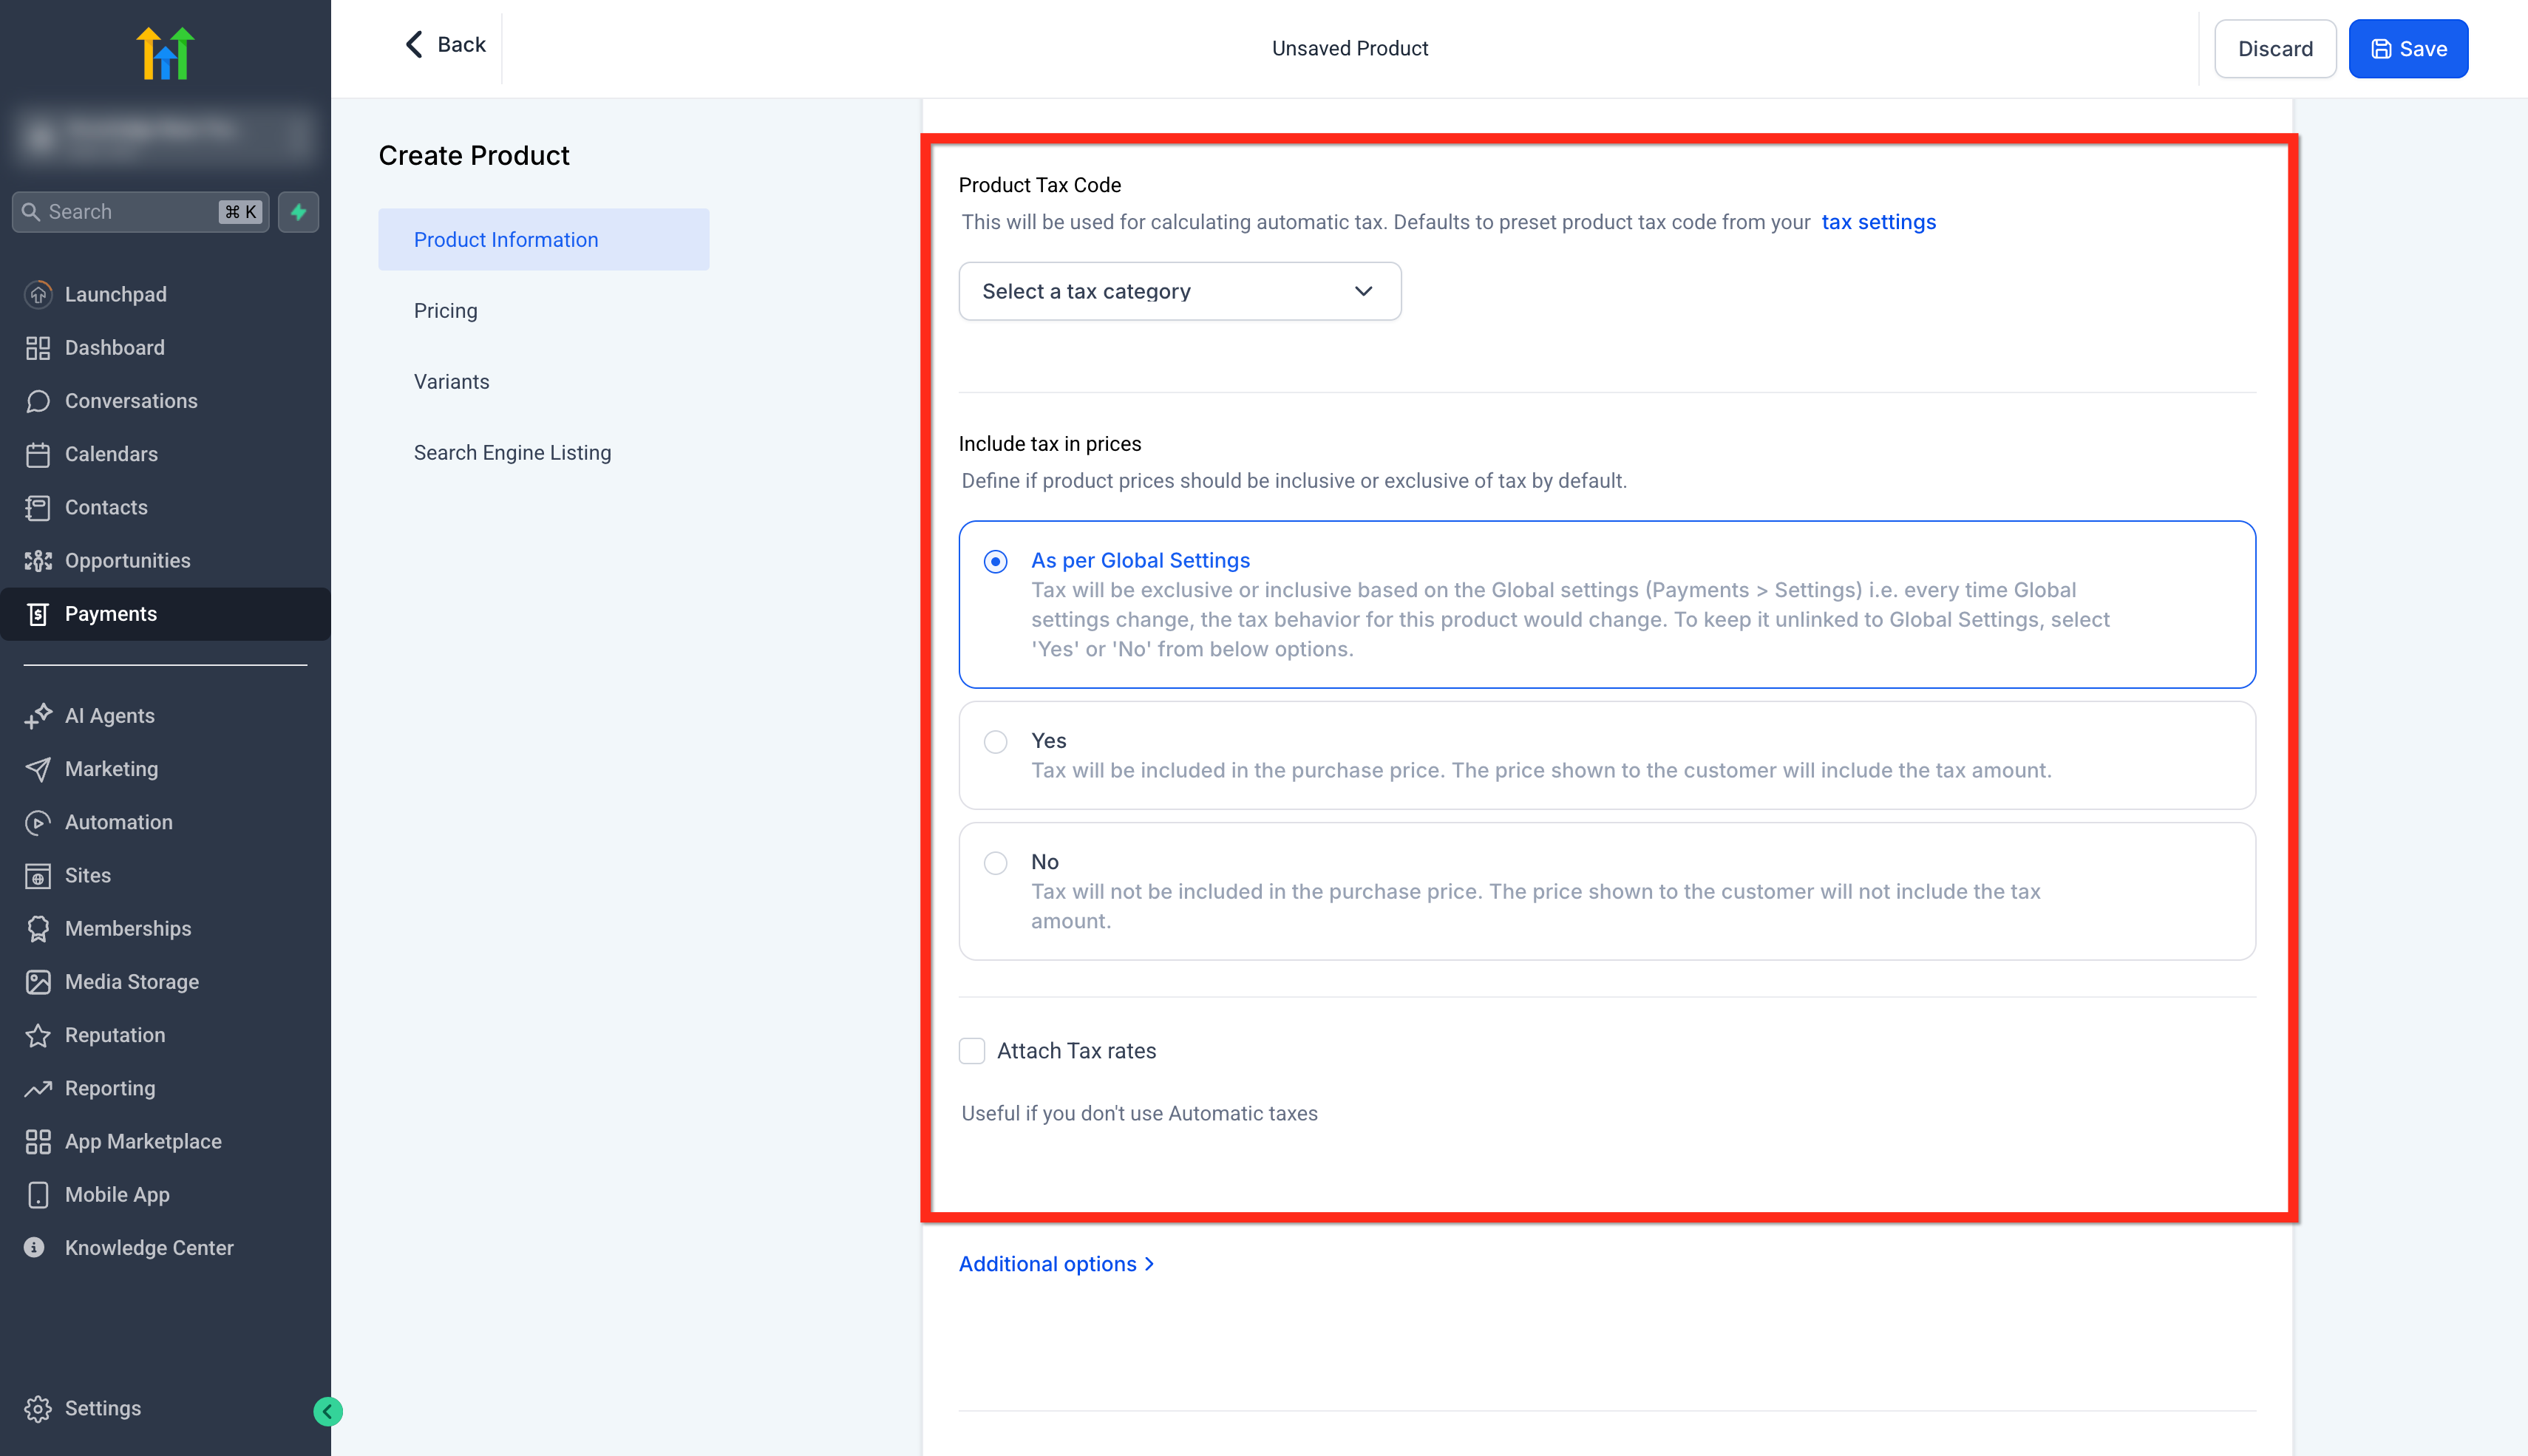
- Choose a Product Tax Code if needed.
- Set the Include tax in prices option as desired.
- Enter a Pricing Name.
- Pick a Pricing Type (One time or Recurring).
- Input the Amount and, optionally, a Compare at Price.
- Select the Currency for the price.
- If required, check Track Inventory and set available quantity.
- Add a variant option name and define its values (e.g., Basic, Premium).
- Click Save.
Duplicate an existing product
- Navigate to Payments > Products.
- Locate the product you want to copy.
- Open the three dot Actions menu and choose Duplicate.
- Edit any fields of the duplicated product as needed.
- Click Save.
Add a trial to a product
- Open Payments > Products.
- Create a new product or edit an existing one.
- In the Pricing section, set the Type to Recurring.
- Enter the price Amount (and optional Compare at Price).
- Select a Billing Period.
- Enter the Trial Period in days (e.g., 5 days).
- Optionally set Number of Payments and a Setup Fee.
- Click Save.
- Add the product to an order form, invoice, or checkout page as needed.
Make products available
- Navigate to Sites.
- Choose where the product should appear: Website, Funnel or Store.
- If selling a digital product, upload the required digital file(s) to each variant before publishing.
- For the online store, keep Include in Online Store enabled and make the product available in the store.
- For a funnel, add the product to the desired funnel and place an order form on the checkout page.
- For a payment link, create a Payment Link and select the product and price.
- For an invoice, create the invoice and add the appropriate product, matching its pricing type.
- For a form, add the Payment element and select the product.
Add a product to a funnel
- Click Funnels and select your desired funnel.
- Open the Products tab inside the funnel.
- Click Add Product.
- Configure the product details as needed.
- Click Save.
Add order form to a funnel
- Open the Site Editor.
- Select the funnel page that will host the checkout form, or create a new step.
- Add a new funnel step and give it a name.
- Insert a full width section element on the page.
- Add a one column row inside the section.
- Place a one step (or two step) order form into the row.
- Configure the order form and associate the product with it.
- Save and Publish the page.
- Test the checkout experience to confirm the correct product, price and payment options appear.
07What it looks like in HighLevel
08Settings that matter
- Include in Online Store. Controls whether the product appears in the public ecommerce storefront.
- Enable Product Label. Allows you to assign a custom badge such as “New” or “Top Pick” to the product.
- Product Tax Code. Selects the tax category used for automatic tax calculations at checkout.
- Include tax in prices. Determines if the displayed price already contains tax or shows tax as a separate charge.
- Track Inventory. Enables stock level management for the product or each variant.
- Pricing Type. Defines whether customers are charged once (One time) or repeatedly (Recurring).
- Trial period. Specifies the number of days a customer can use the product before regular billing begins.
- SEO Title. Provides a search engine friendly title that appears in search results.
- SEO Description. Adds a brief summary for search results to improve visibility.
- Handle. Sets the product’s unique URL slug for direct linking.
09Things to know before you rely on it
- Media files should be no larger than 10 MB and have a resolution of 1024 × 1024 for optimal display.
- Trial periods are always measured in days, regardless of the product’s billing frequency.
- Inventory tracking will hide a product when the available quantity reaches zero.
- Only recurring subscription products can be imported from Stripe; one time items must be created directly.
- Currency cannot be changed on an existing product; a new product or pricing option is required.
10If something goes wrong
- Error requiring a “Category ID” when creating a product in a subaccount.. Create the product first through the Agency’s SaaS Configurator, then import it into the subaccount via Payments > Products.
- Duplicated products appear grayed out when adding them to an invoice.. Ensure the duplicated product is published and has active pricing with the correct billing type and currency before adding it to the invoice.
- Product shows as unavailable during preview.. Check if inventory tracking is enabled and the stock count is zero; increase quantity or disable inventory tracking.
11How it connects to the rest of HighLevel
- Connect your Stripe account to enable recurring product imports. Connect Stripe
- Generate direct checkout links for products you create. Setup payment links
- Add products to invoices for one time or recurring billing. Create and send invoices
Michael's take

When the product you’re selling has a clear price, a repeatable delivery method and you can handle the checkout flow yourself, you get a single place to manage pricing, taxes and inventory while being able to push the same item into stores, funnels, payment links and invoices without rebuilding anything.
If you’re only offering a single, low cost add on that you can bill through a simple form, the extra steps of setting up tax codes, inventory tracking and SEO may not add enough value. In those cases you might be better off using a plain payment link or invoice instead of a full product record.