
01Who this is for
- Coaches can run real time workshops and office hours without external tools, keeping clients inside the community.
- Online course creators can broadcast polished lessons using their existing video setup and share replays for members who missed the live session.
- Community managers can host announcements or Q&A sessions, using chat and reactions to boost engagement.
02Go Live, explained
Go Live adds live video, audio and chat directly to any HighLevel Community group or channel. Admins start a post, pick a video source, and stream either an interactive Meeting Room or an external broadcast via Stream Software. The experience stays inside the platform, so members watch and interact without leaving the community.
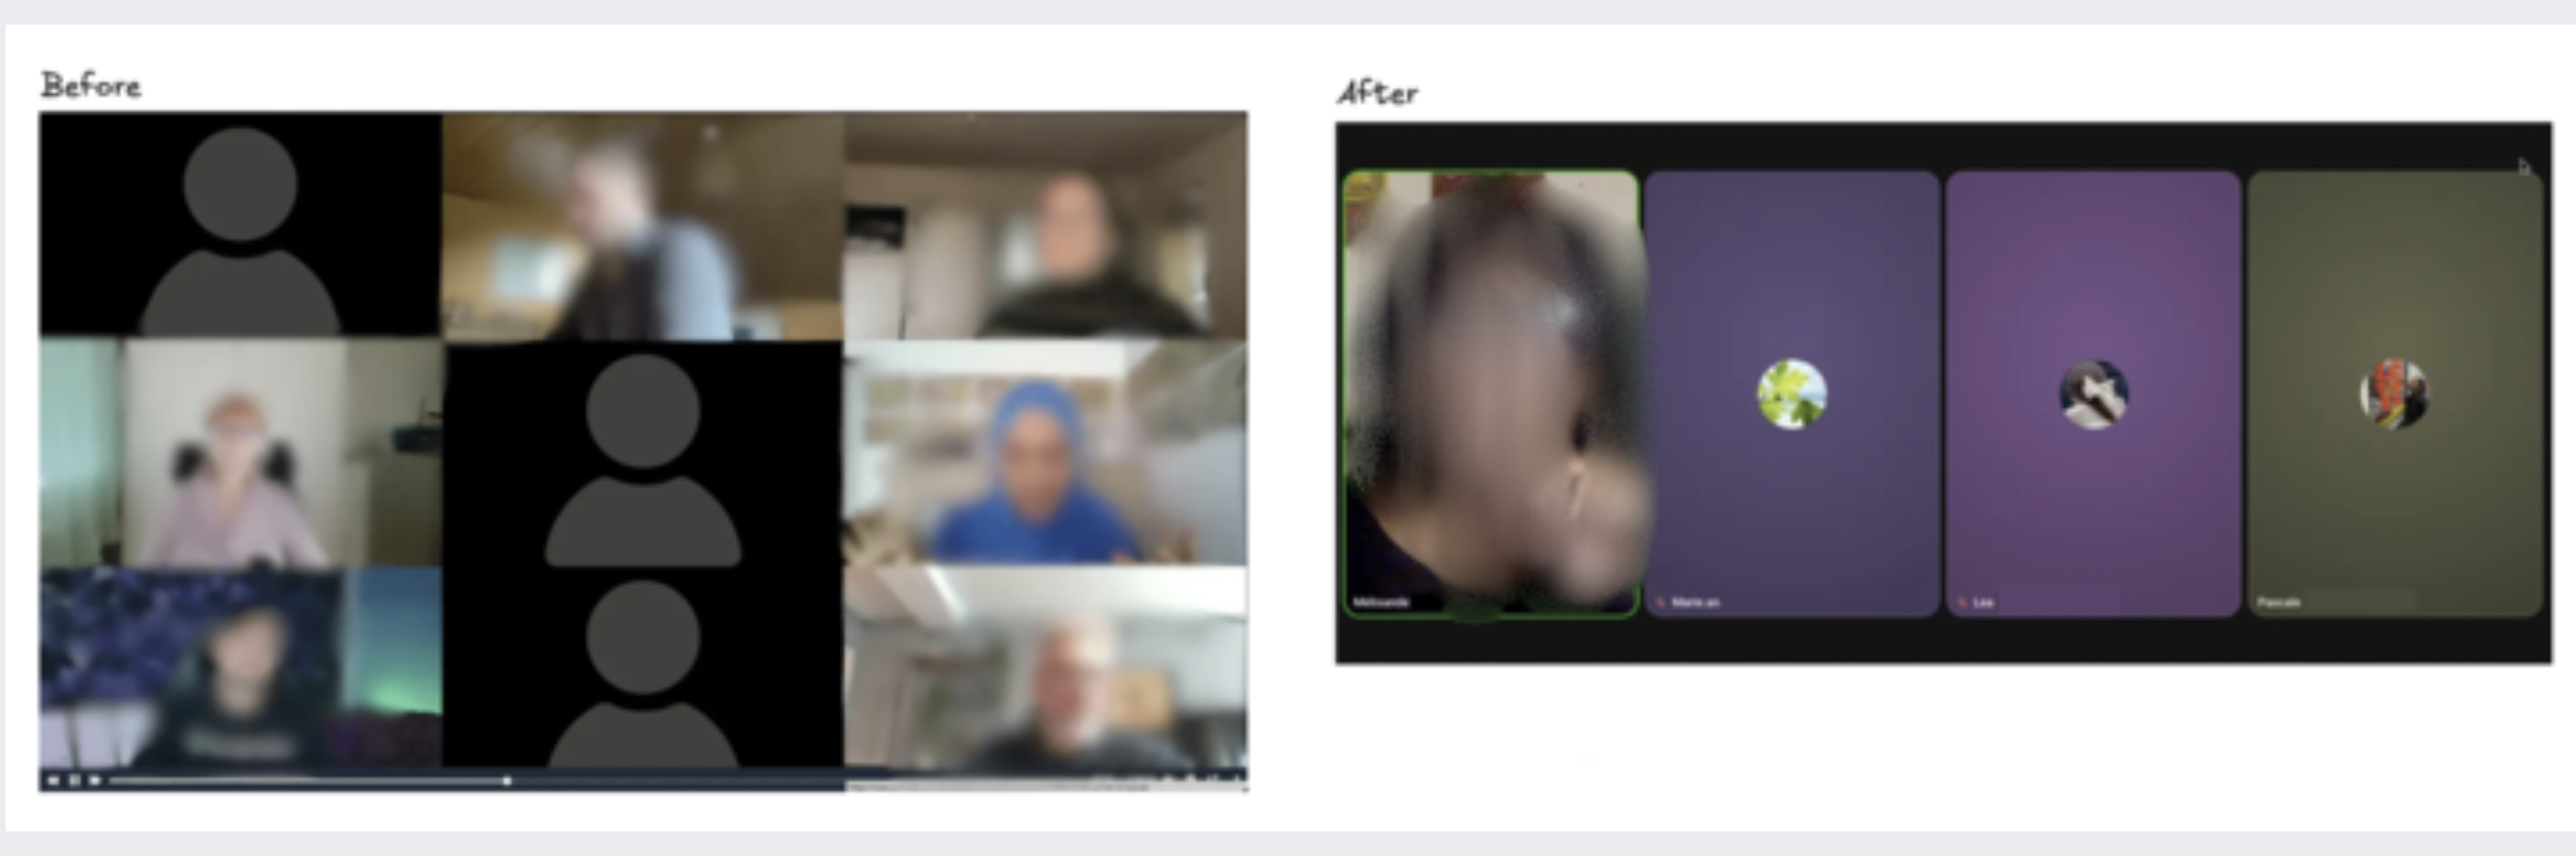
When you select Meeting Room mode, the host controls who can speak, share screens, and manage the layout. Attendees can chat, send emojis, raise their hand, and view the stream in Speaker or Gallery view. Stream Software mode connects an external encoder such as OBS, Zoom or StreamYard using an auto generated Stream Key and URL; viewers still chat and react inside the community while the external video plays. Recordings can be saved and posted as a replay for later viewing.
03How businesses use Go Live
- Coaching practice. The coach starts a Go Live post in a private group, chooses Meeting Room mode, and uses the host controls to manage participant microphones and screen sharing during a live coaching call. The session can be recorded and posted for clients who miss it.
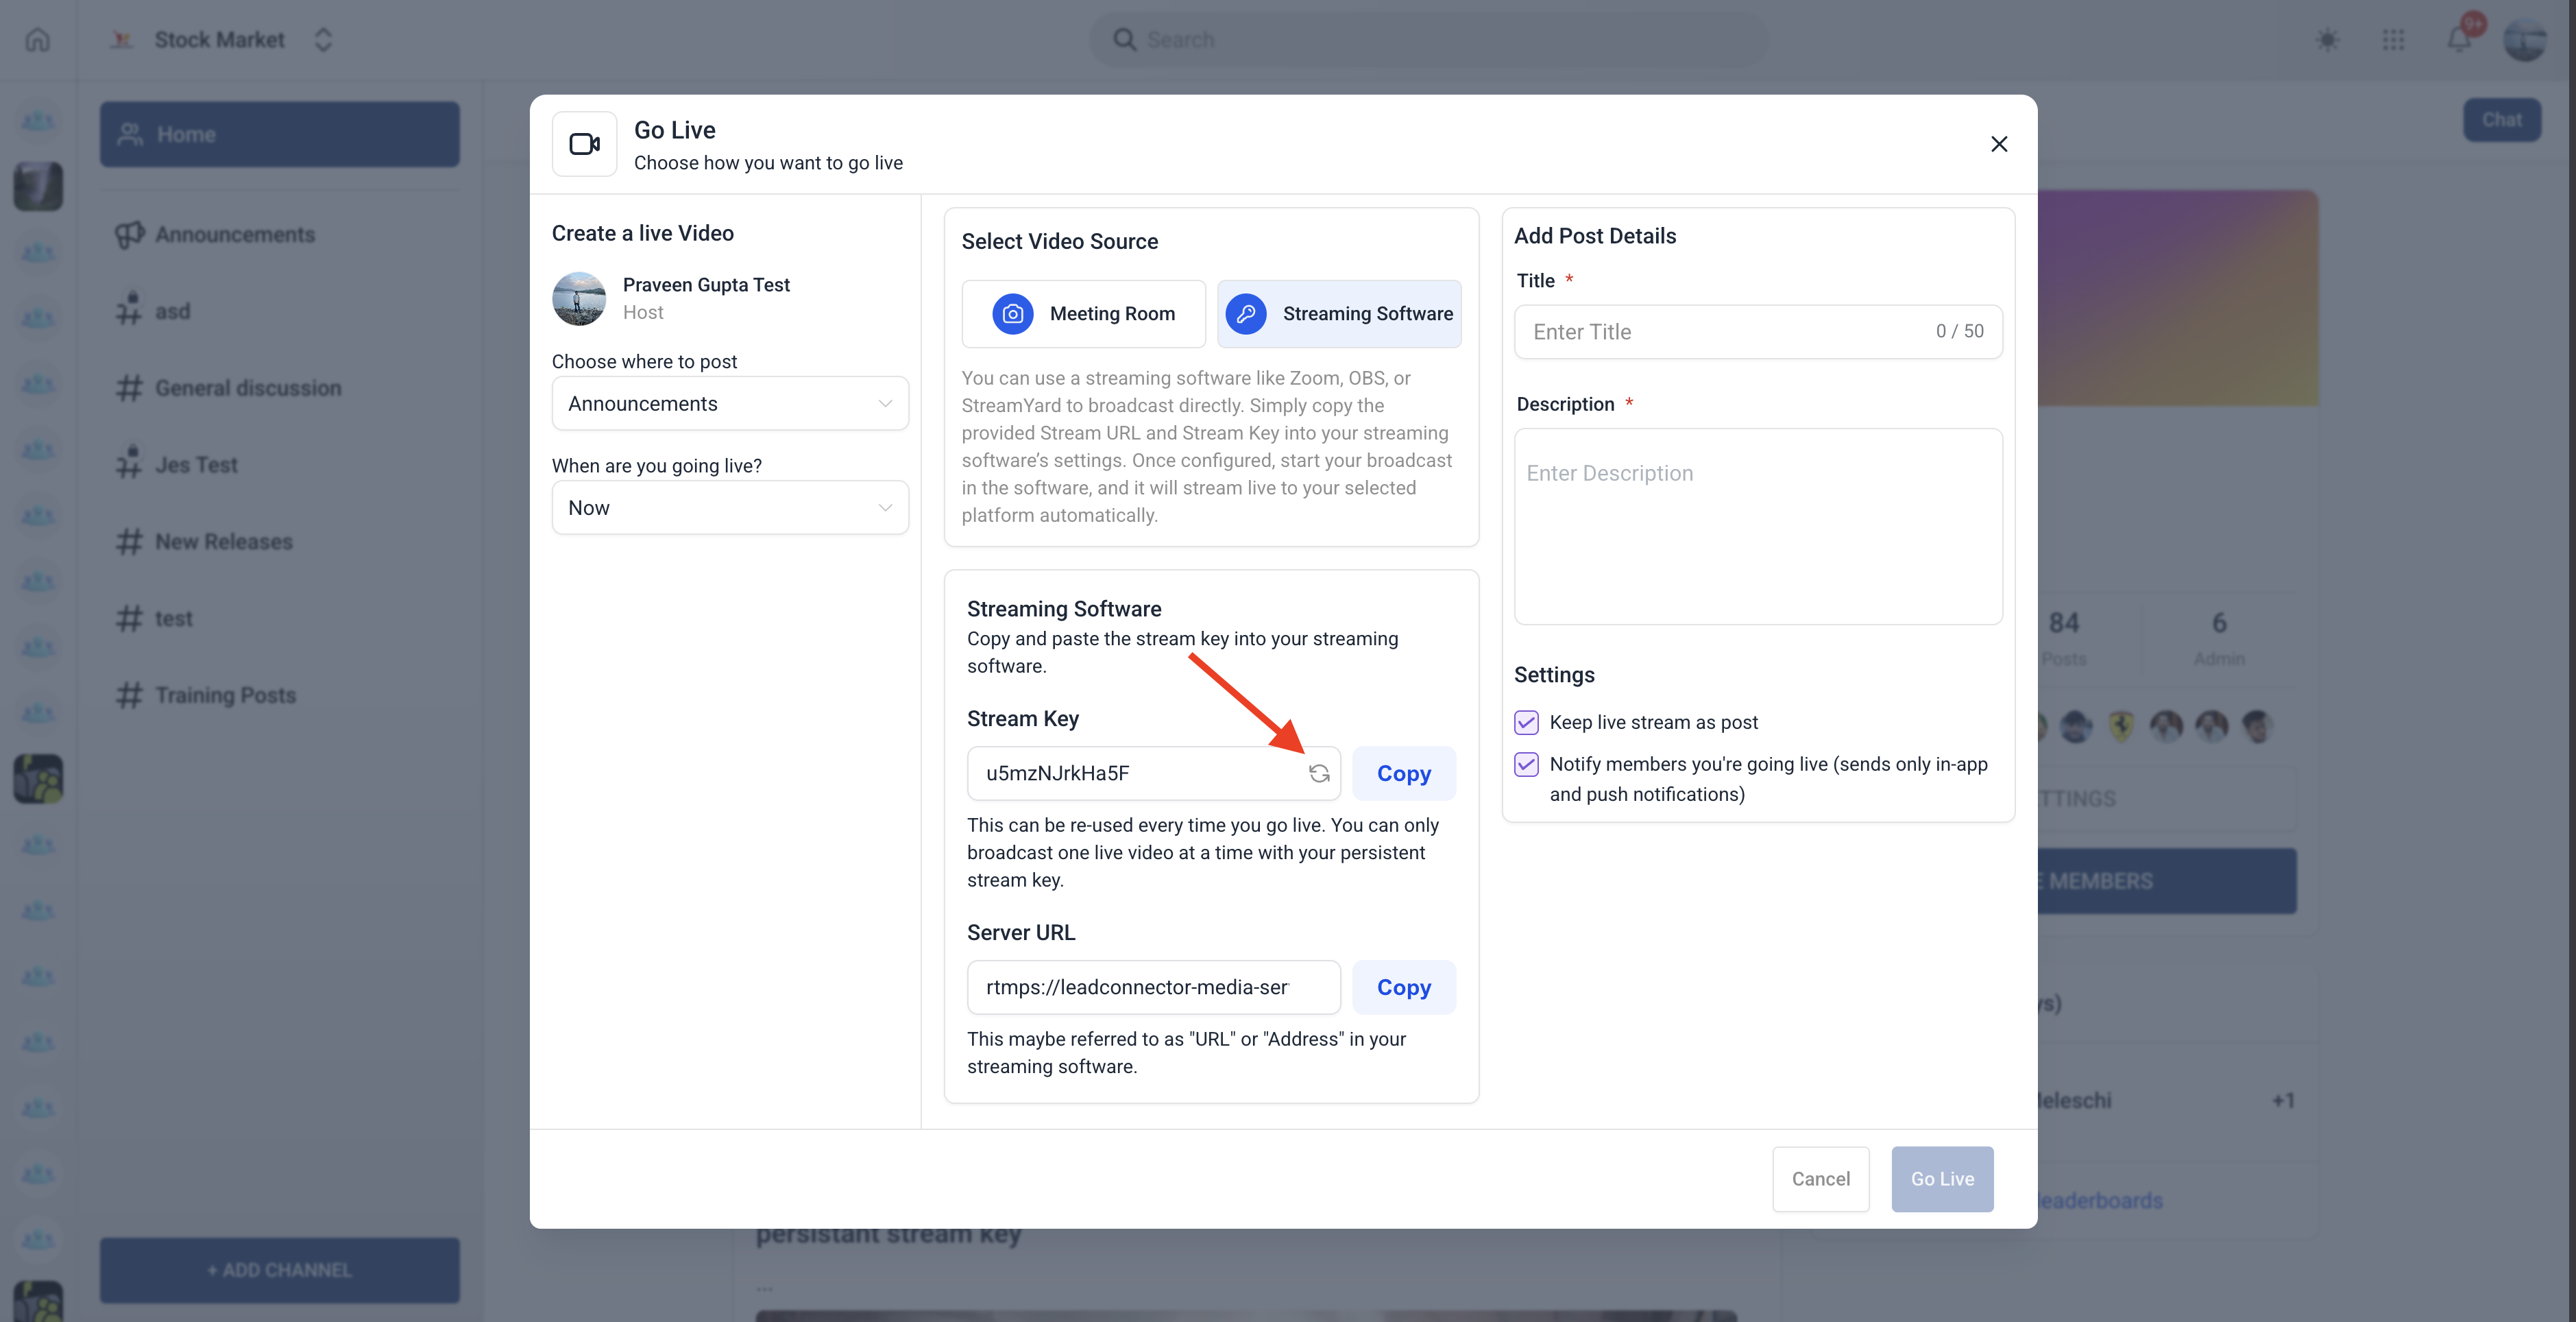
- Membership site. The site owner selects Stream Software mode, copies the persistent Stream Key and URL, and pastes them into their OBS setup. After starting the broadcast, members watch the high quality video inside the community channel and interact via chat and emoji reactions.
- Live streaming event production. An event producer uses the Meeting Room mode to host a panel discussion, assigns co hosts to manage speaker turns, and pins the main presenter. After the event ends, the recording is attached to the post for on demand viewing.
04The numbers and rules that matter
- Chat has no message size limit.
- No maximum length for a stream.
05How to set up and use Go Live in HighLevel
Start a Go Live session
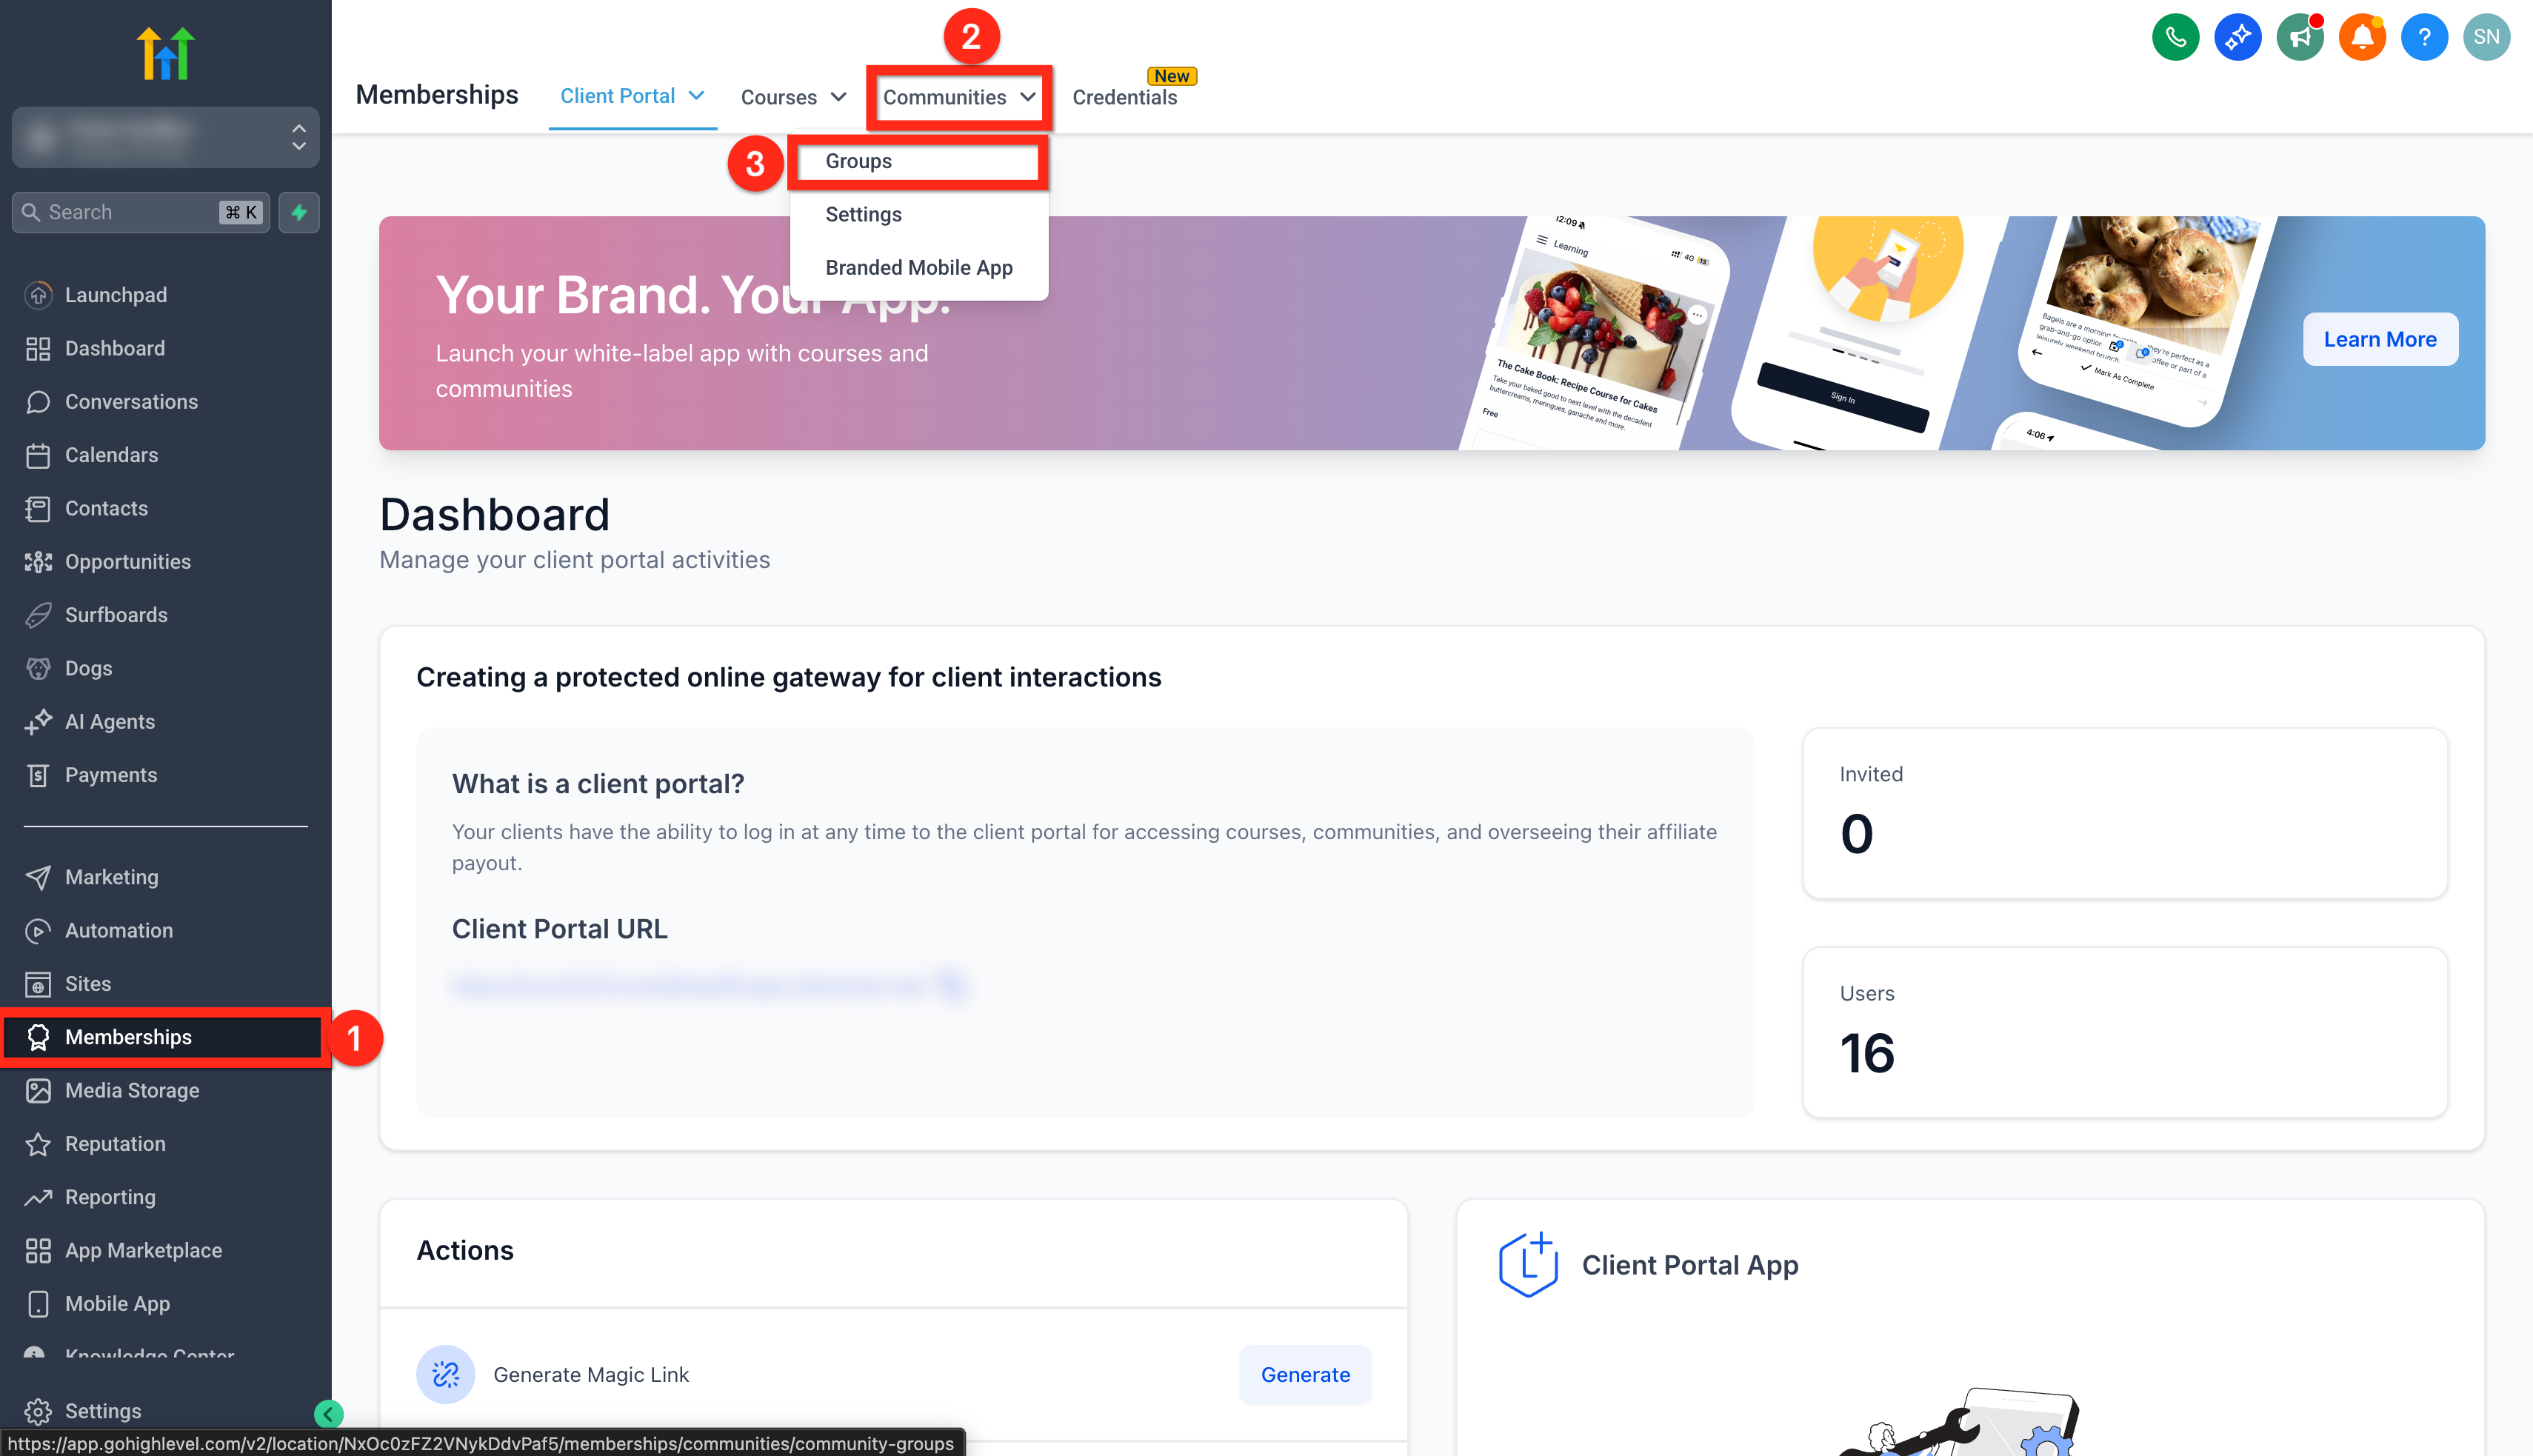
- Navigate to Memberships from the subaccount.
- Hover over the Communities tab.
- Click Groups.
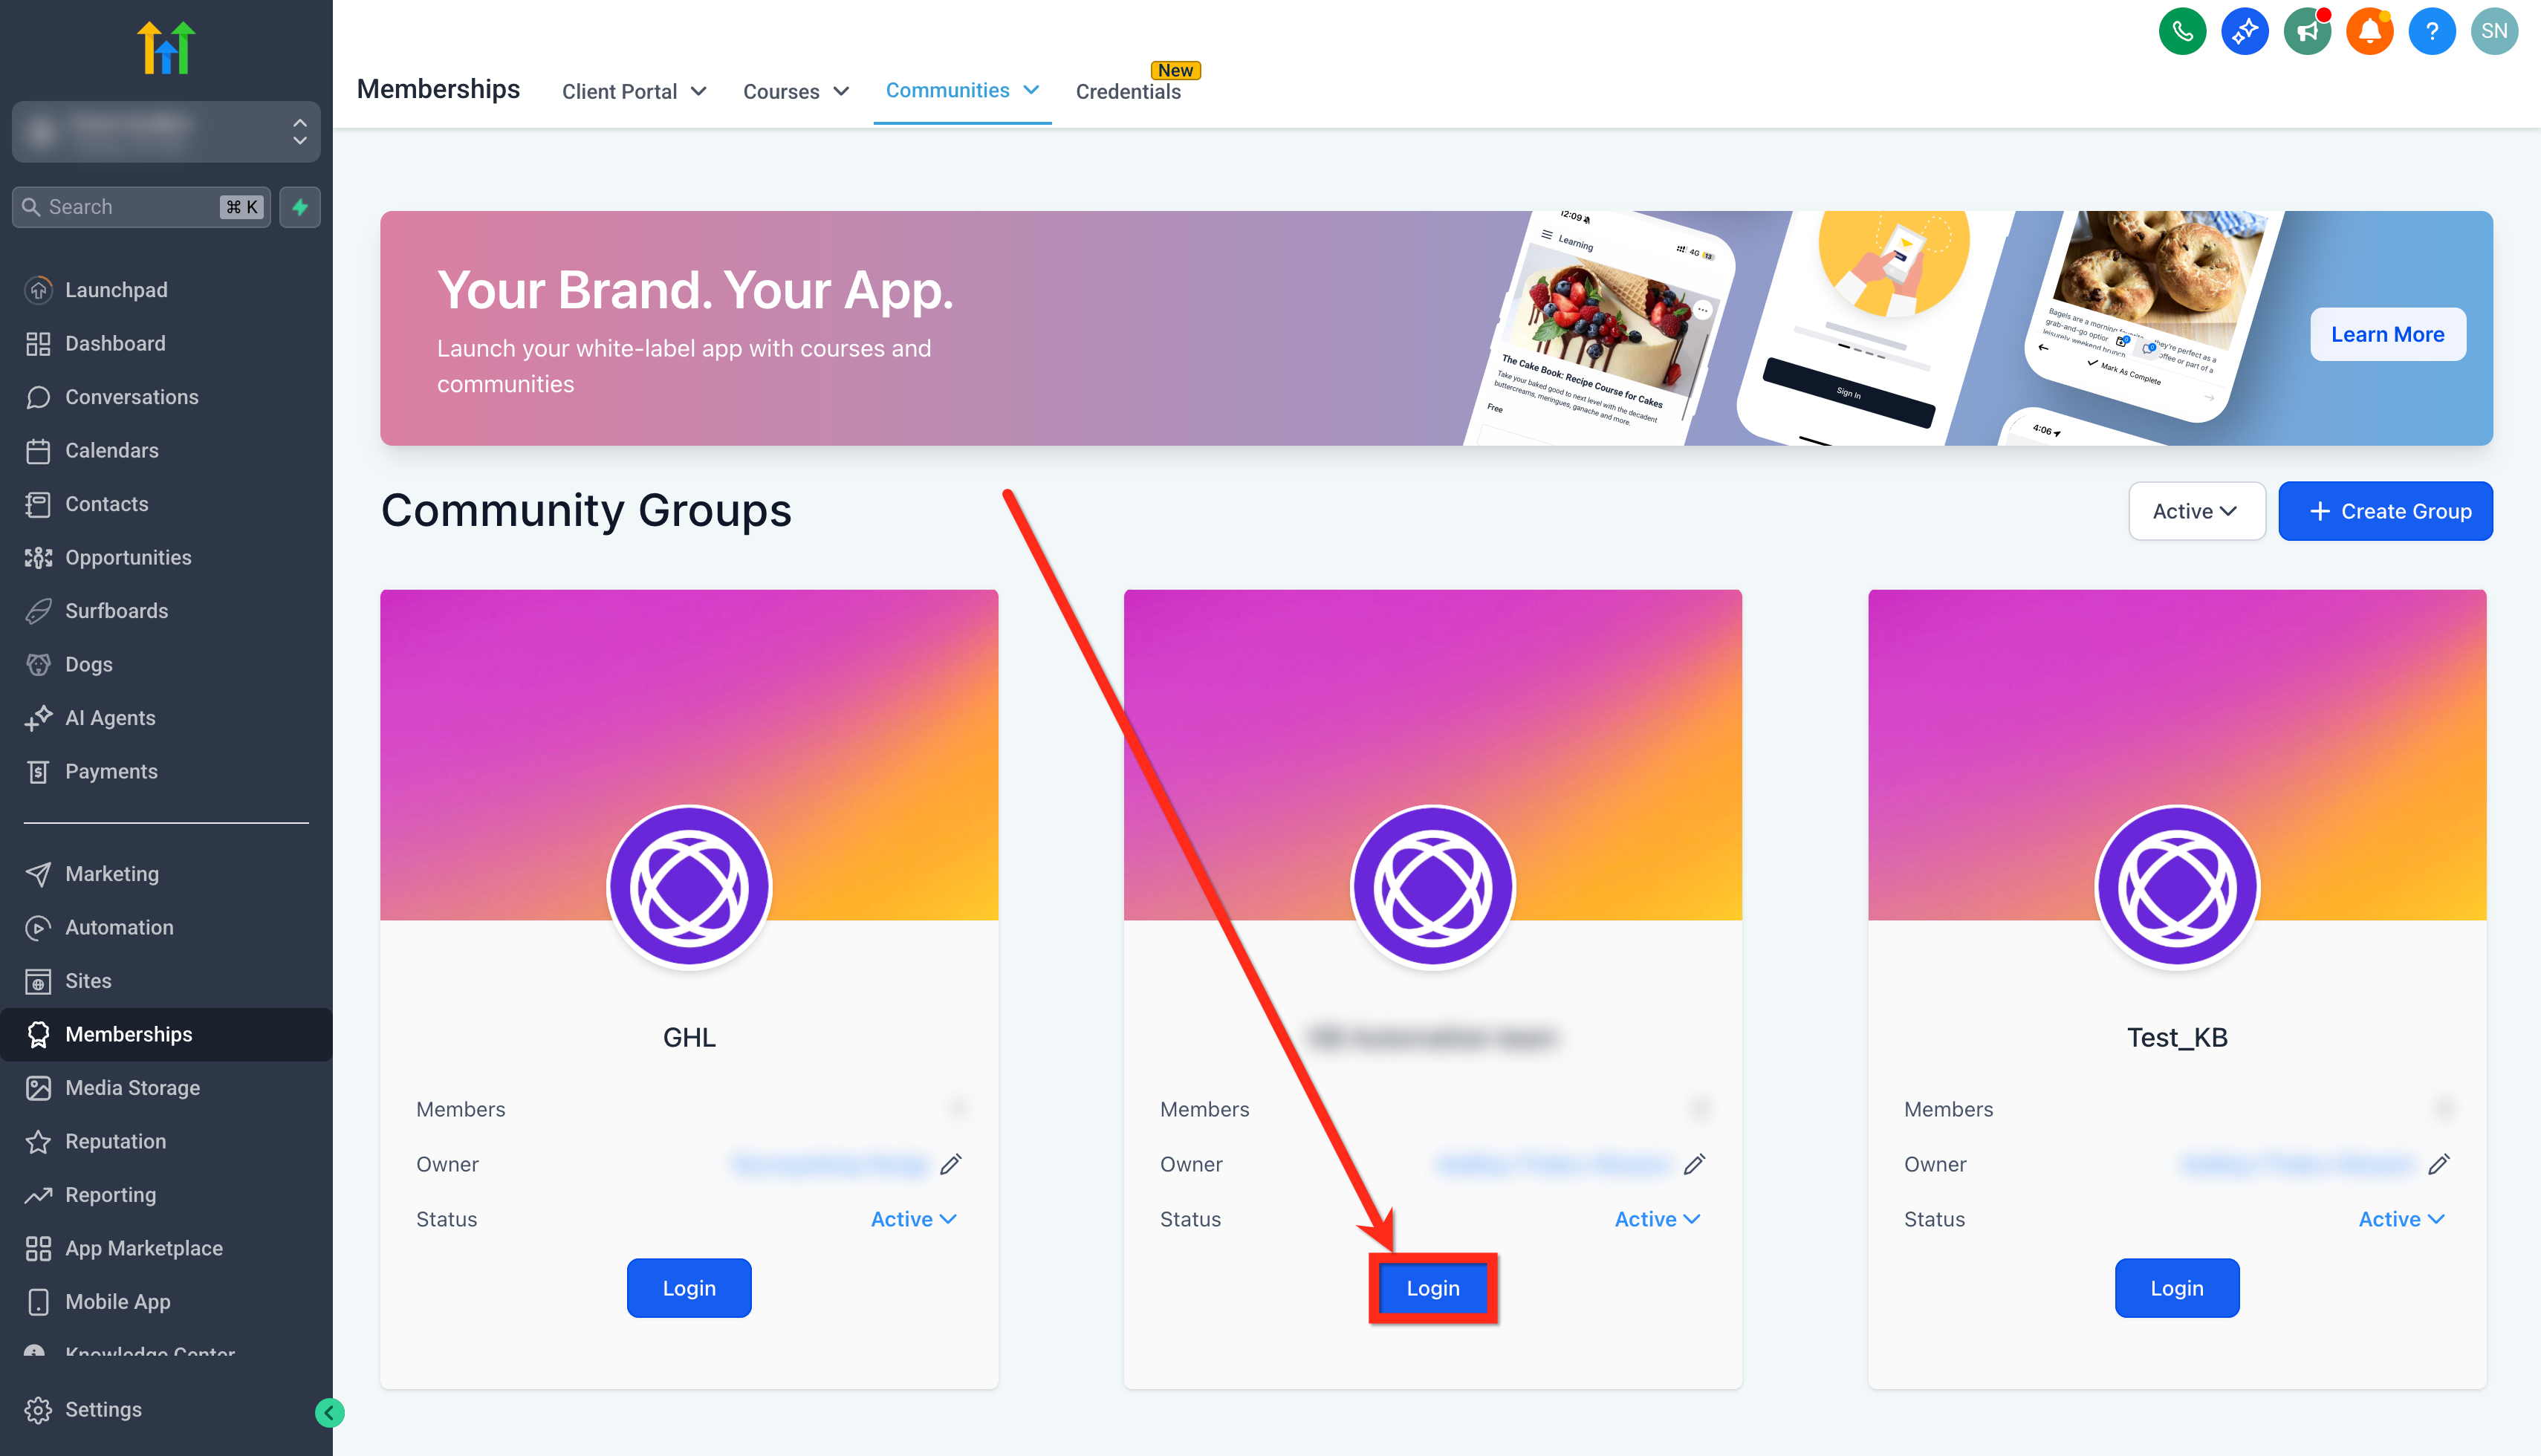
- Select the desired group and click Login.
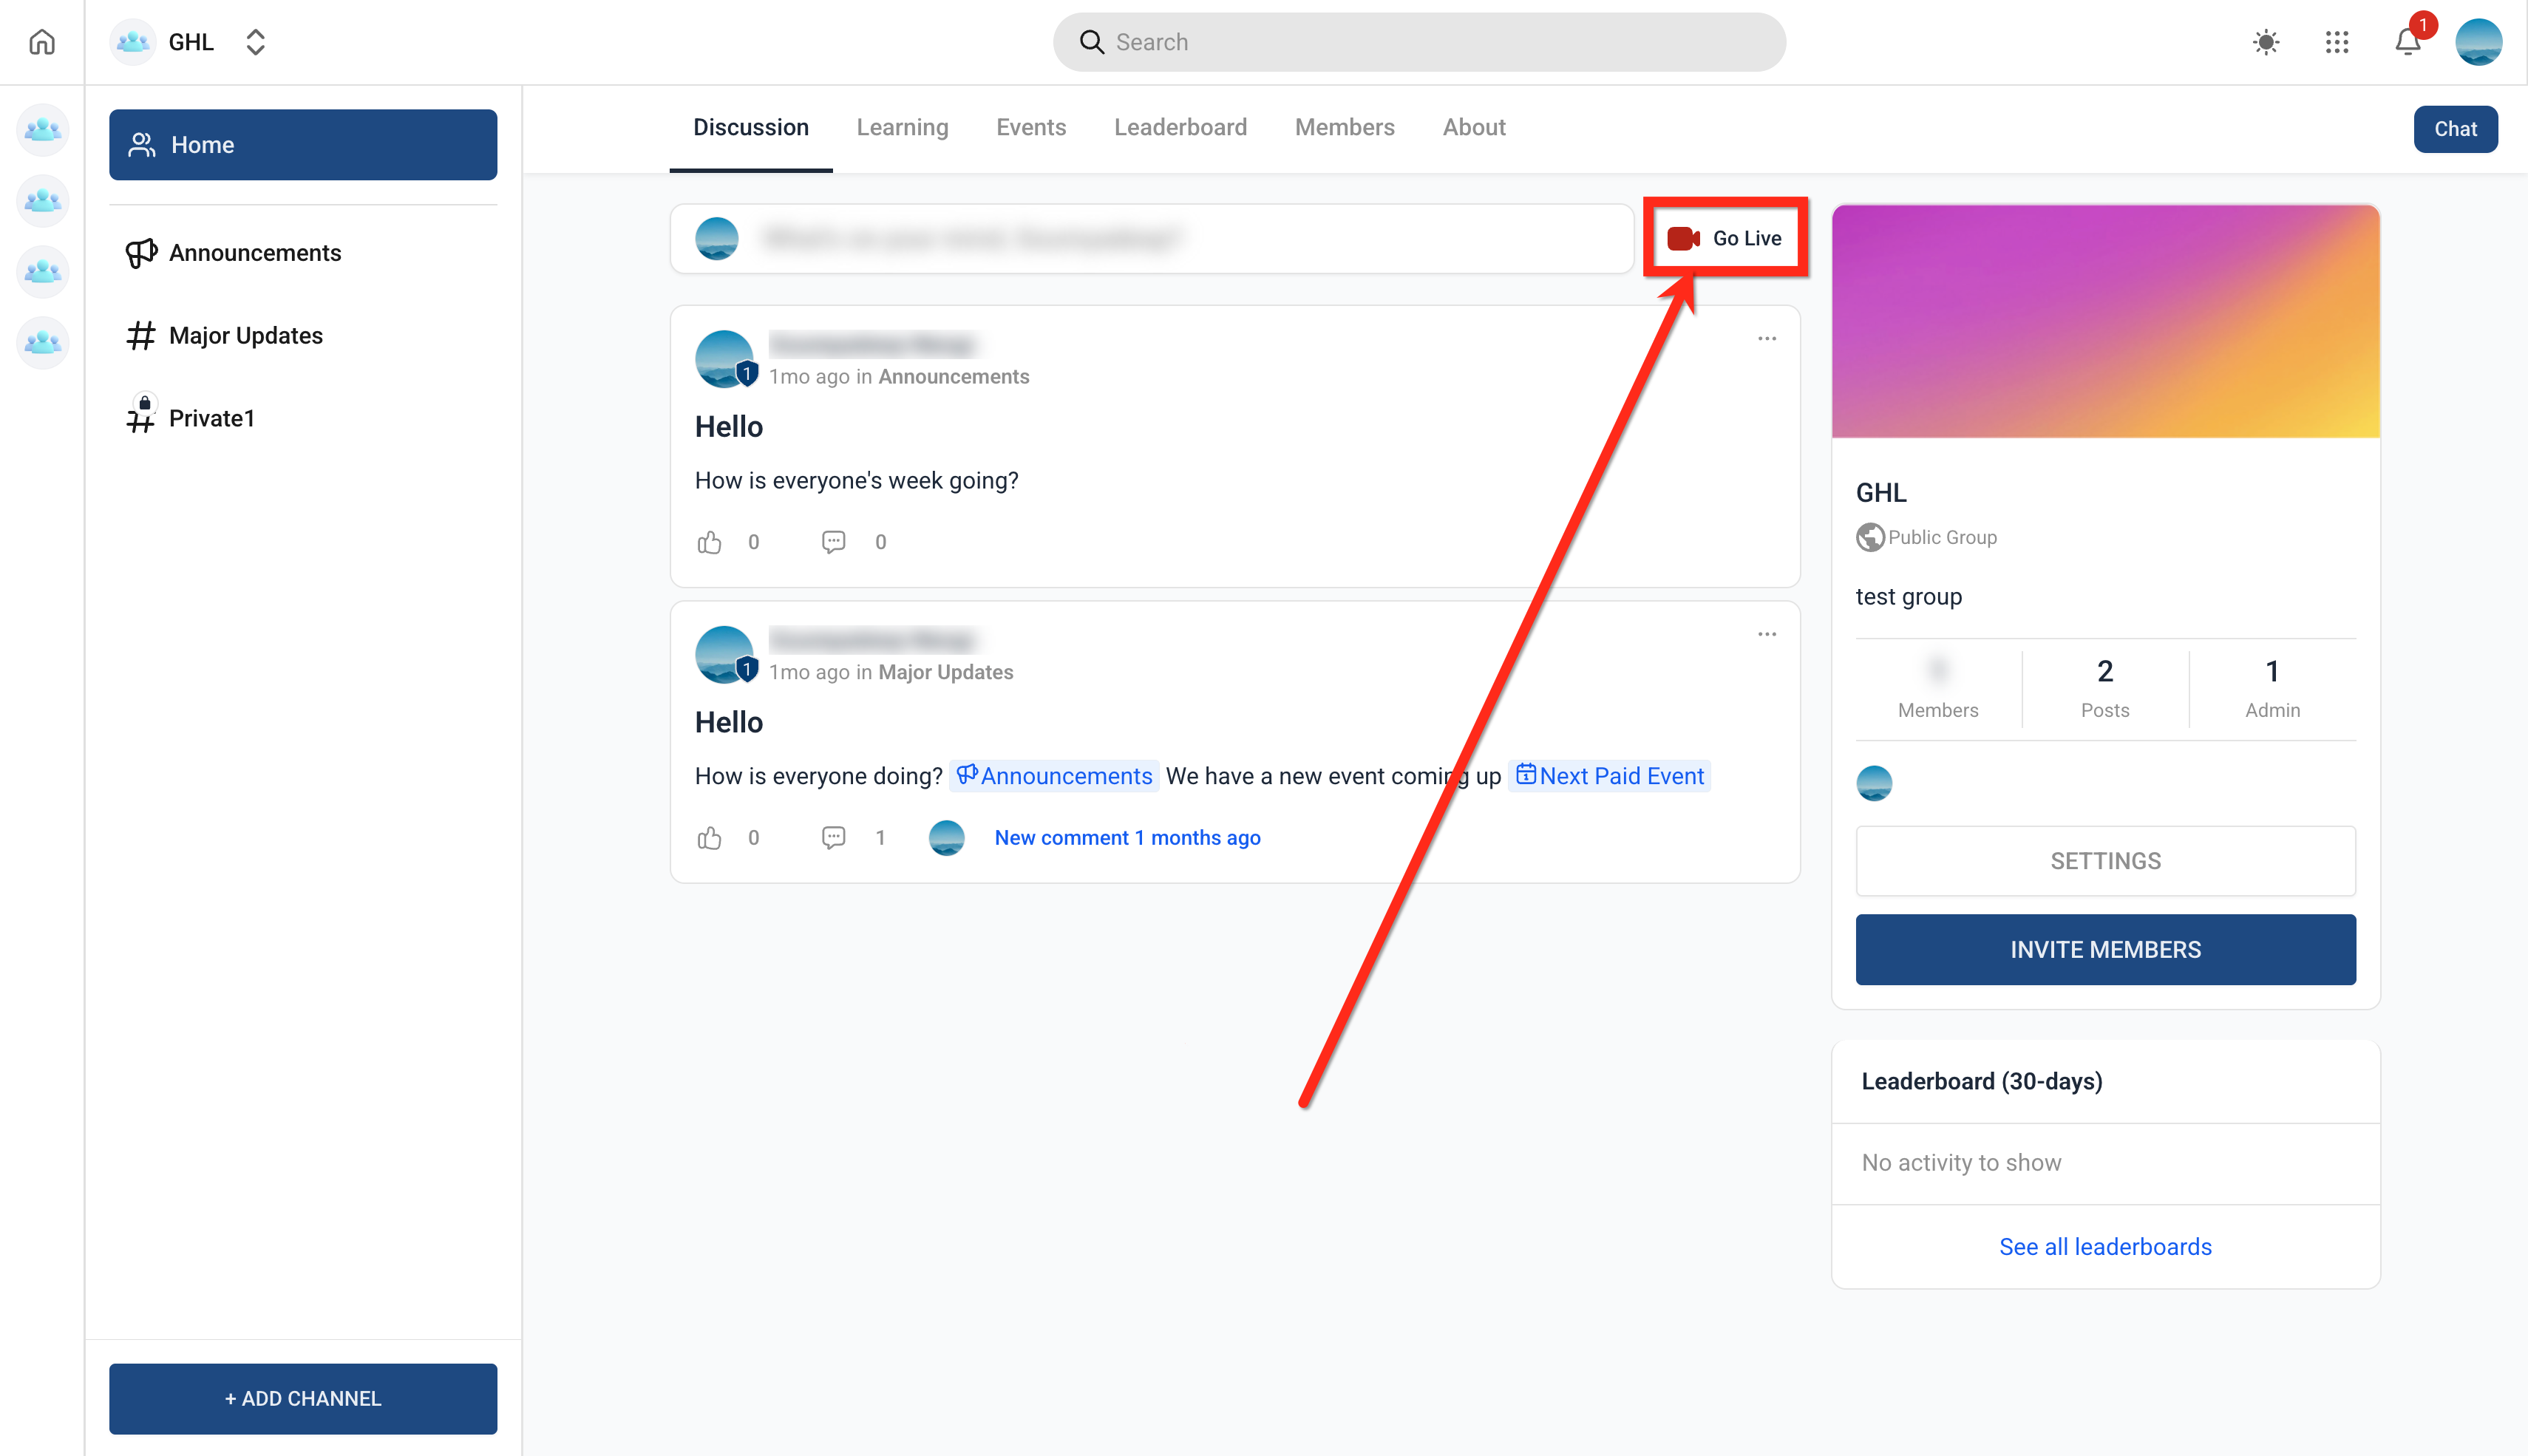
- Click the Go Live red video camera icon near the posting tab.
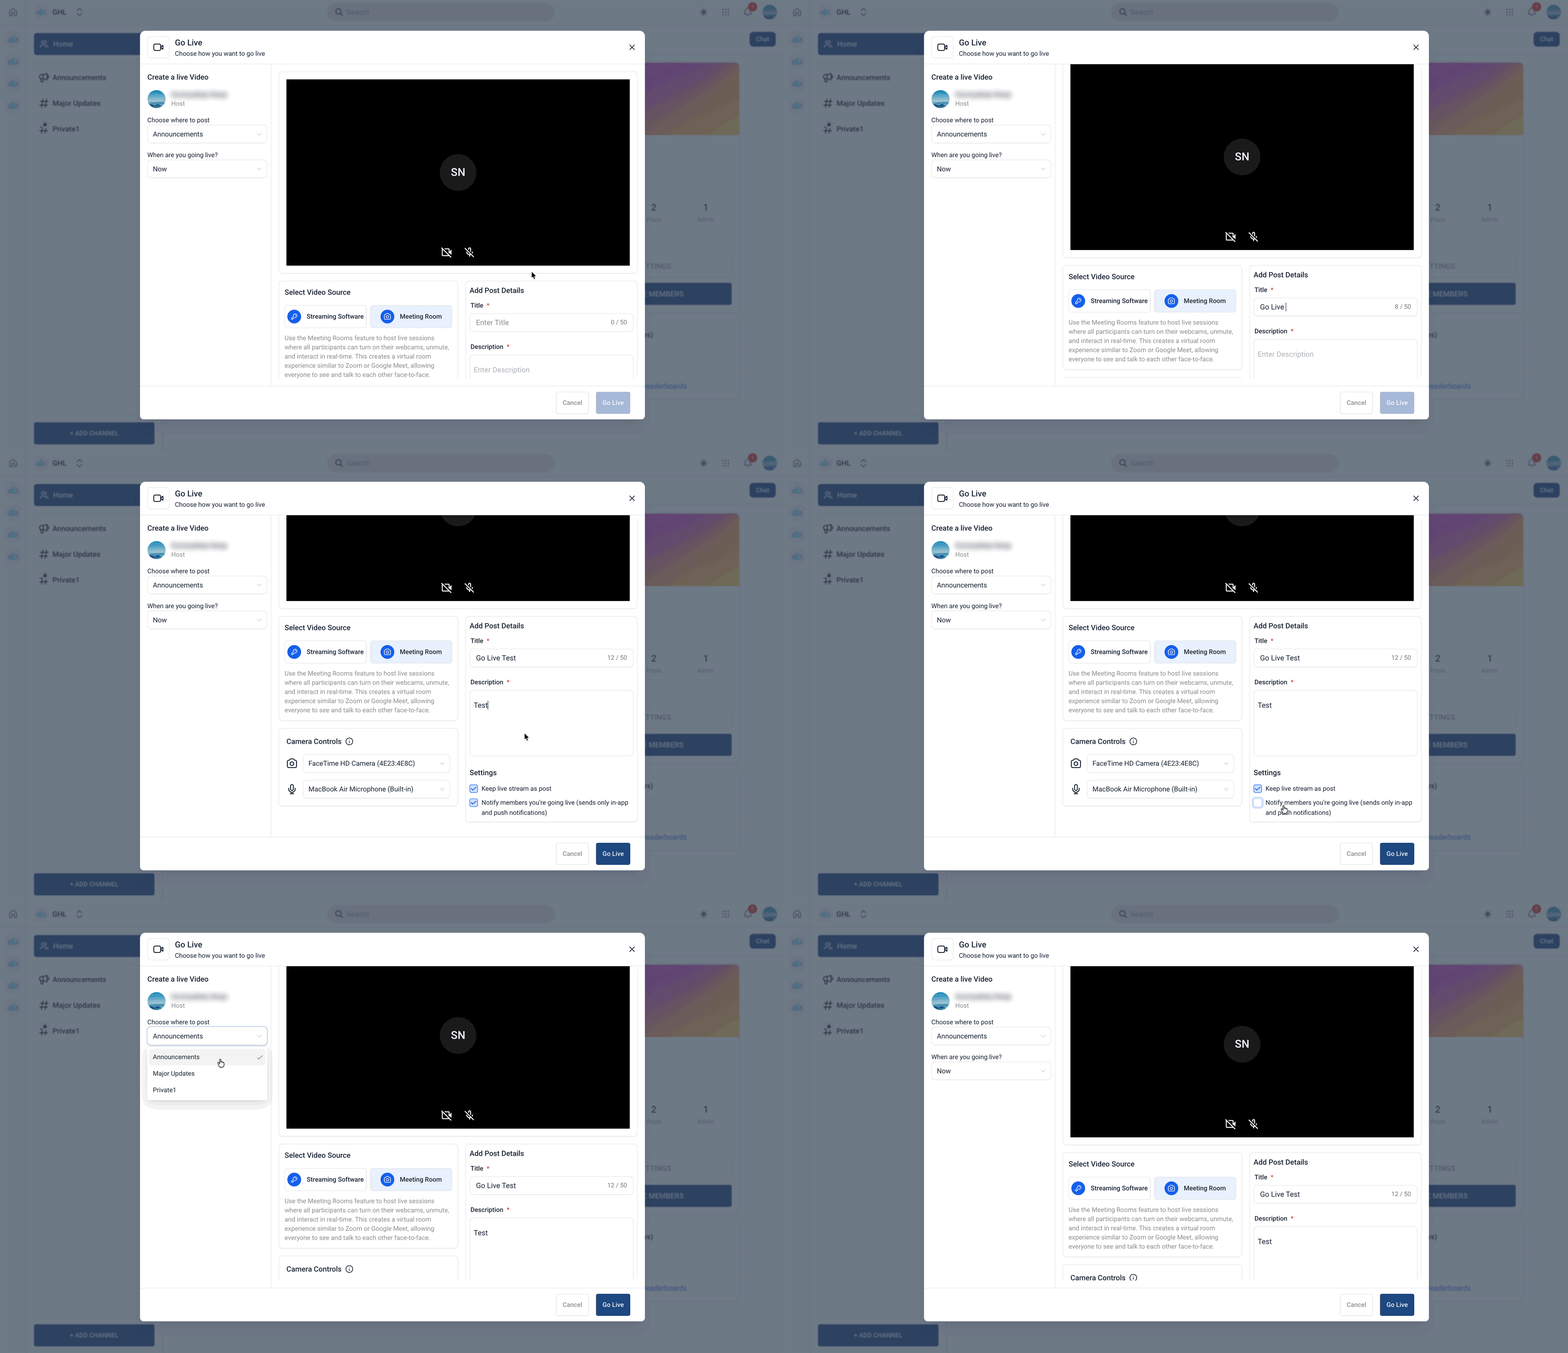
- Enter a Title for the live post.
- Enter a Description for the live post.
- Toggle Keep livestream as post if you want the stream saved after it ends.
- Toggle Notify members you are going live to send in app and push notifications.
Use Meeting Room mode
- In Select video source, choose Meeting Room and click Go live.
- Allow the browser to access your camera and microphone.
- Members join the stream by clicking the Join Stream button in the channel.
- Switch the layout using the view control to Speaker or Gallery.
- Select the desired microphone, speakers and camera from the device menu.
- As host, mute or unmute participants and grant or revoke mic, camera or screen share permissions.
- Use the chat panel to send messages, emojis or file attachments.
- Enable emoji reactions and raise hand features for attendee interaction.
- Share your screen or allow an approved participant to share theirs.
- If the host disconnects unexpectedly, they can rejoin the active meeting and host privileges will return automatically.
- When finished, either End Meeting for All or leave and assign a new host to keep the session active.
Use Stream Software mode
- In Select video source, choose Streaming software.
- Copy the auto generated Server URL and Stream Key.
- Paste the URL and key into your encoder’s RTMP/custom streaming settings.
- Start the broadcast from your streaming application.
- Return to HighLevel and click Go live to launch the stream to the selected channel.
06What it looks like in HighLevel
07Settings that matter
- Keep livestream as post. Determines whether the live video remains available as a post after the session ends.
- Notify members you are going live. Controls sending in app and push notifications to group members about the upcoming live stream.
- When are you going live?. Sets the start time for the stream; the default is Now for immediate broadcasting.
- Choose where to post. Selects the specific channel within the community where the live post will appear.
- Persistent Stream Key (Stream Software Mode). Keeps the same Stream Key for future Go Live sessions unless you reset it manually.
08Things to know before you rely on it
- There is no cap on the number of participants that can join a Go Live session.
- Stream duration is unlimited; sessions can run for any length of time.
- Chat messages have no size limit, allowing unrestricted text, links and file uploads.
09If something goes wrong
- Encoder won’t connect in Stream Software Mode. Double check the Stream URL and Key, confirm you selected Stream Software mode, and start the broadcast from the encoder.
- Session didn’t record. Make sure recording is enabled before going live and verify the session didn’t end due to inactivity, which prevents recording.
10How it connects to the rest of HighLevel
- Learn how to manage members inside groups for better control of who can attend live sessions. Manage group members
- Create channels, posts and manage content to organize where Go Live streams are published. Create channel content
- Set up paid groups to restrict access to live sessions for members who have purchased a subscription. Paid groups
Michael's take

I prefer using Go Live directly inside HighLevel so everything stays in one place and members can join with a single click.
For a workshop I would pick Meeting Room mode, preview my camera, enable chat and reactions, and record the session for later replay.