
01Who this is for
- Founders who run email campaigns, because they can avoid sending to bad addresses and protect sender reputation.
- Customer support teams that send automated follow up messages, as verification reduces bounce notifications and keeps communications reliable.
- Sales teams using drip sequences, to ensure outreach reaches valid inboxes and maintains domain health.
02Email verification actions, explained
The Email Verification action validates a contact’s email address at the point it reaches the step in a workflow. It checks syntax, domain validity, mailbox existence, and risk signals, then returns a status of valid, risky, or invalid.
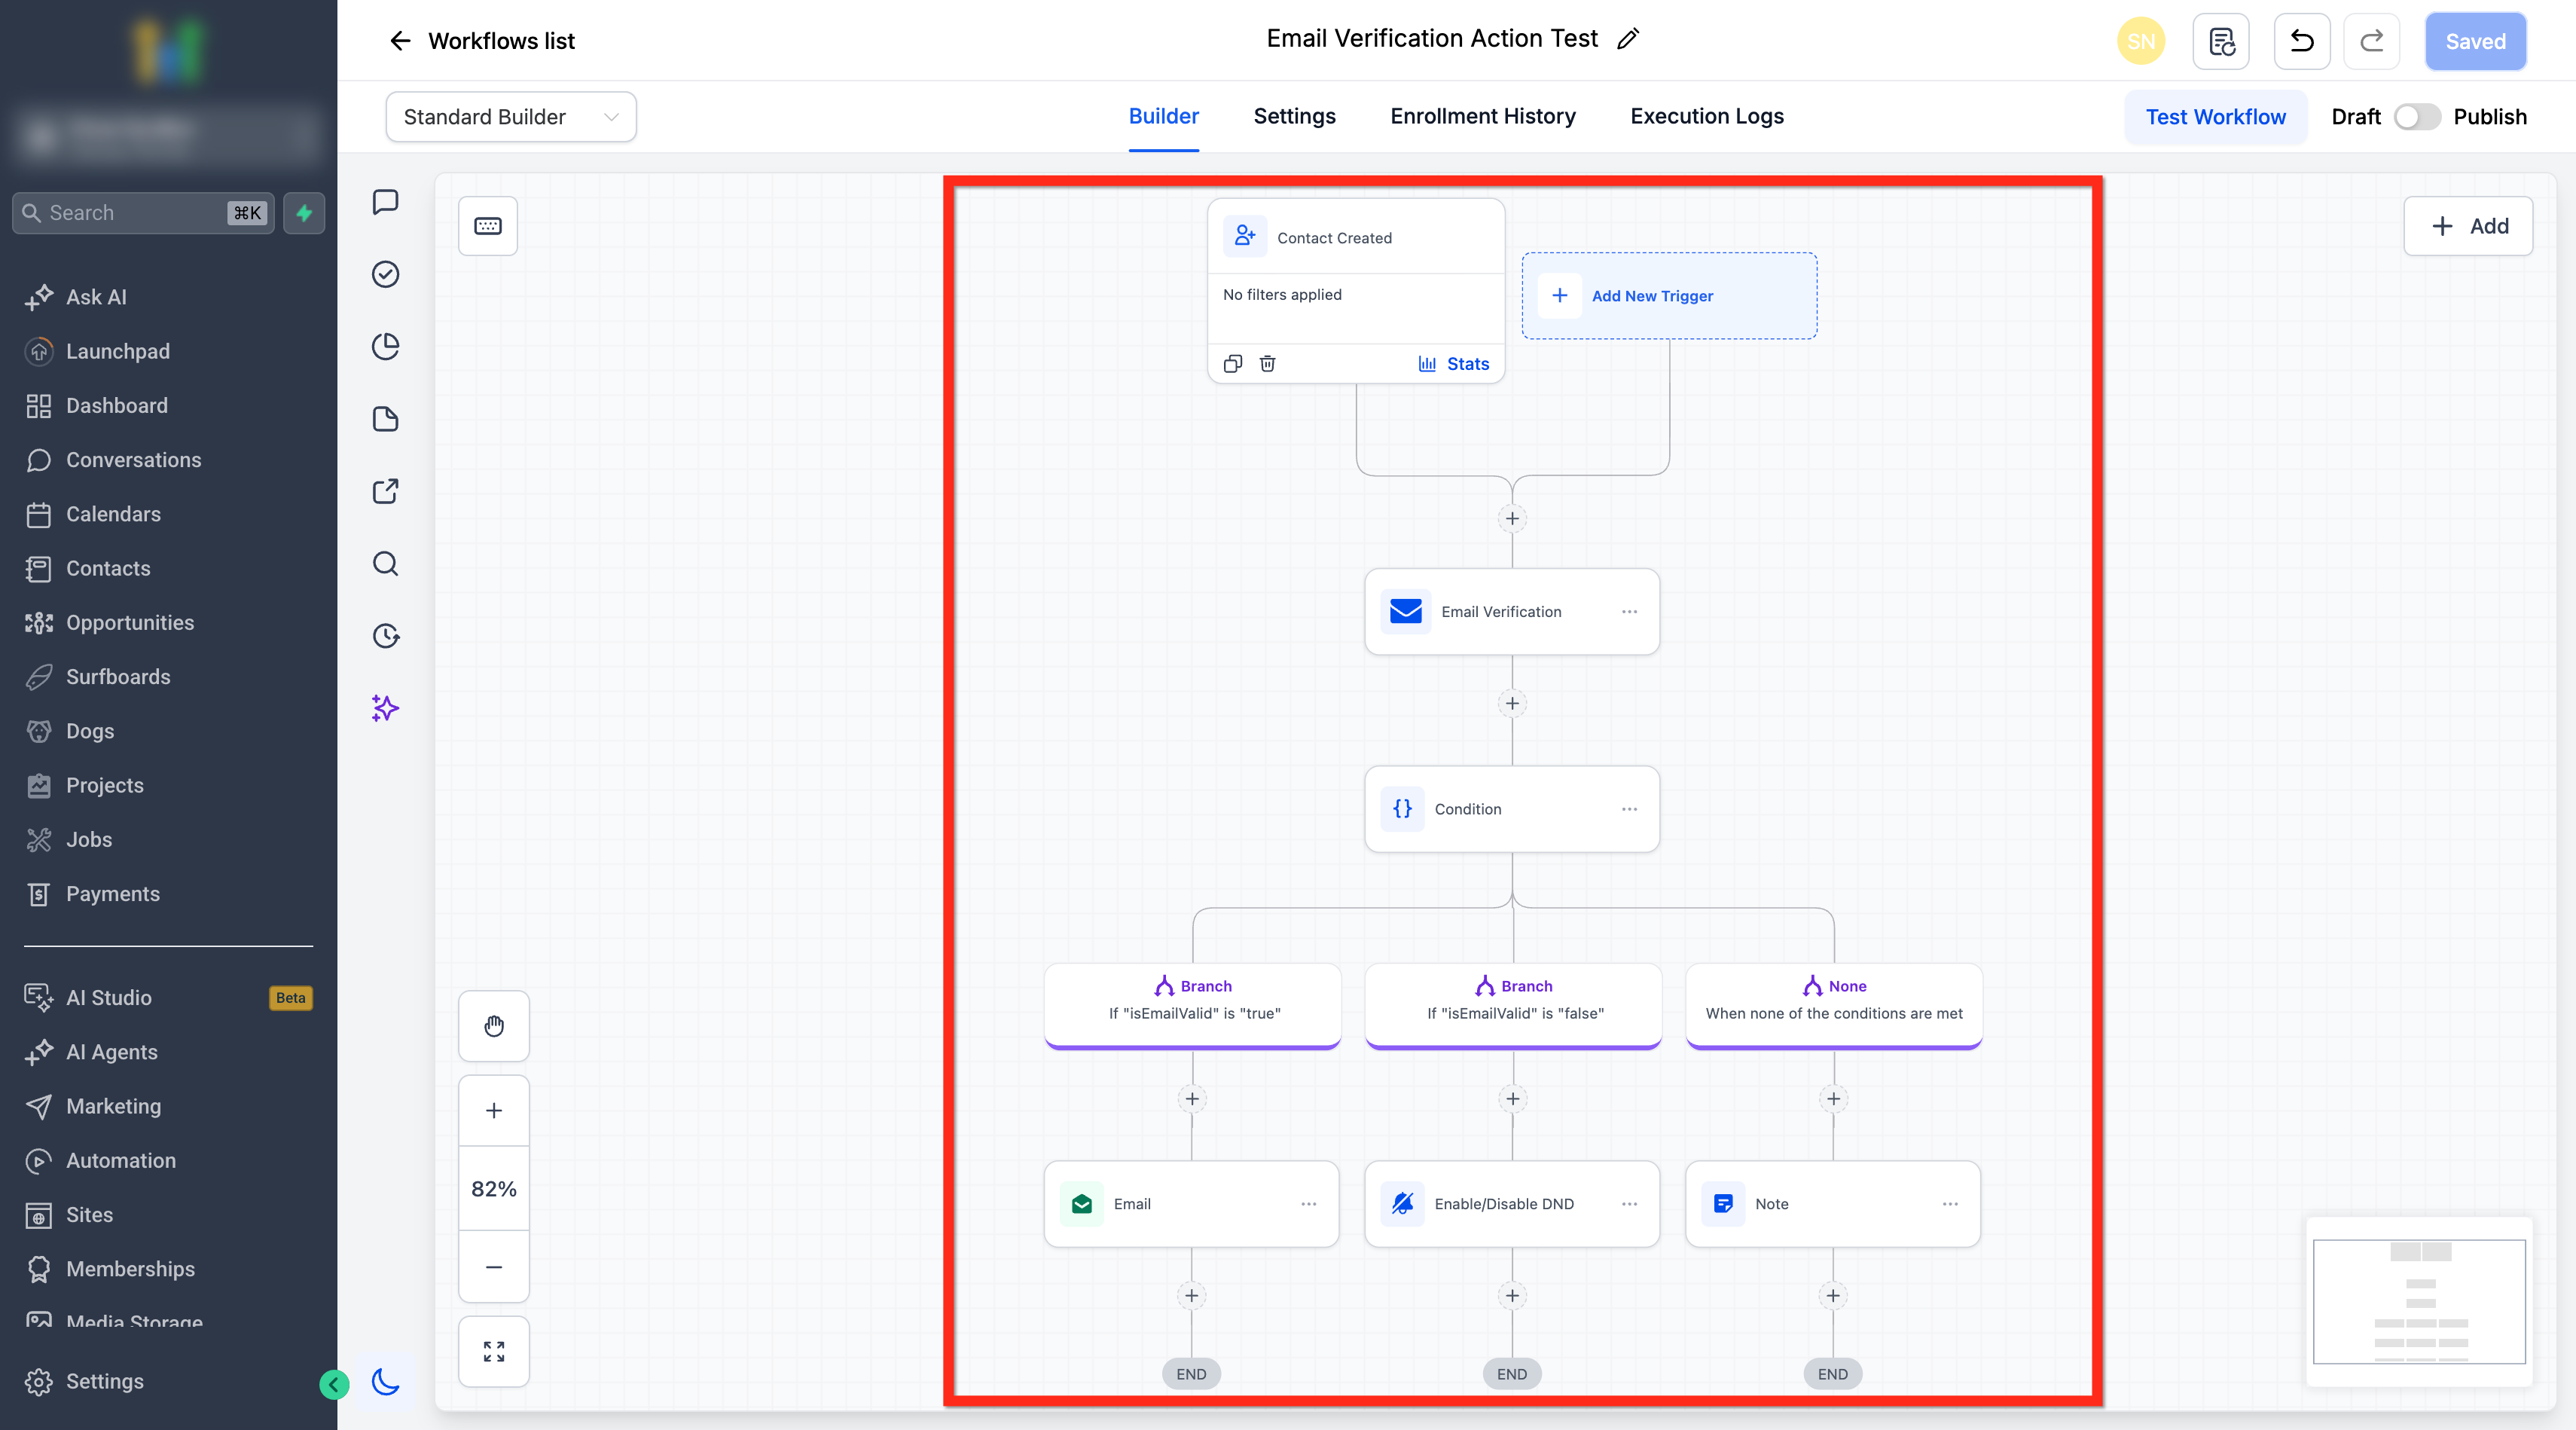
The action is located in Automation > Workflows. After adding it, you can follow the verification result with an If/Else condition to decide whether the contact proceeds to a Send Email step, is routed to an alternate path, or stops the workflow.
03How businesses use email verification action
- Real estate agency. The agency adds the Email Verification action before its listing alert emails. It then uses an If/Else condition to send alerts only to contacts marked as valid, while routing risky addresses to a manual review queue.
- Online education platform. The platform inserts the verification step before course enrollment emails. Contacts with invalid results are excluded from the enrollment sequence, preventing bounce back messages.
- Non profit organization. The organization places the action before its donation receipt emails. Risky contacts are sent a reminder to update their address, while valid contacts receive the receipt automatically.
04Before you start
- Email Verification must be enabled for the subaccount.
- The contact must not be excluded from verification.
- The workflow must have access to the contact’s email address.
05How to set up and use email verification action in HighLevel
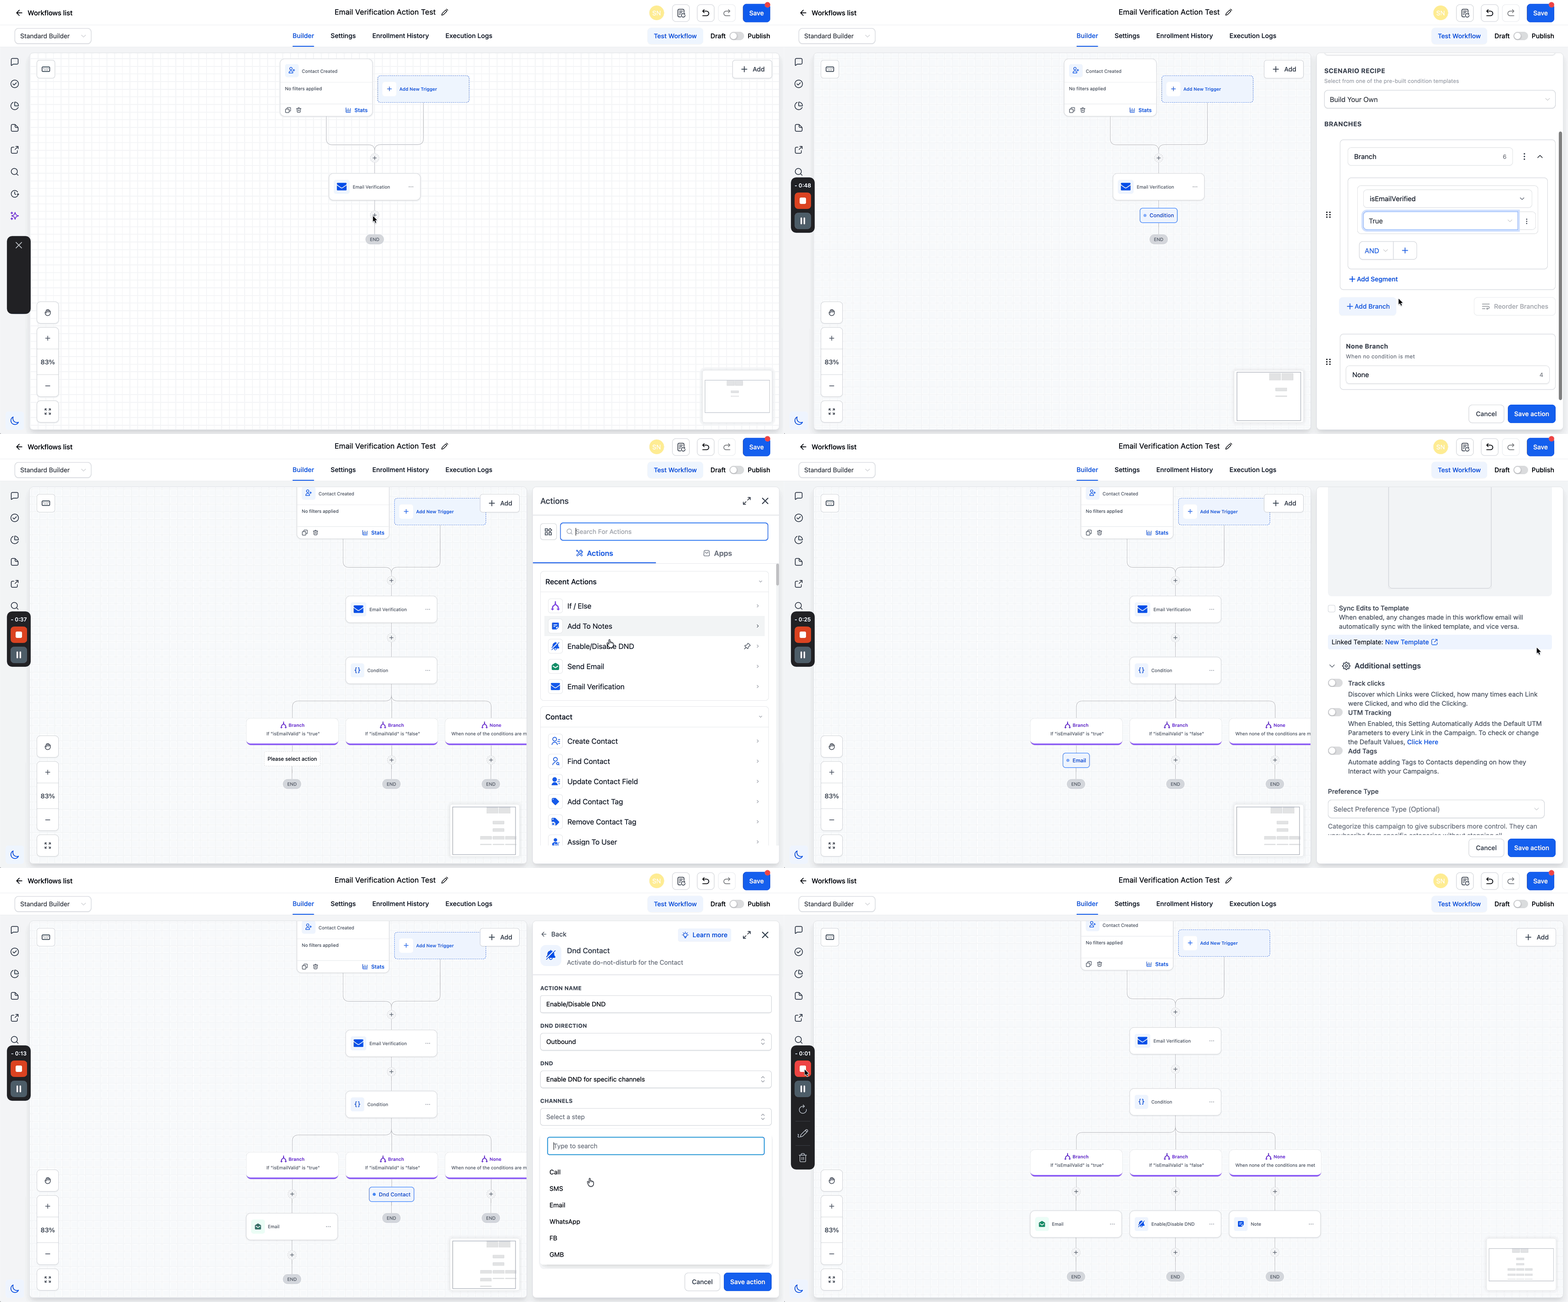
Add Email Verification action to a workflow
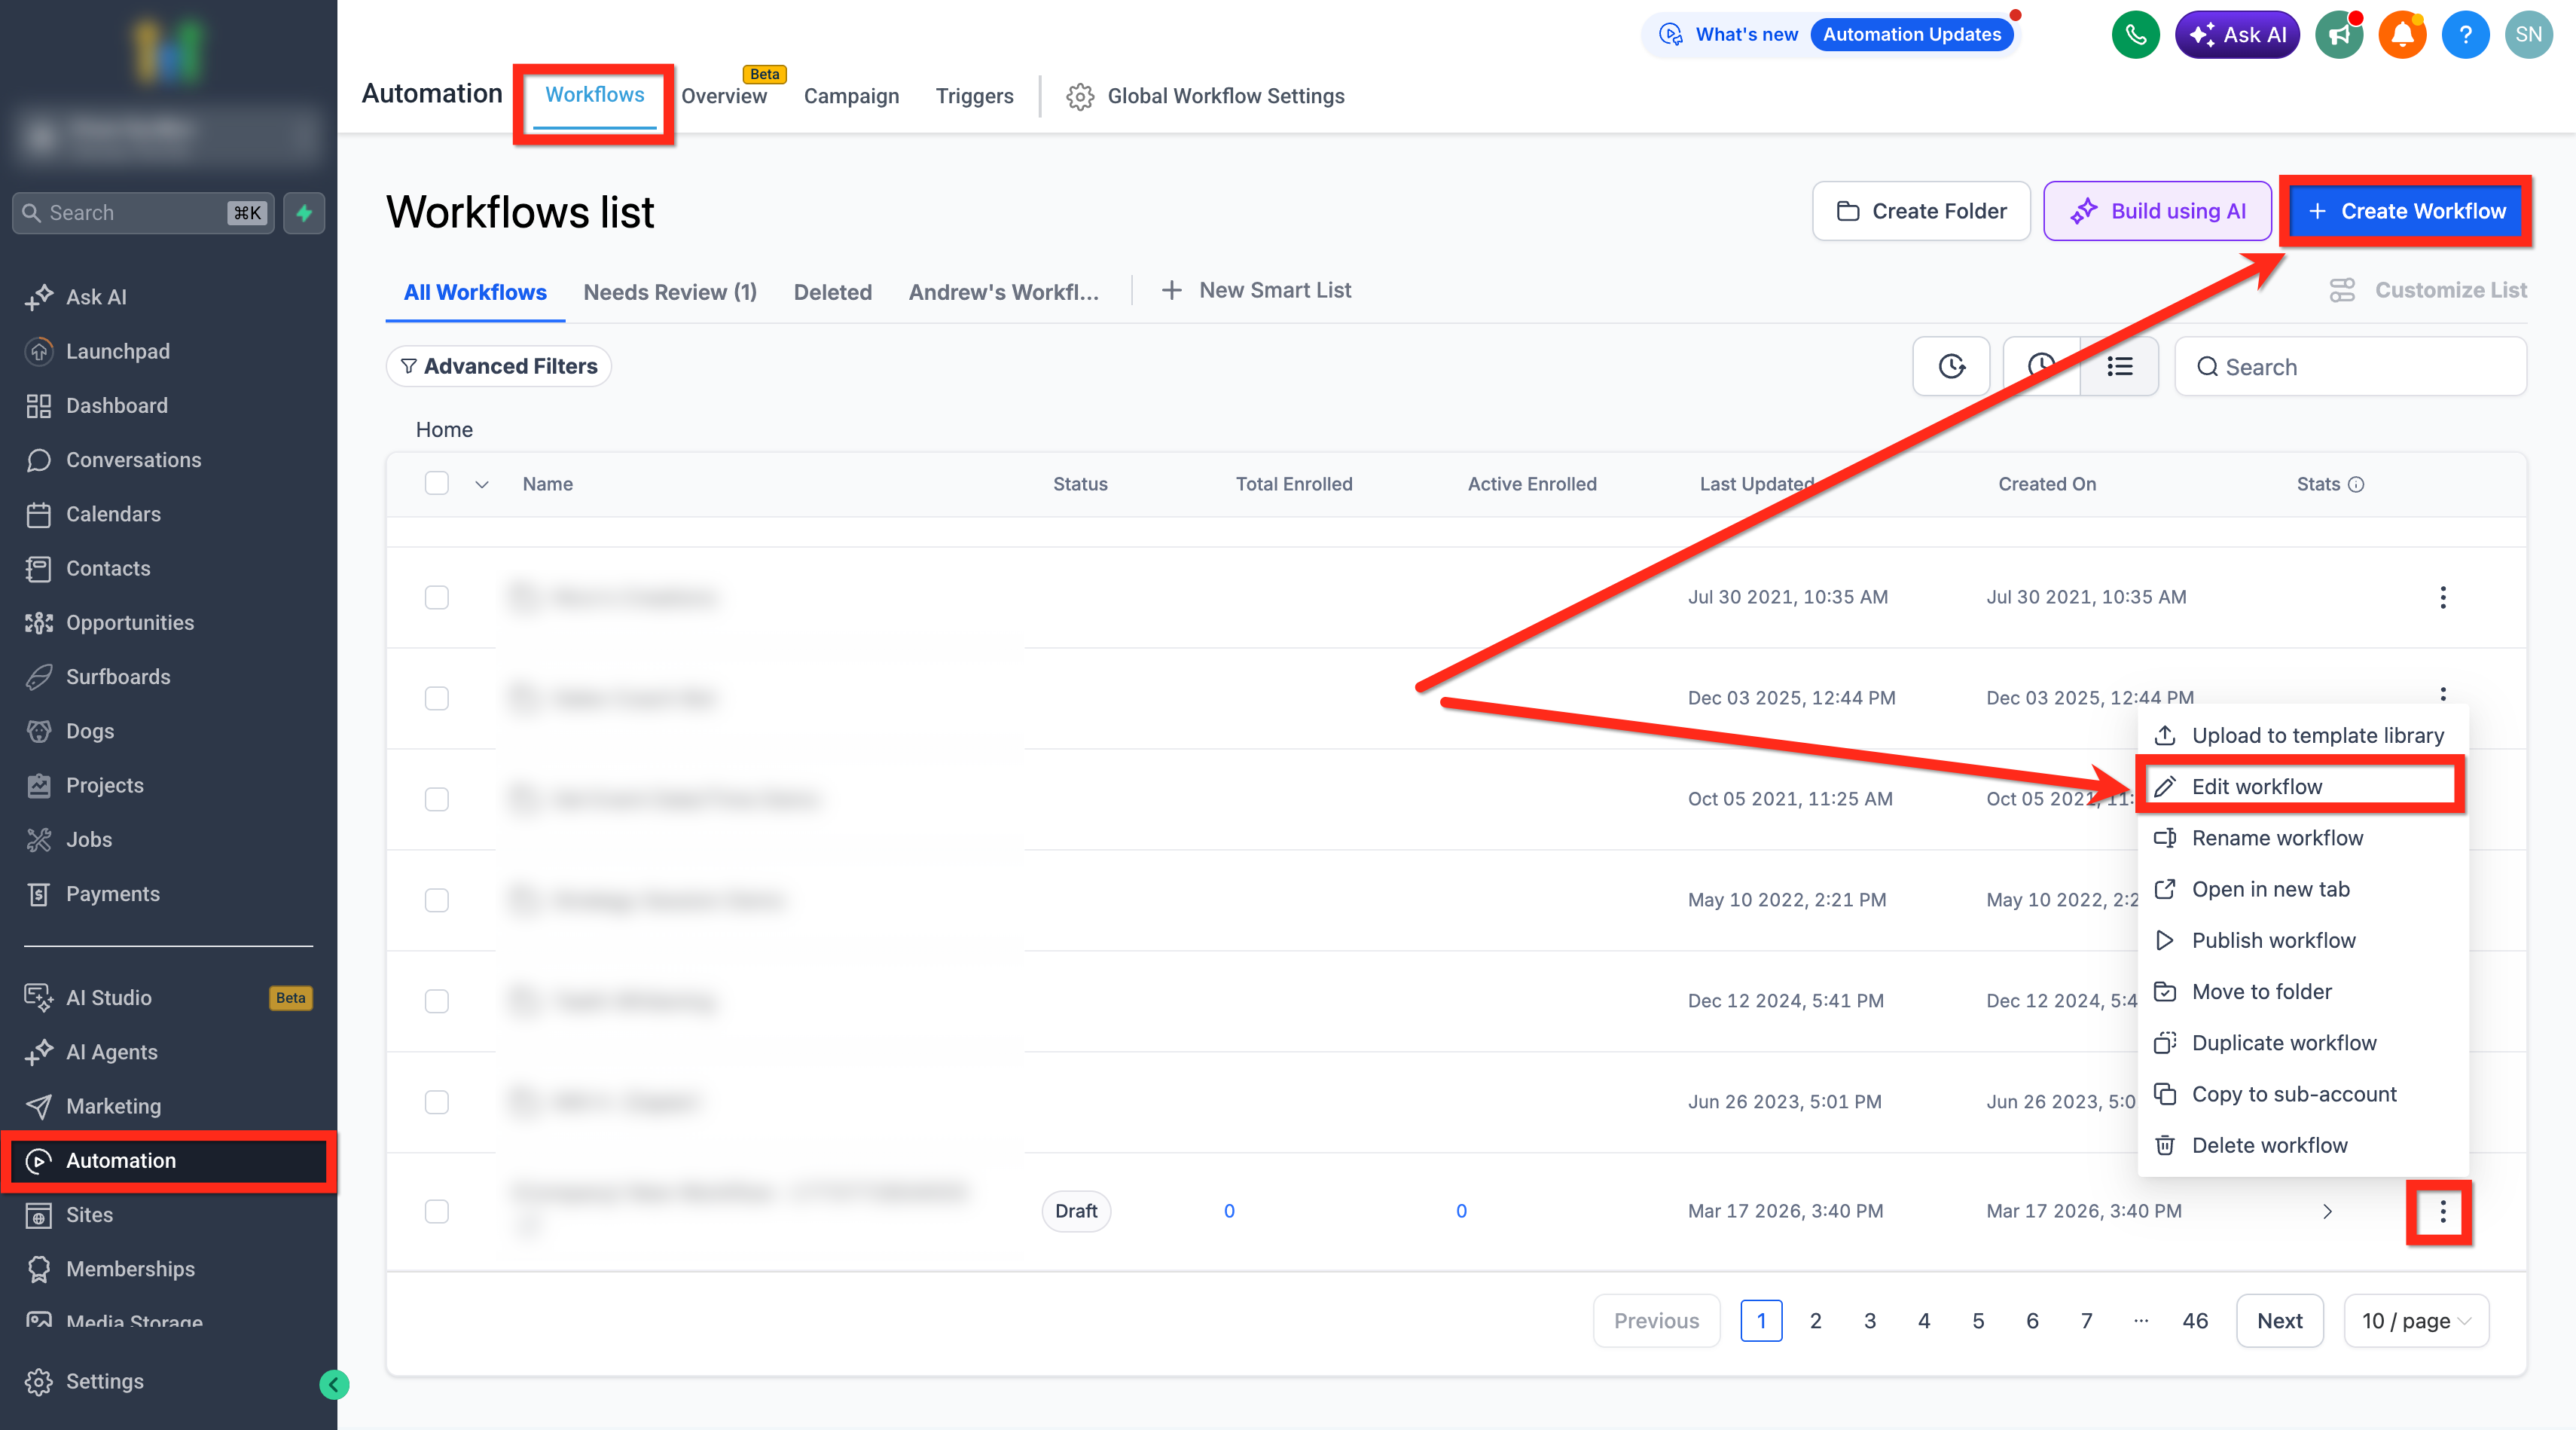
- Open Automation > Workflows.
- Select an existing workflow or create a new workflow.
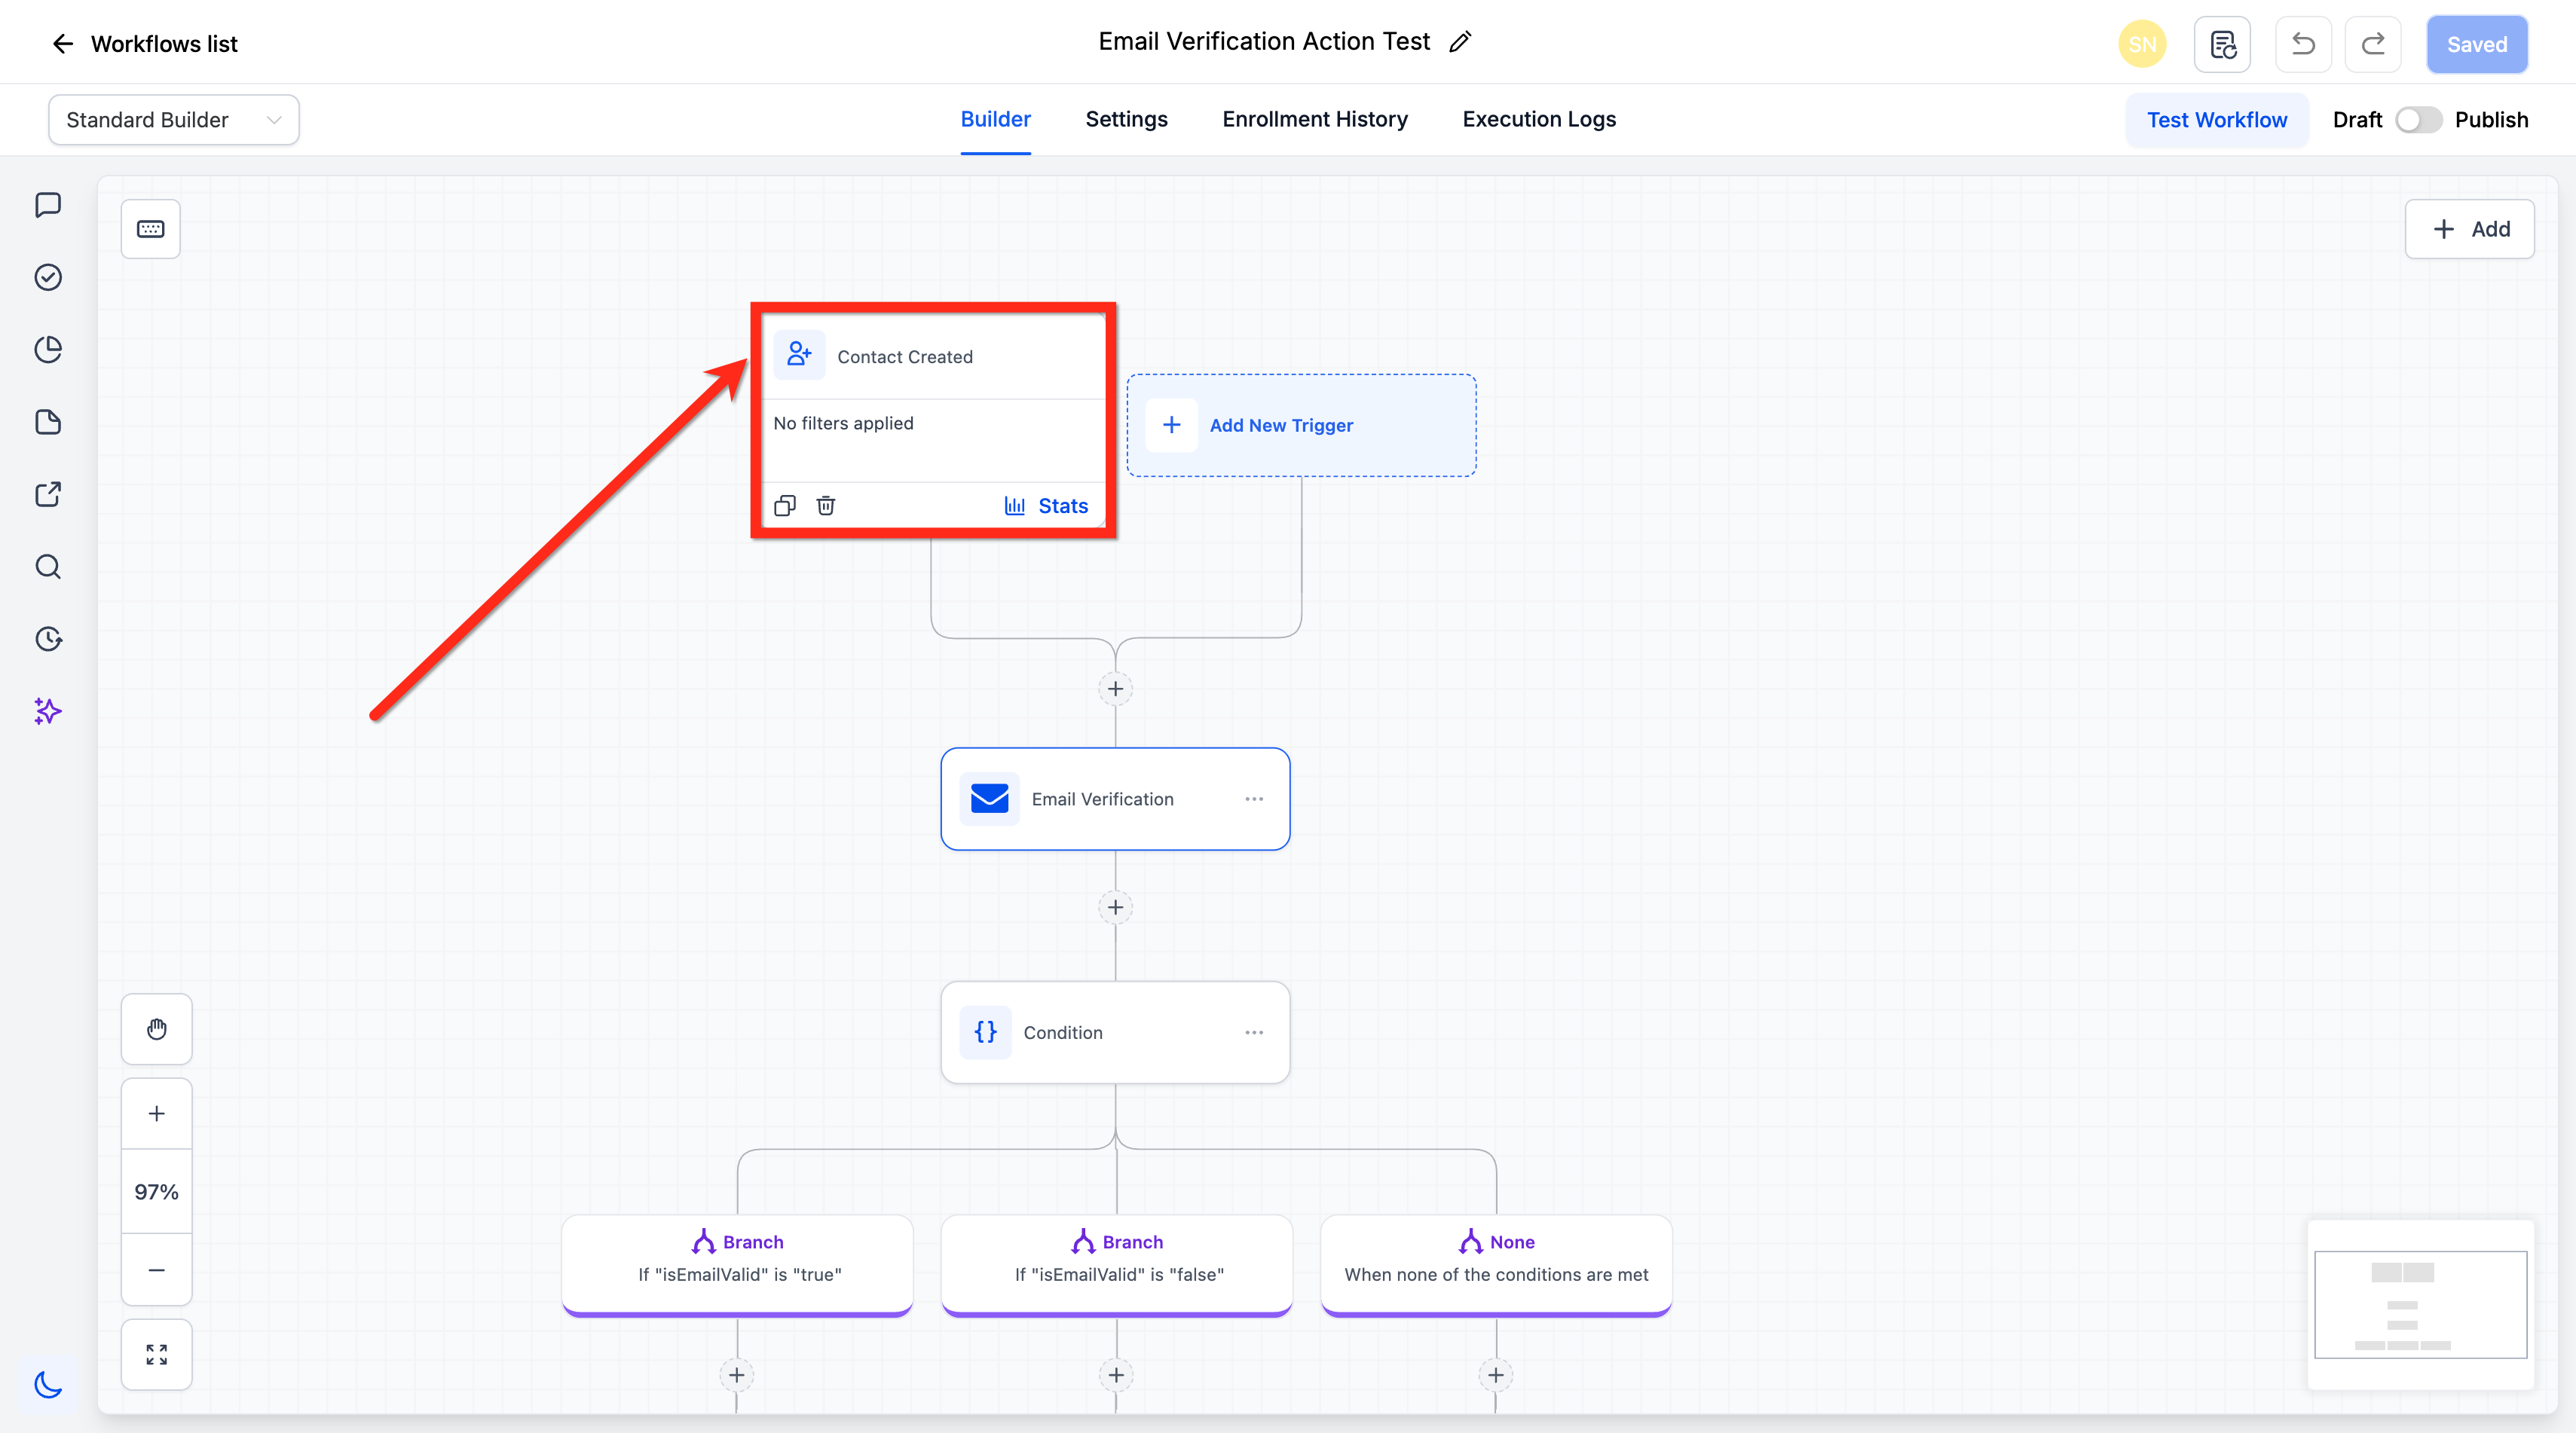
- Add a trigger such as Contact Created.
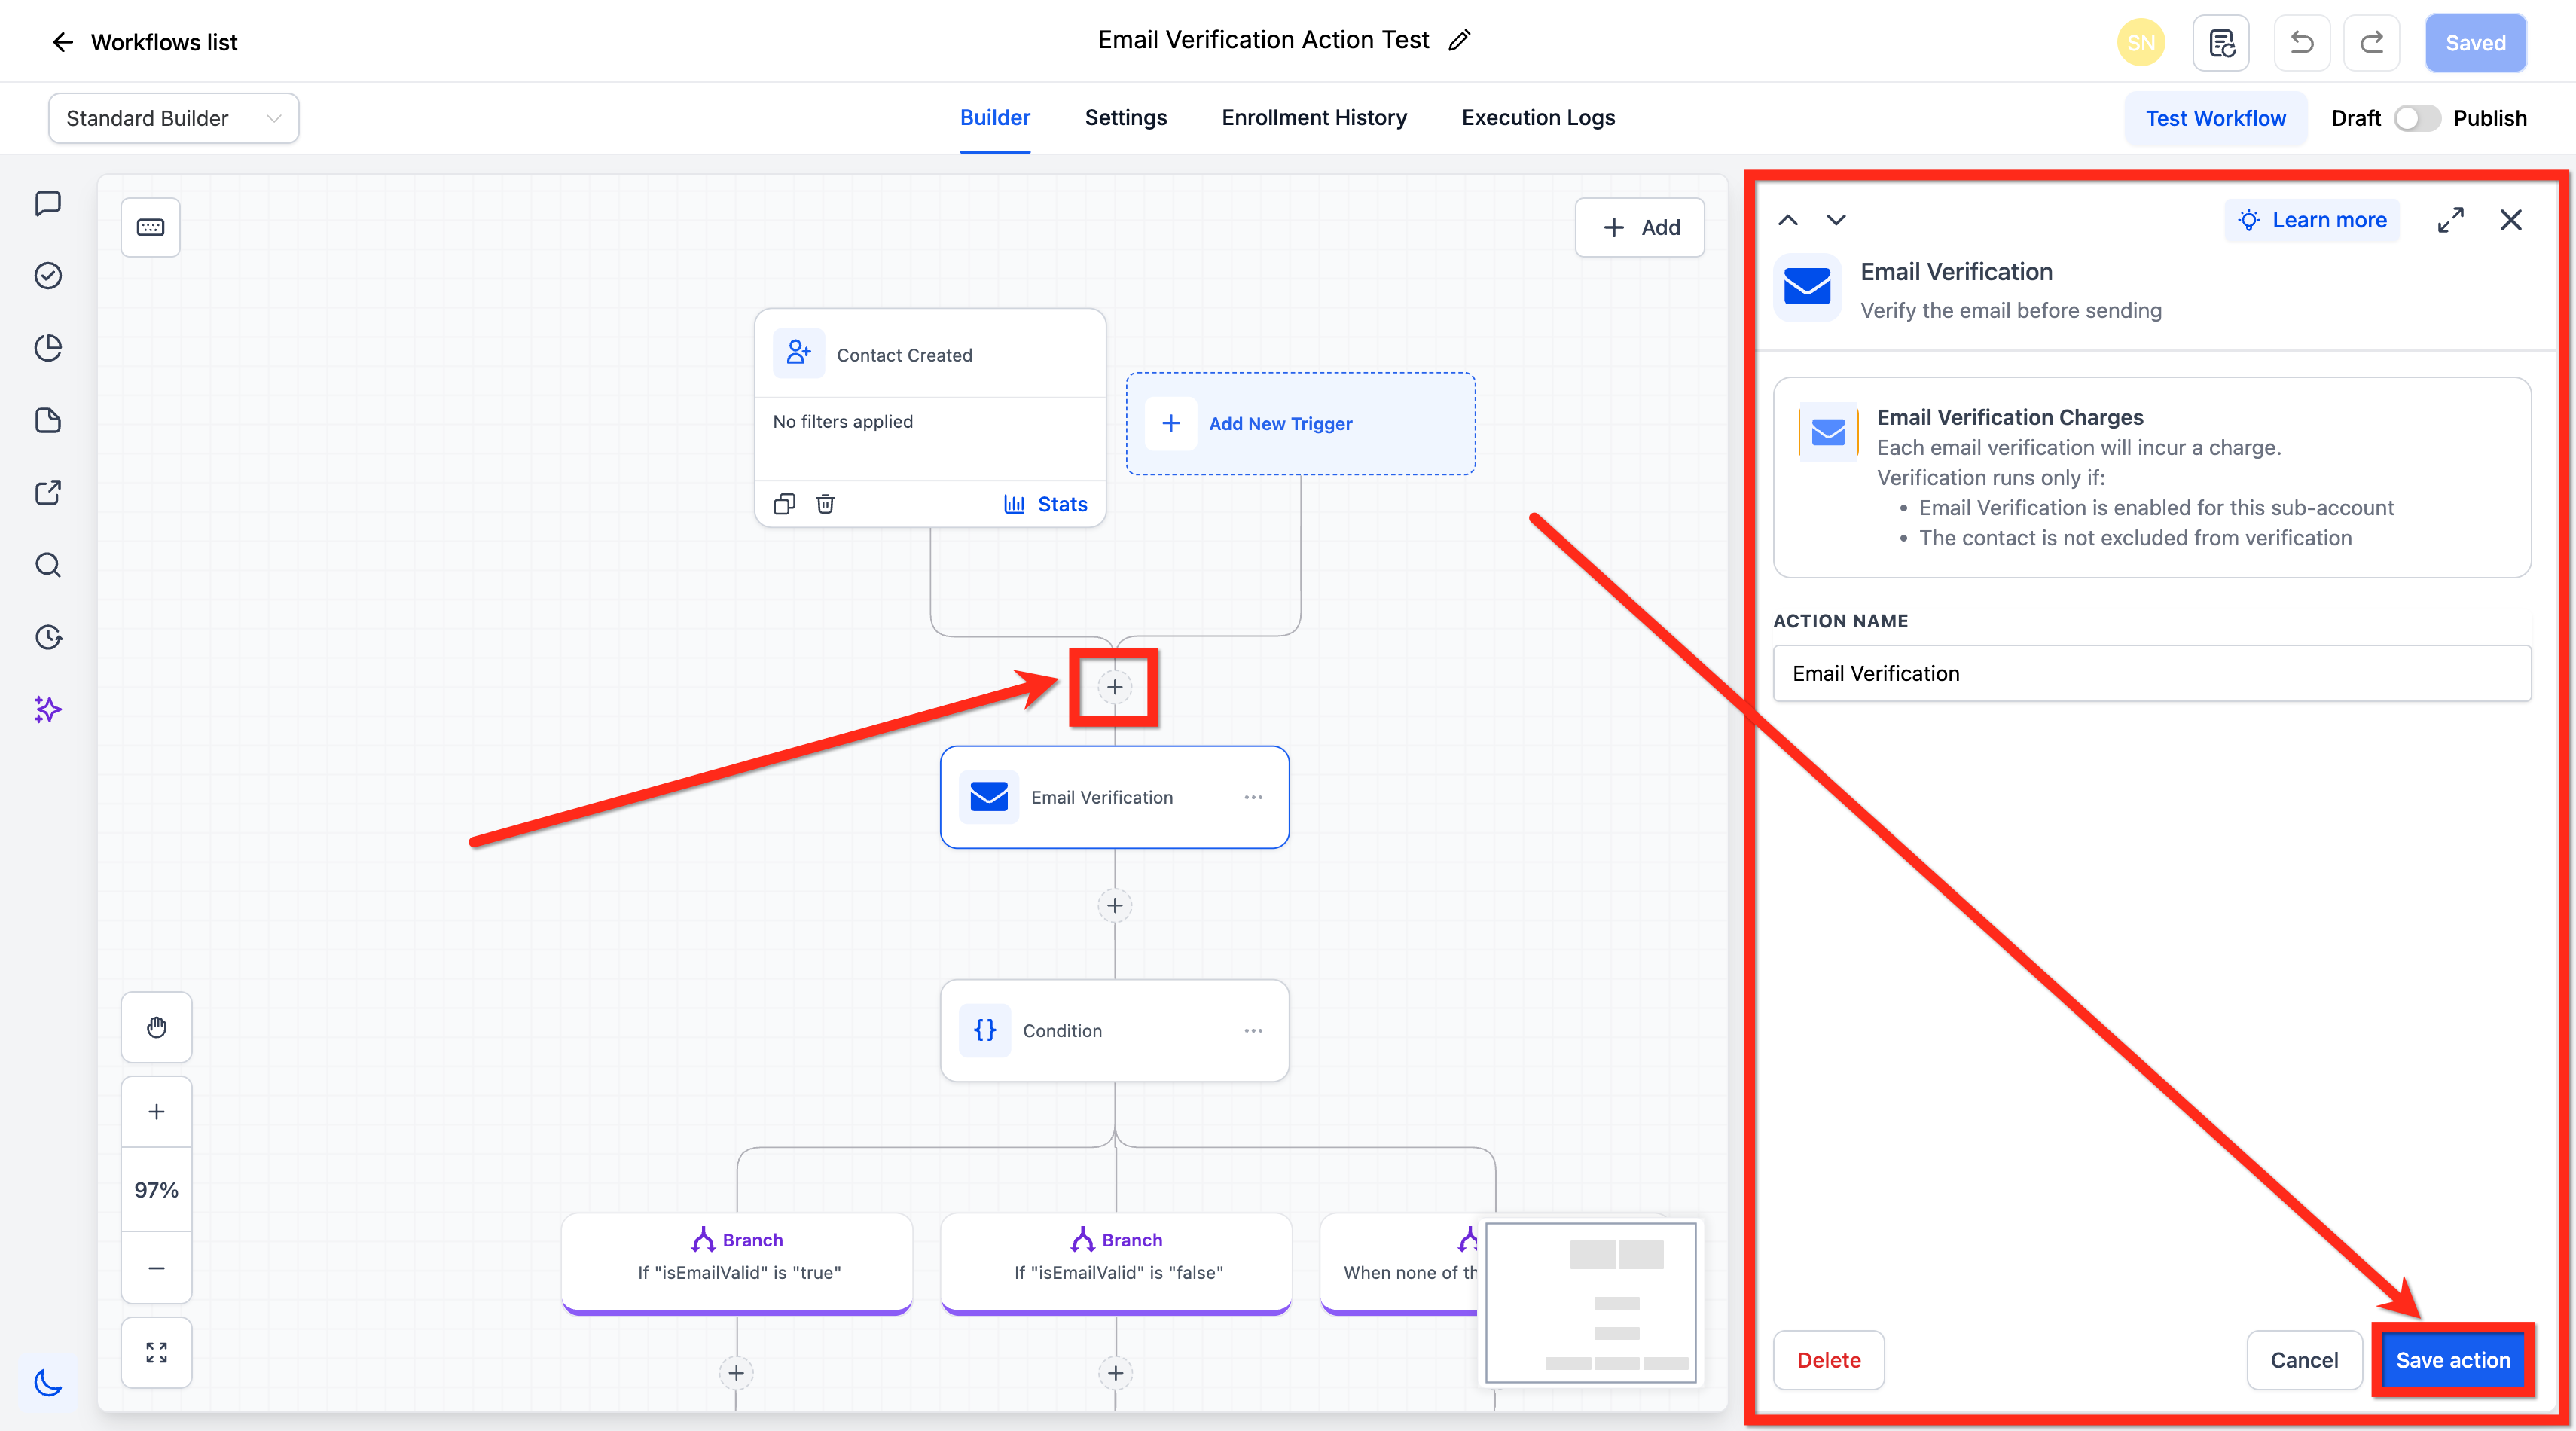
- Click the plus sign to add a New Action.
- Search for Email Verification, select it, and click Save Action.
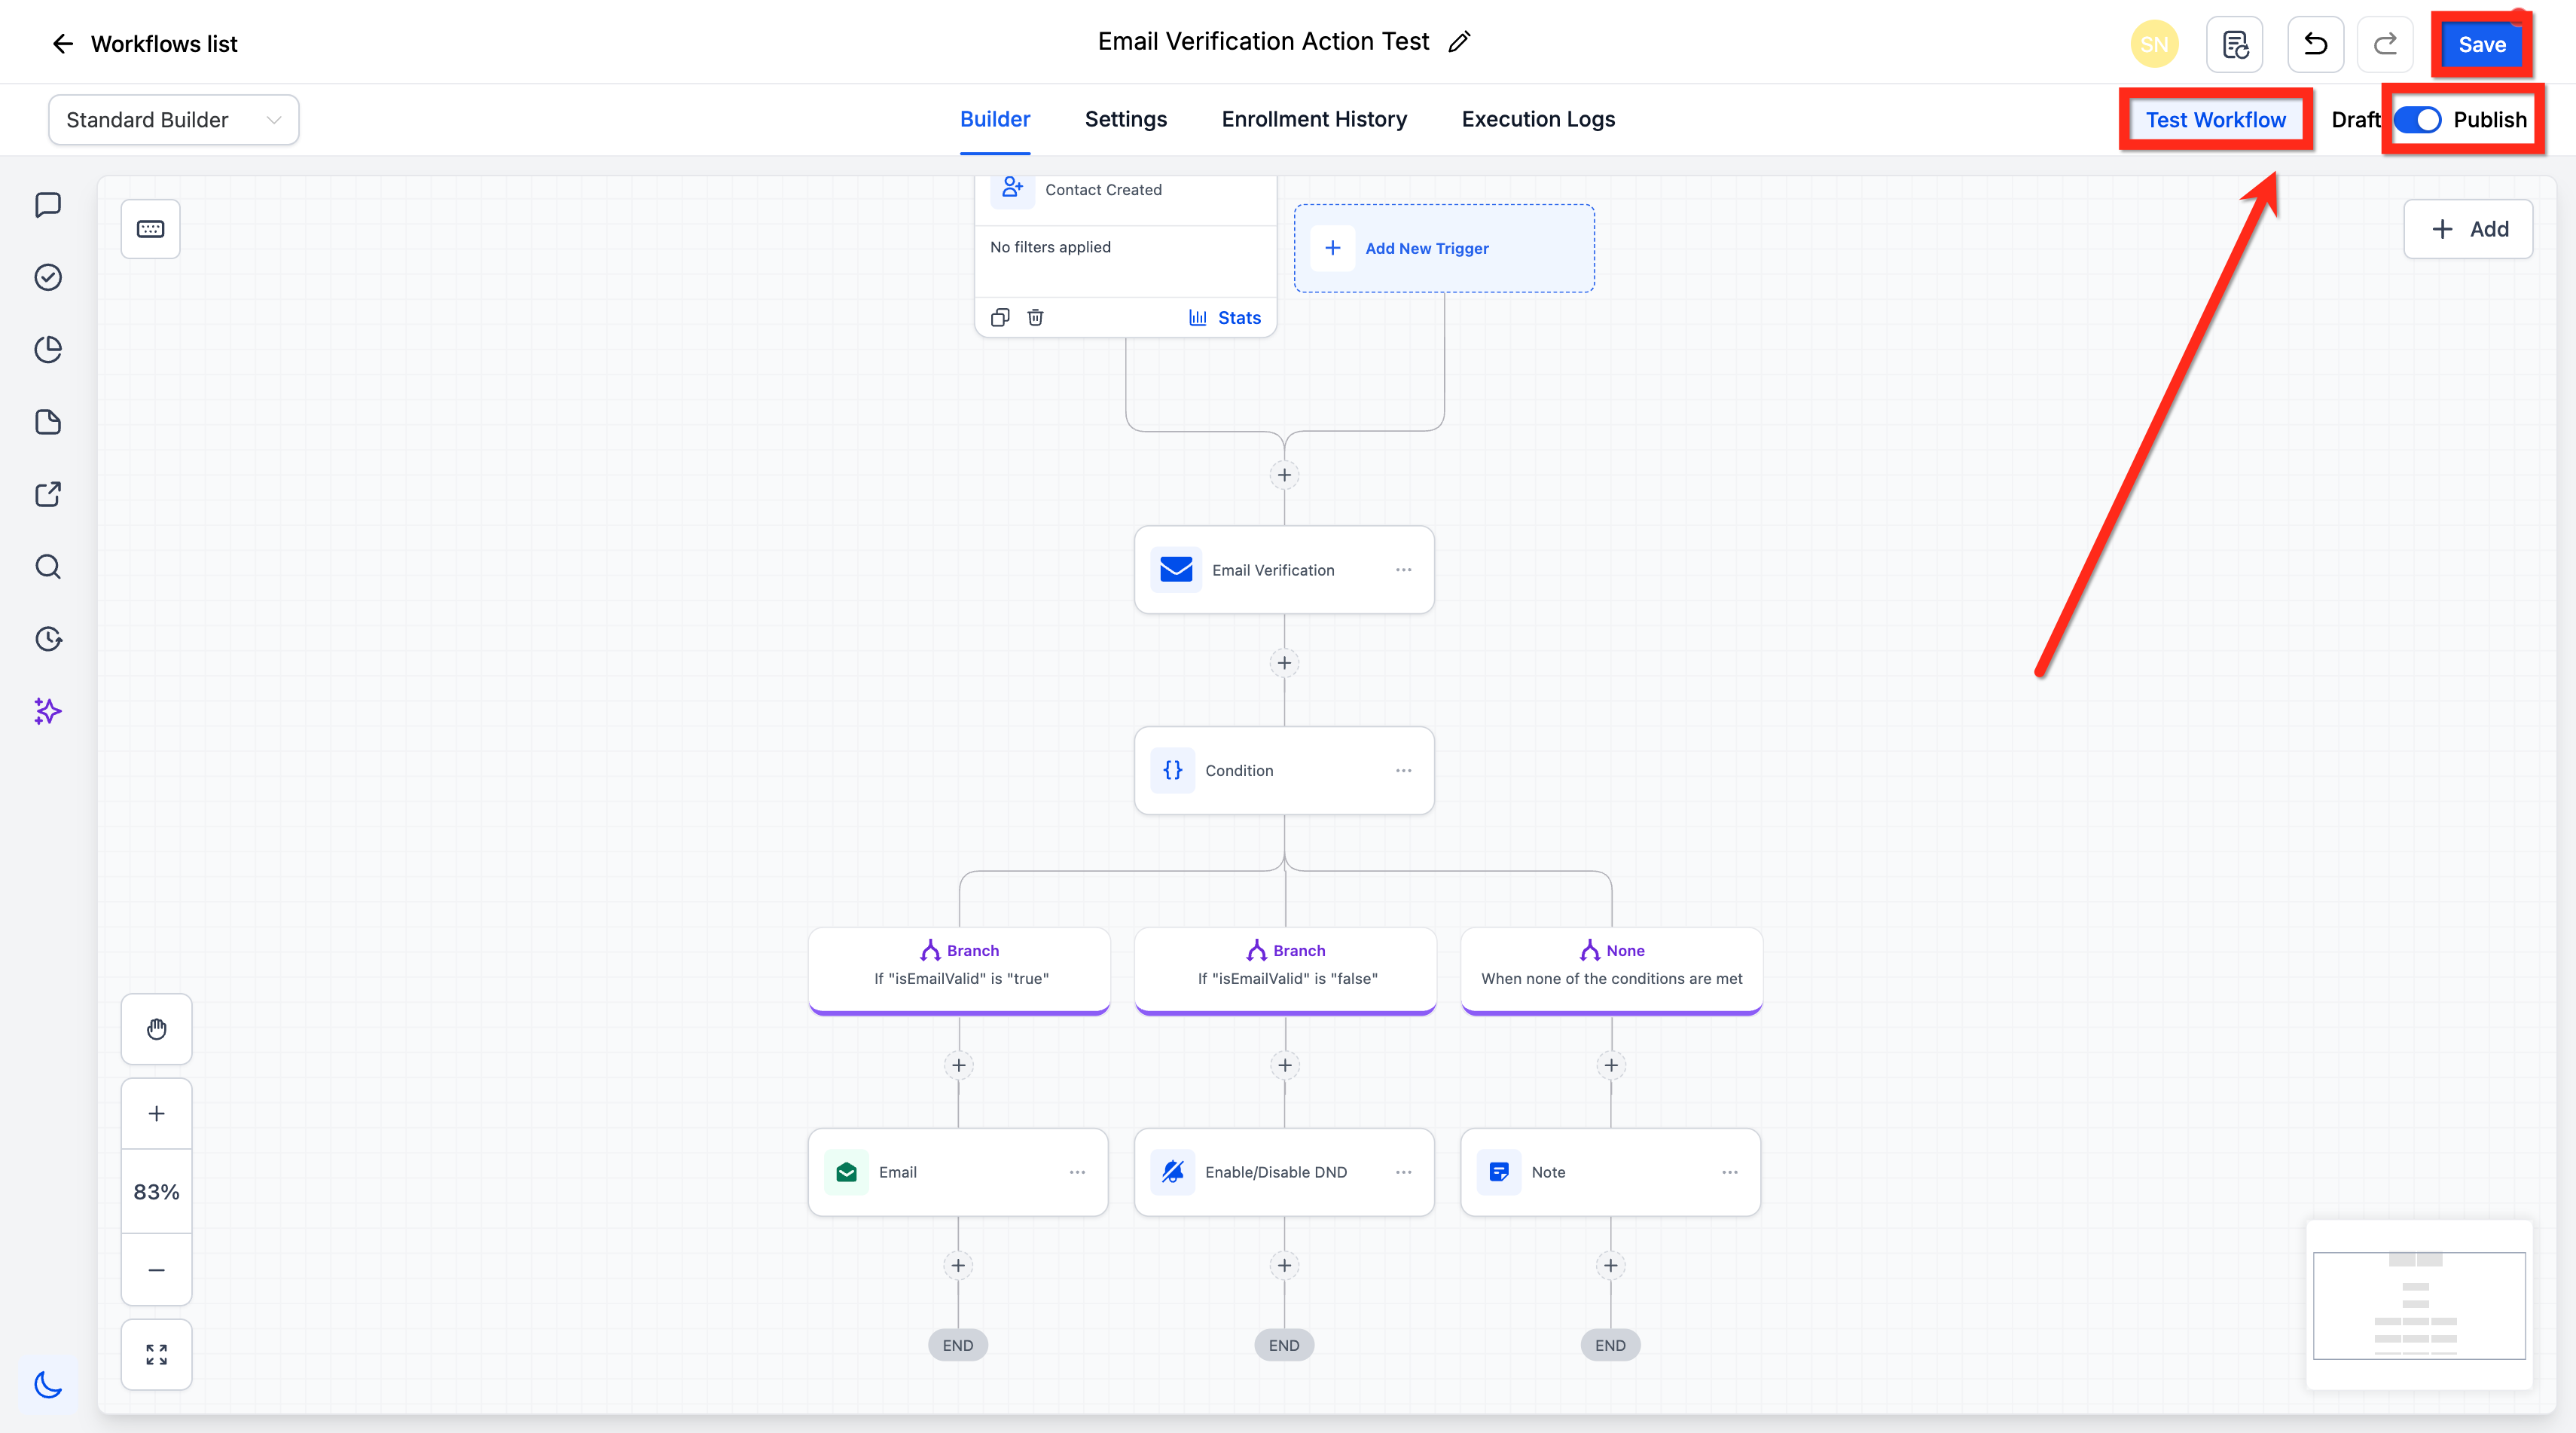
- Make sure the Email Verification action is placed before any email sending actions.
- Insert an If/Else condition after the verification step if branching is needed.
- Configure the condition logic for valid, risky, and invalid email outcomes.
- Route contacts with a valid result to the intended Send Email actions.
- Send contacts with risky or invalid results to an alternate path or stop the workflow.
- Test the workflow to confirm contacts follow the expected routes.
- Save and publish the workflow.
06What it looks like in HighLevel
07Settings that matter
- Email Verification. Controls whether the verification action can run; it must be enabled for the subaccount before the action is used.
08Things to know before you rely on it
- If a contact is marked as excluded from verification, the Email Verification action is skipped.
09How it connects to the rest of HighLevel
- Learn the basics of building workflows in HighLevel. Workflow basics
- Get started with creating triggers and actions for your workflows. Workflow creation guide
Michael's take

Many people assume the verification step will block a bad address on its own, and then they forget to add any branching logic. Without an If/Else after the check, the workflow just keeps running and you may still end up sending to risky contacts.
I would first put the Email Verification action right before the first Send Email step, then add an If/Else that uses the isEmailVerified condition to send only the Valid contacts forward. I’d also set a separate path for Risky results so I can review them before any large scale campaign.