
01Who this is for
- Founders who need to reduce repetitive work and keep processes consistent.
- Marketing teams that want to send follow up messages as soon as a form is submitted.
- Support staff that need to assign tickets automatically when a customer emails.
02Workflows and automations, explained
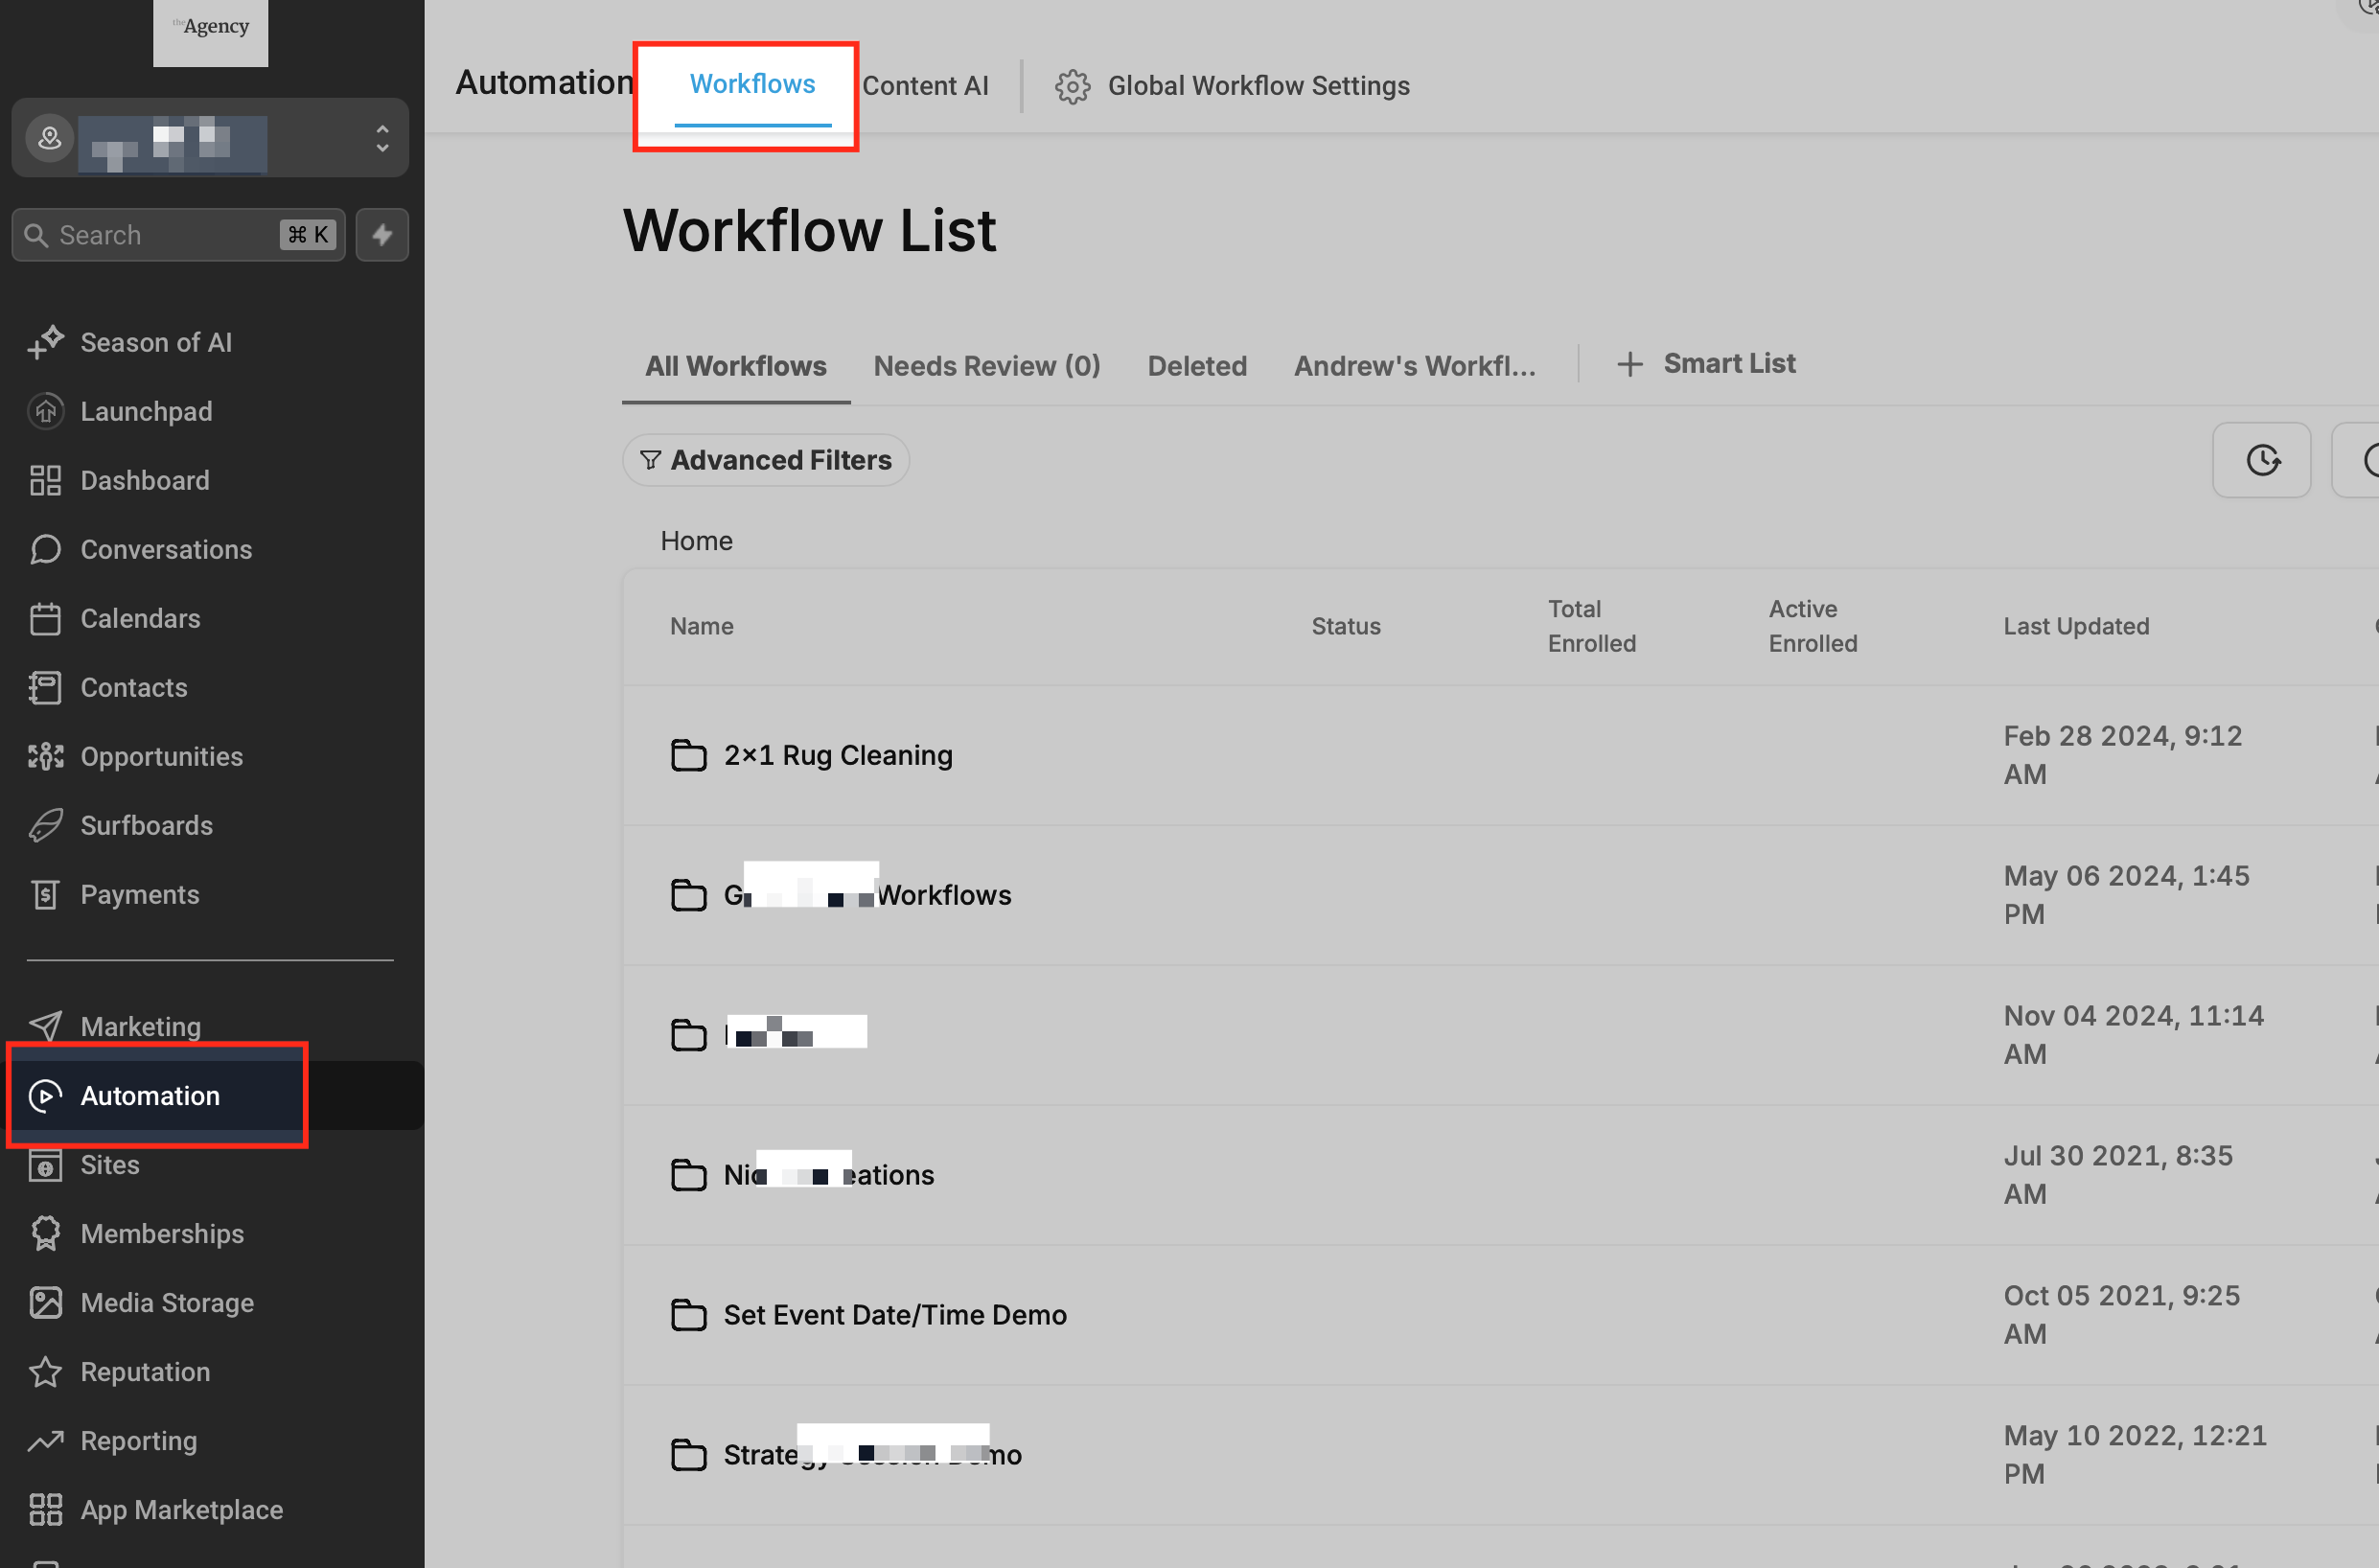
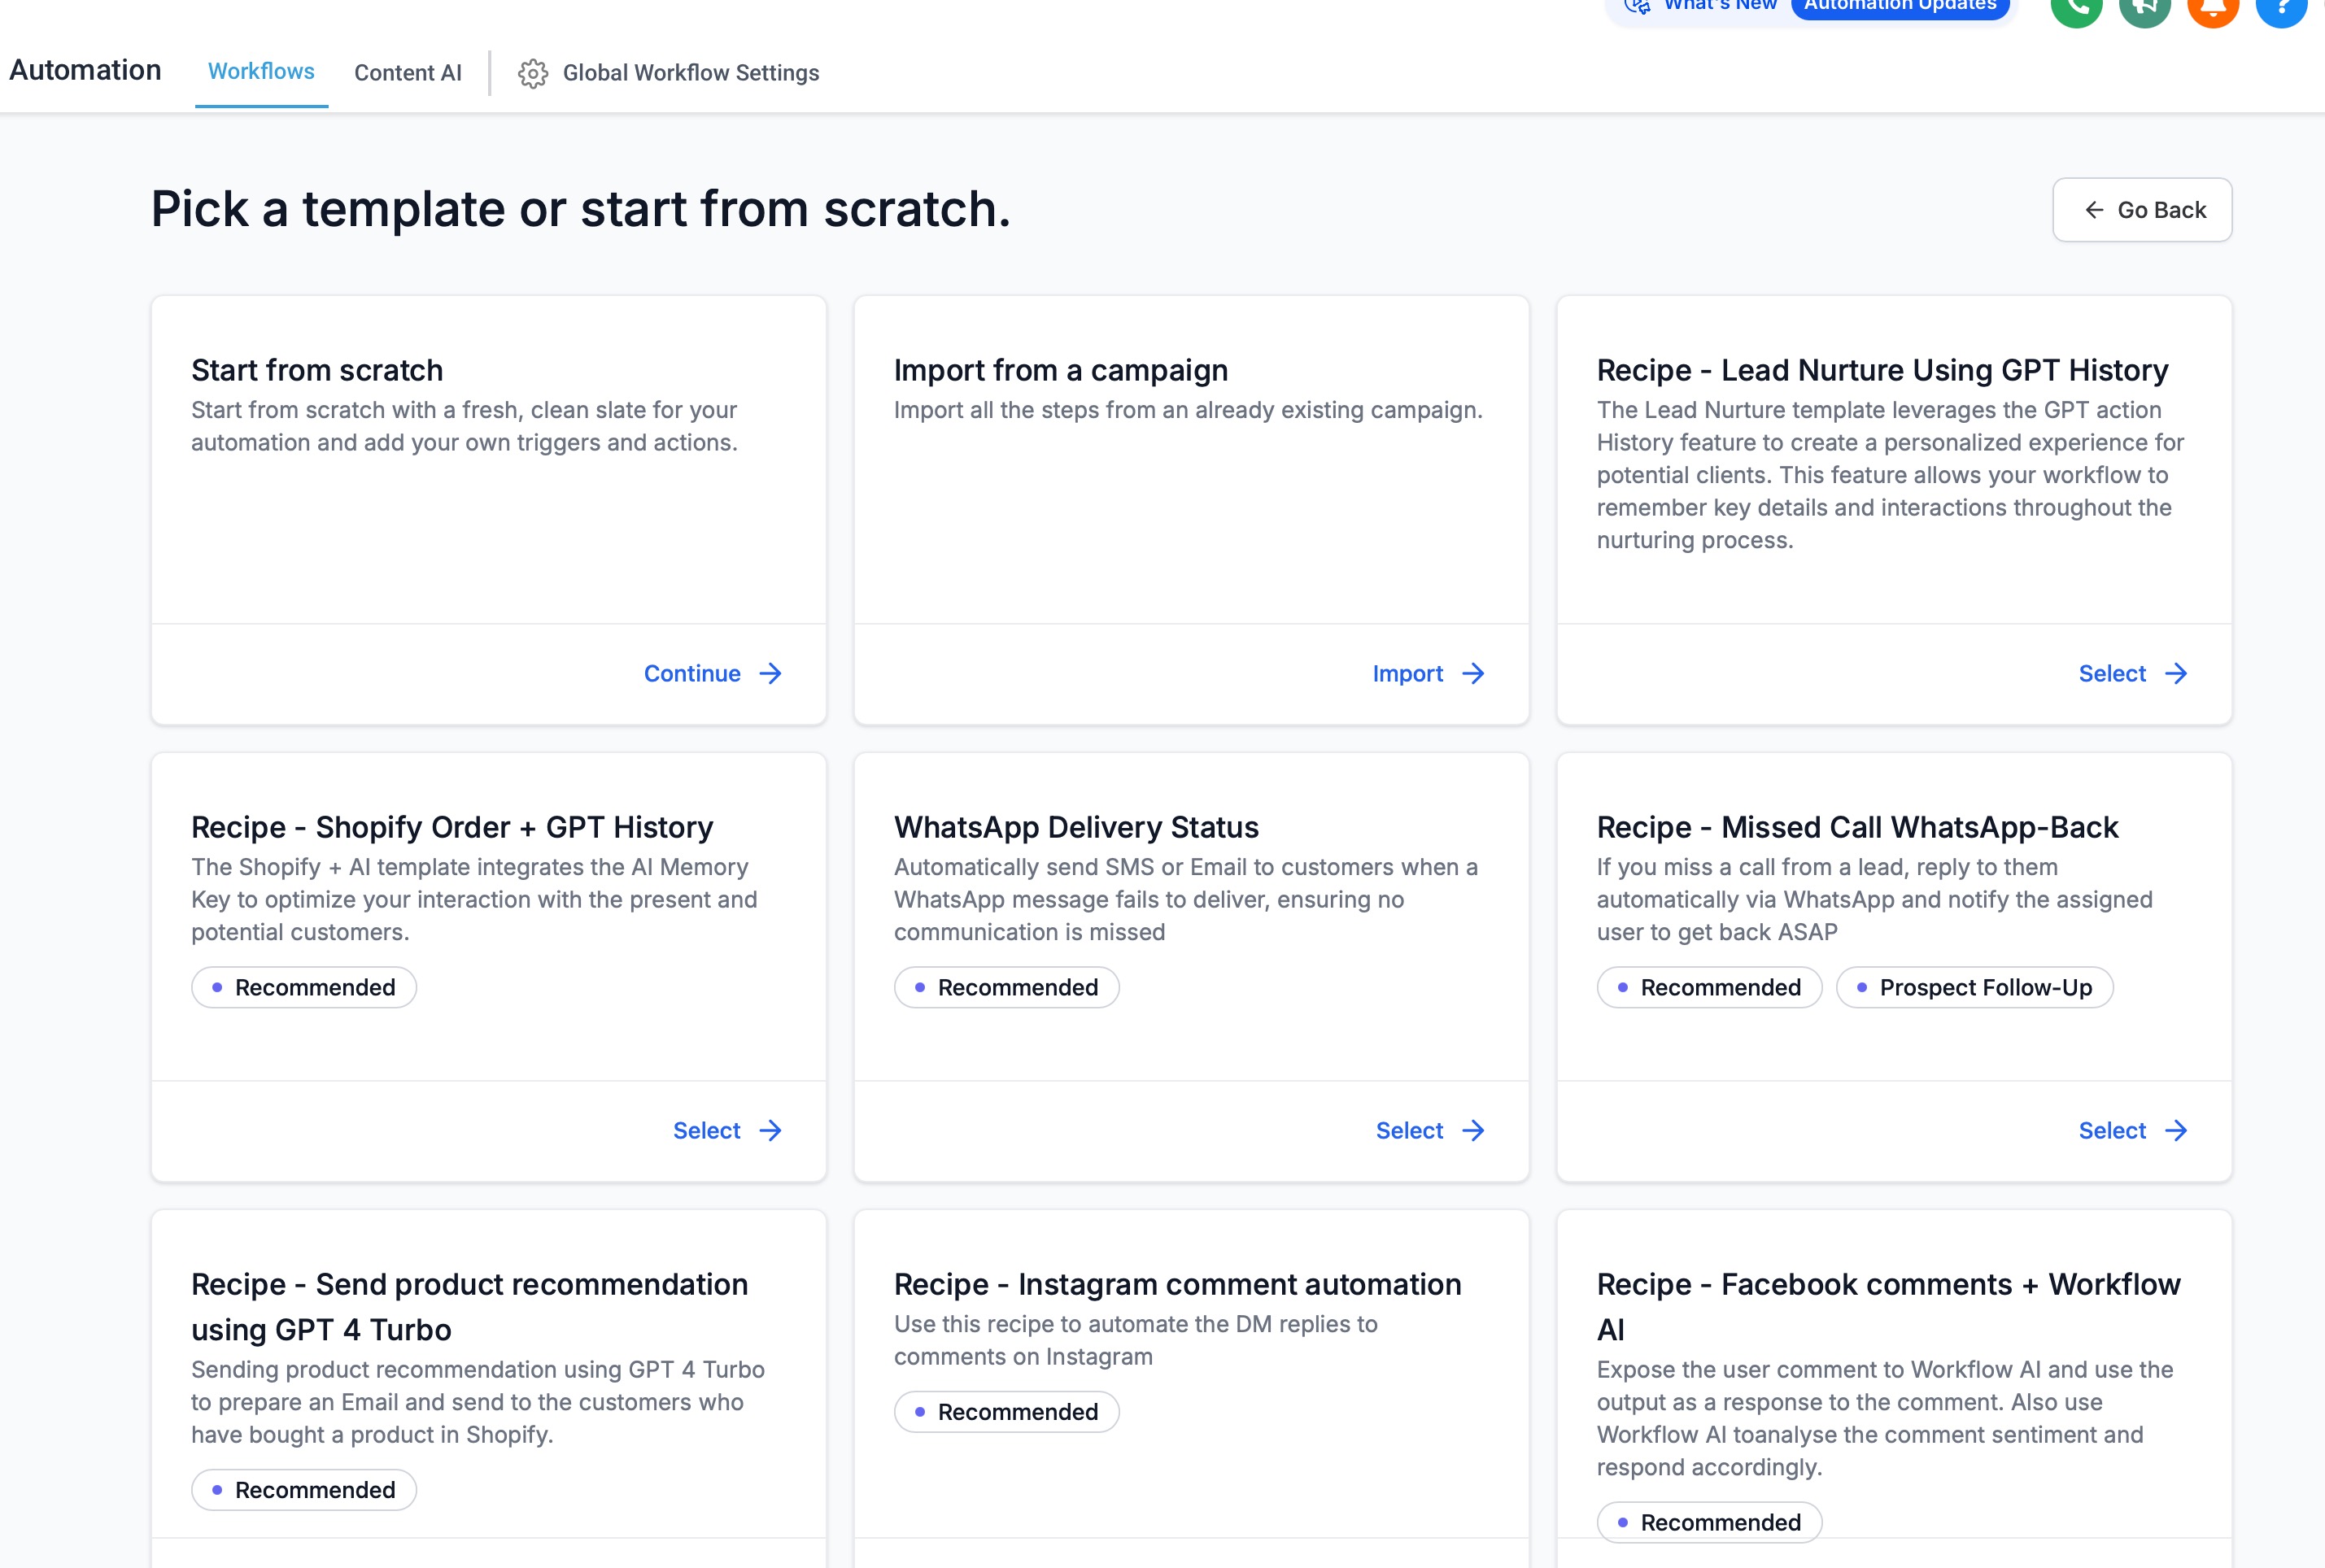
Workflow automation lets you string together events and tasks inside HighLevel. A trigger starts the flow when something happens, such as an appointment booking or a form submission. Actions run after the trigger, for example sending an email or updating a contact record. The automation builder is found in Automation > Workflows. You can start with a template, a recipe, or build a workflow from scratch. After adding triggers and actions you can save, test and then publish the workflow.
03How businesses use workflows and automations
- Real estate agency. The agency creates a workflow that begins when a new lead form is submitted. The workflow adds the lead to the contact list, assigns it to an agent, and sends a welcome email. All steps run automatically inside HighLevel.
- Health clinic. The clinic builds a workflow that triggers on an appointment booking. The workflow confirms the booking, updates the patient record, and sends a reminder email before the visit. The clinic manages the entire process without manual entry.
- Online retailer. The retailer sets a workflow that starts when a support ticket is received. The workflow assigns the ticket to a support rep and notifies the team via internal message. The retailer can track the ticket flow inside HighLevel.
04How to set up and use workflows and automations in HighLevel
Set up a workflow
- Open Automation and select Workflows.
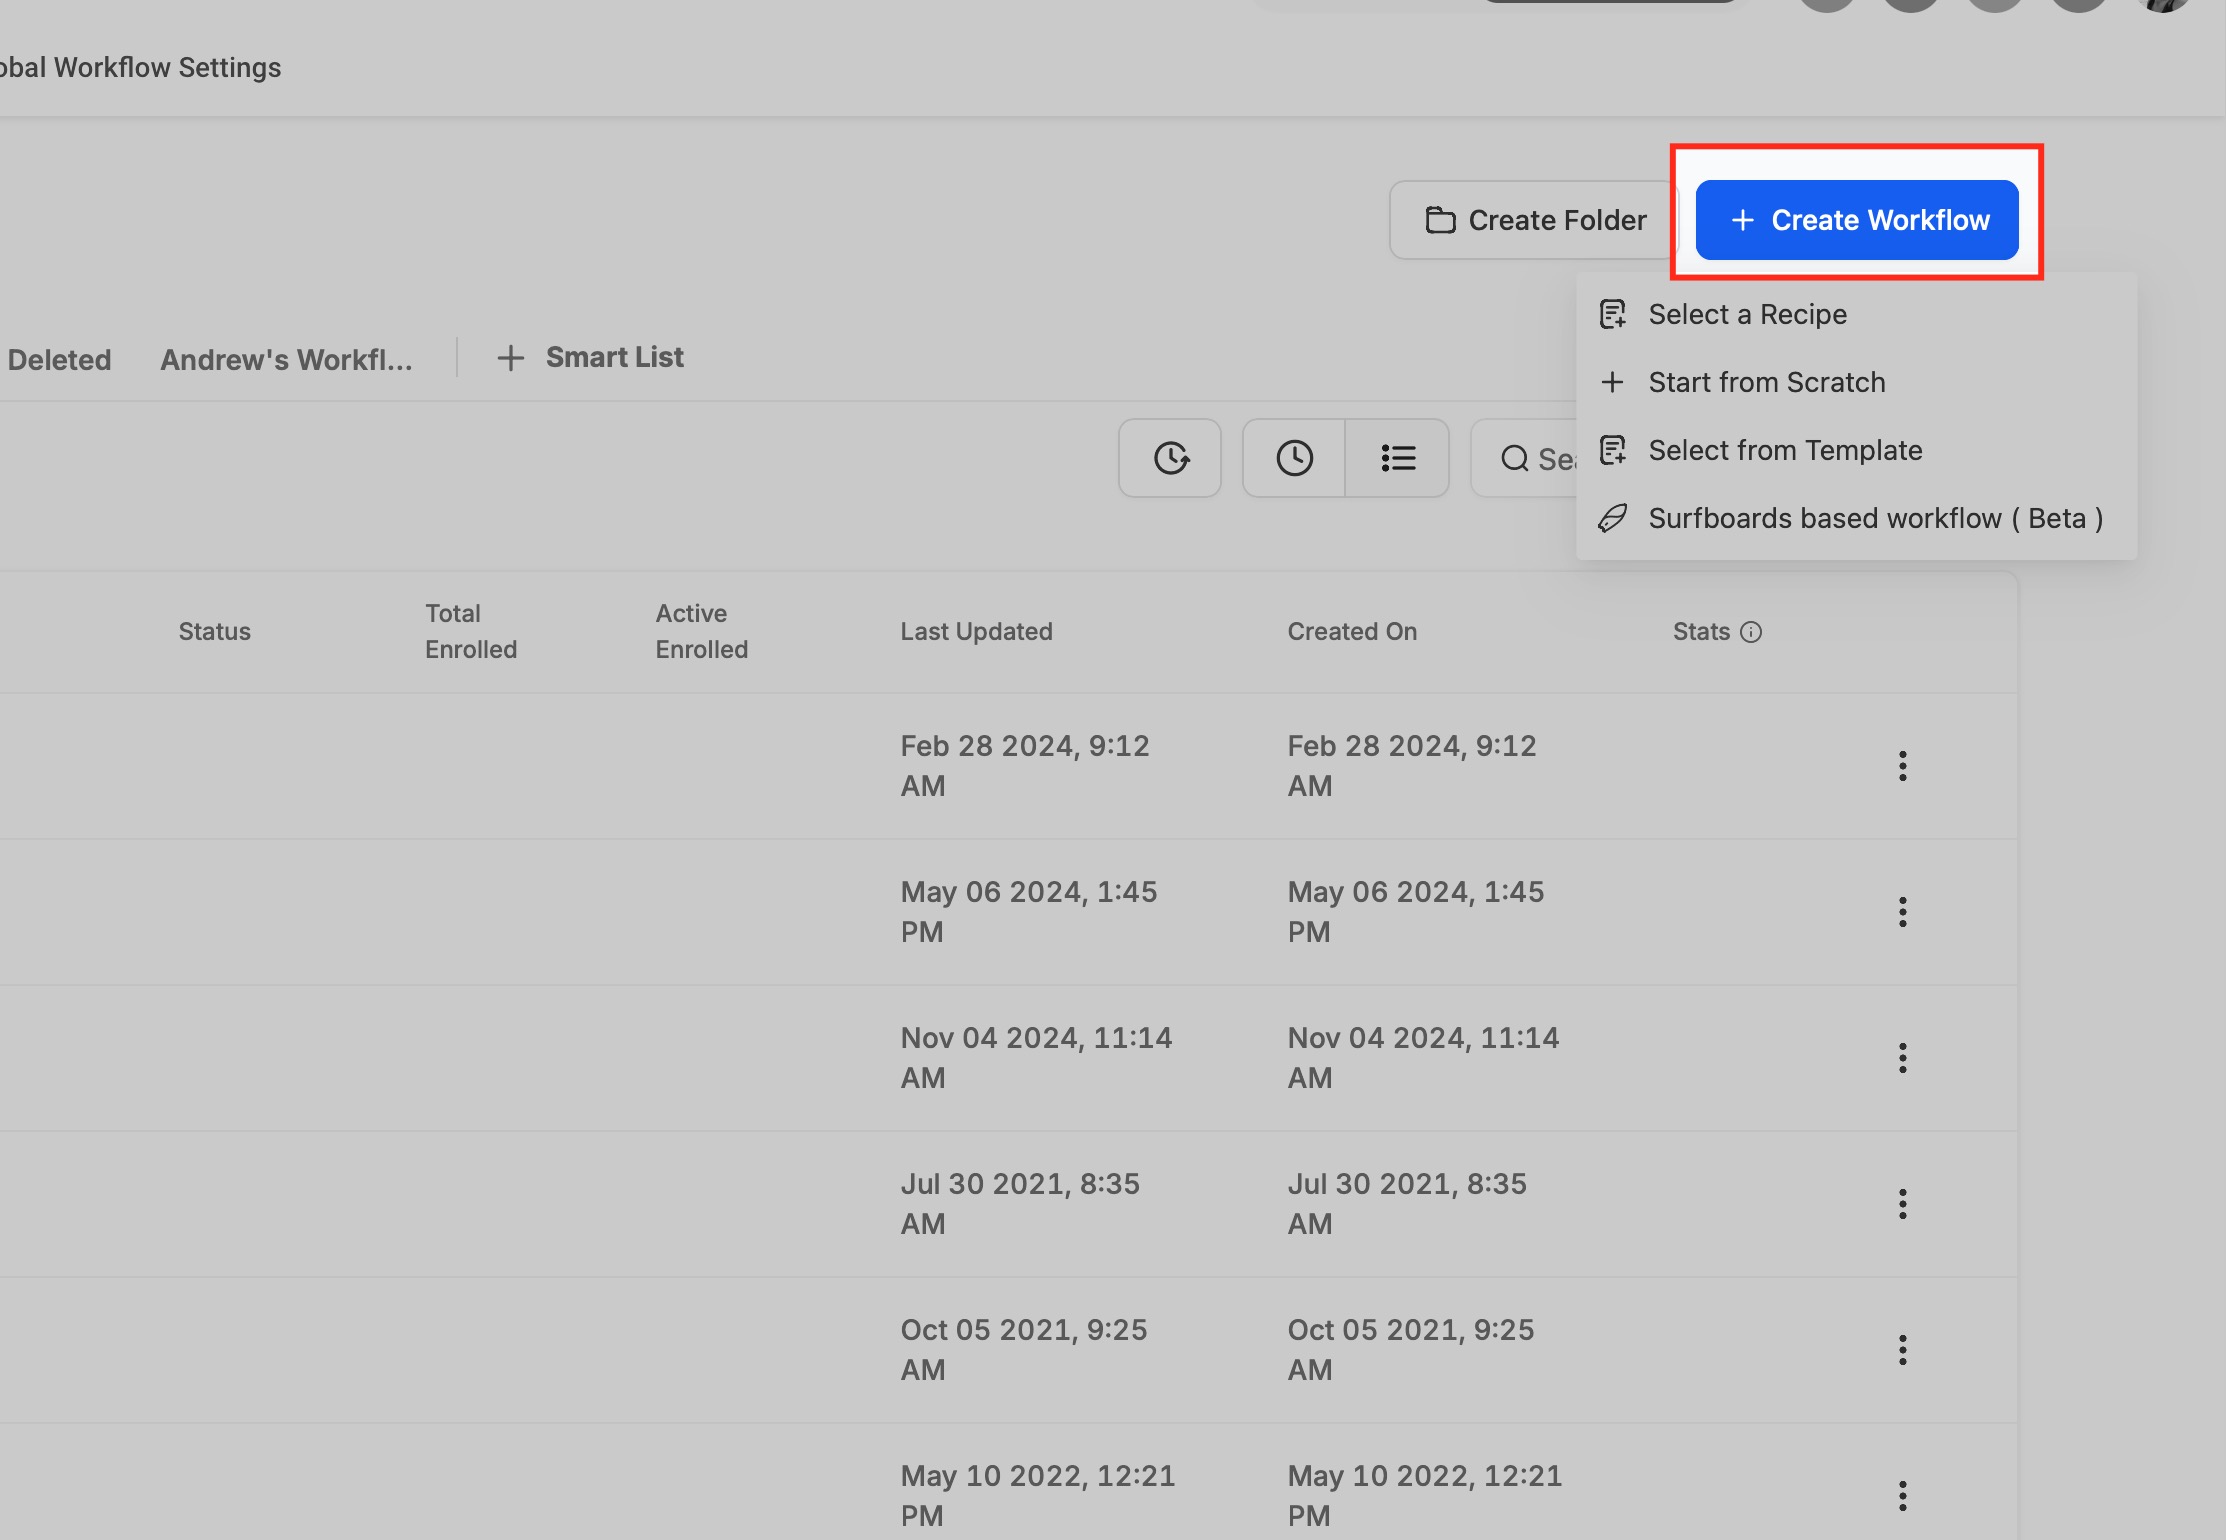
- Click the + Create Workflow button.
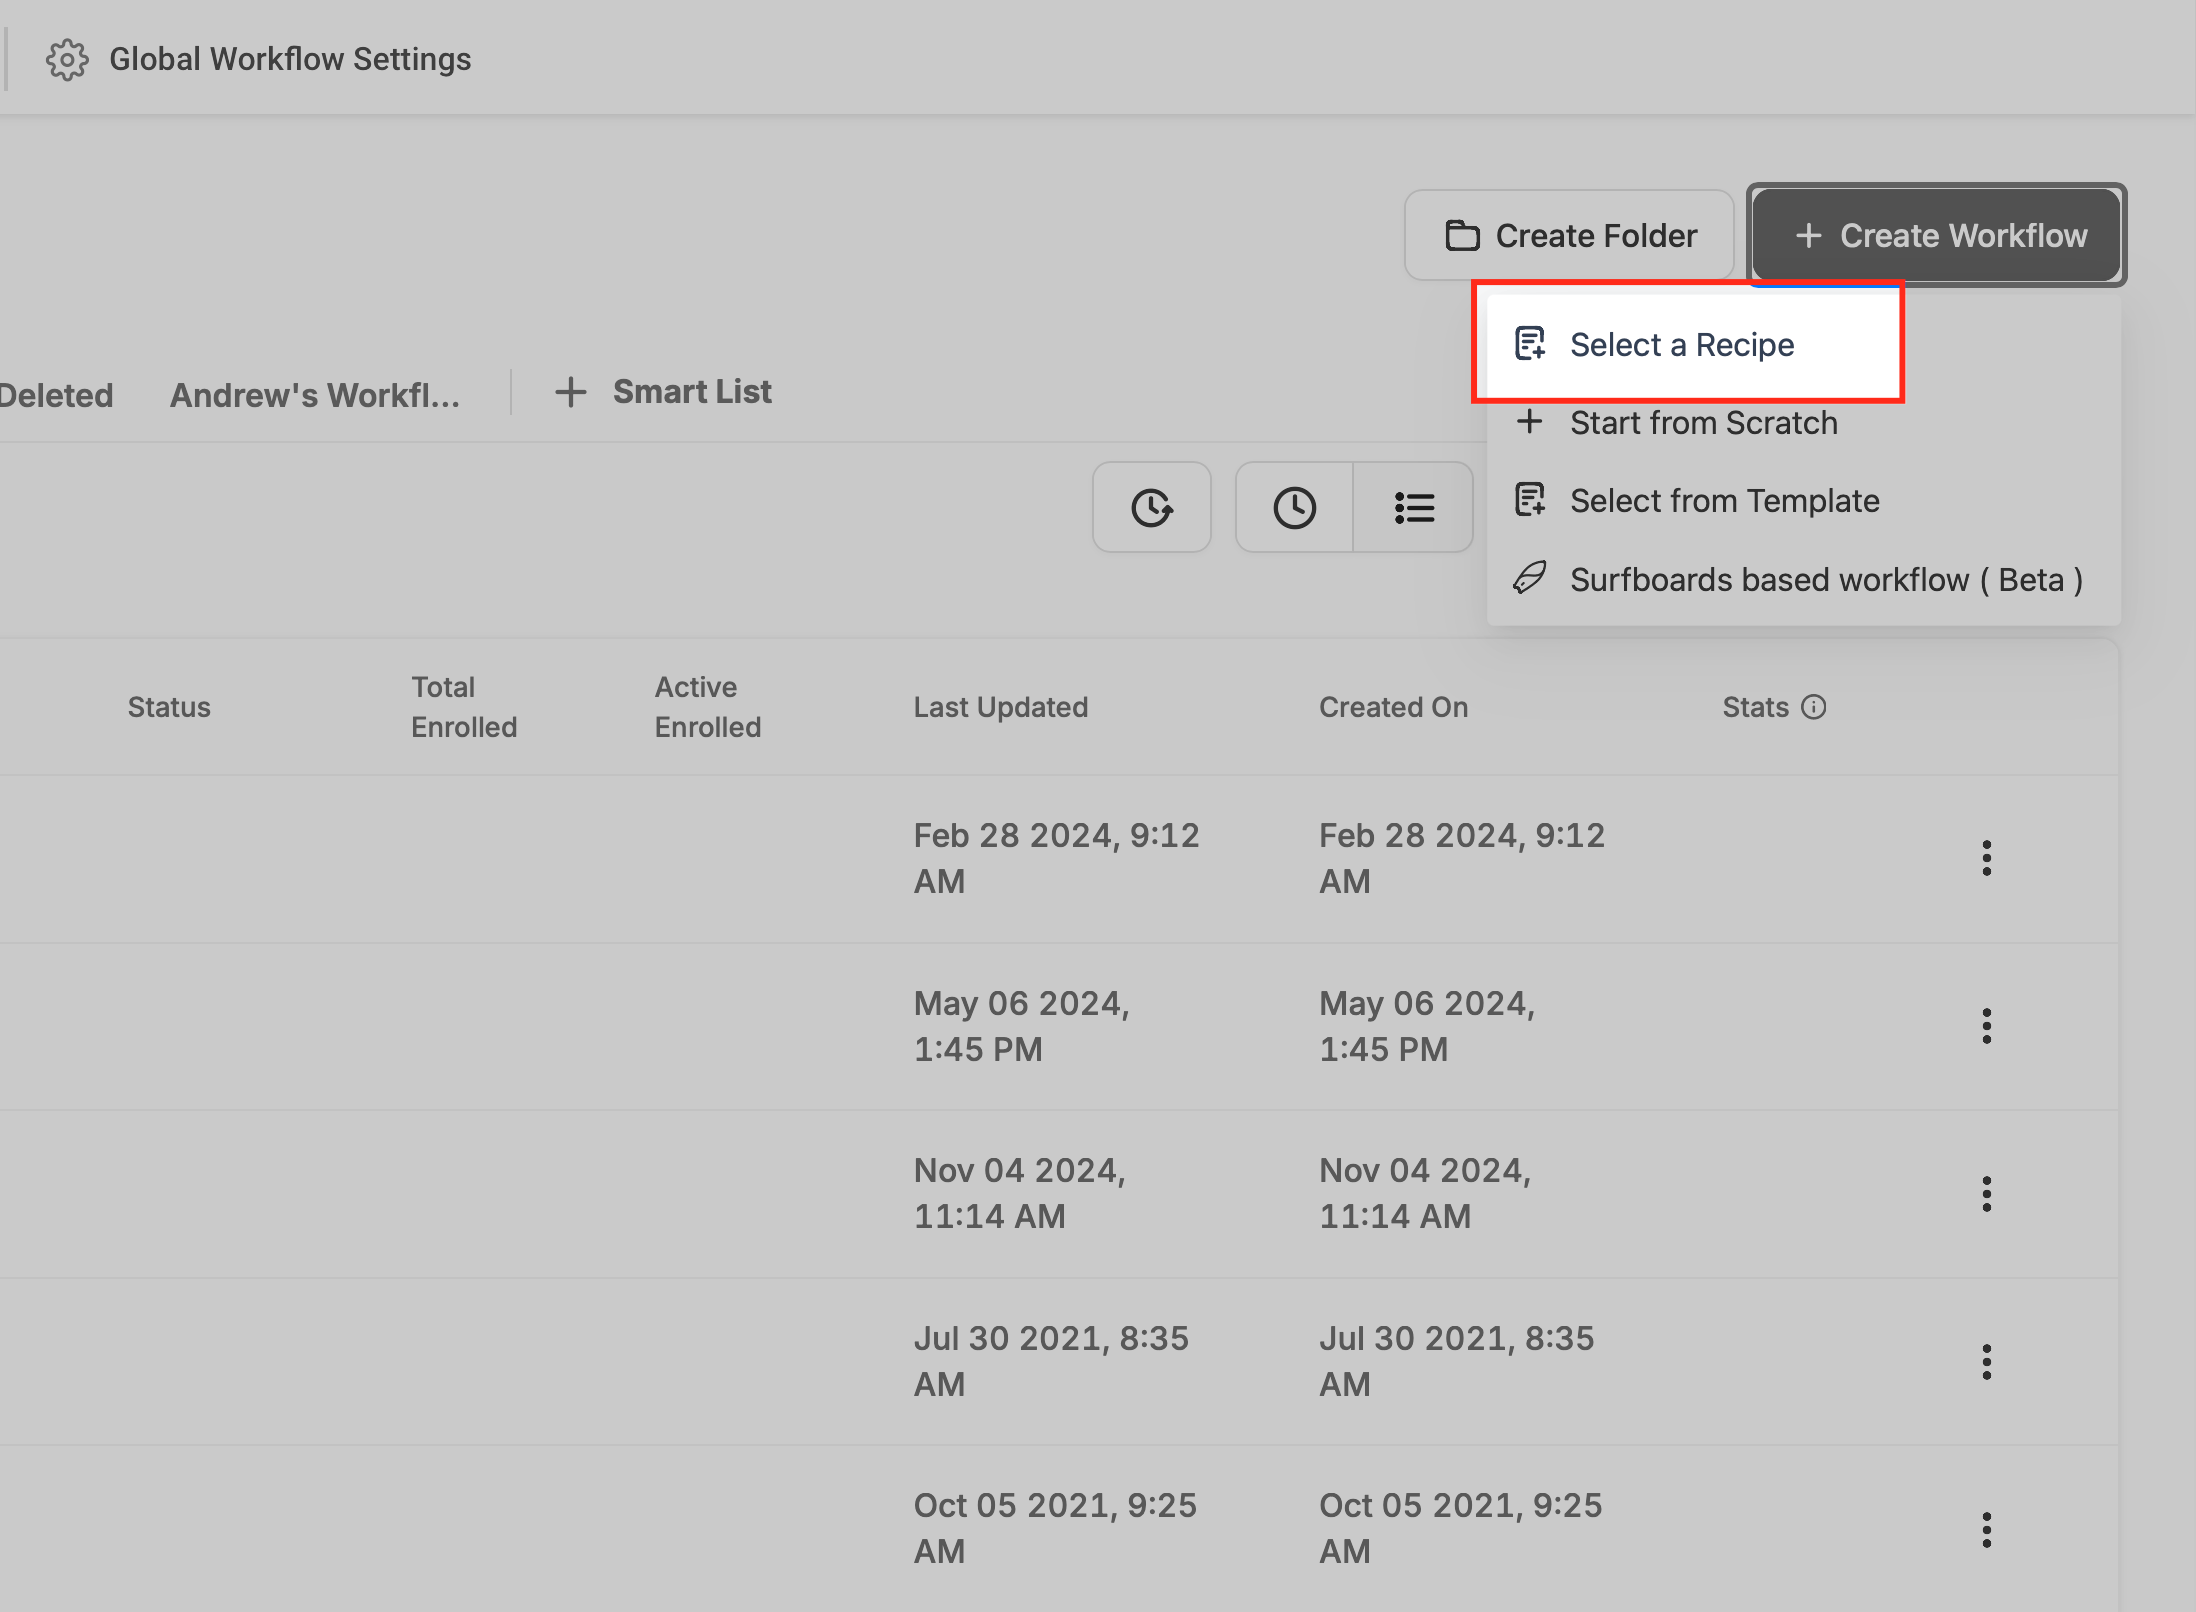
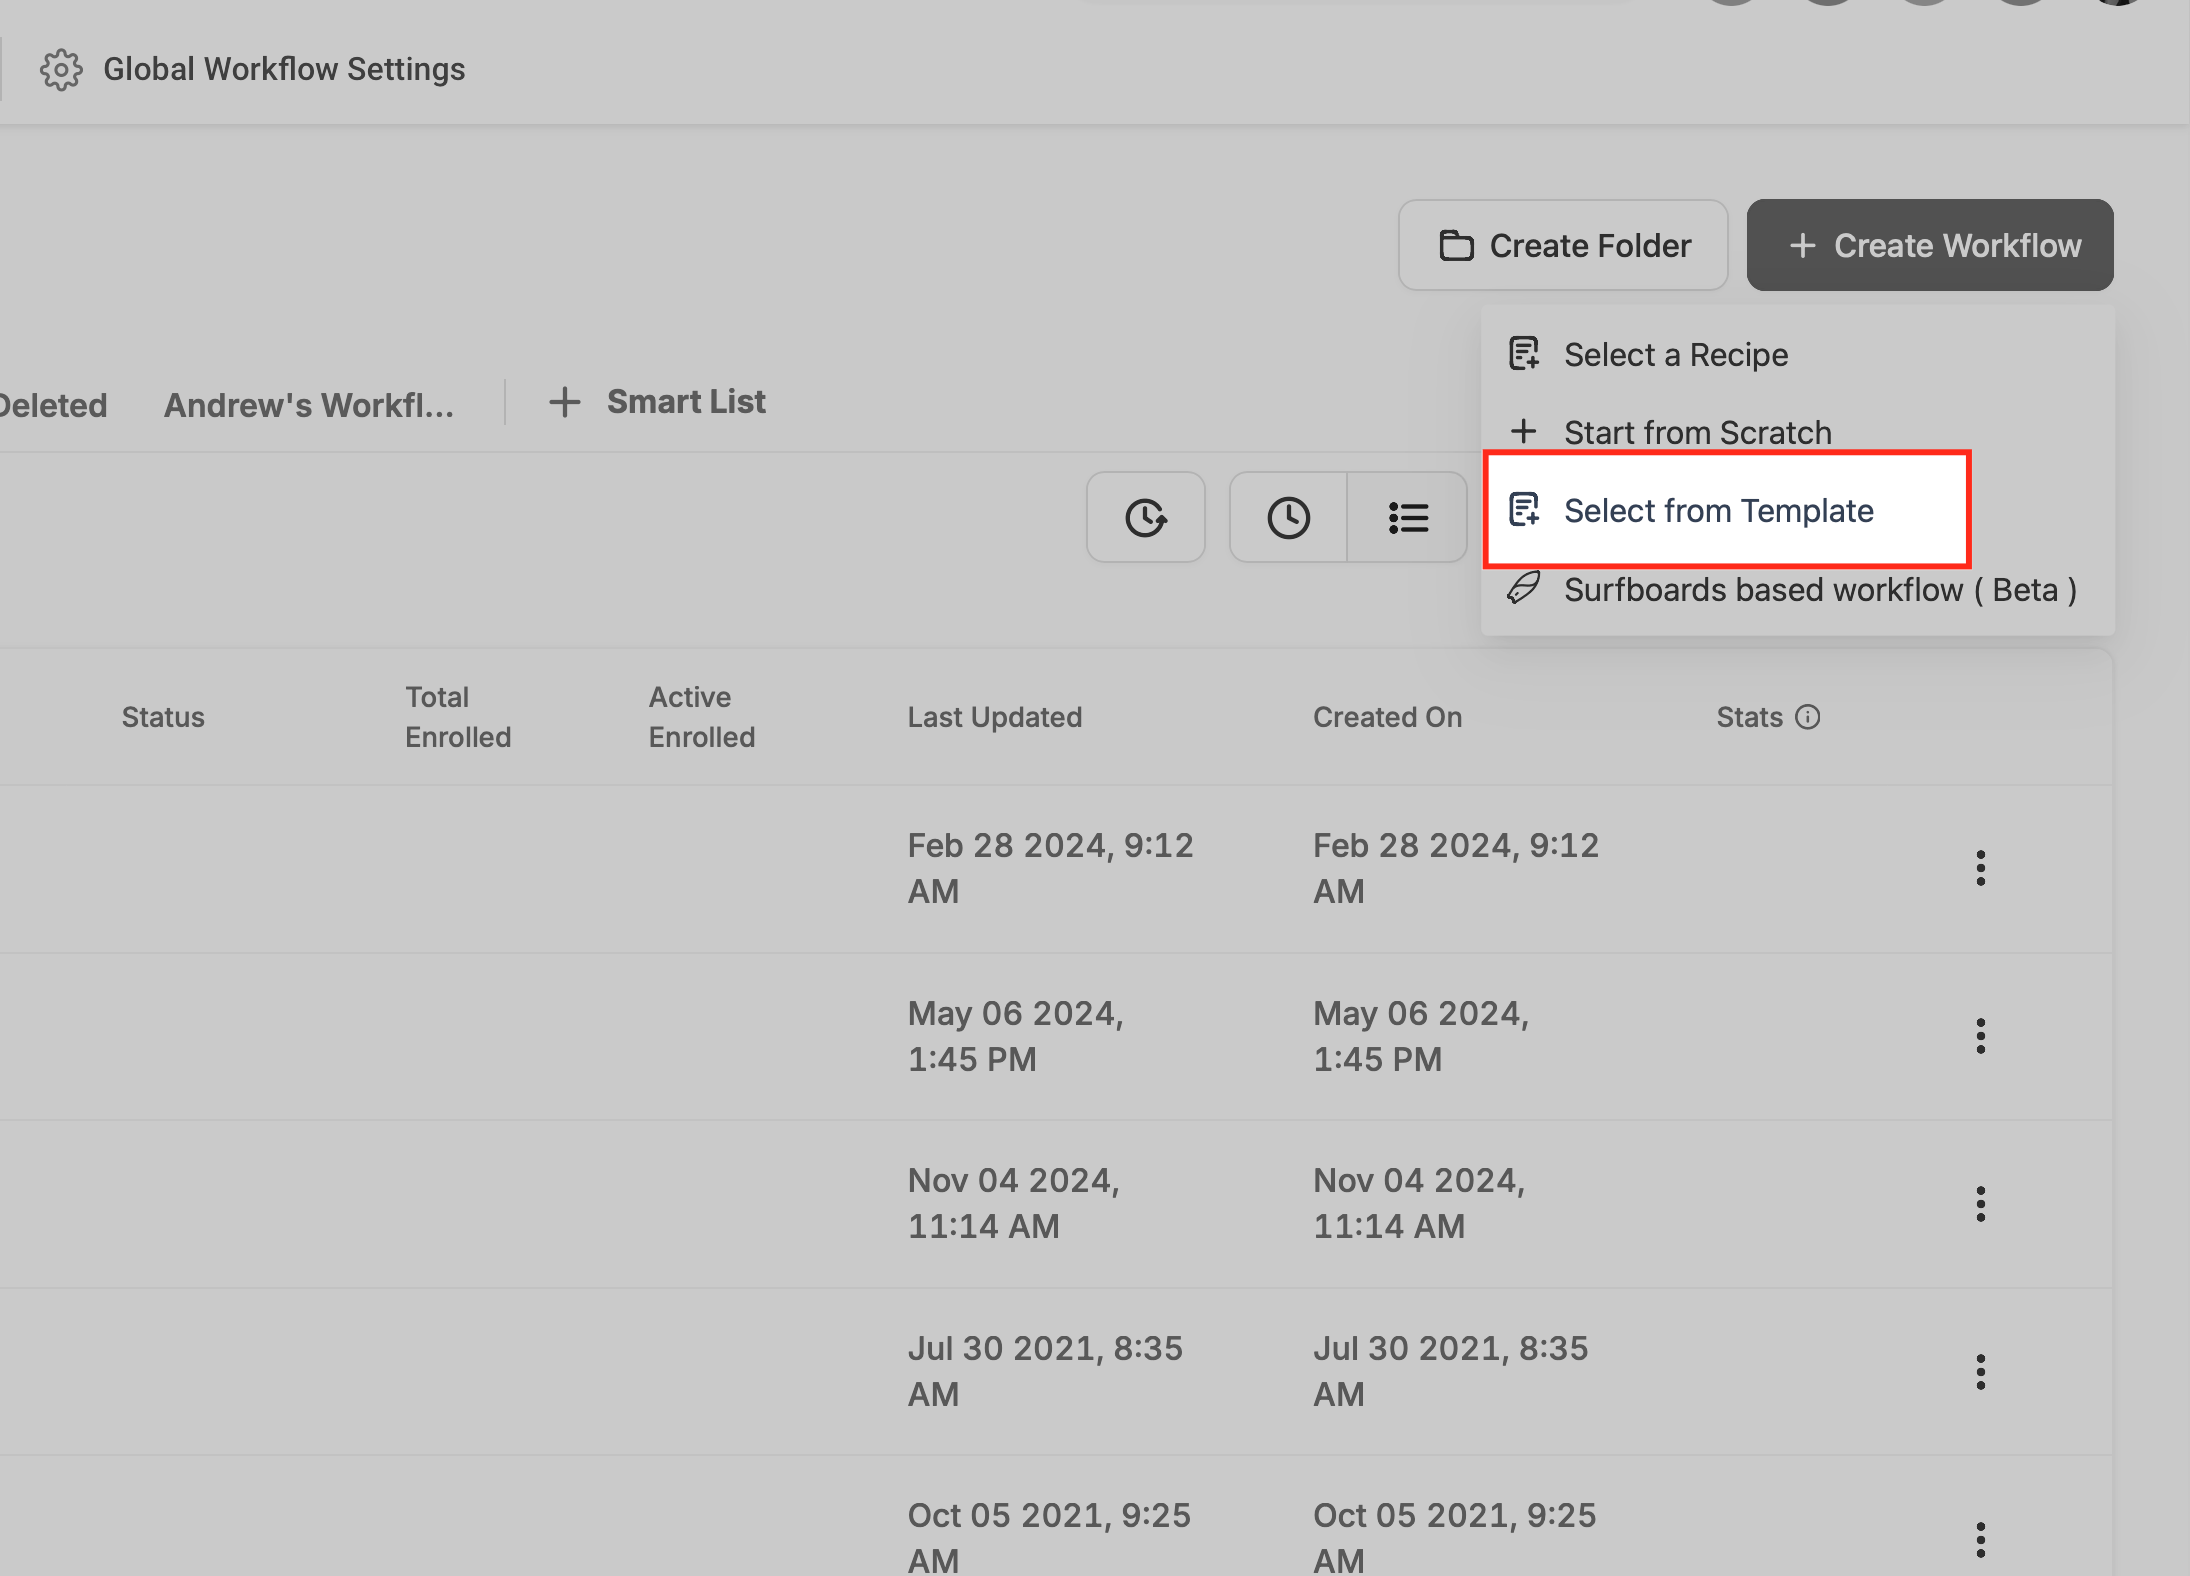
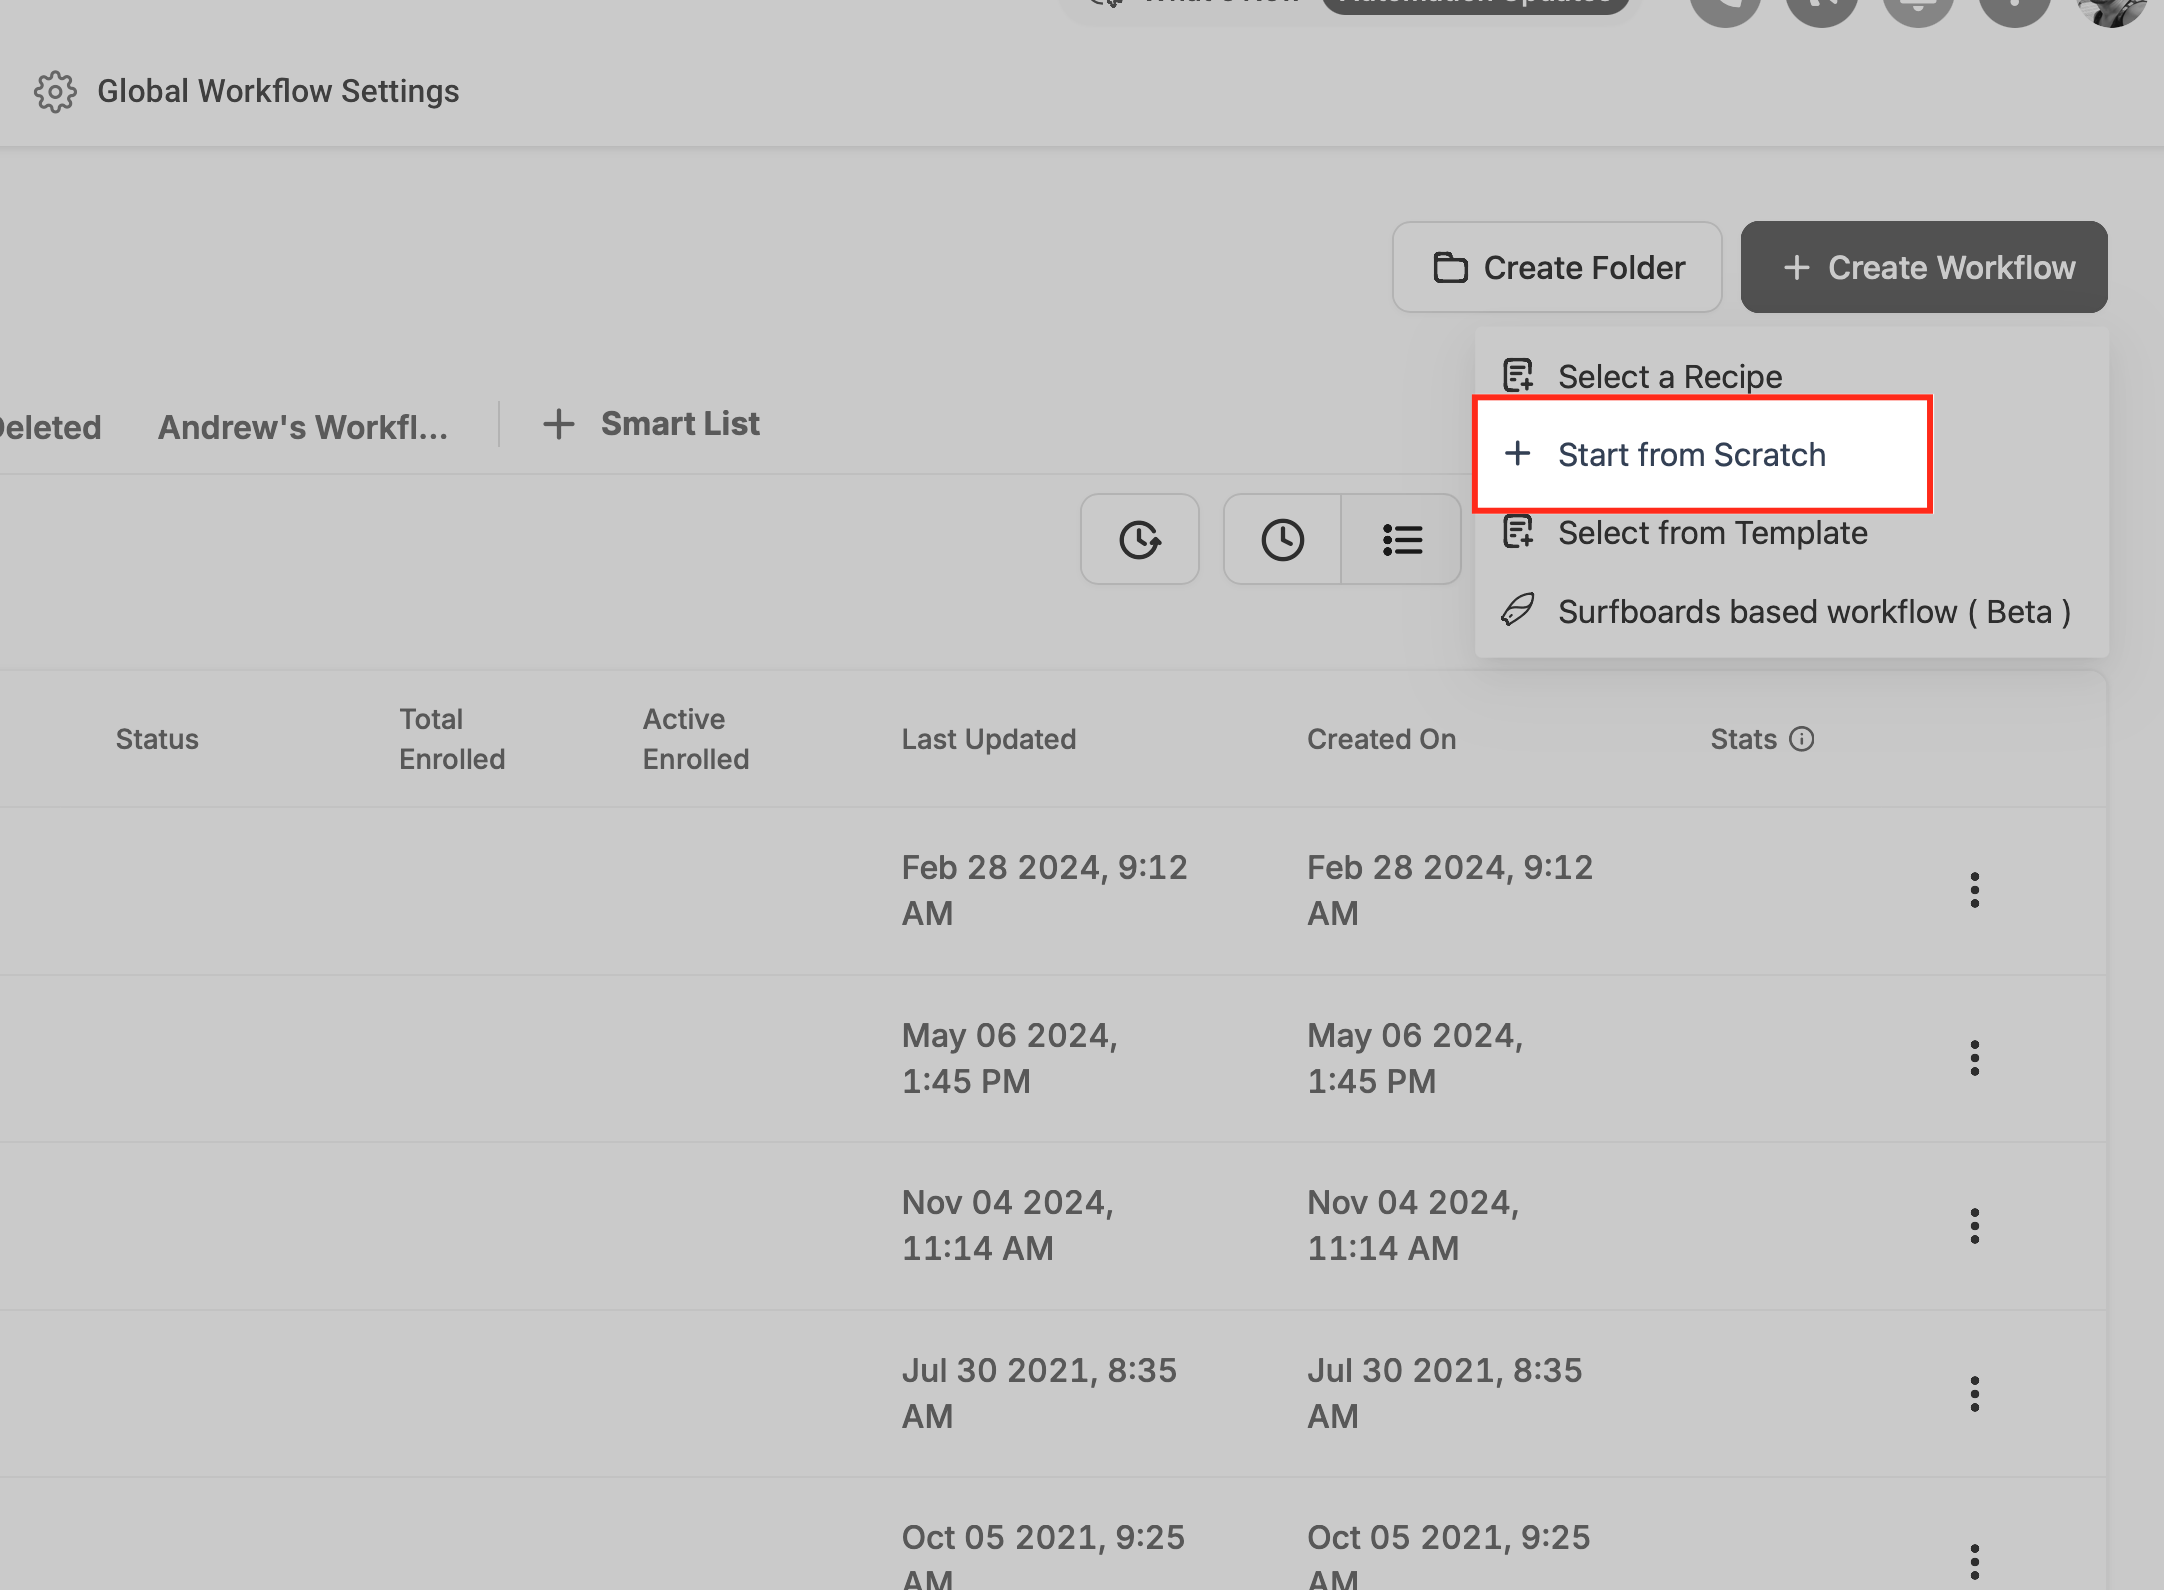
- Choose to start from a recipe, a template, or from scratch.
- If using a recipe, pick the desired recipe from the list.
- If using a template, click Select from Template to view the library.
- If starting from scratch, add a trigger that will start the workflow.
- Add one or more actions that will run after the trigger.
- Click the Save button to store the workflow.
- Before publishing, press Test Workflow to verify the flow.
05What it looks like in HighLevel
06How it connects to the rest of HighLevel
- See pricing options for workflow features. Workflow pricing
- Learn how to enable premium workflow capabilities. Enable premium features
- Start a free 30 day trial of HighLevel. 30 day trial
Michael's take

Workflows can move repetitive tasks into a set of rules that run on their own, reducing manual effort.
I’d start by building a simple lead capture workflow: When a form lands, add the contact, assign a rep, and fire off a welcome email. It’s a quick win that shows the value of automation without any coding.