
01Who this is for
- Founders of SaaS platforms that receive webhook arrays and need to create separate records per item.
- Home services agencies that get several service requests in one inbound webhook and must generate individual opportunities, tasks, and notes.
- Marketing teams that want to run the same email or task creation step for each contact in a list without duplicating workflow steps.
02Loop actions, explained
The Loop action sits inside the HighLevel workflow builder. It takes either a list supplied by a previous step or a numeric range and runs the actions placed inside its dashed box once for each item or number.
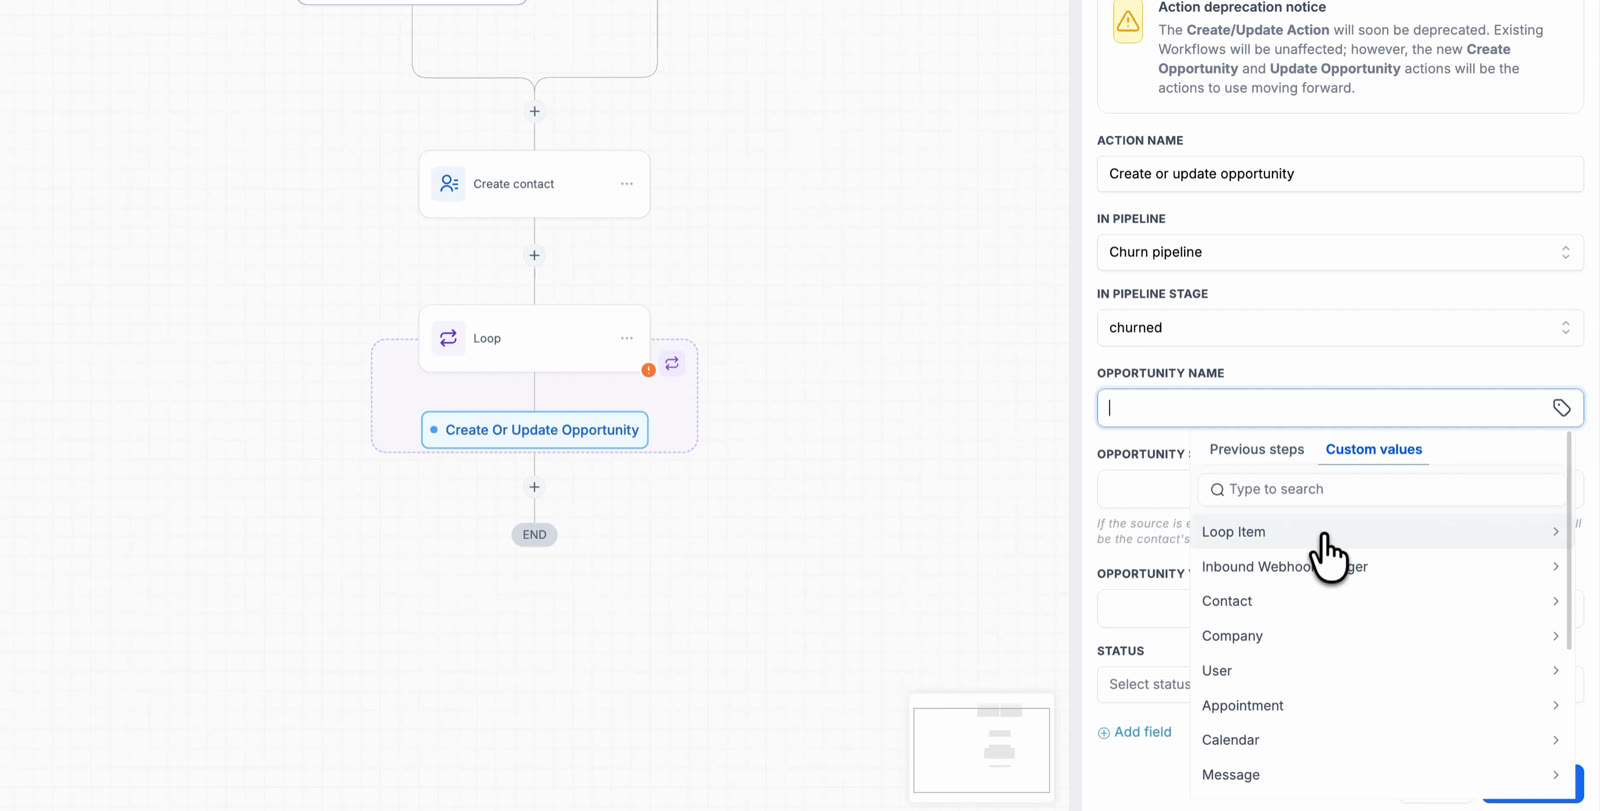
Each iteration can use the current item’s fields through Custom values > Loop Item. You decide whether iterations happen one after another (Sequential) or at the same time (Parallel). After all iterations finish, any actions placed after the Loop run a single time.
03How businesses use the Loop action
- Home services business. After an inbound webhook that contains a services array, the business adds a Loop over the list, maps Loop Item fields to opportunity, task, and note actions, and creates separate records for each requested service.
- Ecommerce platform. When an order includes multiple line items, the platform loops over the items list, uses Loop Item values to create a fulfillment task for each product, and attaches the appropriate SKU and quantity.
- Event management company. From a trigger that provides an attendee list, the company loops over the list, maps Loop Item fields to reminder emails, and sends a personalized reminder for every attendee.
04The numbers and rules that matter
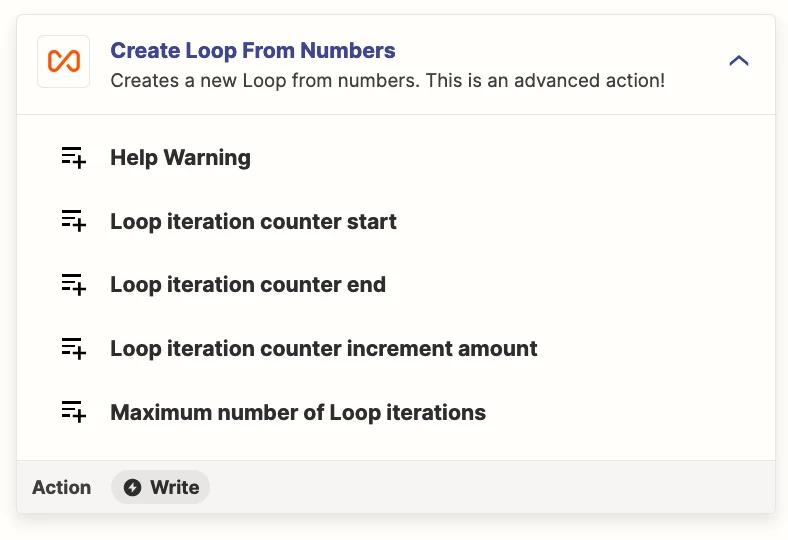
- Start Number: First number in the range. Default: 1. For range loops.
- End Number: Last number in the range. Default: 10. For range loops.
05Before you start
- A workflow trigger or earlier action must provide the list or data that the Loop will process.
06How to set up and use the Loop action in HighLevel
Add and configure Loop
- Navigate to the subaccount where the workflow will run.
- Open Automation > Workflows.
- Open an existing workflow or create a new one.
- Add a trigger that supplies the list or data to be looped.
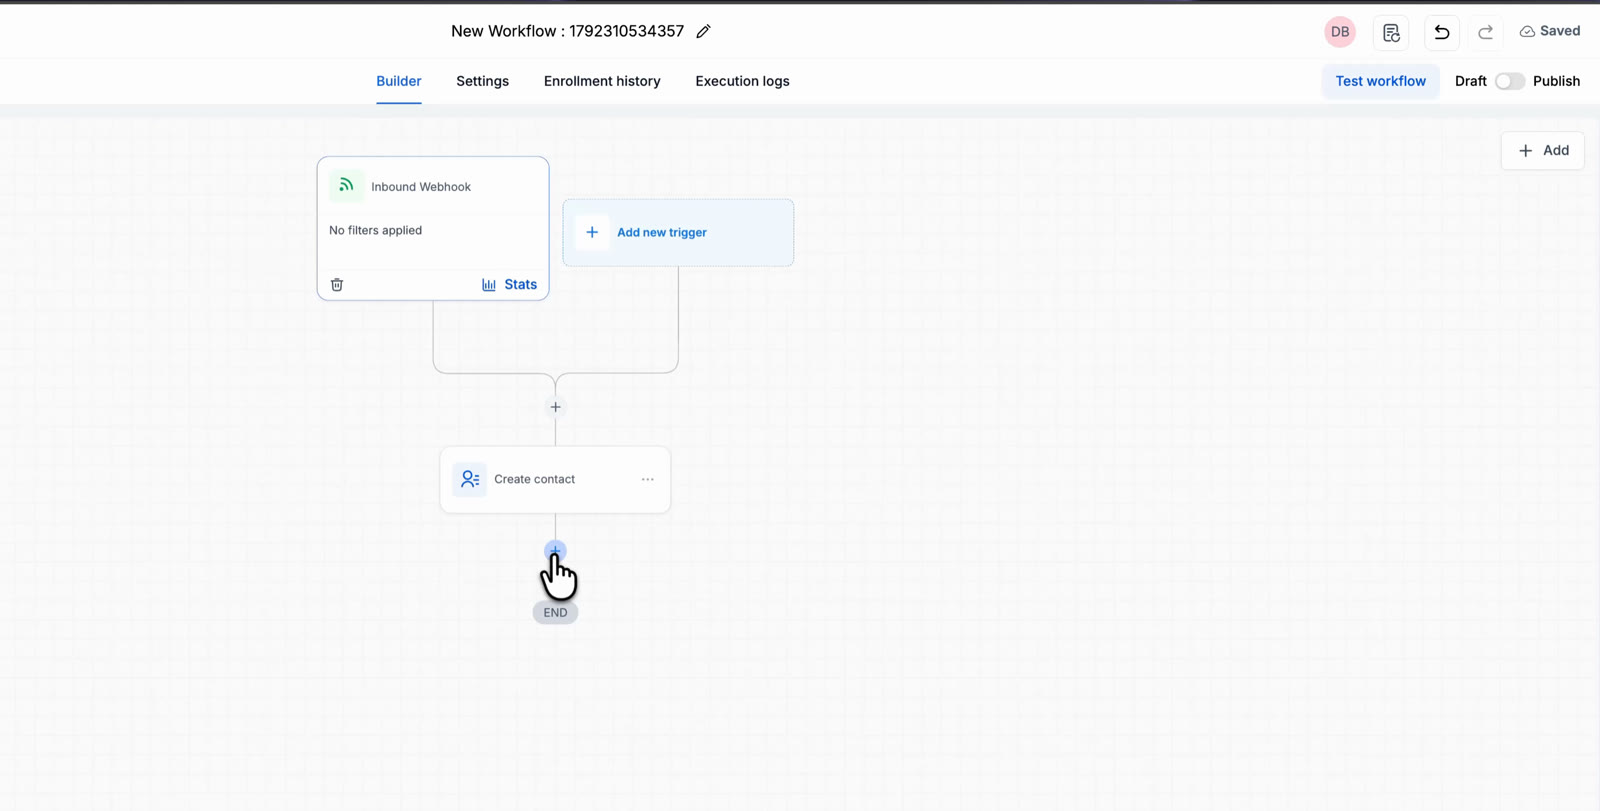
- Click the + icon at the point you want the Loop to begin.
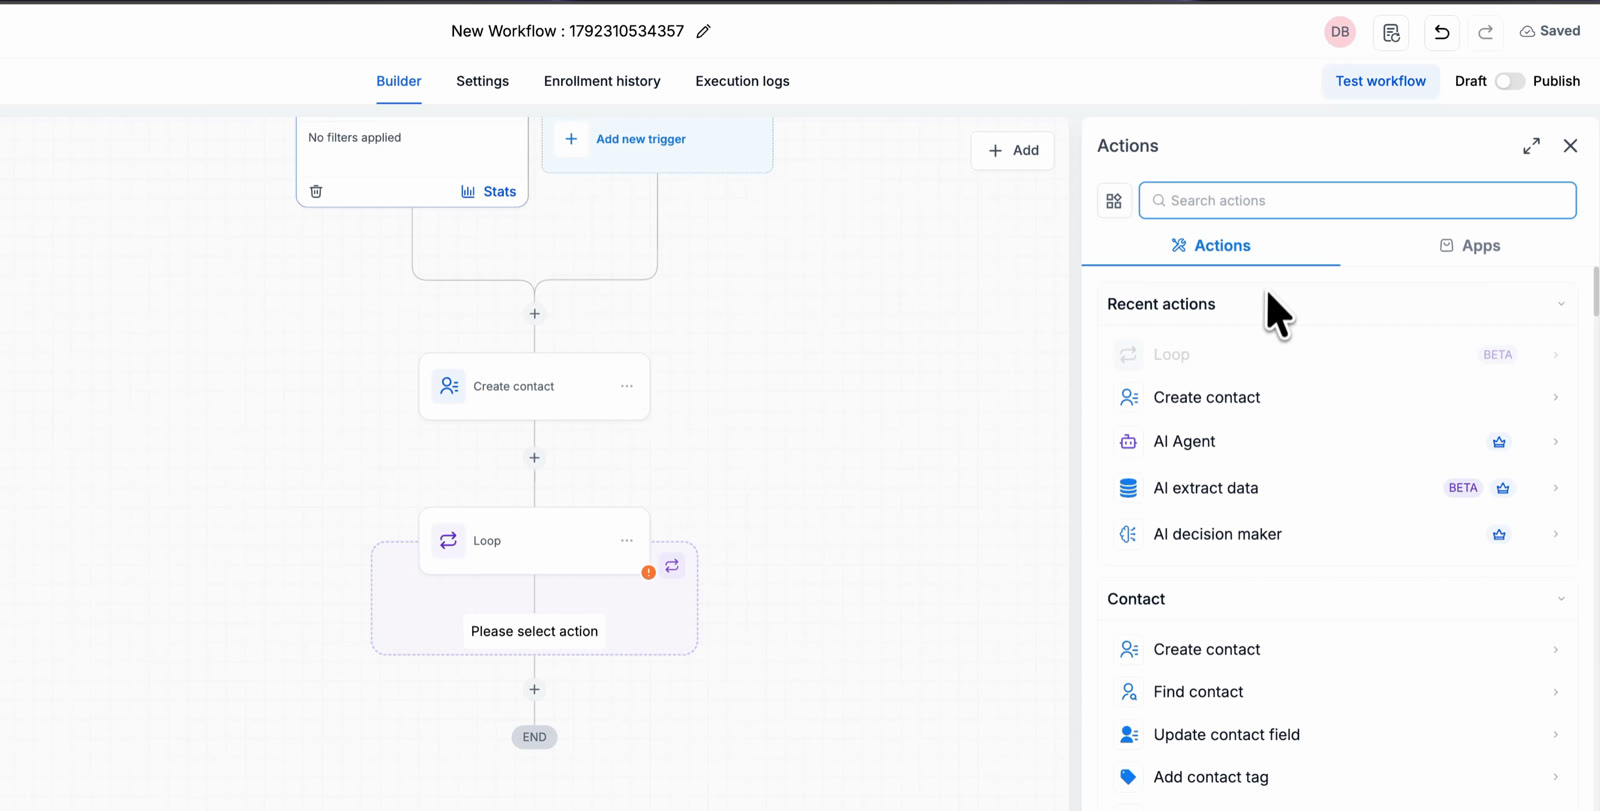
- Search for Loop in the Actions panel and select it.
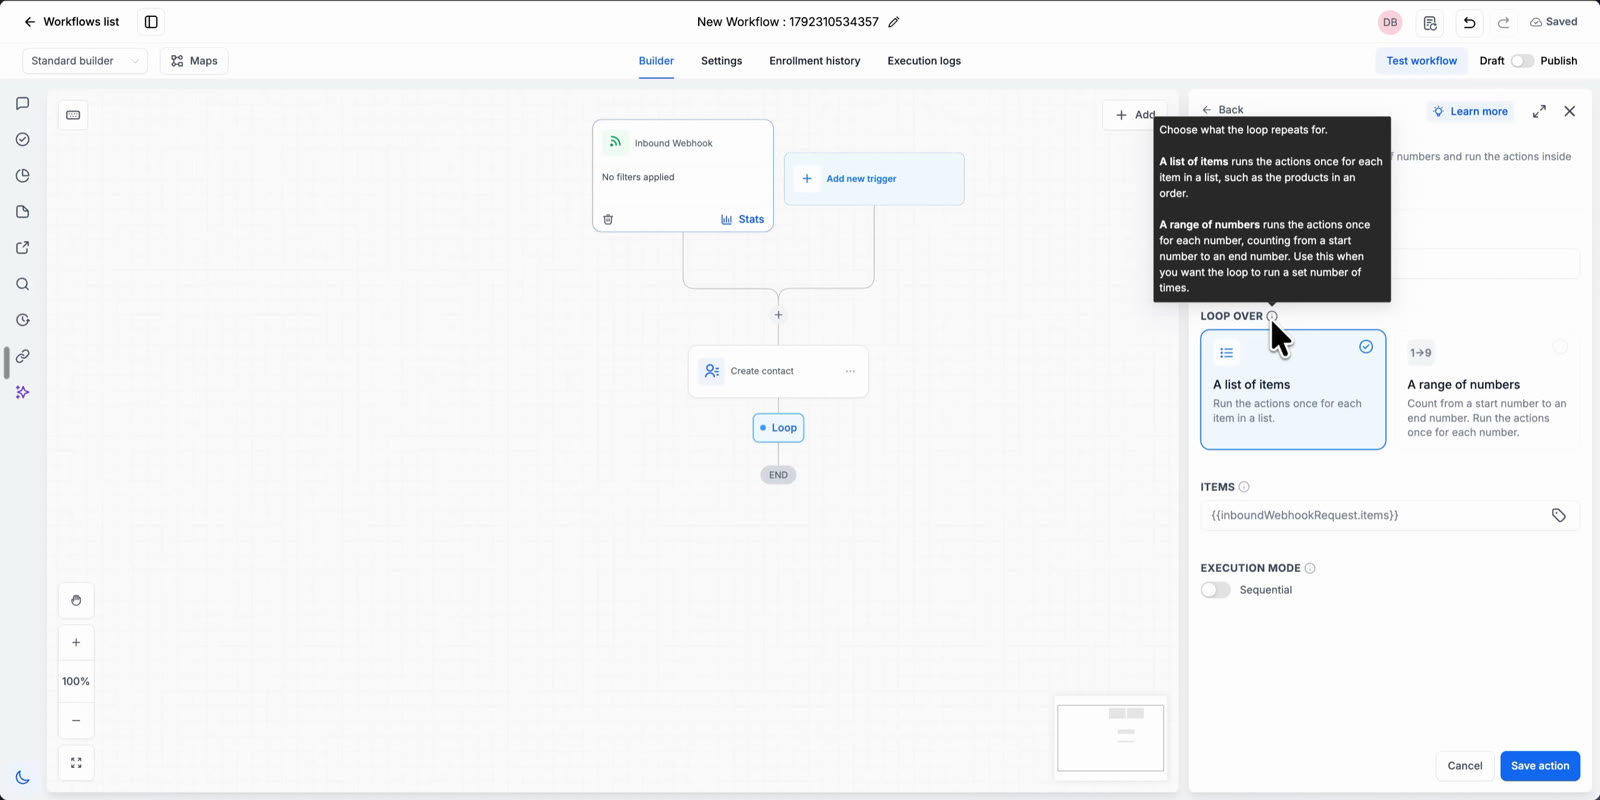
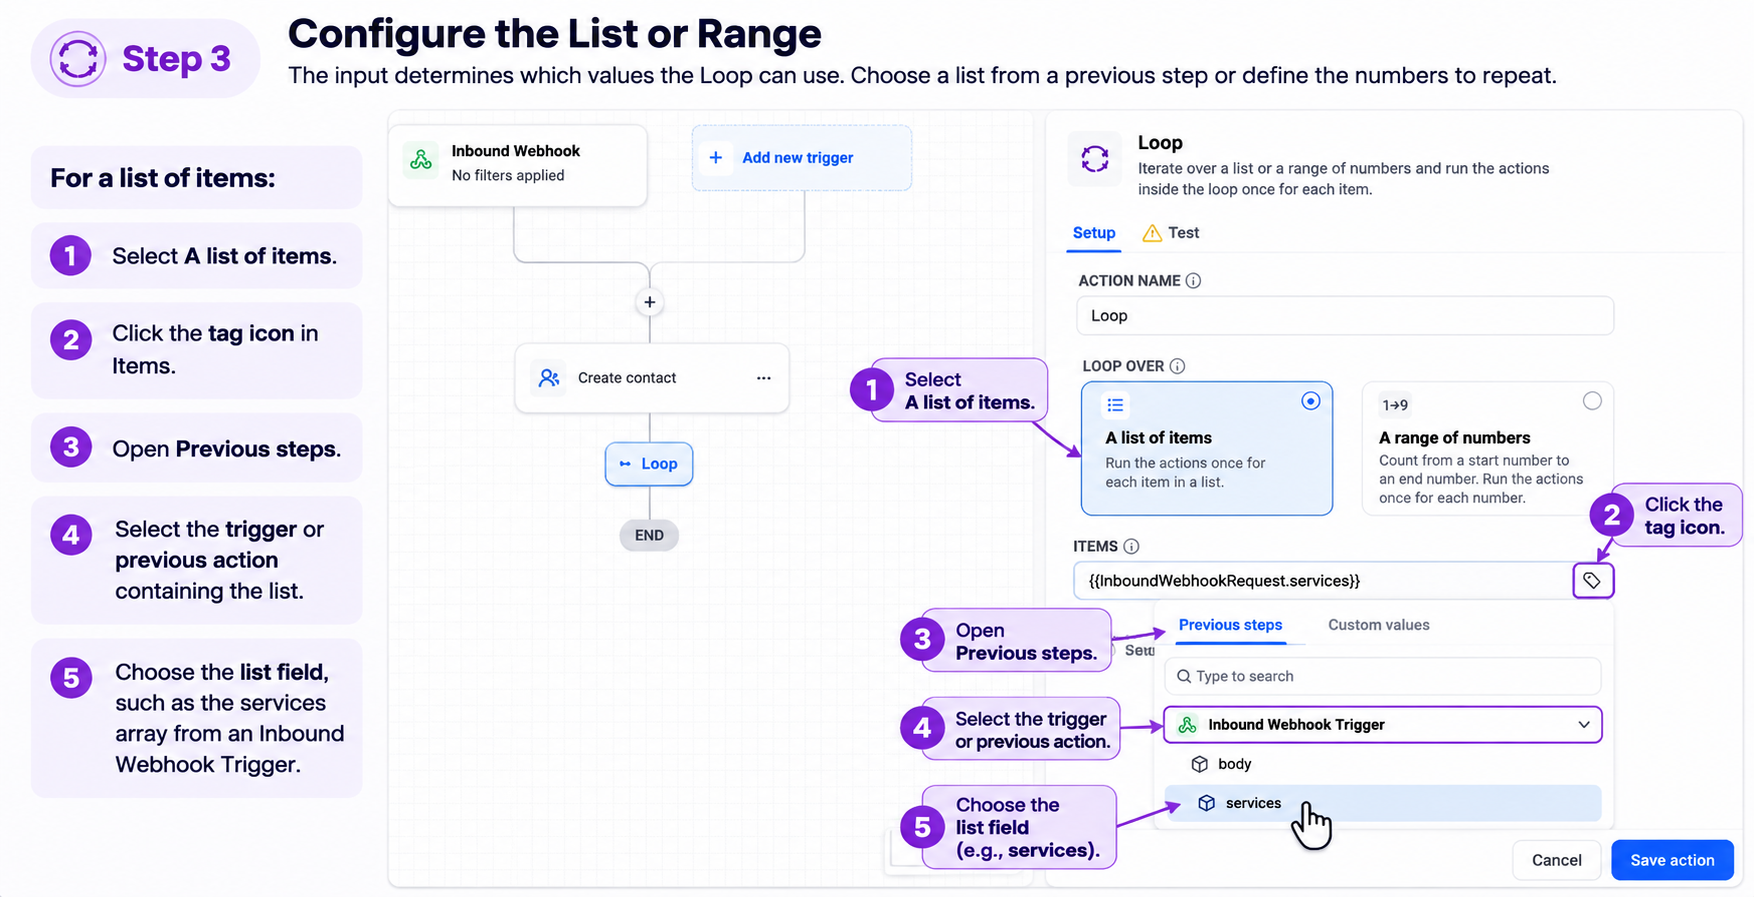
- In the Loop settings, choose A list of items or A range of numbers.
- For a list, click the tag icon in Items and select the list field from a previous step.
- For a range, enter the Start Number and End Number.
- Set the Execution Mode to Sequential or enable Parallel.
- Click Save action to place the Loop on the canvas.
Add actions inside the Loop
- Click the + icon inside the dashed Loop box.
- Add the actions you want to repeat, such as Create Opportunity, Add Task, or Add Note.
- To use data from the current item, click the tag icon in an action field and select Custom values > Loop Item.
Review the finished Loop
- Confirm that only actions inside the dashed box repeat for each item.
- Ensure actions placed below the Loop run once after all iterations finish.
- Save the workflow.
Test the Loop
- Open the workflow containing the Loop.
- Click Test workflow in the upper right corner.
- On the New test tab, select Test using events.
- Choose the workflow trigger and a recorded event (or enable Listen for events and trigger a new event).
- Review the event data and click Start test run.
- When the test finishes, select the Loop step on the canvas and open its Test tab.
- Use the Iterations list to inspect each iteration’s Input and Output.
07What it looks like in HighLevel
08Settings that matter
- Action Name. The label shown on the workflow canvas; defaults to Loop.
- Loop Over. Selects whether the Loop processes a list of items or a numeric range.
- Items. The list chosen from a prior step, such as an array from an inbound webhook.
- Start Number. First number in a range loop; defaults to 1.
- End Number. Last number in a range loop; defaults to 10.
- Execution Mode. Determines if iterations run sequentially (default) or in parallel.
09Things to know before you rely on it
- Loop Over is mandatory; you must select either a list or a range.
- When looping over a range, the default start and end numbers are 1 and 10.
- Parallel execution is optional and may reduce processing time when actions call external systems.
- In a range loop, List item fields are empty; use the loop counter under Custom values > Loop Item for the current number.
- Actions placed after the Loop run only once, after all iterations finish.
10How it connects to the rest of HighLevel
- Understanding how workflows are built helps you place the Loop correctly. Workflow basics
- An inbound webhook trigger can supply the list that the Loop processes. Inbound webhook trigger
Michael's take

I think the Loop action can reduce the need to build separate workflows for each record. It lets you take a list. Like three service requests from a webhook. And create an opportunity, task, and note for each one by adding the Loop, pointing it at the array, and mapping the fields.
If I were setting this up, I’d start with a simple inbound webhook that returns a list of items. I’d run a quick test with a handful of dummy records, check the Loop’s Test tab, and make sure each iteration creates the right records before I publish the live workflow.