
01Who this is for
- Founders who have built custom automations in n8n and want a quick start in HighLevel without rebuilding each node.
- Marketing agencies that need to migrate client workflows from n8n to HighLevel Managed Agents for unified automation.
- Small businesses that already use n8n and want to leverage HighLevel’s AI agents while retaining existing logic.
02N8n workflow import, explained
The n8n workflow import reads a .json export from n8n and maps its components to Managed Agent elements such as triggers, decision rules and actions. Conditional branches become agent reasoning, AI nodes become part of the agent’s instruction set, and supported app actions are linked to HighLevel integrations. The process stops after analysis; an agent is only created when you save or publish.
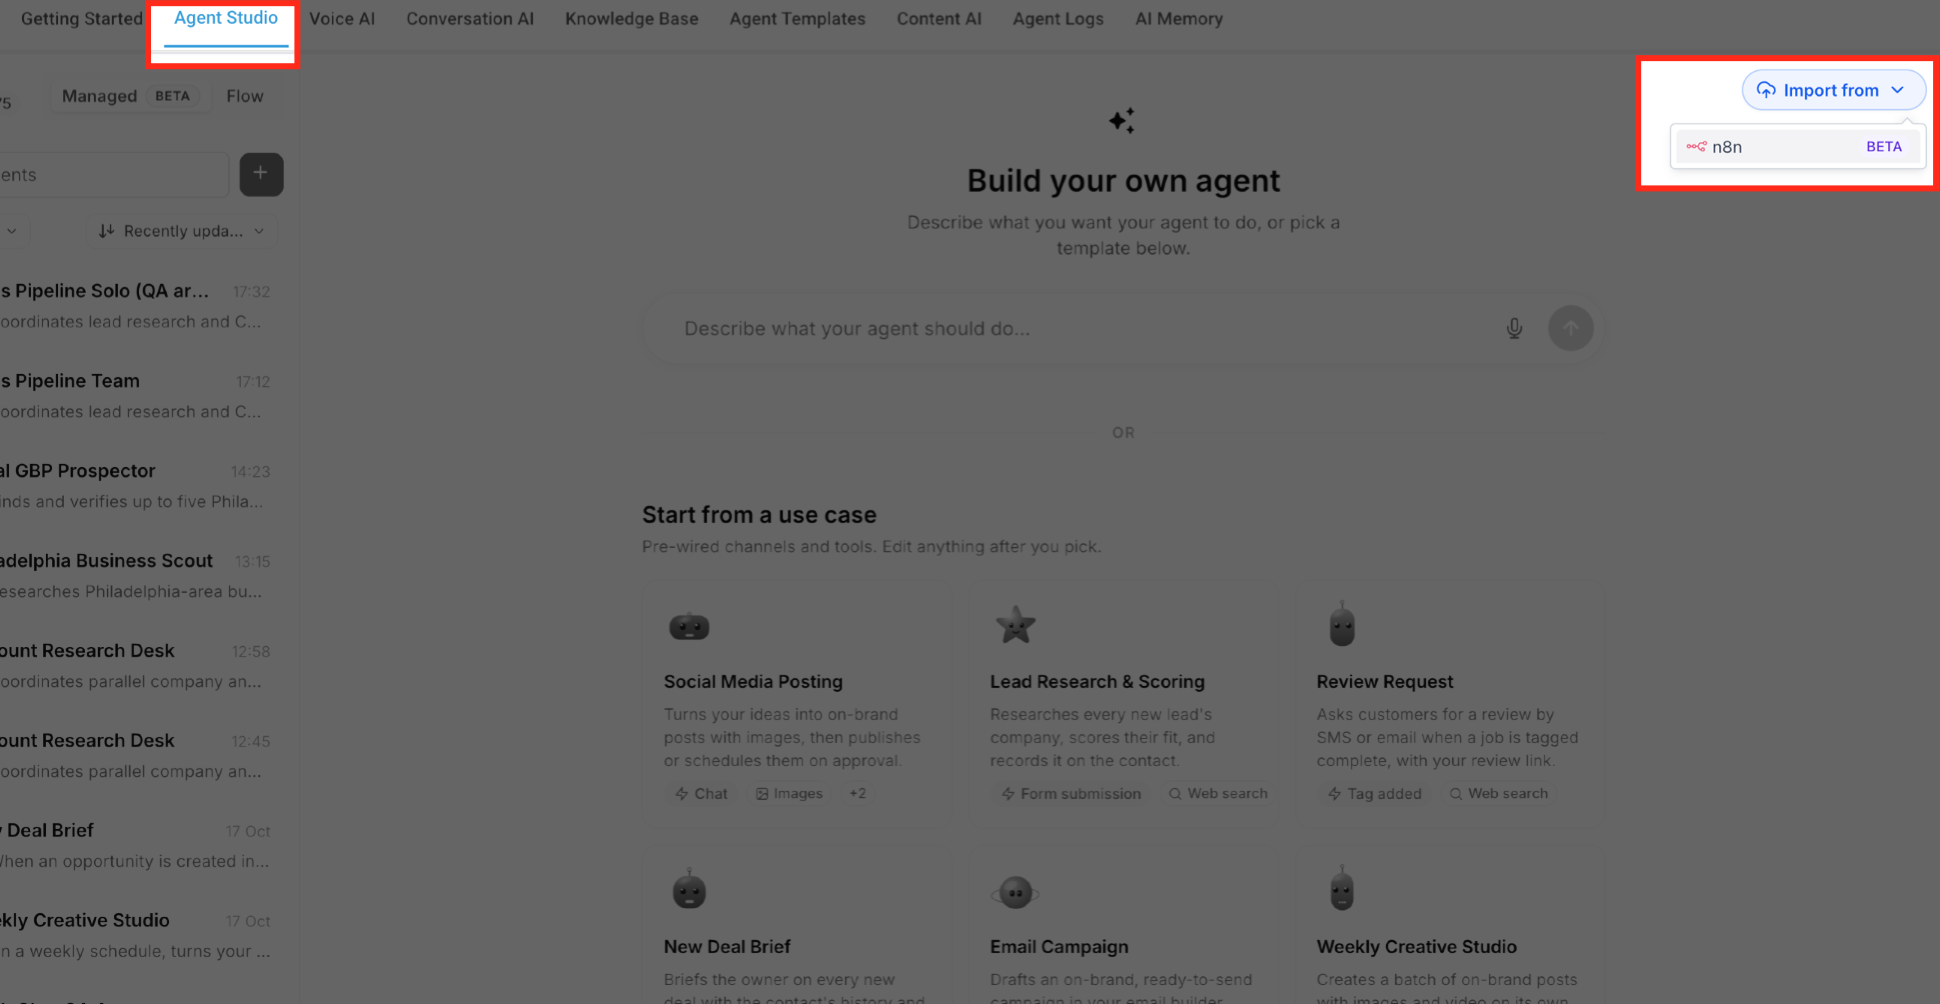
The feature lives inside Agent Studio under the Managed Agents tab. From there you select Import from > n8n (Beta) to open the importer. The importer provides an upload area, a button to start analysis, and a Review & set up screen where you can adjust starting conditions, connect required apps, and supply missing values before finalizing the agent.
03How businesses use N8n workflow import
- Marketing agency. The agency uploads a client’s n8n workflow JSON, reviews how conditional branches became agent decision rules, connects the client’s CRM app, and then publishes the Managed Agent to automate lead follow up.
- SaaS startup. The startup pastes the JSON of an internal n8n automation, verifies that scheduled triggers were mapped to a HighLevel schedule, provides missing API keys, and saves the agent as a draft while testing the new logic.
- Ecommerce store. The store imports an order processing n8n workflow, checks that webhook nodes were turned into inbound webhook triggers, connects the payment gateway app, and publishes the agent to handle order events directly in HighLevel.
04The numbers and rules that matter
- File size limit: 10 MB for JSON upload.
05Before you start
- Have an n8n workflow exported as a .json file.
- Ensure the JSON file is no larger than 10 MB.
- Access Managed Agents in the desired HighLevel subaccount.
- Be ready to connect any external apps referenced by the workflow.
06How to set up and use N8n workflow import in HighLevel
Open the n8n importer
- Log in to HighLevel and open the target subaccount.
- Select AI Agents from the navigation menu.
- Choose Agent Studio.
- Click the Managed Agents tab.
- Press Import from in the upper right area of the Agents page.
- Pick n8n (Beta) from the dropdown menu.
Upload or paste the n8n workflow JSON
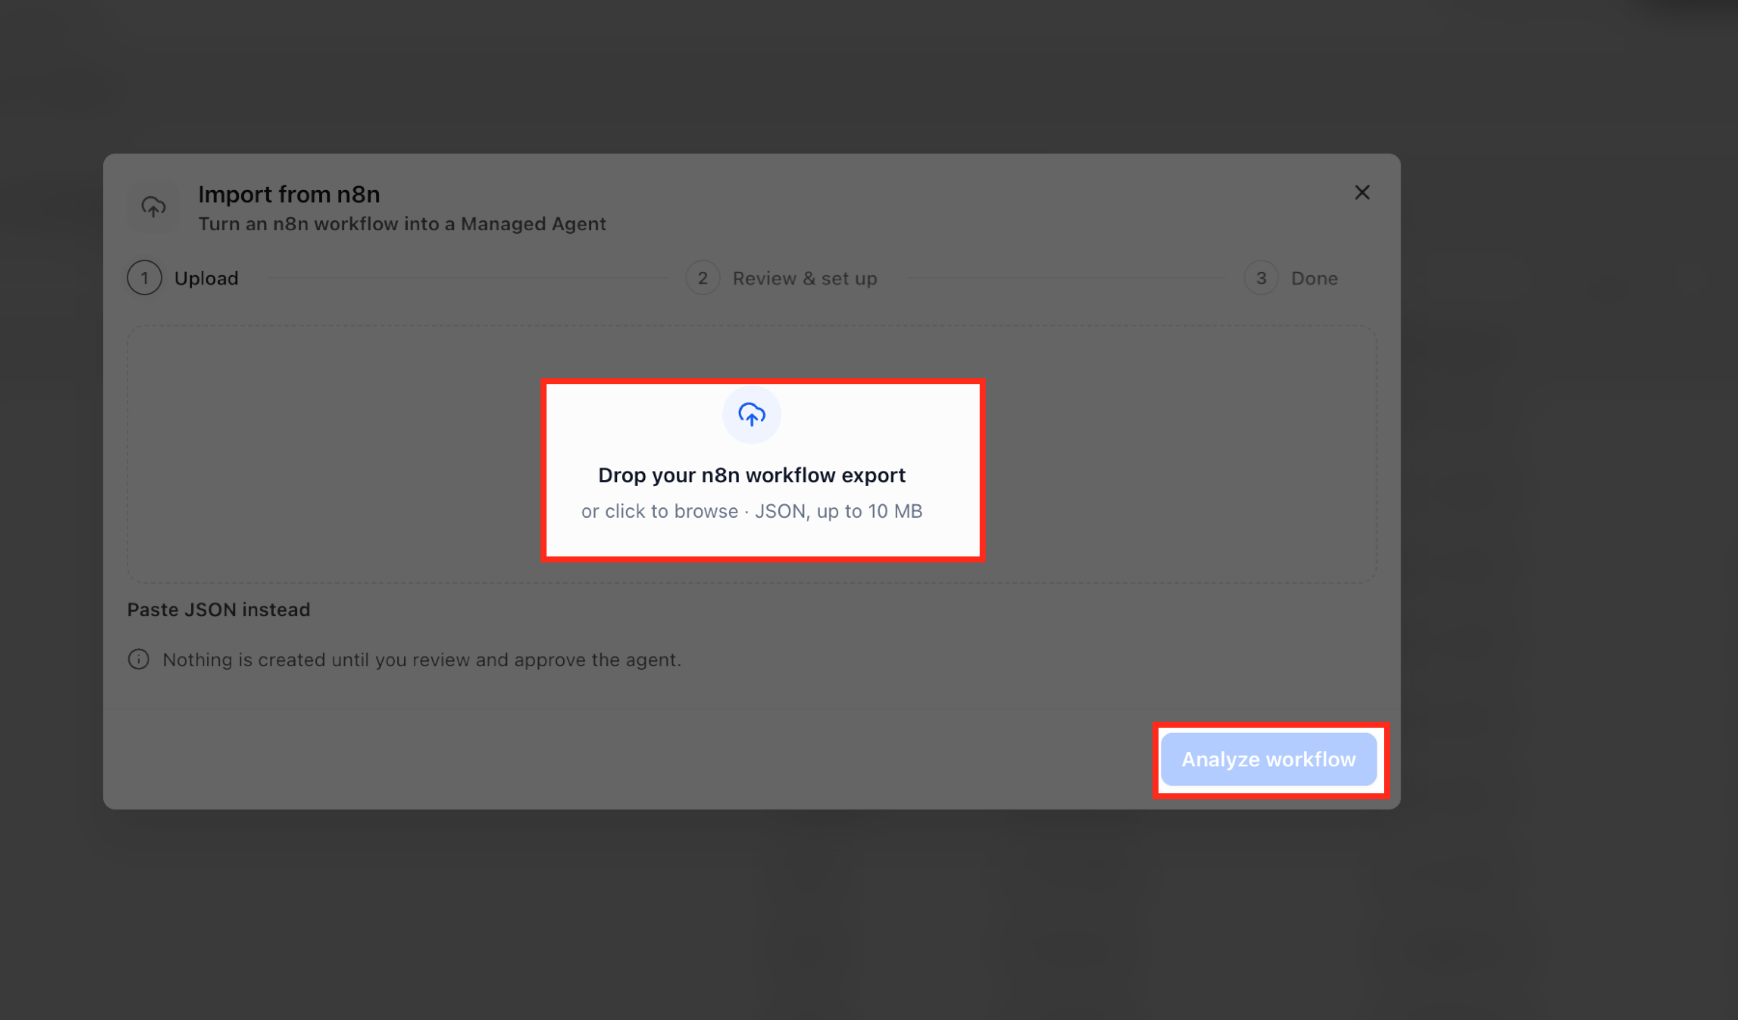
- Locate the Drop your n8n workflow export area in the Import from n8n window.
- Drag the exported .json file onto the area or click to browse and select it.
- If preferred, select Paste JSON to enter the workflow text manually.
- Confirm the file is a JSON export and does not exceed 10 MB.
- Click the Analyze workflow button to start processing.
Analyze the workflow
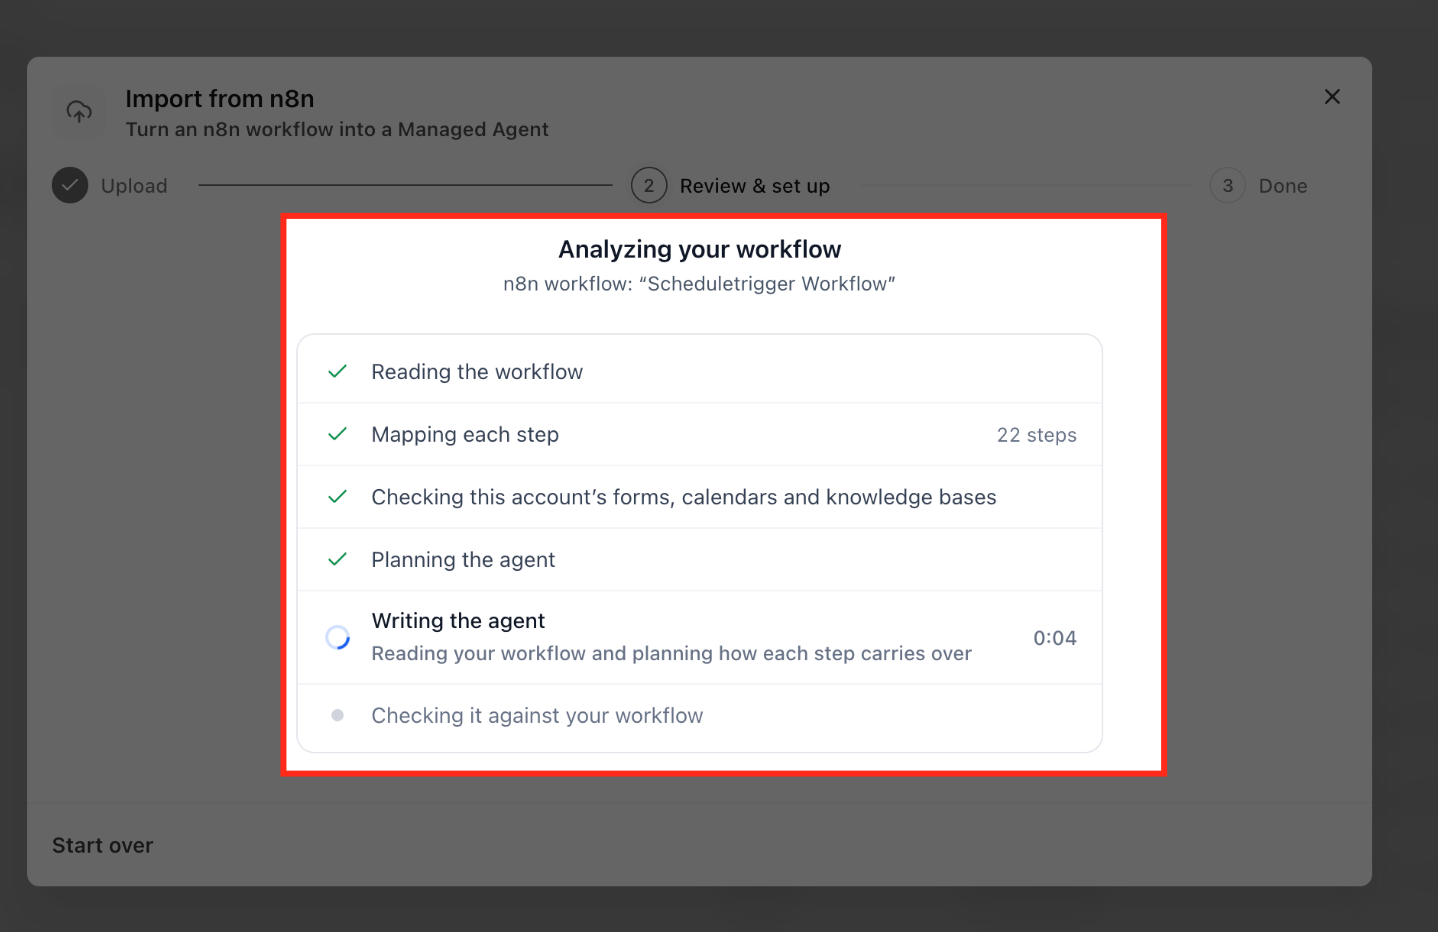
- Watch the progress screen as HighLevel reads the uploaded workflow definition.
- Observe the mapping stage that identifies each workflow step for conversion.
- Review the check of the account’s forms, calendars and knowledge bases.
- Note the planning stage that decides how the workflow maps to a Managed Agent.
- See the writing stage that builds the proposed agent instructions.
- View the final comparison that checks the generated agent against the original workflow.
Review the generated agent and conversion results
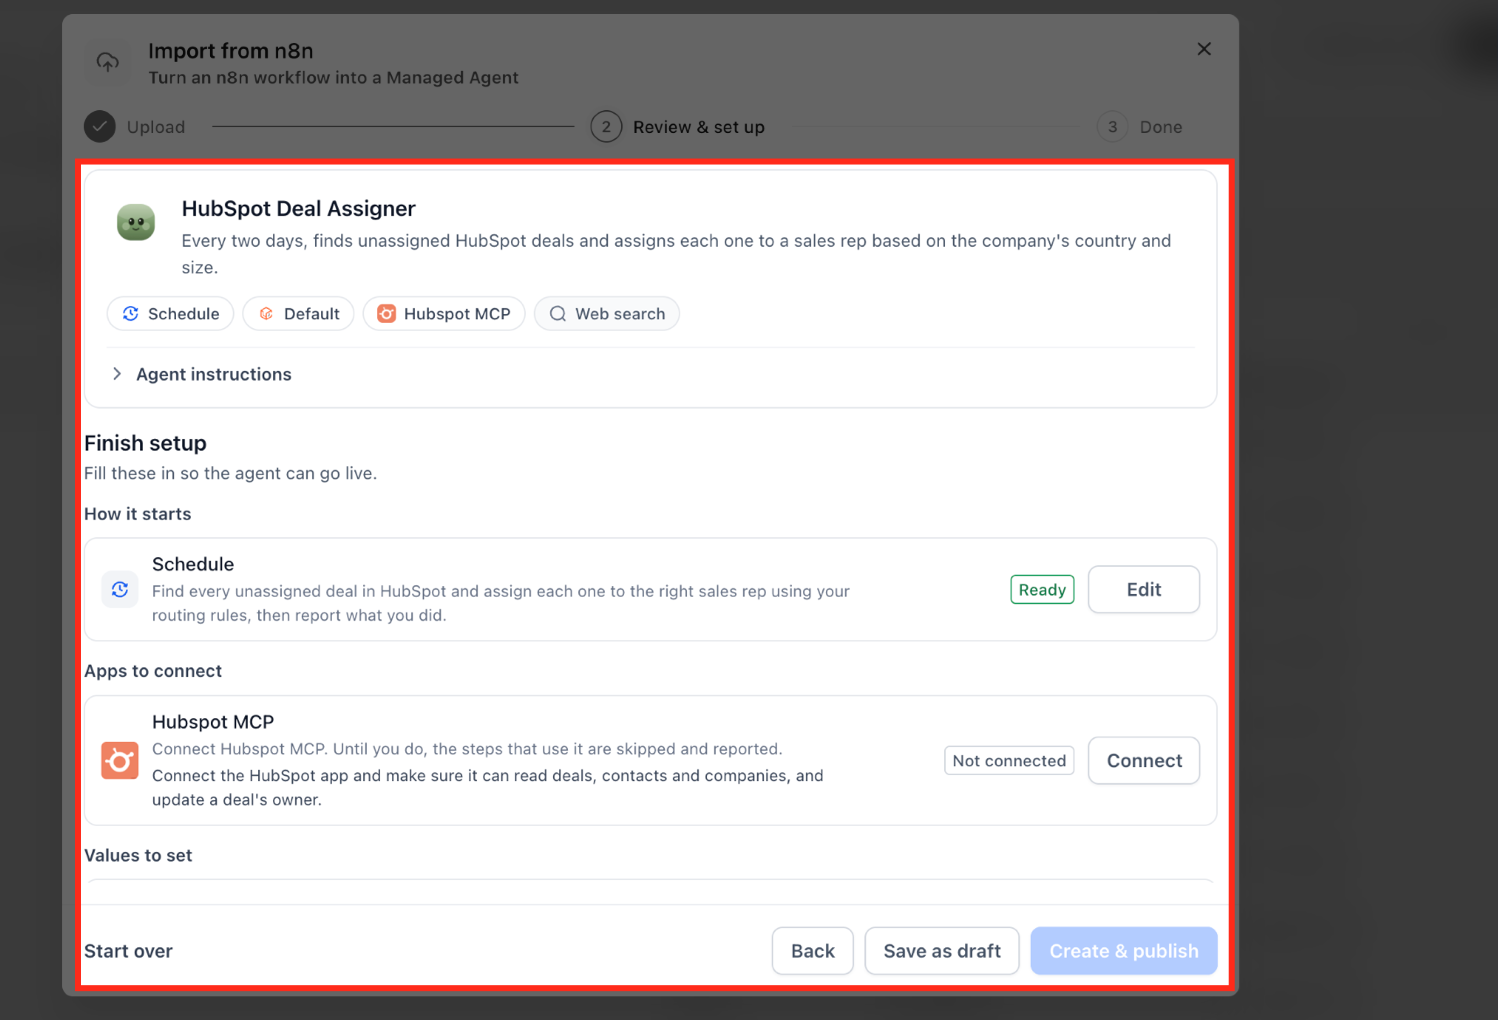
- In the Review & set up view, locate the generated agent summary.
- Verify the agent name and description match the intended purpose.
- Examine the displayed starting condition, app connections and capabilities.
- Expand Agent instructions to read the generated actions, decision rules and follow up logic.
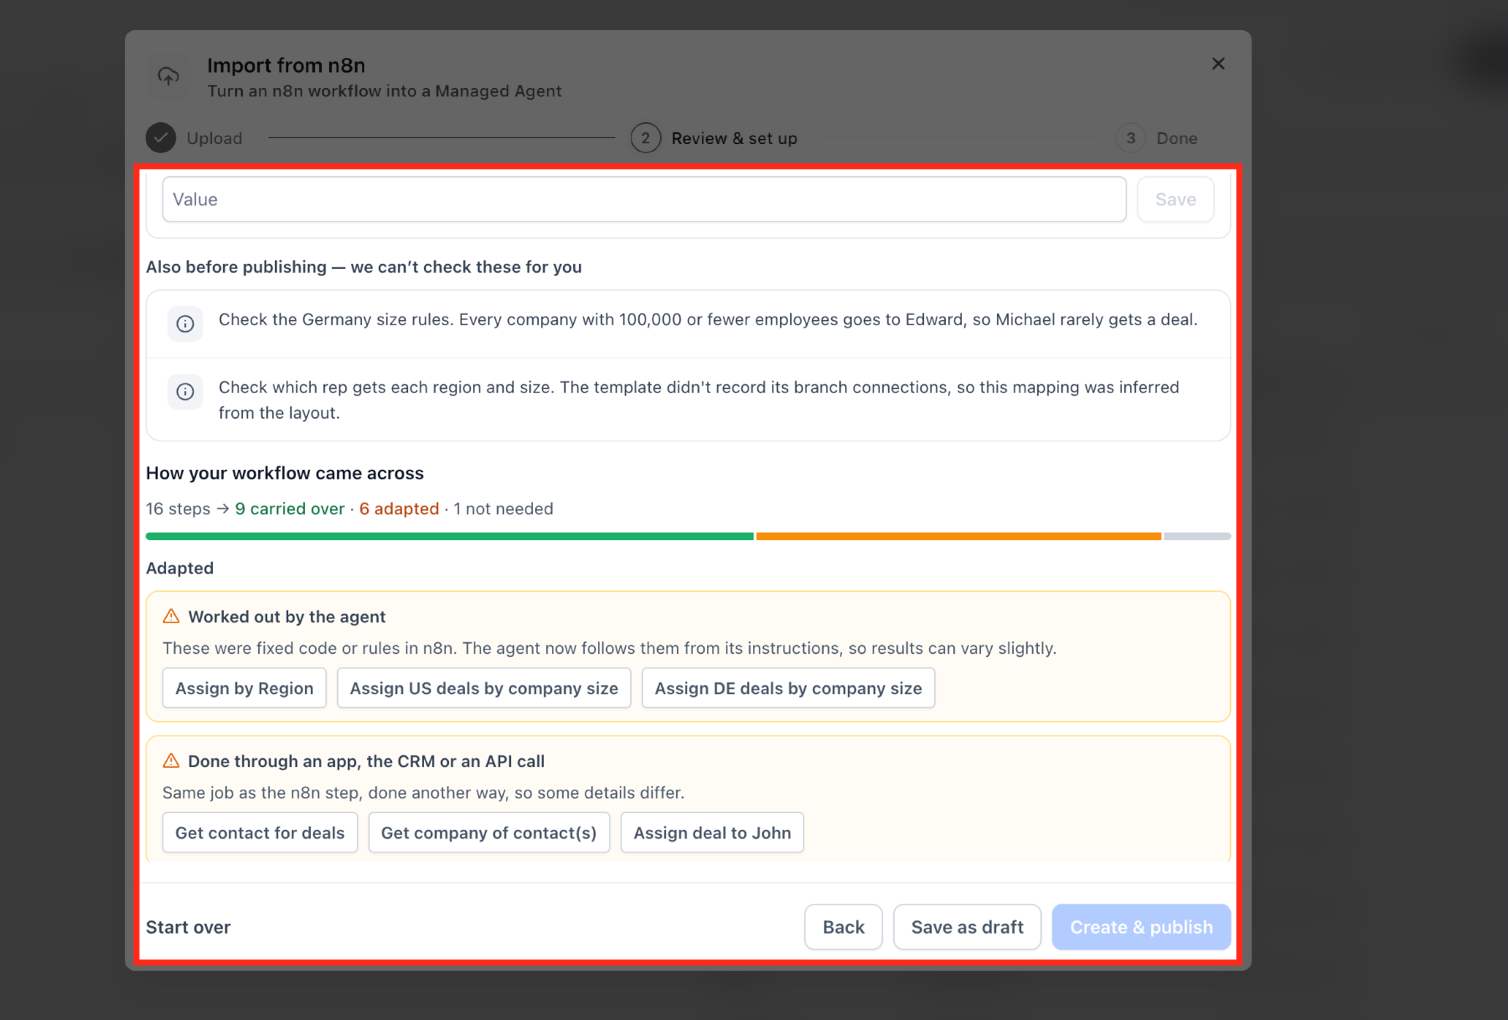
- Scroll to the How your workflow came across section to see the conversion summary.
- Look at the Carried over, Adapted and Not possible lists and read any warnings.
Complete the required agent setup
- In the How it starts area, click Edit if needed to adjust the starting condition.
- In the Apps to connect area, click Connect for any app shown as Not connected.
- For already linked apps, click Manage to review the existing connection.
- In the Values to set area, fill each field marked Needs input and click Save.
- Address any flagged resource IDs, Knowledge Base items or other warnings as instructed.
Save as draft or create and publish
- Scroll to the bottom of the Review & set up window and check remaining requirements.
- Select Save as draft to store the Managed Agent without publishing.
- Or choose Create & publish once all required items are completed.
Locate the imported agent and finish setup
- Navigate to AI Agents > Agent Studio > Managed Agents from the subaccount view.
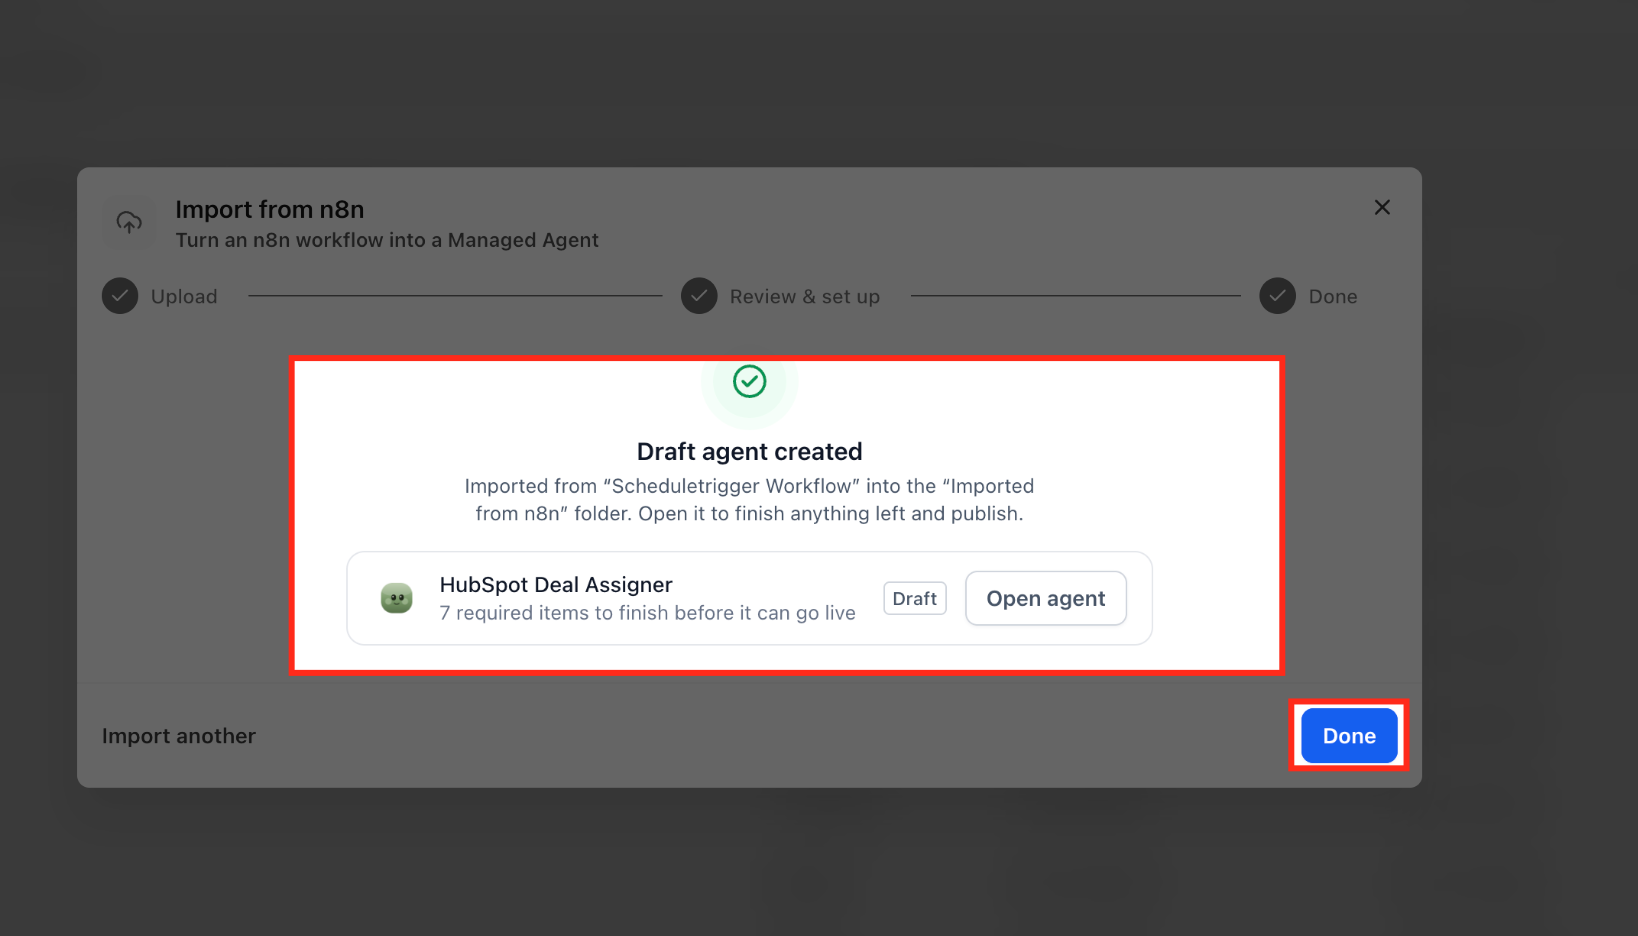
- Open the Imported from n8n folder.
- Select the imported Managed Agent (or click Open agent from the completion screen).
- If a Finish setup notice appears, use the provided links or Replace option to resolve outstanding items.
07What it looks like in HighLevel
08Things to know before you rely on it
- The importer accepts JSON files up to 10 MB in size.
- The feature appears as Beta in the interface and may have limited rollout.
- Credentials from n8n are not transferred; required apps must be connected in HighLevel.
- Some n8n steps are adapted into agent instructions, which can change behavior slightly.
- Analysis alone does not create an agent; you must Save as draft or Create & publish.
09How it connects to the rest of HighLevel
- Learn the basics of HighLevel workflow automation before importing. Workflow basics
- Set up inbound webhook triggers for agents that start with a webhook. Inbound webhook guide
- Review pricing and plan options if you need access to Managed Agents. Pricing
Michael's take

A useful shortcut for anyone with existing n8n automations that want to move into HighLevel without rebuilding everything.
If you rely heavily on custom code or proprietary n8n nodes, you may find the conversion requires a lot of manual tweaking and should consider rebuilding instead.