
01Who this is for
- Community managers who need a single place for members to discover, register and attend live sessions.
- Coaches and trainers who want to run workshops or Q&A sessions without requiring external meeting tools.
- Course creators who wish to charge for live events while keeping the experience inside the community.
02Live rooms, explained
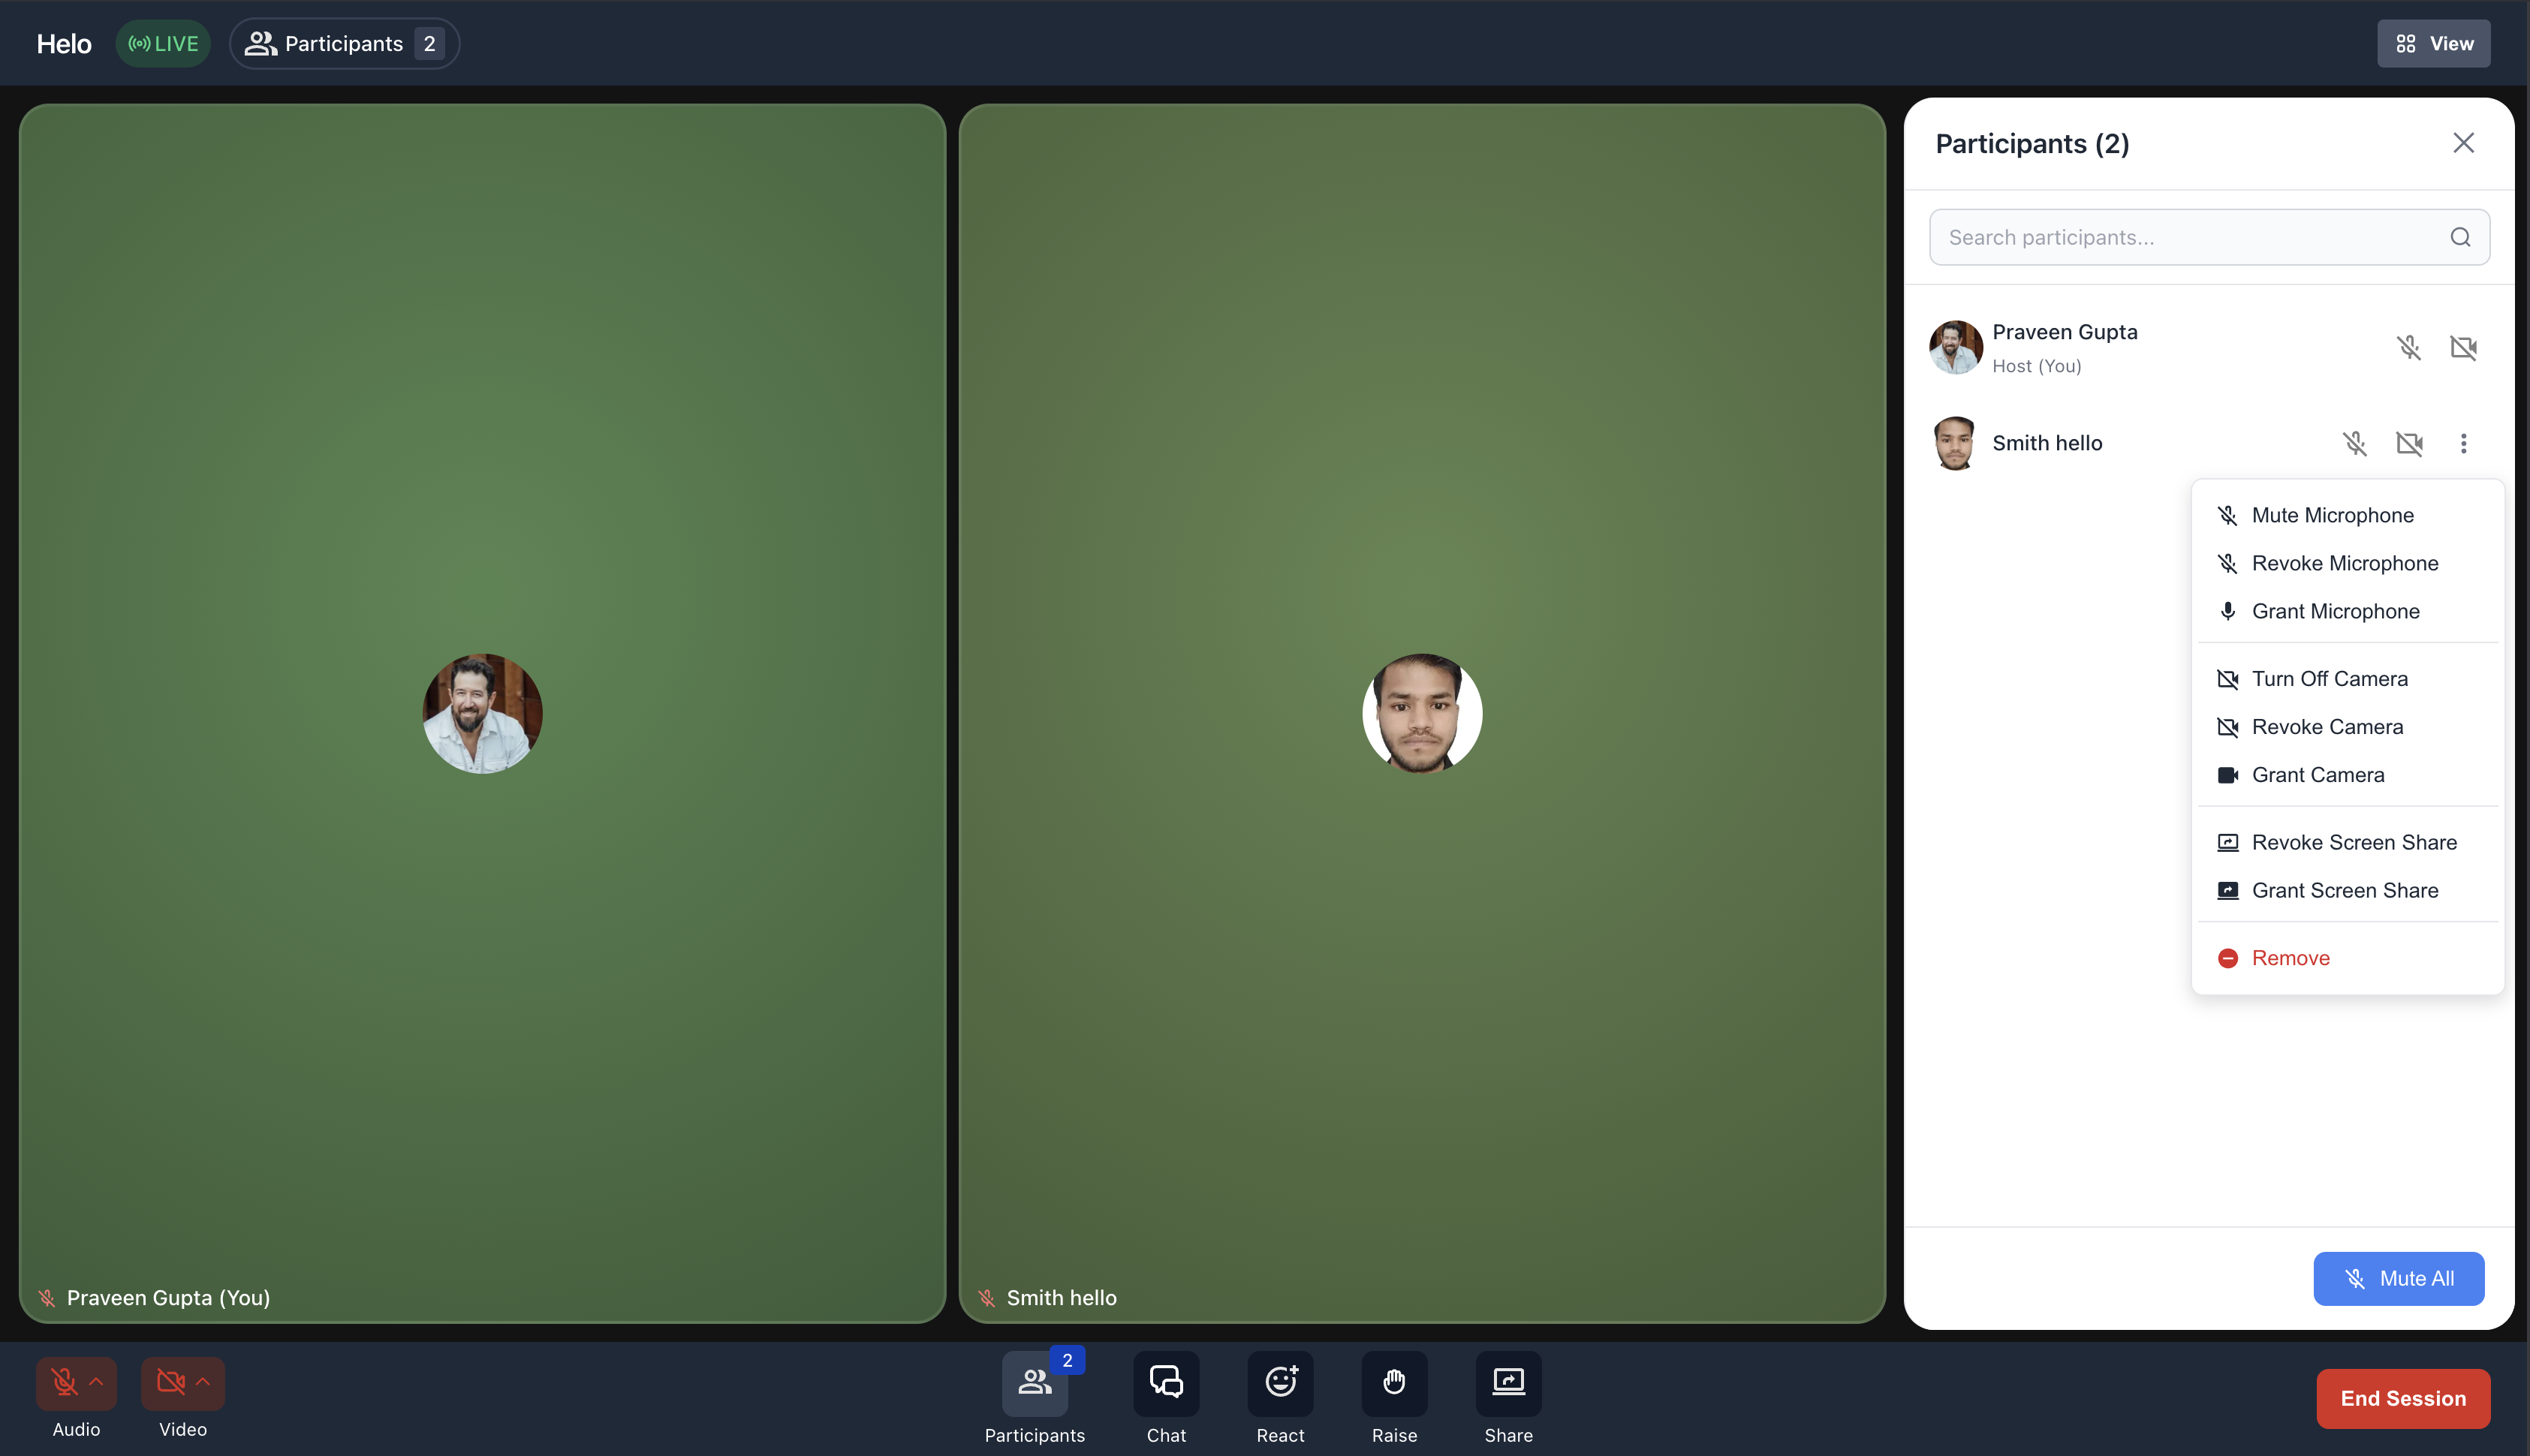
Live Room adds a native meeting location to the standard Community Event workflow. When you create an event, you choose Live Room instead of an external link and the event page displays a Join button that opens HighLevel’s Go Live interface. The Go Live venue supports video, audio, screen sharing, chat, reactions, raise hand and host controls, keeping the conversation within the community.
The feature lives in the Communities section of HighLevel. It uses the same event details, registration, calendar actions, pricing and reminder settings that already exist for Community Events. Members can access Live Room events from supported browsers or the HighLevel mobile app after signing in.
03How businesses use live rooms
- Coaching business. A coach creates a Community Event, selects Live Room as the location, sets the date and price, then shares the event. Members register and join the live coaching call directly from the event page, using video, chat and screen sharing without opening Zoom.
- Fitness studio. The studio schedules a workout class as a Community Event, chooses Live Room, and adds a restriction so only members of the fitness group can attend. Participants sign up, get calendar reminders and join the live class inside the community.
- Software SaaS community. A product team sets up a launch webinar as a paid Community Event, selects Live Room, and configures pricing. After purchase, attendees receive a confirmation email and can join the live demo from the event page, using the platform’s chat and reaction tools.
04Before you start
- Be an admin or owner of the target Community group.
- Have a Community group already created where the event will be hosted.
05How to set up and use live rooms in HighLevel
Set up live room for community event
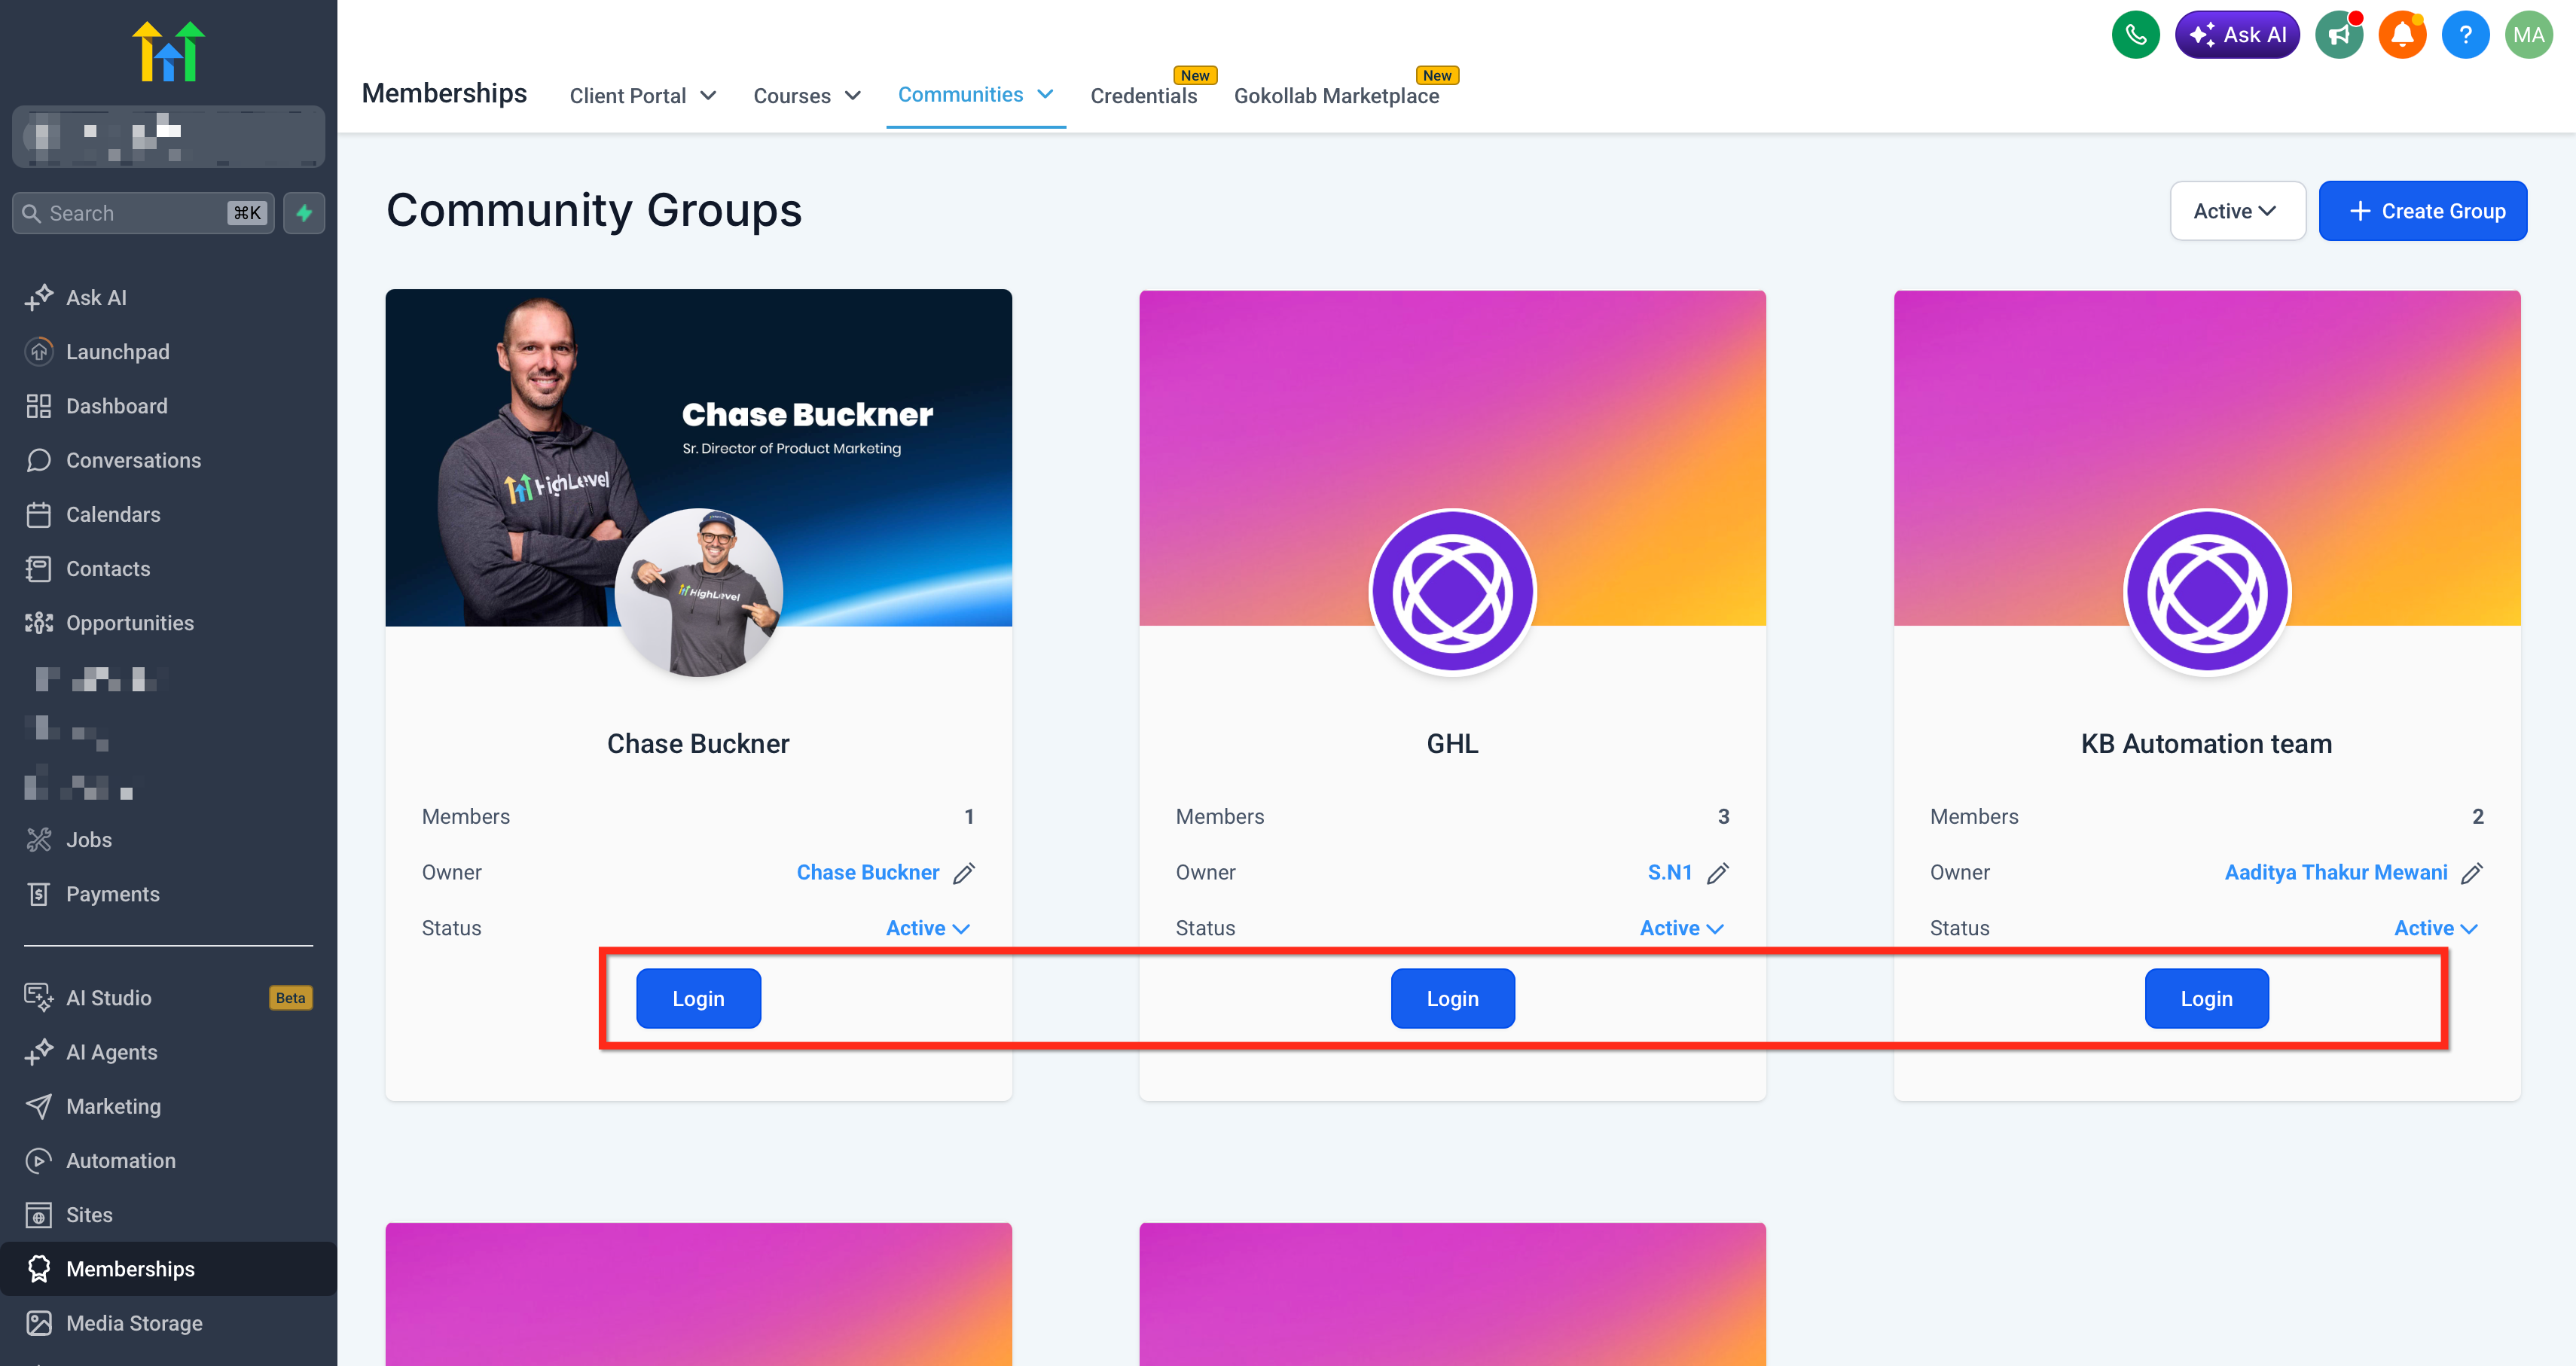
- Navigate to Memberships > Communities > Groups and log in to the desired group.
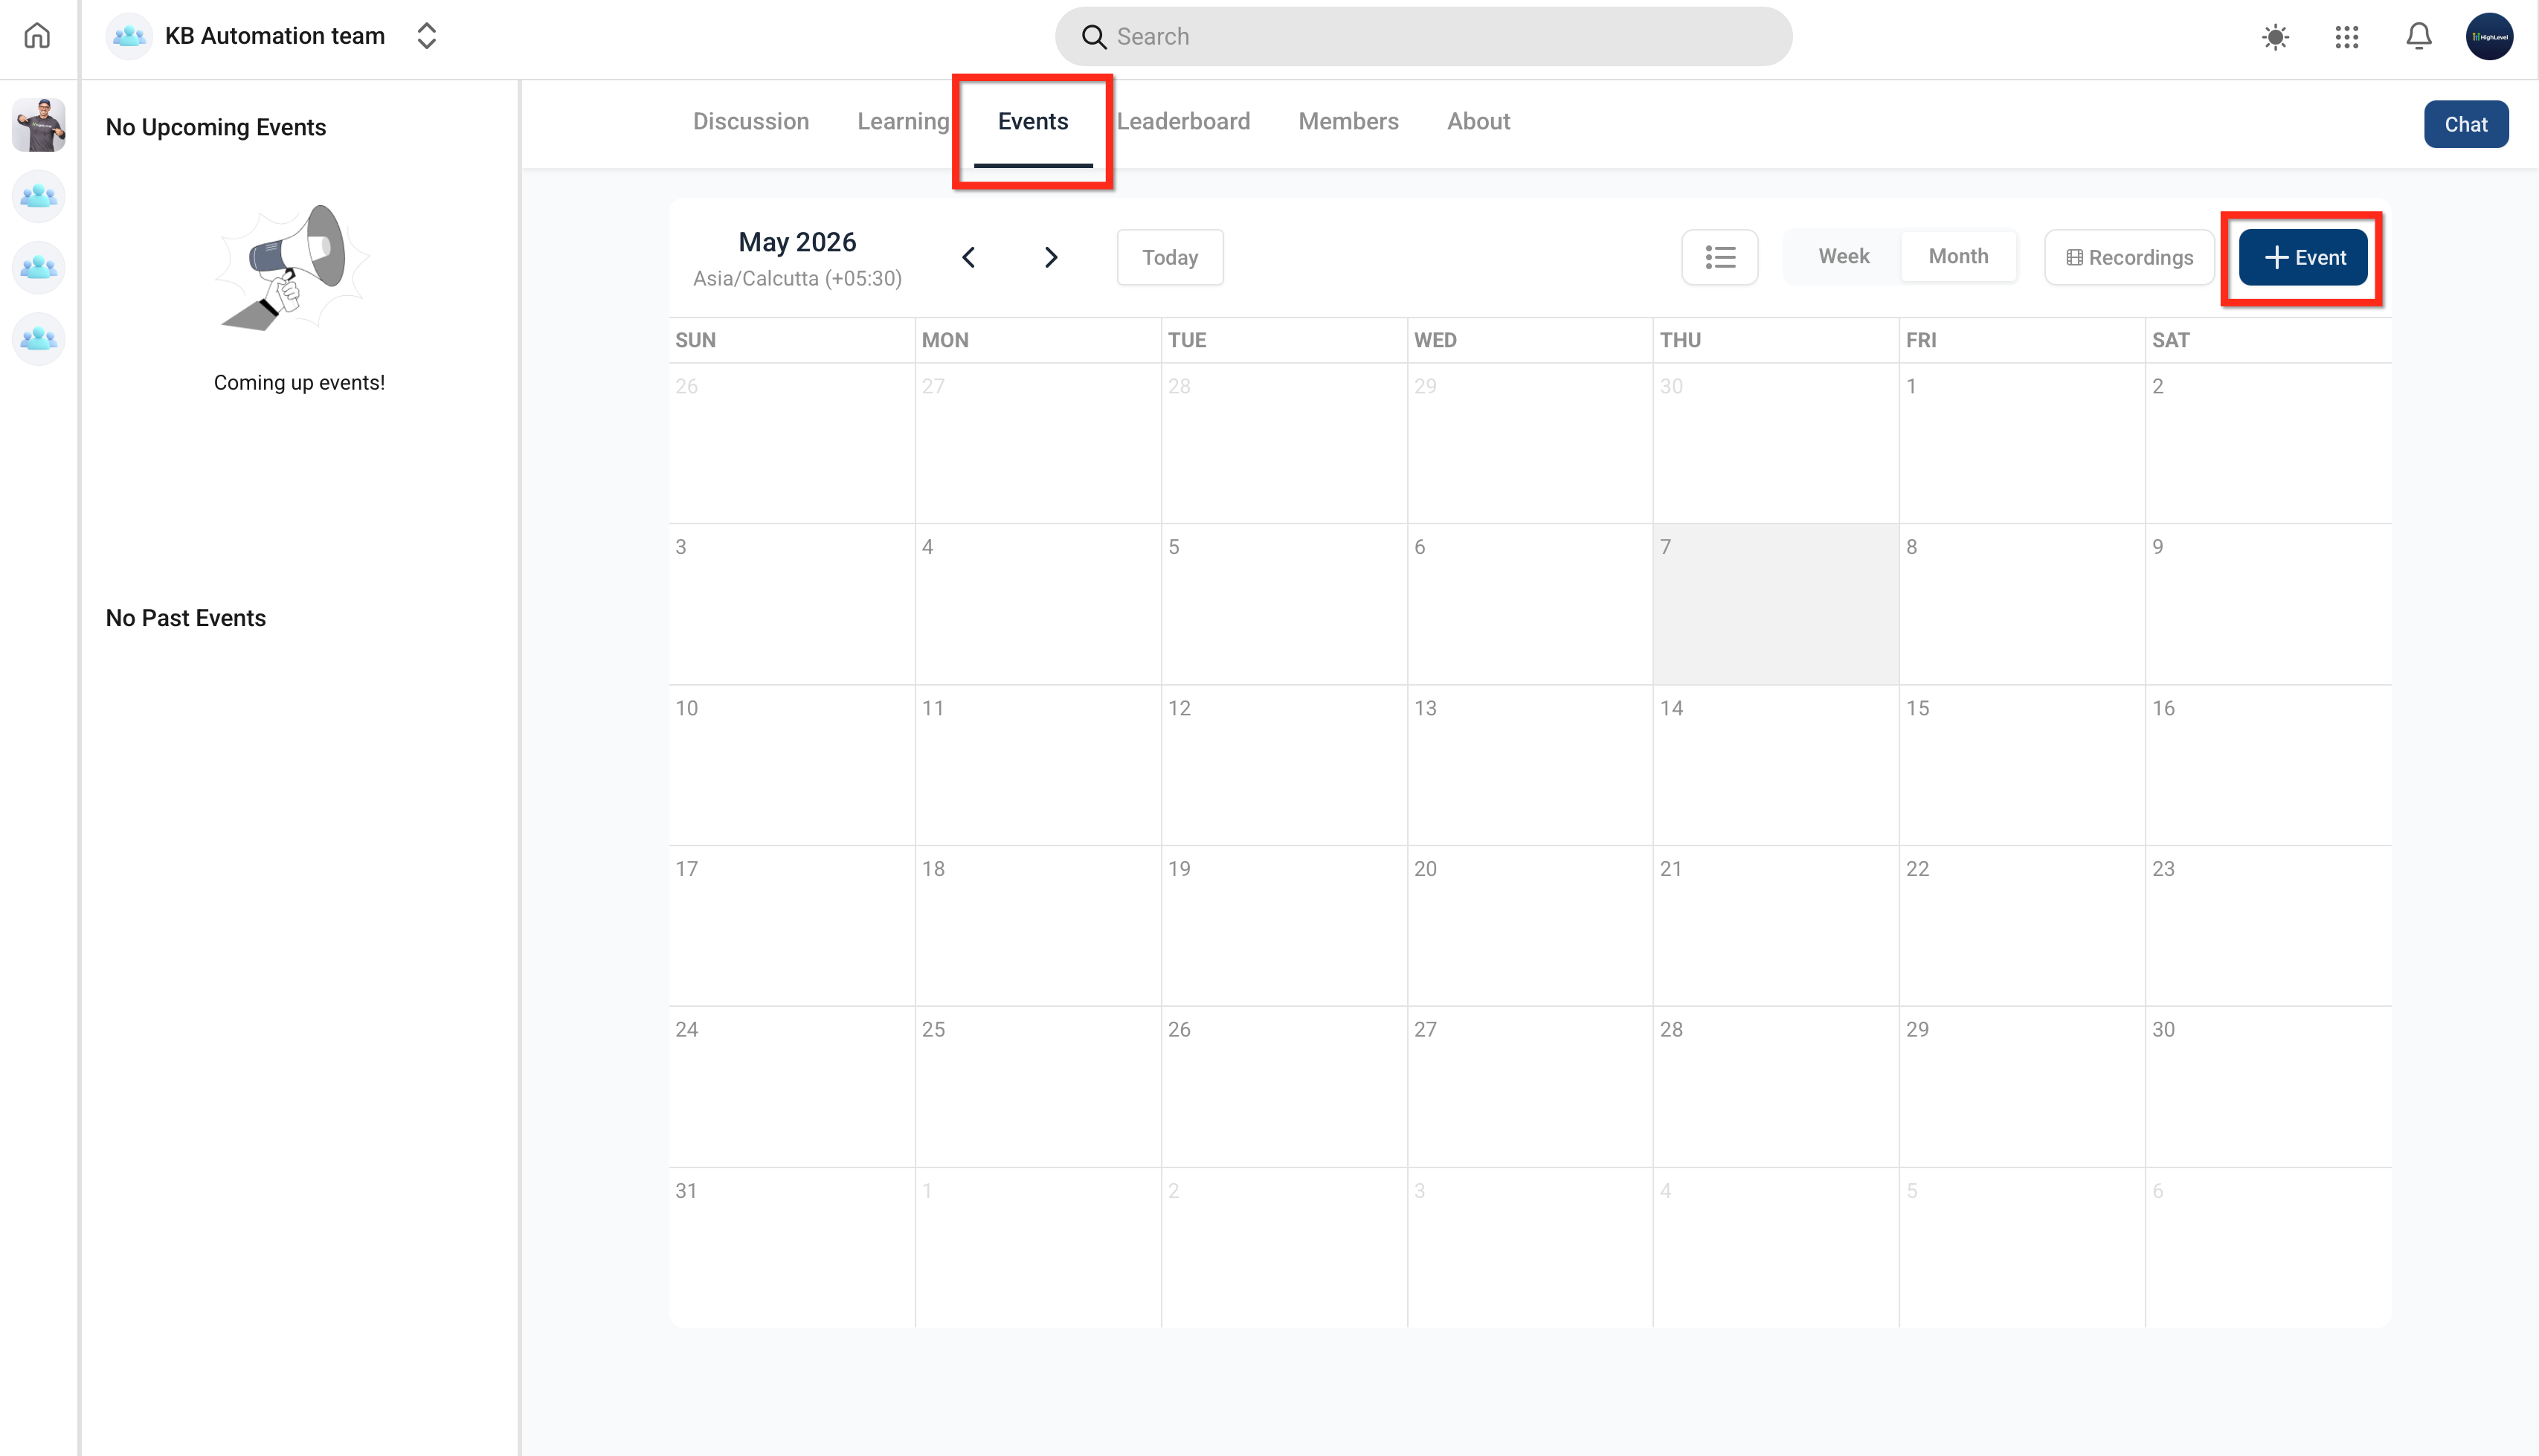
- Open the Events tab within that group.
- Click Create Event to start a new event.
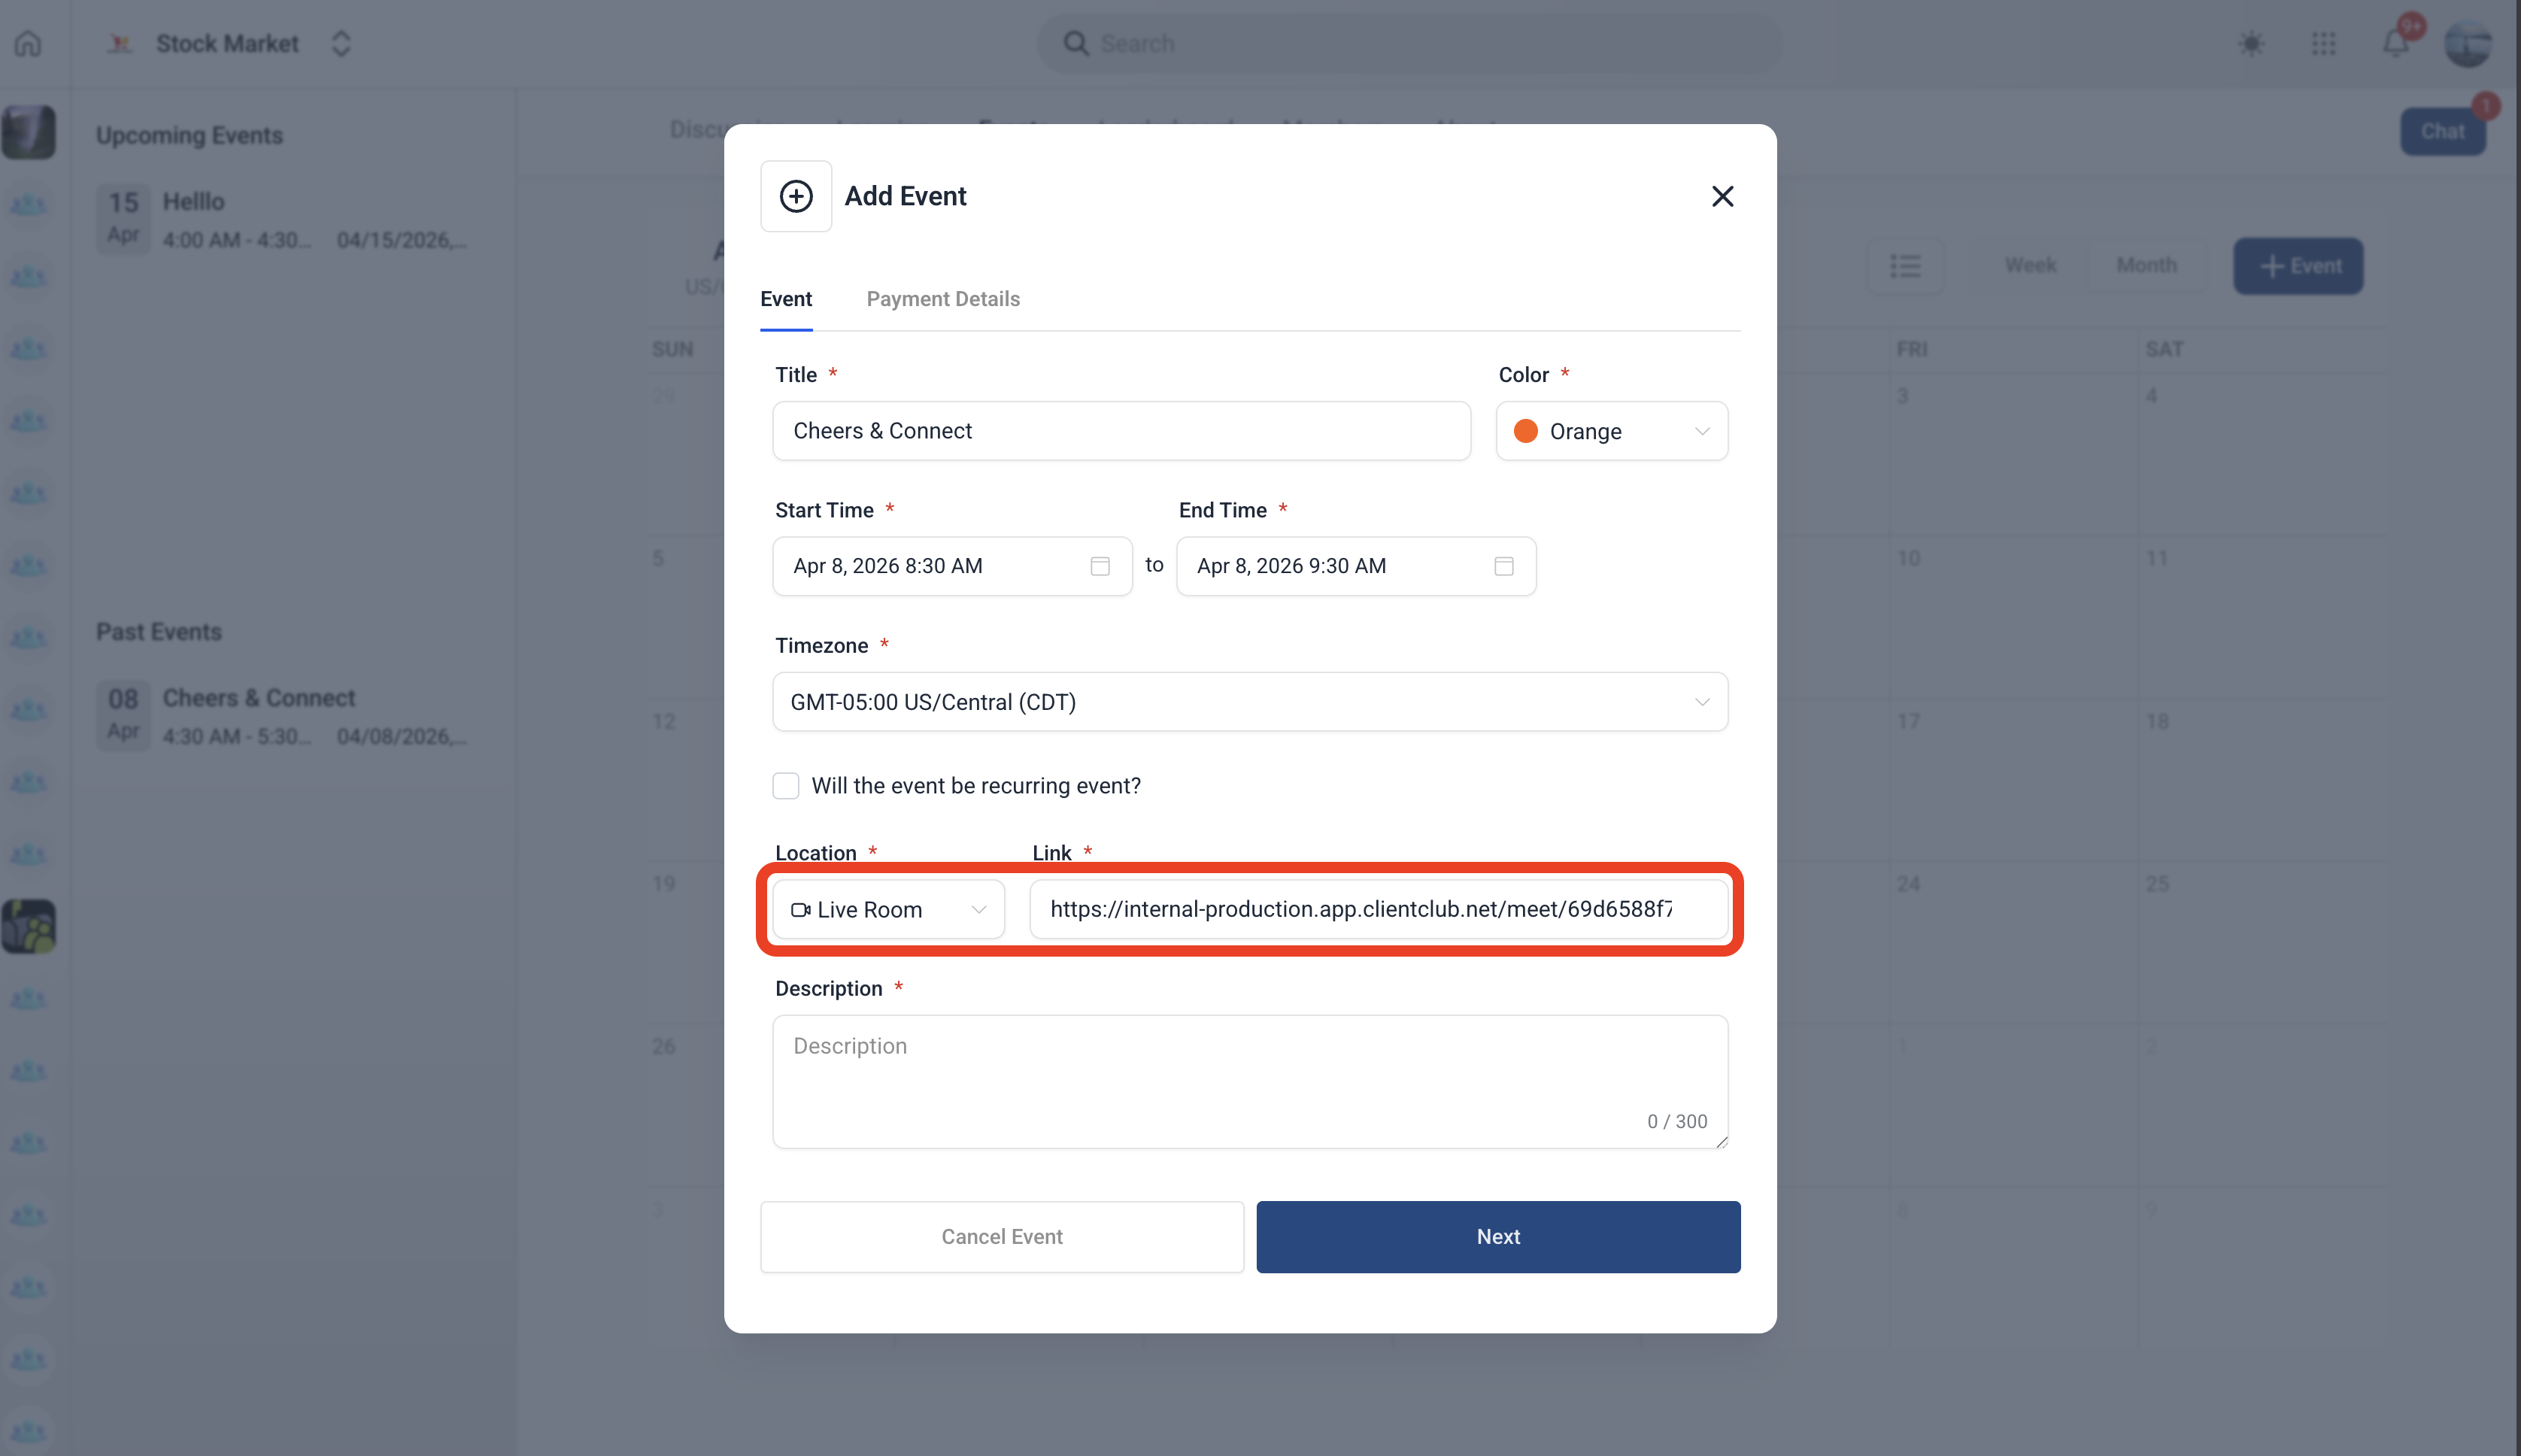
- Enter the event title, description, date, time, duration and timezone.
- Add an image or banner for the event if desired.
- In the Location type field, select Live Room.
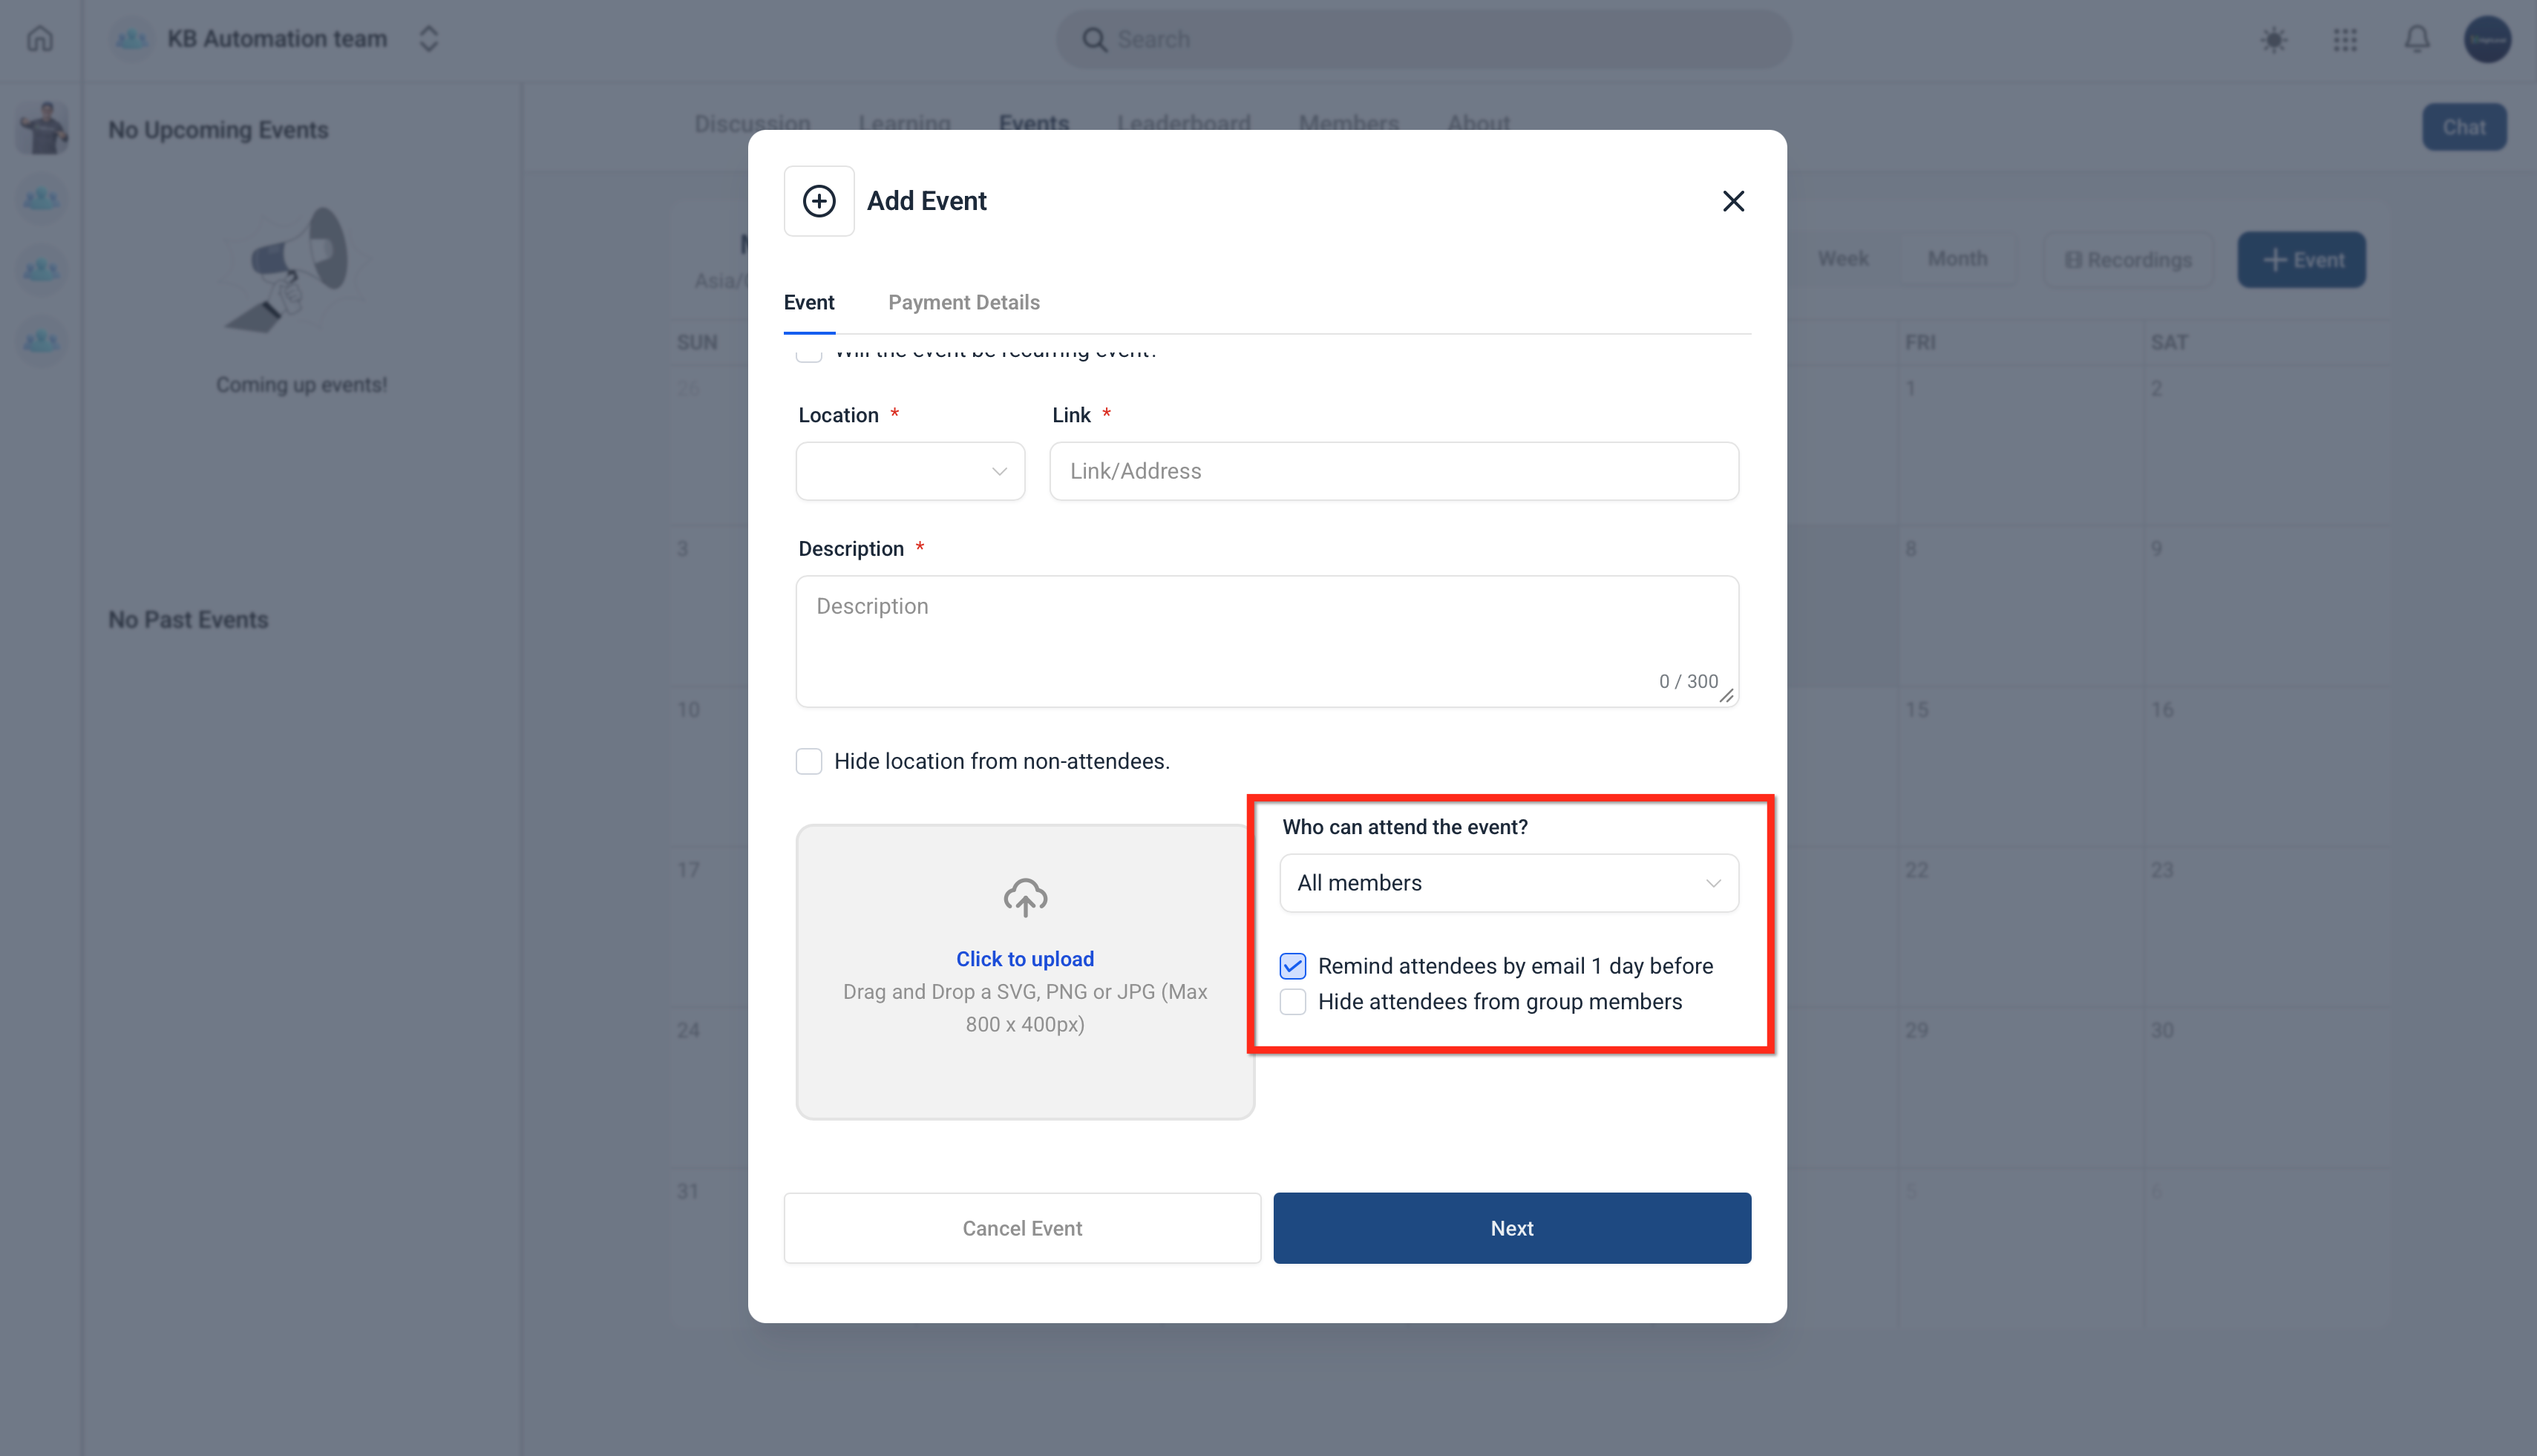
- Choose view and attendance restrictions, then click Next.
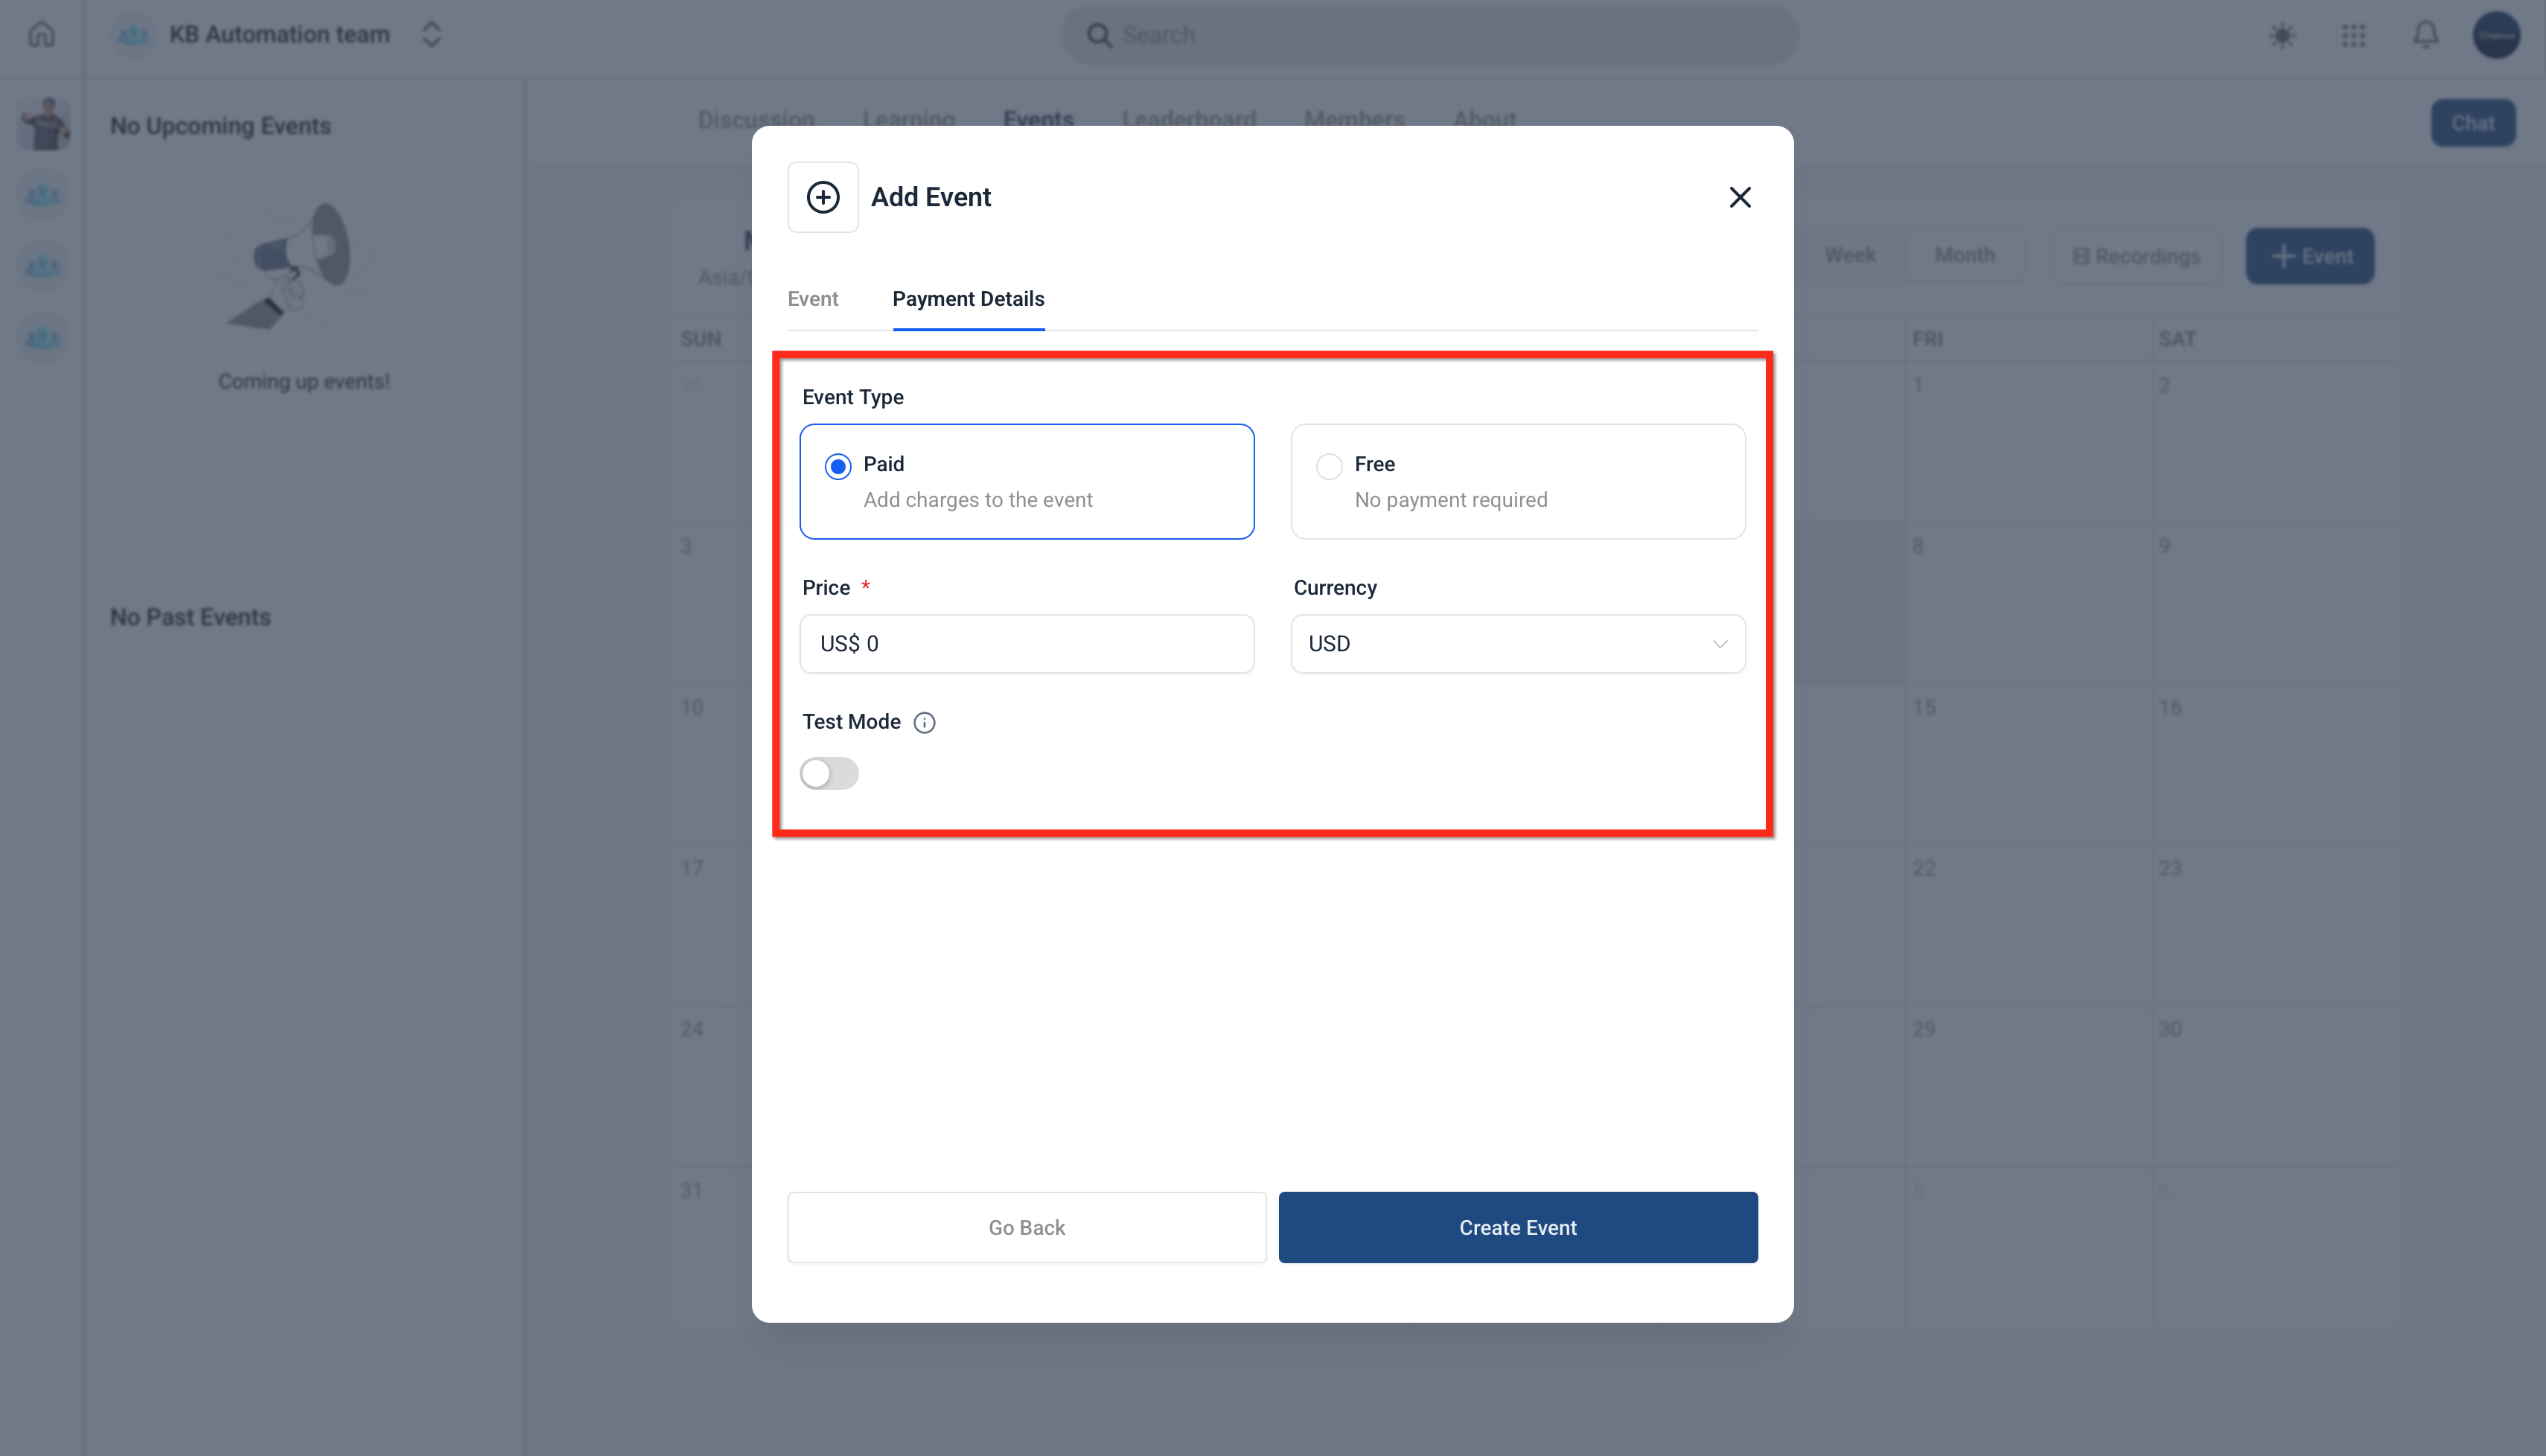
- Select Free or Paid; if paid, enter the price and currency, then click Create Event.
- Share the event with members via a post, email, SMS or other channel.
- At the scheduled time, open the event from the Events tab and click Live Room.
06What it looks like in HighLevel
07Settings that matter
- Location type. Determines where the event will be held; selecting Live Room enables a native HighLevel meeting.
- View/attendance restrictions. Controls which members can see or attend the event based on course, group, private channel or membership level.
- Free or paid. Sets whether the event requires a payment and, if so, records the price and currency.
- Event image or banner. Provides a visual thumbnail for the event page.
08How it connects to the rest of HighLevel
- How to create and manage a HighLevel community Create and manage community
- Managing members inside groups in HighLevel Manage group members
- HighLevel community: create channels, posts and manage content Create channels and posts
- HighLevel pricing and plans Pricing
- Start a 30 day HighLevel trial Free trial
Michael's take

I like that Live Room keeps everything inside HighLevel, so members don’t need to switch to an external video tool.
If I were setting this up, I’d double check the event’s visibility settings first to make sure the right group or membership level can see the event.