
01Who this is for
- Founders who want a consistent brand look across their digital courses can control visual elements without hiring a designer.
- Coaches offering multiple membership products can give each offering a unique feel while reusing the same theme settings.
- Community managers can adapt header and hero sections to match the tone of each community space.
02Membership themes, explained
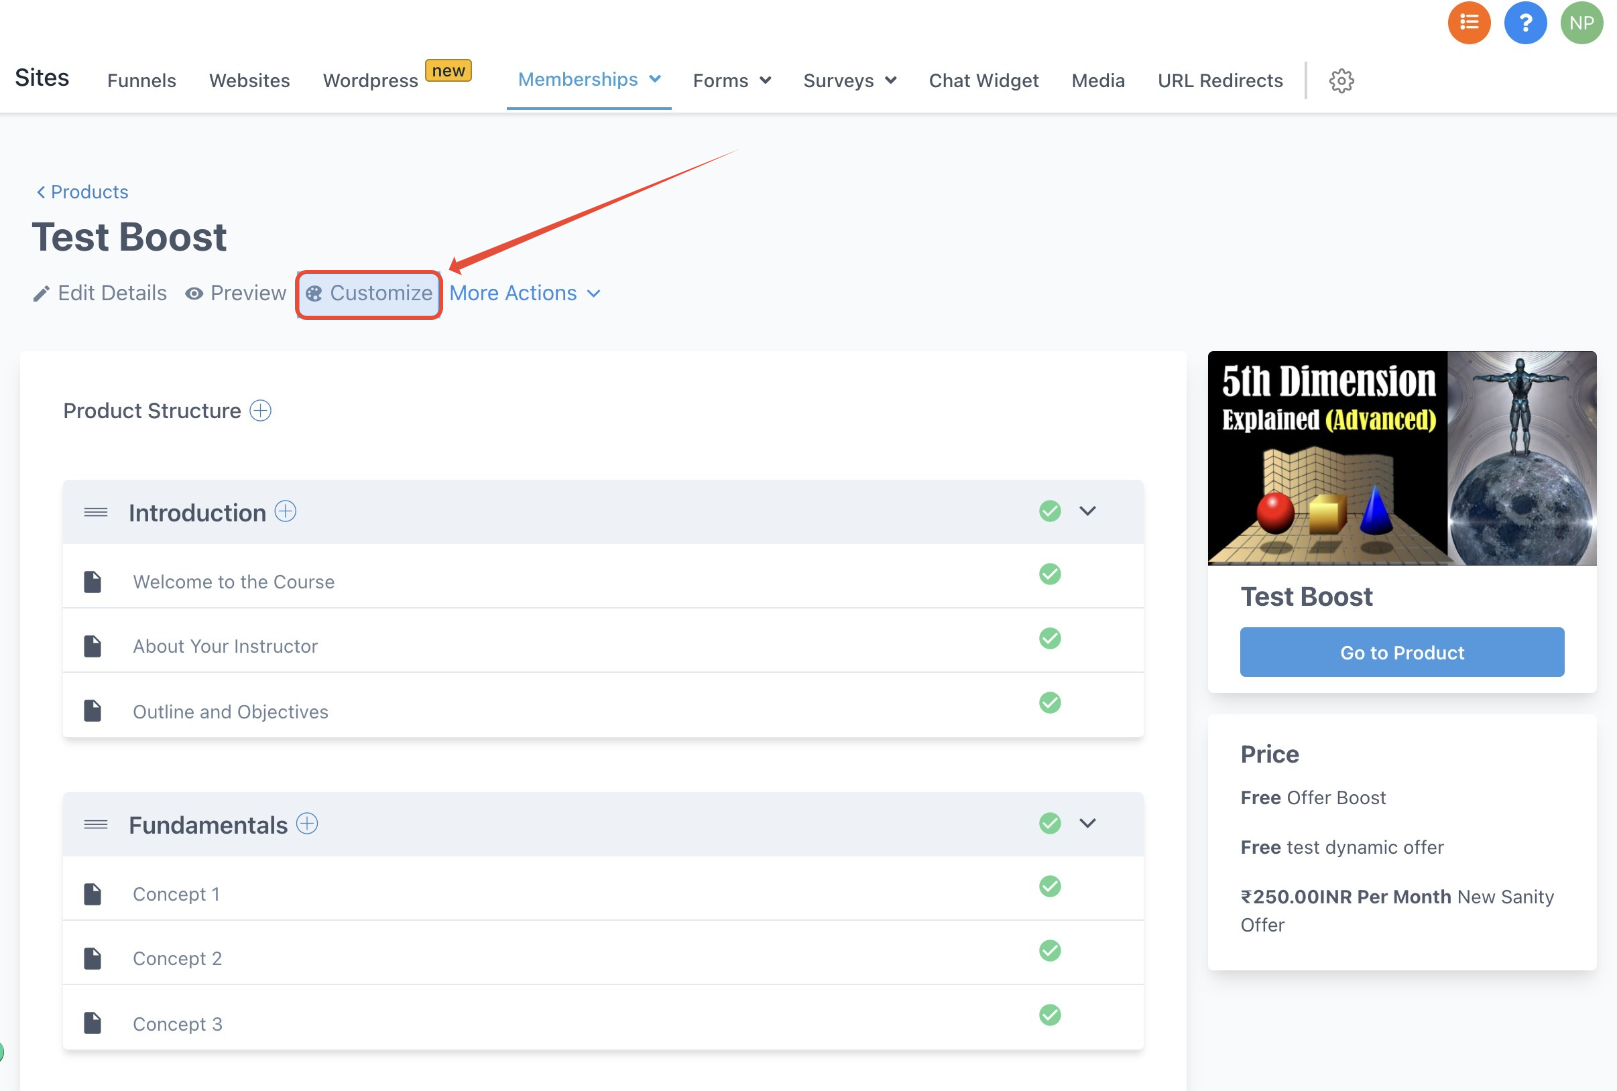
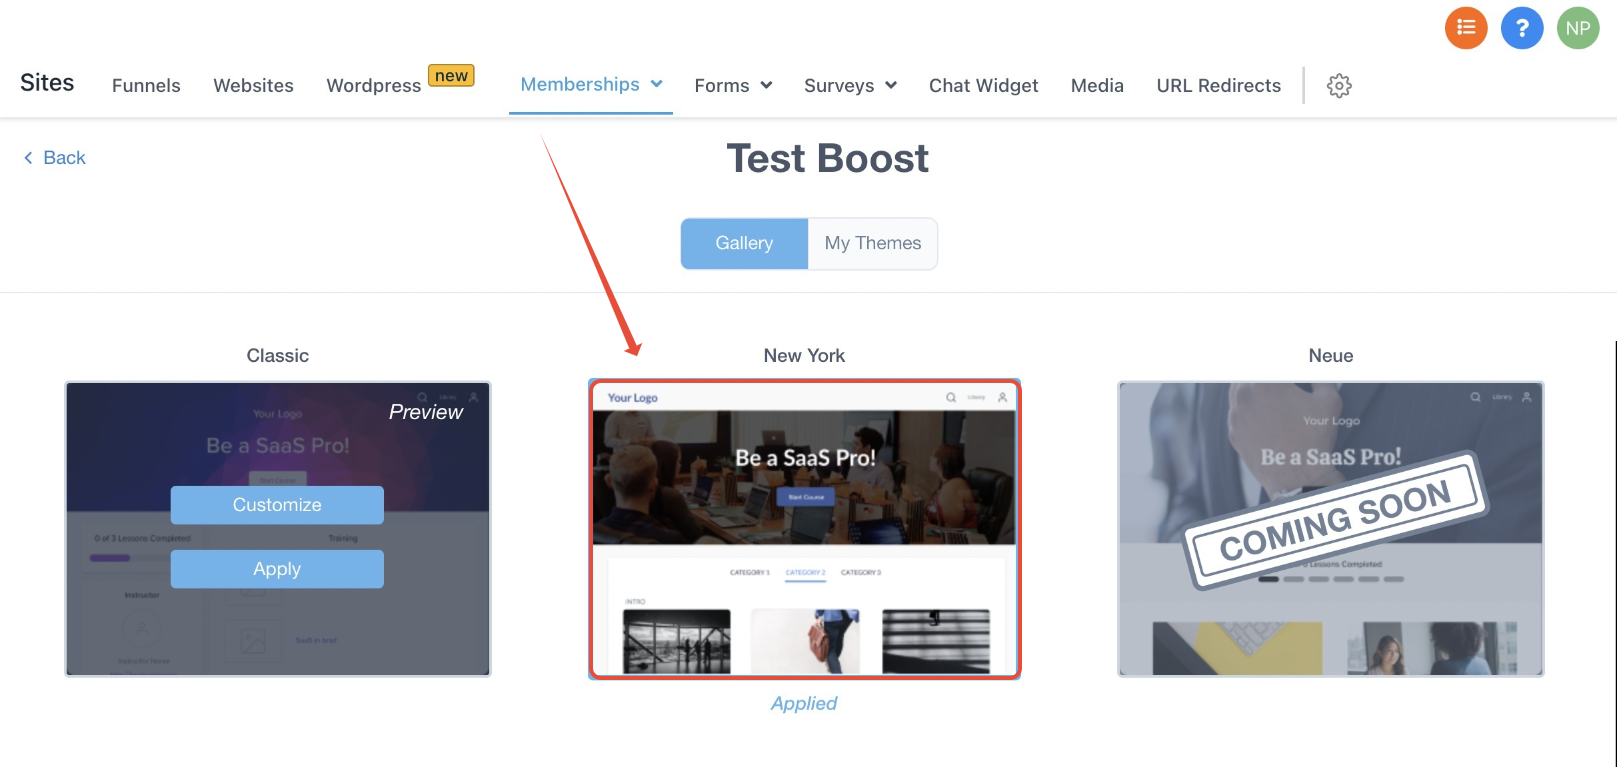
The theme feature lives under Sites > Membership > Products > Customize. When you open a product, a Theme gallery shows the default classic theme and additional system themes. Selecting a theme applies its base design to the product page.
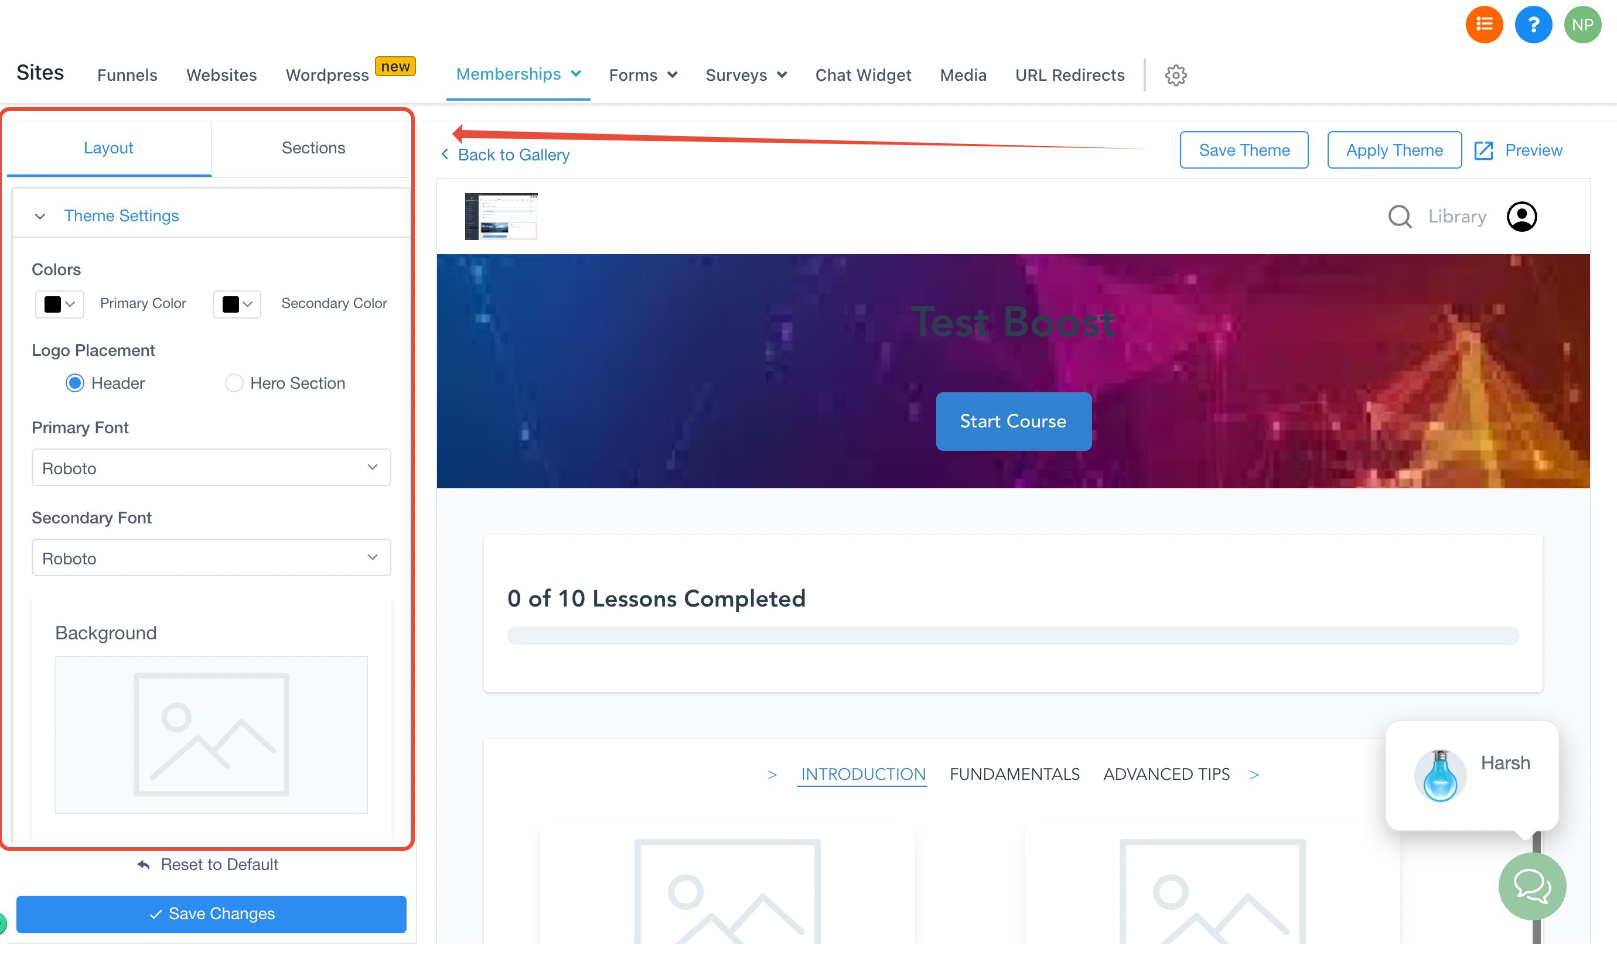
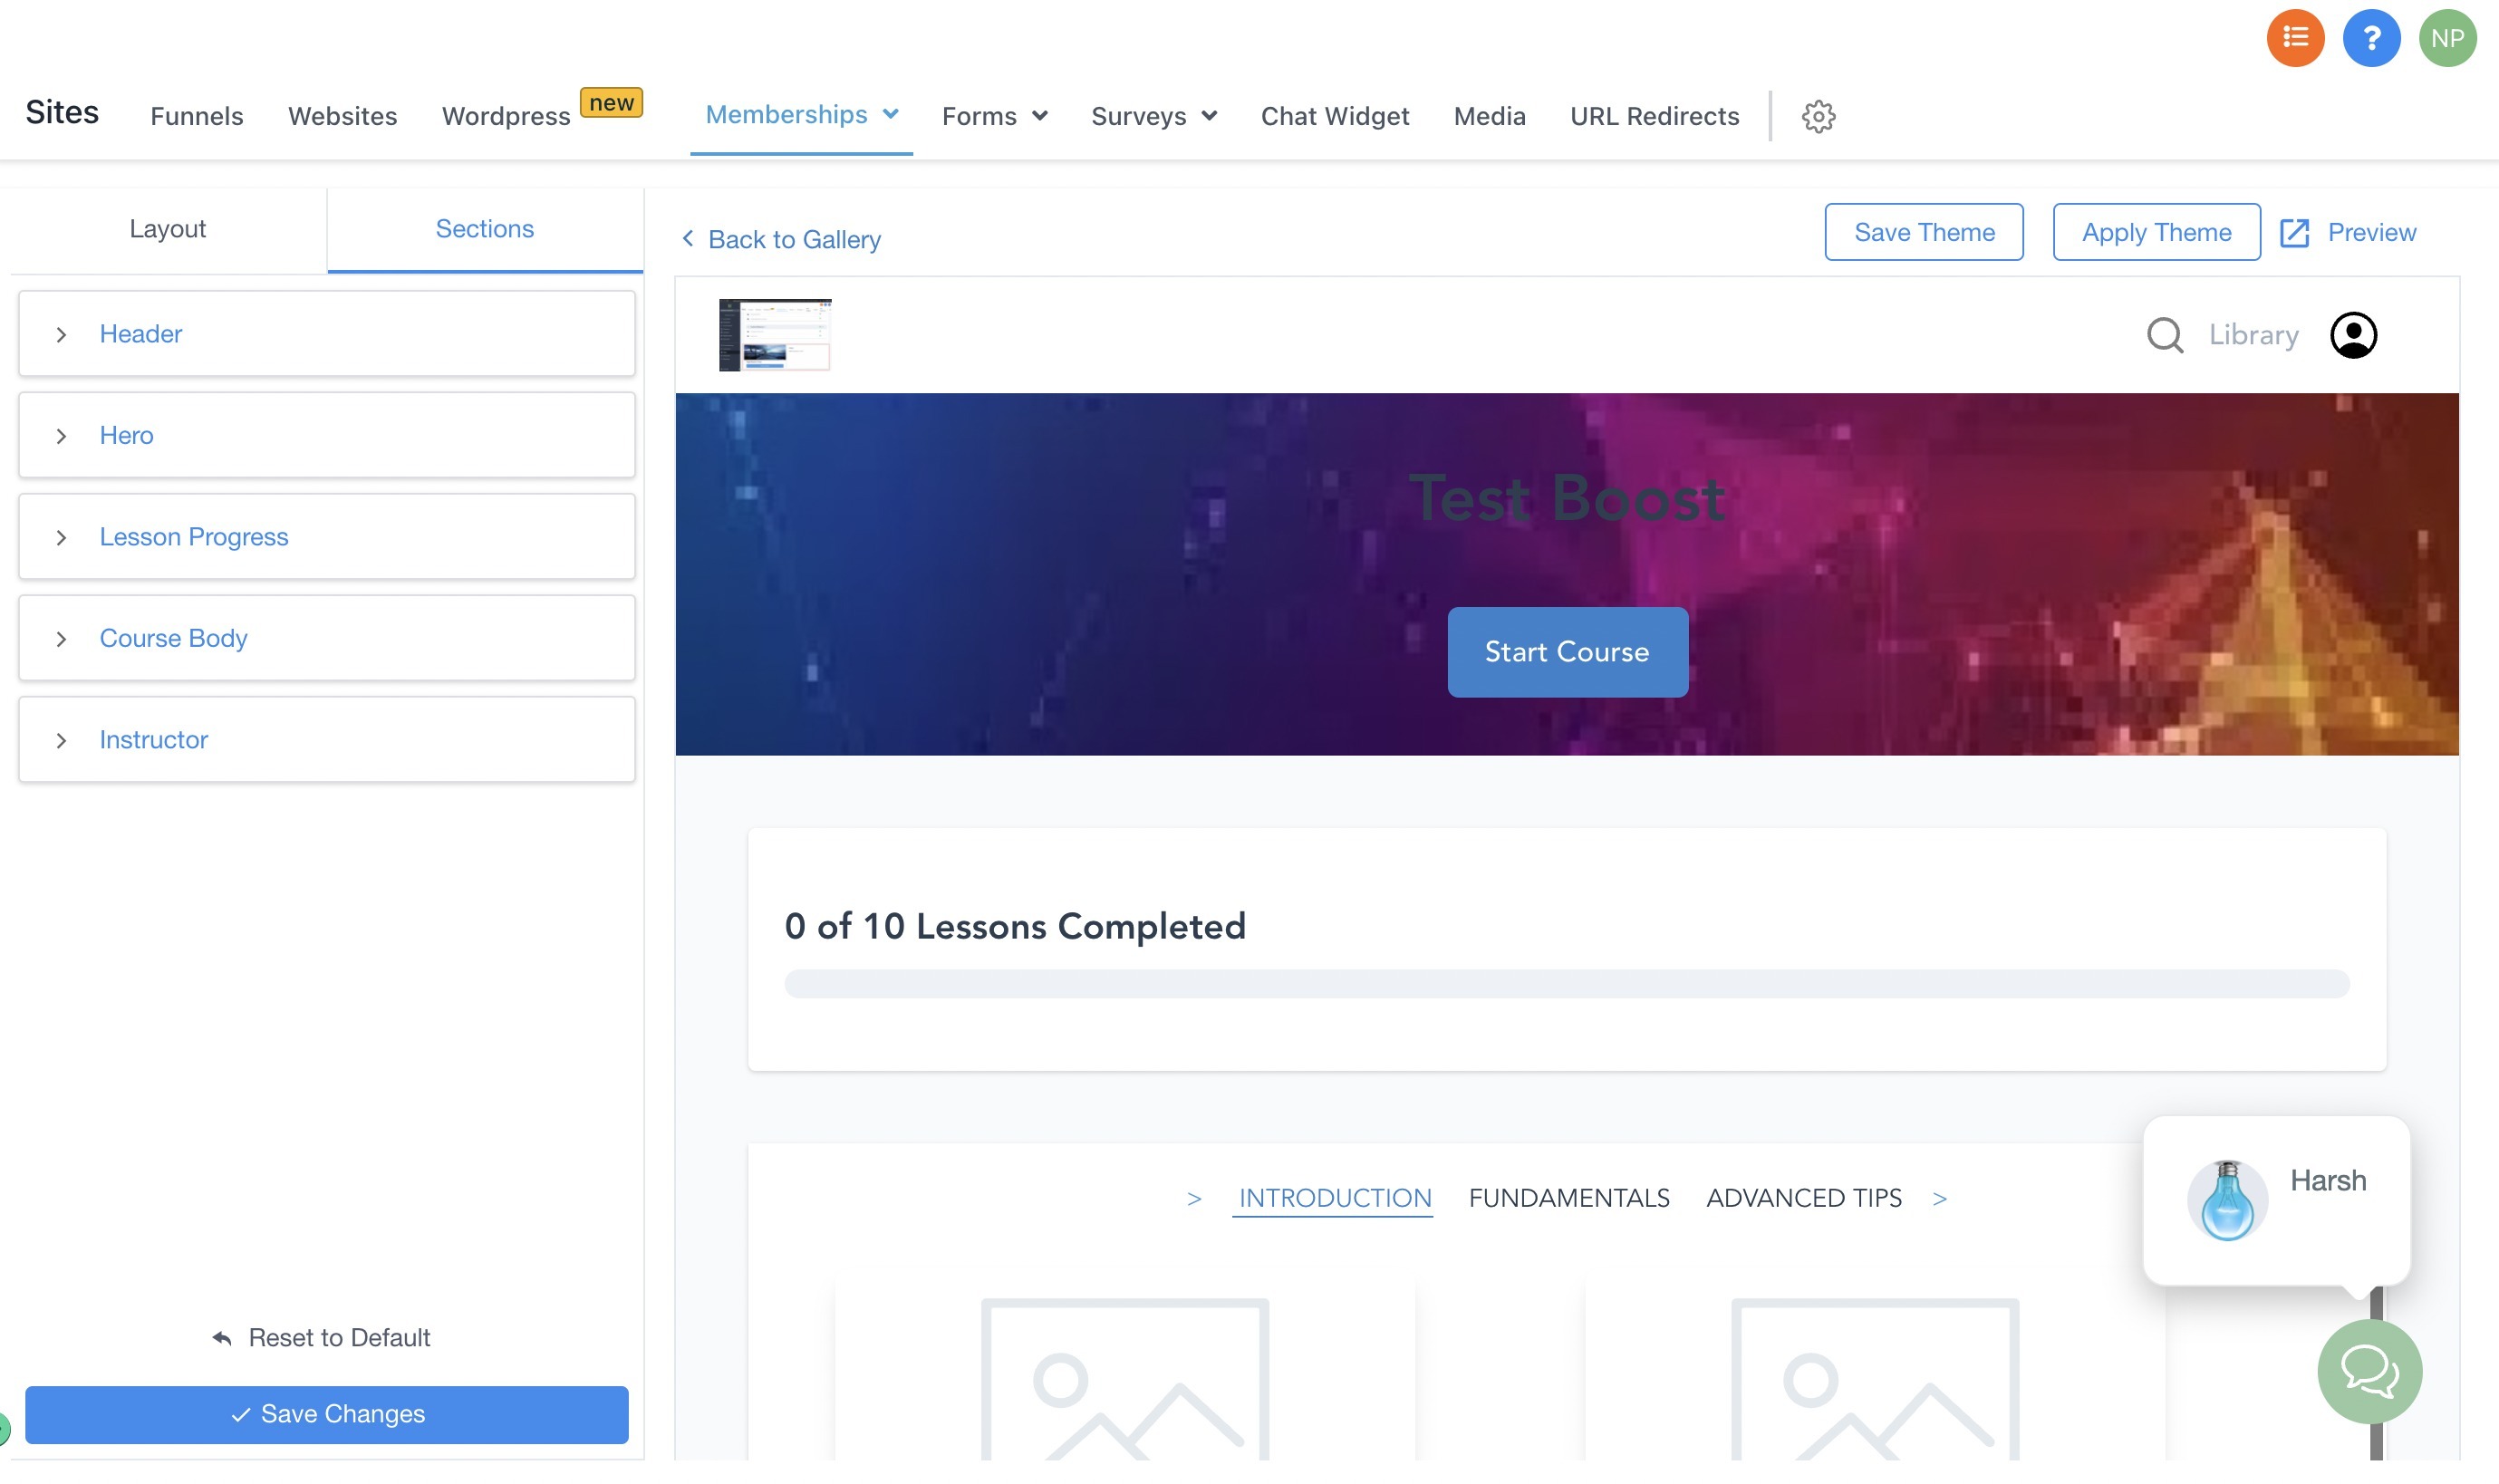
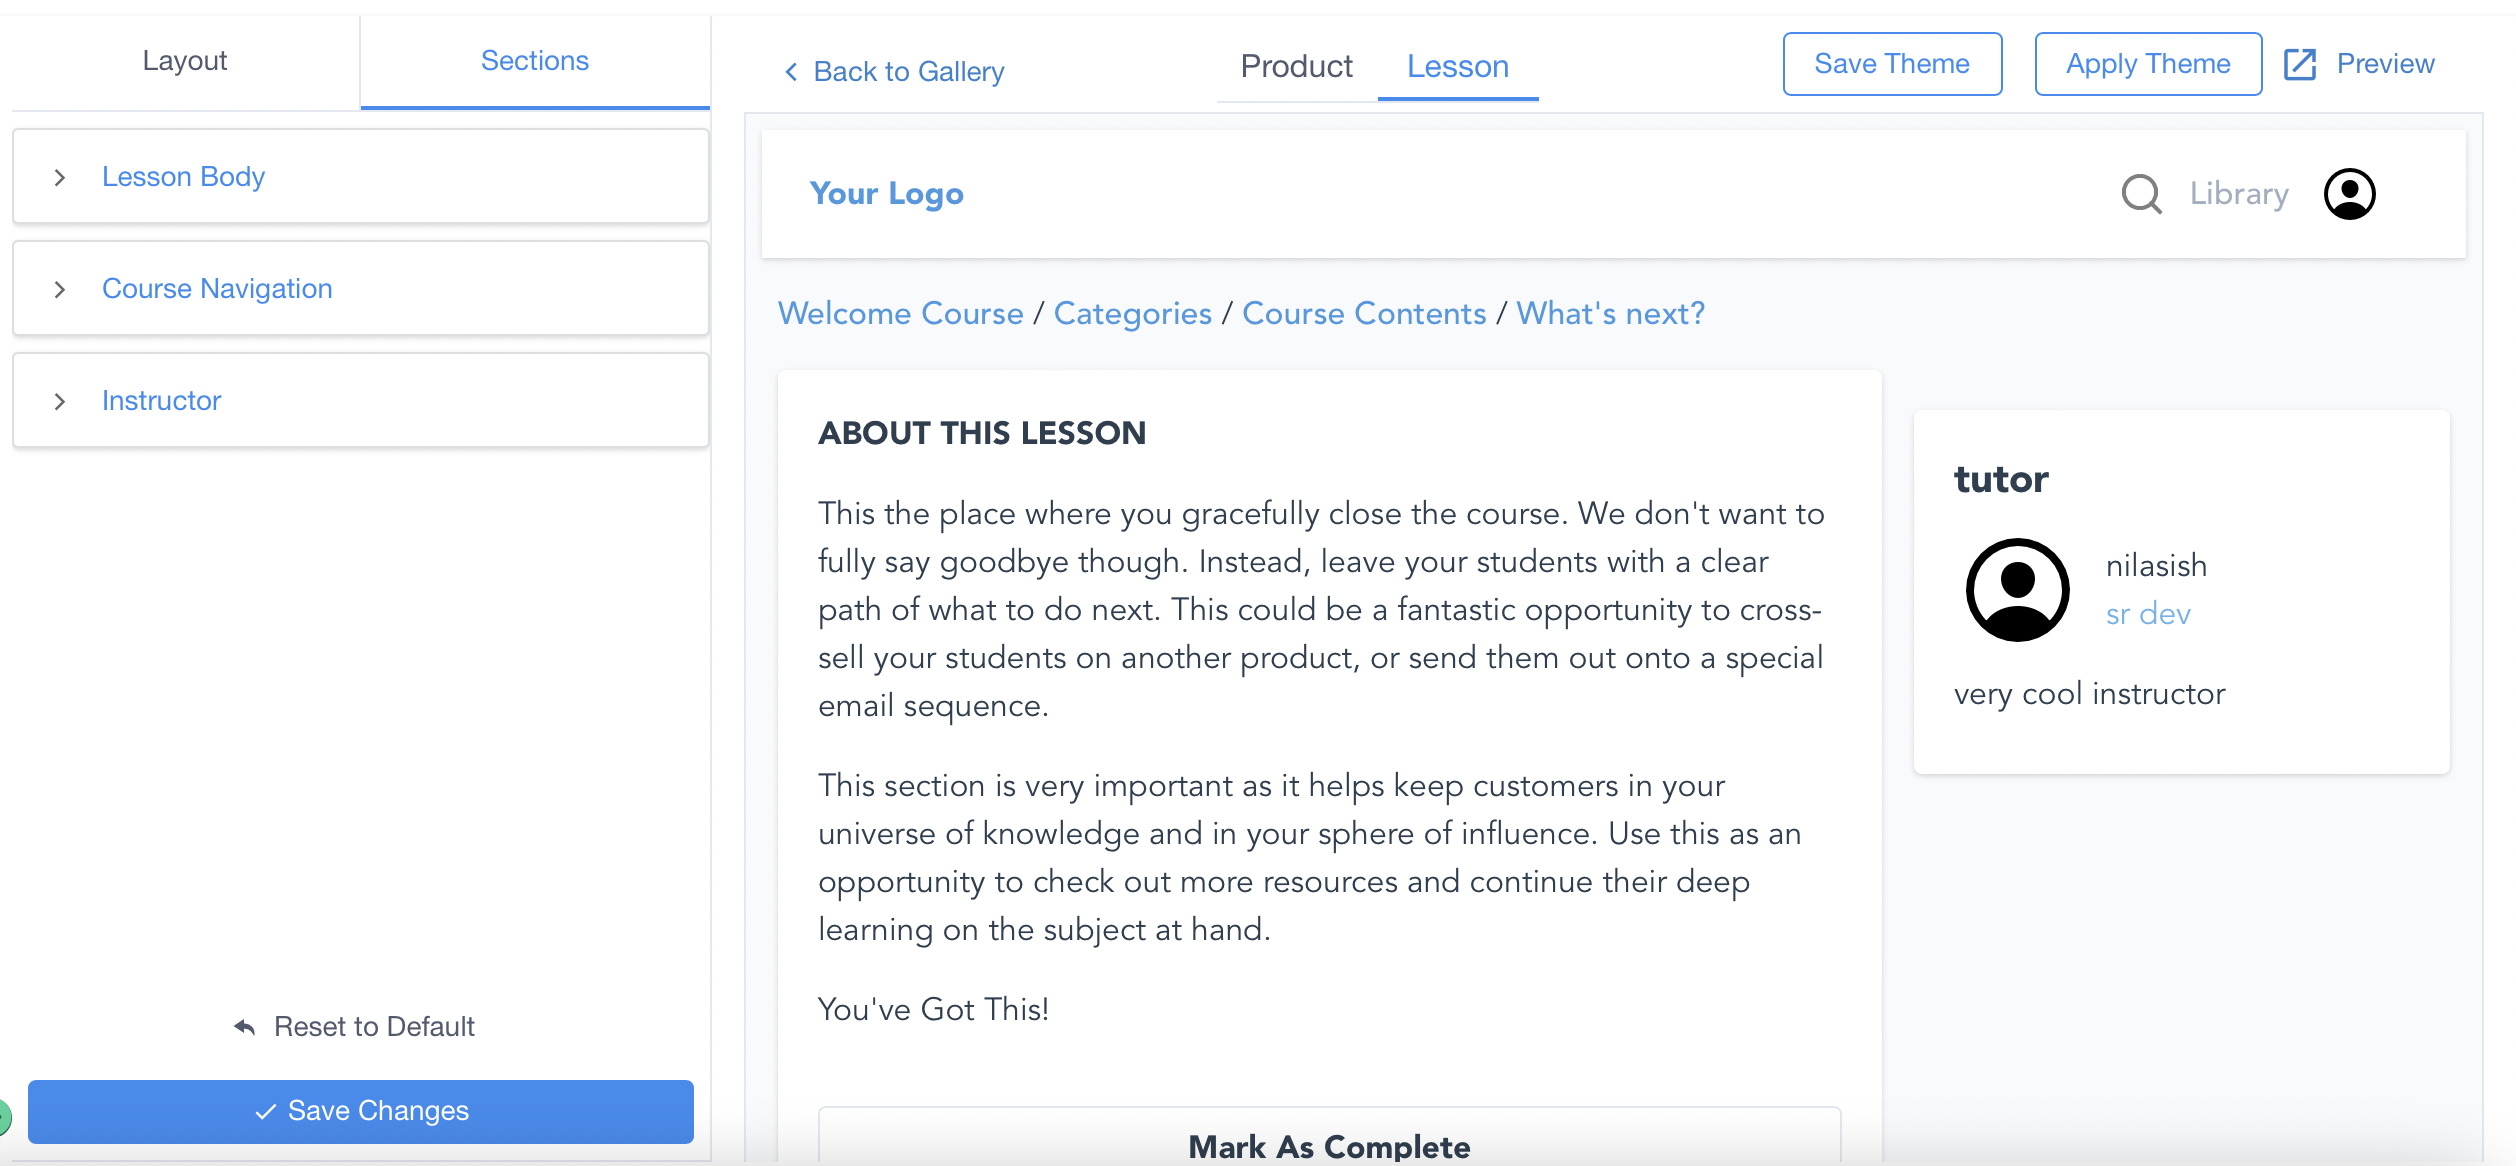
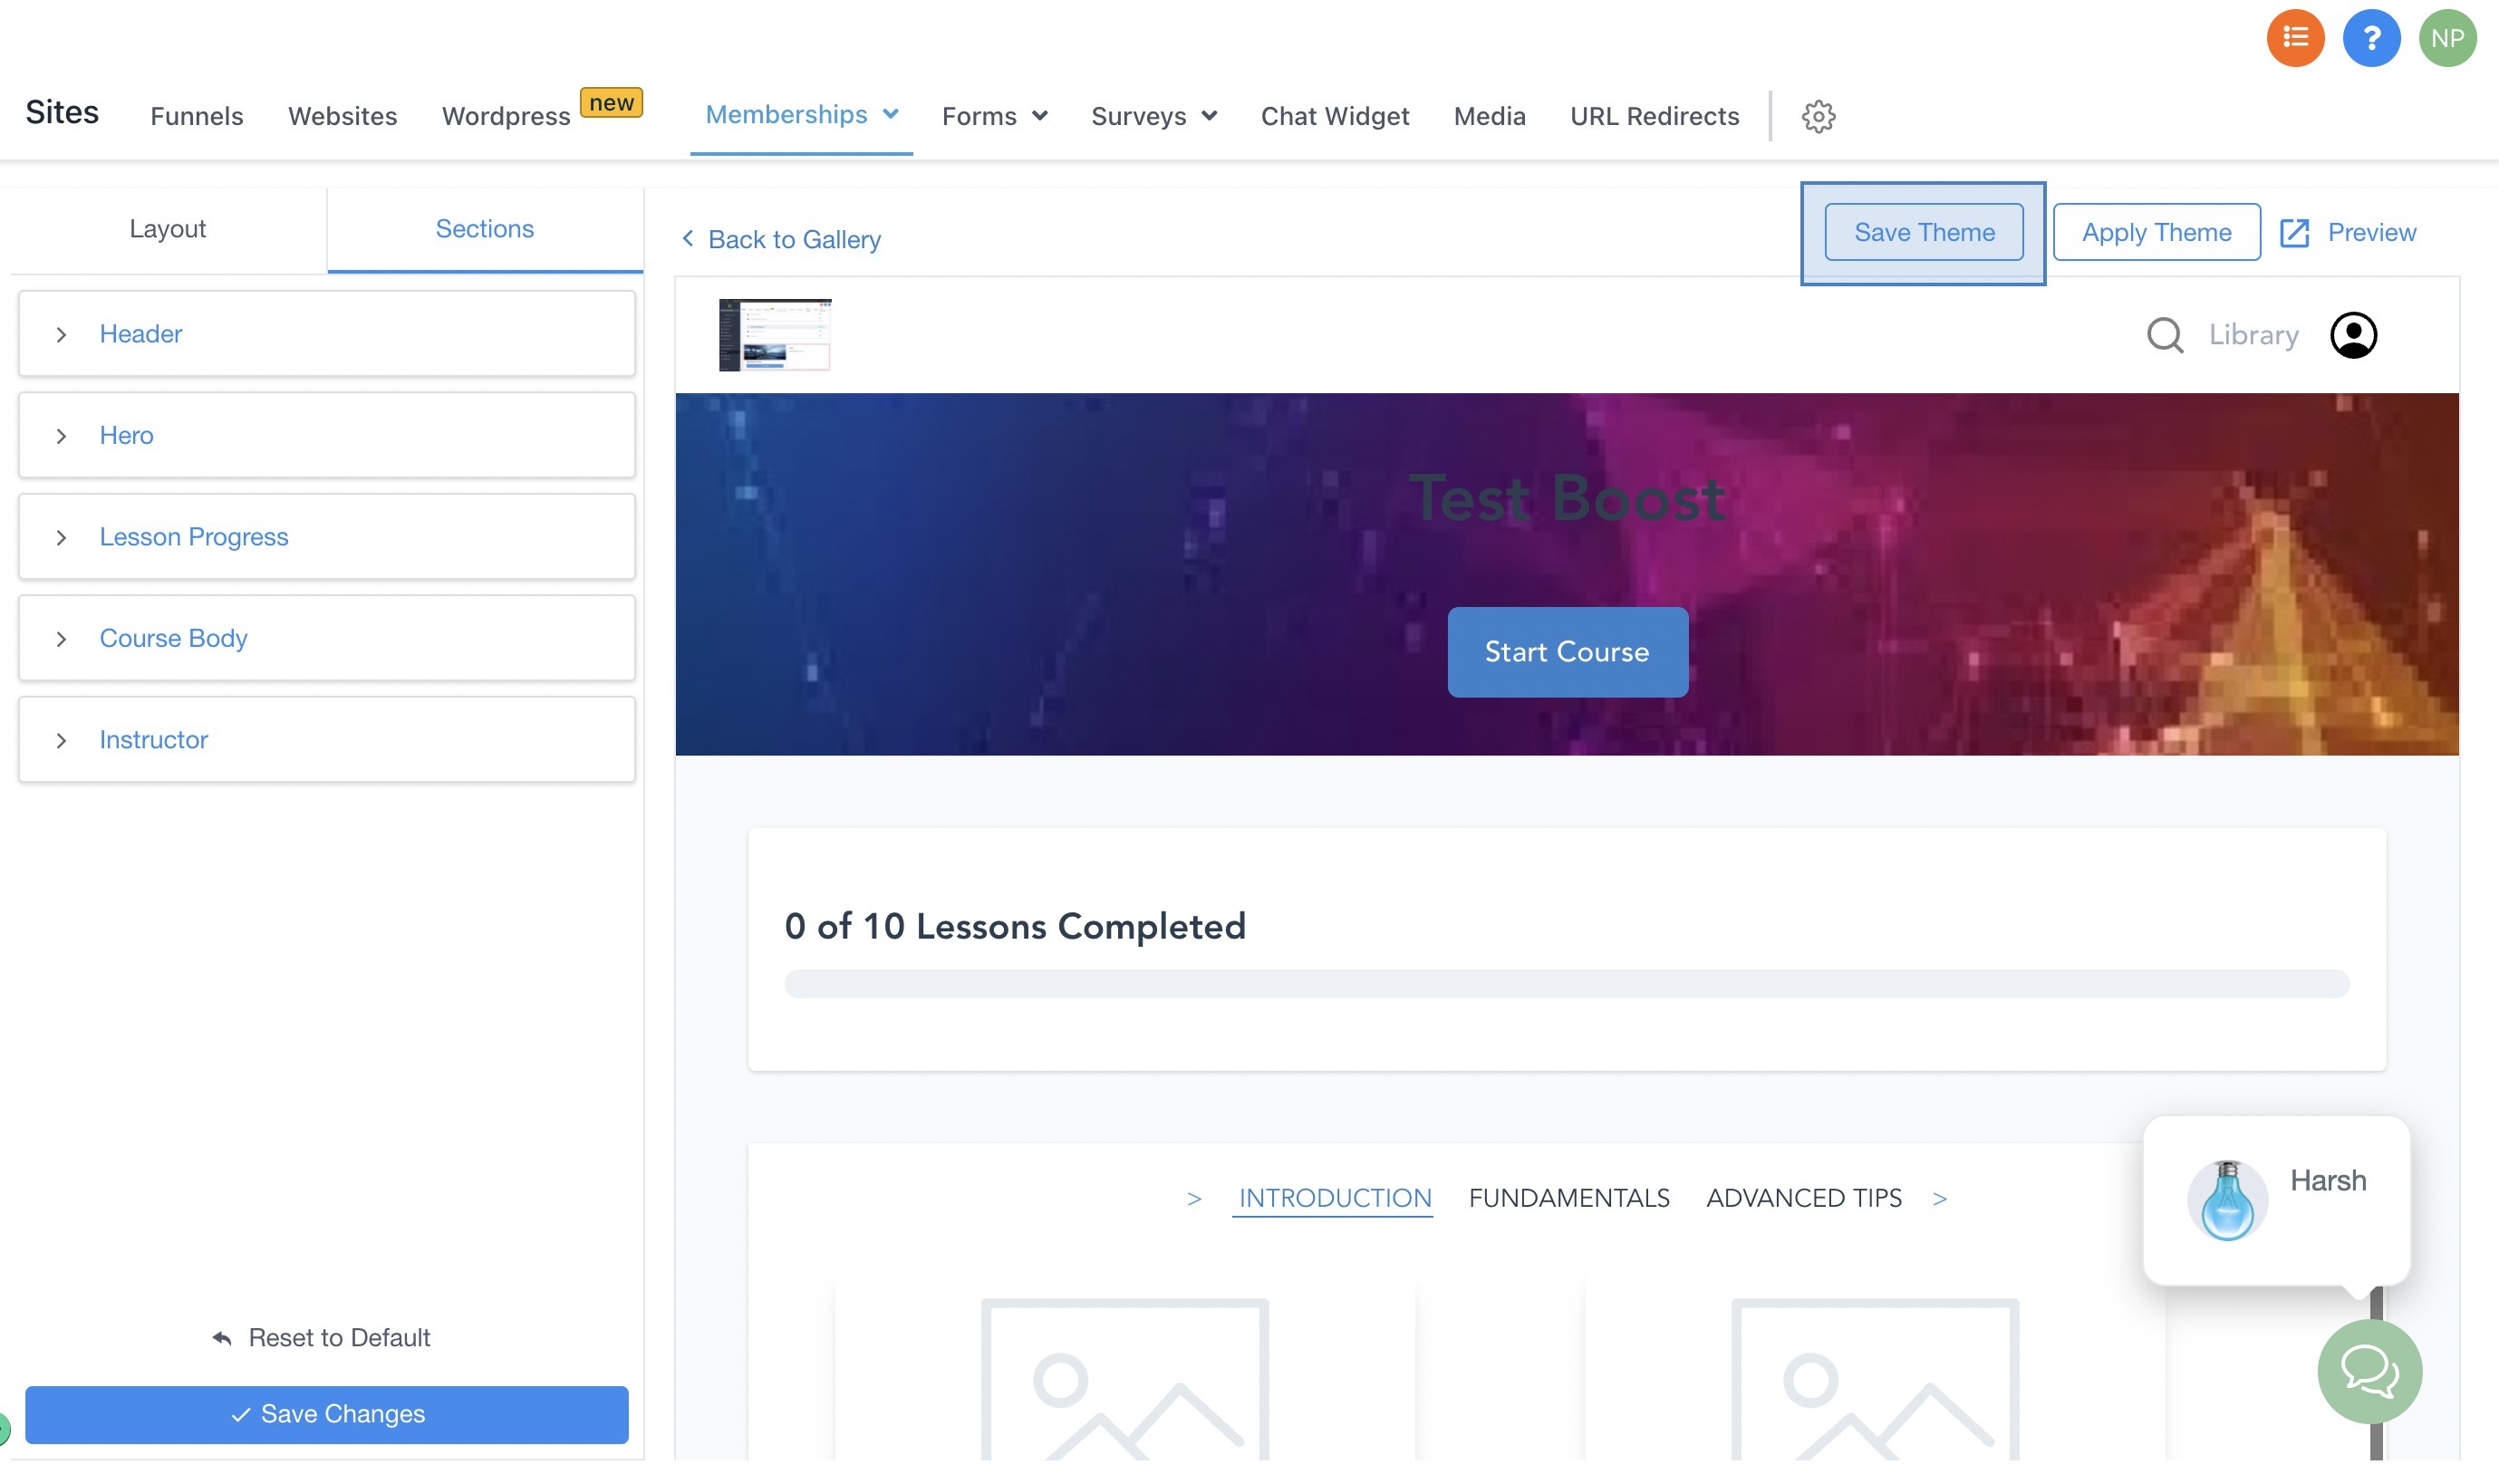
Inside the Theme gallery you can click Customize to open a builder. The left hand sidebar lists each page section, Header, Hero, Lesson Progress, Course Body, Instructor, etc. Clicking a section reveals its specific options such as background colour, alignment, font type and size. Above the sections, global theme settings let you set primary and secondary colours, primary and secondary fonts, and decide where the logo appears.
After making changes you either Apply the theme to the current product or Save Theme to store the customized version for use in other locations. Saving changes without applying creates a draft that can be applied later. All modifications are reflected in a live preview once you click Save Changes.
03How businesses use membership themes
- Online coaching program. The coach selects a theme that matches the program’s palette, edits the hero background and button colours, then applies the theme so members see a branded landing page when they log in.
- Educational course library. An administrator opens the Theme builder, changes the primary font for lesson titles and adjusts the instructor section fonts, then saves the theme to reuse it for future courses.
- Member only community. The community manager customizes the Header alignment and logo placement, modifies the hero size, and applies the theme so all community members experience a consistent look.
04How to set up and use membership themes in HighLevel
Choose a product theme
- Open the product you wish to theme.
- Click the Customize button.
- In the Theme gallery, select a system theme and confirm.
Customize your theme
- Within the Theme gallery, click Customize to launch the builder.
- Select a section from the left sidebar to view its options.
- Edit the global theme settings such as colours, fonts, and logo placement.
- Adjust the chosen section’s properties like background, alignment, or size.
- Click Save Changes to update the live preview.
Apply or save your theme
- Return to the product’s Customize view and open the Theme gallery.
- Click Apply on the desired theme or on the top right Apply button after saving changes.
- Press the Save Theme button if you want the customized theme available across locations.
05What it looks like in HighLevel
06Settings that matter
- Primary Color. Sets the colour for buttons, top icons, lesson progress indicators, course titles, category titles, lesson titles and instructor titles.
- Secondary Color. Defines the colour for instructor name, instructor description, lesson description, category description and button text.
- Primary Font. Applies the selected font to buttons, top icons, lesson progress, course titles, category titles, lesson titles and instructor titles.
- Secondary Font. Used for instructor name, instructor bio, lesson description, category description and button text.
- Logo placement. Chooses whether the logo appears in the header area or within the hero section.
- Header, Background. Sets a background colour for the page header.
- Header, Alignment. Aligns header content to the left, right or centre.
- Hero, Size. Selects the hero section size from extra small, small, medium or large.
- Hero, Course Title, Font. Changes the font style for the course title displayed in the hero.
- Hero, Course Title, Alignment. Aligns the course title within the hero section.
- Hero, Background, Color Picker. Chooses a background colour for the hero area.
- Lesson Progress, Background. Specifies a background colour for the lesson progress bar.
07Things to know before you rely on it
- Only system provided themes are available now; user created themes will appear in later releases.
- A preview updates only after clicking Save Changes; Reset to Default restores the original theme values.
- Section customizations made after changing theme settings will override those theme settings for that product.
- Save Changes stores edits as a draft for the product; unsaved changes are not retained.
- Save Theme records the latest saved changes for global use; it does not affect products already using the same base theme.
- Applying a theme via the Apply button affects only the selected product, not other products or locations.
08How it connects to the rest of HighLevel
- Set up and organise your course content before applying a theme. HighLevel course builder
- Generate password free access links that respect your brand style. HighLevel magic links
- Configure a white label PWA so members experience the themed product on mobile devices. White label membership PWA
Michael's take

I warn you not to rush into theme changes without first checking how they look in the preview. A mismatched color or font can hurt the professional feel you’re trying to convey.
When the design aligns with your brand, the member experience feels polished and cohesive.