
01Who this is for
- Online course creators can sell structured learning paths without manual enrollment.
- Coaches offering certification programs can package multiple modules and automate access after purchase.
- Fitness studios selling class memberships can bundle sessions and manage enrollment through the product.
02Products and membership course offers, explained
The product feature lets you define a sellable item that represents one or several membership courses. You set a title, description, media, pricing options and tax details, then attach a published membership offer. After a purchase, HighLevel automatically enrolls the buyer in the linked courses.
You find the product tools under the Payments section of the platform. From the Products submenu you can create, edit, and organize products, add variants, and configure SEO data. All settings are saved to the product record, and the linked offer governs the course access granted to customers.
03How businesses use products and membership course offers
- Online education platform. Create a product for each learning bundle, set the price, and attach the appropriate membership offer. When a student pays, the system enrolls them in the selected courses automatically. No extra steps are needed to grant access.
- Professional training consultancy. Define a product that includes several certification modules, choose recurring pricing if needed, and link it to a published offer. After a client completes payment, they receive immediate entry to all certified courses tied to that offer.
- Health and wellness membership site. Set up a product for a class package, upload a thumbnail, and enable the online store toggle. Attach the product to a membership offer that contains the classes. Purchasers are automatically added to the class schedule after checkout.
04The numbers and rules that matter
- Upload media files with a resolution of 1024×1024 and a size not exceeding 10MB.
05Before you start
- Create and publish the membership offer that you want to attach before building the product.
06How to set up and use products and membership course offers in HighLevel
Access the product creation interface
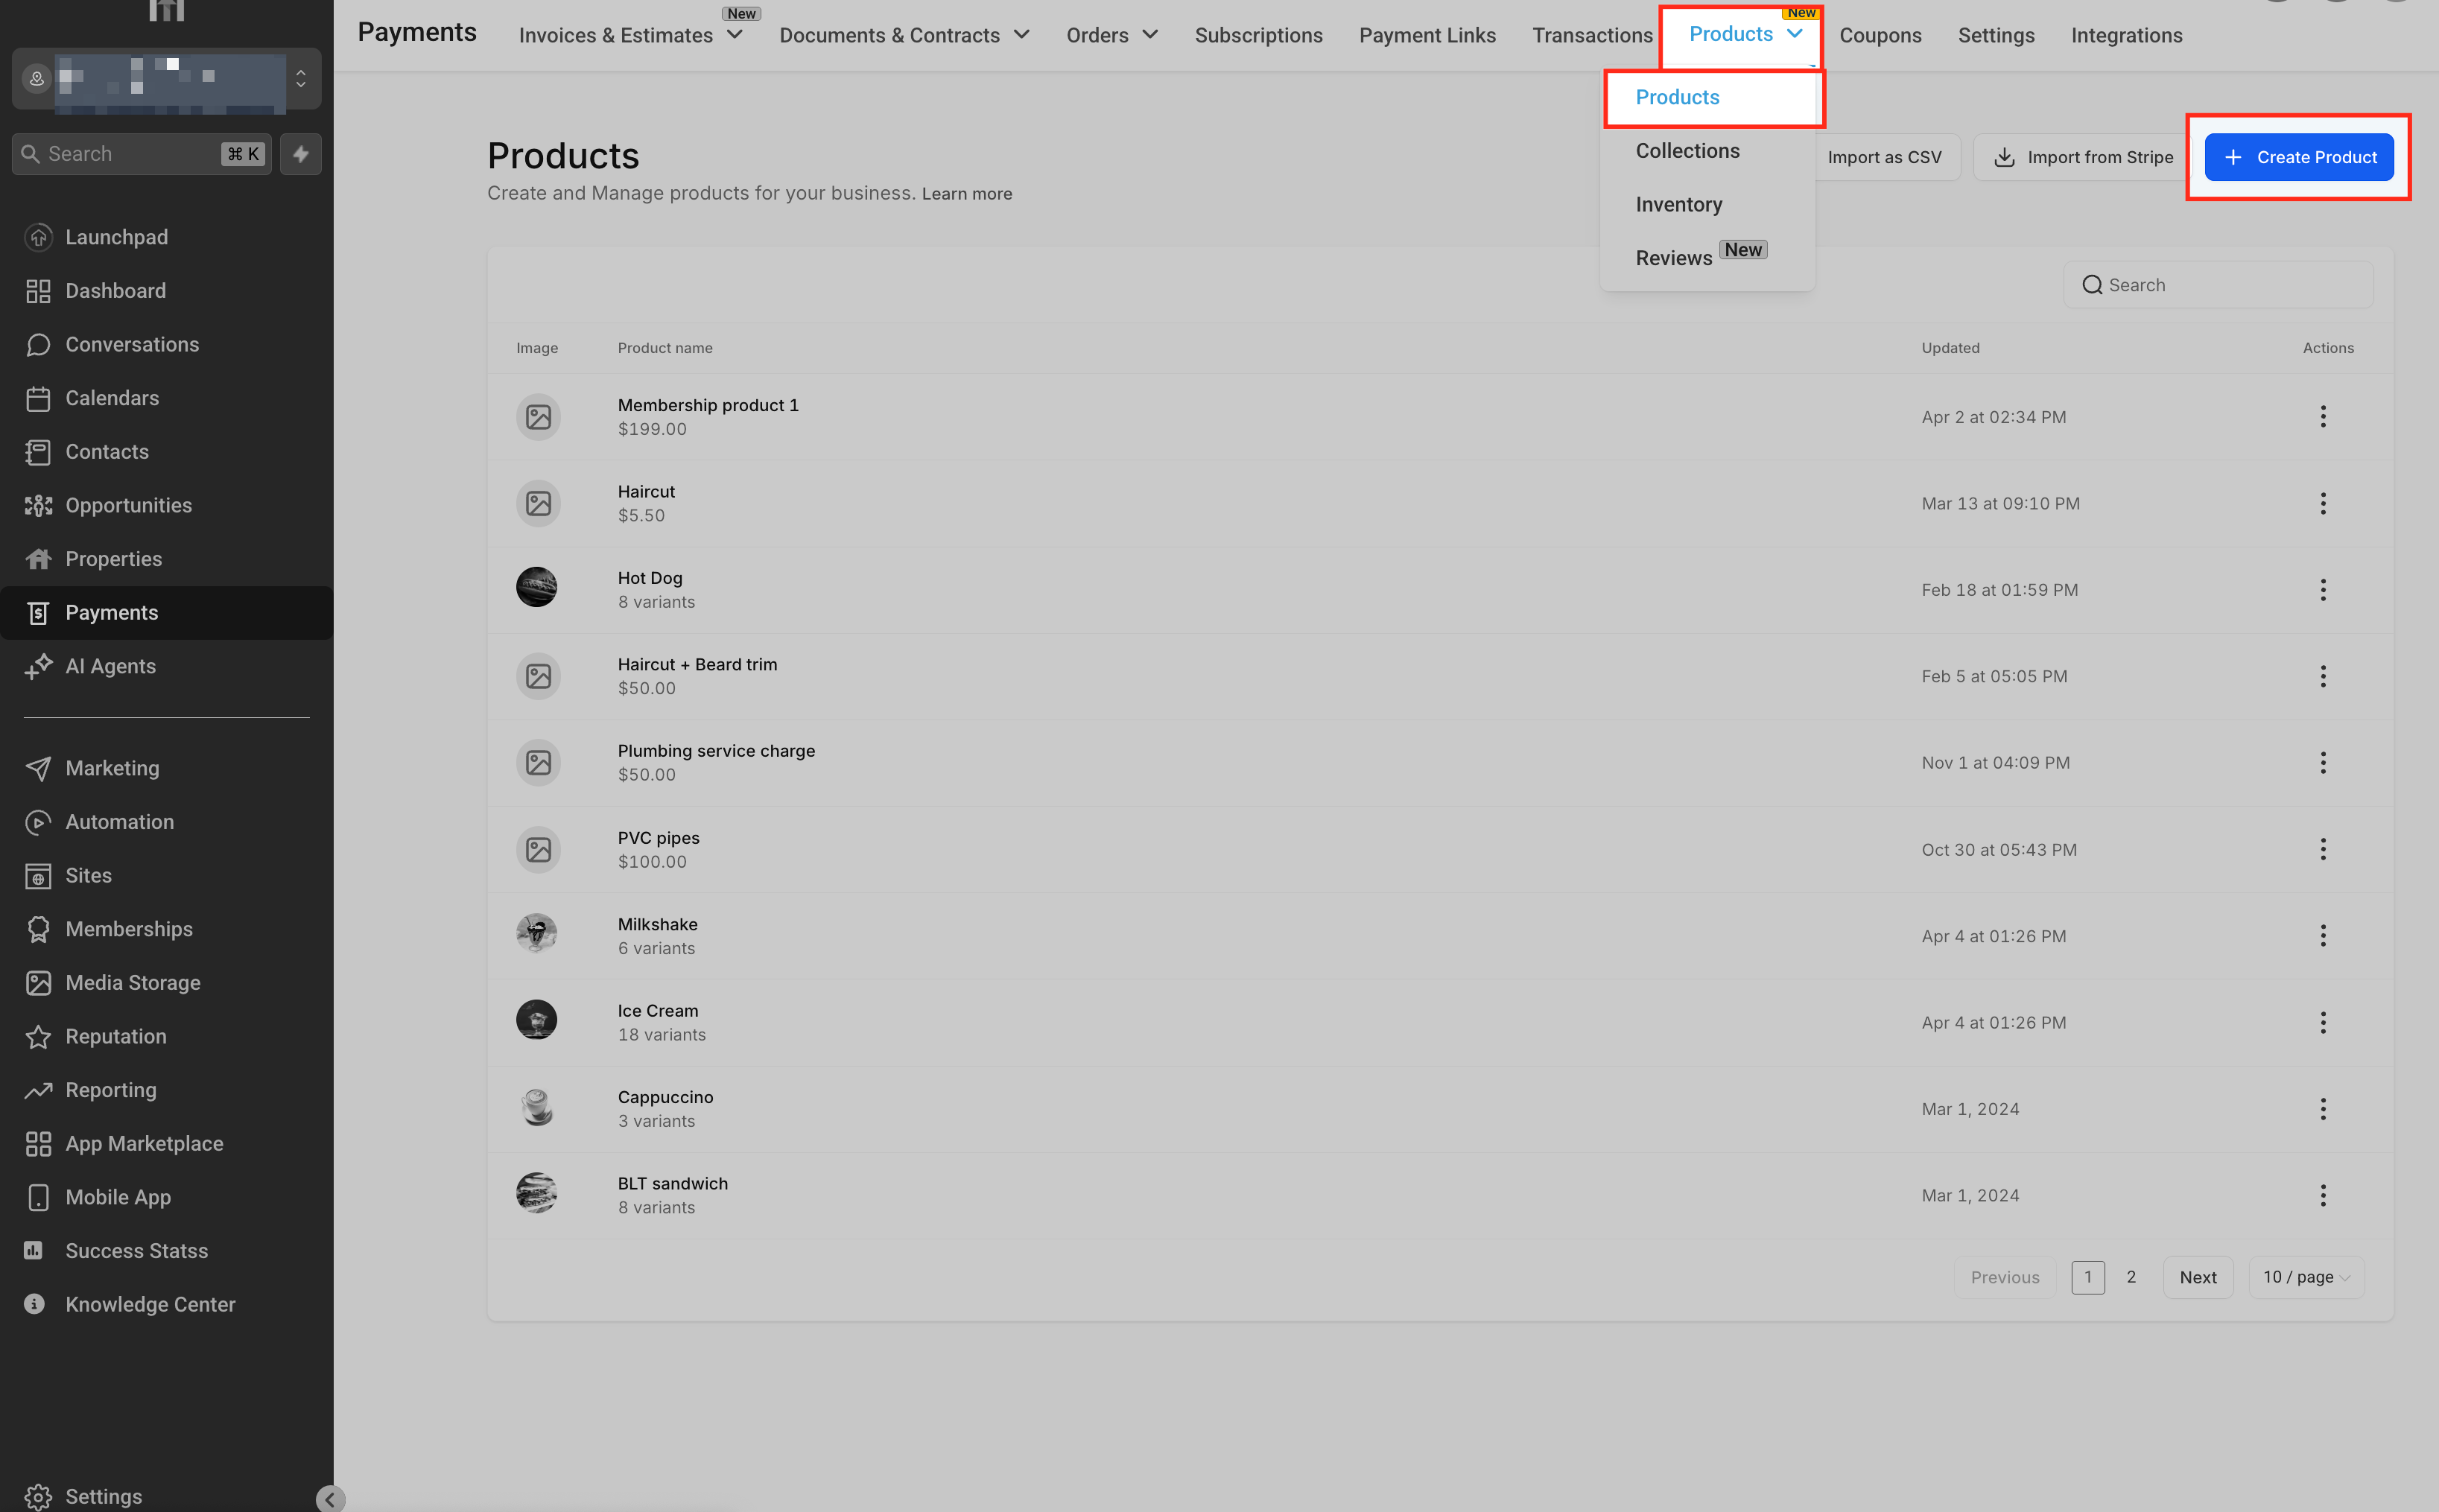
- Open the dashboard and click Payments in the left menu.
- Hover over Products in the top submenu and select Products.
- Press the blue + Create Product button at the top right of the screen.
Enter the basic product details
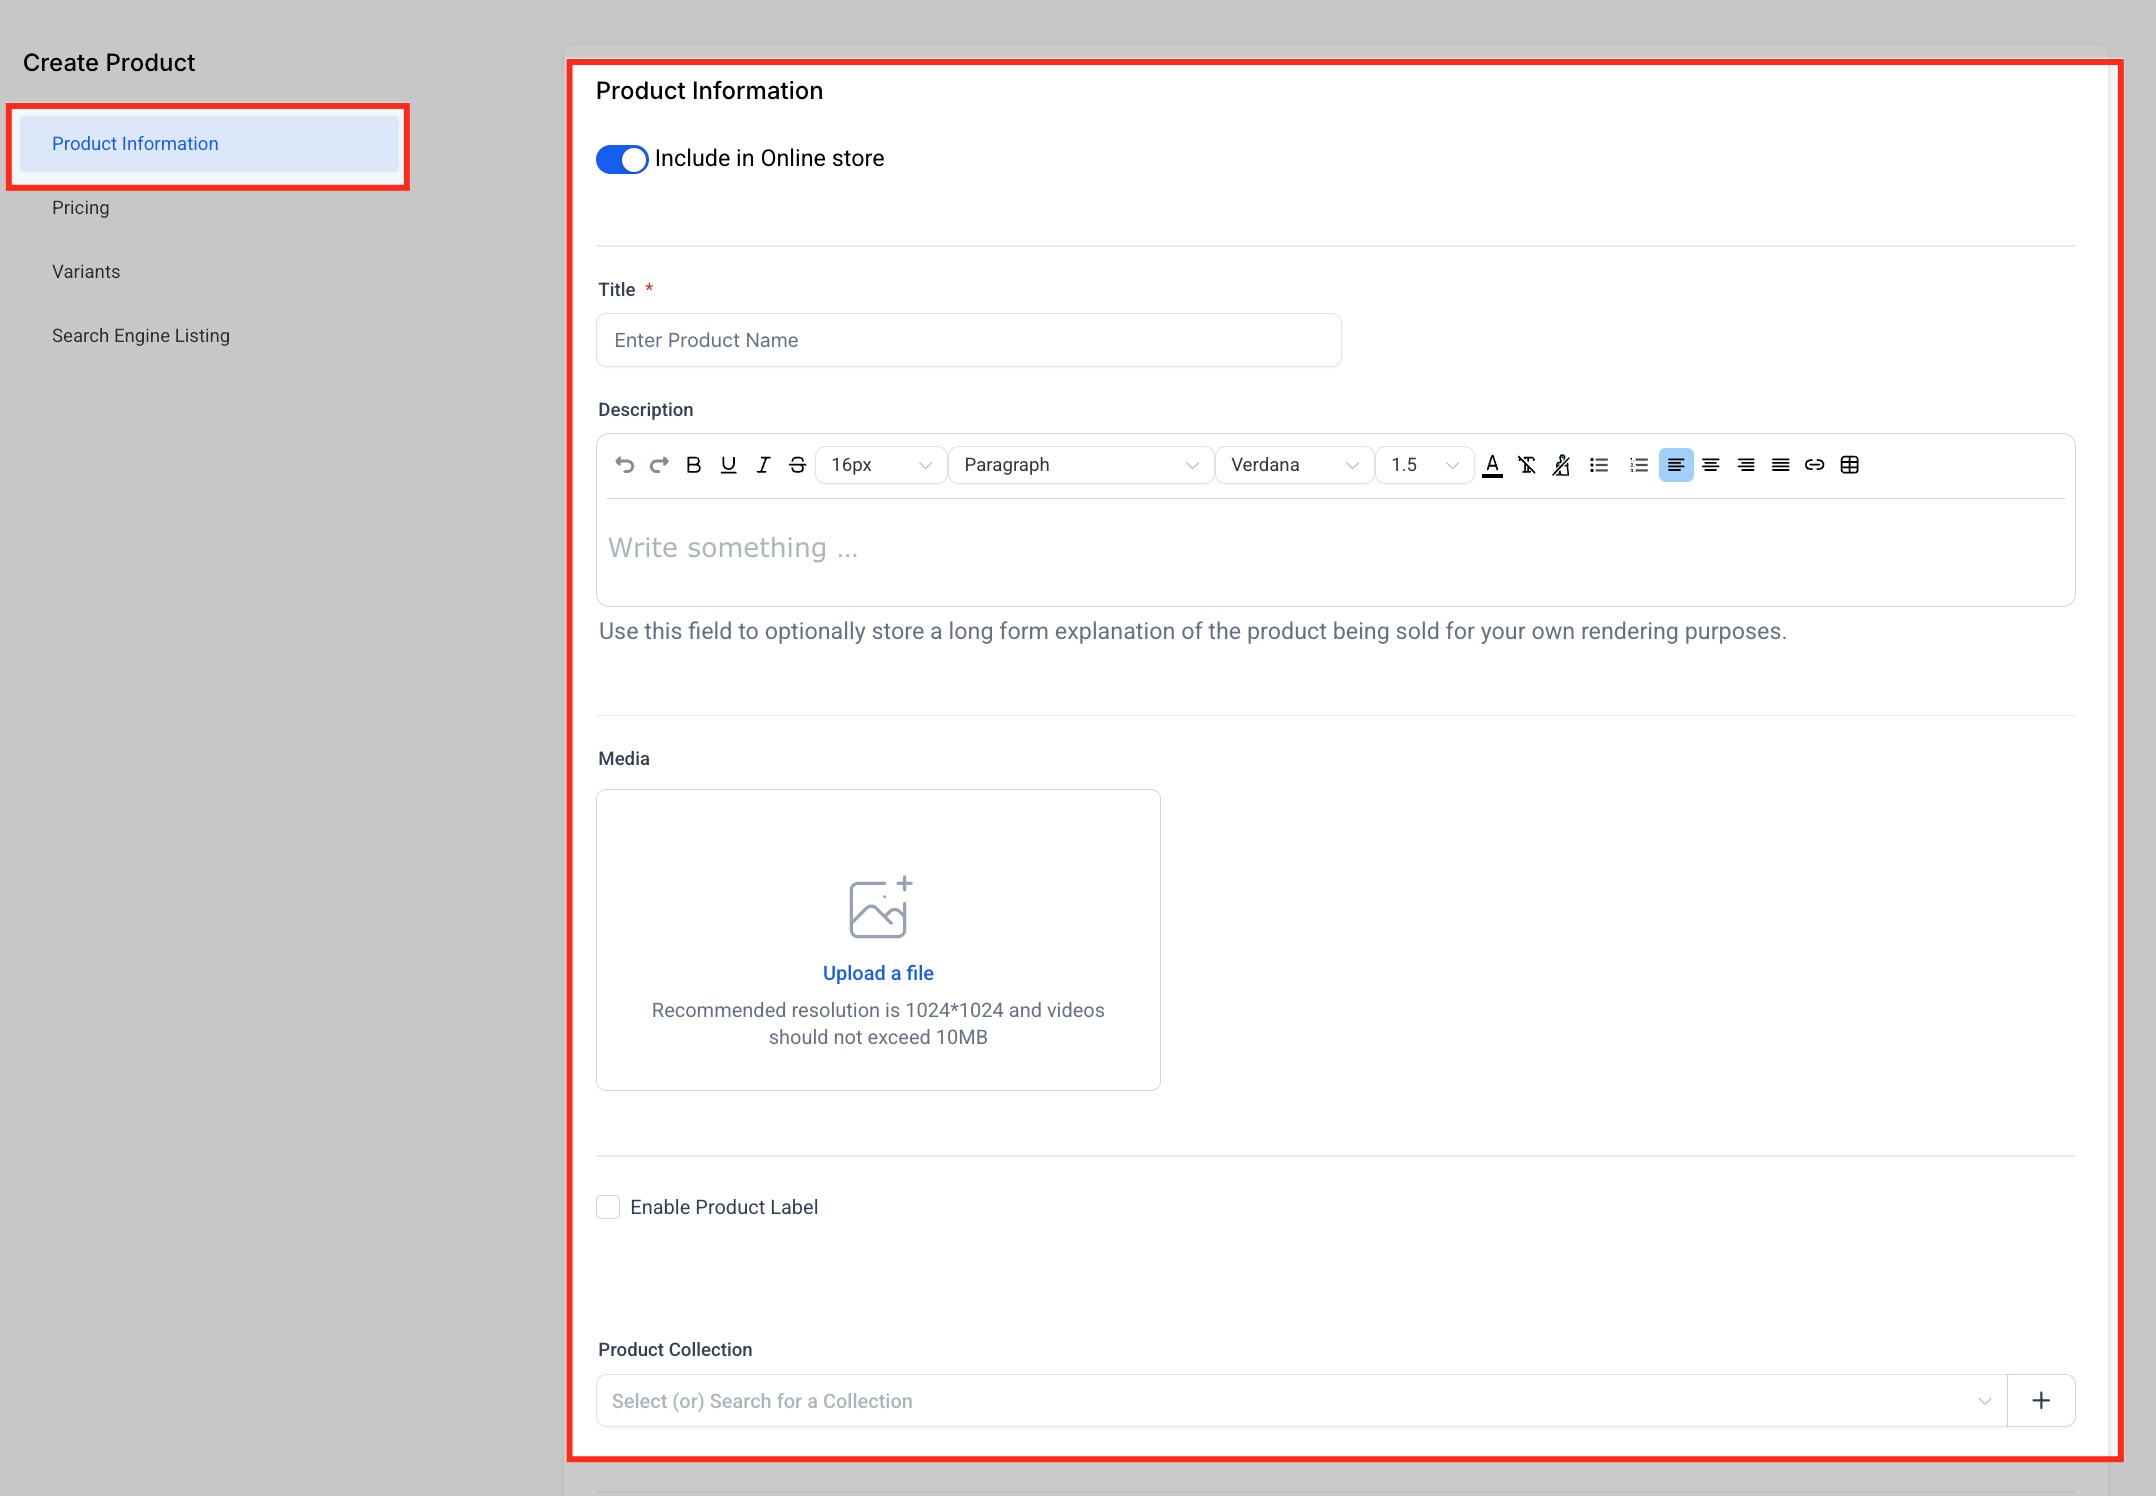
- Turn on the Include in Online Store toggle.
- Type a title for the product in the Title field.
- Write a description using the rich text editor.
- Upload an image or video in the Media section, keeping the file under 10 MB.
- Check the Enable Product Label box if a custom badge is needed.
- Select a collection from the Product Collection dropdown.
Set up tax configuration
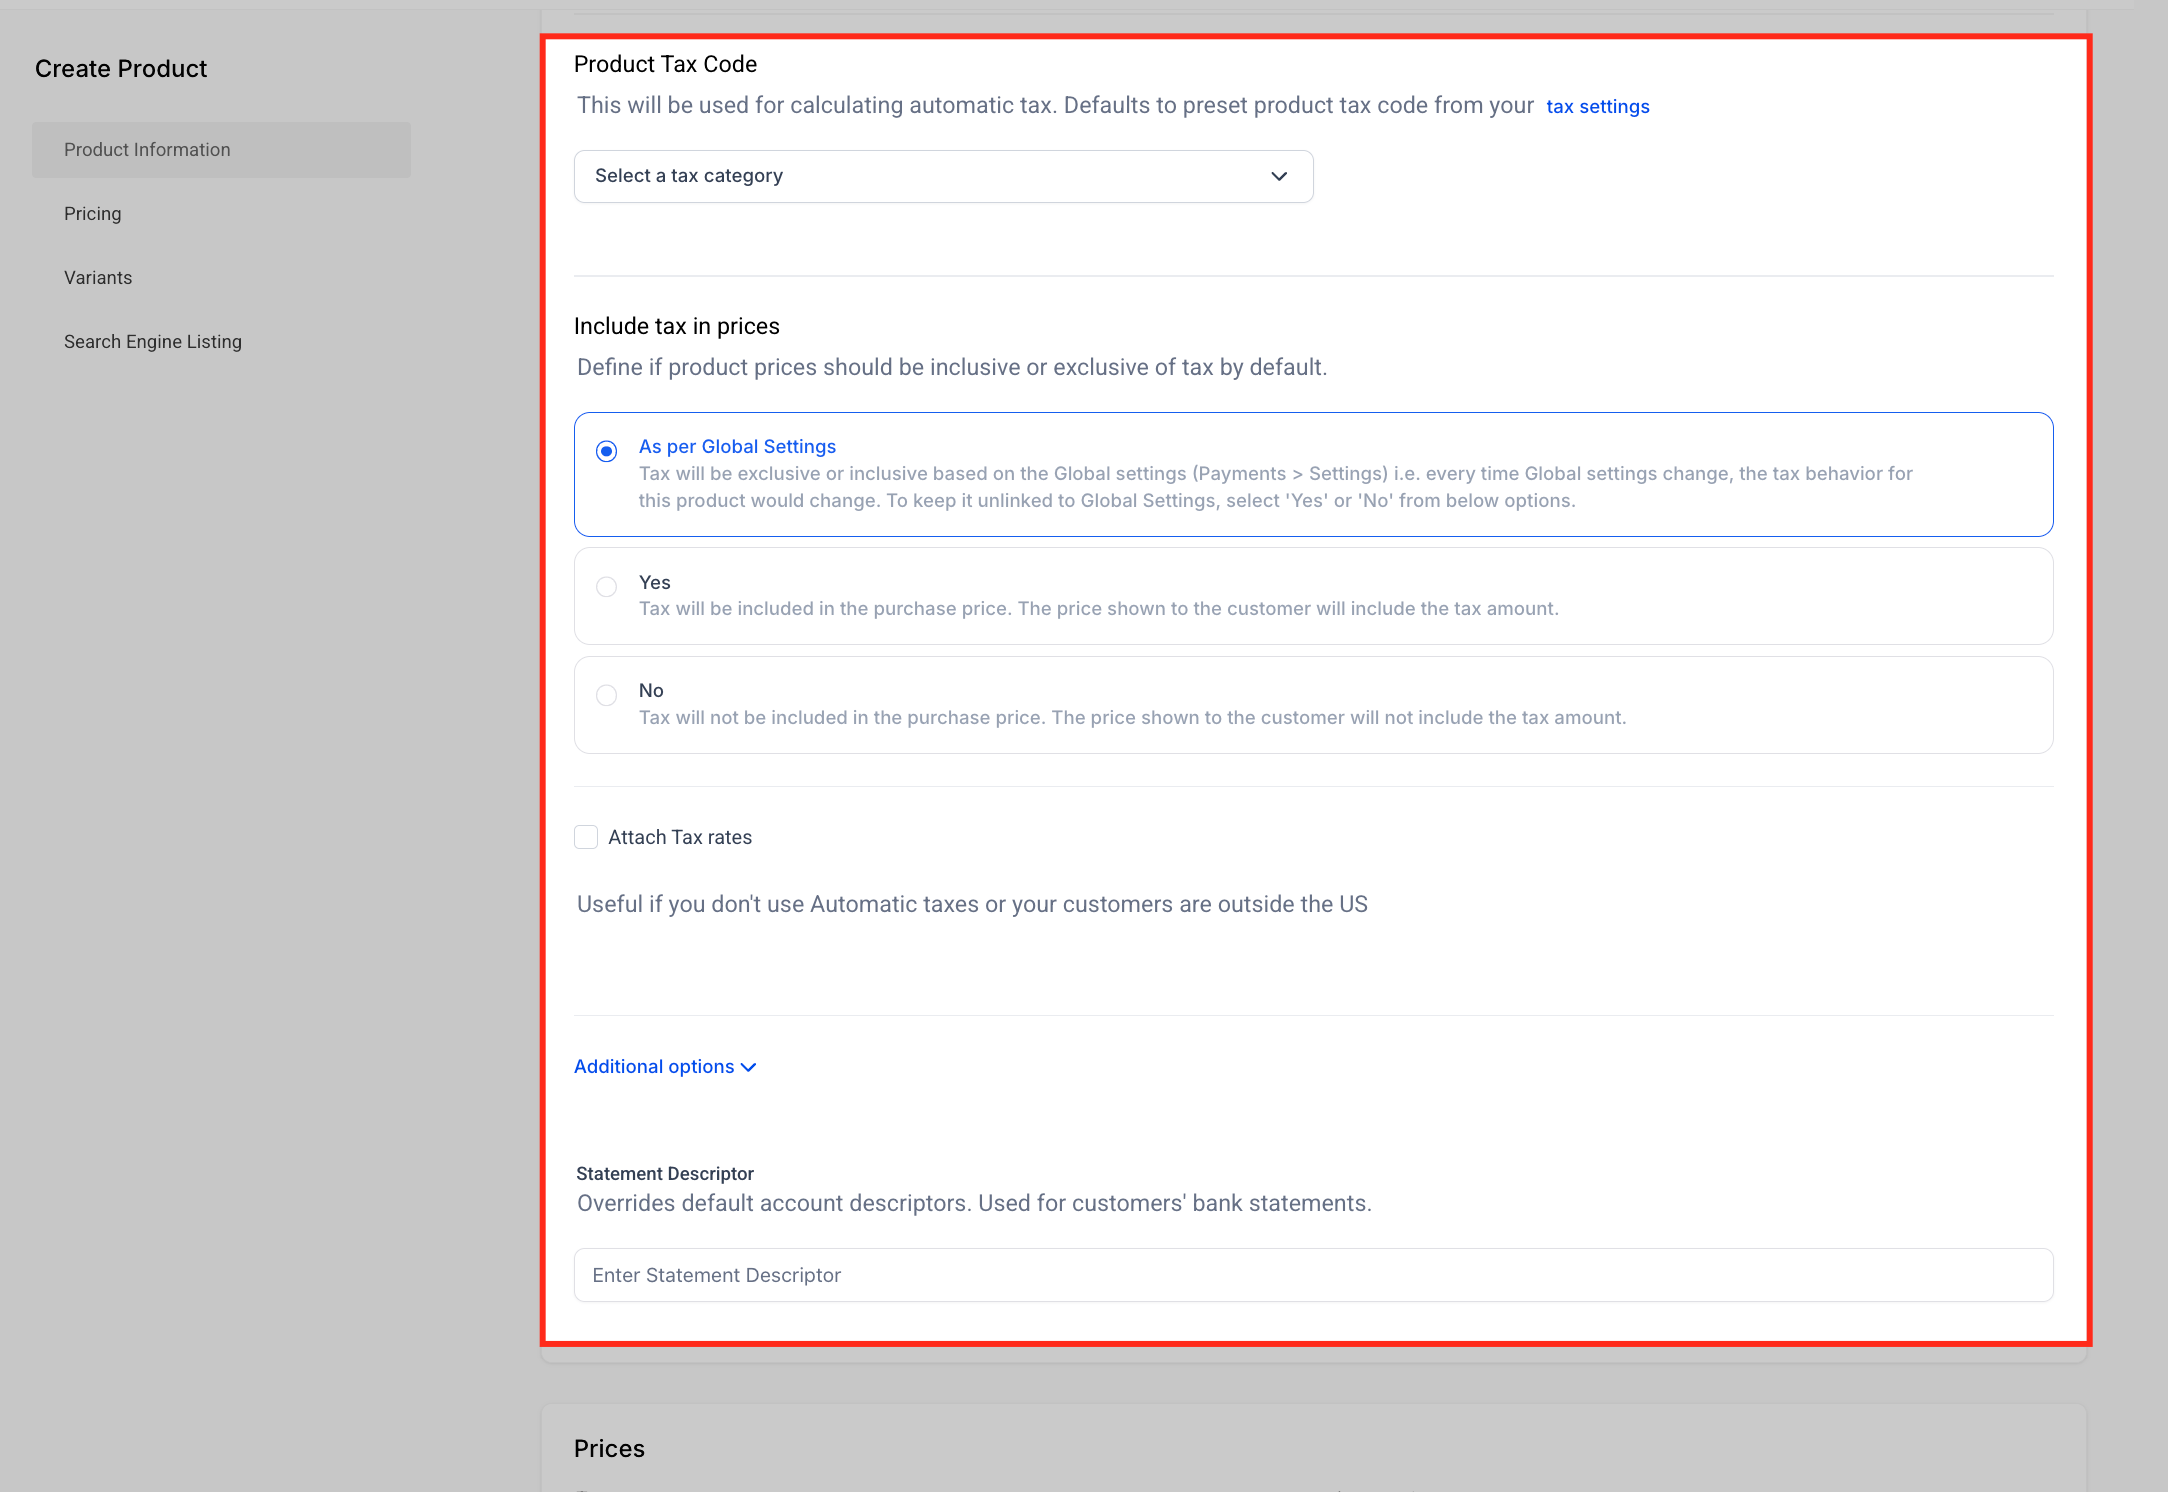
- Choose a value for the Product Tax Code field.
- Set the Include tax in prices option to Yes or No.
- Use the Attach Tax Rates option to add specific tax rates when required.
- Enter custom text in the Statement Descriptor field.
Define pricing for the product
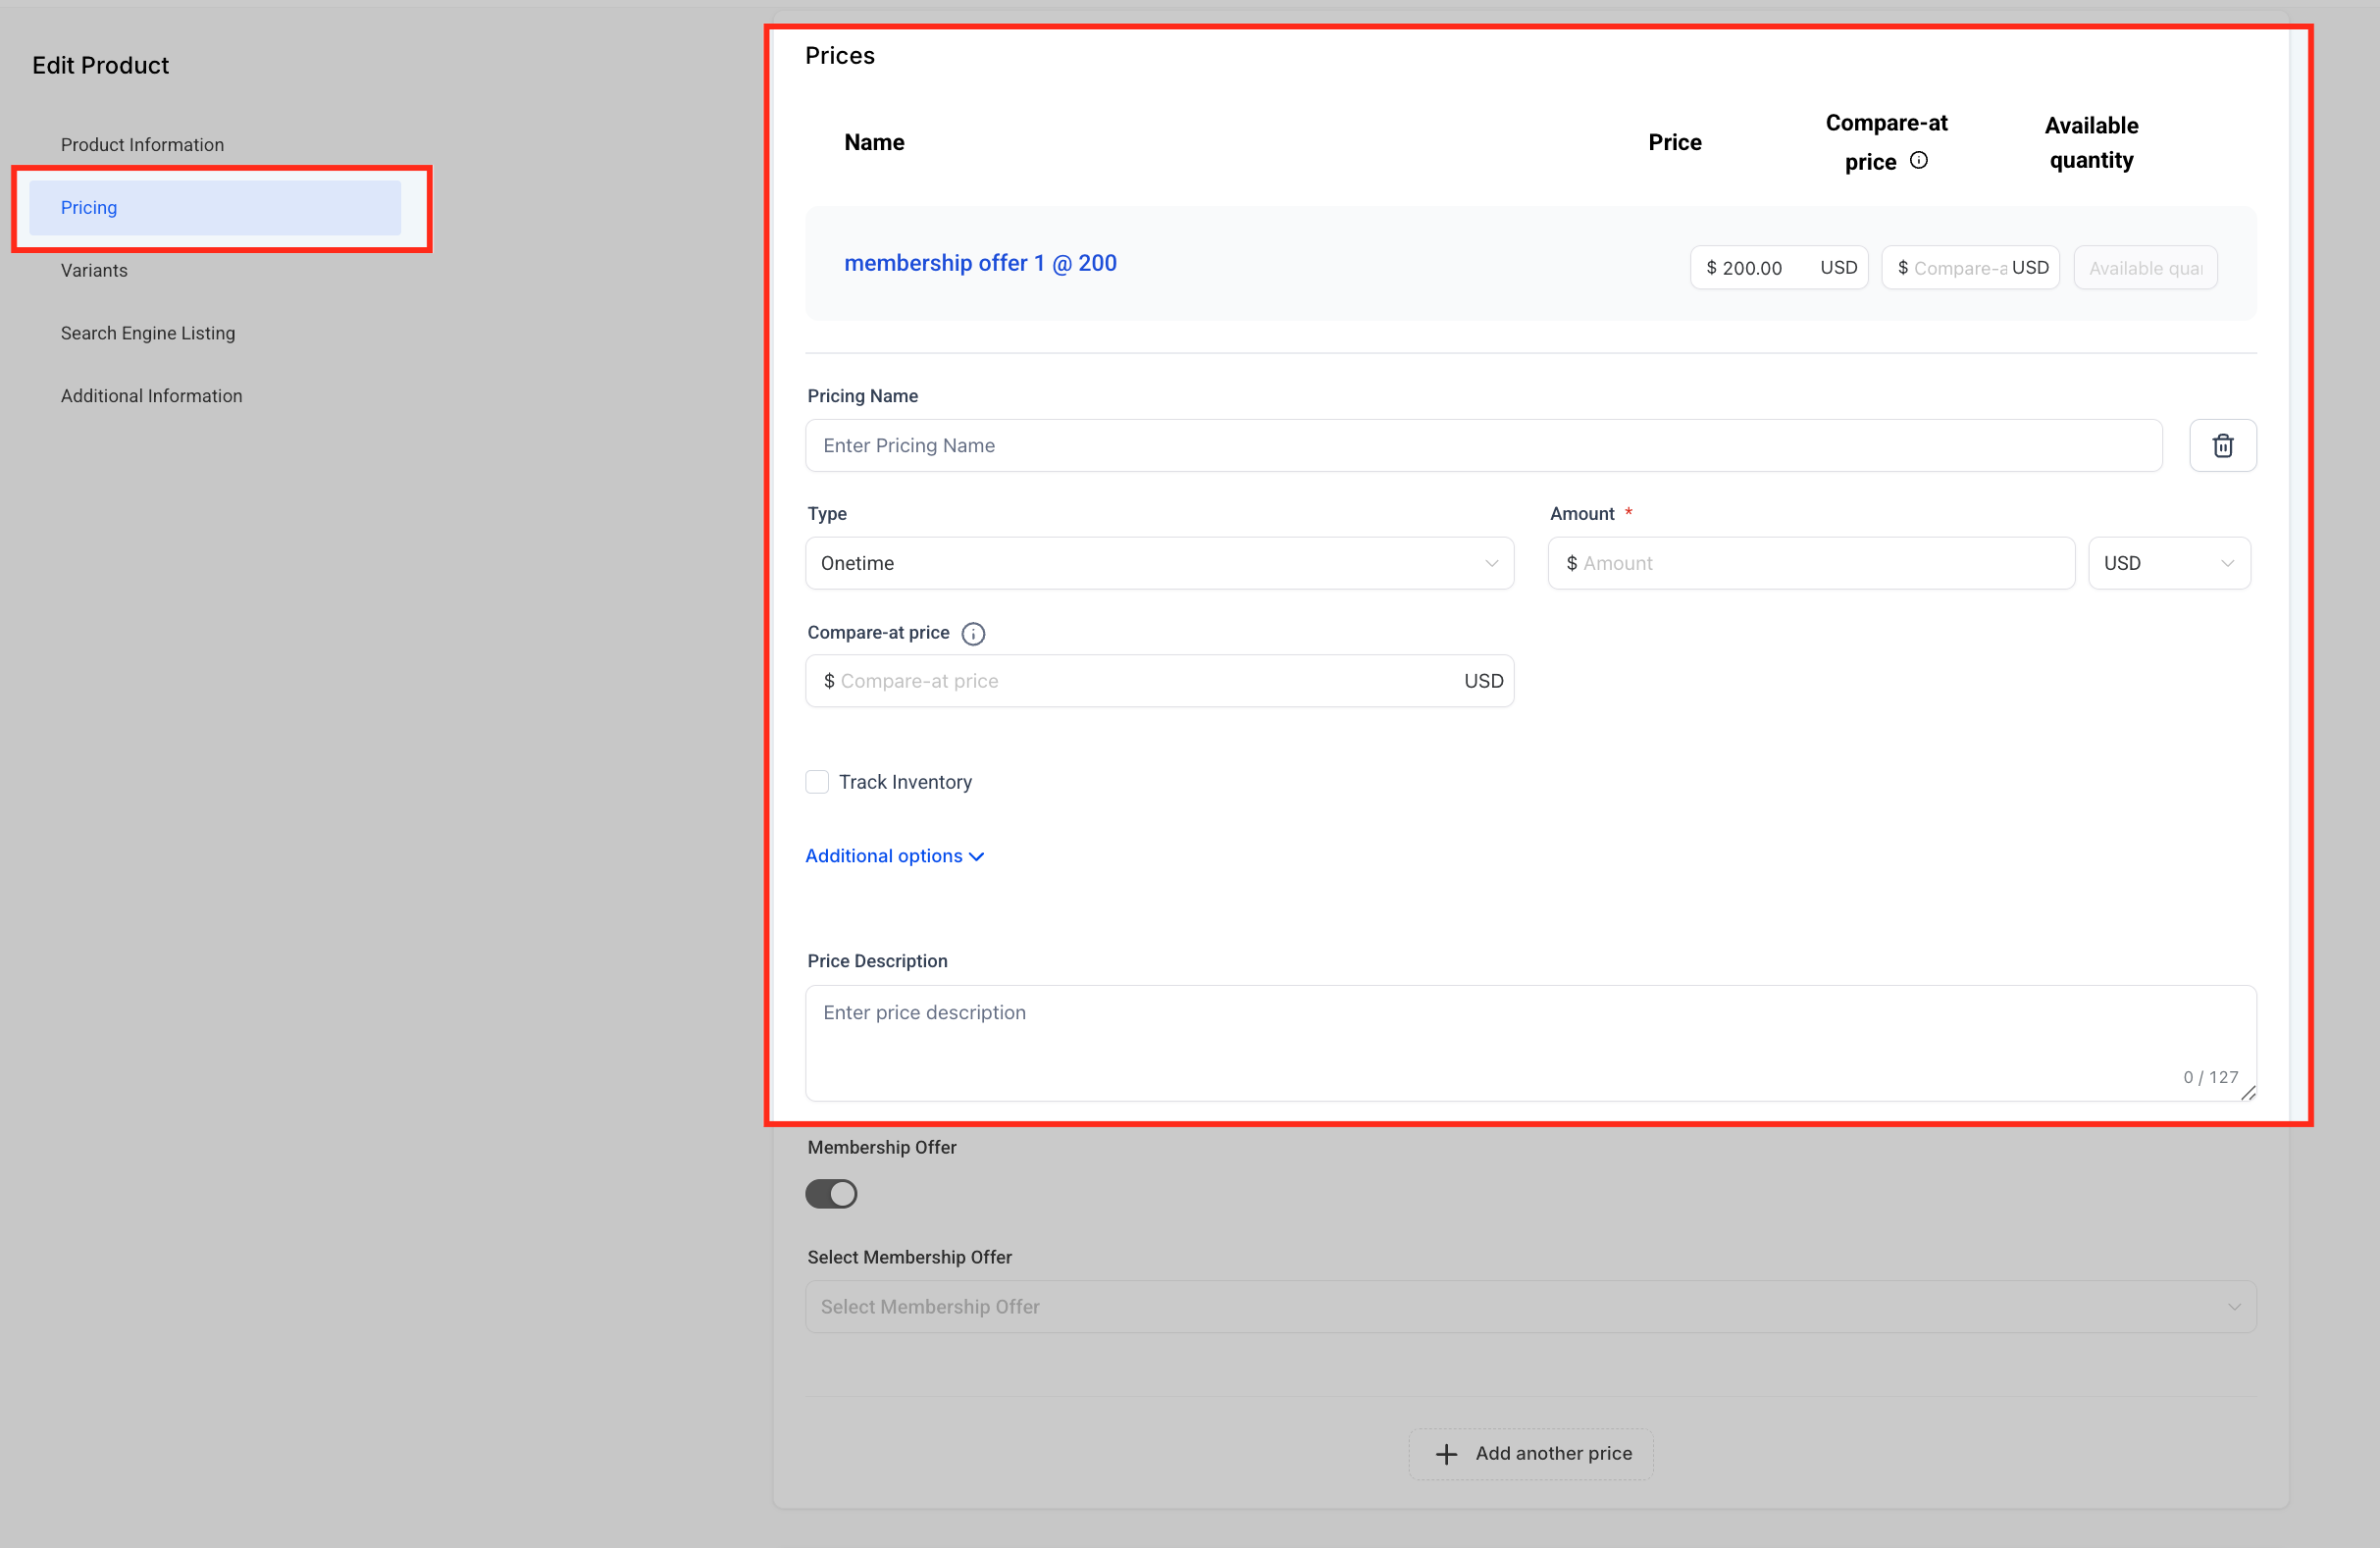
- Enter a name in the Pricing Name field.
- Select Onetime or Recurring from the Type dropdown.
- Input the price amount in the Amount field.
- Optionally fill the Compare at Price field to show a discounted original price.
- Choose the currency with the Currency selector.
- Check Track Inventory if you need to monitor stock levels.
- Click Additional Options to reveal extra settings and adjust them as needed.
- Add a brief note in the Price Description field.
Create product variants
- Enter an option name such as Course Level.
- List the option values (e.g., Basic, Premium) and click Done.
- Assign individual prices, compare at prices, and quantities to each variant.
- Enable Track Inventory for a variant if you want to limit its sales.
Improve search engine visibility
- Fill the SEO Title field with a concise, keyword rich title.
- Write a short summary in the SEO Description field.
- Define a unique slug in the Handle field for the product URL.
07What it looks like in HighLevel
08Settings that matter
- Include in Online Store. Controls whether the product appears in the public storefront.
- Enable Product Label. Allows assignment of a custom badge or label to the product.
- Product Tax Code. Selects the tax category used for automatic tax calculations.
- Include tax in prices. Determines if tax is built into the displayed price or shown separately.
- Attach Tax Rates. Adds specific tax rates manually when automatic calculation is not used.
- Statement Descriptor. Overrides the name that appears on a buyer’s bank statement.
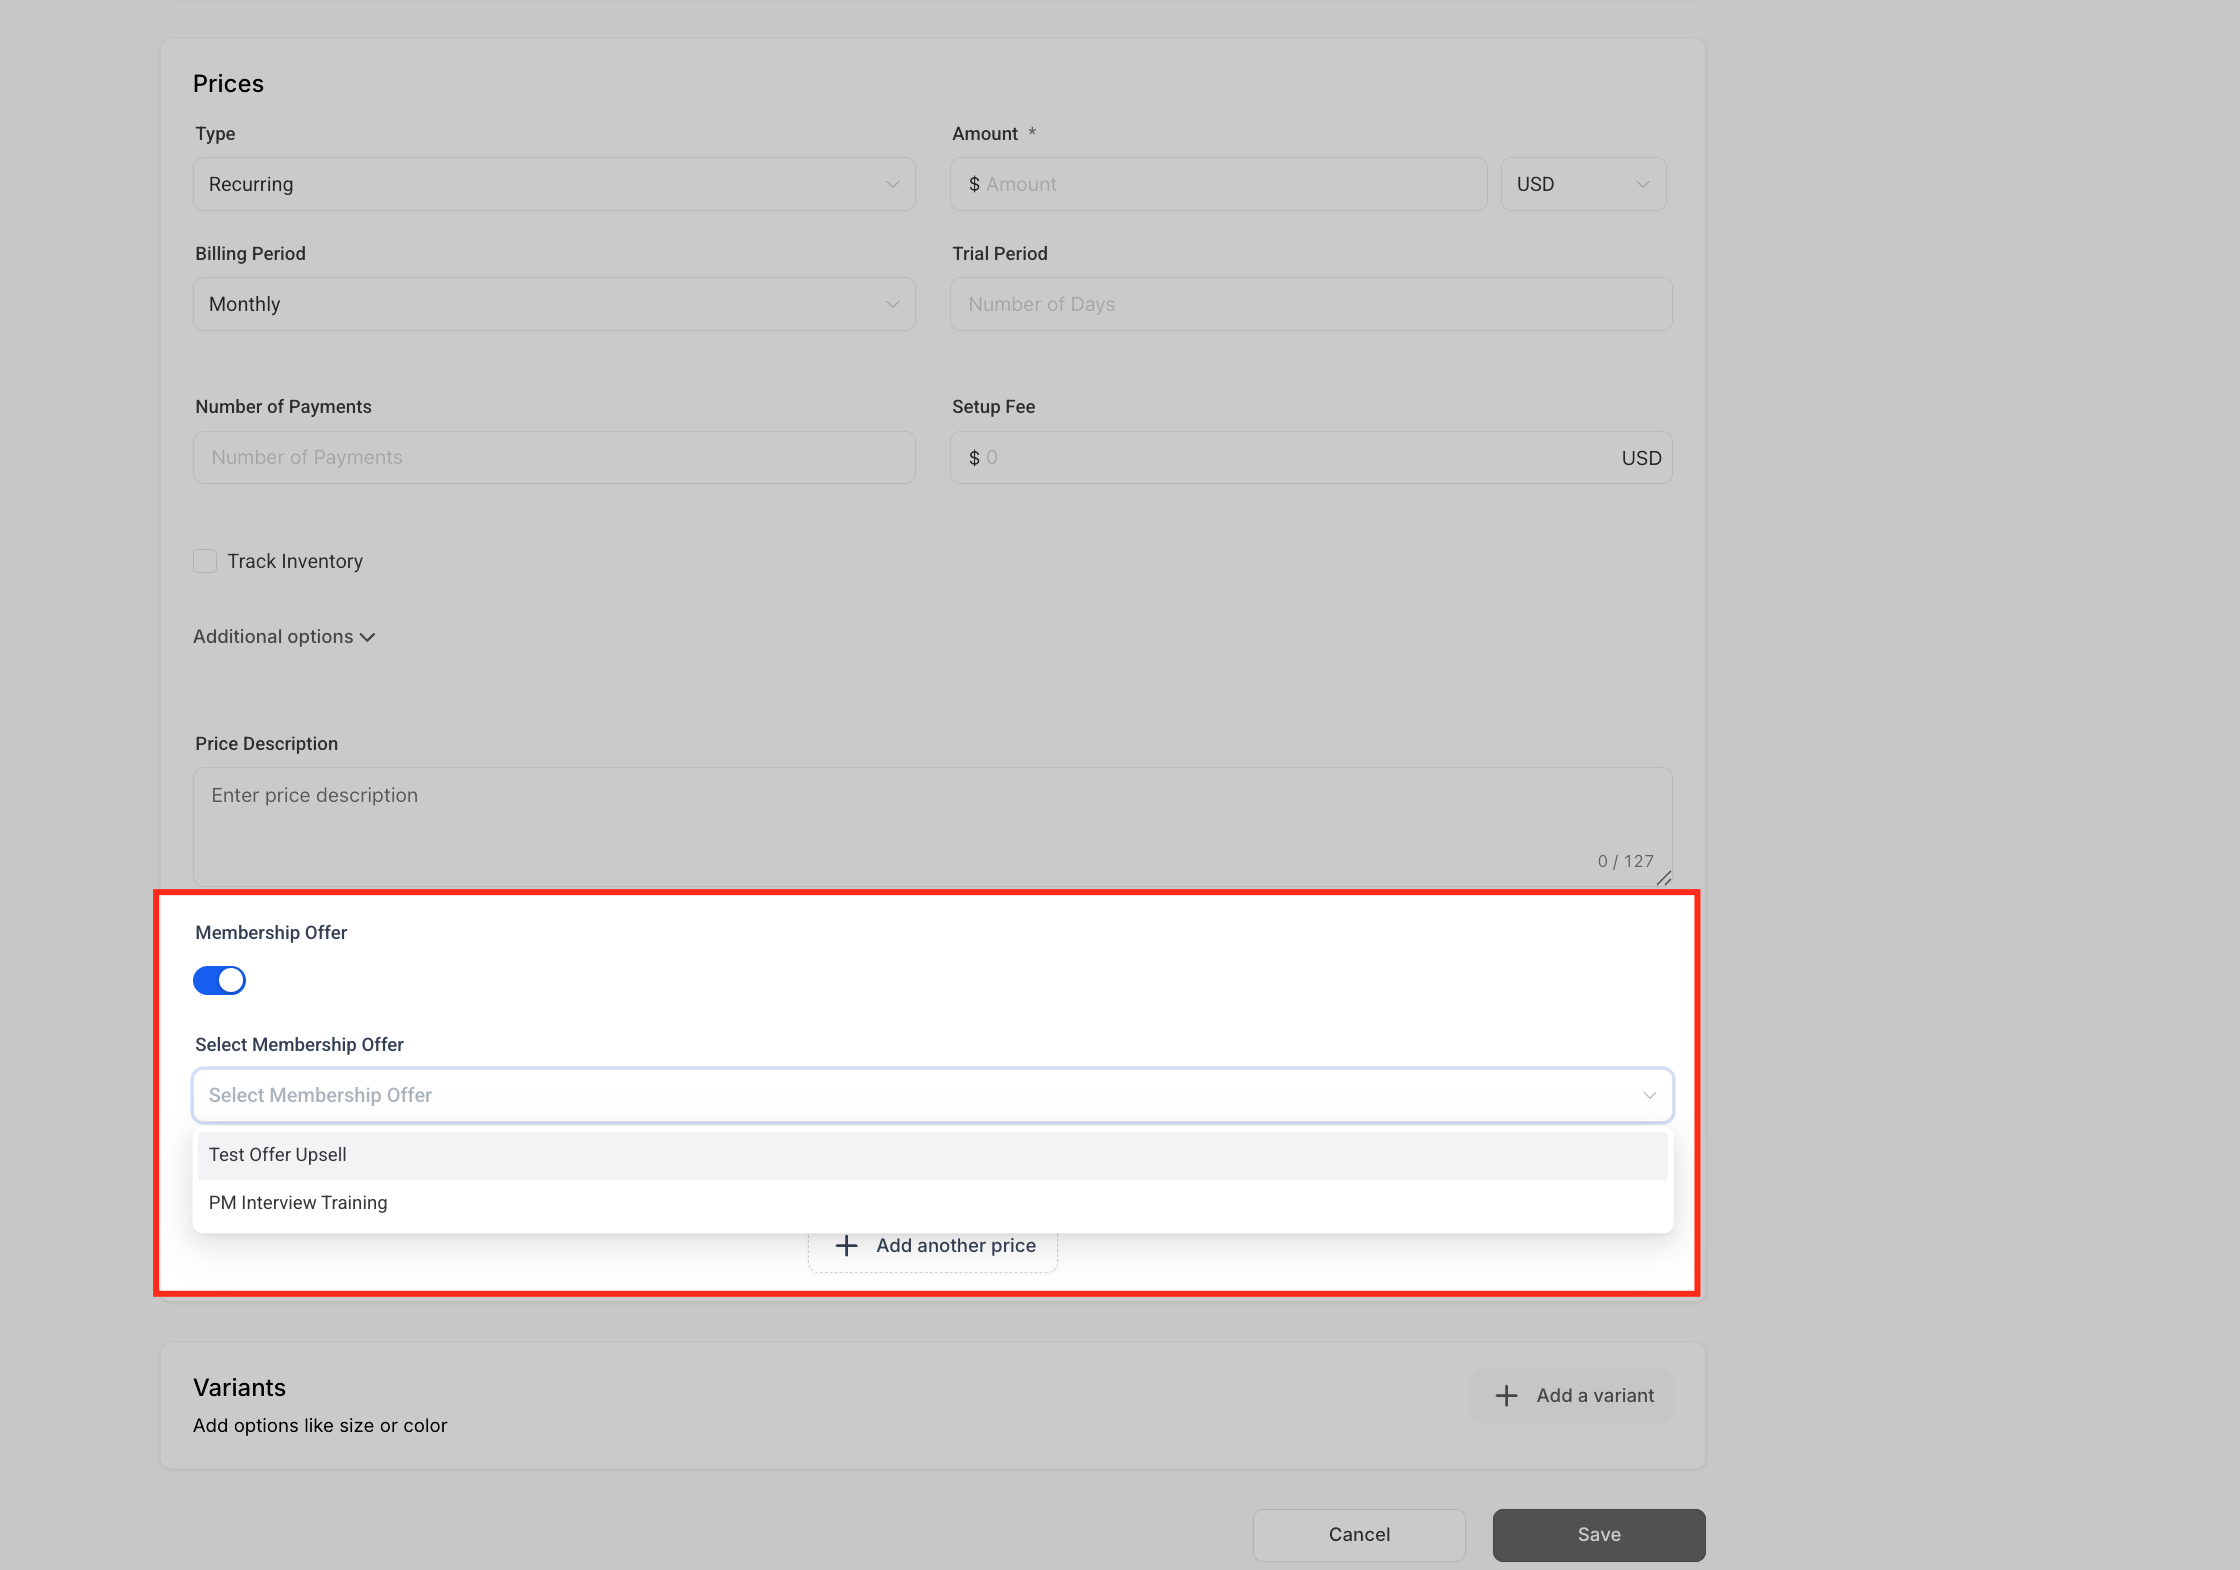
- Membership Offer. When enabled, links the product to a published membership offer for automatic enrollment.
- Pricing Name. Provides an internal label to identify a particular pricing entry.
- Type. Chooses between a one time charge or a recurring subscription.
- Track Inventory. Activates inventory tracking for the product or each variant.
- SEO Title. Sets the title that search engines display in results.
- SEO Description. Provides the meta description shown by search engines.
09Things to know before you rely on it
- Media files should not exceed 10 MB and are recommended to be 1024 × 1024 pixels for optimal display.
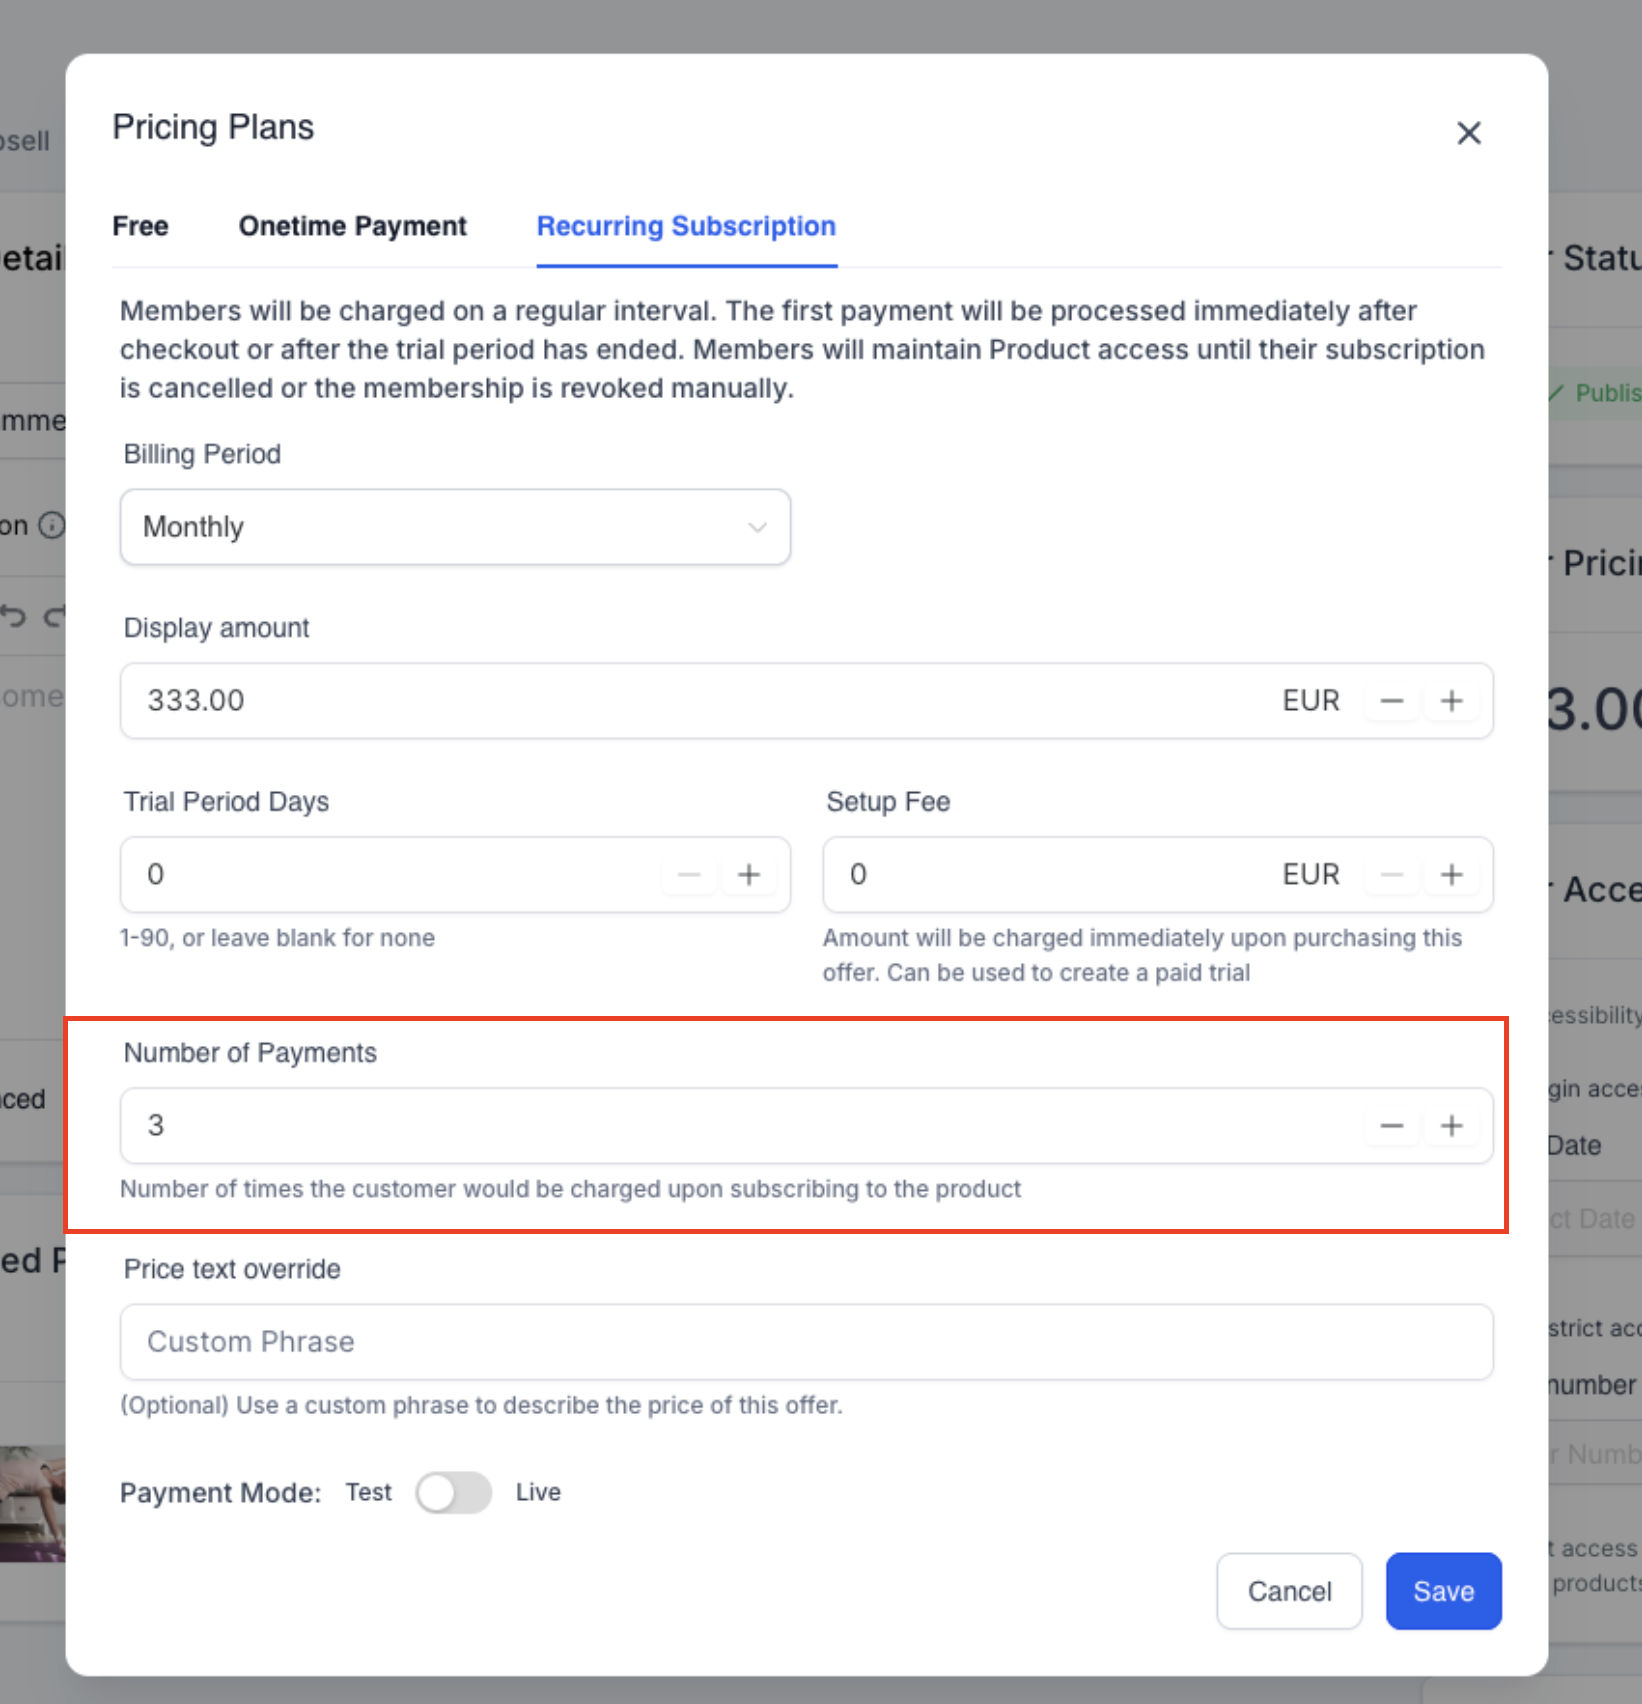
- If a recurring pricing entry includes a set number of payments, the subscription ends and is cancelled after that number of payments.
- Only published membership offers appear in the Membership Offer dropdown during product setup.
- Leaving the Product Tax Code blank applies the account’s default global tax settings.
10If something goes wrong
- Membership offer does not appear in the product dropdown. Publish the offer first; only published offers are selectable.
- Buyers do not receive login credentials. Enable the Send Welcome Email option in Membership settings.
- Need to remove a payments product. Delete the associated offer; the product is removed automatically.
11How it connects to the rest of HighLevel
- Learn how to build courses and membership sites Course builder guide
- Generate password free access with magic links Magic links overview
- Review HighLevel pricing and plan options HighLevel pricing
Michael's take

Wondering if you really need to tie a product to a membership offer? It’s the cleanest way to let HighLevel do the heavy lifting. You set the product, choose the offer, and the system enrolls buyers without any manual follow up.
If I were building a new course, I’d create the product first, make sure the offer is published, then enable the Membership Offer toggle so that after purchase the buyer is enrolled in the offer.