
01Who this is for
- Course creators who need consistent branding across all lessons.
- Marketing agencies that manage client training portals and want easier navigation.
- Coaches delivering video modules who require quick visual cues for learners.
02Lesson thumbnails, explained
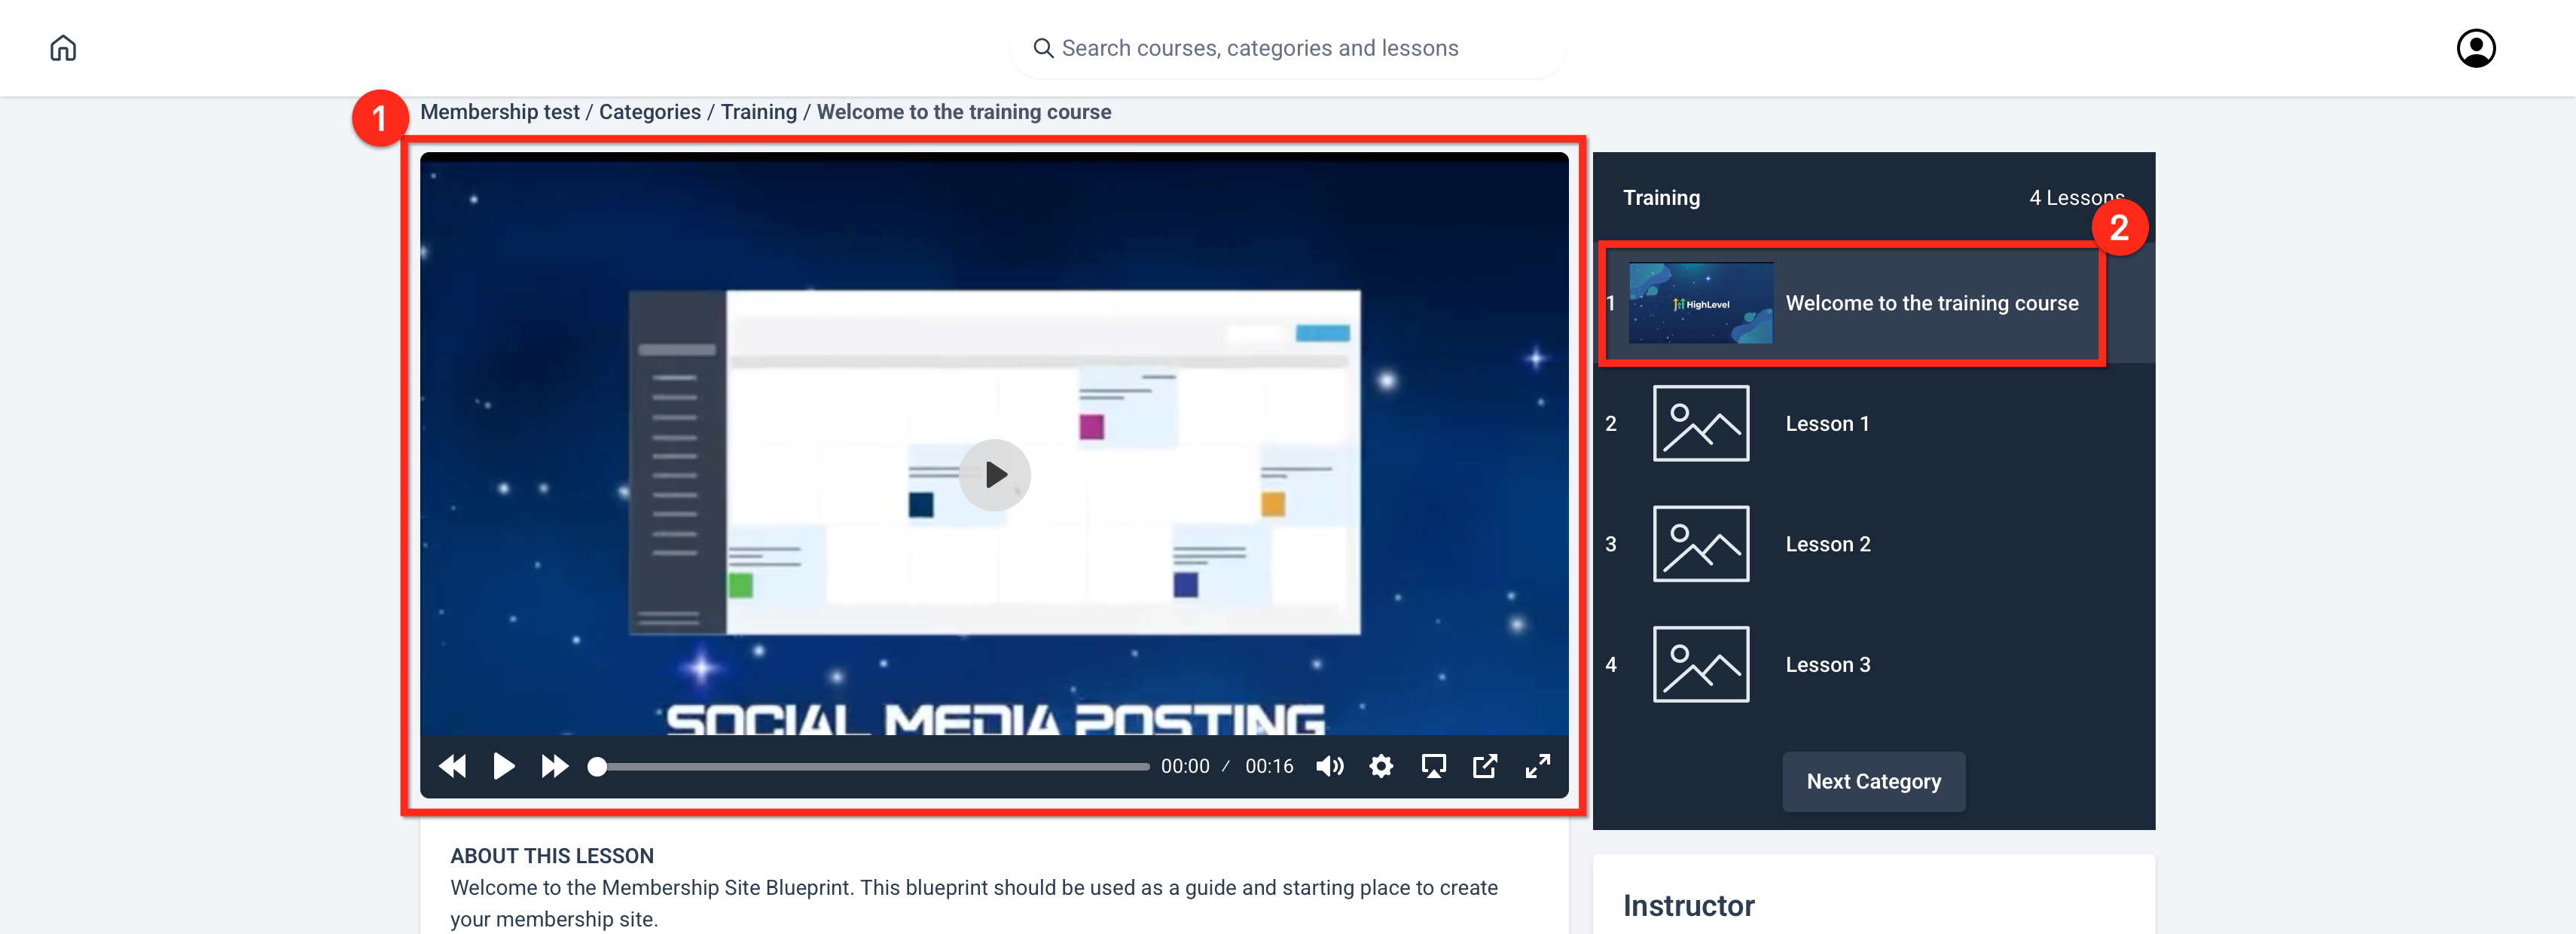
The thumbnail feature lets you assign a single image to a lesson. You can either grab a frame from the video you have uploaded or upload your own picture. The selected image is used for two places: the lesson tile shown in the course overview and the preview image that appears inside the video player.
When you save the lesson, the platform updates both locations automatically. If you use an embedded third party player such as YouTube, the “Use current frame” option is unavailable, so you must upload a custom image to control the lesson tile.
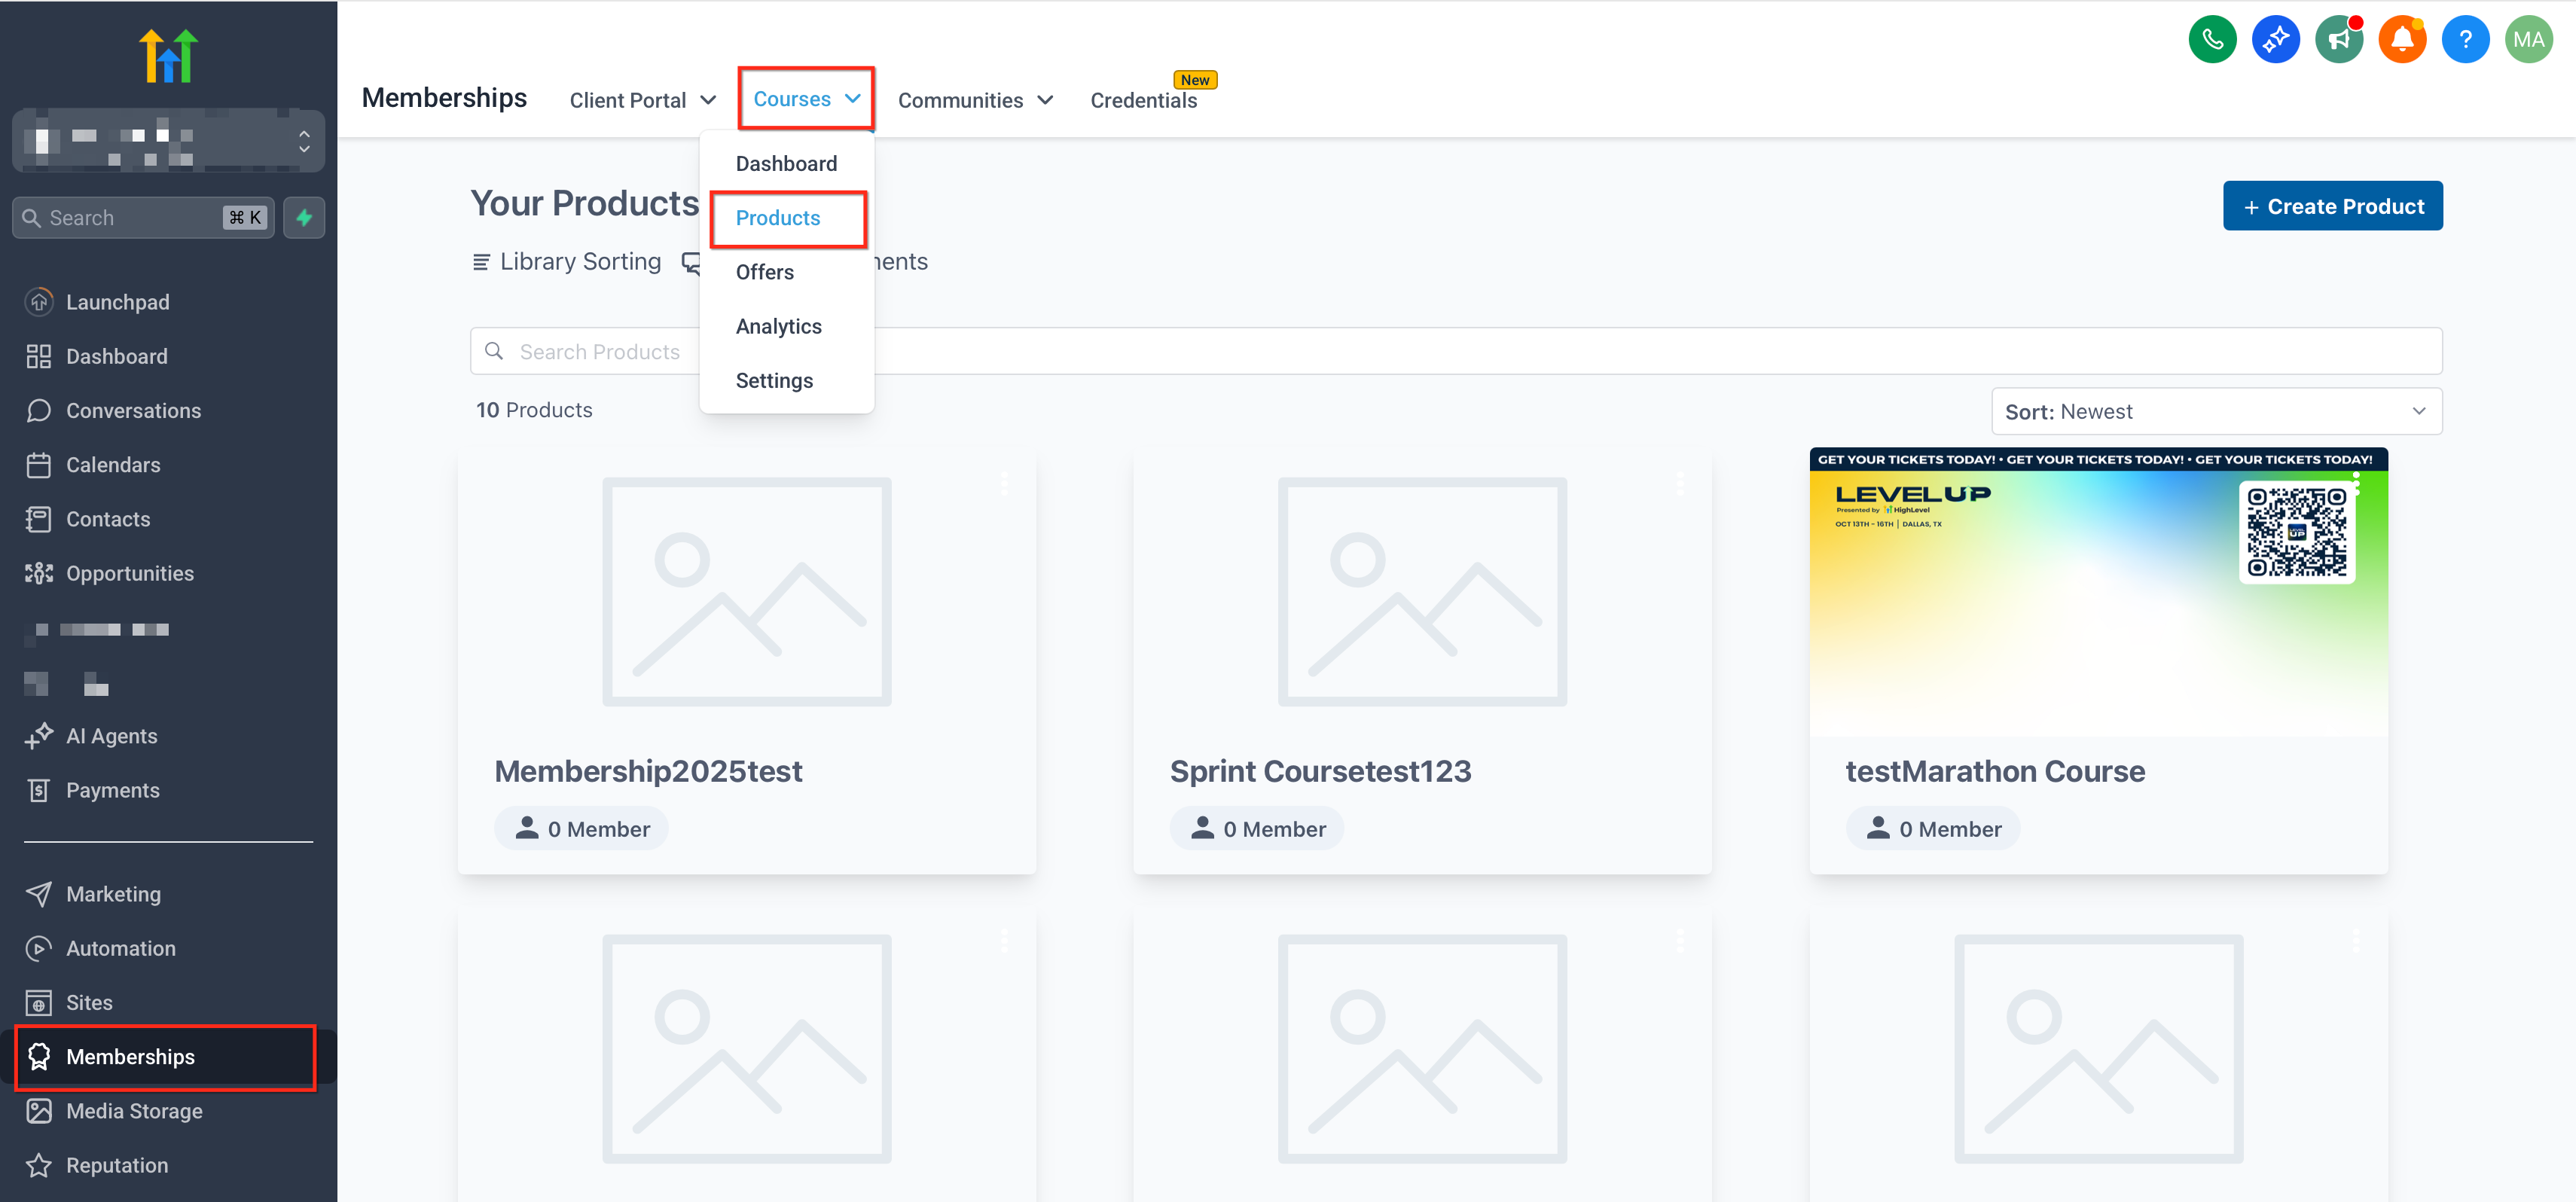
The controls live inside the lesson editor, which you reach from Sites > Memberships > Courses. All changes are saved with the standard Save button in the editor.
03How businesses use lesson thumbnails
- Fitness coaching business. Upload workout videos to a course, pause at a moment that shows the exercise, and click Use current frame as thumbnail. Learners see that frame on the lesson list, helping them locate the right routine quickly.
- SaaS onboarding program. Add product demo videos, pick a clear screen capture as the thumbnail, and optionally upload a branded image for the lesson tile. New users recognize the feature they are about to learn from the thumbnail.
- Language tutoring platform. Record lesson videos, select a frame showing the instructor’s face, or upload an image with the lesson title. The thumbnail gives students a visual cue of the lesson content before they start.
04The numbers and rules that matter
- Use a 16:9 image (1280×720 or larger) for best results.
05Before you start
- A video must be uploaded directly to the lesson if you want to use a video frame as the thumbnail.
- If the lesson uses an embedded third party player, prepare a custom image to upload as the lesson thumbnail.
06How to set up and use lesson thumbnails in HighLevel
Set a lesson thumbnail
- Navigate to Sites > Memberships > Courses and open the desired course.
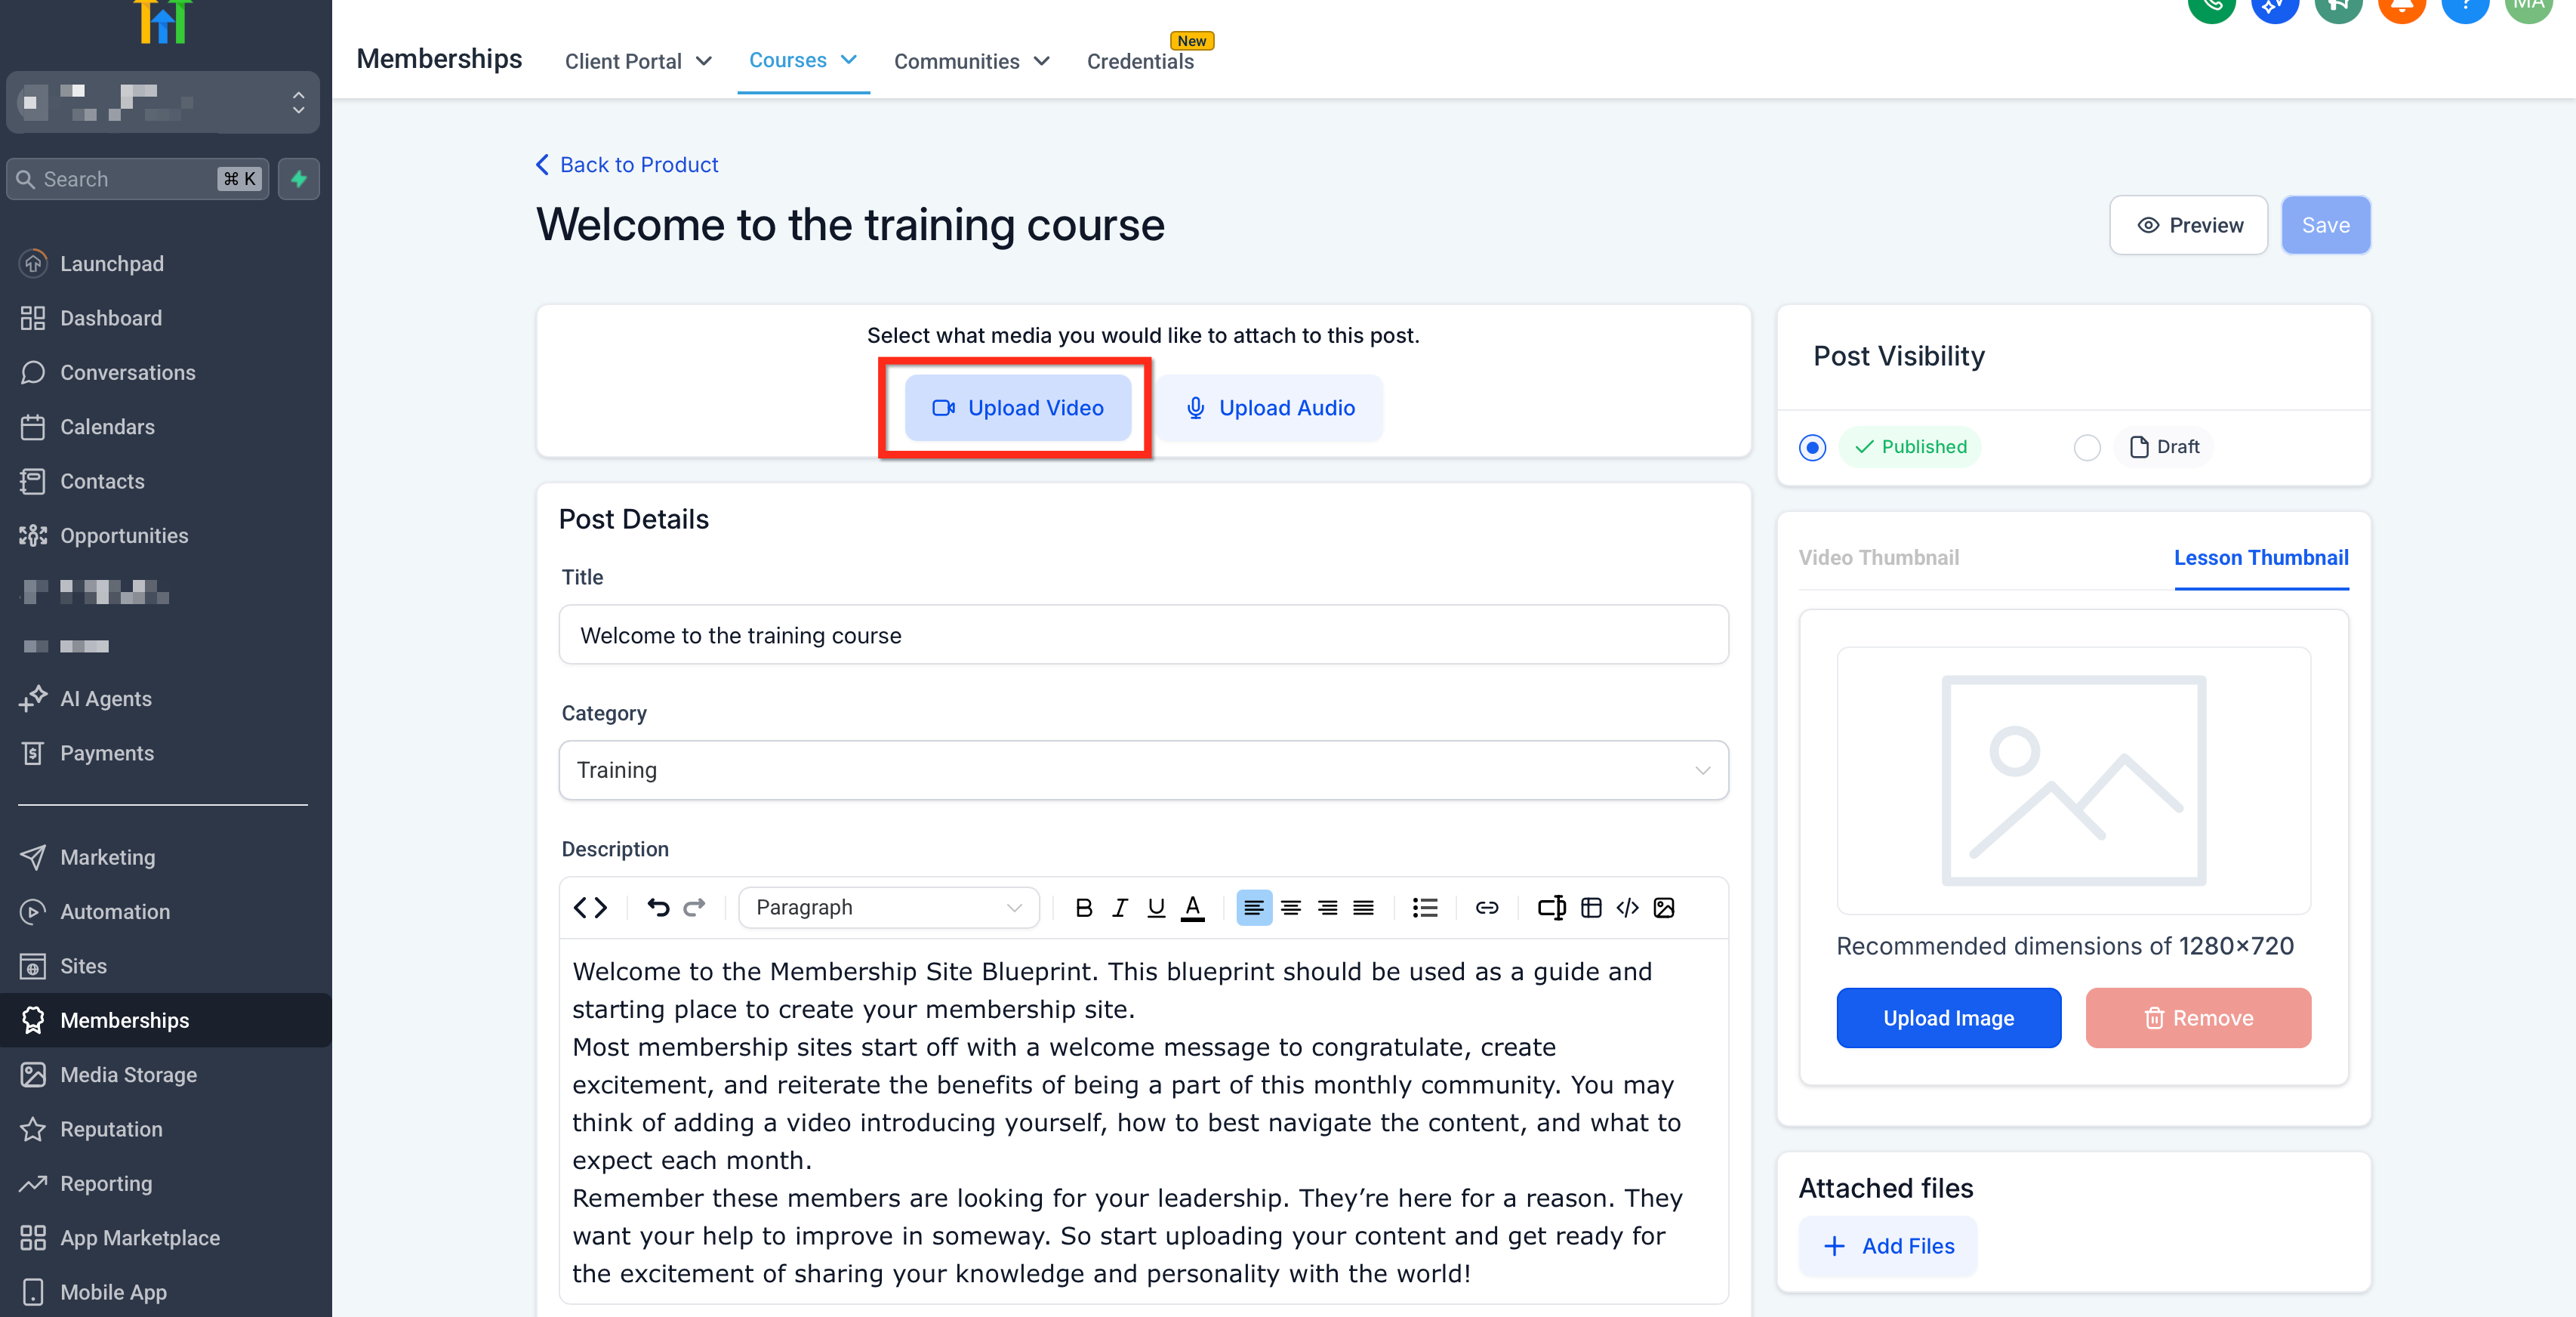
- Select the lesson you wish to edit and upload the video file.
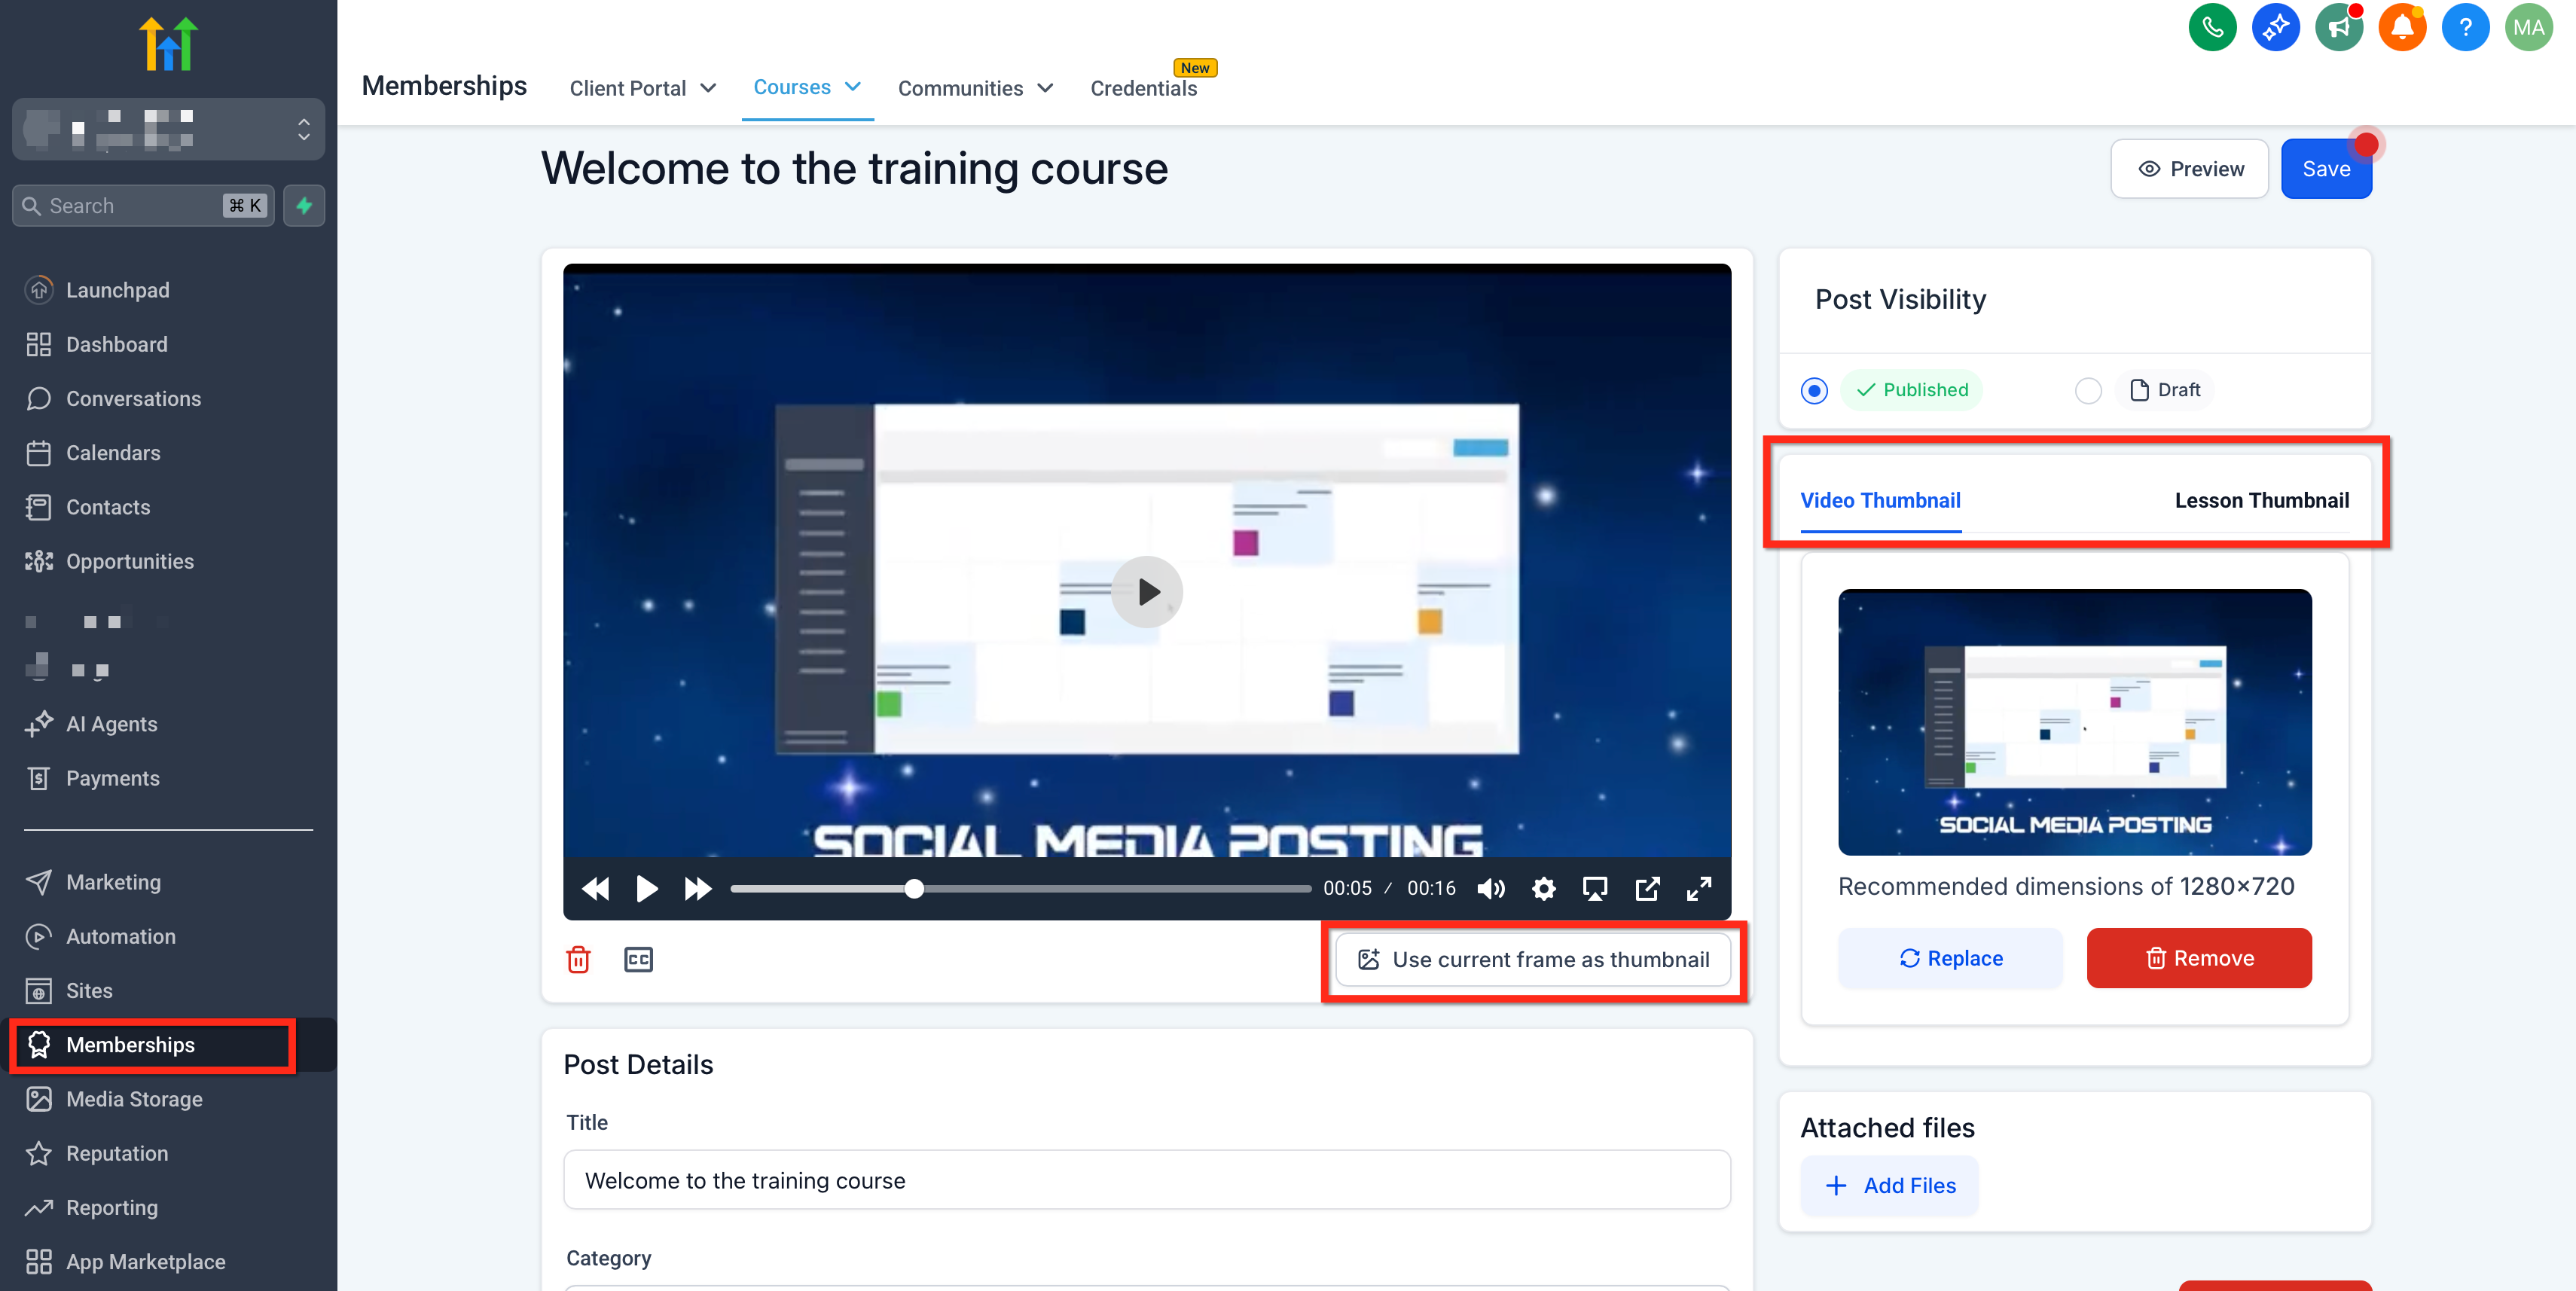
- Play the video to the preferred moment, pause, and click Use current frame as thumbnail.
- Verify that the preview image updates with the chosen frame.
- Click Save in the lesson editor to apply the thumbnail.
Use a different image for the lesson tile
- Keep the selected video frame as the video thumbnail inside the lesson.
- Switch to the Lesson thumbnail option and either pick another video frame or upload a custom image to replace the tile image.
- Return to the course list and confirm that the lesson and video thumbnails reflect your selections.
07What it looks like in HighLevel
08Settings that matter
- Use current frame as thumbnail. Sets the currently displayed video frame as the thumbnail for both the video player preview and the lesson tile.
- Upload custom thumbnail. Allows you to provide an external image that will be used as the lesson tile thumbnail, overriding any video frame thumbnail.
09Things to know before you rely on it
- The frame capture option works only with videos uploaded directly to the lesson; it does not apply to embedded YouTube or Vimeo players.
- For embedded videos you must upload a custom thumbnail image to control the lesson tile.
- You must click Save after choosing or uploading a thumbnail for the change to take effect.
10How it connects to the rest of HighLevel
- Learn how to build and launch courses in HighLevel. Course builder
- Generate password free access links for your membership content. Magic links
- See pricing options and start a trial if you need a plan that includes courses. Pricing
Michael's take

I focus on getting the visual style right. Pick a frame that shows the speaker’s face or a key graphic and keep the colors consistent across all lessons.
After that, I upload a custom thumbnail for any embedded videos that can’t use a video frame, so every lesson tile looks the same whether the video lives in HighLevel or on an external platform. This helps navigation and keeps the brand front and center.