
01Who this is for
- Course creators who need to reuse videos across several lessons, saving time on uploads.
- Course creators who manage a large media library and require consistent file versions.
02Import from Media Storage, explained
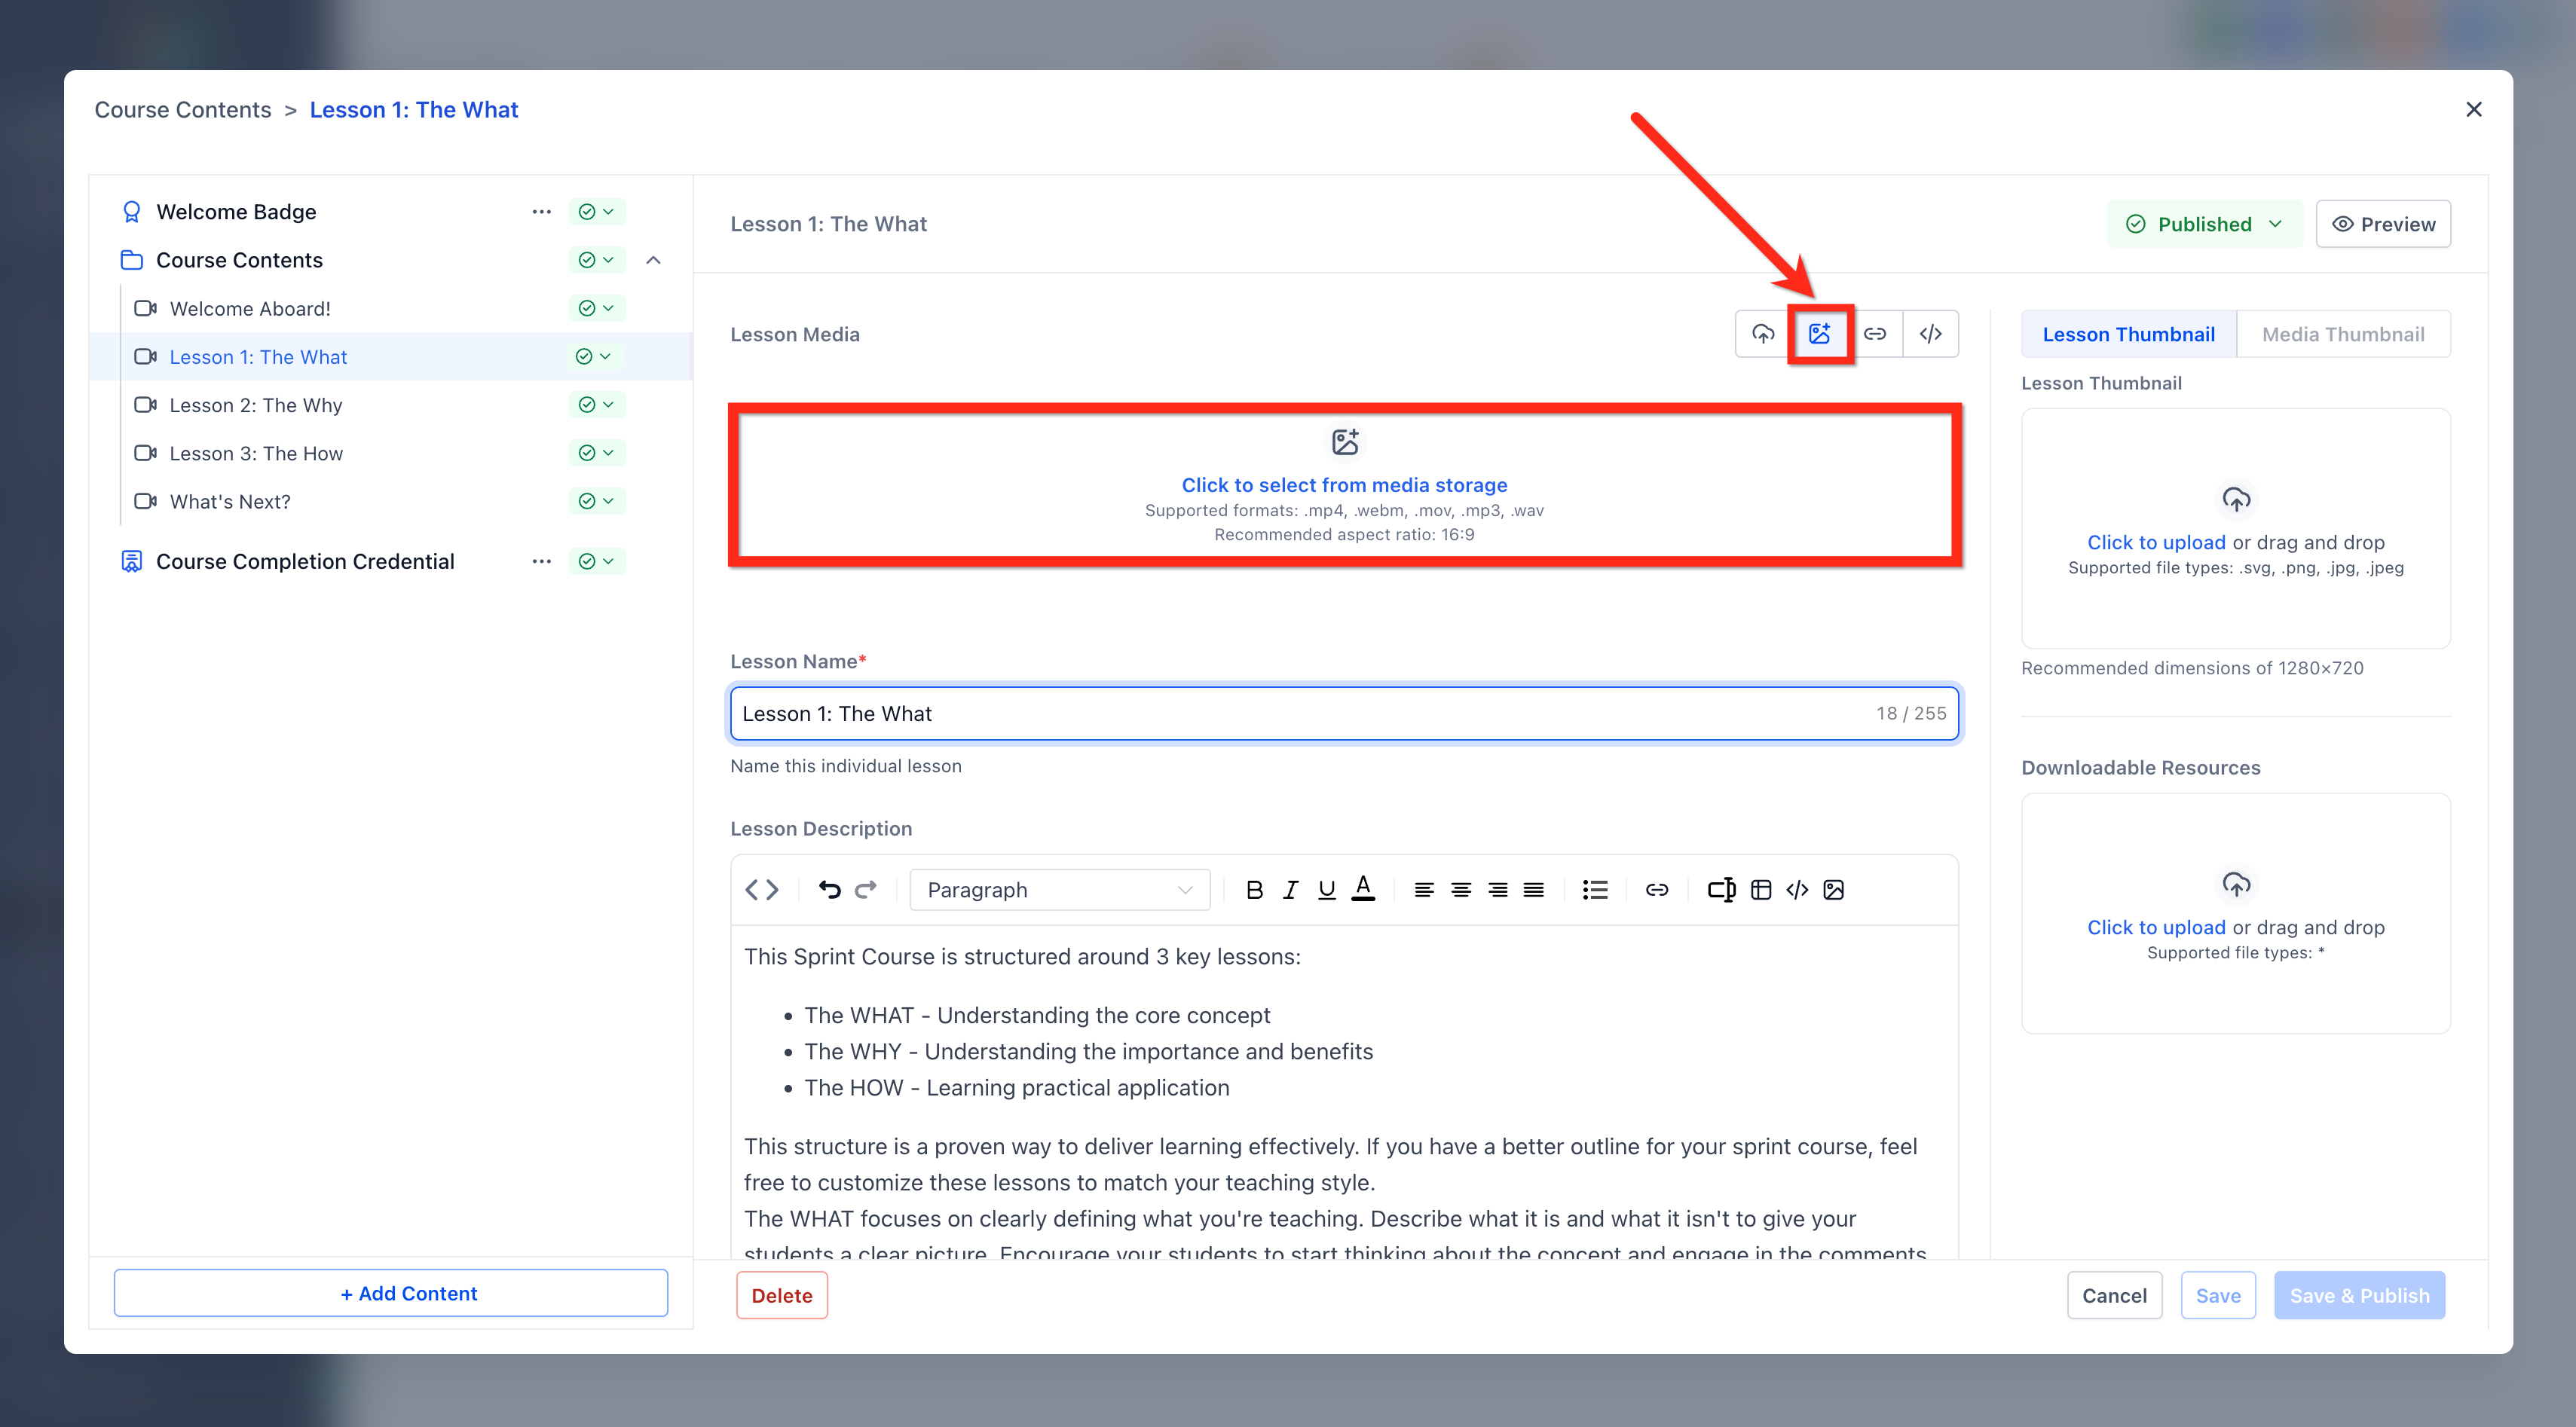
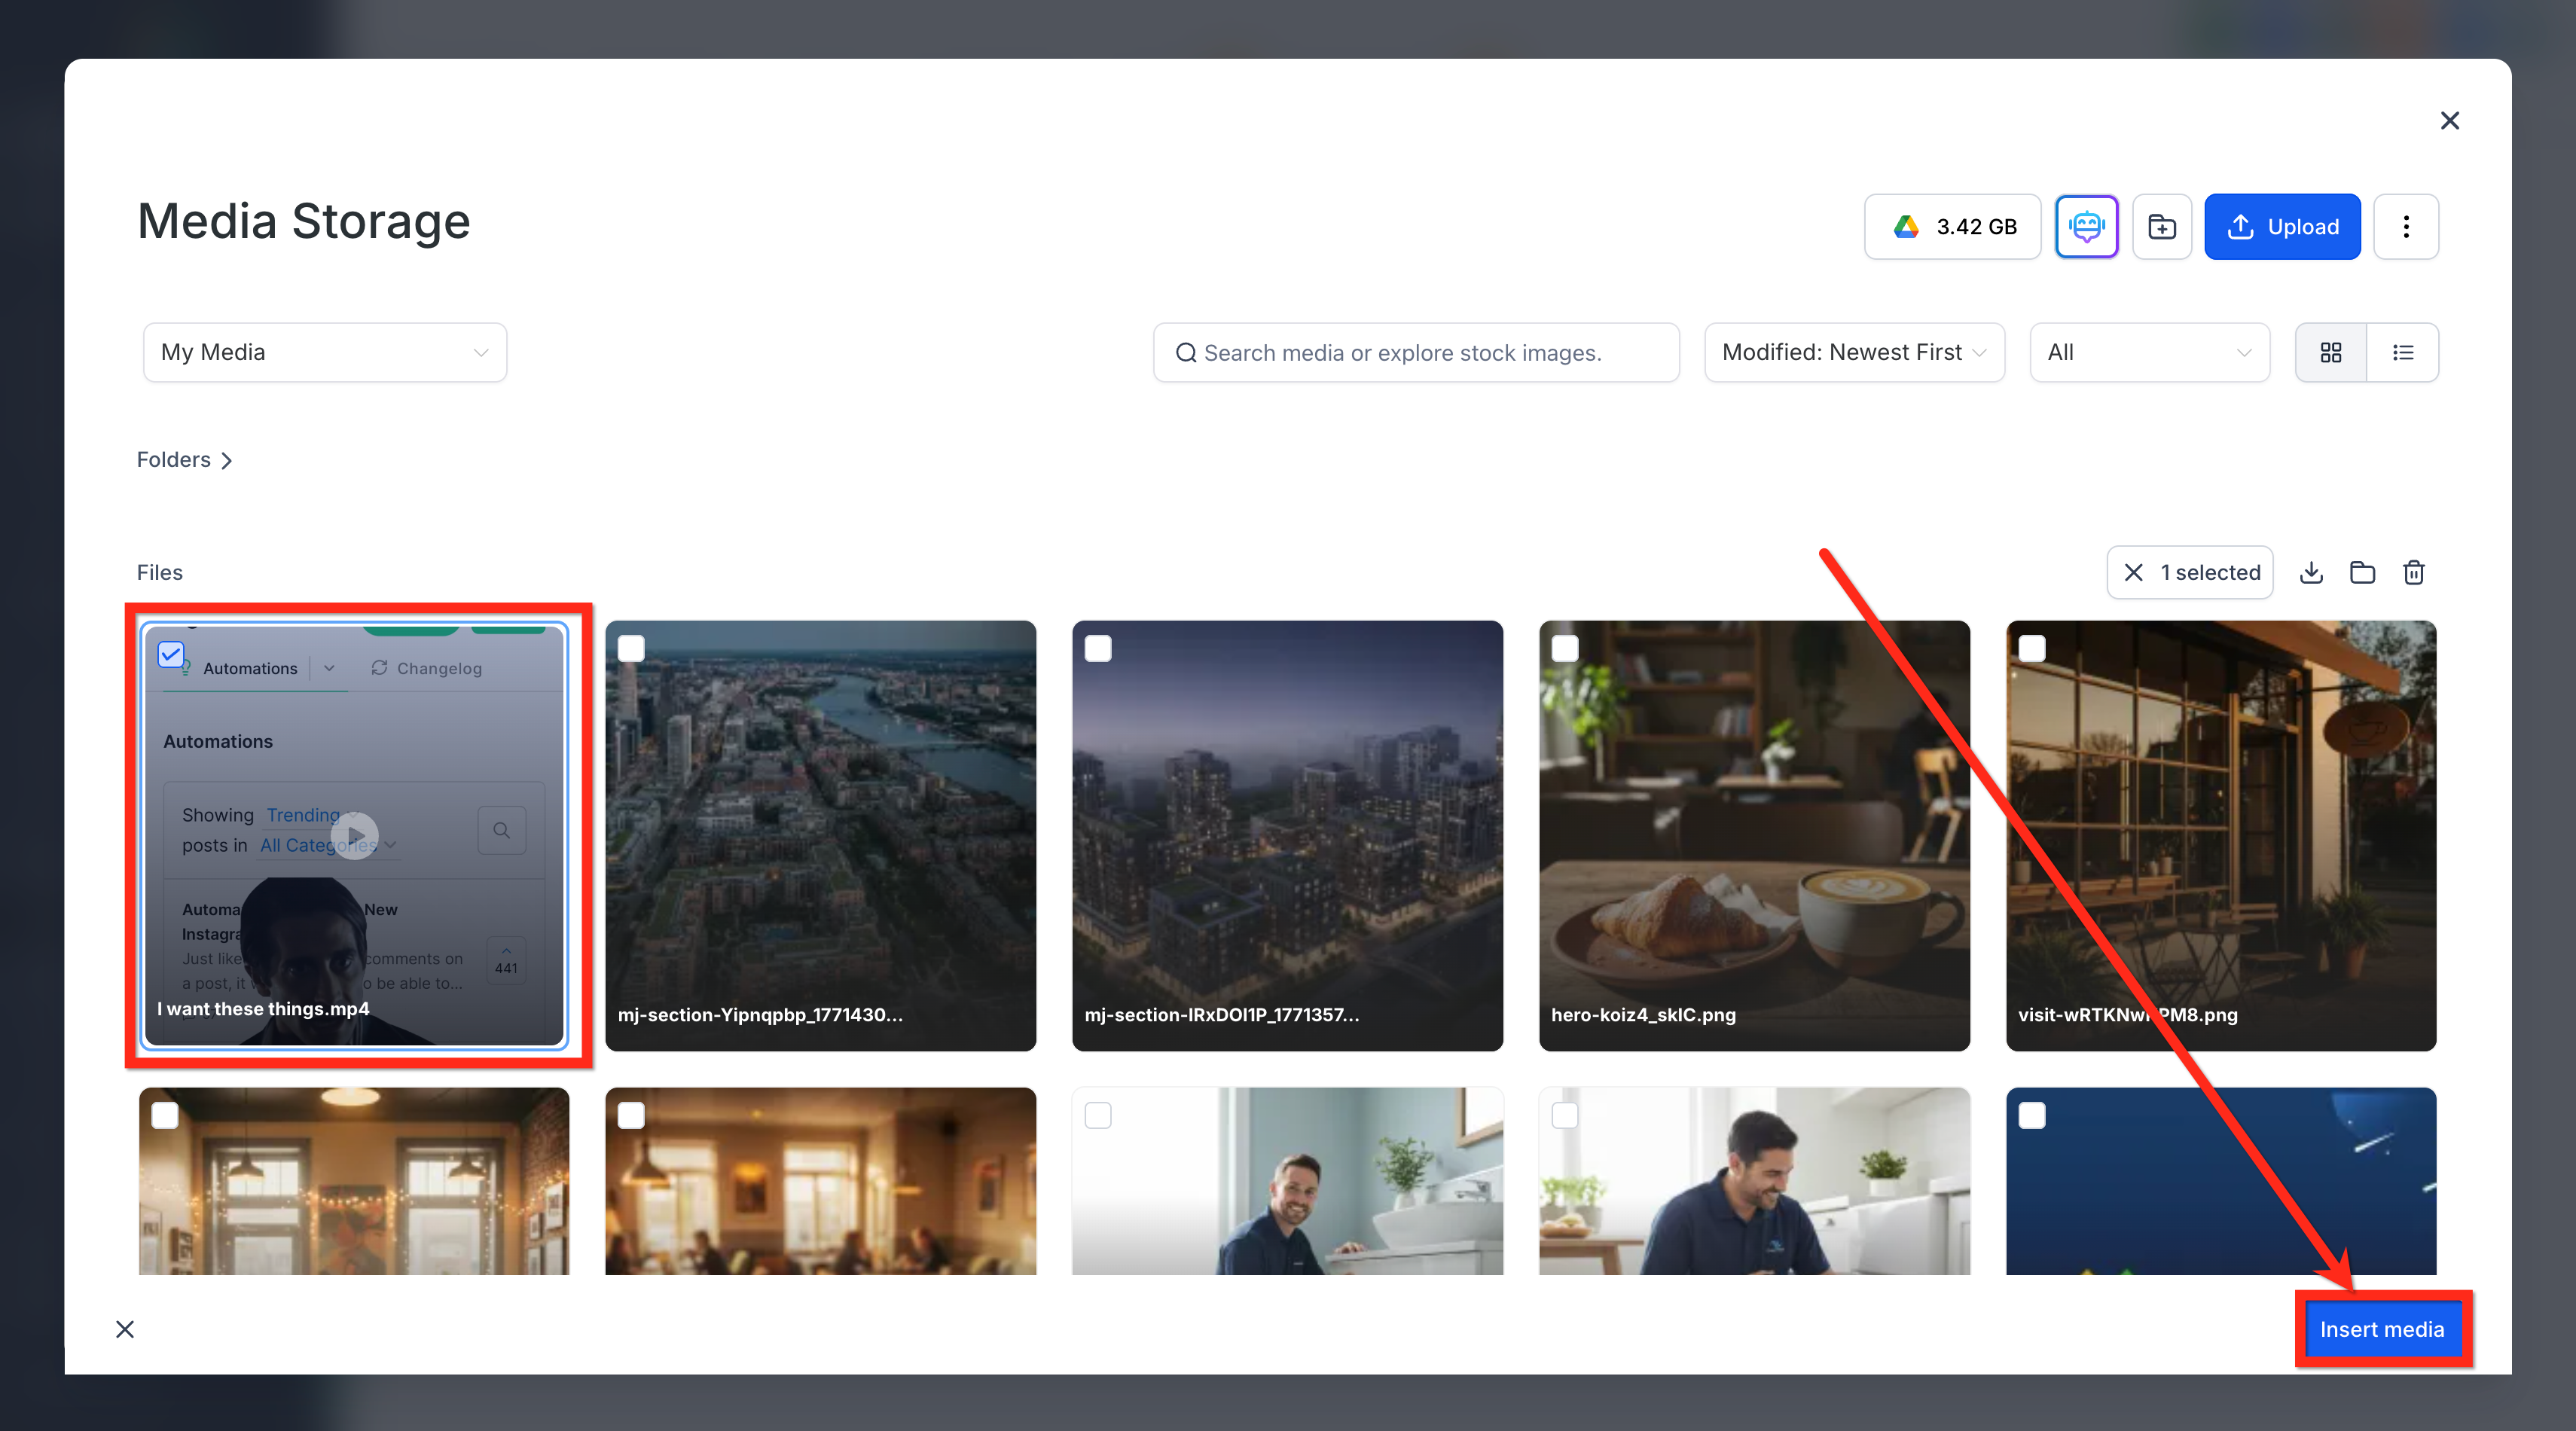
The feature adds an Import from Media Storage button inside the lesson editor. When you click it, a dialog appears that shows all audio and video files already saved in Media Storage. Selecting a file and confirming inserts that media into the lesson without creating a new copy.
The import works only for audio and video files; image files are not supported. The imported media becomes part of the lesson content and follows the lesson’s publishing settings. If the lesson is not published, learners will not see the media until you publish the lesson.
03How businesses use import from Media Storage
- Online fitness coach. The coach uploads workout videos to Media Storage once. When building each weekly lesson, they click Import from Media Storage, select the appropriate video, and insert it, avoiding re uploading the same file for each class.
- Language tutoring service. Audio recordings of pronunciation drills are stored in Media Storage. The tutor opens a new lesson, uses the import button, picks the audio file, and adds it to the lesson, keeping the audio file consistent across all levels.
- Software training company. The company saves product demo videos in Media Storage. For each module lesson, they import the same demo video using the button, ensuring every lesson references the identical file without duplicate copies.
04Before you start
- Audio or video files must already be uploaded to HighLevel Media Storage.
- You must be in the lesson editor, either creating a new lesson or editing an existing one.
- Your user role must include access to Media and Memberships/Courses.
05How to set up and use import from Media Storage in HighLevel
Import media into a lesson
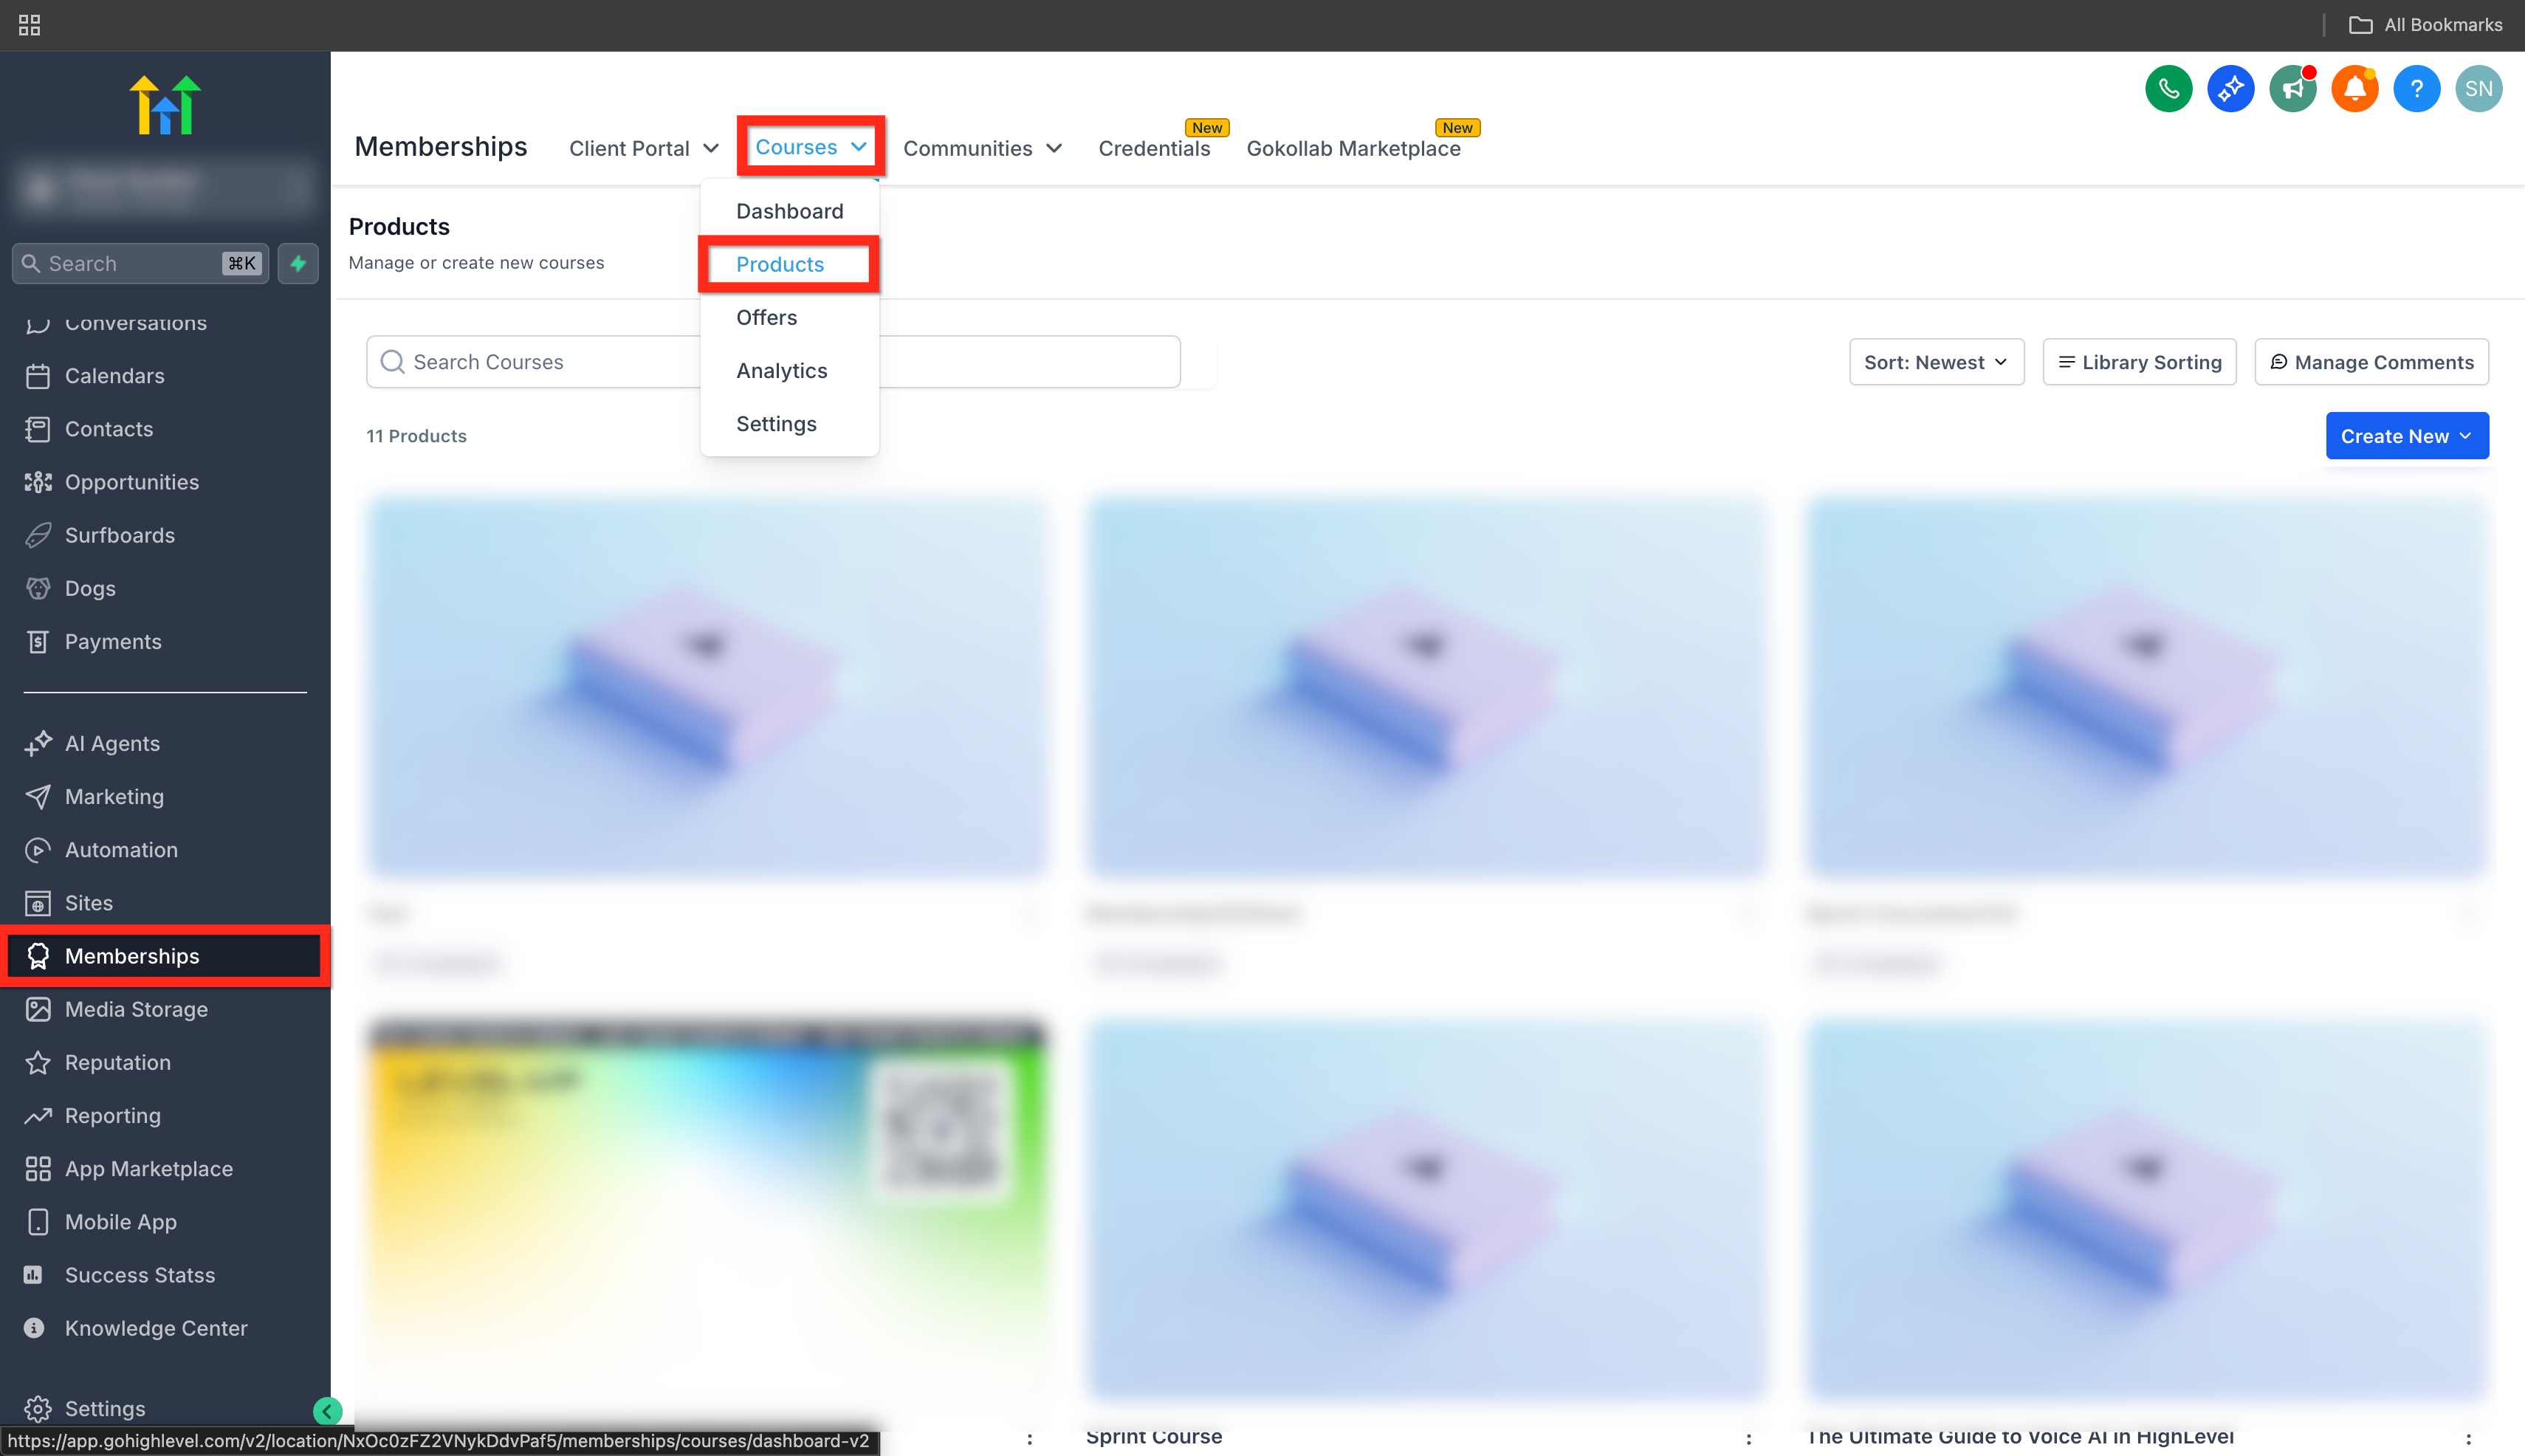
- Go to Memberships > Courses > Products.
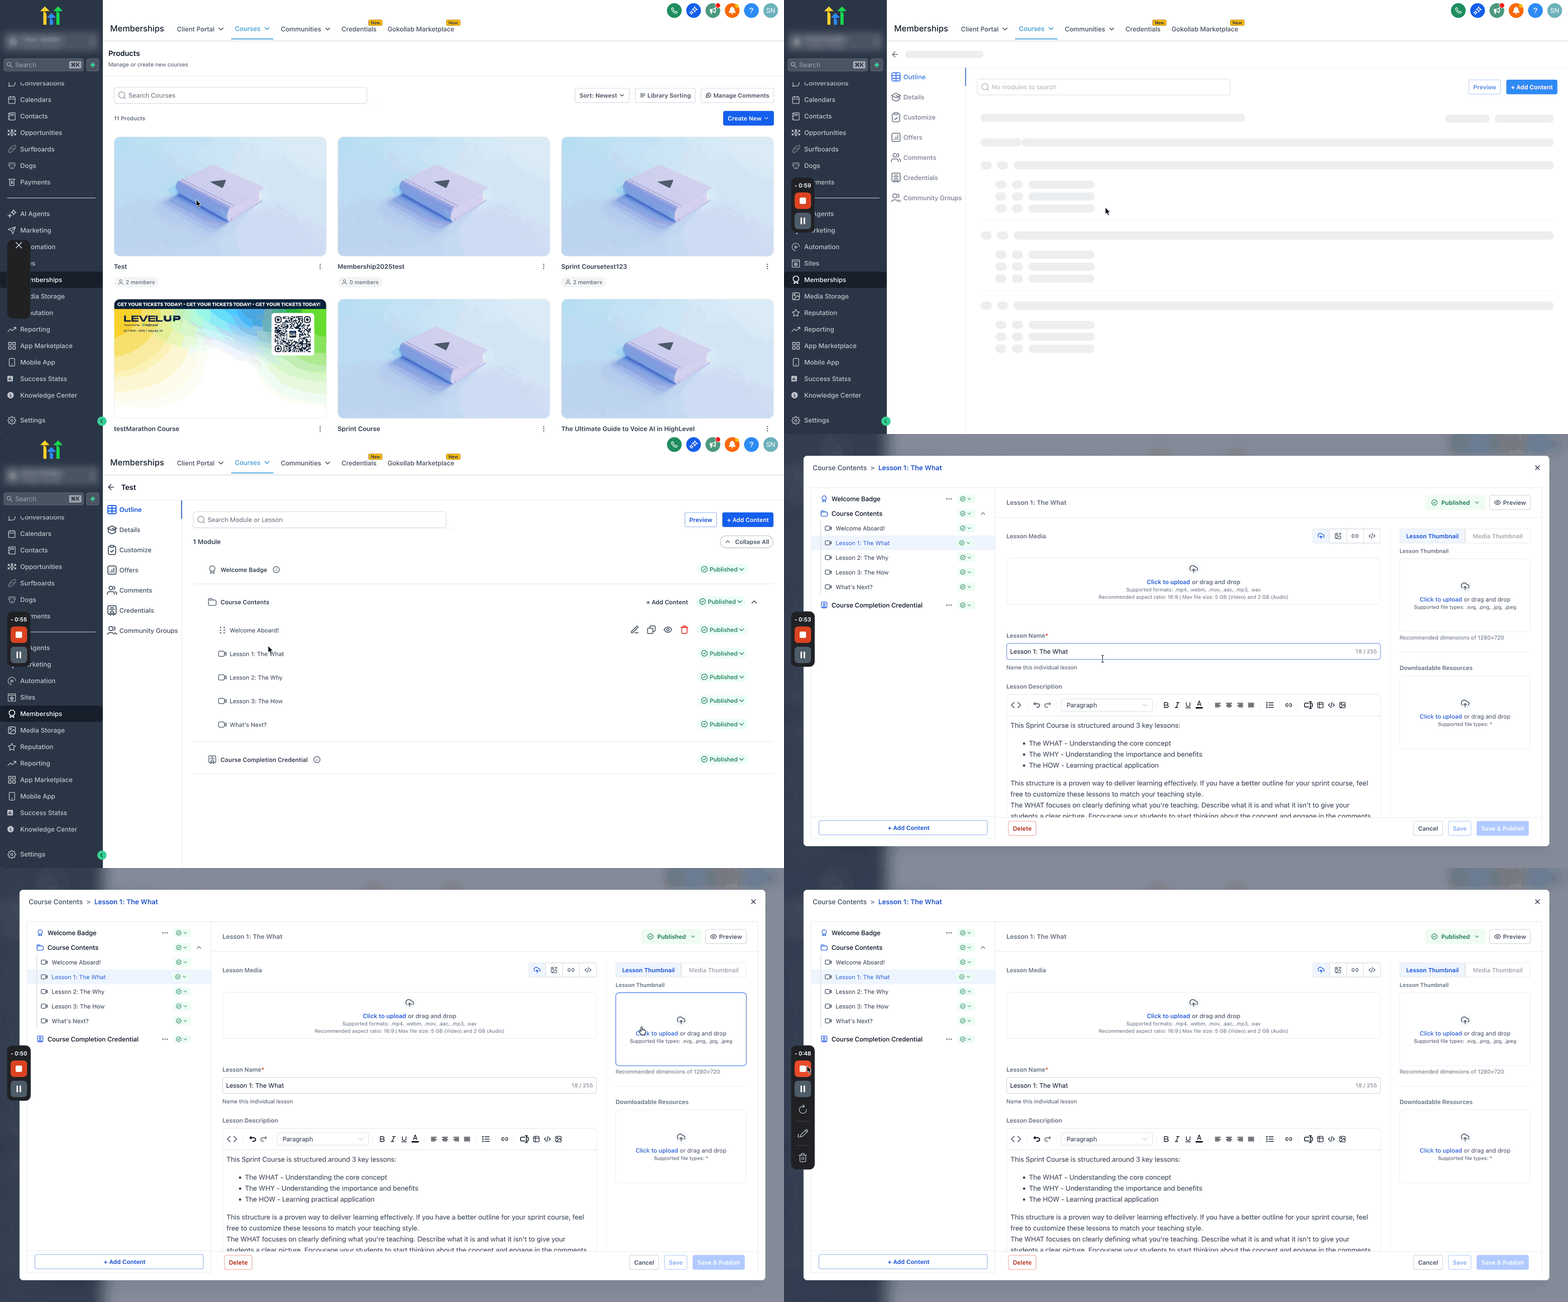
- Click the course you want to edit.
- Open the lesson you want to update.
- Choose to create a new lesson or edit an existing lesson.
- Click the Import from Media Storage button.
- Click the Click to select from media storage button and choose the desired file.
- Select Insert Media to add the file to the lesson.
06What it looks like in HighLevel
07Things to know before you rely on it
- Only audio and video files can be imported; image files are not supported.
- Importing does not create a new copy of the file, so duplicate uploads are avoided.
08If something goes wrong
- The Import from Media Storage option does not appear in the lesson editor.. Confirm you are in the lesson editor (create or edit mode) and verify that your user role includes access to Media and Memberships/Courses.
09How it connects to the rest of HighLevel
- Build and organize courses using the HighLevel course builder. Course builder guide
- Generate password free access links for your members with magic links. Magic links
- Review Media Storage limits and upload guidelines. Media Storage overview
Michael's take

When you have an existing library of videos or podcasts that you want to weave through several courses, Import from Media Storage saves you from reuploading files and keeps everything in one place.
If you only need a few one off media files or your courses are mostly text, the feature adds little value. It also won’t help if you’re trying to bring in images, since the import is limited to audio and video.