
01Who this is for
- Online educators who want to sell a single class without building a separate Offer, because pricing lives on the course itself.
- Membership site owners needing quick free course enrollment, as no payment provider is required for free pricing.
- Businesses that run recurring subscriptions for training content, since the feature supports recurring billing directly from the course.
02Course pricing, explained
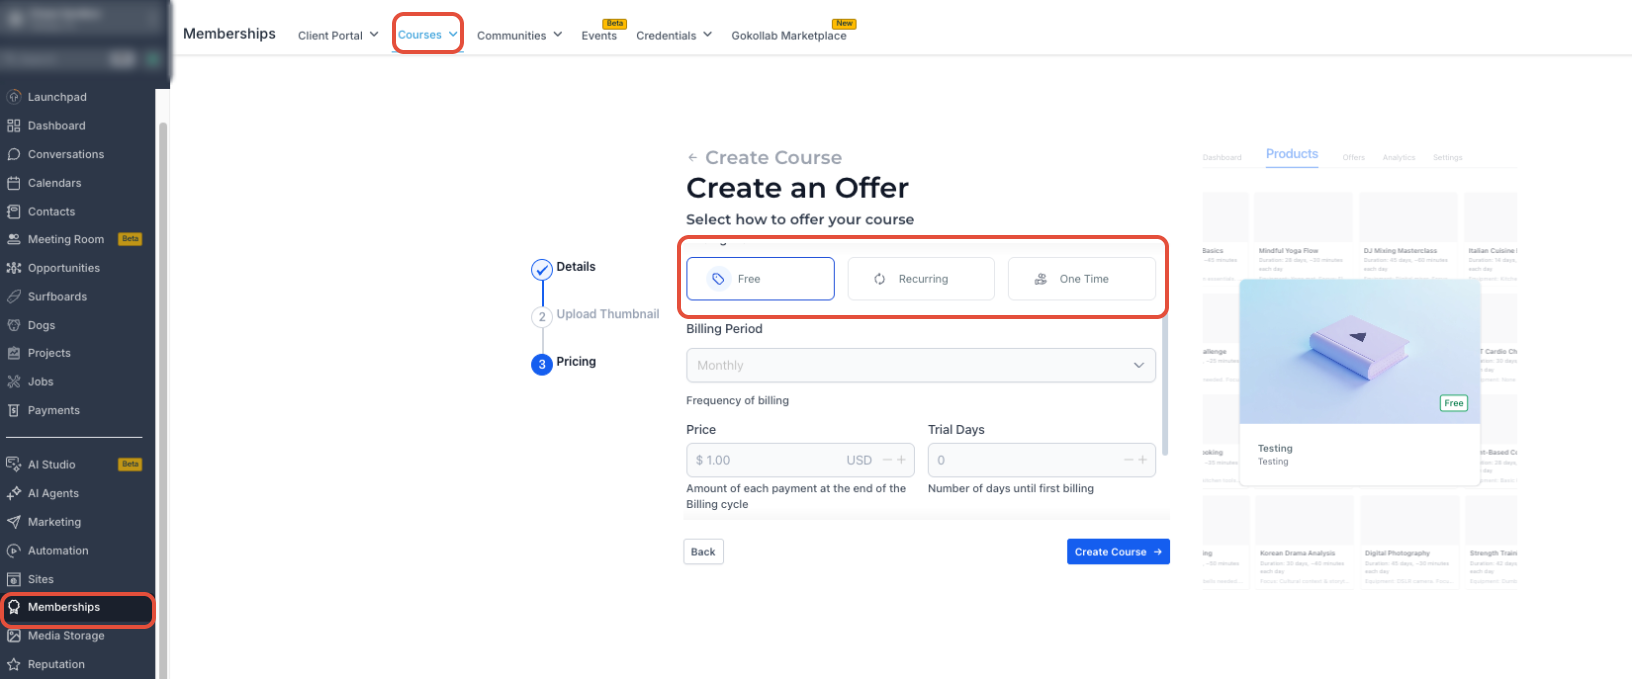
Course Pricing is a feature that appears on a course’s Pricing tab when the subaccount has the capability enabled. It lets you select Free, One time, or Recurring pricing and saves the settings to create a unique checkout link for that course.
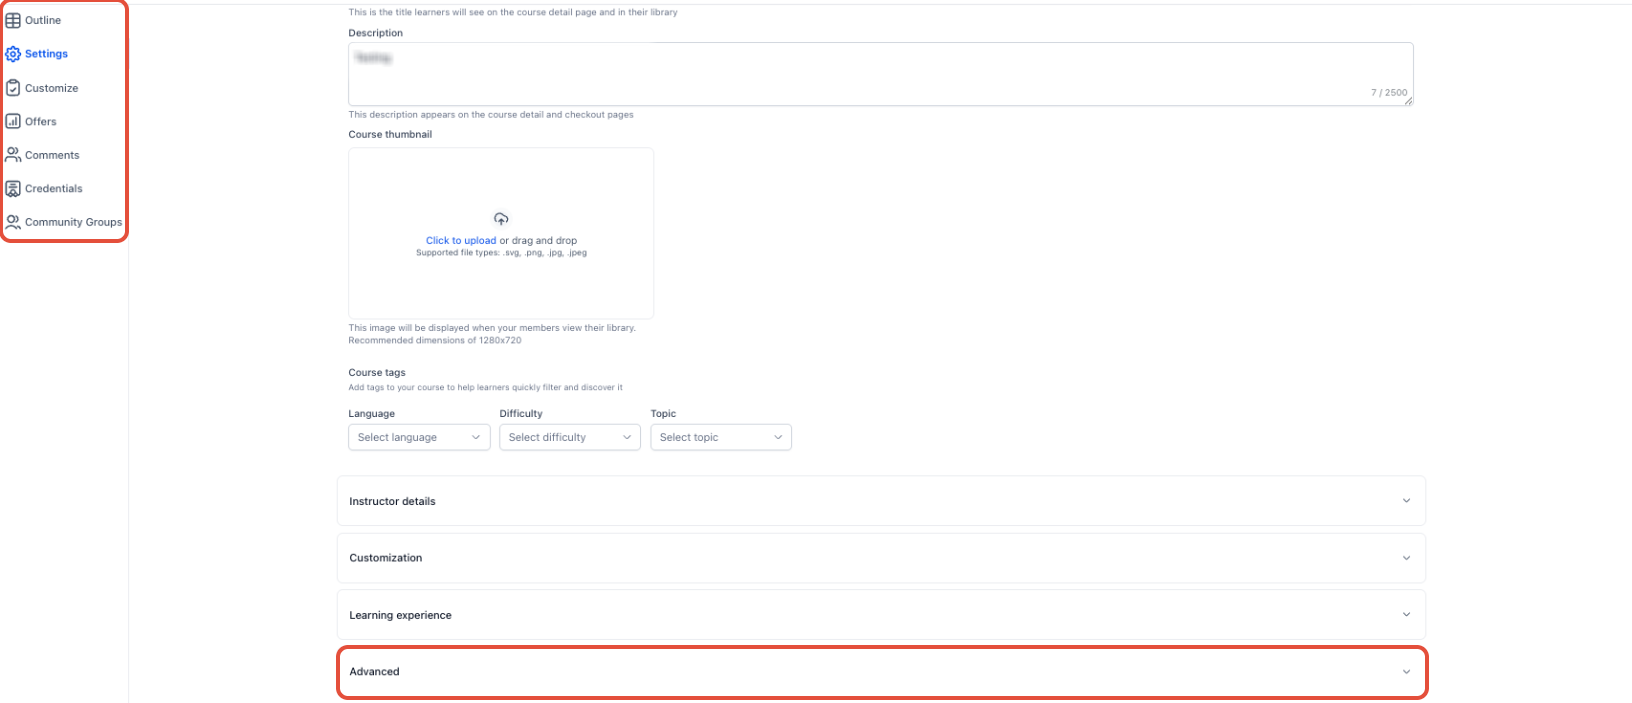
The generated link can be opened in preview mode to see the learner’s checkout experience. After saving, additional controls appear under an Advanced section where you can define when access starts, how many days it remains active, and whether coupons are usable.
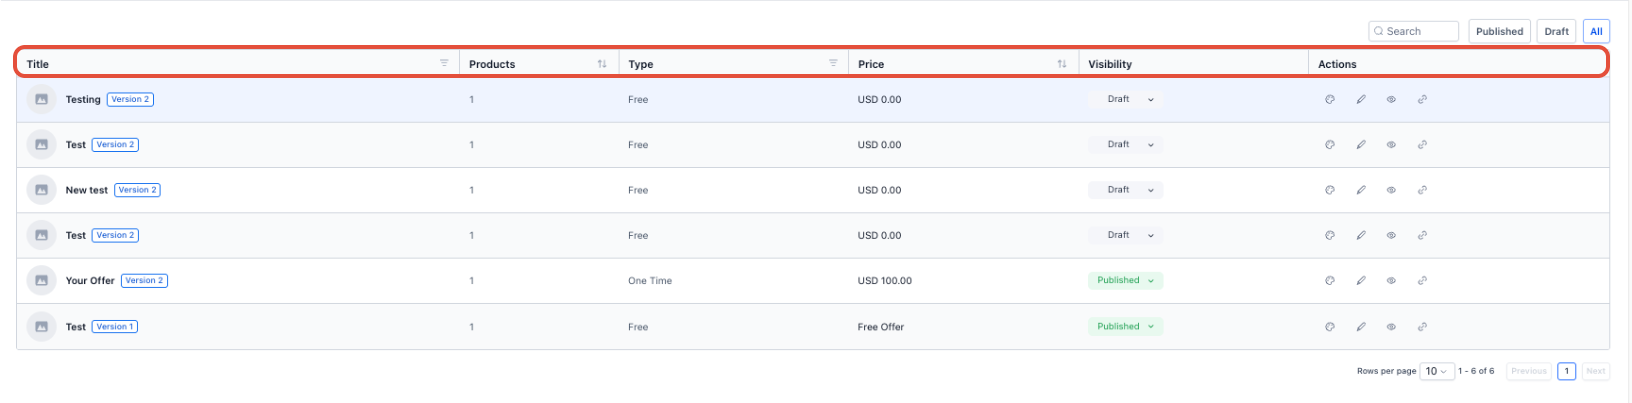
All settings are stored on the course record, so the checkout flow stays linked to the course without needing a separate Offer. Courses that lack a saved price show a “Not set up” status.
03How businesses use course pricing
- Fitness coaching program. The coach opens the desired course, picks a recurring price, and saves the setting. HighLevel then produces a checkout link that the coach copies and posts in a private Facebook group. Learners click the link to subscribe and gain timed access as configured.
- Language tutoring platform. The platform selects a specific language module, marks it as a one time purchase, and enables coupons in the Advanced settings. After saving, a checkout URL is generated and sent via email to prospective students, who can redeem a coupon code at purchase.
- Software training provider. The provider creates a free introductory course, chooses the Free option, and saves. HighLevel creates a link that can be placed on the website’s resources page, allowing visitors to enroll without any payment setup.
04The numbers and rules that matter
- Course Pricing is rolling out gradually and is enabled for 20% of newly created subaccounts.
05Before you start
- Direct Course Pricing must be enabled in the subaccount; it is only available for a portion of newly created subaccounts during rollout.
- A supported payment provider must be connected before testing or publishing a paid checkout link.
06How to set up and use course pricing in HighLevel
Set up course pricing
- In the Subaccount view, click Memberships.
- Click Courses.
- Open Products.
- Choose the course you want to price.
- Select the Pricing tab.
- Pick Free, One time, or Recurring as the pricing type.
- If you chose a paid option, enter the price and billing details.
- Review the information you entered.
- Click Save to store the course pricing.
- Use the preview function to view the learner checkout page.
- Run through the checkout flow to verify it works before sharing.
Configure advanced course pricing settings
- Navigate to Memberships > Courses > Products.
- Open the course you are editing.
- Select the Pricing tab.
- Make sure the main Course Pricing has already been saved.
- Click the Advanced button.
- Set the access start option to define when learners can begin the course.
- Enter an access duration to specify how many days the course remains available.
- Turn on coupons if you want to allow promotional codes.
- Save the changes.
Share a priced course
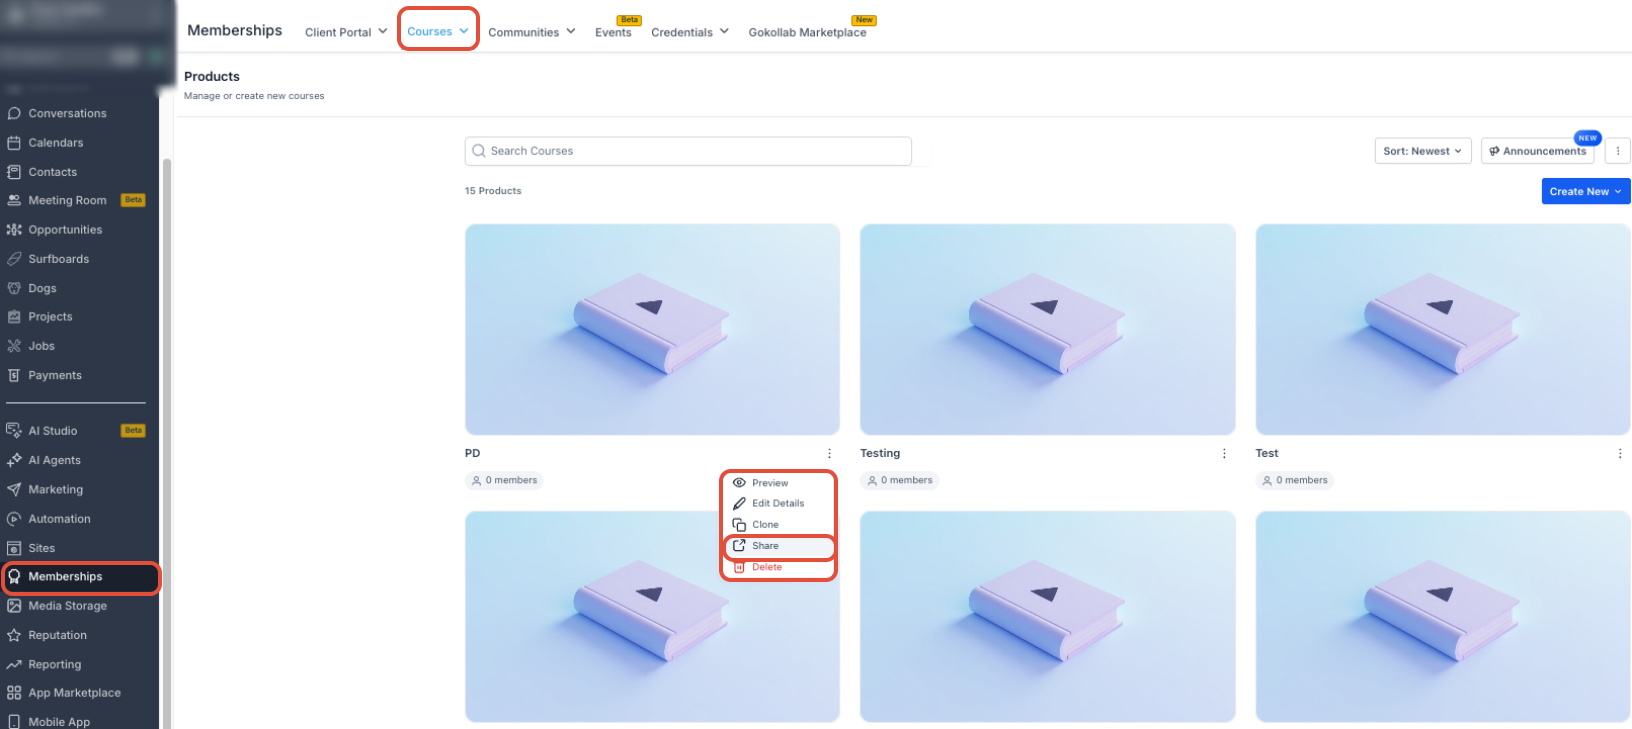
- Go to Memberships > Courses > Products.
- Open the course or locate it on the Products list.
- Click Share Course.
- Examine the checkout link controls that appear.
- Copy the generated checkout URL.
- Distribute the link through the channel you prefer for learners.
07What it looks like in HighLevel
08Settings that matter
- Free, One, time, Recurring. Determines whether the course is offered at no cost, a single payment, or a repeating subscription.
- access, start. Controls the date or condition that triggers the beginning of learner access.
- access duration. Specifies the number of days a learner retains access before it expires.
- Enable coupons. Activates the ability to apply coupon codes during checkout for the course.
09Things to know before you rely on it
- The feature rolls out gradually; initially only 20% of newly created subaccounts receive access, and existing accounts do not have it.
- A connected, supported payment provider is required only for One time and Recurring pricing.
- Courses without a saved price display a Not set up status and cannot use the direct checkout link.
- Advanced settings become visible only after the primary pricing configuration is saved.
10If something goes wrong
- Course Pricing controls are not visible. If the Pricing tab does not appear, continue using the existing Membership Offer flow.
11How it connects to the rest of HighLevel
- Learn how to build and launch courses in HighLevel Course builder
- Generate password free access links with magic links Magic links
- Customize the look of your membership portal with themes Membership themes
Michael's take

Course pricing is a convenient shortcut for creators who want to sell a single class without building a full Offer funnel. It trims a few clicks, keeps pricing tied to the course, and still provides a checkout link.
A fitness coach who runs monthly workshops can use the Recurring option, set a 30 day access window, and fire off a coupon for early bird members. I’d test the checkout link first, make sure the payment provider is live, and then start pushing the link in the coach’s email list.