
Home/HighLevel/Guides/Build an application in AI Studio
HighLevel Guides · Volume 10 · AI Studio
How to build an app in GoHighLevel AI Studio wired to your CRM.
This build turns one business process into a working application inside HighLevel. You describe the app, keep the private logic on the server, give it a database and user accounts, take payment through your HighLevel catalog, and send every form submission into a workflow. At the end you have a published app on your own domain with a backup of the code. HighLevel is the same platform many people still search for as GoHighLevel.
What you are building
What you are building and what it does.
The finished system is a customer facing application built in AI Studio. The public pages render on the server so search engines can read them. Private work such as account lookups runs in Server Functions, and any API key stays in Secrets instead of the browser. The cloud backend holds the app's data, its user accounts and uploaded files. Checkout is handled by HighLevel using products from your catalog. Every form submission fires a HighLevel workflow, so leads land in the CRM and follow up starts on its own.
- A published AI Studio application on a custom domain
- Private credentials stored in Secrets and used only on the server
- A database, user sign in and file storage running in Cloud
- A checkout that sells products from your HighLevel catalog
- A workflow that fires on every AI Studio form submission
- A GitHub repository and a ZIP backup of the full codebase
Before you start
What to have ready before you start.
Most of the delays in this build come from things that live outside AI Studio, so set them up first.
- A HighLevel subaccount with AI Studio enabled and the View & Manage AI Studio permission on your user
- The Manage Git & download code permission under Settings, then Team, then Permissions, then AI Studio
- A written description of the process: the public pages, the private steps, and any outside service it talks to
- The API keys or tokens for any outside service, ready to paste into Secrets
- Products and prices already created in the HighLevel product catalog
- A payment provider connected in HighLevel payment settings
- A domain you control, with access to its DNS, and a GitHub account
Part 01 of 06
Create the project and describe the whole app.
AI Studio builds what you describe. If you only describe the look, you get a website. Describe the behavior, the private steps and the outside services, and you get an application with the right architecture from the first draft.
- Open your subaccount and click AI Studio in the left navigation.
- Create a new project from the home screen.
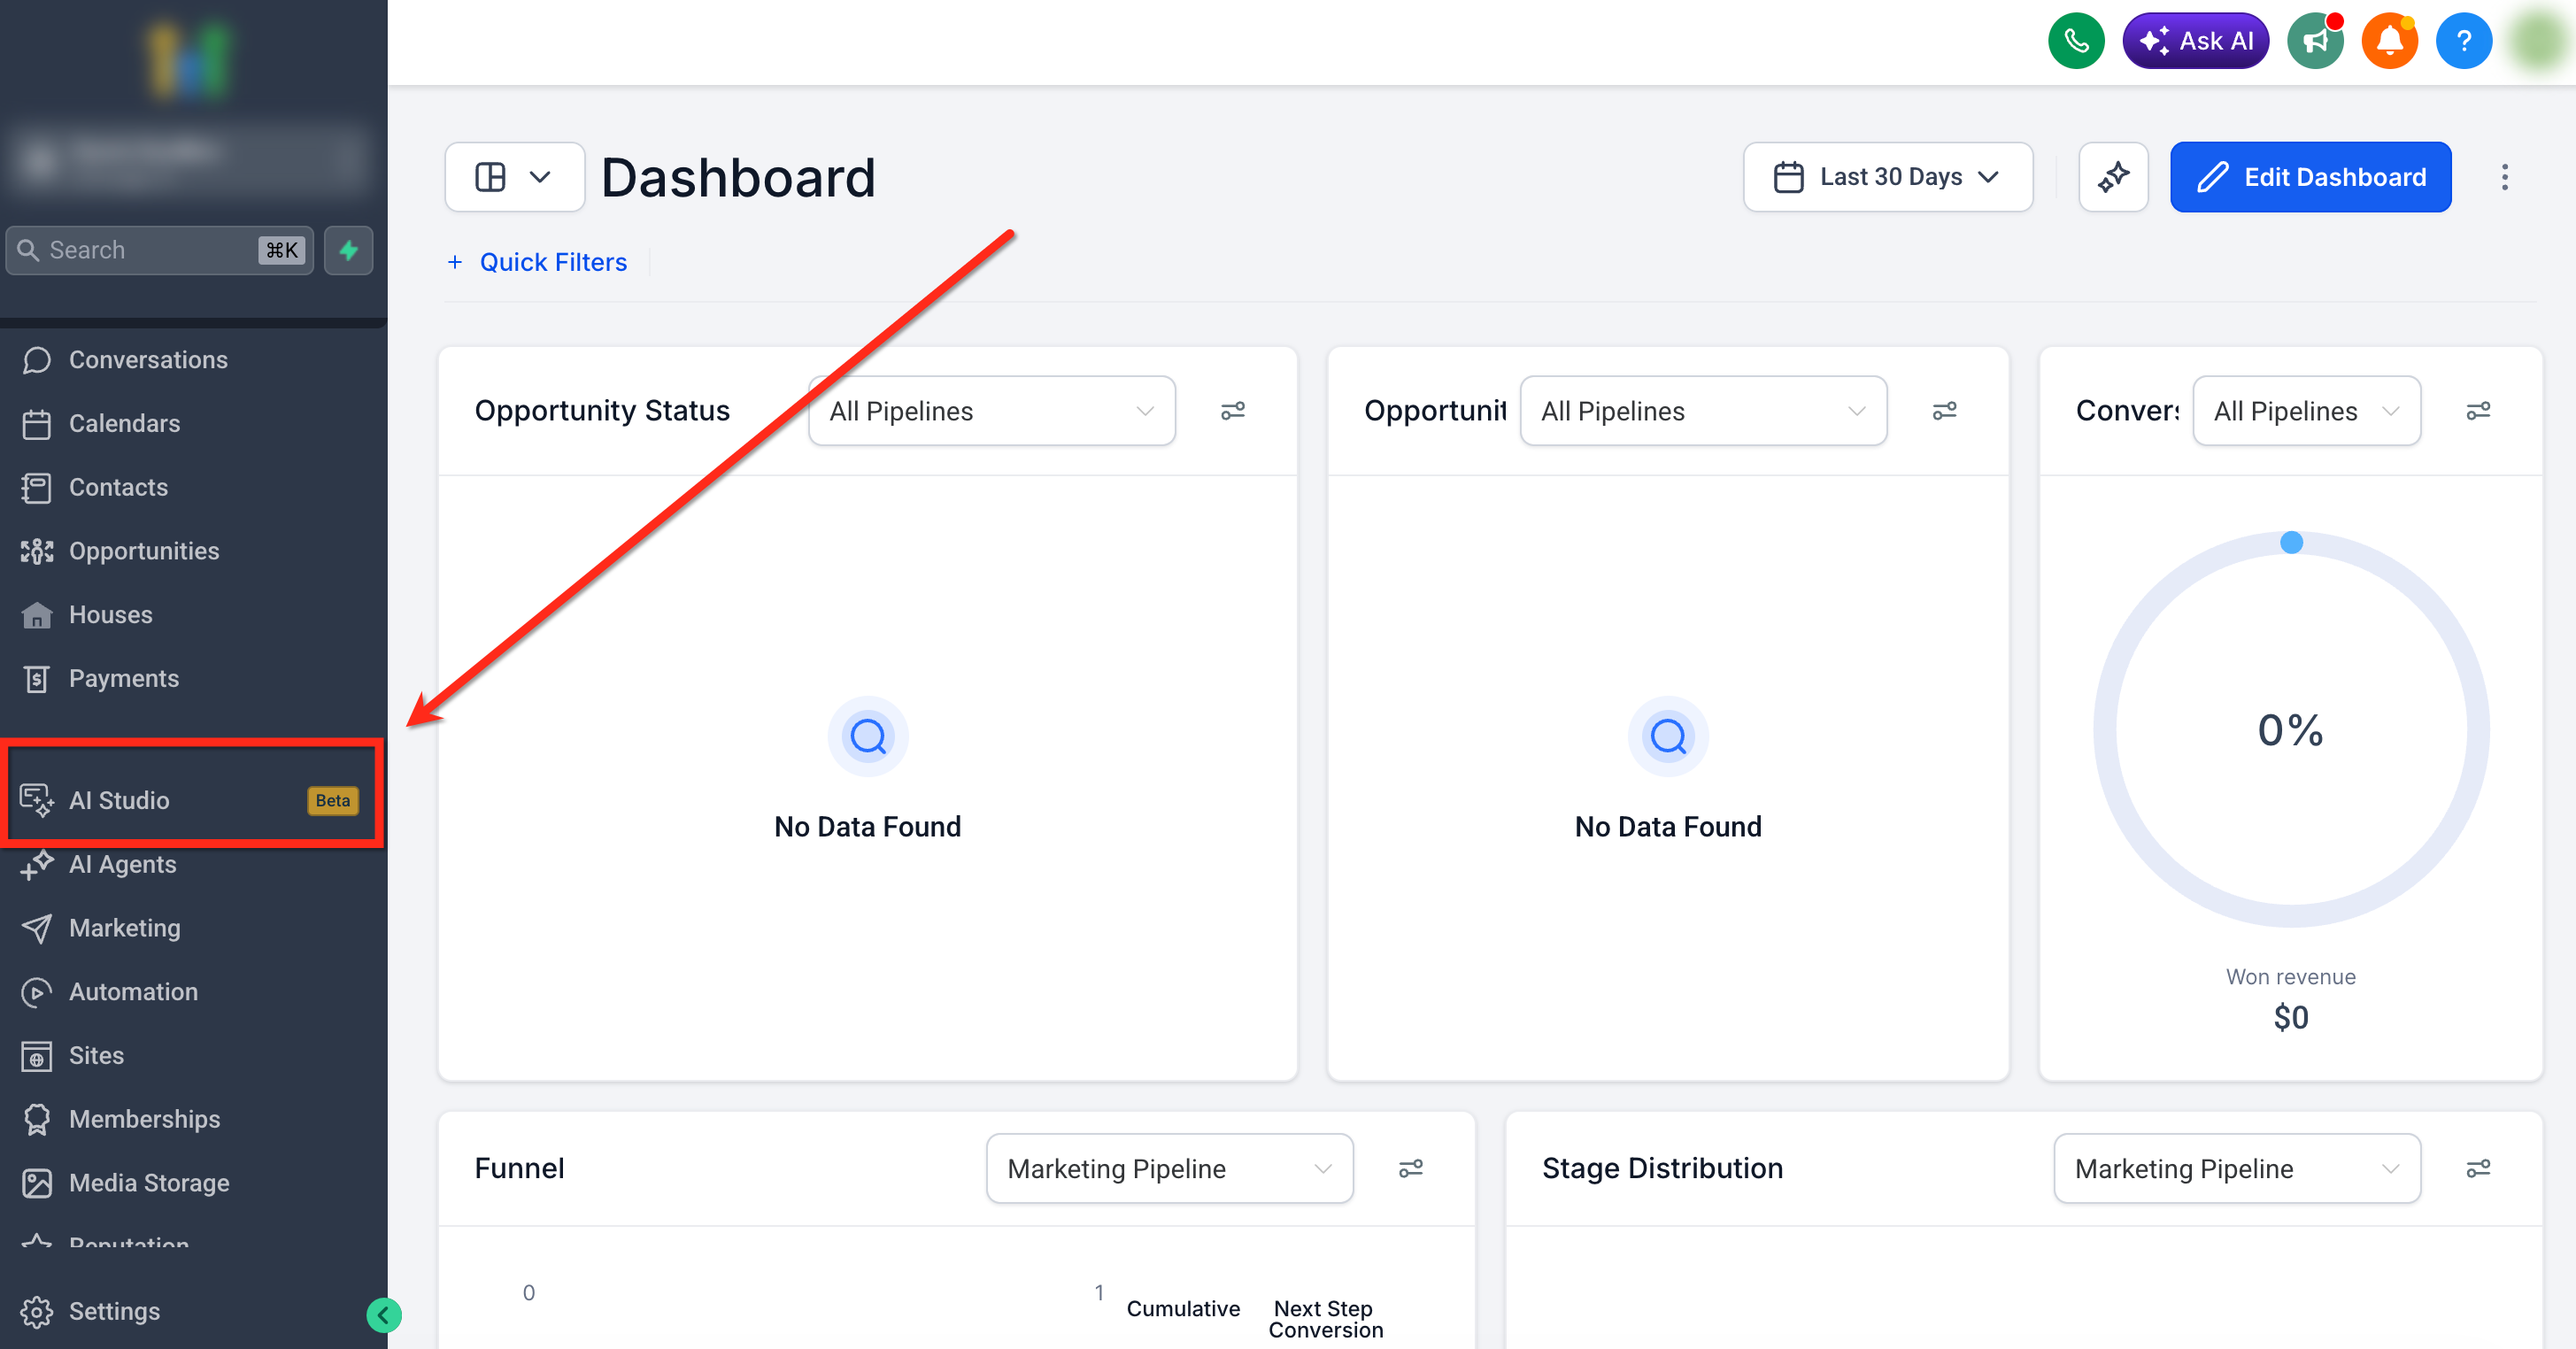
Describe the behavior, not just the look, and AI Studio builds the backend pieces with it. - In the prompt box, describe the application, including the public pages and the private functionality, not just the design.
- Name every outside service, private credential, incoming webhook and public API the app needs. Example: an order status portal with a public landing page, a private account lookup that runs on the server, and an API endpoint that receives order status webhooks.
- Optionally attach files, images or a live URL for inspiration.
- Click Generate and wait for the first draft.
- Refine the draft with follow up prompts, use Visual Edits to click elements in the preview, or open the Code Editor for direct changes.
Part 02 of 06
Keep secrets server side and off the page.
This is the part most people skip, and it is the part that keeps the app safe. Any API key goes into Secrets. Any work that uses that key runs in a Server Function. The browser only ever sees the result.
- Identify every private credential the integration needs.
- When AI Studio prompts for it, add each credential through the Secrets workflow and give it a clear, recognizable name.
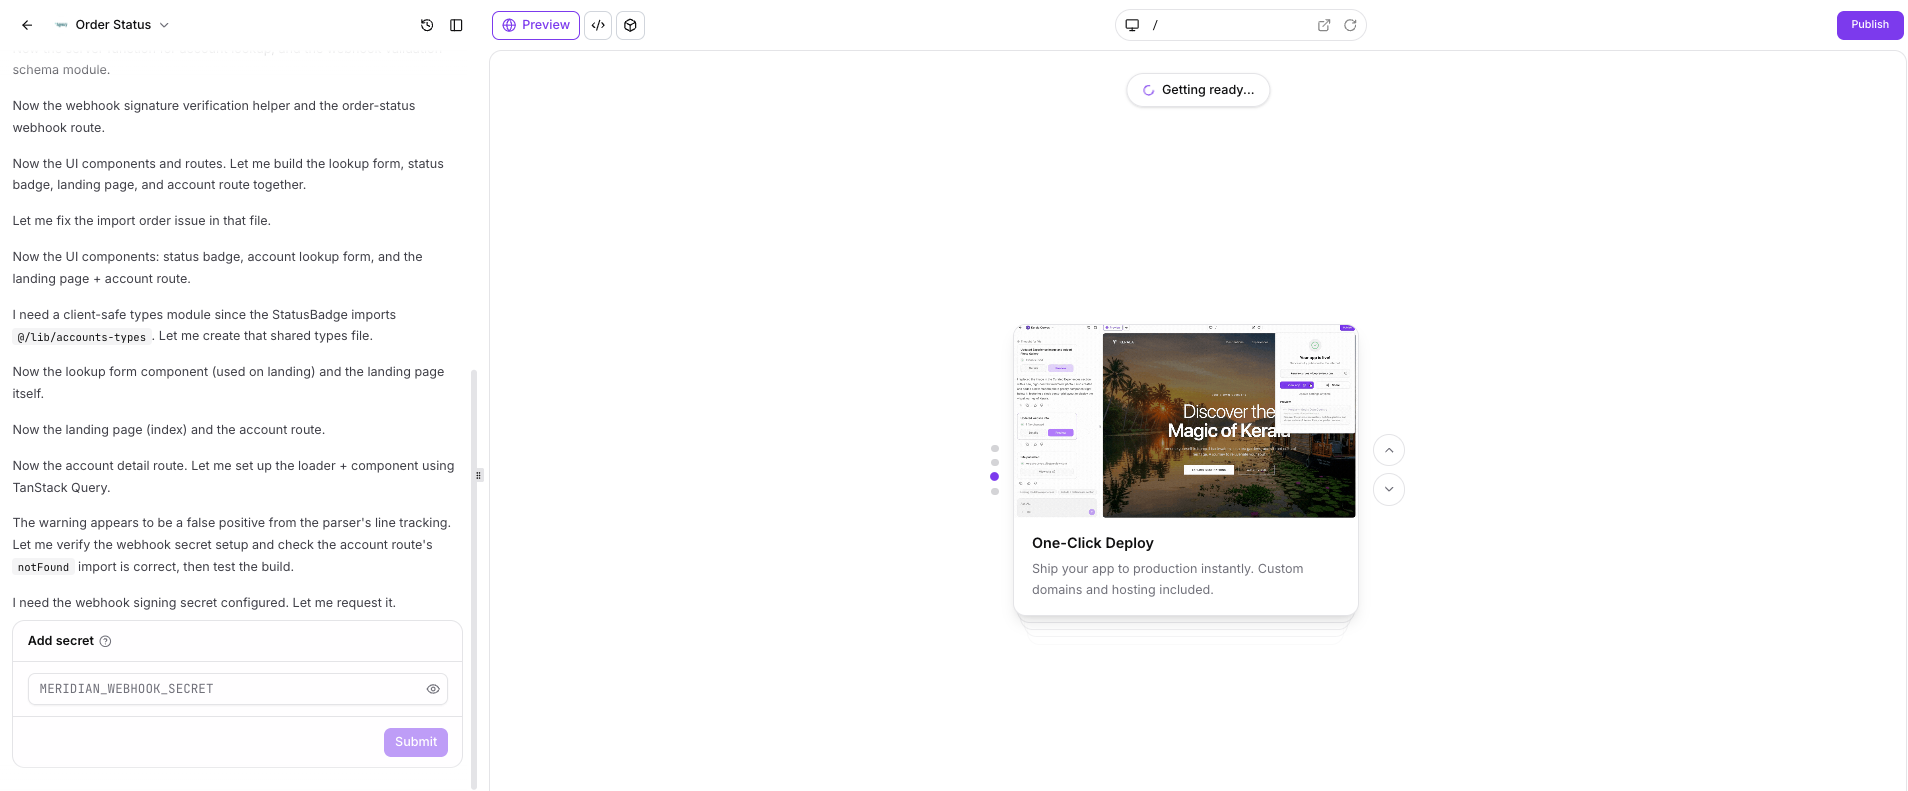
Secrets stay on the server. Server Functions do the private work. REST APIs take calls from outside. - Ask AI Studio to create a Server Function for each backend task the frontend calls.
- Check that the Server Function reads the credential from Secrets and returns only the information the frontend needs.
- For any outside system that must call your app, such as a webhook, ask AI Studio to create a REST API route under /API/ with the HTTP method and expected payload defined.
- Add authentication or signature validation to that route when the outside system supports it.
- Test each Server Function and REST endpoint with both expected and unexpected input.
- Review the generated code for any extra validation you want.
Part 03 of 06
Turn on Cloud and give the app data, users and storage.
Cloud is the managed backend that lives inside the project. Enabling it creates a database, a sign in service and file storage buckets. You manage all three from the Cloud dashboard without writing server code.
- Inside the project, click More, then Cloud.
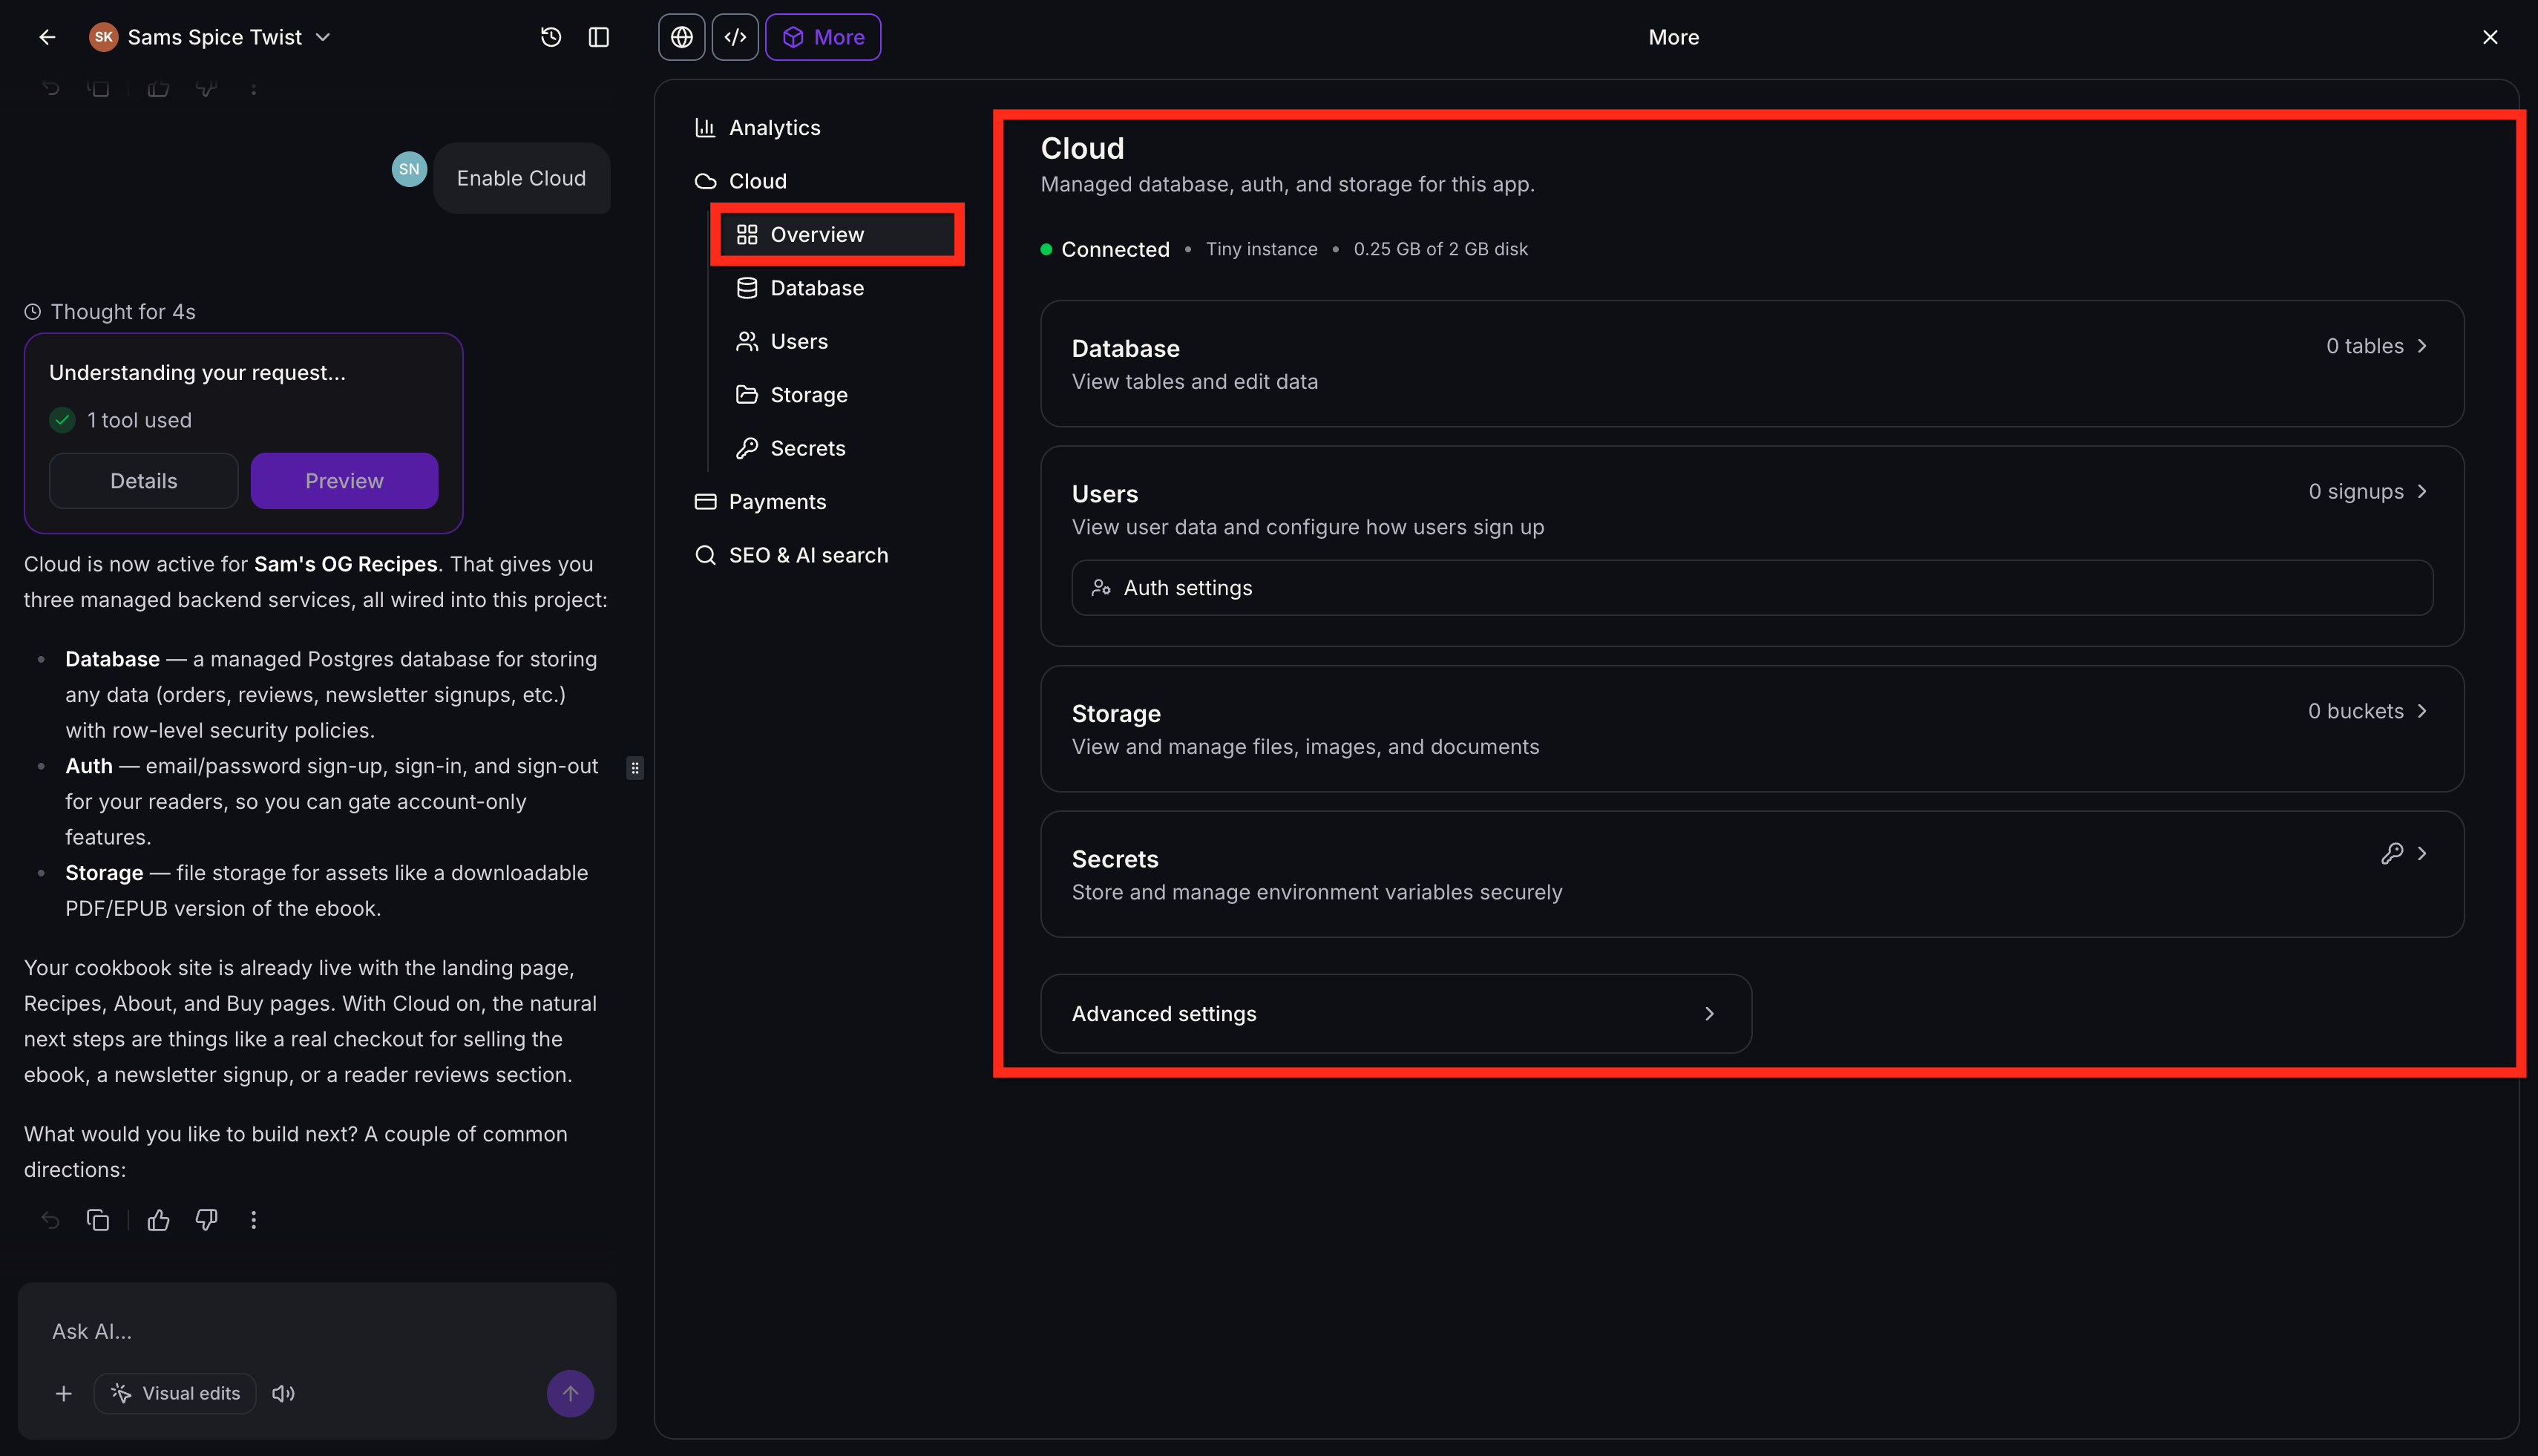
The Cloud dashboard: database, users and storage in one place. - Open Overview and click Enable Cloud, then keep working while provisioning finishes.
- Go to Cloud, then Database, click RLS policies and review the access policy on each table. Describe any change you need in the chat.
- Go to Cloud, then Users. Set the Sign in methods to email and password, set the Minimum password length, and leave Autoconfirm email off.
- Set the Site URL and add any Redirect URLs users return to after signing in.
- Go to Cloud, then Storage and click New bucket. Enter a lowercase name and choose Private for user uploads.
- Open the bucket's Storage page, enter an Upload size limit that fits your files, and click Save.
Part 04 of 06
Connect the form and fire a workflow on every submission.
Cloud stores app data. It does not store leads. A form connected to CRM tracking sends each submission into the subaccount, and the AI Studio Form Submitted trigger starts the follow up.
- Ask AI Studio to add the lead form your process needs and to connect it to CRM tracking.
- If the form existed before, type Retrigger form integration in the chat, then connect the form to CRM tracking again.
- Go to Automation, then Workflows and create a new workflow.
- Click Add New Trigger, search for AI Studio Form Submitted and select it.
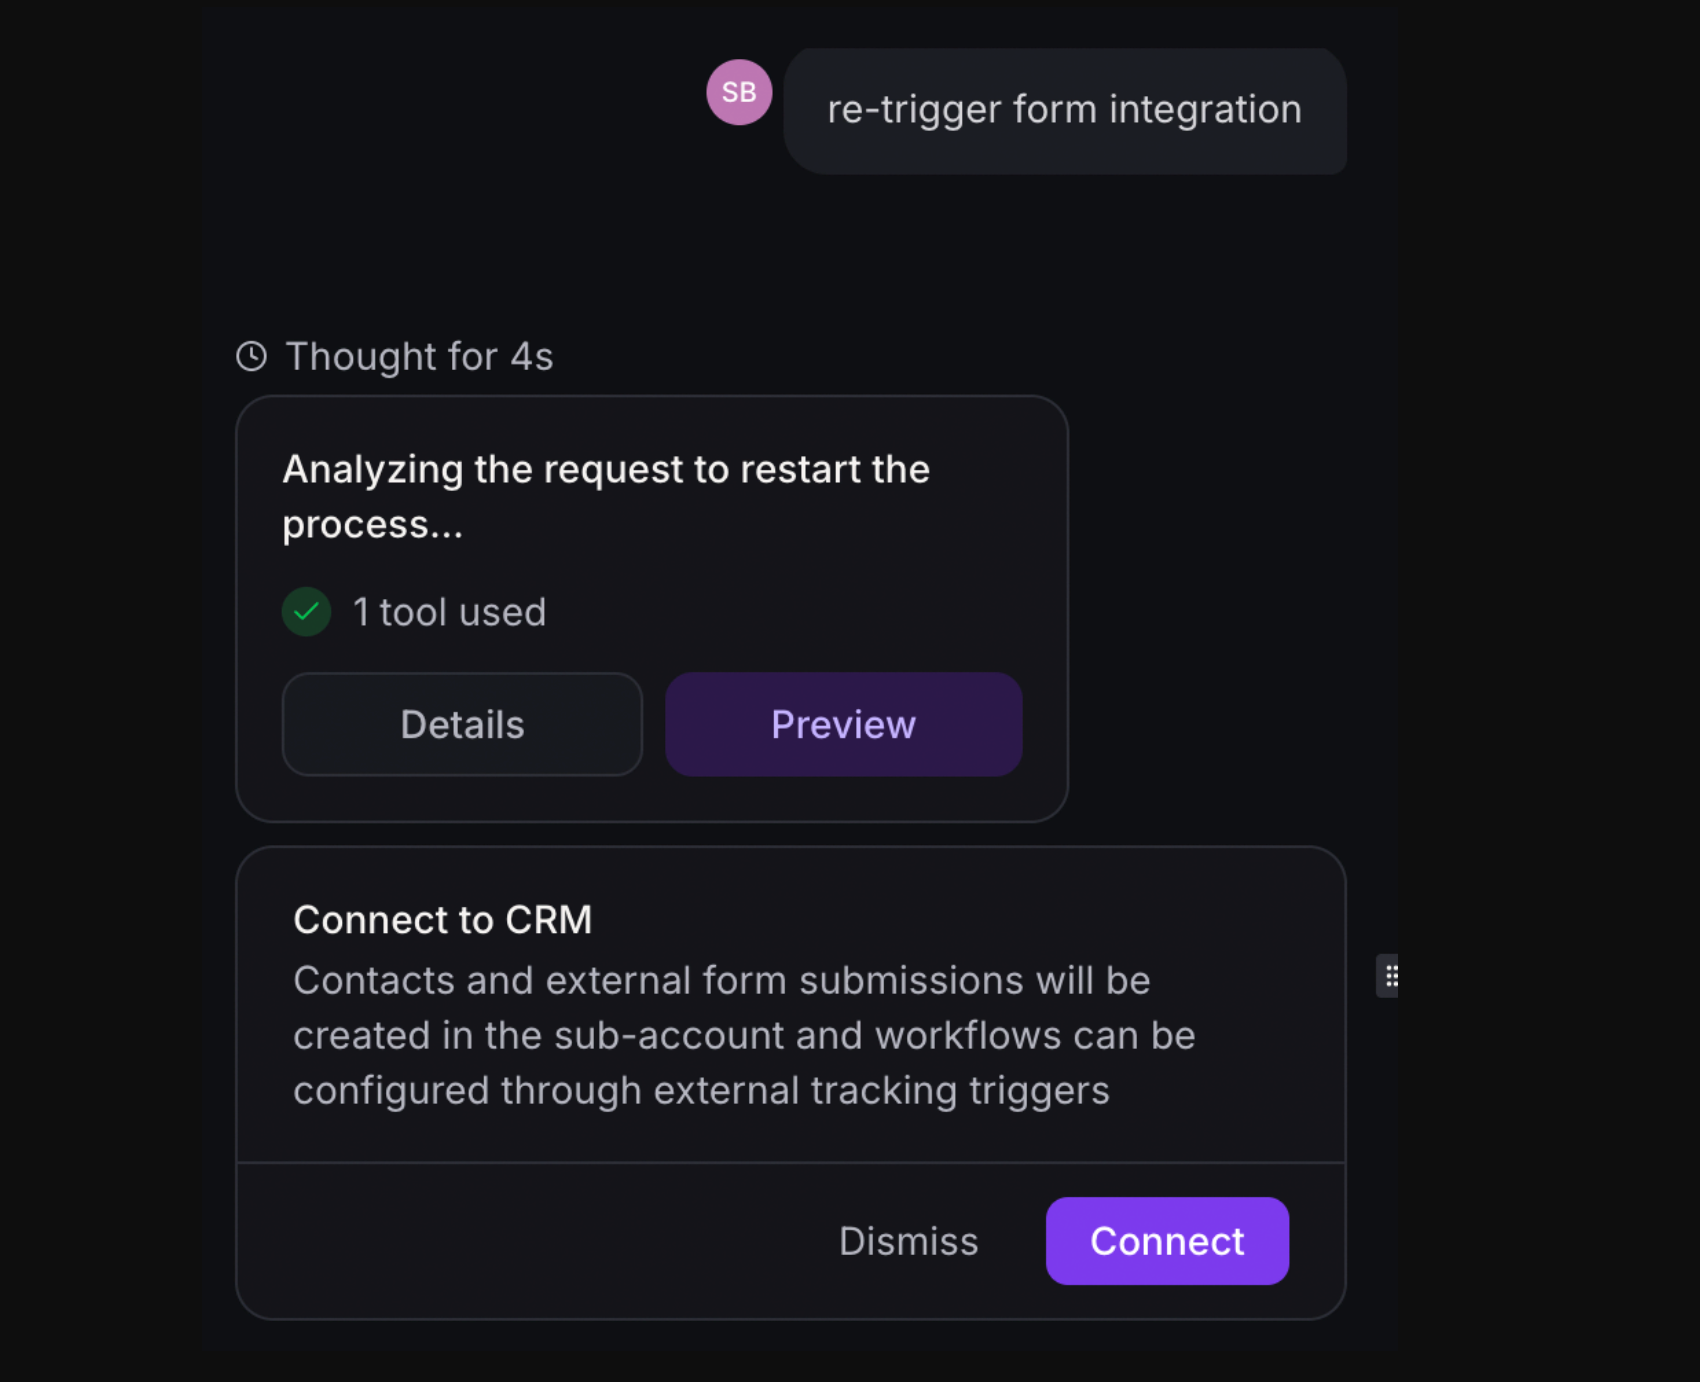
Filter by project and form so the right workflow fires. - Add the AI Studio project filter and the AI Studio form filter so only this app's form starts the workflow.
- Add the actions you want, such as an email, an SMS, a tag or opportunity creation.
- Save the workflow and toggle it to Published.
Part 05 of 06
Add payments from your HighLevel catalog.
HighLevel renders the checkout, so your app never touches card data. The trade is that every product, price and variation must already exist in the HighLevel product catalog. Payments start in Test mode.
- Inside the project, click More, then Payments.
- Click Enable Payments. If AI Studio already offered Add payments to this app during the build, you can click Enable Payments there instead.
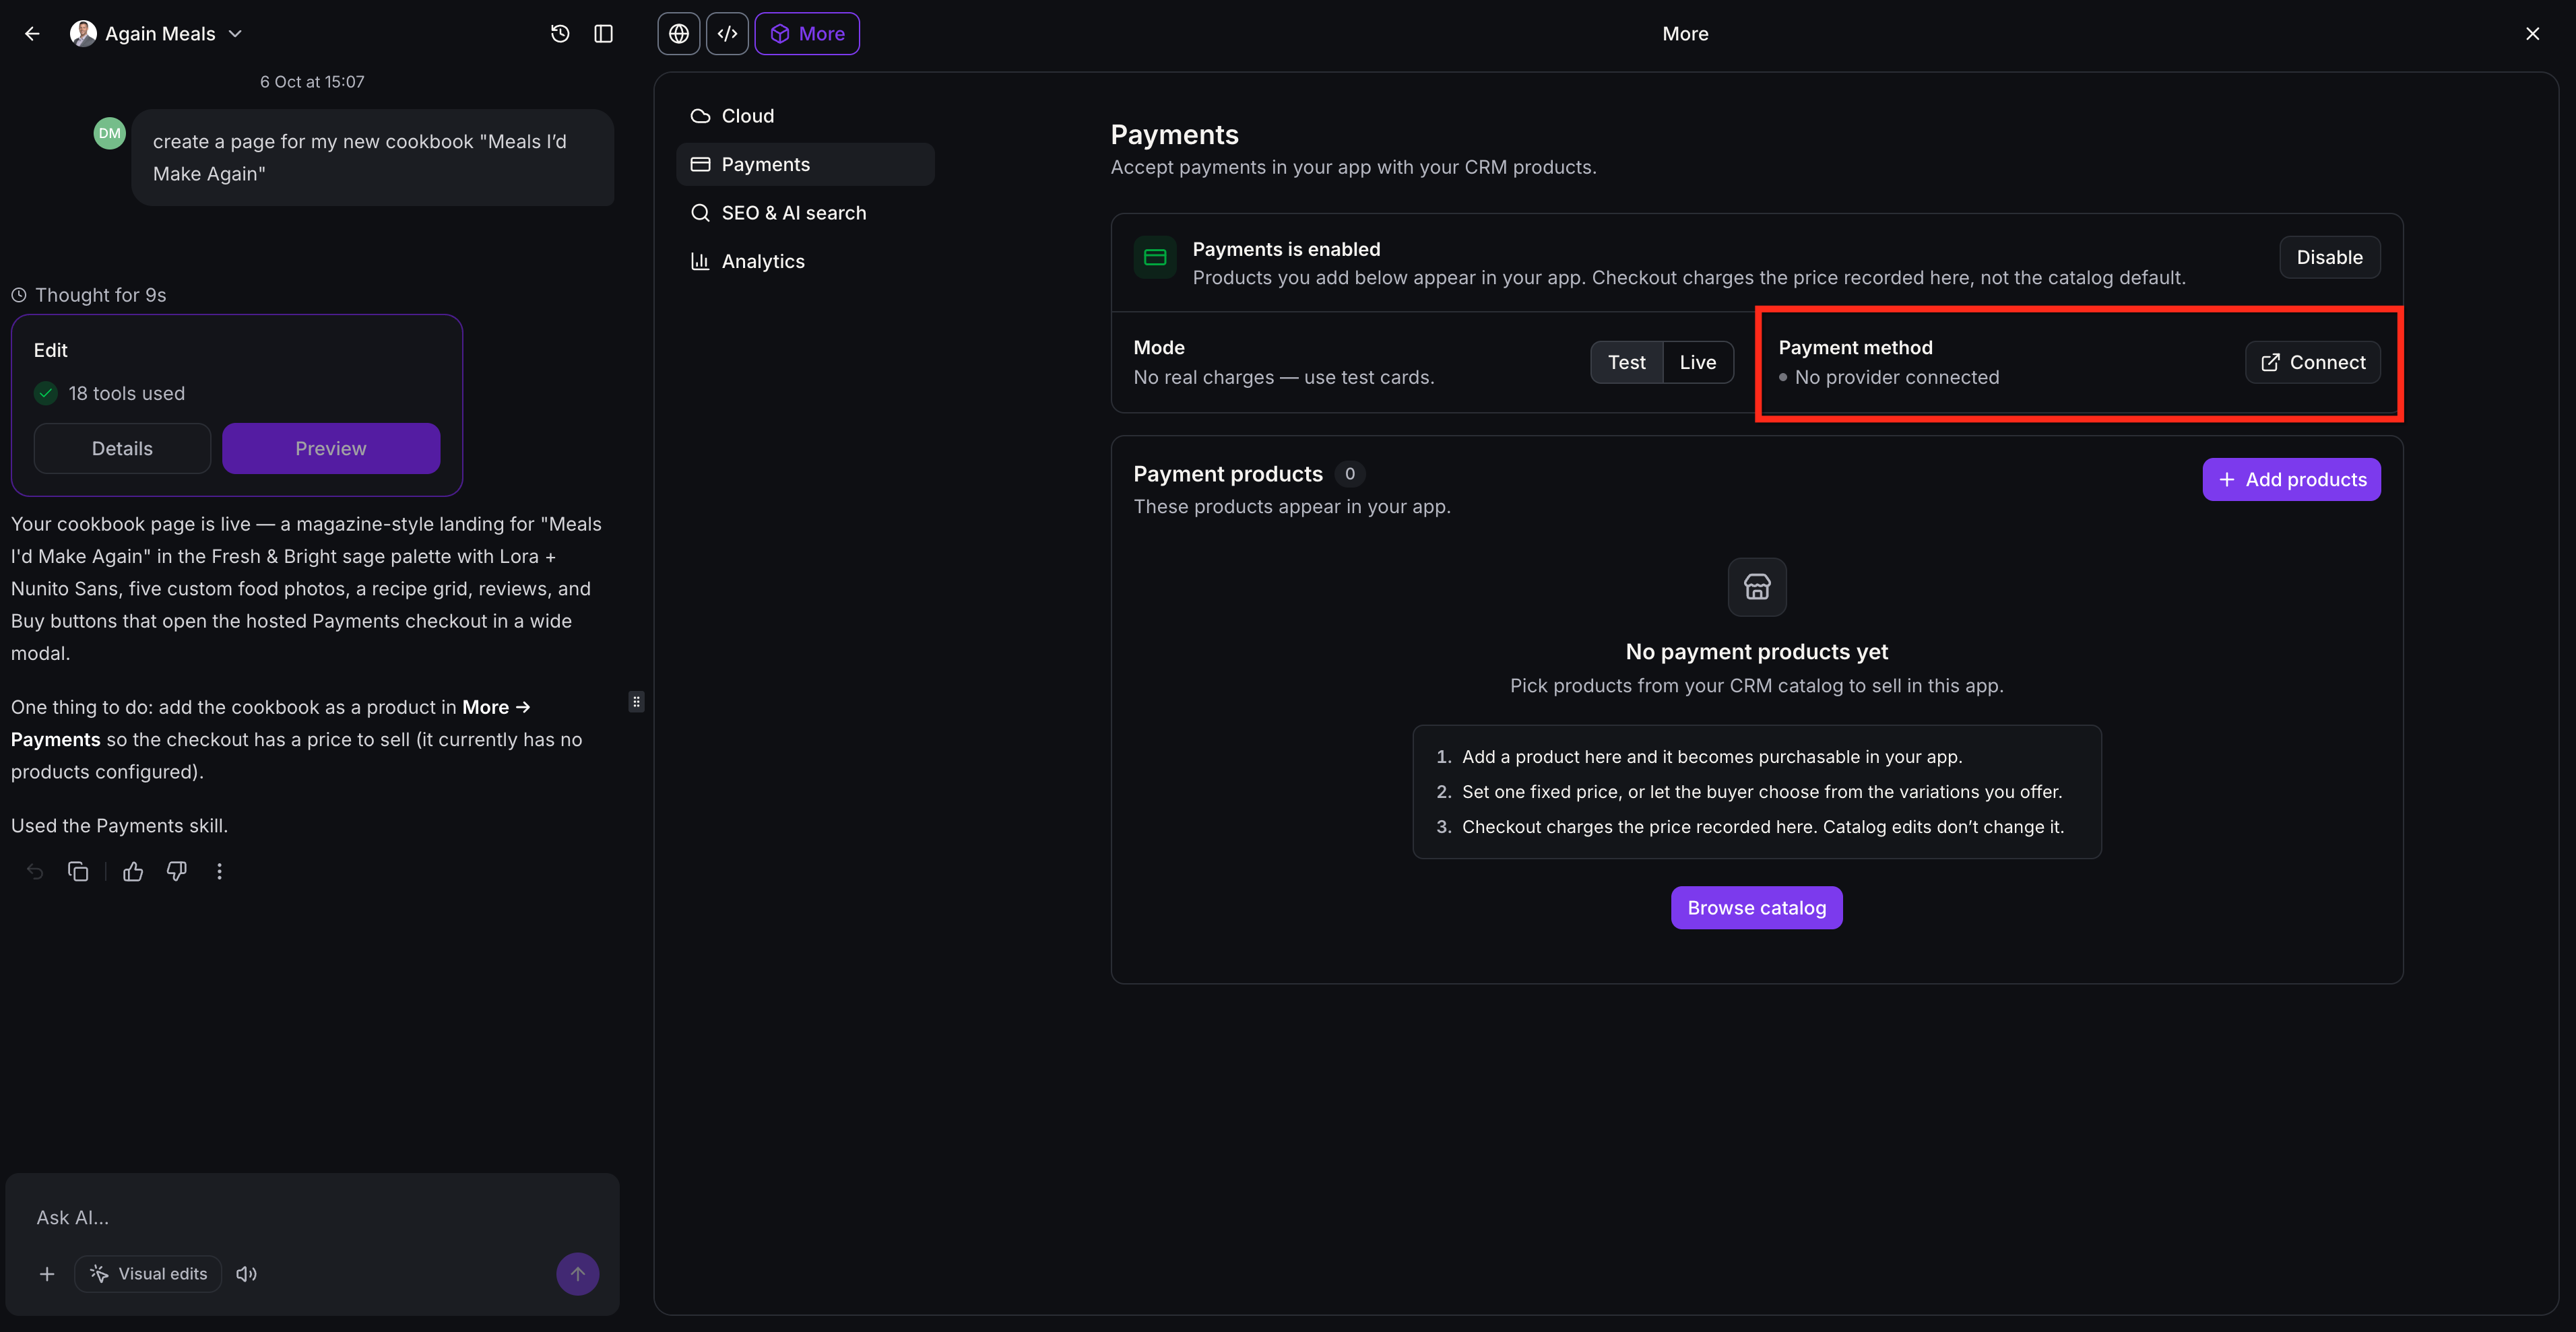
Products come from the HighLevel catalog. The provider comes from HighLevel payment settings. - In Payment products, click Add products or Browse catalog.
- Search for the product by name or SKU and select it.
- Click Continue to pricing and choose Fixed price or Customer chooses variation.
- Review the configuration and click Add product.
- Check the Payment method area shows your connected provider.
- Leave the project in Test mode until you have run a full checkout.
Part 06 of 06
Publish on your domain and back up the code.
Publishing puts the app on a preview URL first, then on your own domain. Git sync and the ZIP download give you a copy of the code outside HighLevel, which matters the day you want to hand the project to a developer.
- Click Publish in the top right corner, review the generated address, and confirm publication.
- Click Publish again, select Add Custom Domain, and enter your domain.
- Add the DNS records AI Studio shows at your domain provider, click Verify DNS, and wait for certificate provisioning to finish.
- Click More, then Git, select GitHub, click + Add connection, and click Continue on GitHub.
- Install and authorize Lead Connector on GitHub, then return to AI Studio and let the connection finish. A private repository is created and the first version is pushed.
- Confirm Automatic Push and Automatic Pull are both enabled.
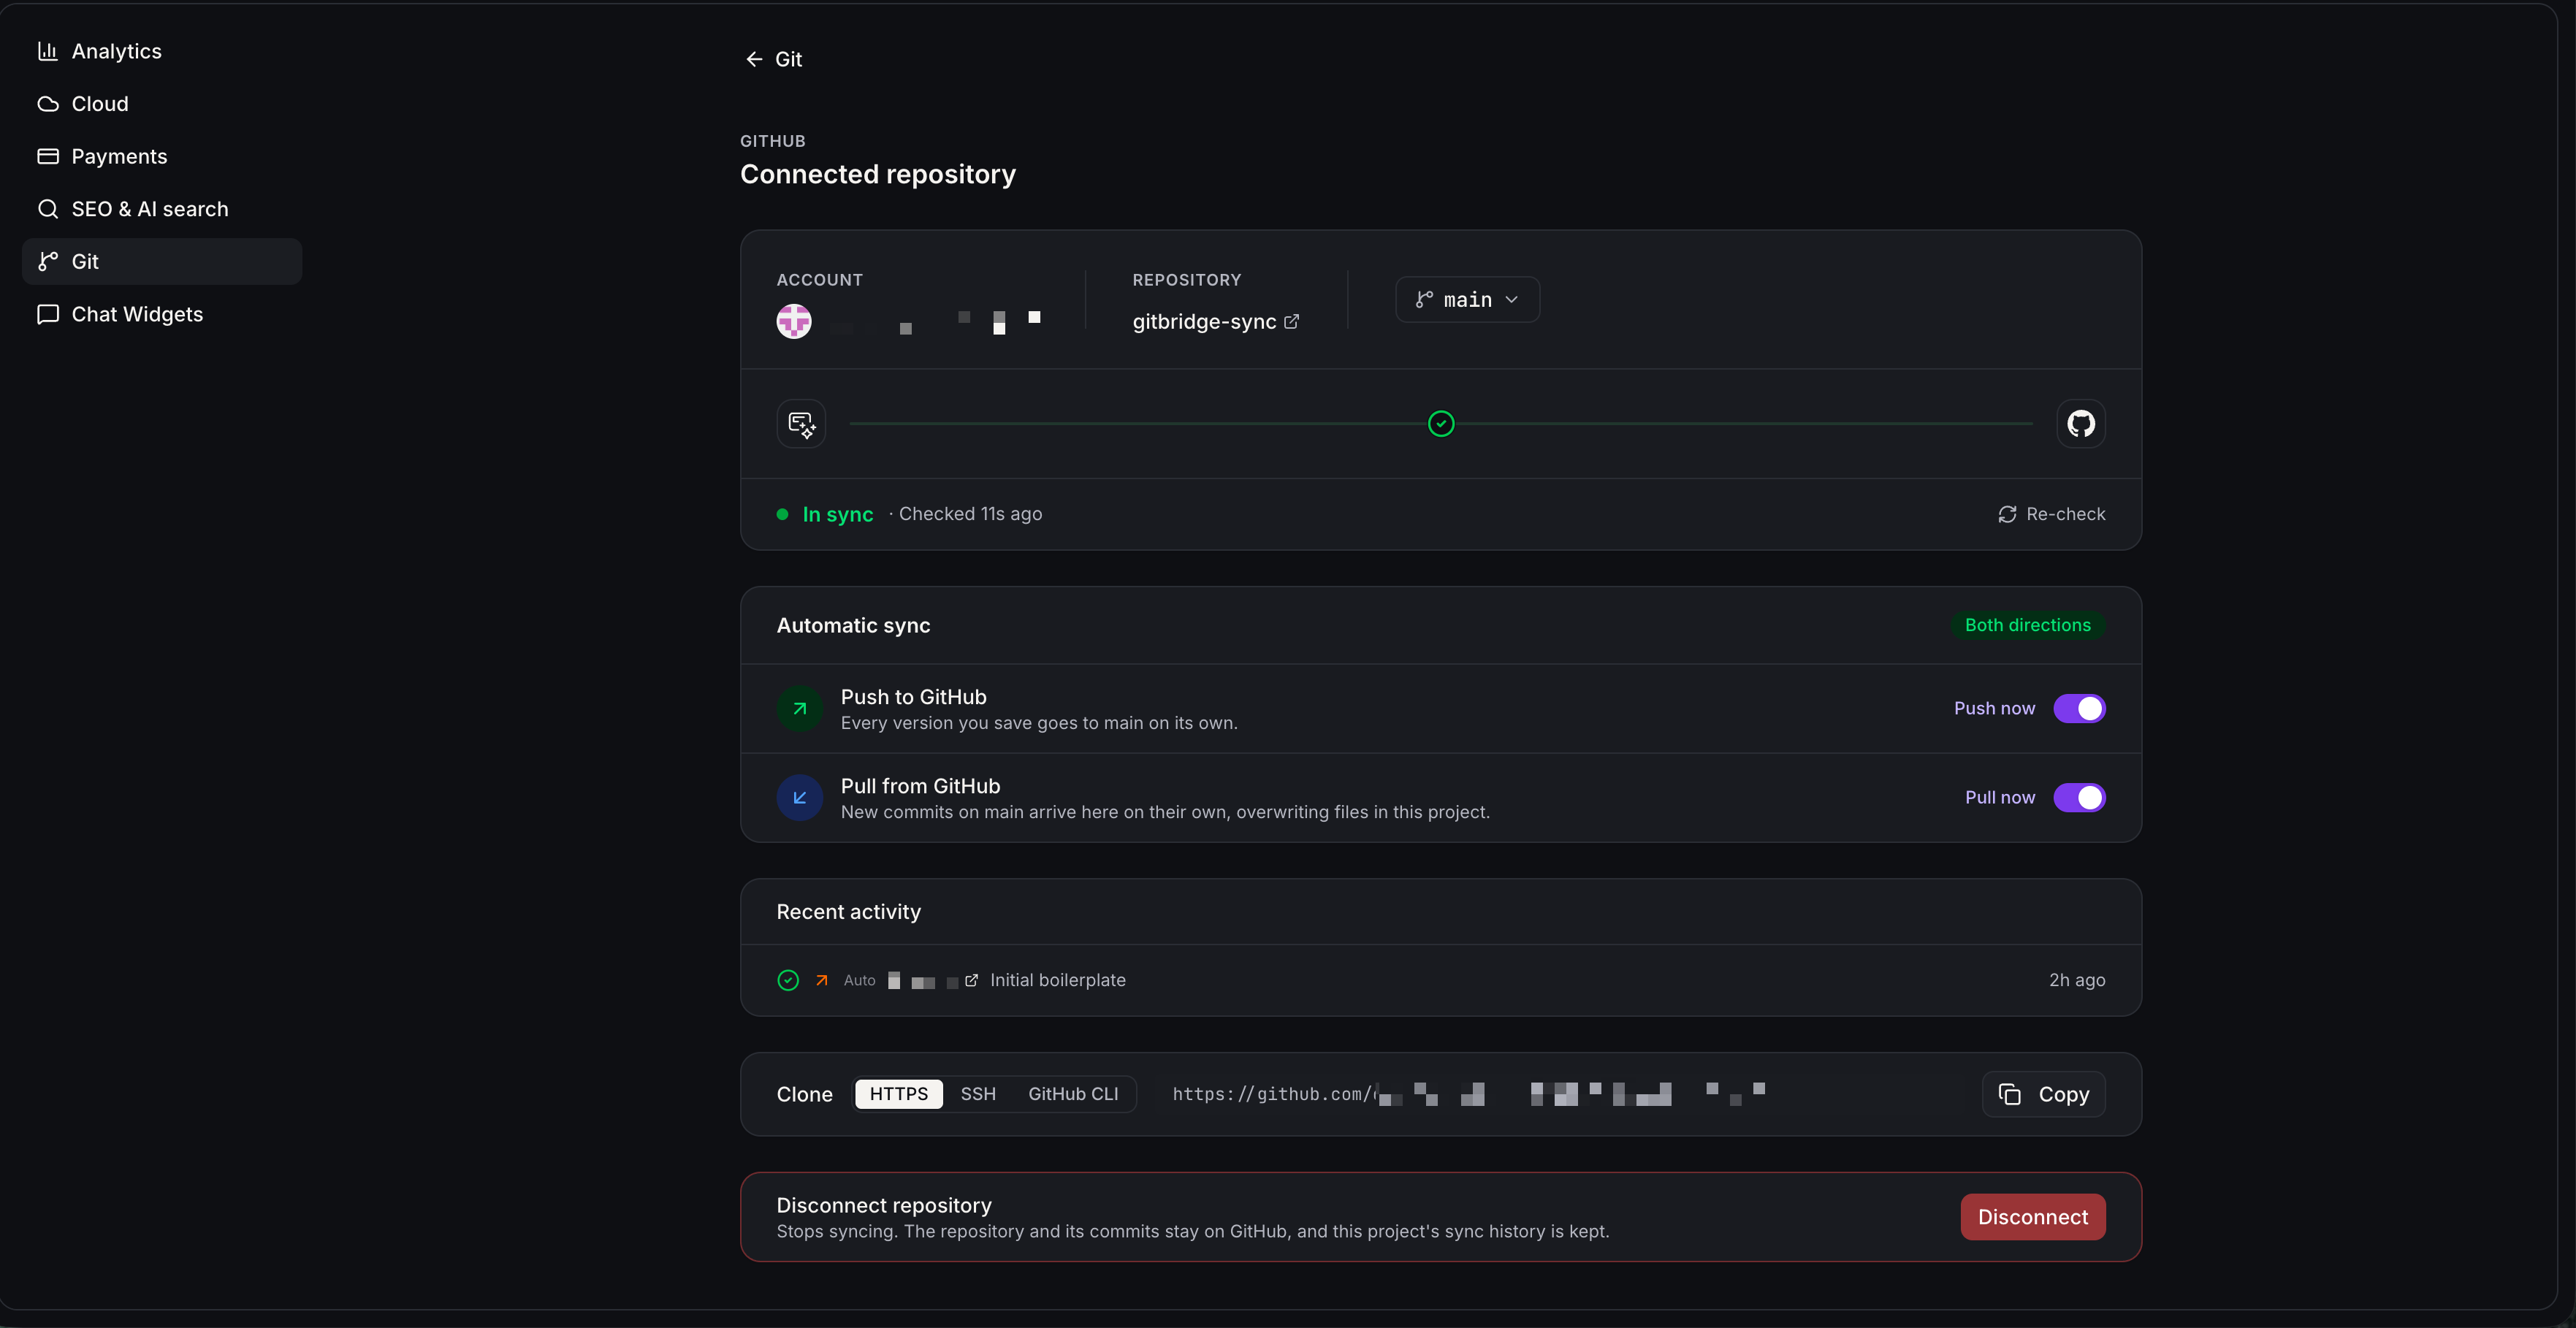
Every saved version pushes to GitHub on its own. - Click Code in the top navigation, scroll to the bottom, and click Download Codebase to keep a ZIP snapshot.
- Open More, then Payments and switch from Test mode to Live mode once the test checkout in the next section passes.
Test it
Test the app before you call it done.
Run these on the published URL, not the preview, so you test what customers will see.
- Open the published domain in a private browser window. The public pages load and the page titles and headings read correctly.
- Trigger the private action, such as the account lookup. You get the expected result, and view source shows no API key anywhere in the page.
- Send a test request to the REST endpoint with a wrong payload. The app returns a clean error, not a crash.
- Sign up as a new user with a short password. The app rejects it until the password meets the minimum length. Then sign up correctly and confirm the user appears under Cloud, then Users.
- Upload a file as that user. It appears in the private bucket under Cloud, then Storage.
- Submit the lead form. The contact appears in the subaccount, and the workflow's Execution Logs tab shows the AI Studio Form Submitted trigger fired and the actions ran.
- Run a checkout in Test mode. Pricing matches the catalog and the order completes without a real charge. Then switch to Live mode.
New to AI Studio? Start with the shorter AI Studio tutorial. This guide builds a web application, which is different from the HighLevel phone app. For that, see whether HighLevel has a mobile app. Plan prices are on the GoHighLevel pricing hub and plans compared, and you can build this in your own account during a 30 day trial through Michael's link.
When a step fails
When something fails and how to fix it.
Most failures in this build trace back to one of these.
- Cloud or Payments will not enable on an existing project
- Both need a TanStack Start project. Open Project Settings, then Migrate to SSR, or start a new project.
- The form submits but the workflow never fires
- Confirm the form is connected to CRM tracking, the project is published, and the test entry was sent after that publish. If the form predates the trigger, type Retrigger form integration in the chat and reconnect it. Then check the Execution Logs tab.
- The Git push is blocked
- Git sync found a credential in the code. Move it into Secrets, reference it from a Server Function, and push again.
- The GitHub branch shows as diverged
- Both sides have new commits. Select Review, then choose Force push to keep the AI Studio version or New branch to keep both sets of commits.
- Cloud paused on its own
- The wallet balance ran out. The app keeps running for 48 hours while the agency owner is notified, then Cloud pauses without deleting data. Fund the wallet and Cloud wakes up automatically.
- The project environment goes stale or stops responding
- Ask AI Studio in the chat to recover the environment. It restores the project and verifies the result before finishing.
Questions
Common questions.
These questions come up most during an AI Studio app build.
- What is the difference between a Server Function and a REST API?
- A Server Function is private backend logic that your own frontend calls. A REST API is an HTTP endpoint that outside systems, such as a webhook provider, can call. New AI Studio projects are built on TanStack Start, which gives you both, along with server side rendering and Secrets for API keys.
- Does enabling Cloud update my published app?
- No. The published app stays as it was until you publish the project again. Turn on Cloud, finish the changes that use it, then publish again so the live app picks them up. Run your tests on the published URL, not the preview, so you test what customers will see.
- Are form submissions stored in Cloud?
- No. A form connected to CRM tracking sends each submission to the subaccount CRM, and the AI Studio Form Submitted trigger starts the follow up workflow. Cloud storage is a separate capability for the app's own data, such as its database, user accounts and uploaded files.
- What does Cloud cost?
- Every project gets a free Tiny instance, 2 GB of database storage and 1 GB of file storage. Larger instances and extra storage bill hourly. Pausing stops instance charges only for fully paused hours, and only removing Cloud stops all charges, which also deletes the database, users and files.
- What payment methods work in AI Studio?
- Card payments through the connected provider and PayPal Express Checkout. Manual payment methods such as Cash on Delivery, shipping and pickup options, and product personalization fields are not supported in AI Studio payments. Checkout sells products from your HighLevel catalog, and payments need a project built on TanStack Start.
- Can I add Cloud and payments to an older AI Studio project?
- Yes, after a migration. New projects are built on TanStack Start, which gives you server side rendering, Server Functions, REST APIs and Secrets. An older React project needs Project Settings, then Migrate to SSR before Cloud or payments will work.
From the field
Michael’s take.

The first thing I do on an app build is write the process down before I touch the prompt box. Which pages are public, which steps must stay private, and which outside system the app talks to. That one paragraph decides whether AI Studio gives you a brochure or an application. Then I add the Secrets before I ask for a single Server Function, because the architecture follows the credentials.
Where people go wrong is the frontend. They paste an API key into the page because it worked in the preview. It works right up until someone opens view source. Keep every key in Secrets, let a Server Function do the work, and test the endpoint before you publish. Git sync will block the push if you get this wrong, and that block is a gift.
This build pays off when the process you turned into an app used to need a person. An order lookup, a client portal, an intake with a paid step. On the backend side I stay on the free Tiny instance until the app earns an upgrade, and I watch Cloud usage, because the reserved database storage does not shrink and keeps billing while paused. For a prototype I would rather remove Cloud than pay for idle capacity.
Go deeper
The features behind this build.
Every feature this guide touches has its own page in the library, with the settings, limits and Michael’s notes.
- AI EmployeeAI Studio in HighLevel: Build sites and experiences with AI
- AI EmployeeAI Studio full stack features: SSR, server functions, REST APIs & secrets
- AI EmployeeAI Studio cloud backend. Manage data, users and storage in HighLevel
- AI EmployeeAccept payments in AI Studio in HighLevel
- AI EmployeeAI Studio Cloud pricing in HighLevel
- AI EmployeeDownload AI Studio codebase as ZIP in HighLevel
- AI EmployeeHow to use Git sync in HighLevel AI Studio
- AI EmployeeAI Studio form submitted trigger for HighLevel workflows
Get the guide
Take it with you. The PDF is yours.
The whole build, cover to cover, as a PDF you can keep open on a second screen or print for the team. HighLevel's Founder page opens alongside it.
Next step
Build it in your own account with the CRM Pros team.
Start a HighLevel trial through Michael and the CRM Pros team comes with it. You get the account, the training and people who have built this exact app before.
The how to library has step by step HighLevel builds for Conversation AI, Voice AI, funnels, calendars, workflows and AI Studio. Go back to the full list.
Back to the GuidesAll the step by step builds