
01Who this is for
- Digital marketing teams can automate alerts when a client post fails, keeping campaigns on track.
- Small business owners can trigger follow up emails when a new post is published on a specific platform.
02Social Planner posts, explained
The trigger monitors activity in Social Planner. When a post meets the defined filter criteria, the workflow begins. Supported platforms include Facebook, Instagram, Bluesky, Google Business Profile, LinkedIn, Pinterest, Threads, TikTok, and YouTube. Post status options cover Approved, Failed, Approval Rejected, Approval Requested, Published, and Scheduled.
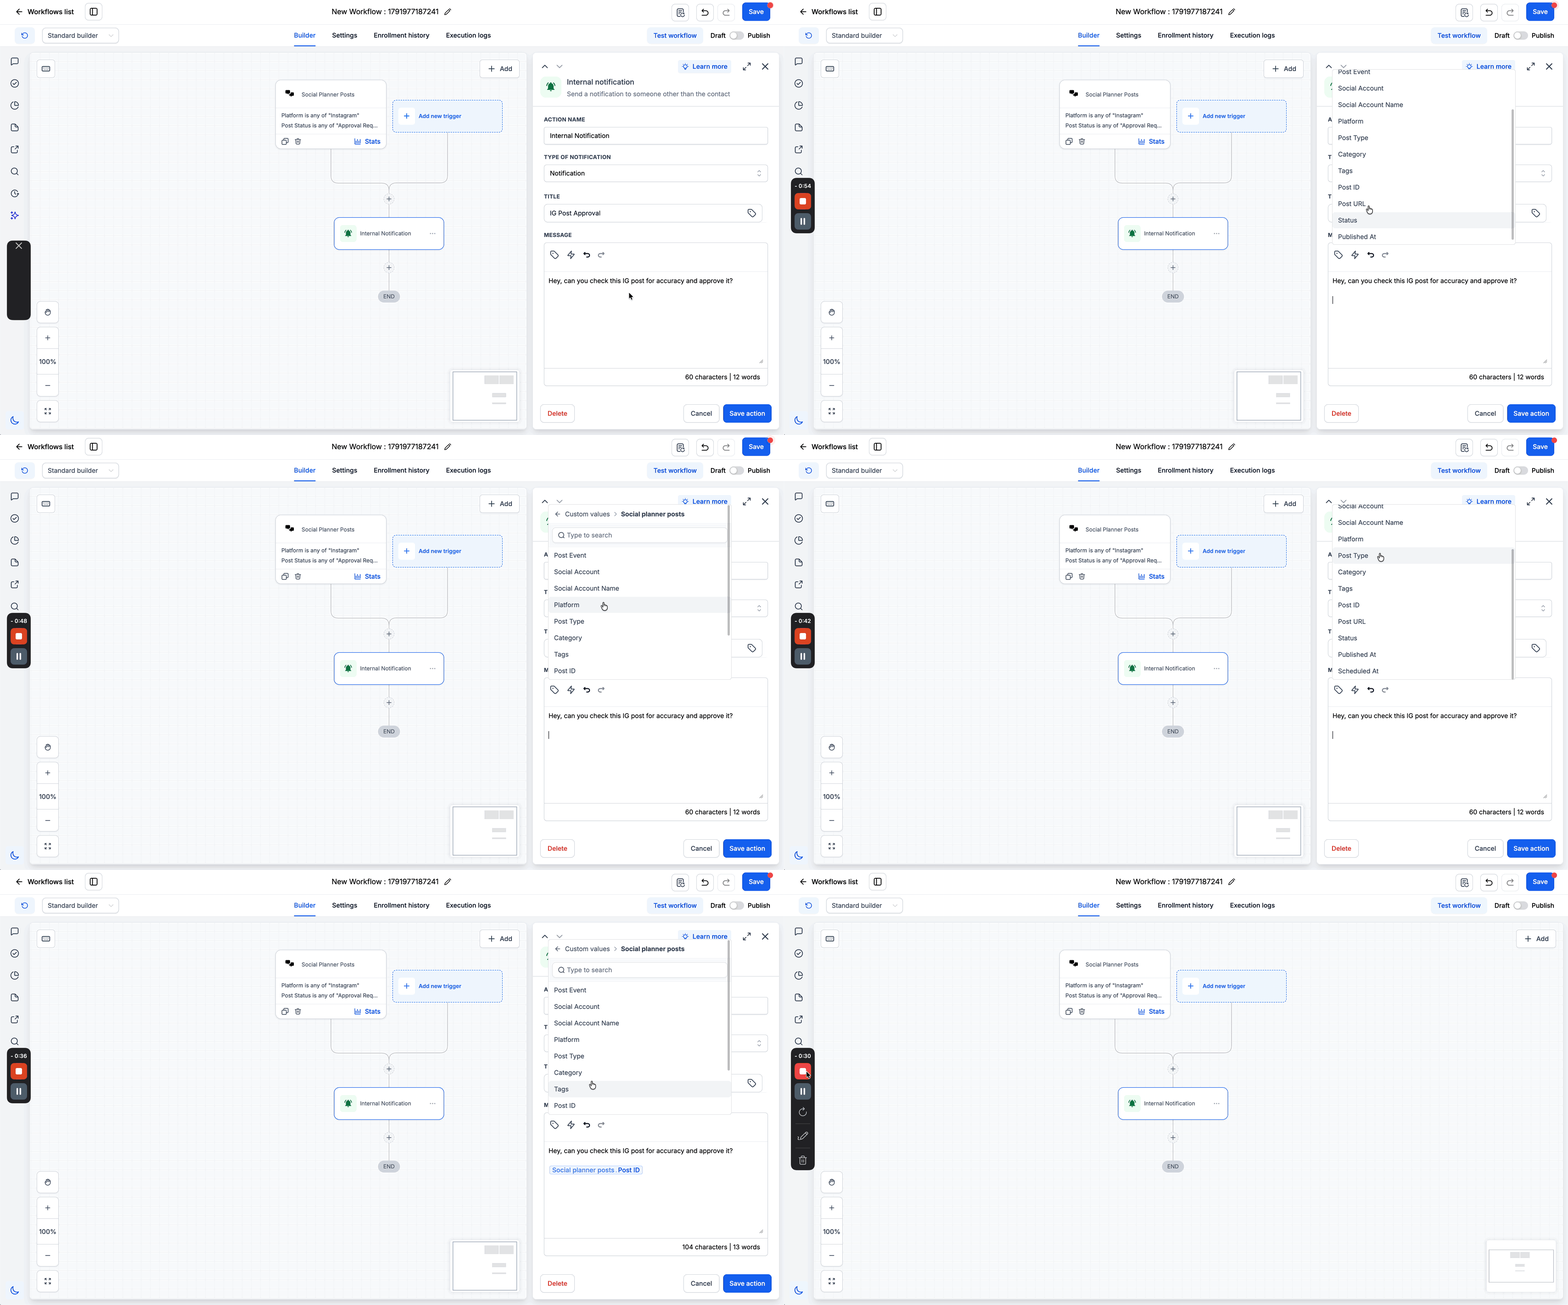
Filters let you narrow the start condition to categories, platforms, post types, specific social accounts, or tags. After the trigger fires, you can add any workflow actions and embed post fields such as Platform or Post ID in messages.
03How businesses use Social Planner posts
- Digital marketing agency. The agency adds the trigger, selects Platform: Facebook and Post Status: Failed, and creates an internal notification action. The team receives an alert each time a scheduled Facebook post does not publish, allowing rapid response.
- Restaurant. The restaurant sets Platform: Instagram and Post Status: Published, then adds an email action that includes the Post ID and Platform. When a new Instagram post goes live, a kitchen staff email includes the post details for coordinated promotions.
- Real estate brokerage. The brokerage chooses Post Type: Carousel and Tag: NewListing, then configures a text message to the sales team. Whenever a carousel post tagged as a new listing is approved, the team receives the listing details automatically.
04The numbers and rules that matter
- Filters available: Category, Platform, Post Status, Post Type, Social Accounts, Tags.
05Before you start
- Social Planner accounts must be connected to HighLevel.
- Only accounts linked through Social Planner are supported; accounts added via Integrations will not fire this trigger.
06How to set up and use Social Planner posts in HighLevel
Set up the Social Planner Posts trigger
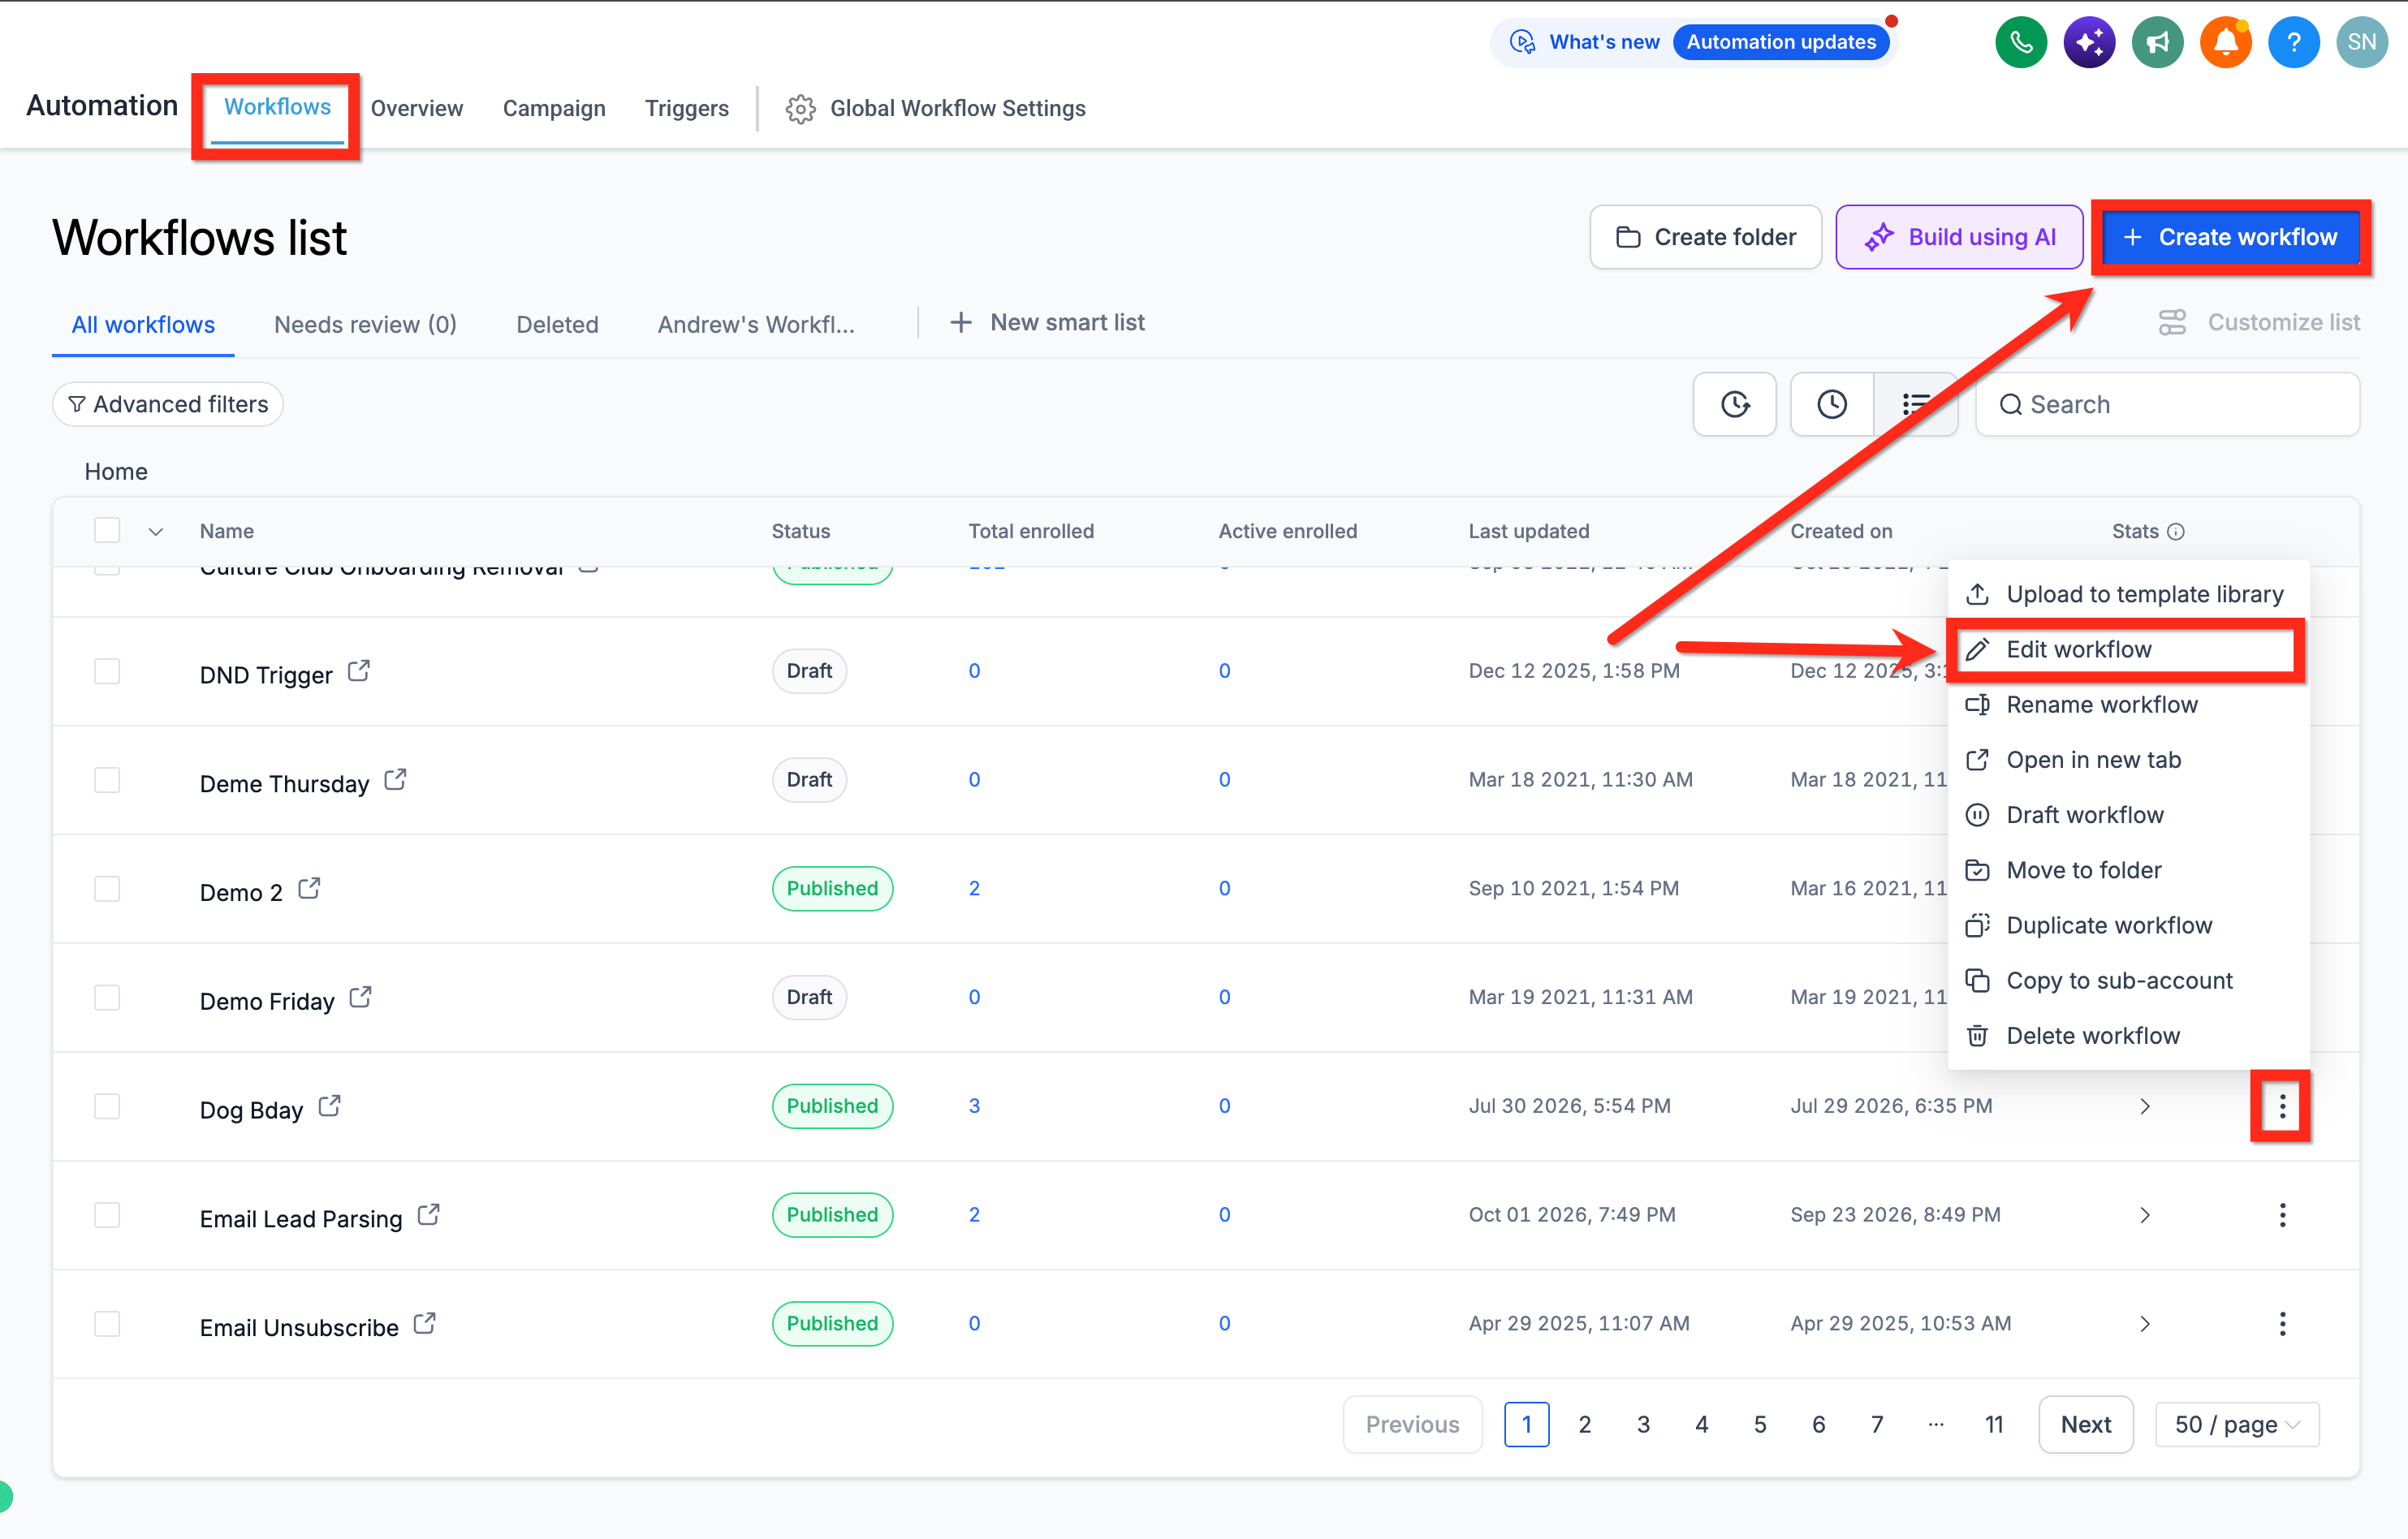
- Open Automation > Workflows and create a new workflow or open an existing one.
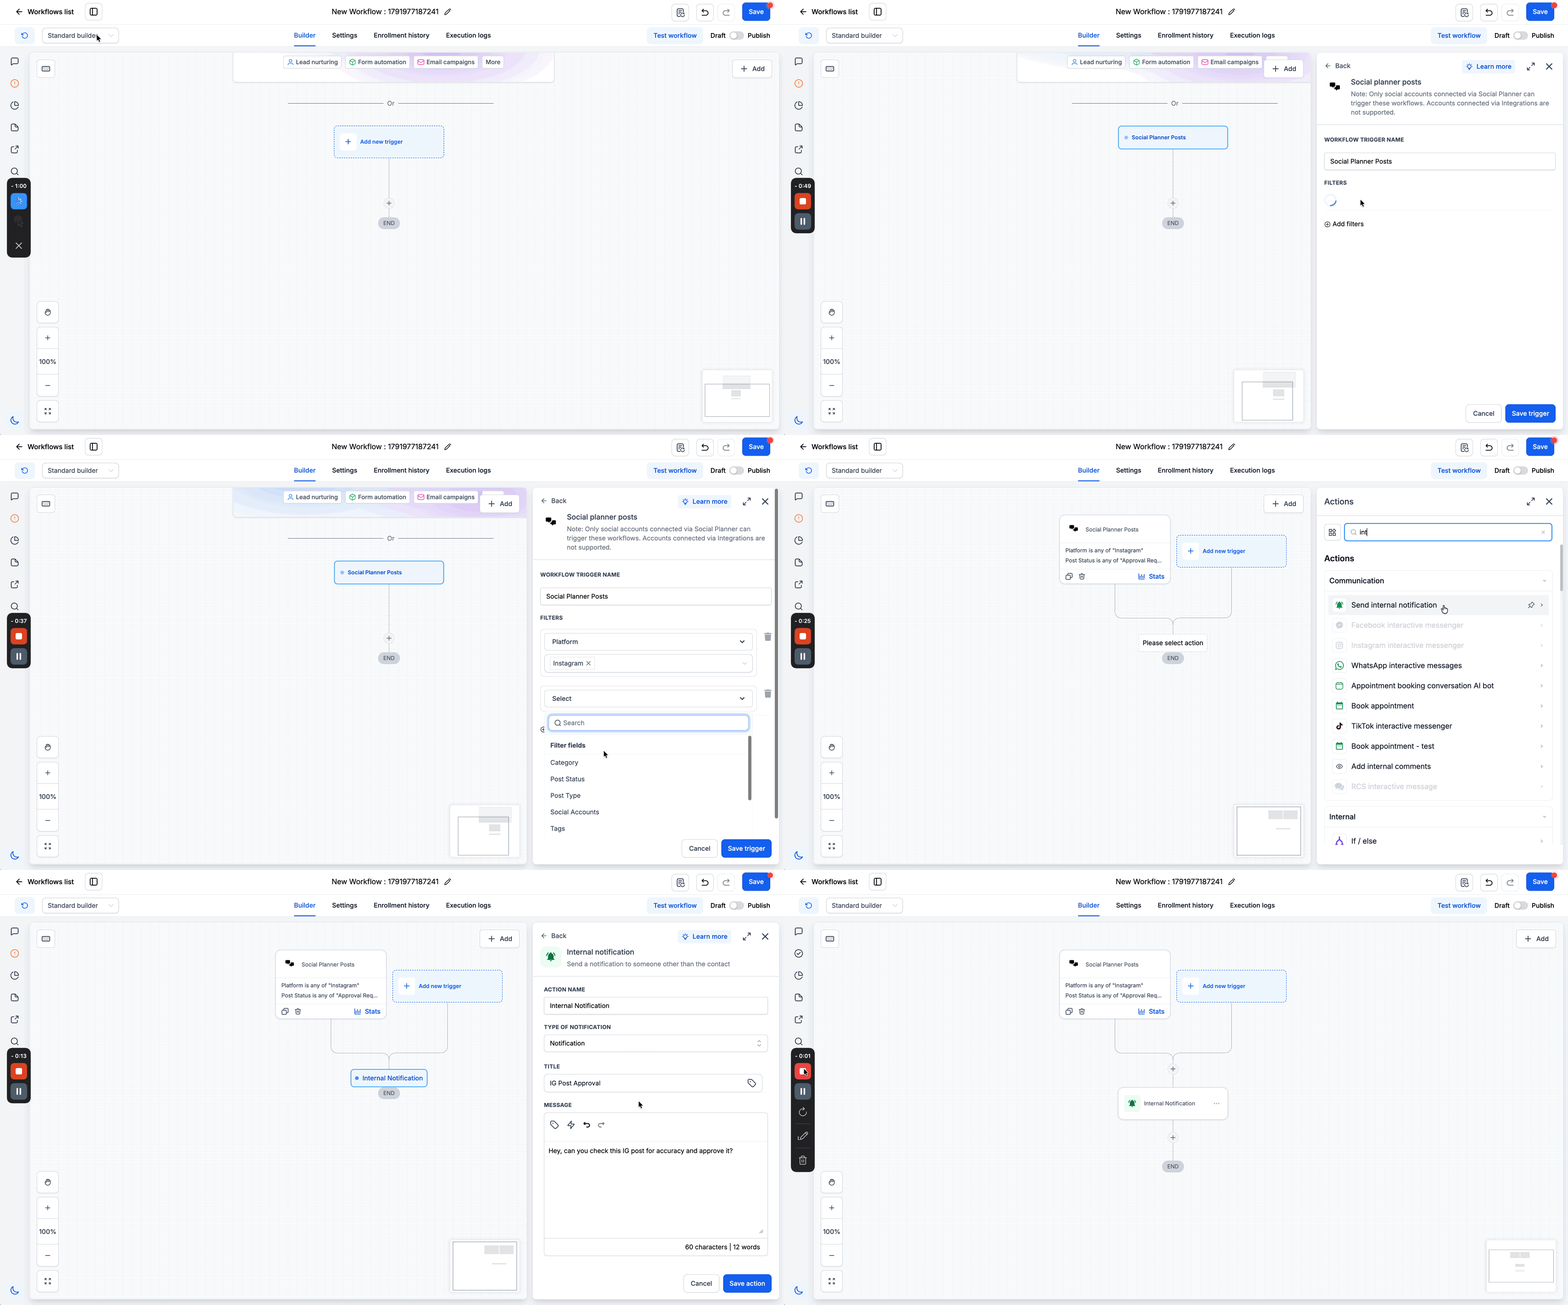
- Click Add new trigger, type Social planner posts in the search box, and select the result.
- In the Filters section, pick the conditions you need, such as Platform or Post Status.
- Click Save trigger to confirm the selection.
- Add the actions you want the workflow to perform, for example an internal notification.
- Save the workflow and click Publish to make it active.
07What it looks like in HighLevel
08Settings that matter
- Category. Limits the trigger to posts that belong to a specific Social Planner category.
- Platform. Specifies which social network(s) the trigger applies to, such as Facebook or TikTok.
- Post Status. Determines which stage of the post lifecycle (Approved, Failed, etc.) starts the workflow.
- Post Type. Filters by the kind of content, for example Reel or Story.
- Social Accounts. Targets only the social accounts that are linked through Social Planner.
- Tags. Uses existing Social Planner tags to narrow which posts trigger the workflow.
09Things to know before you rely on it
- The trigger works only with social accounts connected via Social Planner; accounts added through Integrations are not supported.
- Filters you set define which post events actually start the workflow.
10How it connects to the rest of HighLevel
- Learn how to build a workflow with triggers, filters, and actions Workflow basics
- Review HighLevel pricing and plan options Pricing
- Explore the Founder Plan for unlimited automation Founder Plan
Michael's take

Social Planner posts is a small convenience that can turn a missed post into a quick alert for the team. It isn’t a game changing automation, but it does stop you from wondering why a scheduled tweet never went live.
A local boutique that relies on Instagram stories would fit well. Set the trigger to fire on Failed and send a Slack message that includes the post ID so the marketer can troubleshoot right away.