
01Who this is for
- SaaS Founders who need real time payment notifications to keep lead records current.
- Ecommerce owners who want order data from external checkout systems to start follow up sequences.
- Service based businesses that receive appointment confirmations from third party calendars and wish to update client statuses automatically.
02Inbound webhook triggers, explained
The Inbound Webhook Trigger starts a HighLevel workflow whenever an external application sends a POST, GET, or PUT request to a generated URL. The request can contain any JSON payload, such as form submissions or payment updates. Once the data arrives, the workflow can use it to drive actions like status changes or email sends.
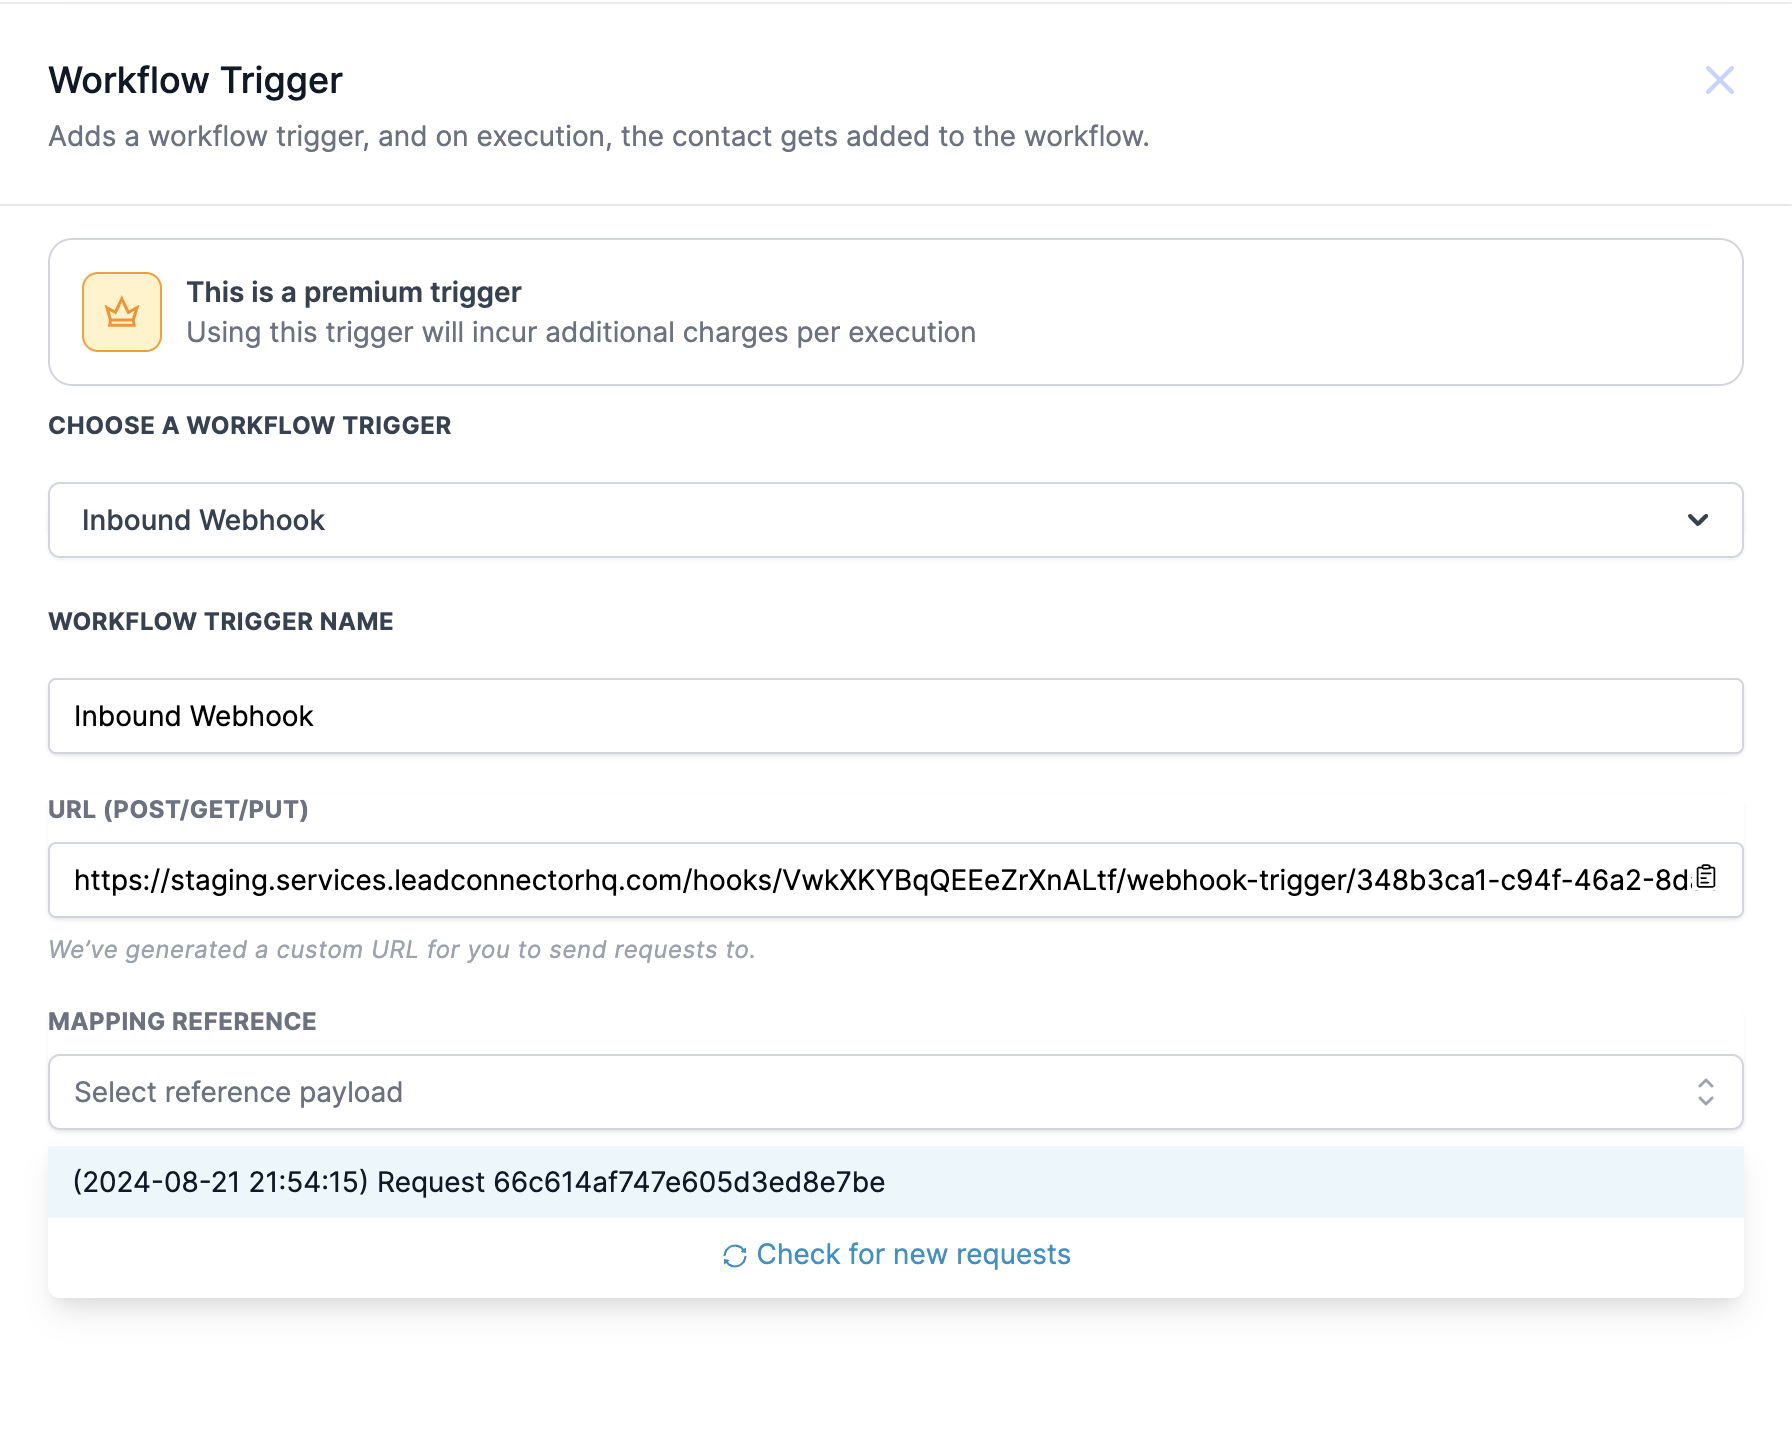
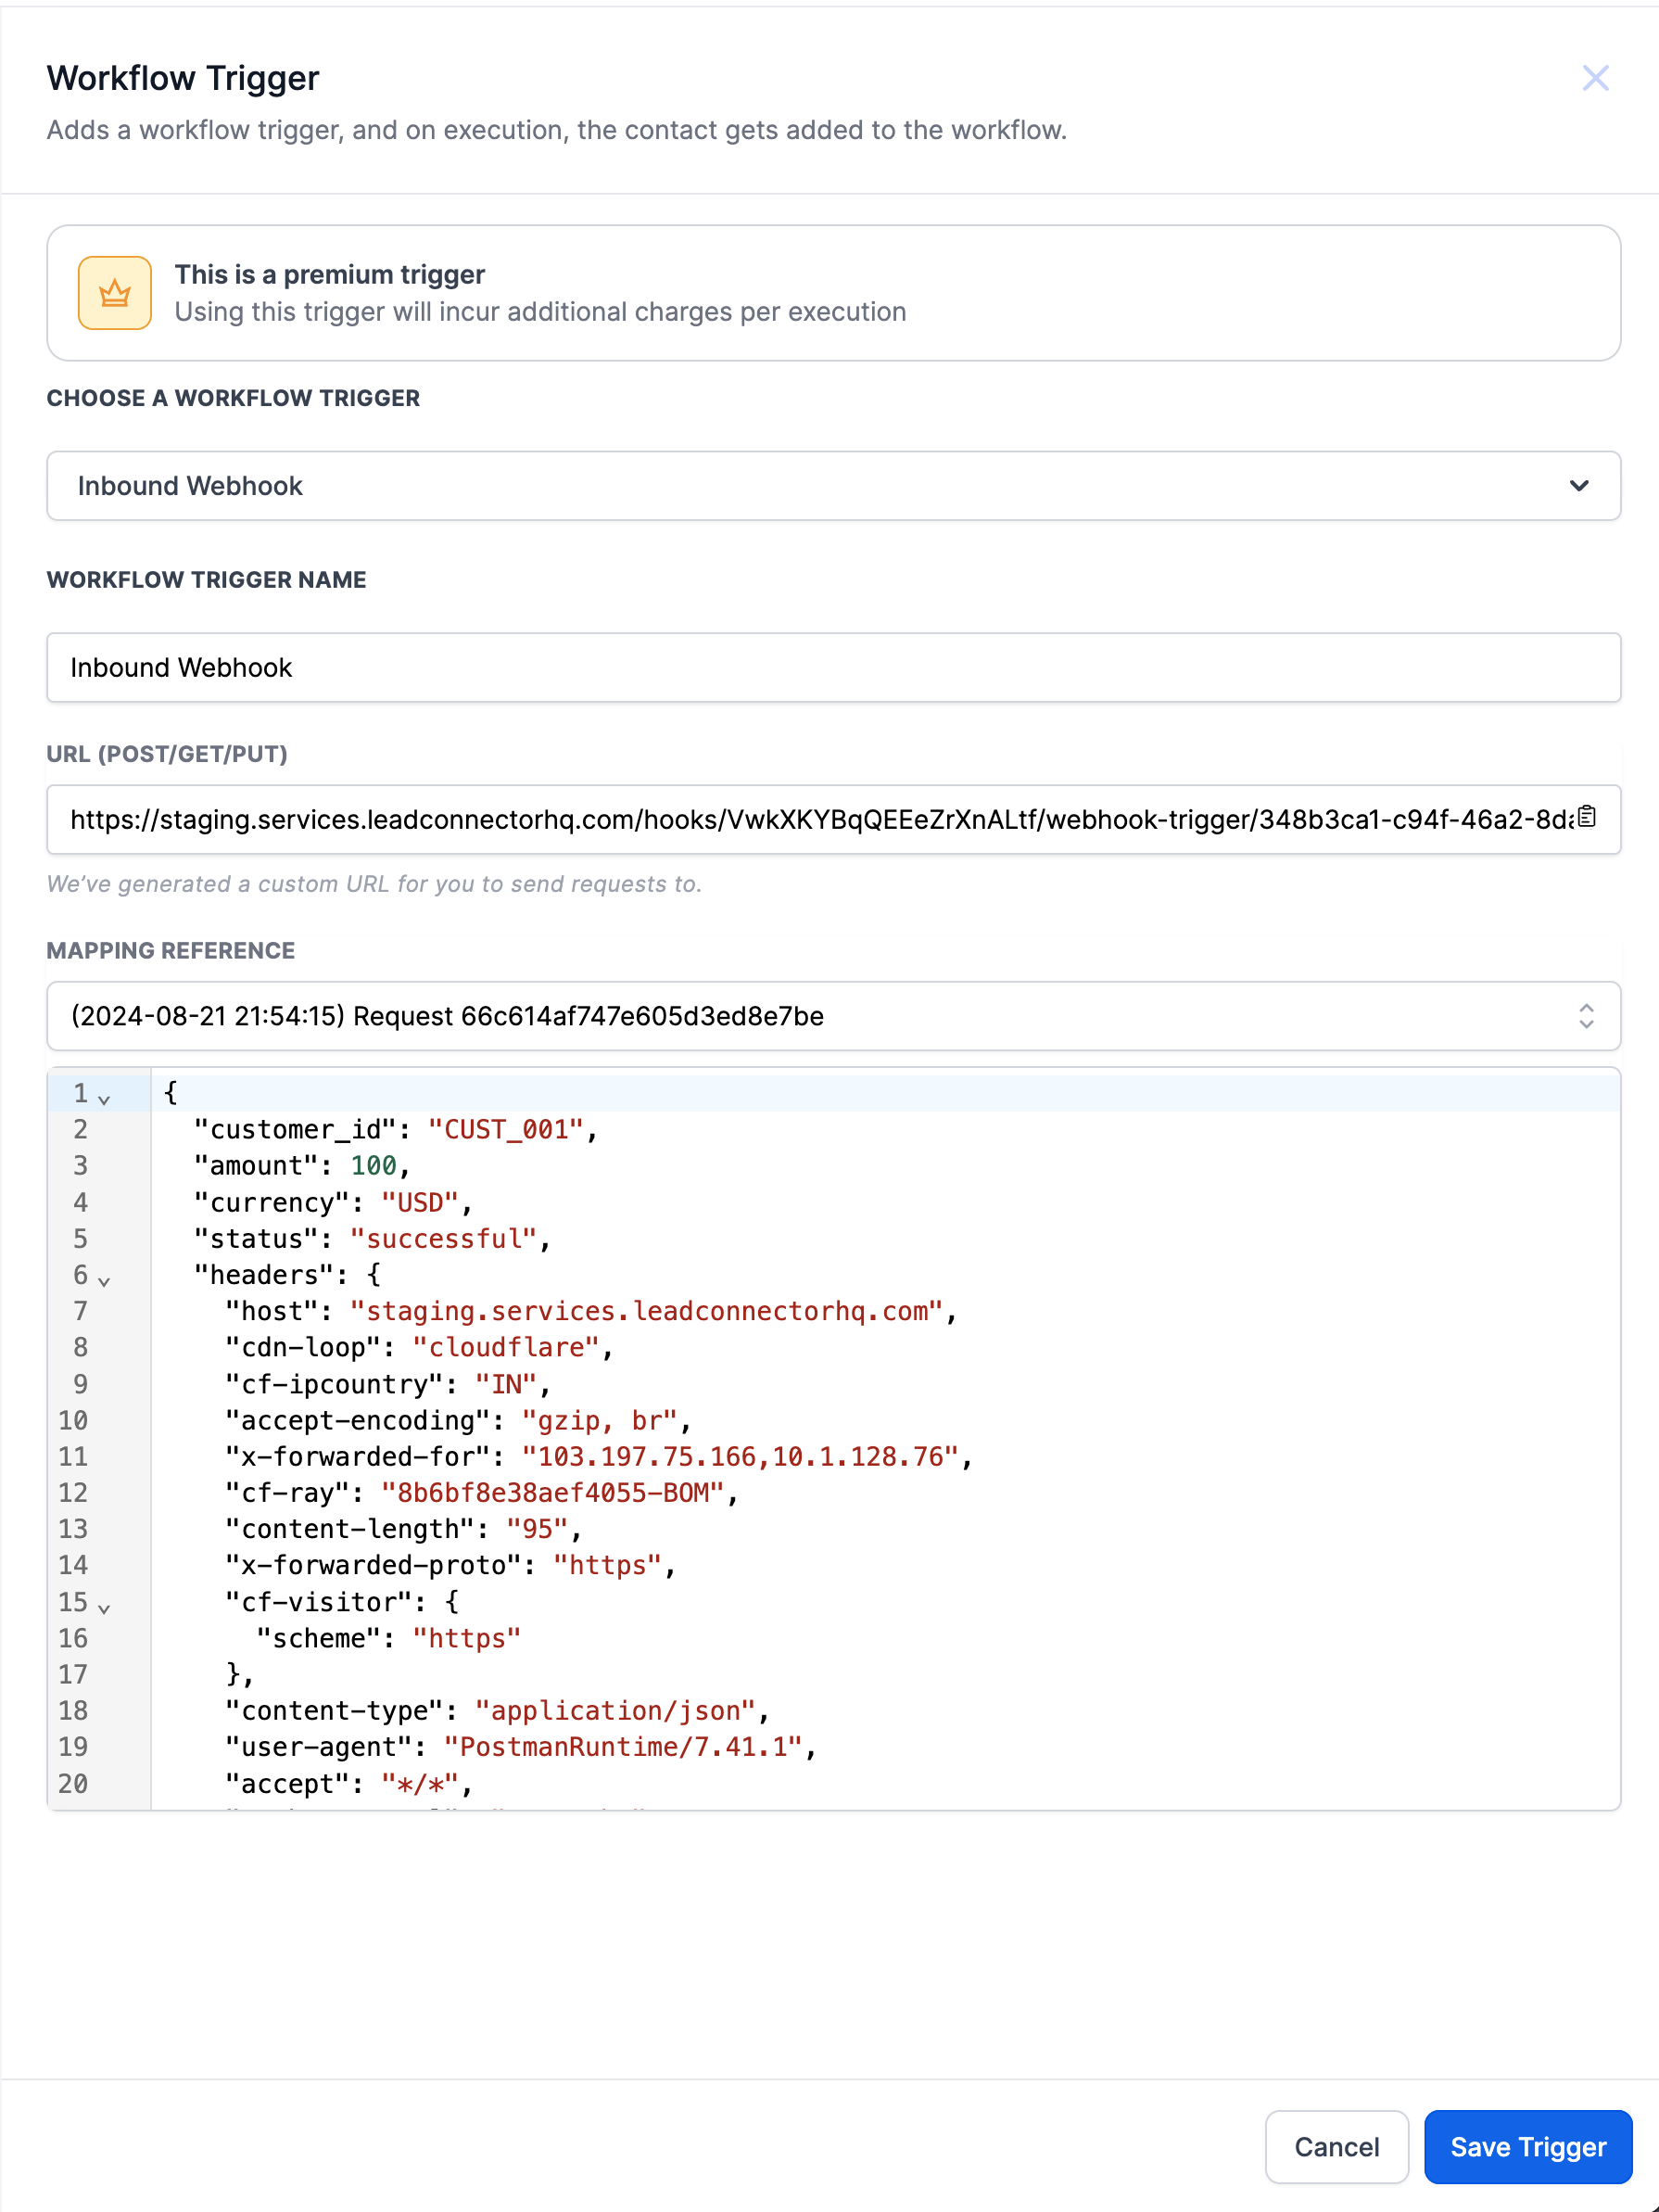
The trigger appears in the workflow editor. After selecting it, HighLevel creates a unique webhook address that you copy and give to the outside service. The workflow then lets you map any incoming JSON fields to internal variables, enabling precise automation based on the received data.
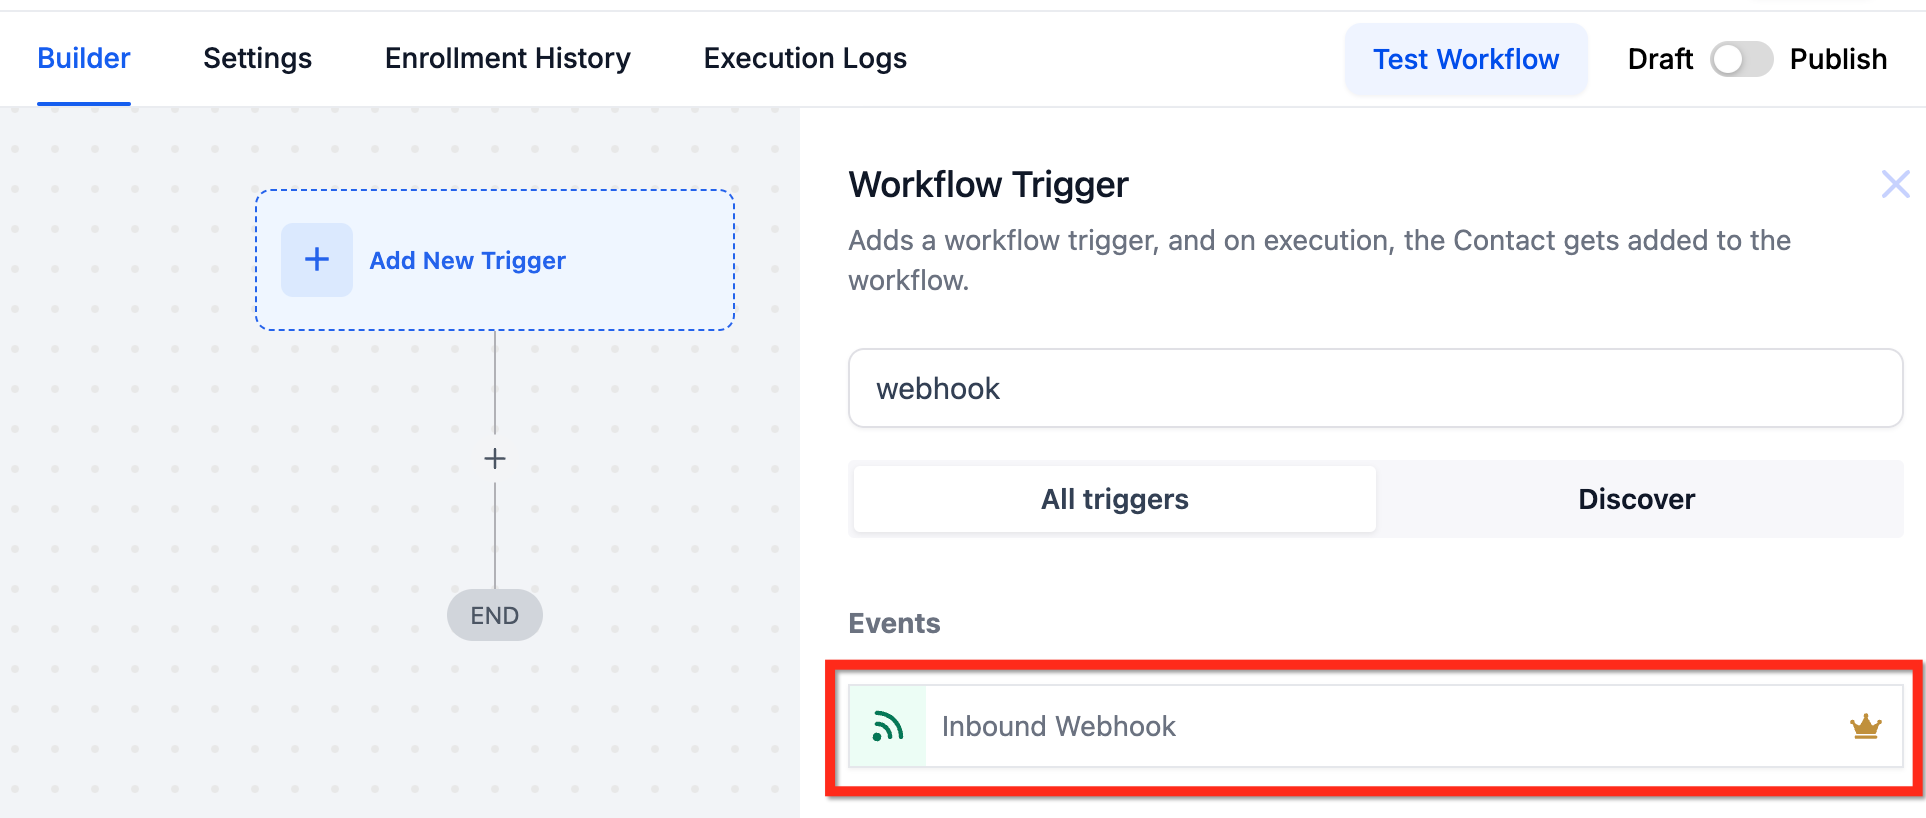
You find this feature inside any workflow under the trigger selection area. Choose Inbound Webhook, copy the URL, configure the external app, test, map fields, and save the trigger to activate the integration.
03How businesses use inbound webhook triggers
- Ecommerce store. Create a workflow that uses the Inbound Webhook Trigger. Provide the generated URL to your checkout platform so it posts order details in JSON. Map the order fields to workflow variables and automatically send order confirmation emails.
- Subscription SaaS company. Set up the webhook trigger and give the URL to your payment processor. When a subscription payment succeeds, the processor posts the payment data. The workflow maps the payment status and updates the customer record, then sends a receipt email.
- Medical clinic. Add the Inbound Webhook Trigger to a workflow and share the URL with an online scheduling tool. The tool posts appointment data when a patient books. Map the appointment fields to the clinic's lead record and trigger reminder messages.
04How to set up and use inbound webhook triggers in HighLevel
Set up inbound webhook trigger
- Open an existing workflow or create a new one in HighLevel.
- Select the Inbound Webhook option as the workflow trigger.
- Copy the unique webhook URL that HighLevel generates for the trigger.
- In the external application, configure a POST request that points to the copied URL and includes the required JSON payload.
- Send a test request from the external application to verify the webhook reaches HighLevel.
- In the workflow editor, map the incoming JSON fields to the desired workflow variables or fields.
- Click the Save Trigger button to finalize the configuration.
05What it looks like in HighLevel
06Settings that matter
- Inbound Webhook. Determines that the workflow will listen for incoming POST, GET, or PUT requests at a generated URL and provides that URL for external integration.
07Things to know before you rely on it
- The article does not specify any limits, exclusions, or beta status for this trigger.
08How it connects to the rest of HighLevel
- Start building a workflow by learning about triggers, filters, and actions. Workflow basics
- Read the dedicated guide on configuring the inbound webhook trigger in HighLevel. Inbound webhook guide
- Explore the general introduction to workflow automation on HighLevel. Workflow automation intro