
01Who this is for
- Marketing managers can automate follow up messages when a lead receives a specific tag.
- Sales team leaders can alert reps automatically when a prospect loses a "Lead" tag.
- Customer support supervisors can route contacts to the right queue when a "VIP" tag is applied.
02Contact tag workflow triggers, explained
The Contact Tag trigger monitors tag changes on a contact record. When the selected tag is added or removed, the workflow fires after the tag update is applied. This trigger lives inside the Workflow Builder under the list of available triggers.
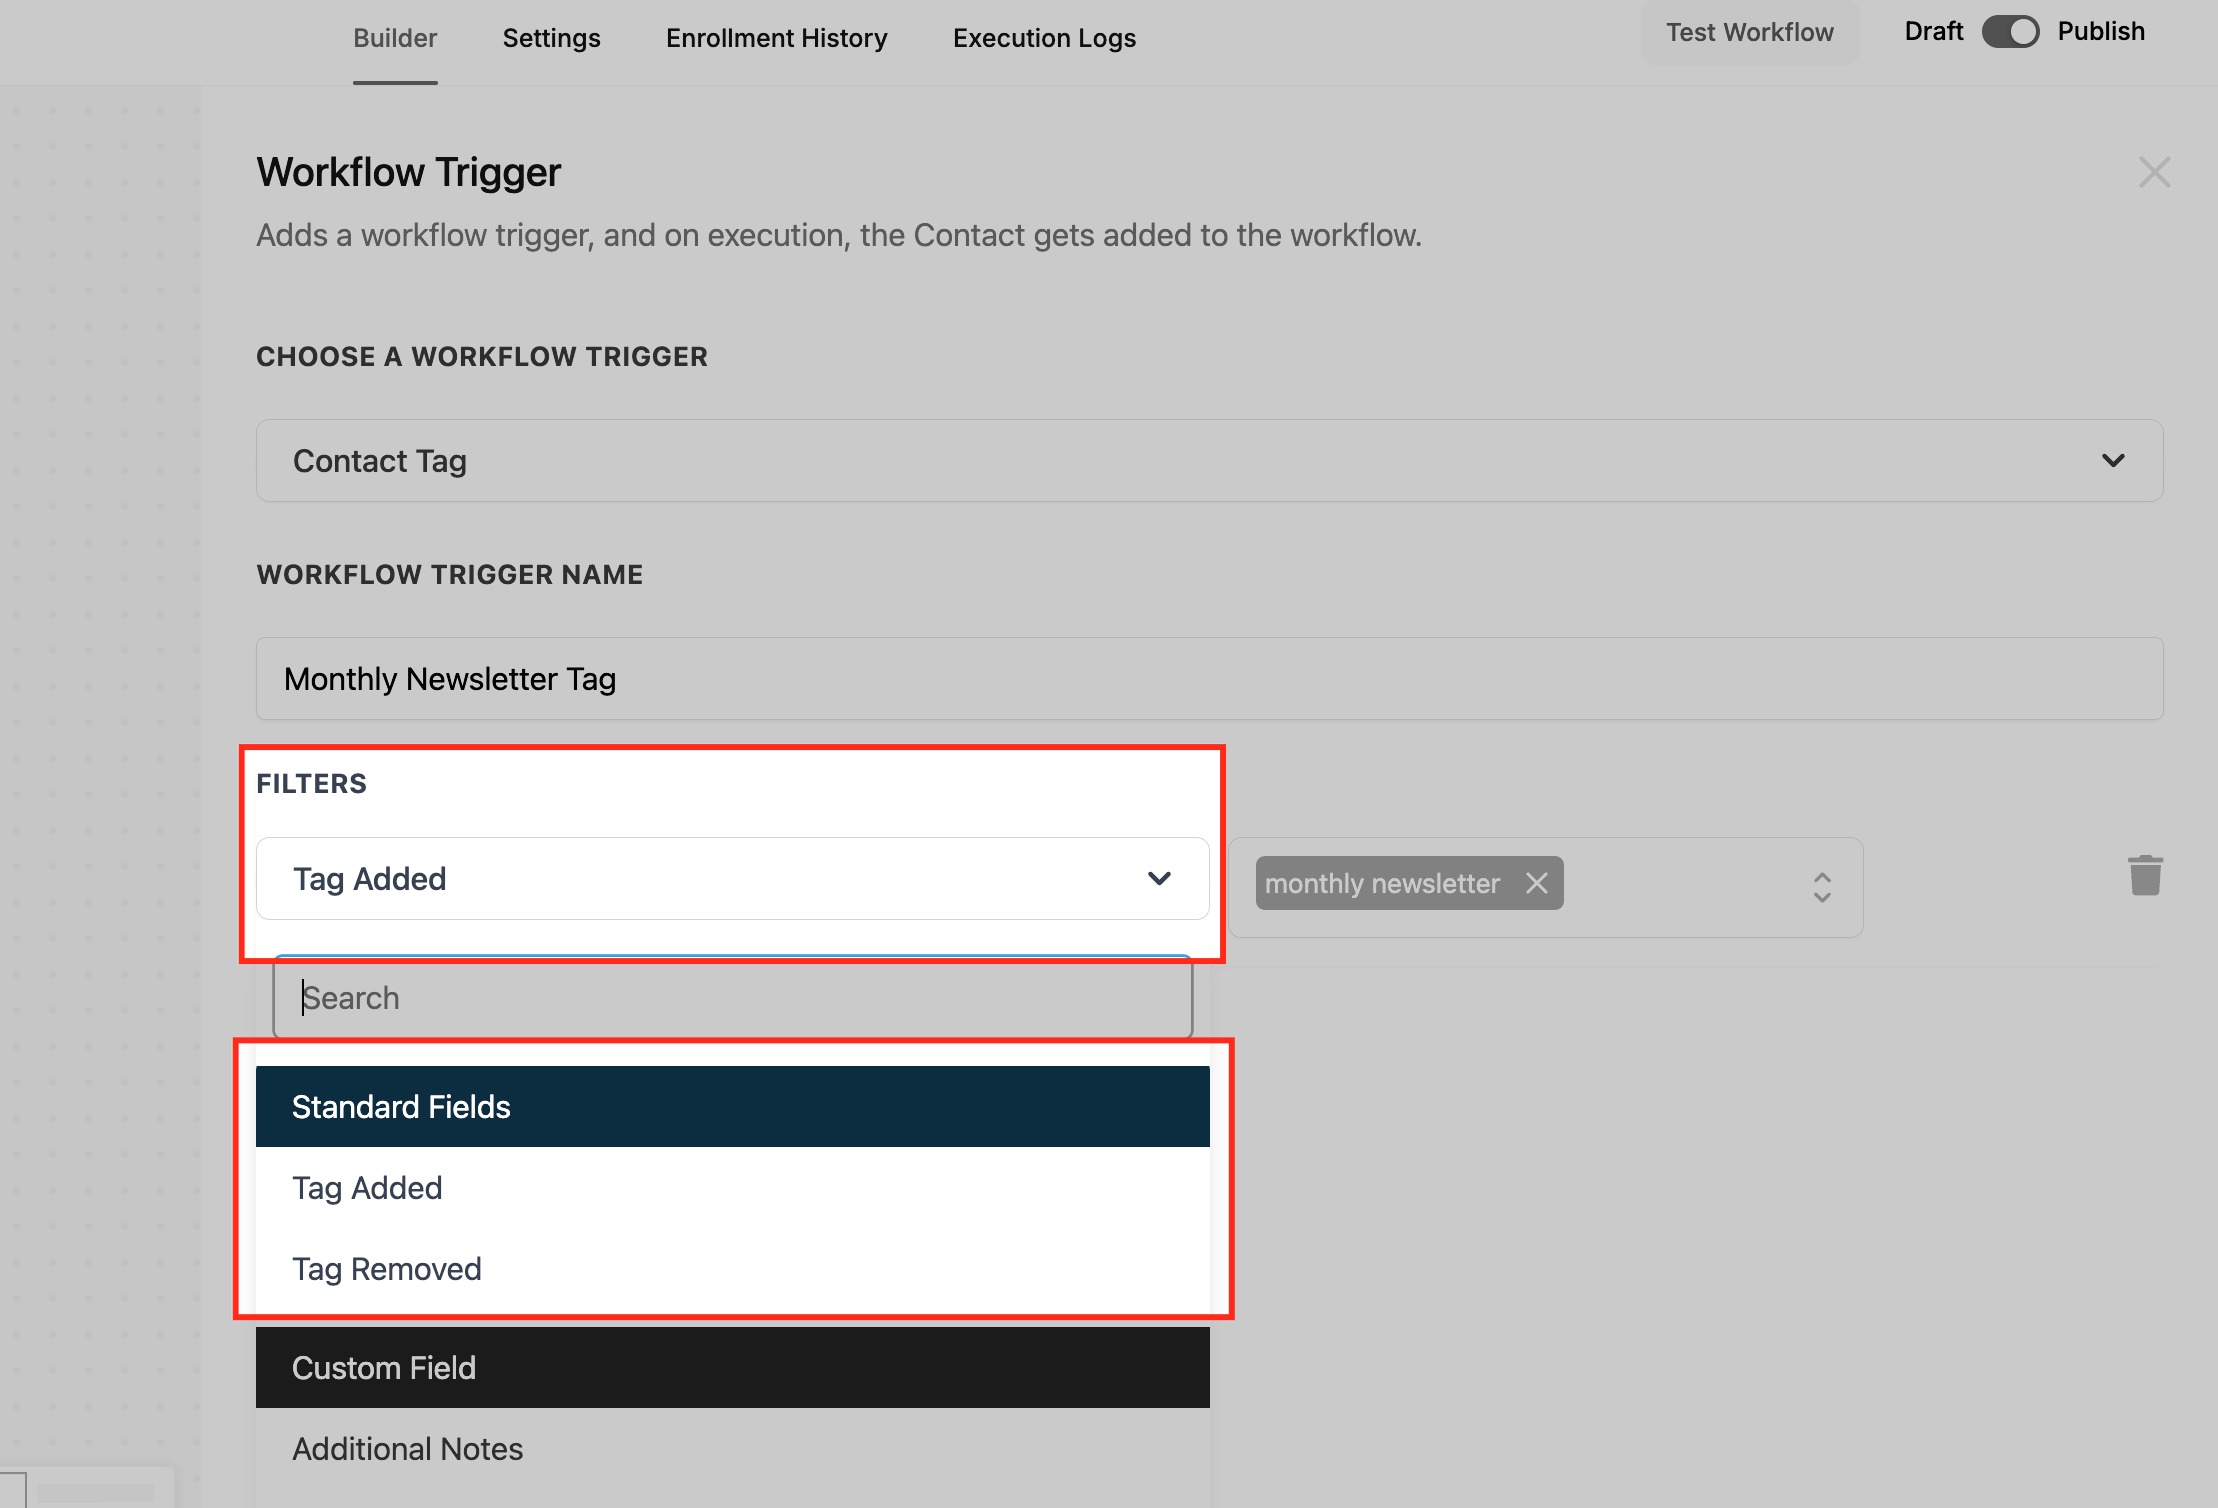
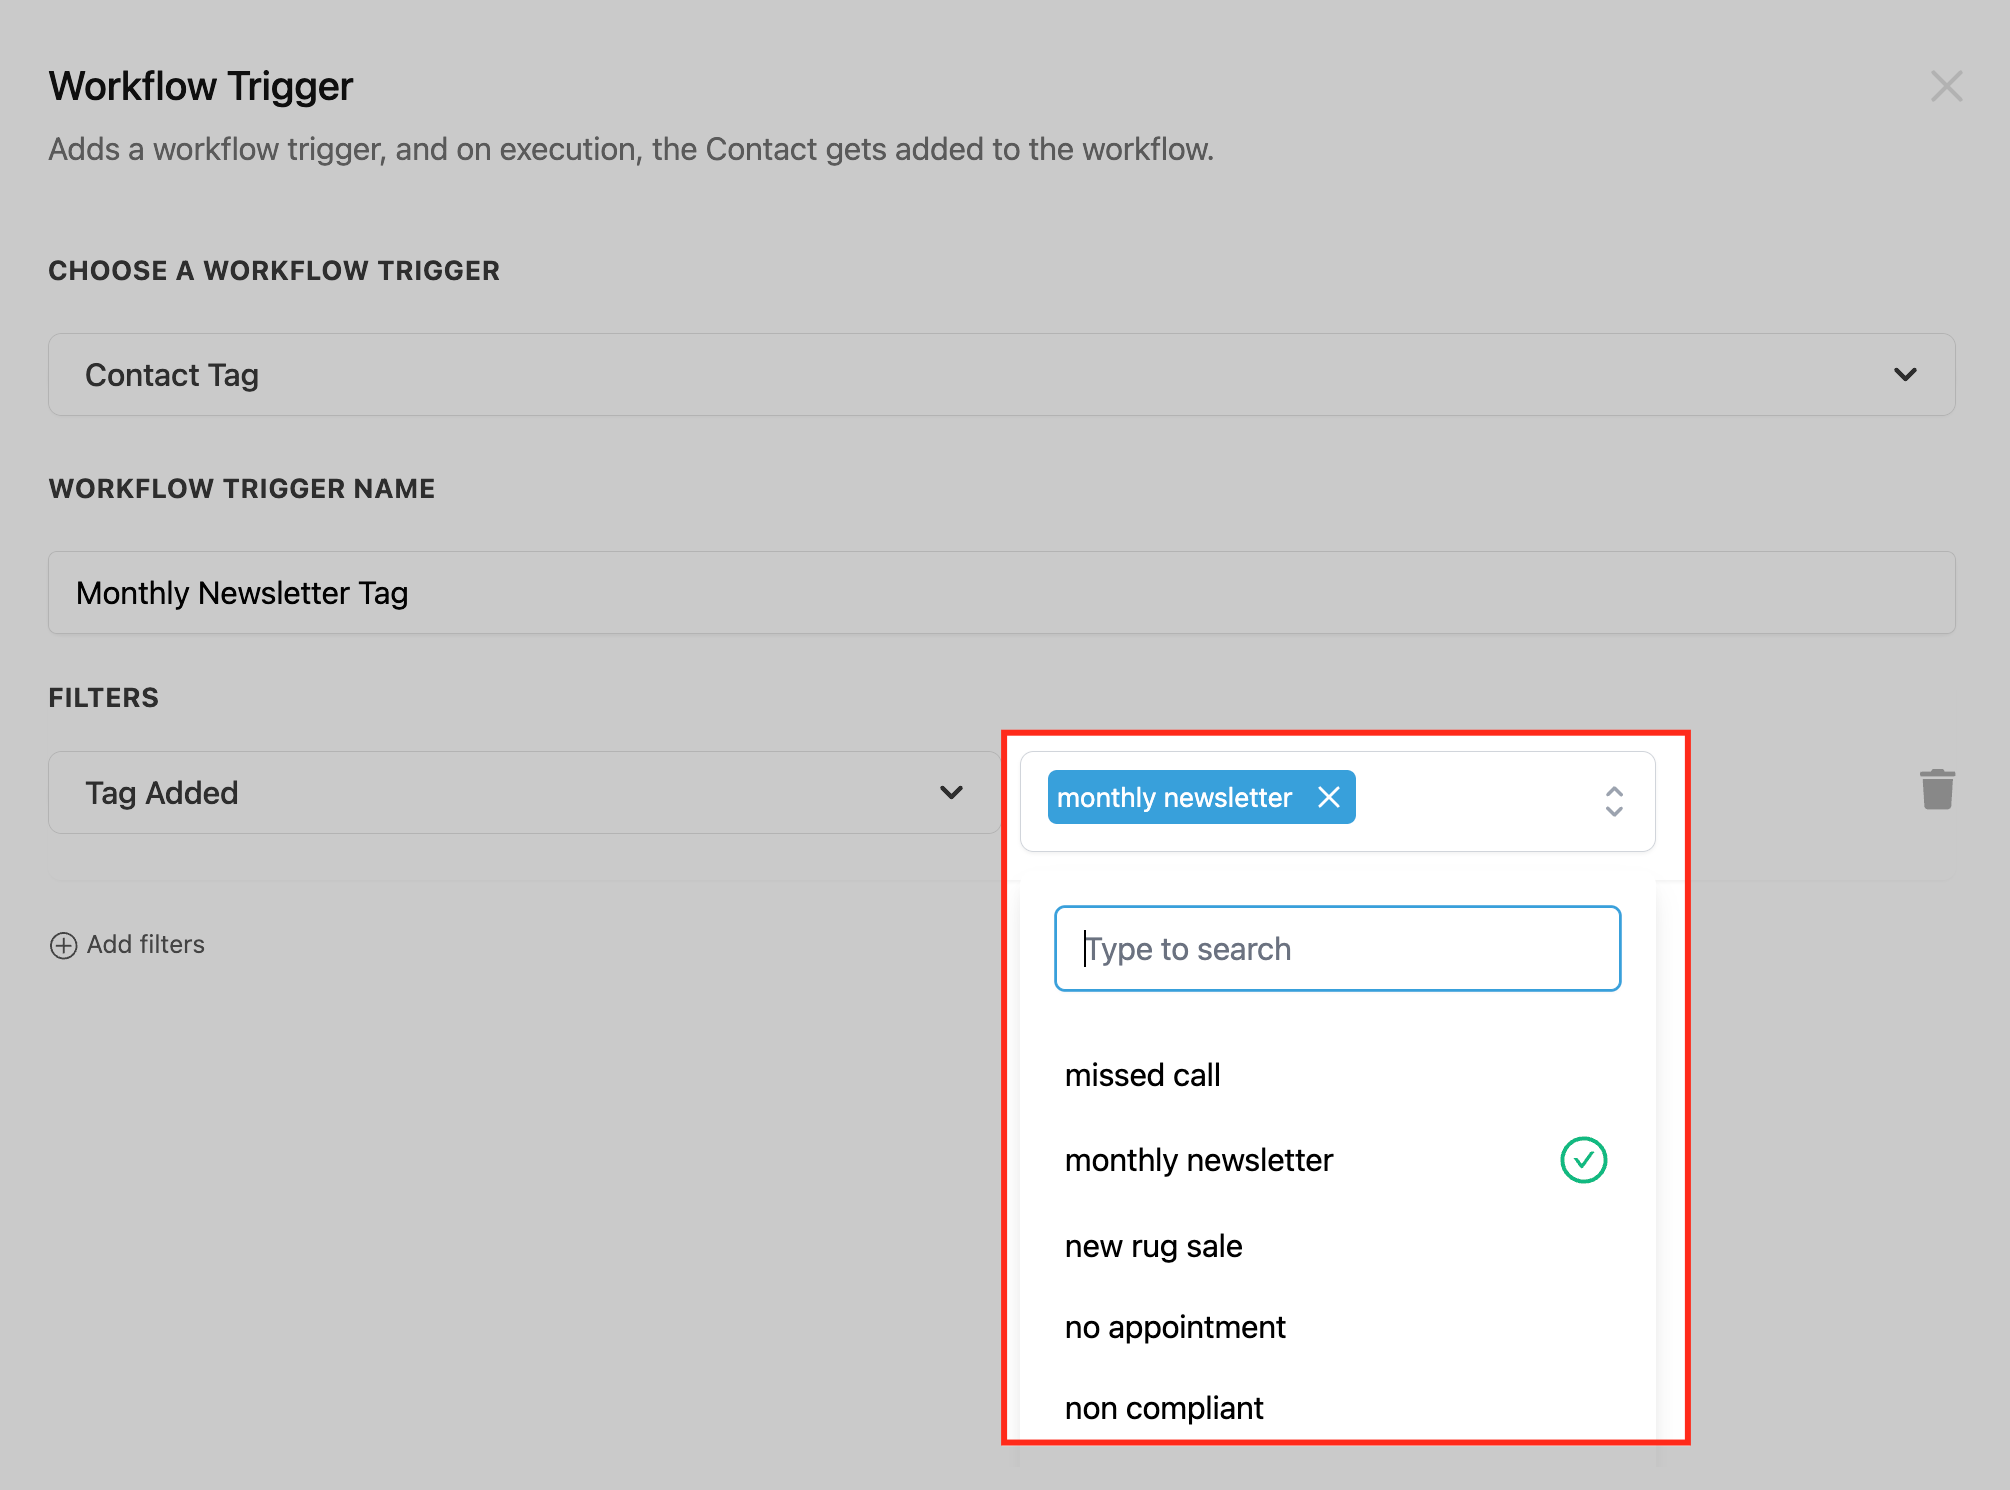
In the builder you name the trigger, decide whether it reacts to an addition or a removal, and pick one or more tags that should activate it. You may also create a new tag directly from the trigger screen. After the trigger is set, you attach actions such as emails, SMS, task assignments, or pipeline stage updates. The workflow runs automatically each time the tag condition is met.
03How businesses use contact tag workflow trigger
- Digital marketing agency. The agency adds a "New Client" tag to a contact. The trigger sends a welcome email and assigns a kickoff task to the account manager, ensuring the client receives immediate onboarding.
- Real estate brokerage. When a property prospect loses the "Showing Scheduled" tag, the trigger sends a re engagement SMS offering a new viewing slot, keeping communication active without manual effort.
- Health clinic. Staff removes the "Appointment Reminder Sent" tag after a reminder is delivered. The trigger then updates the contact’s pipeline stage to "Awaiting Confirmation".
04Before you start
- You must have access to the HighLevel Workflow Builder.
05How to set up and use contact tag workflow trigger in HighLevel
Set up a contact tag trigger
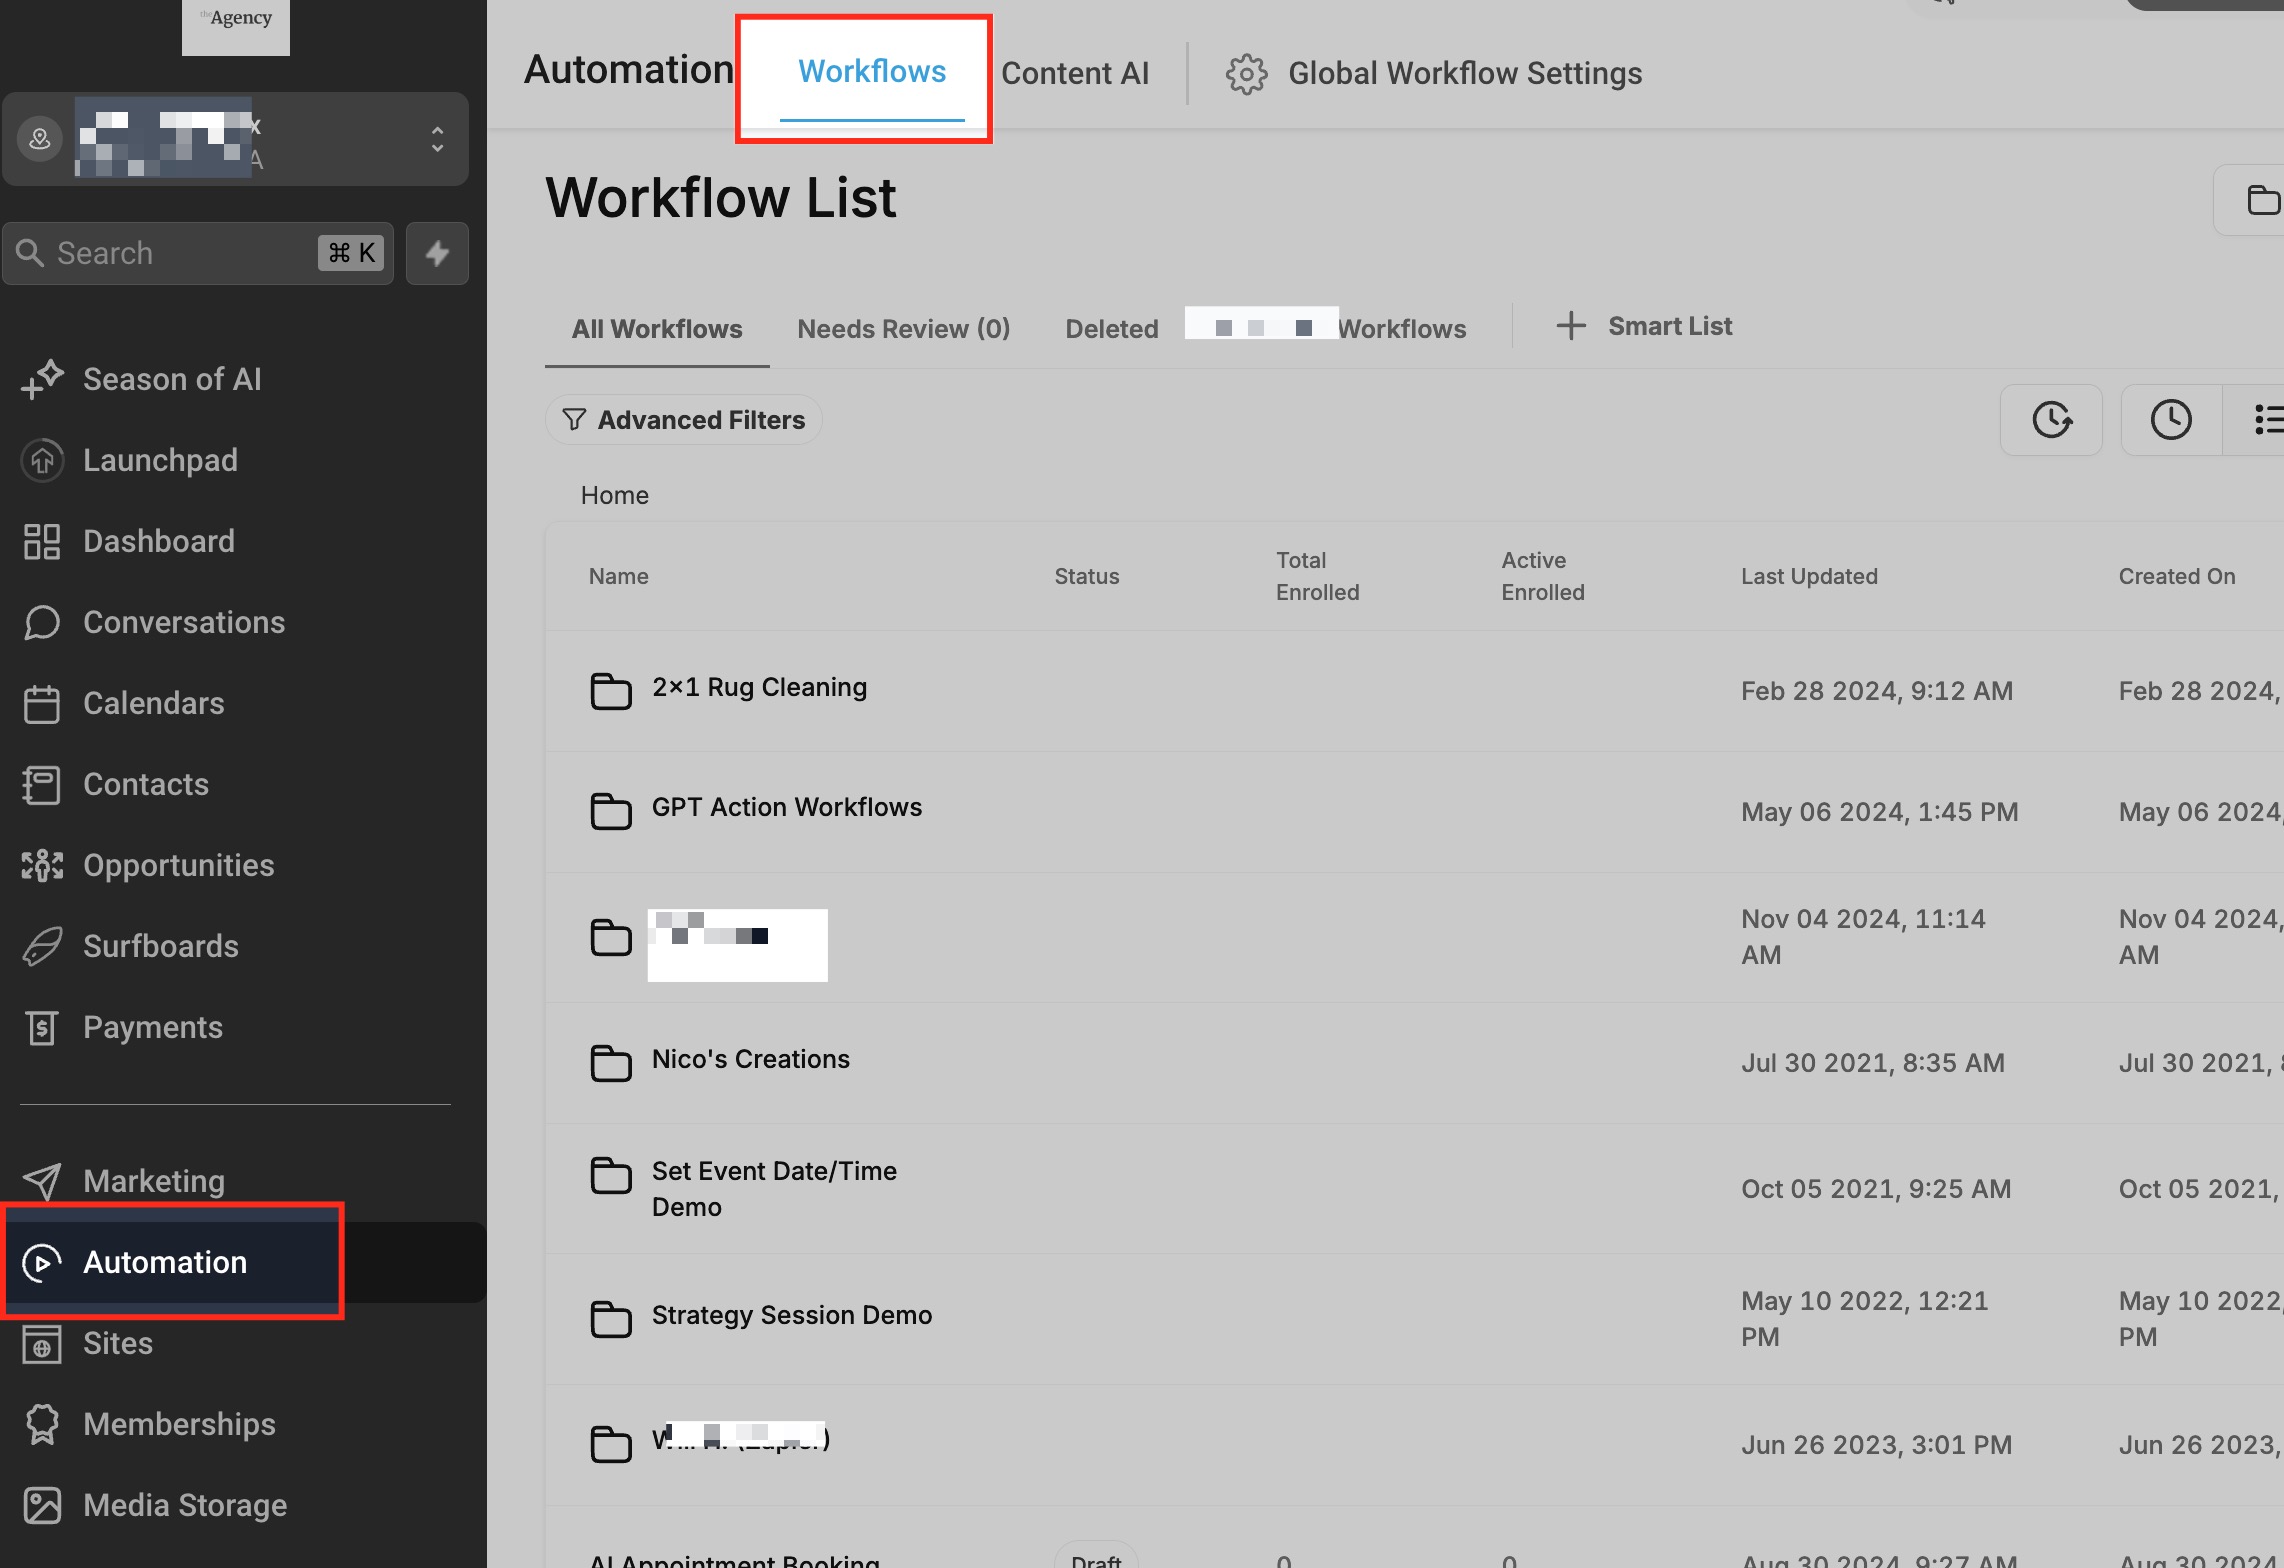
- Open the Workflow Builder in HighLevel.
- Navigate to Automations > Workflows.
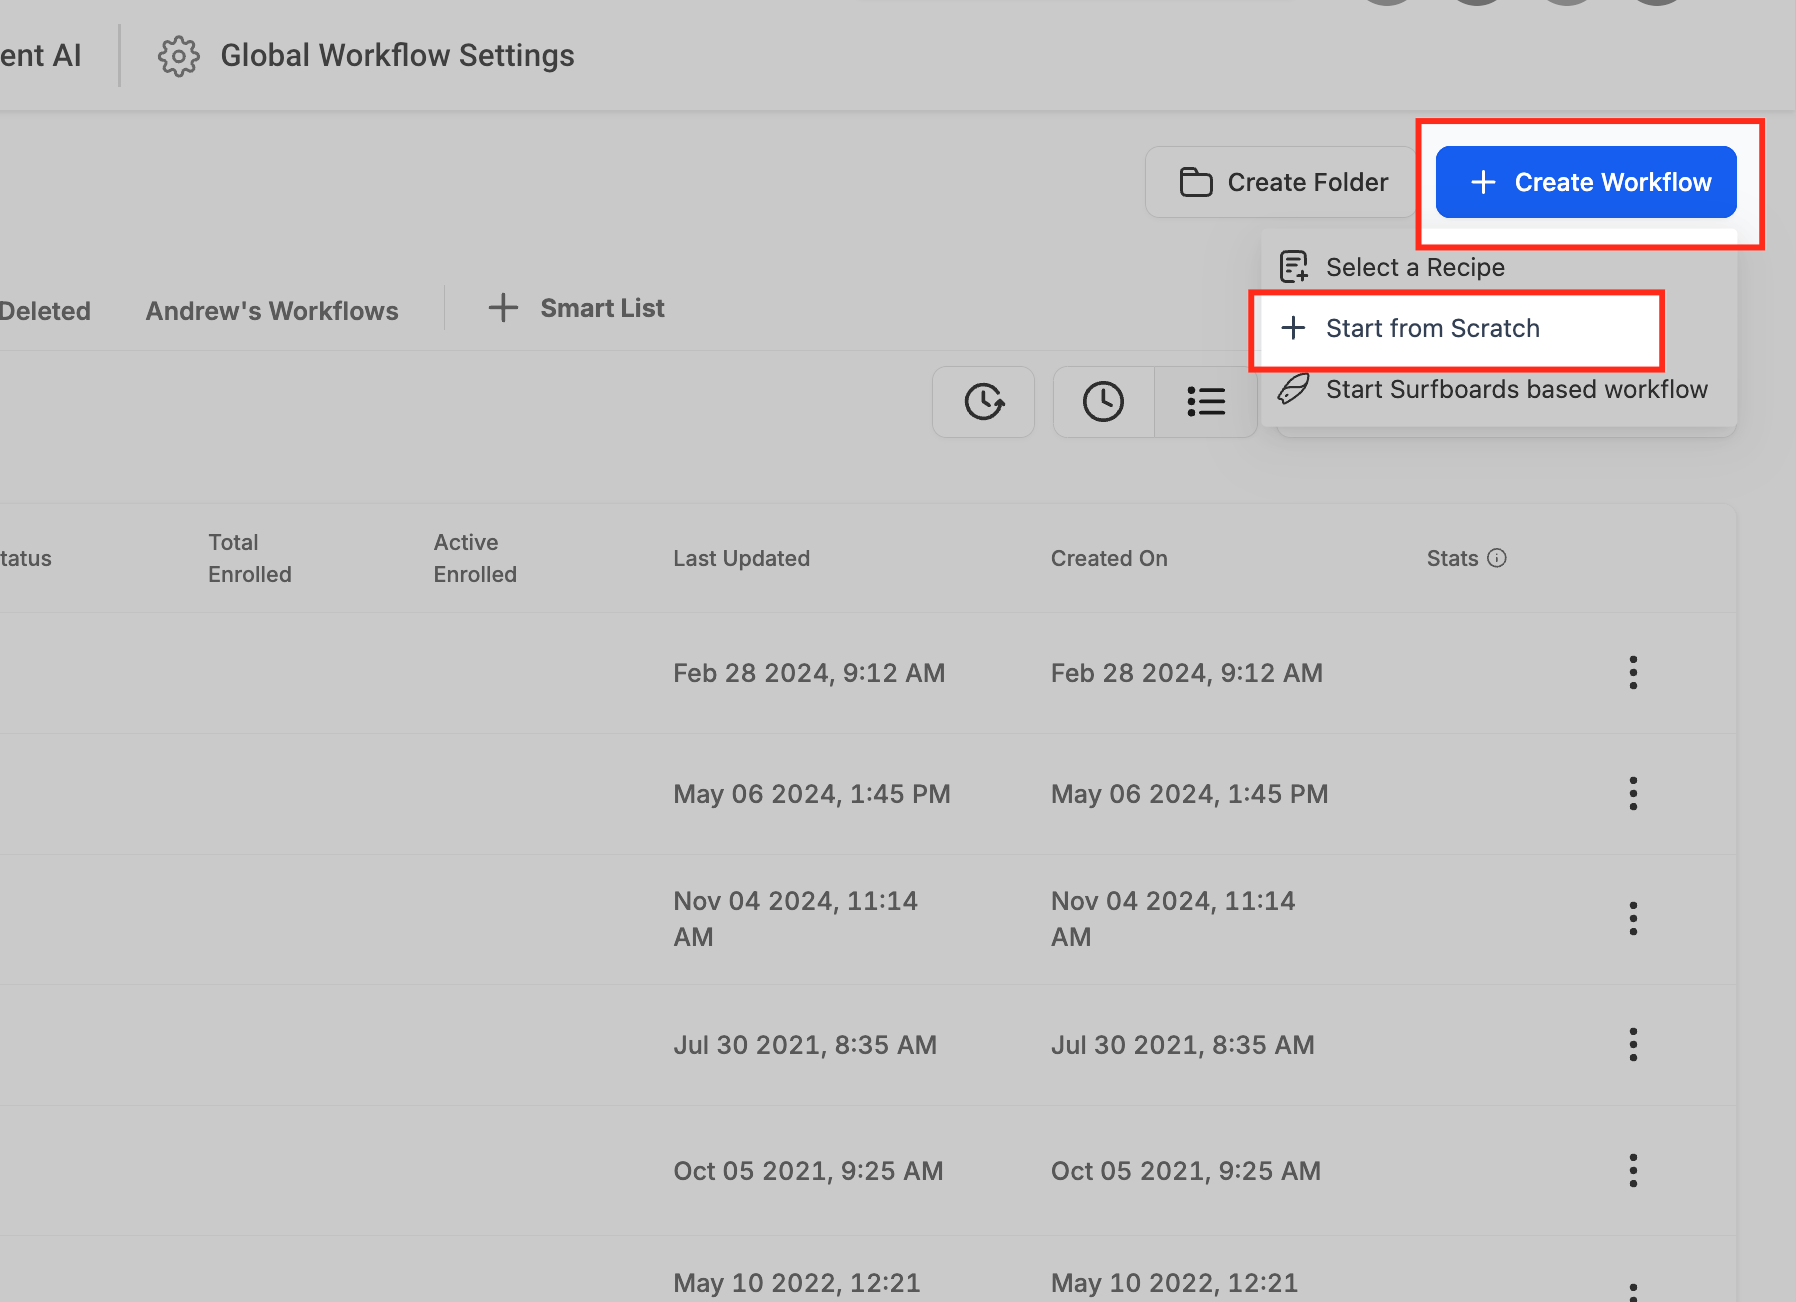
- Click Create Workflow and select a blank workflow or a template.
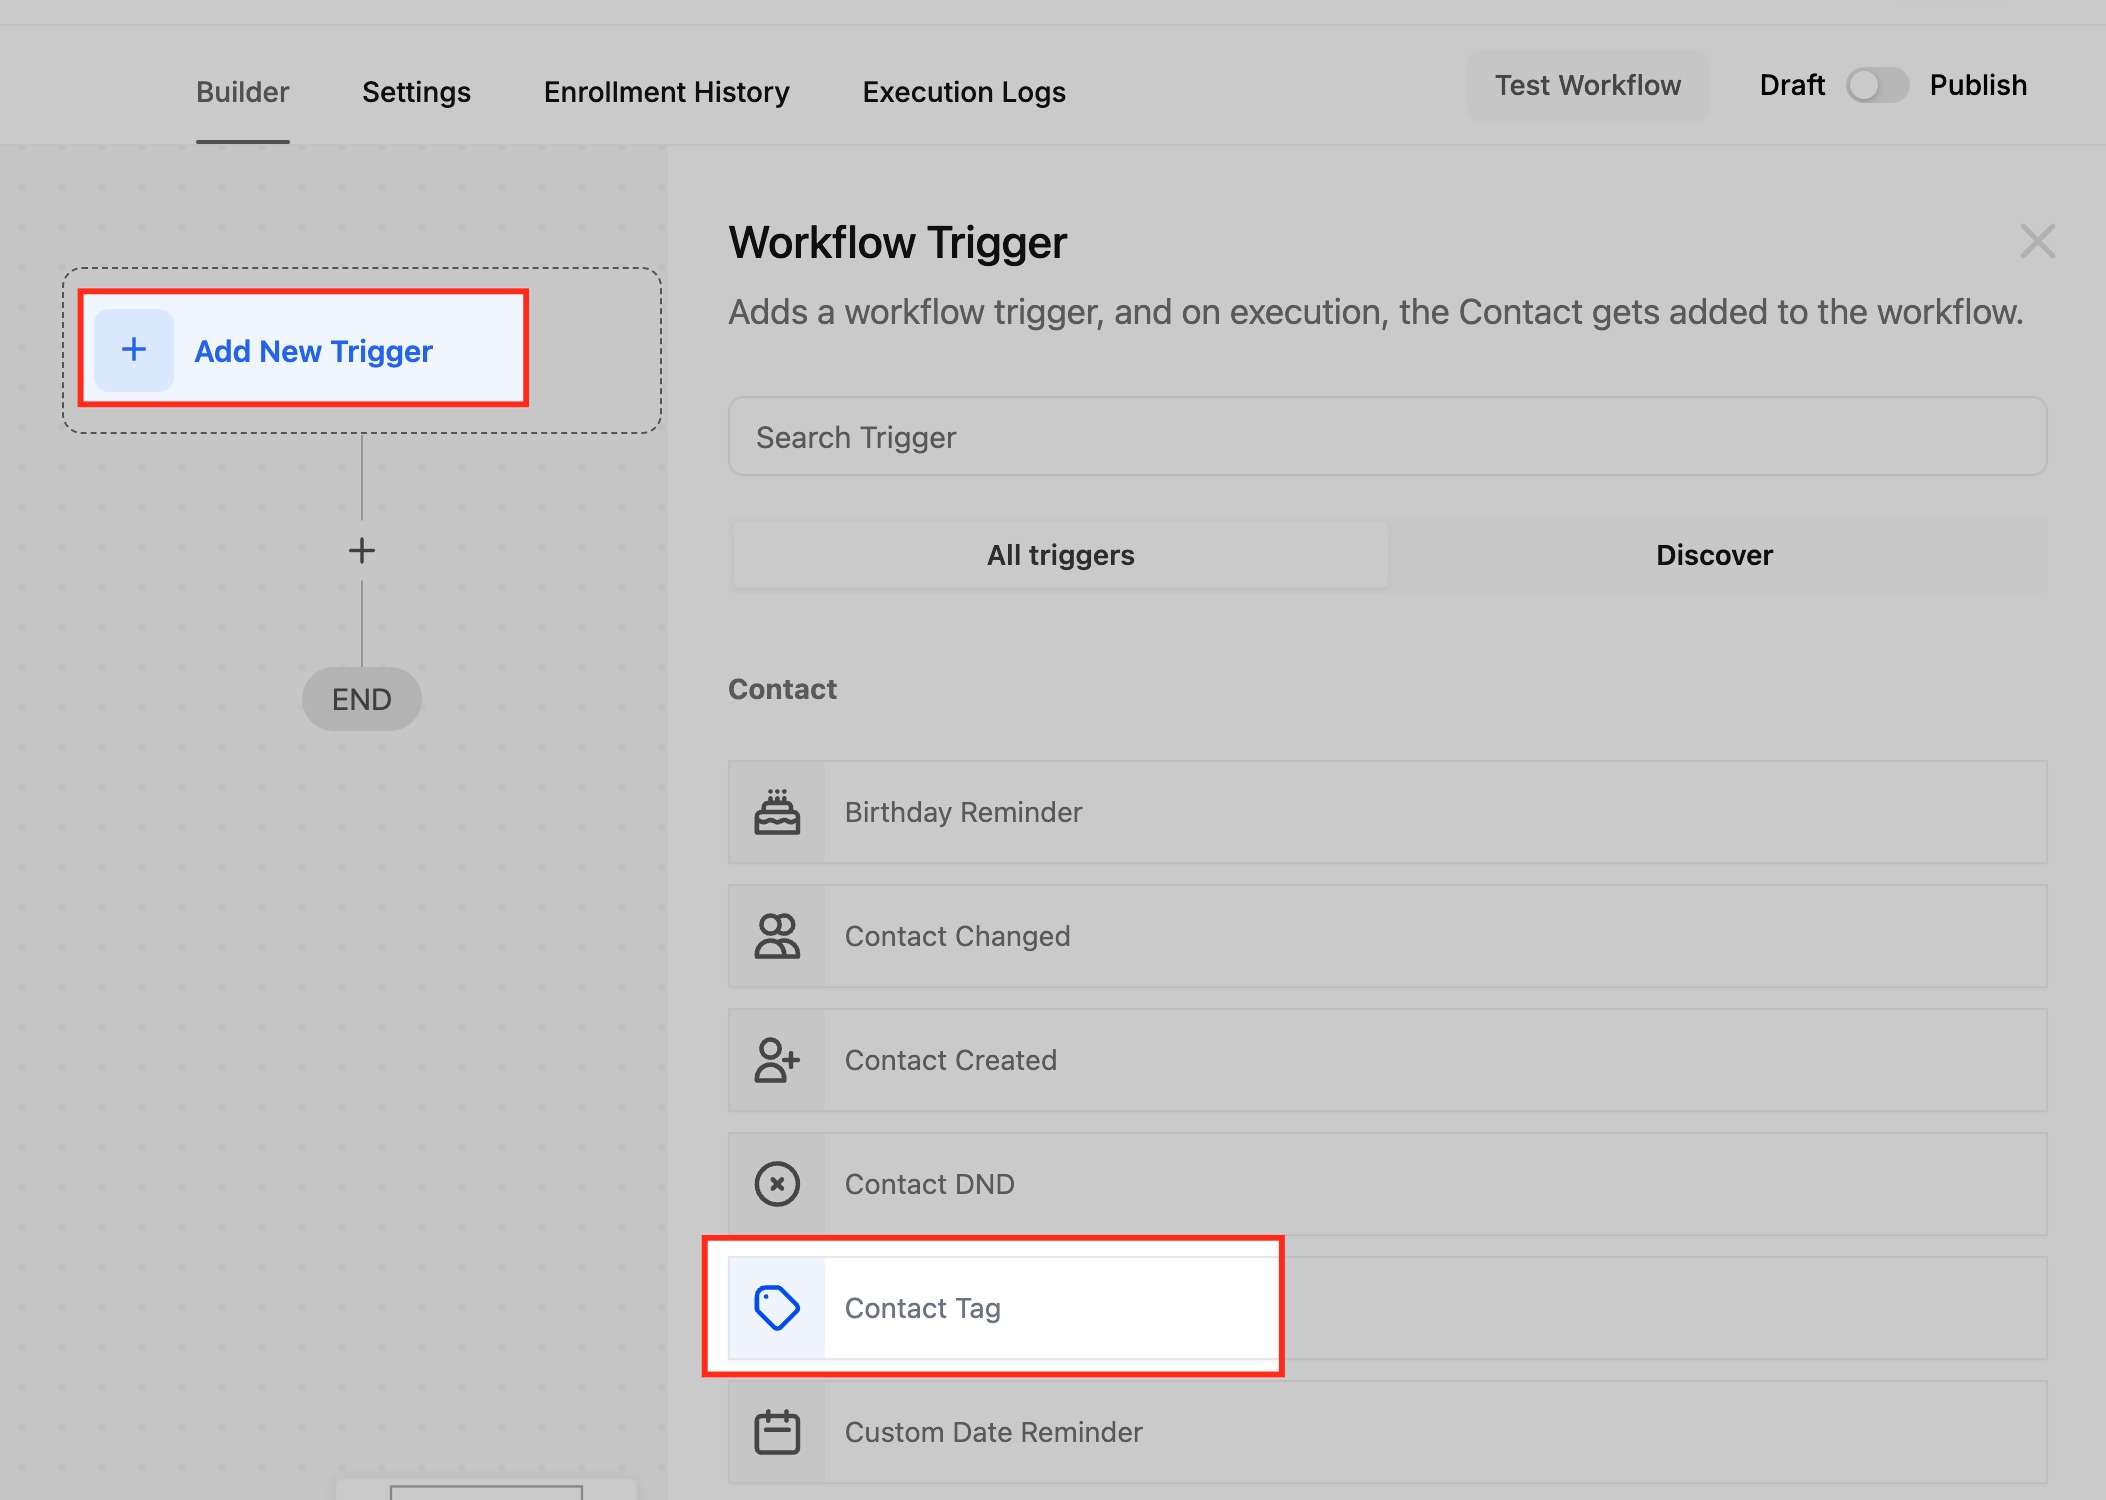
- Click Add Trigger and search for Contact Tag.
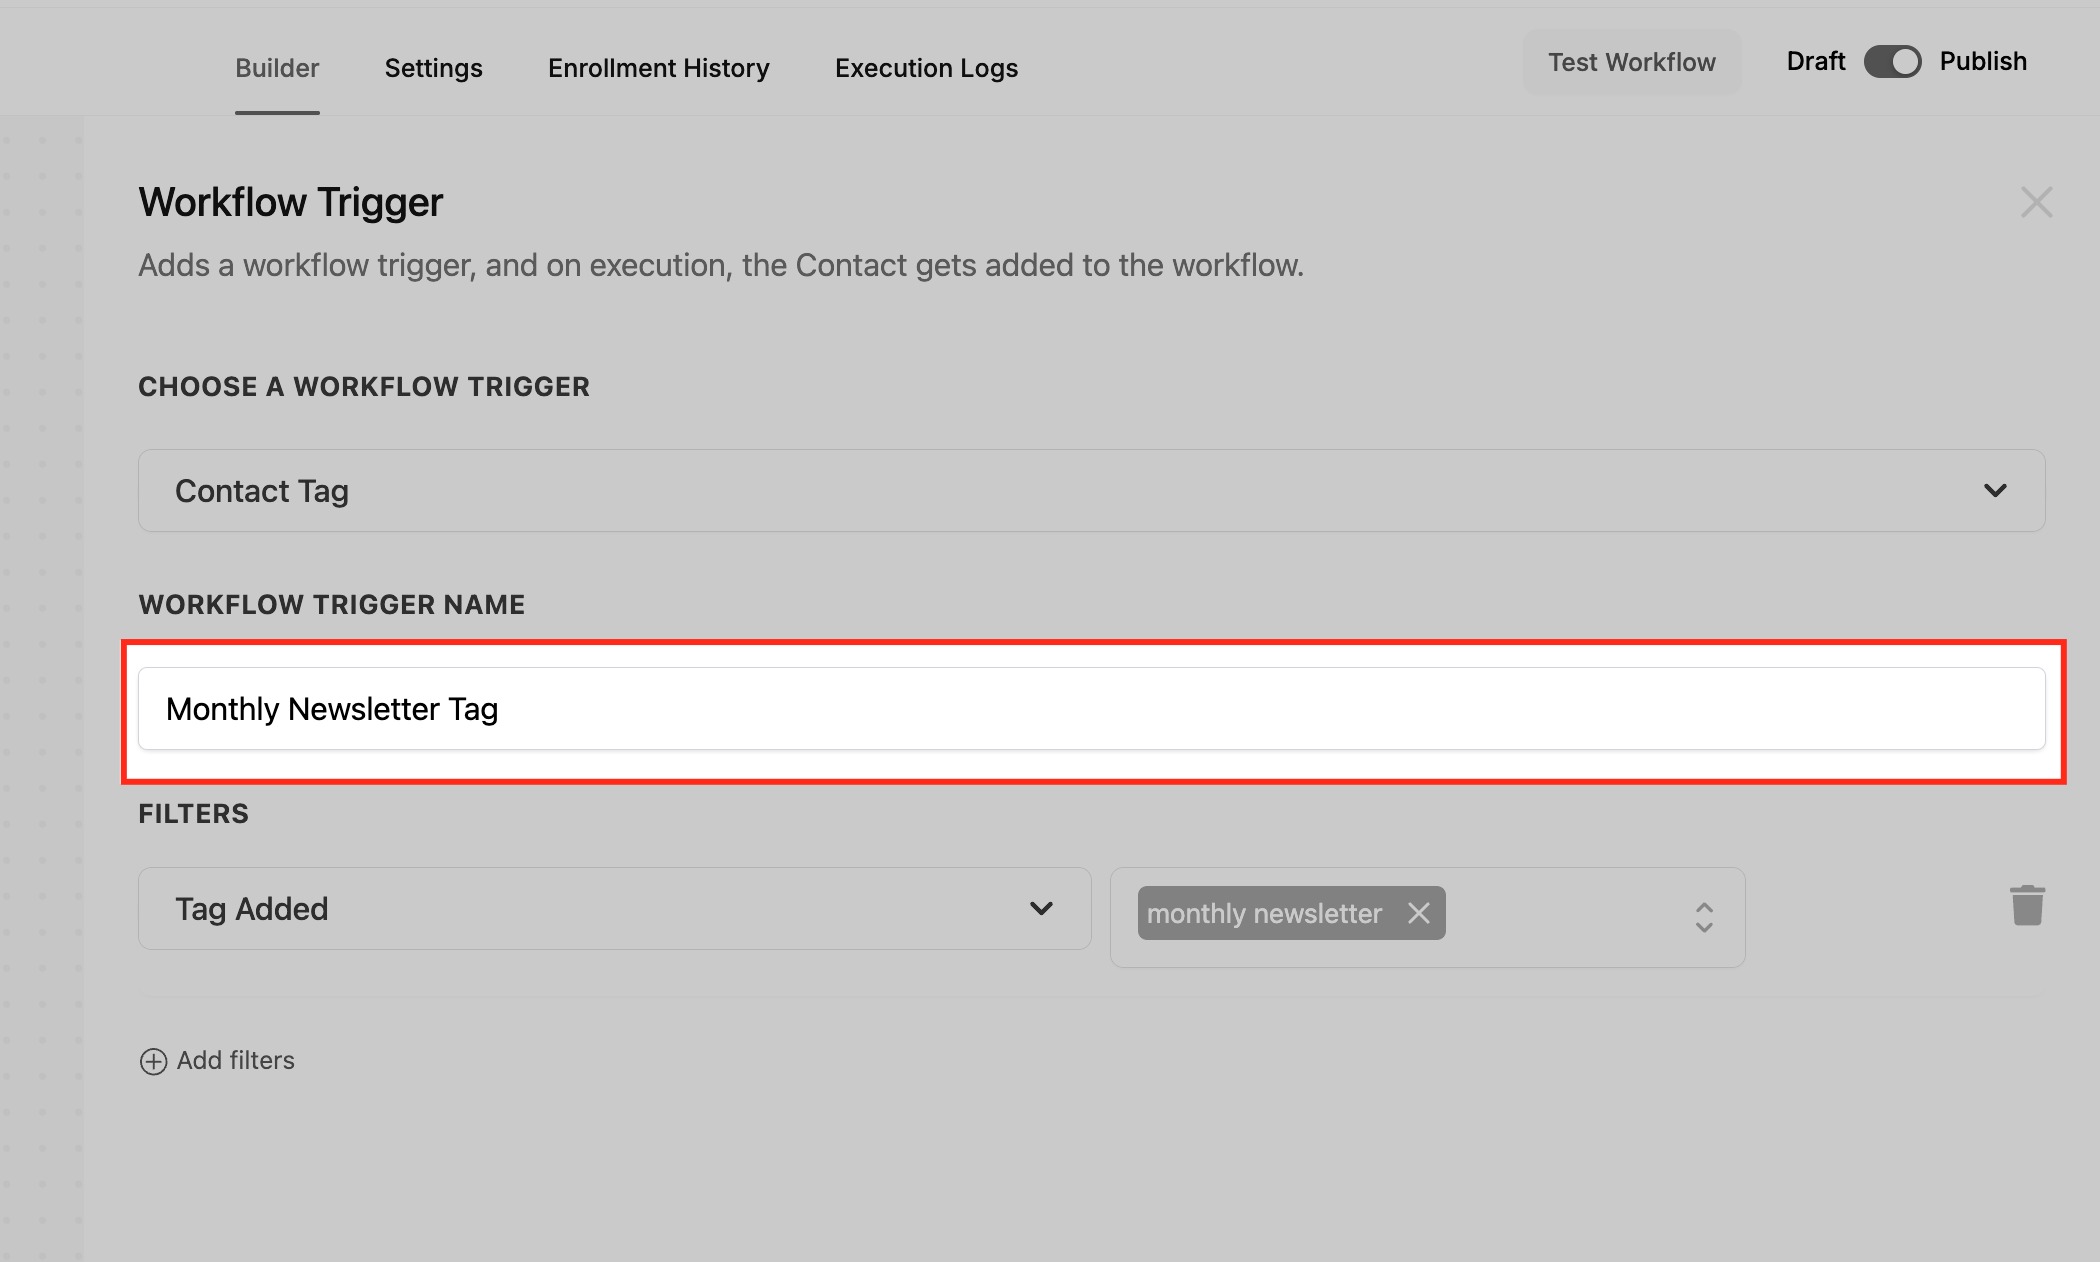
- Enter a descriptive name for the trigger.
- Select Added or Removed to define when the trigger fires.
- Choose the tag that will activate the workflow.
- Confirm the tag change by clicking Apply before saving.
- Use + Add New Tag to create a tag if needed.
- Add any additional tags that should also trigger the workflow.
- Add actions such as email, SMS, task assignment, or pipeline update.
- Save the workflow and test it by tagging a contact.
06What it looks like in HighLevel
07Settings that matter
- Workflow Trigger Name. Defines the readable label for the trigger within the workflow.
- Tag Added or Removed. Determines whether the workflow runs when the tag is applied or when it is deleted.
08Things to know before you rely on it
- Tag changes are applied only after you confirm them, for example by clicking Apply.
- Duplicate tags can cause confusion in workflows; keep tags unique.
- Multiple workflows using the same tag will activate at the same time, which may lead to overlapping actions.
09If something goes wrong
- Duplicate tags. Make tags unique and descriptive to avoid confusion.
- Inactive workflow. Confirm the workflow is published and active.
- Missing actions. Check that all desired actions are correctly configured under the trigger.
- Overlapping workflows. Avoid setting up several workflows with the same tag trigger.
10How it connects to the rest of HighLevel
- Set up a workflow that starts when a new contact is created. Contact Created trigger
- Configure a workflow to react to any change in a contact’s details. Contact Changed trigger
- Read the basics of building automations with HighLevel workflows. Workflow basics
Michael's take

Tag based automation eliminates the need to manually reach out each time a contact changes category. I would begin with creating a clean, consistent naming system for all tags so the triggers fire where I expect them to.
Then I would build a simple workflow that sends a welcome message when a “New Customer” tag is added, to confirm the trigger works before scaling it up.