
01Who this is for
- Consultants who need to invoice a client after a single session can use this action to collect payment automatically.
- Event organizers can charge attendees once they submit a registration form, ensuring payment is captured before the event.
- Fitness trainers can bill a client immediately after an appointment is confirmed, removing manual follow up.
02Stripe one time charges, explained
The Stripe One Time Charge action is a workflow step that creates a one off payment in your Stripe account. It runs whenever the workflow’s trigger fires and sends the charge to the Stripe Customer ID you specify. The action records the transaction in Stripe and links it to the selected customer.
You add the action in the HighLevel workflow builder, give it a recognizable name, and fill in four fields: the Stripe Customer ID, an optional description, the amount to charge, and the currency. Once saved, the workflow will execute the charge each time the trigger conditions are met.
The action lives inside the workflow editor under the list of available actions. It works only for one time payments; recurring billing requires different Stripe actions.
03How businesses use Stripe one time charge
- Consulting practice. Create a workflow that triggers on "Appointment Confirmed". Add the Stripe One Time Charge action, enter the client’s Stripe Customer ID, set the consultation fee amount, choose USD, and optionally add a description. The client is billed automatically when the appointment is confirmed.
- Event management company. Set up a workflow triggered by a "Form Submission" for event registration. Include the Stripe One Time Charge action, select the registrant’s Stripe Customer ID, input the ticket price, and select the appropriate currency. The charge occurs as soon as the registration form is submitted.
- Personal training studio. Build a workflow that fires when a tag "Ready to Pay" is added to a client’s profile. Use the Stripe One Time Charge action, provide the client’s Stripe Customer ID, enter the session cost, choose the currency, and leave the description blank or add a note. The system charges the client when the tag is applied.
04Before you start
- Stripe integration must be configured in HighLevel before using this action.
- A valid Stripe Customer ID must be available for the contact.
05How to set up and use Stripe one time charge in HighLevel
Configure Stripe one time charge
- Give the action a clear name such as "Stripe One Time Charge".
- Enter or select the Stripe Customer ID of the person to be charged.
- Optionally add a short description for the charge.
- Specify the exact amount to charge.
- Choose the currency in which the amount will be processed.
06What it looks like in HighLevel
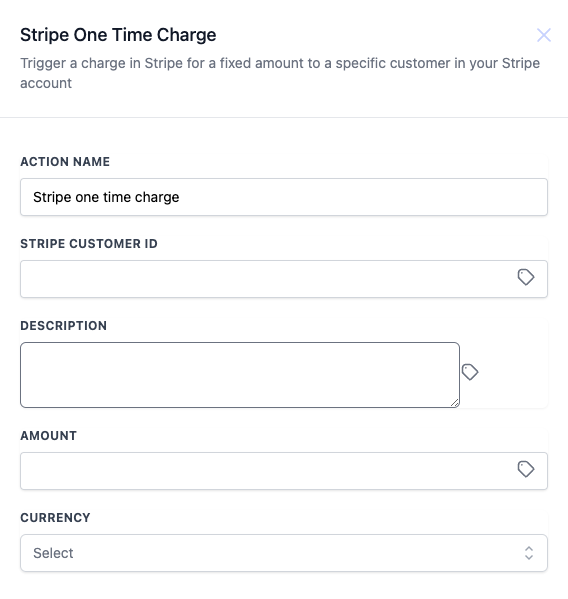
07Settings that matter
- Stripe Customer ID. Identifies the Stripe customer record that will receive the charge.
- Description. Provides a brief note about the charge; it is optional.
- Amount. Sets the monetary value that will be charged to the customer.
- Currency. Determines the currency used for the transaction.
- Action Name. Labels the workflow step for easy identification.
08Things to know before you rely on it
- The action processes only one time payments; it does not support recurring subscriptions.
- It is intended for agencies to charge subaccount admins, not to charge contacts of subaccounts.
- A valid Stripe Customer ID is required; an invalid ID will cause the charge to fail.
- Stripe integration must be active in HighLevel before the action can be used.
09How it connects to the rest of HighLevel
- Learn the full setup steps for Stripe one time charges in HighLevel workflows. Stripe one time charge guide
- Get an overview of creating workflows, adding triggers, filters, and actions. Workflow creation basics
- Review the pricing tiers that include access to advanced workflow actions. Workflow Pro Plan pricing
Michael's take

Collecting a single fee after a client signs up can be a hassle when you have to flip between apps. The Stripe One Time Charge action lets you embed that payment step directly in a HighLevel workflow, so the charge happens automatically once a trigger fires.
The first setting I would lock down is the Stripe Customer ID mapping. Make sure the ID you pass matches a real customer in Stripe; otherwise the workflow will fail and the payment won’t go through.