
01Who this is for
- Sales managers who need proposals sent right away, because the action automates estimate creation and delivery.
- Service businesses with a pipeline, such as home remodelers, who require consistent branded estimates at each stage.
- Agencies that must track estimate views and acceptance, using the built in audit trail.
02Send estimate actions, explained
The Send Estimate action builds an estimate from a pre created template when a workflow reaches the step. It inserts information from the contact or opportunity, applies the template’s branding, taxes and currency, and then sends the document.
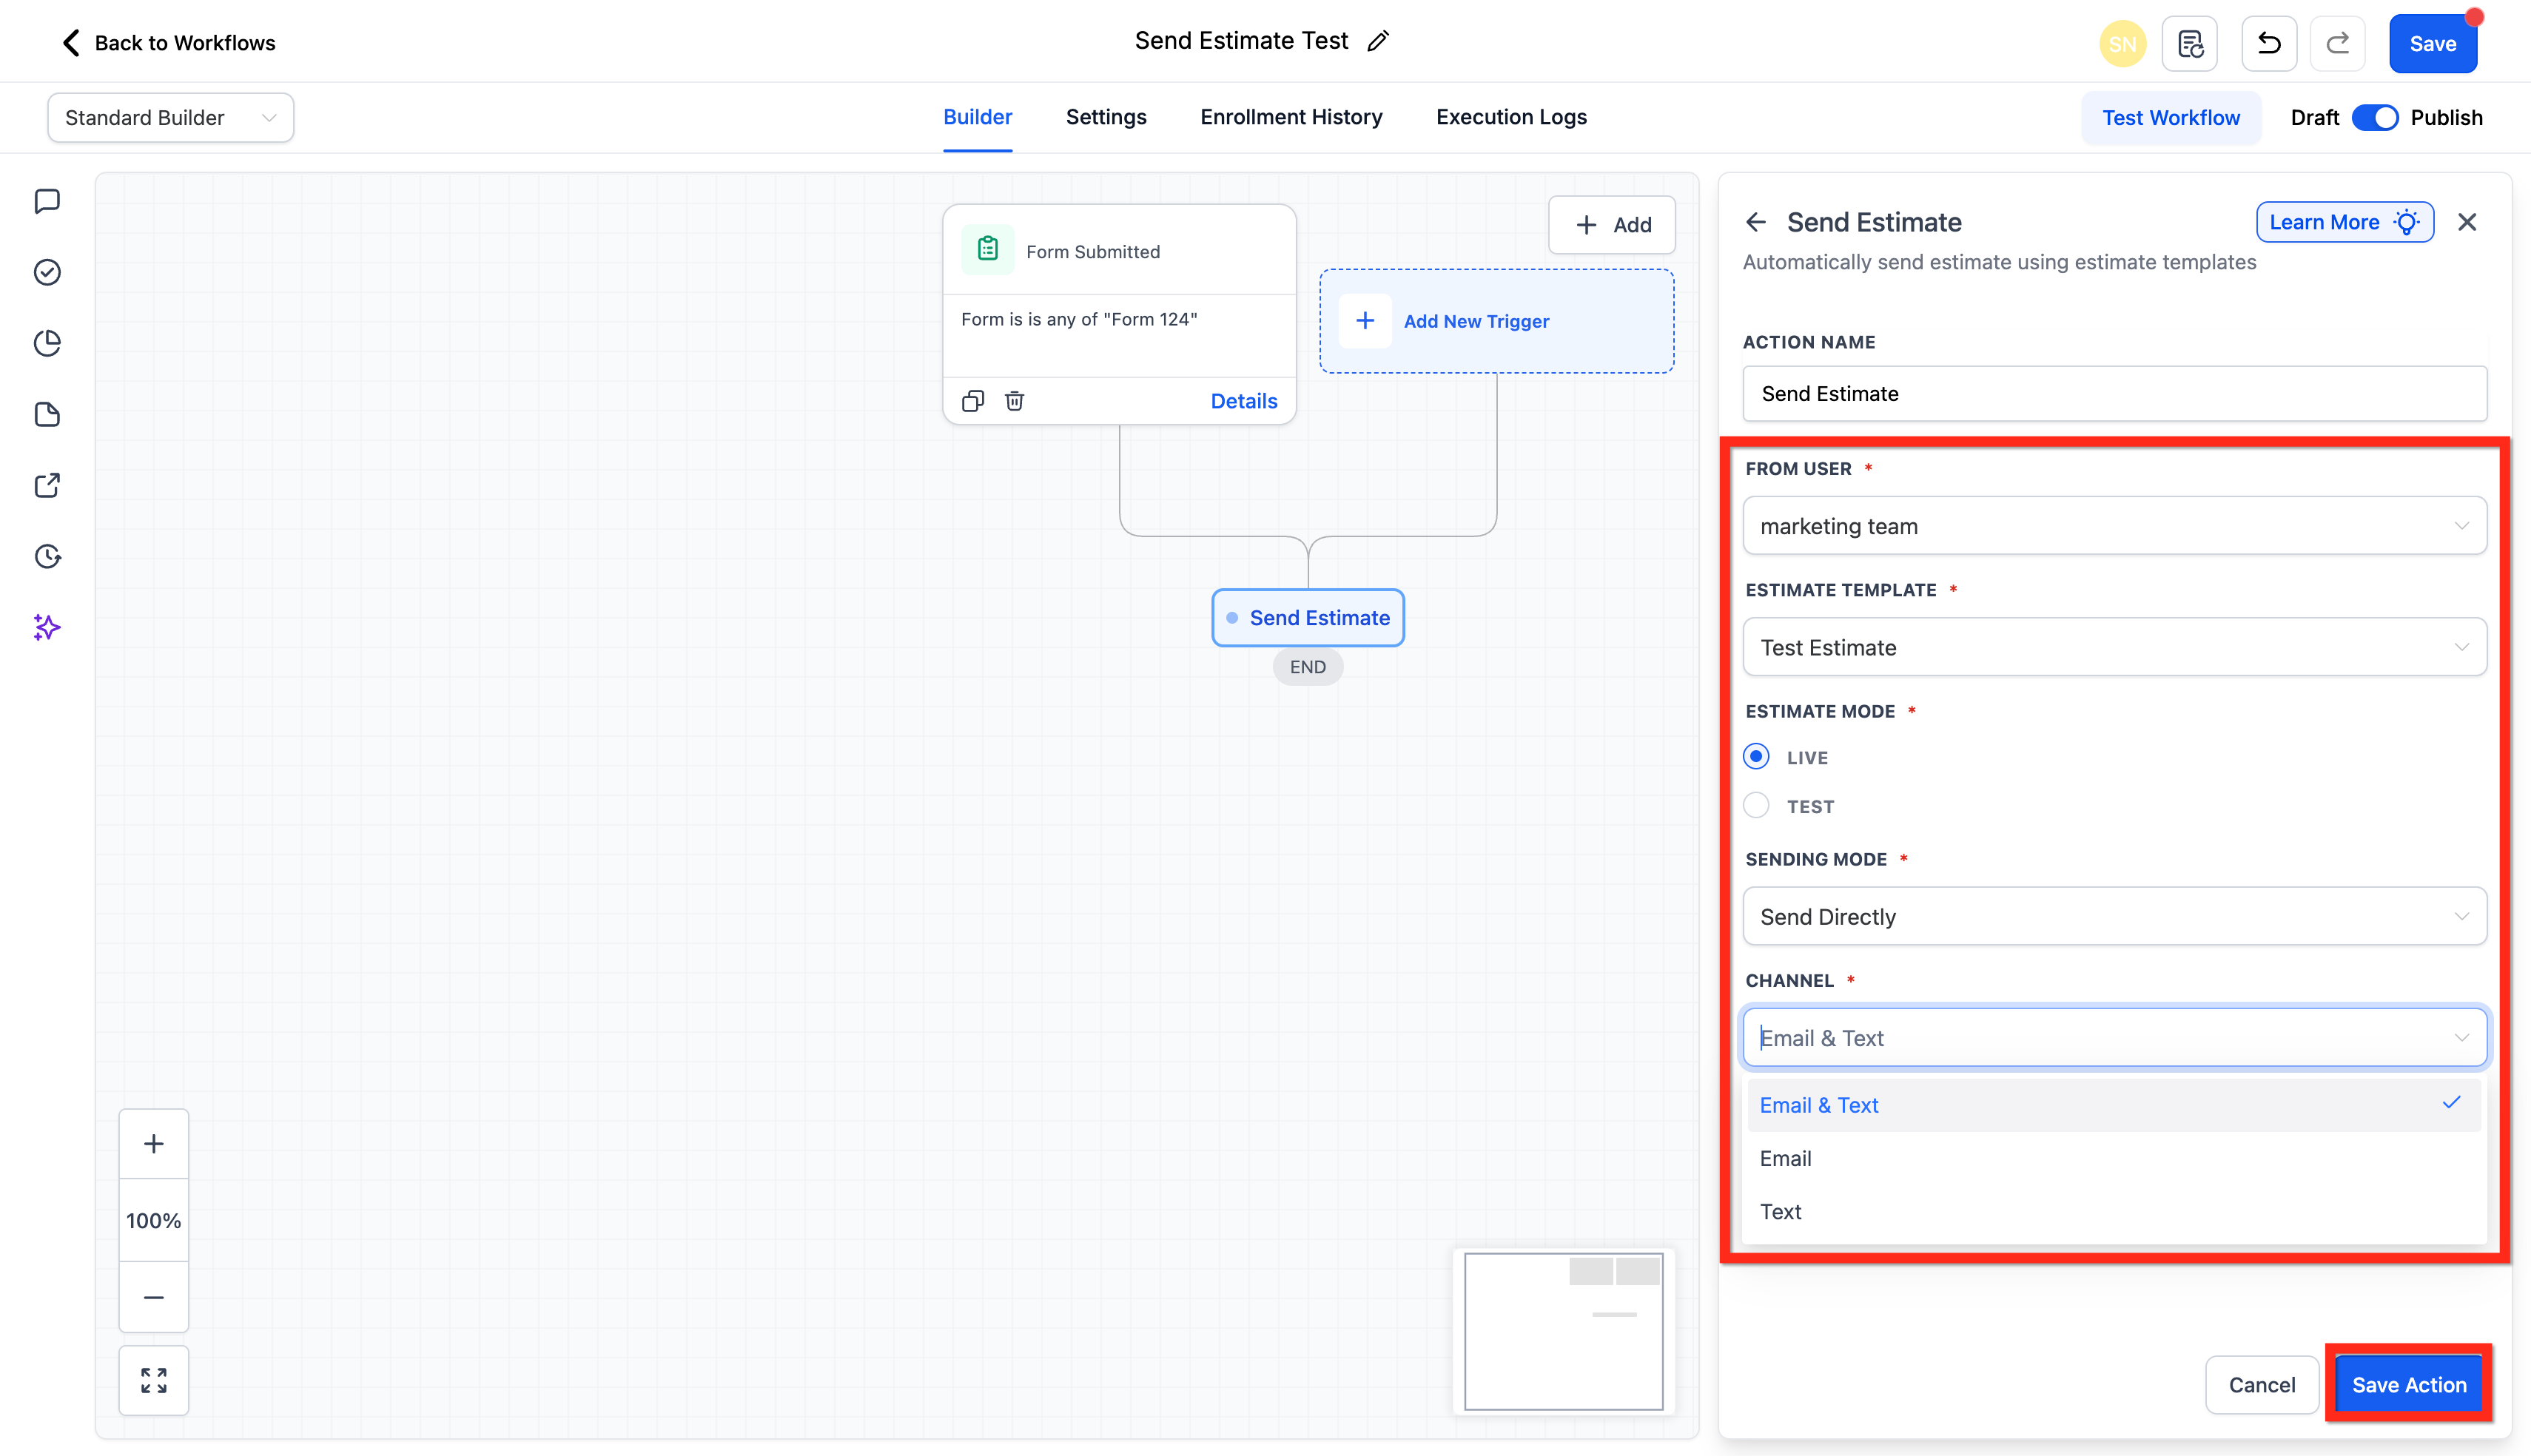
The action lives inside the workflow editor. You pick the sender, template, payment mode, sending mode and delivery channel. After saving, the workflow can be tested and then published, after which estimates are generated and dispatched automatically.
03How businesses use send estimate
- Home renovation company. When a new opportunity is created, the workflow triggers the Send Estimate action. The company selects its renovation estimate template, chooses the contractor as the sender, and sends the estimate by email and text in live mode so the client receives a final proposal.
- Pipeline driven sales process. A business sets a trigger such as a pipeline stage change; the Send Estimate action then automatically generates an estimate from the selected template and delivers it through the chosen channel without manual effort.
- Test mode validation. The team configures the action in Test mode with a seed contact to verify template variables, branding, taxes and delivery before switching the workflow to Live mode for real customers.
04Before you start
- Payments must be enabled for the location and a payment processor connected.
- At least one active Estimate Template with branding, taxes and currency set up.
- The contact record must contain a valid email address and/or phone number for the chosen channel.
- Email sending domain and SMS sending compliance must be verified and the contact opted in.
05How to set up and use send estimate in HighLevel
Set up send estimate action in a workflow
- Log in to the subaccount.
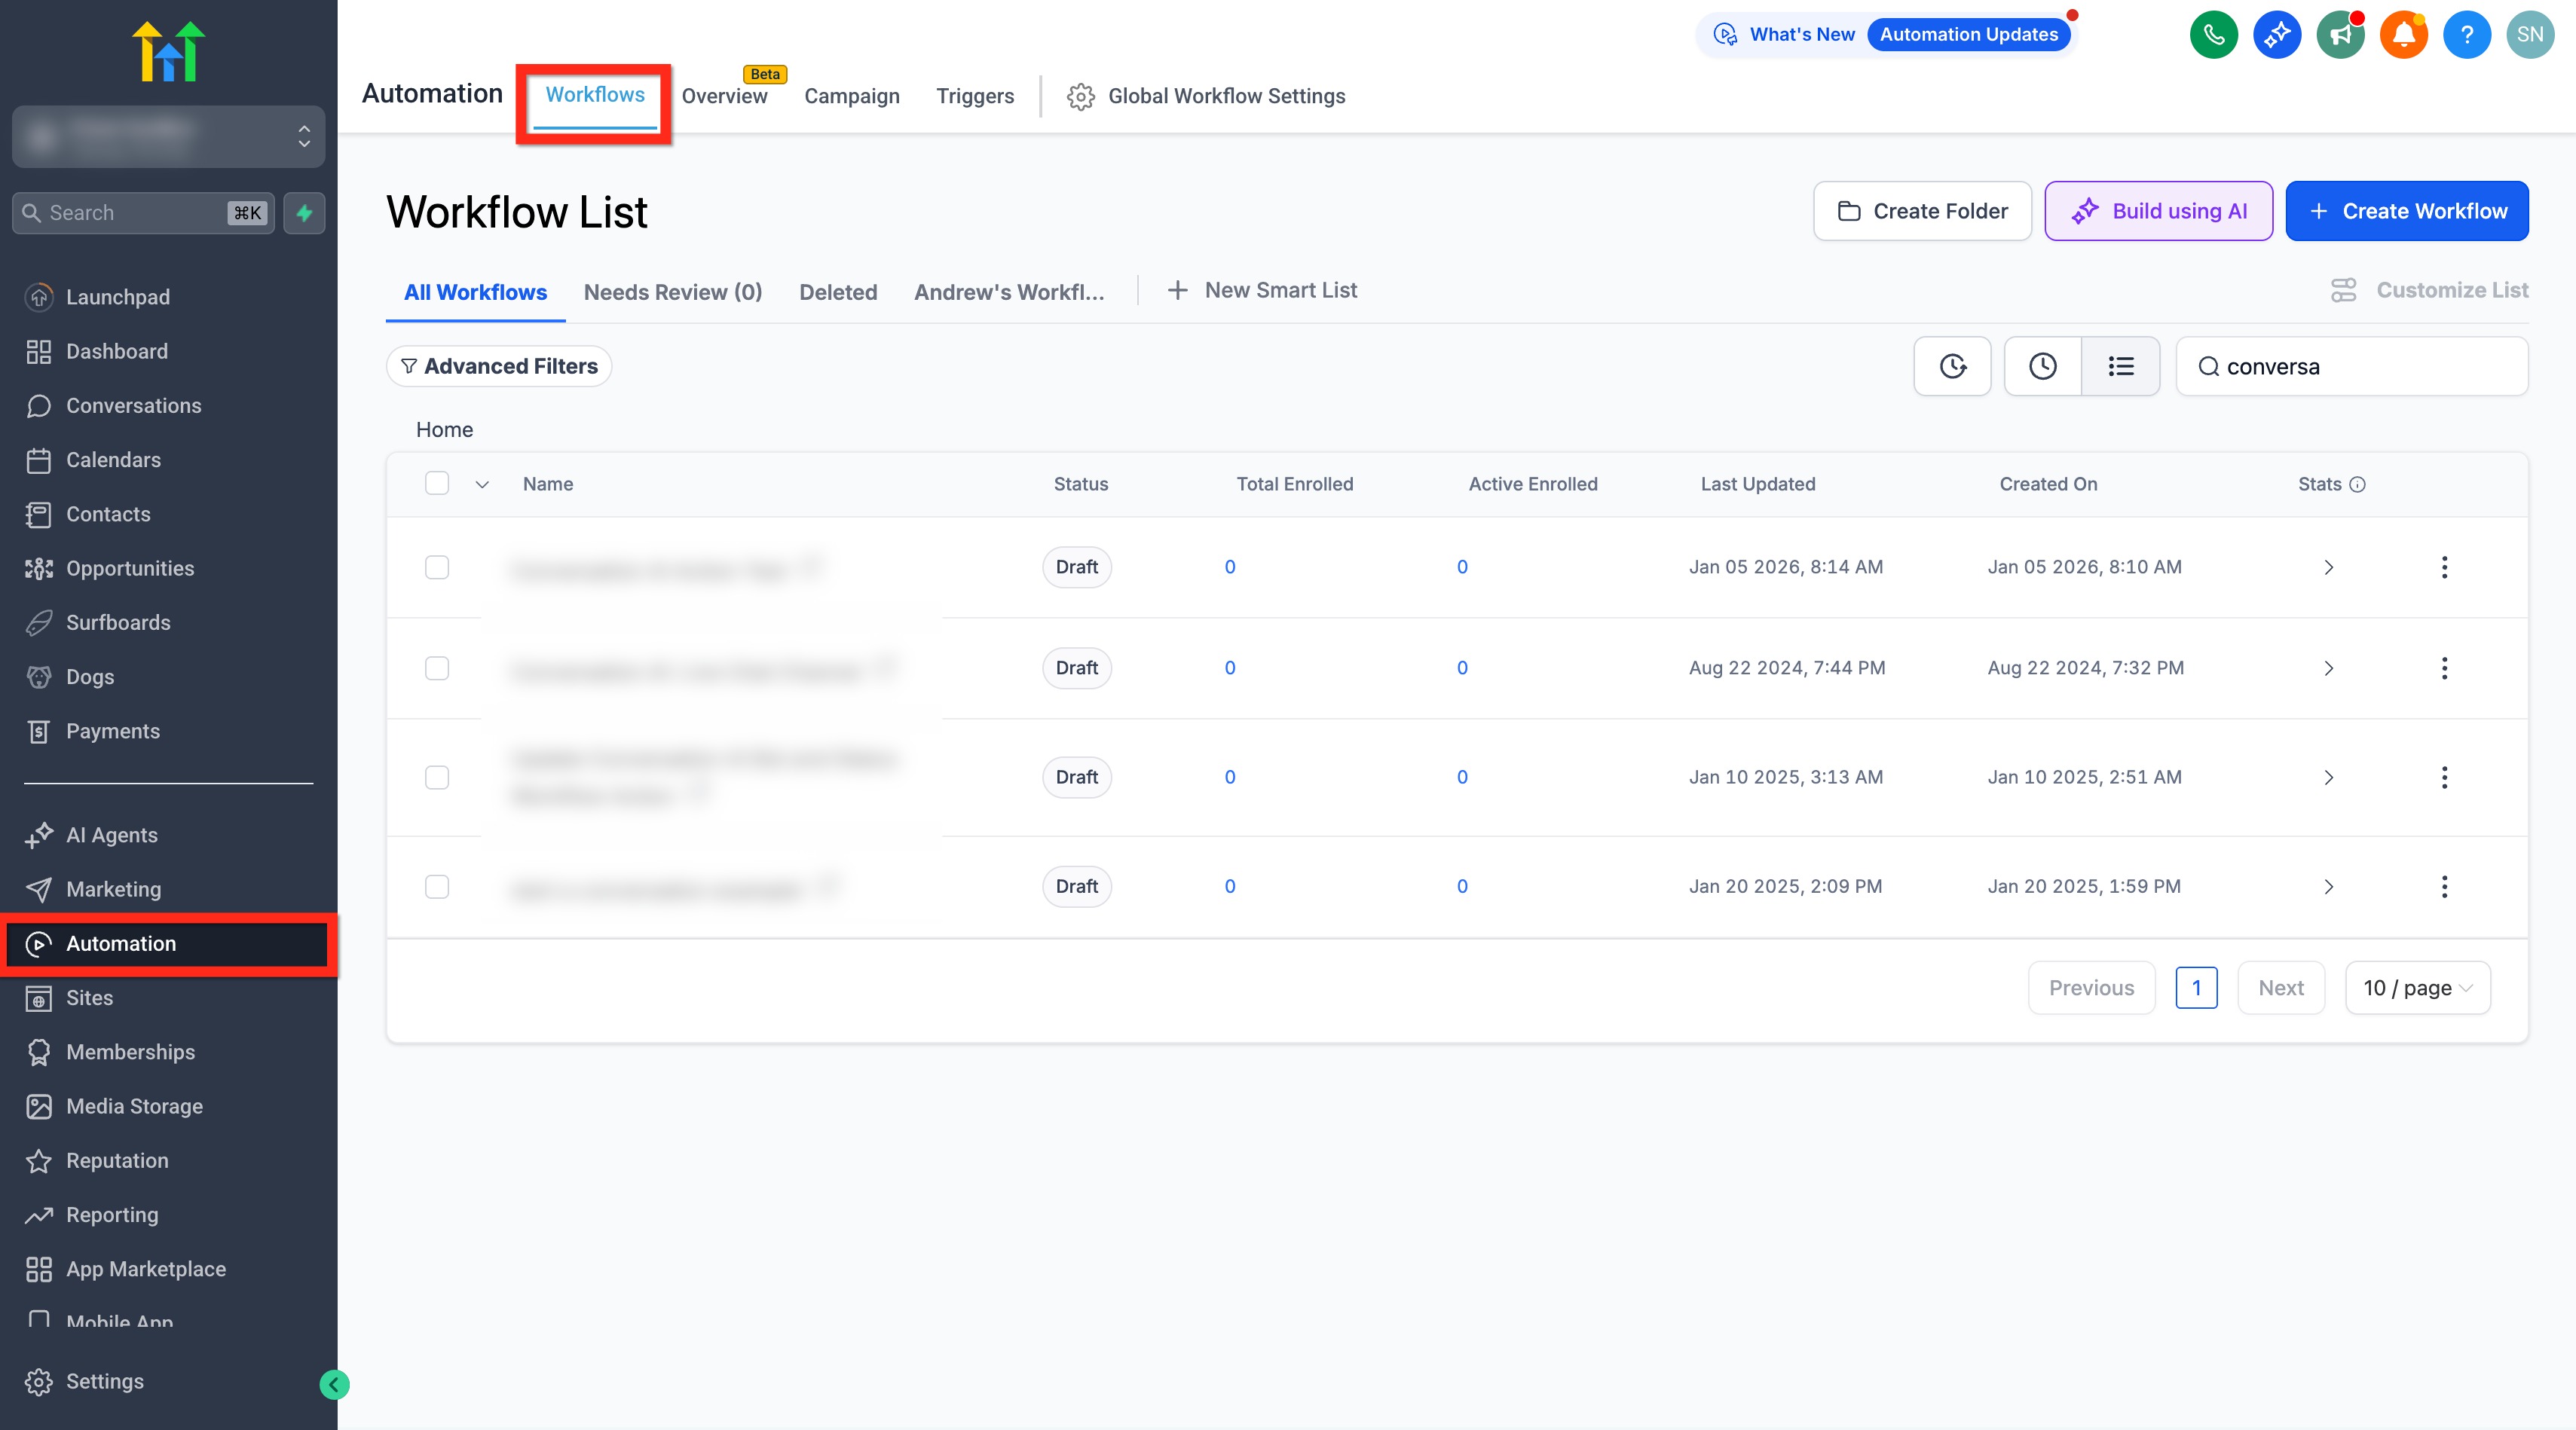
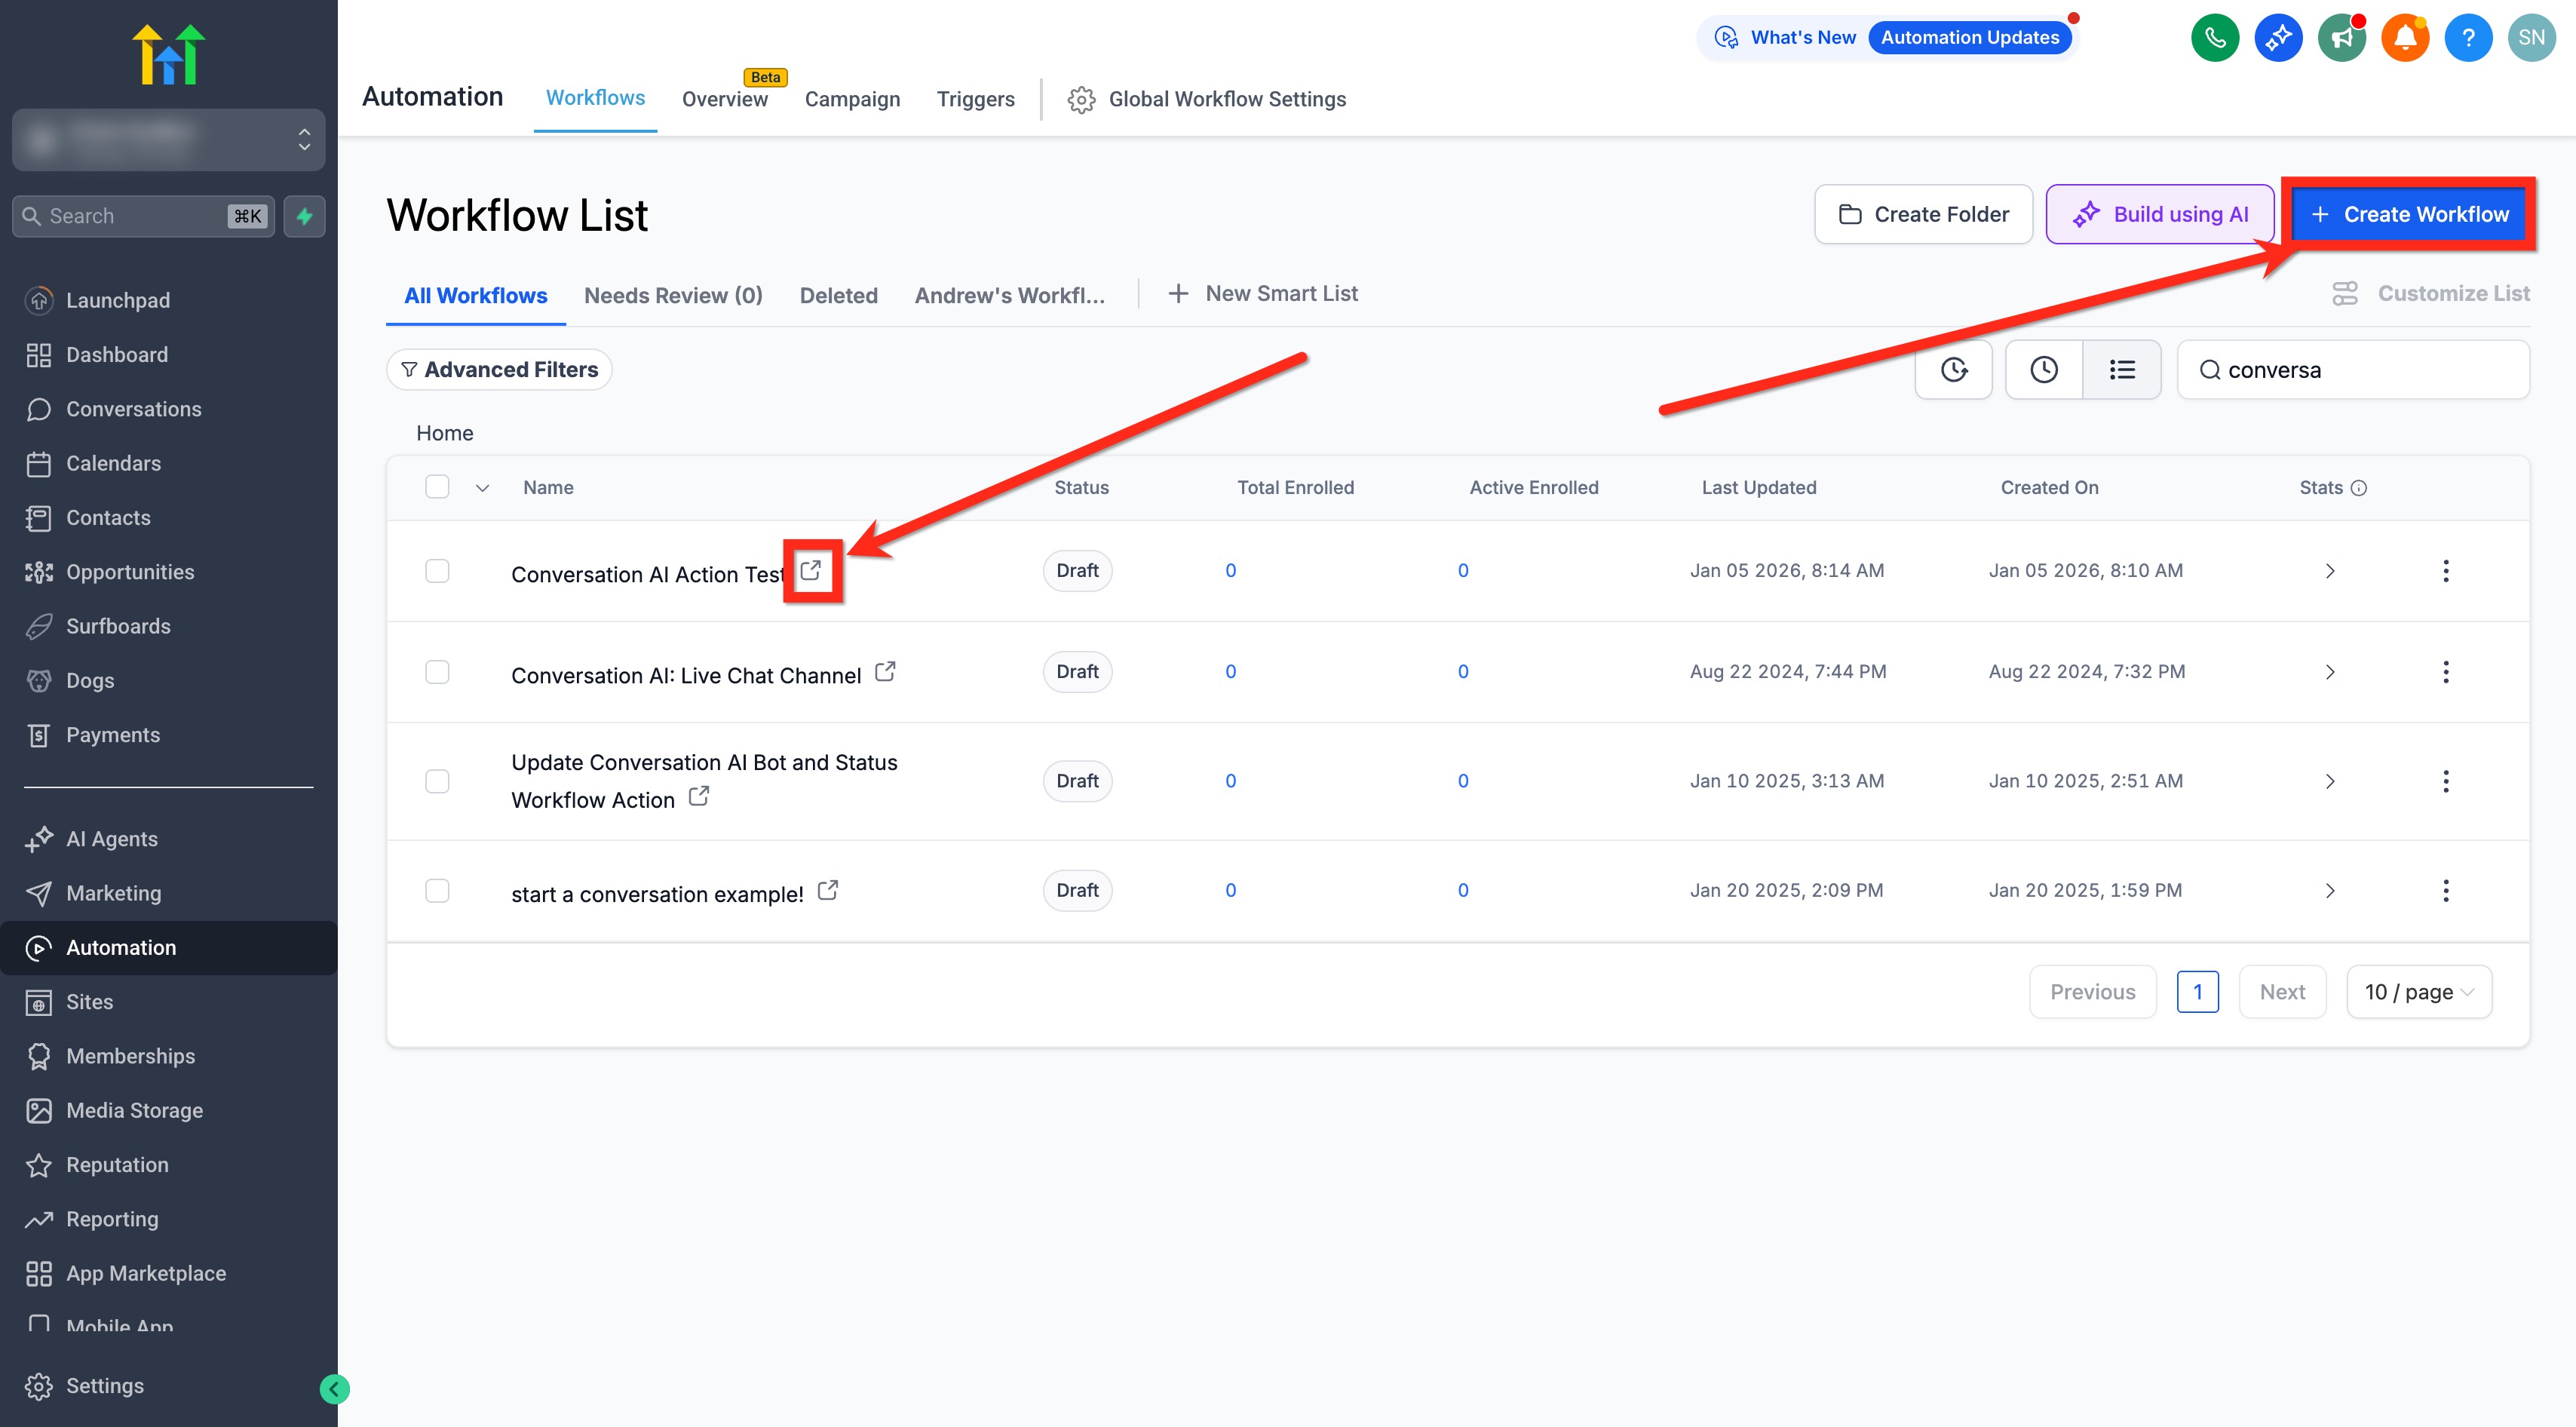
- Navigate to Automations > Workflows.
- Create a new workflow or open an existing one.
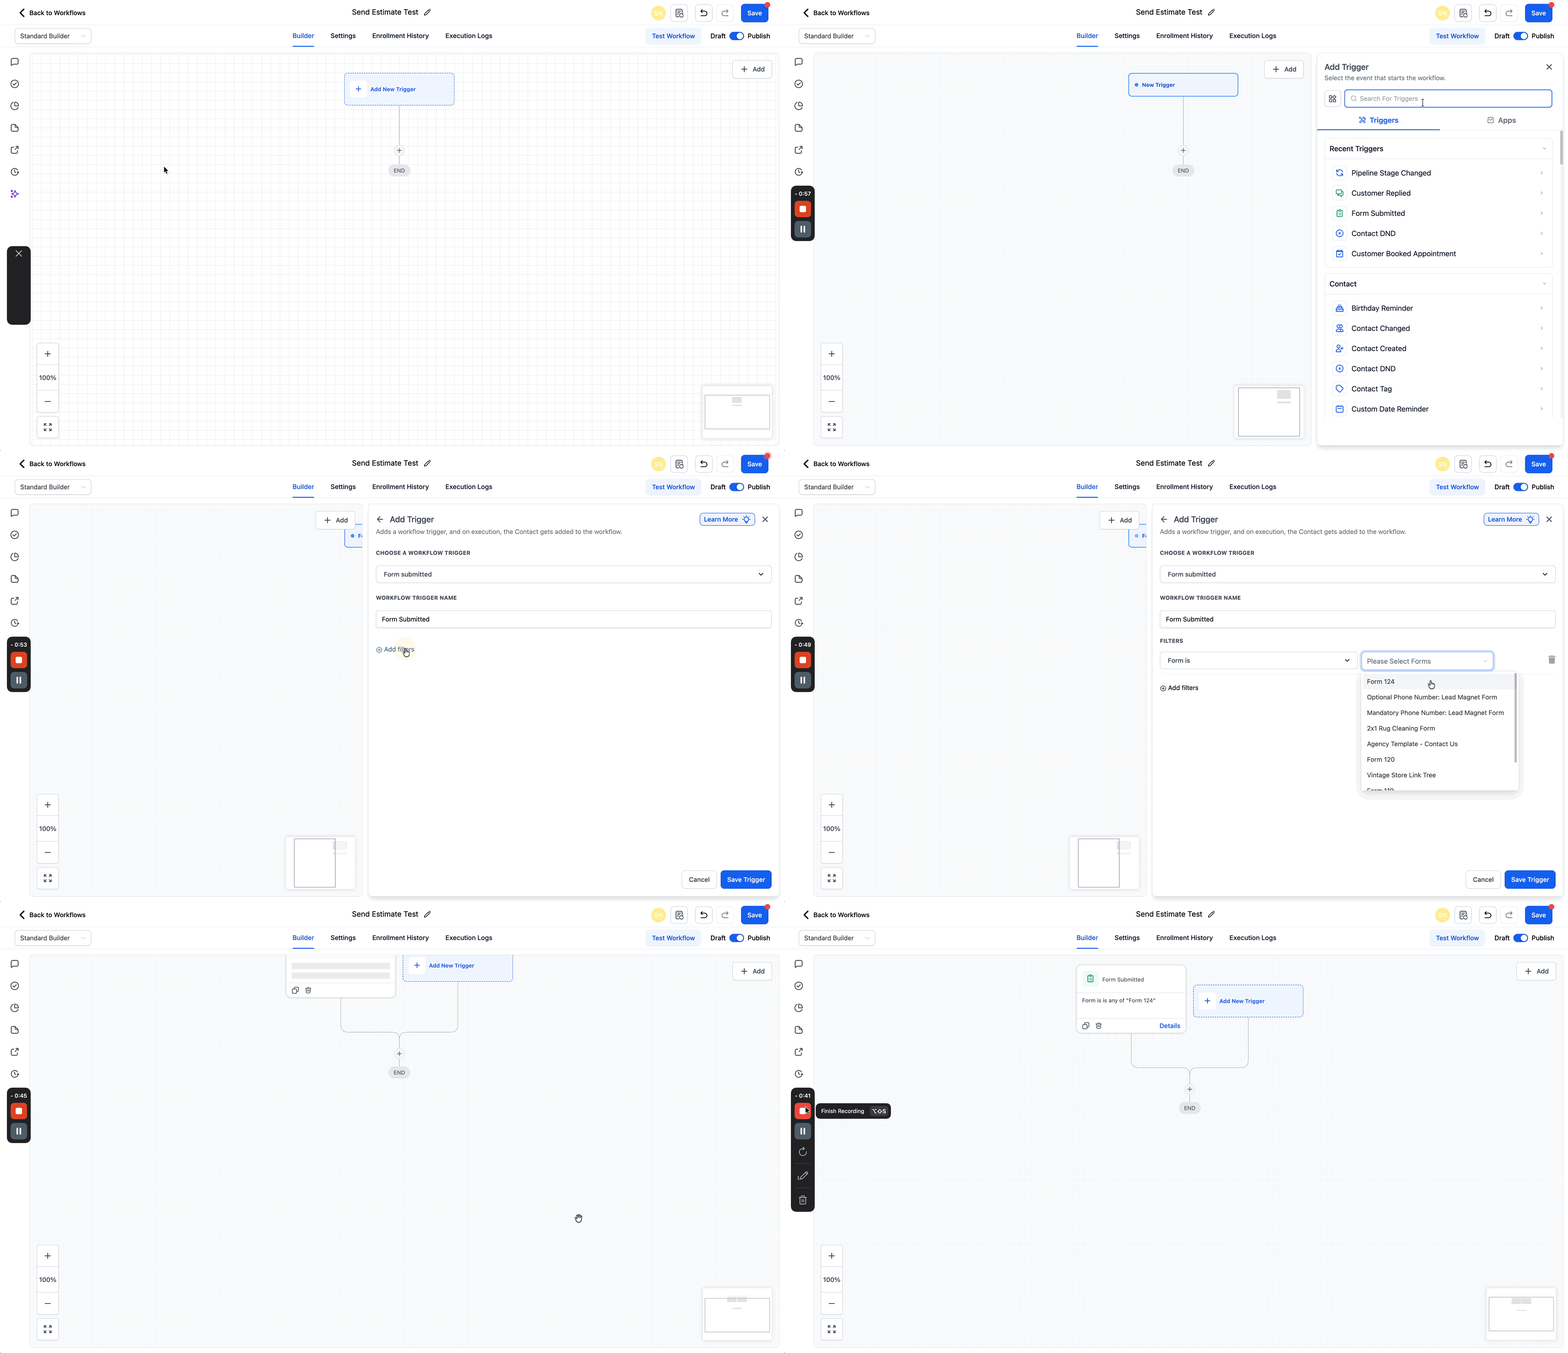
- Add a trigger that matches the desired event, such as a pipeline stage change.
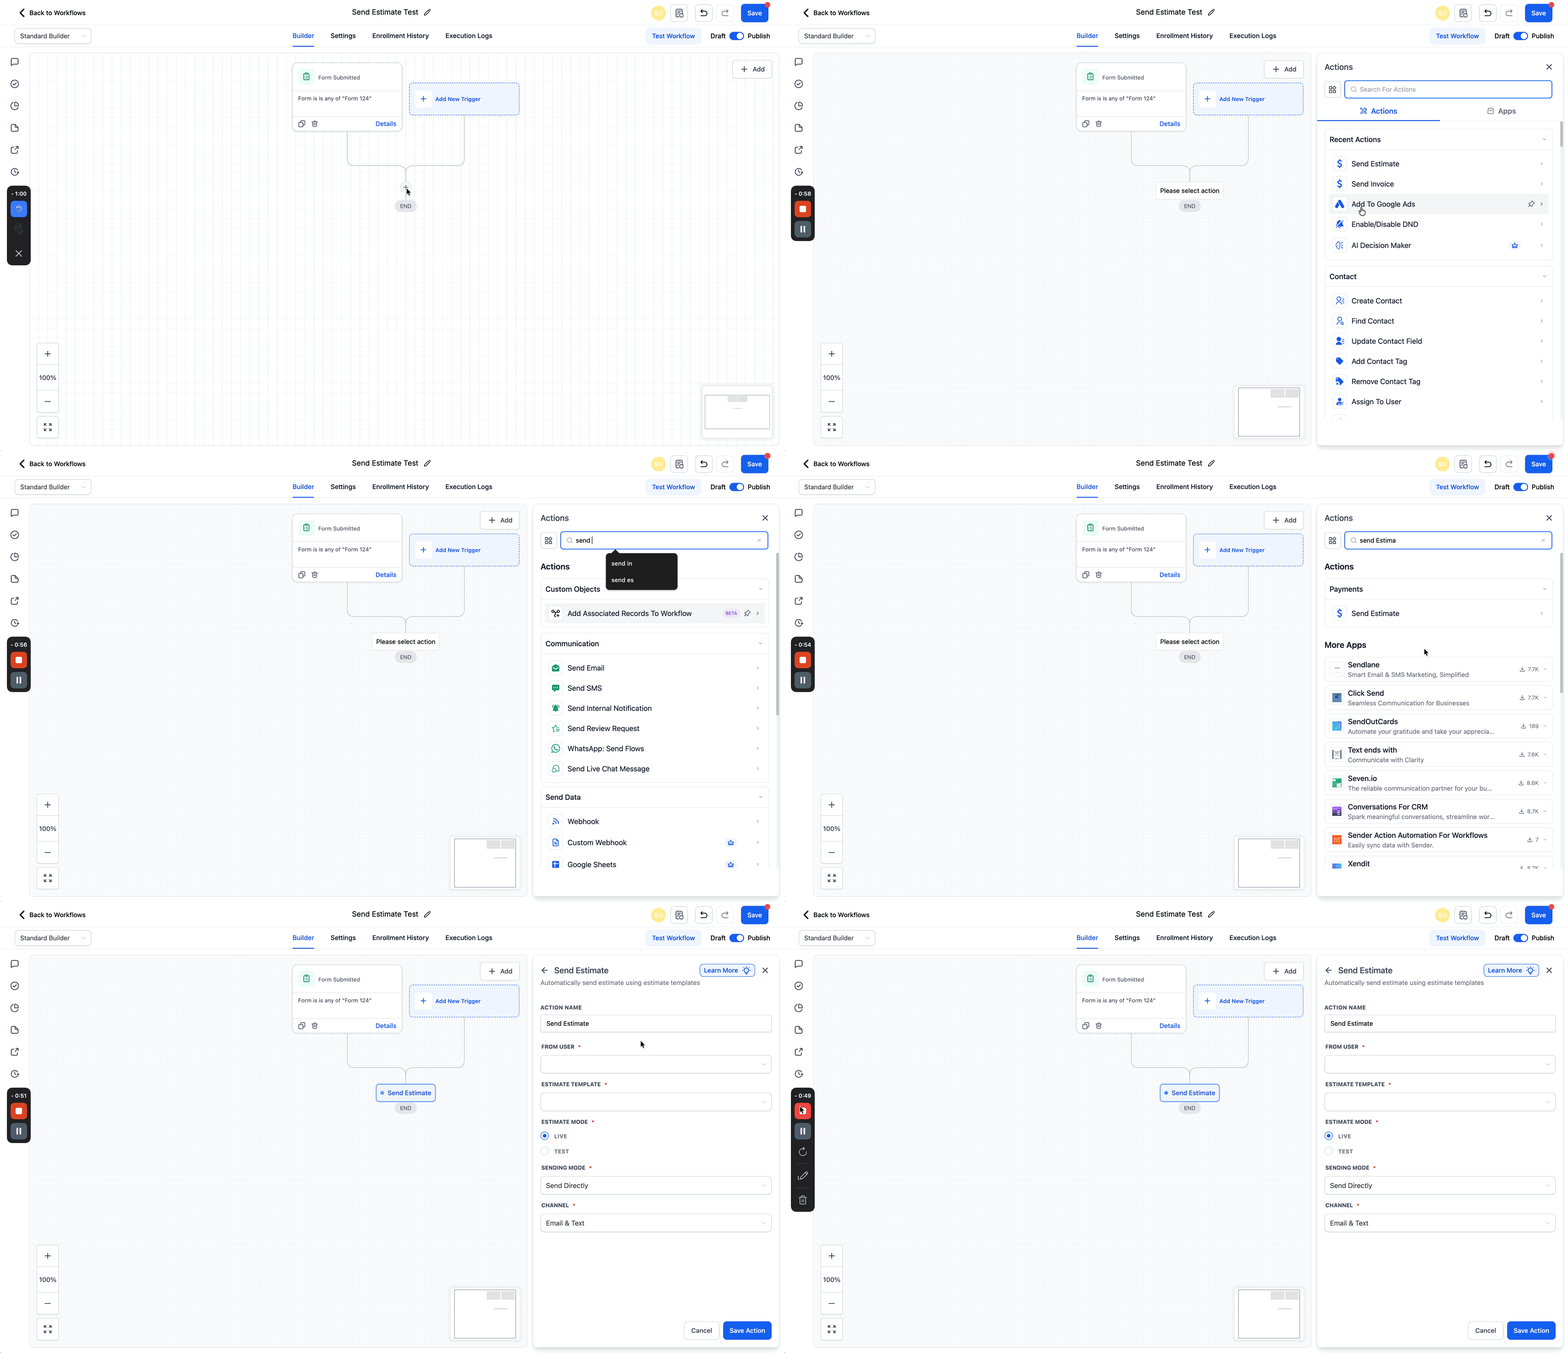
- Add an action and search for Send Estimate.
- Choose the user who will send the estimate and select the appropriate estimate template.
- Pick the payment mode, using Live for real payments or Test for sandbox validation.
- Set the sending mode to Create as Draft or Send Directly.
- Select the delivery channel: Email, Text, or both.
- Save the action.
- Test the workflow to confirm the configuration works as expected.
- Publish and save the workflow.
06What it looks like in HighLevel
07Settings that matter
- From User. Determines which user’s identity is used as the sender of the estimate.
- Estimate Template. Specifies the pre designed estimate layout that will be populated with data.
- Payment Mode. Controls whether the estimate processes real payments (Live) or runs in a sandbox environment (Test).
- Sending Mode. Defines if the estimate is saved as a draft for review or sent immediately after the workflow runs.
- Channel. Sets how the estimate is delivered: via Email, Text, or both.
08How it connects to the rest of HighLevel
- Send invoices using a similar workflow action Send Invoice action
- Basics of building workflows in HighLevel Workflow basics
- Review plan options and pricing for workflow features HighLevel pricing
Michael's take

Will sending estimates automatically really save me time? The action generates the estimate automatically when a trigger fires, removing the need for manual creation.
If I were setting this up, I would first make sure my Estimate Template is perfect. Logo, taxes, currency. Then run a quick test in Test mode to confirm the email and SMS look right. Once the test passes, switch to Live mode and let the workflow handle the rest, knowing every send is logged for audit purposes.