
01Who this is for
- Sales managers, need to free reps when deals close, keeping the pipeline tidy.
- Customer support supervisors, want agents to lose a ticket once it is resolved.
- Workflow designers, require a way to reset assignments before re routing contacts.
02Remove assigned user, explained
The Remove Assigned User action removes the current user assignment from a selected contact. After it runs, the contact shows no owner but remains in the system with its history intact. The action is available inside the workflow builder, requires no additional fields, and is triggered by the workflow’s defined conditions. Add the step, label it, save, test, and then publish to make it active.
03How businesses use remove assigned user
- Sales pipeline cleanup. When a contact’s opportunity status changes to “Closed Won” or “Closed Lost,” the workflow removes the assigned salesperson, freeing the rep to focus on active opportunities.
- Customer support task completion. After a support agent resolves a ticket and the task is marked completed, the workflow removes the agent’s assignment from the contact so the agent can take on new tickets.
- Combined trigger automation. The action can be paired with multiple triggers, such as a status change and a task completion, to automatically reset assignments in complex workflows.
04How to set up and use remove assigned user in HighLevel
Configure the Remove Assigned User action
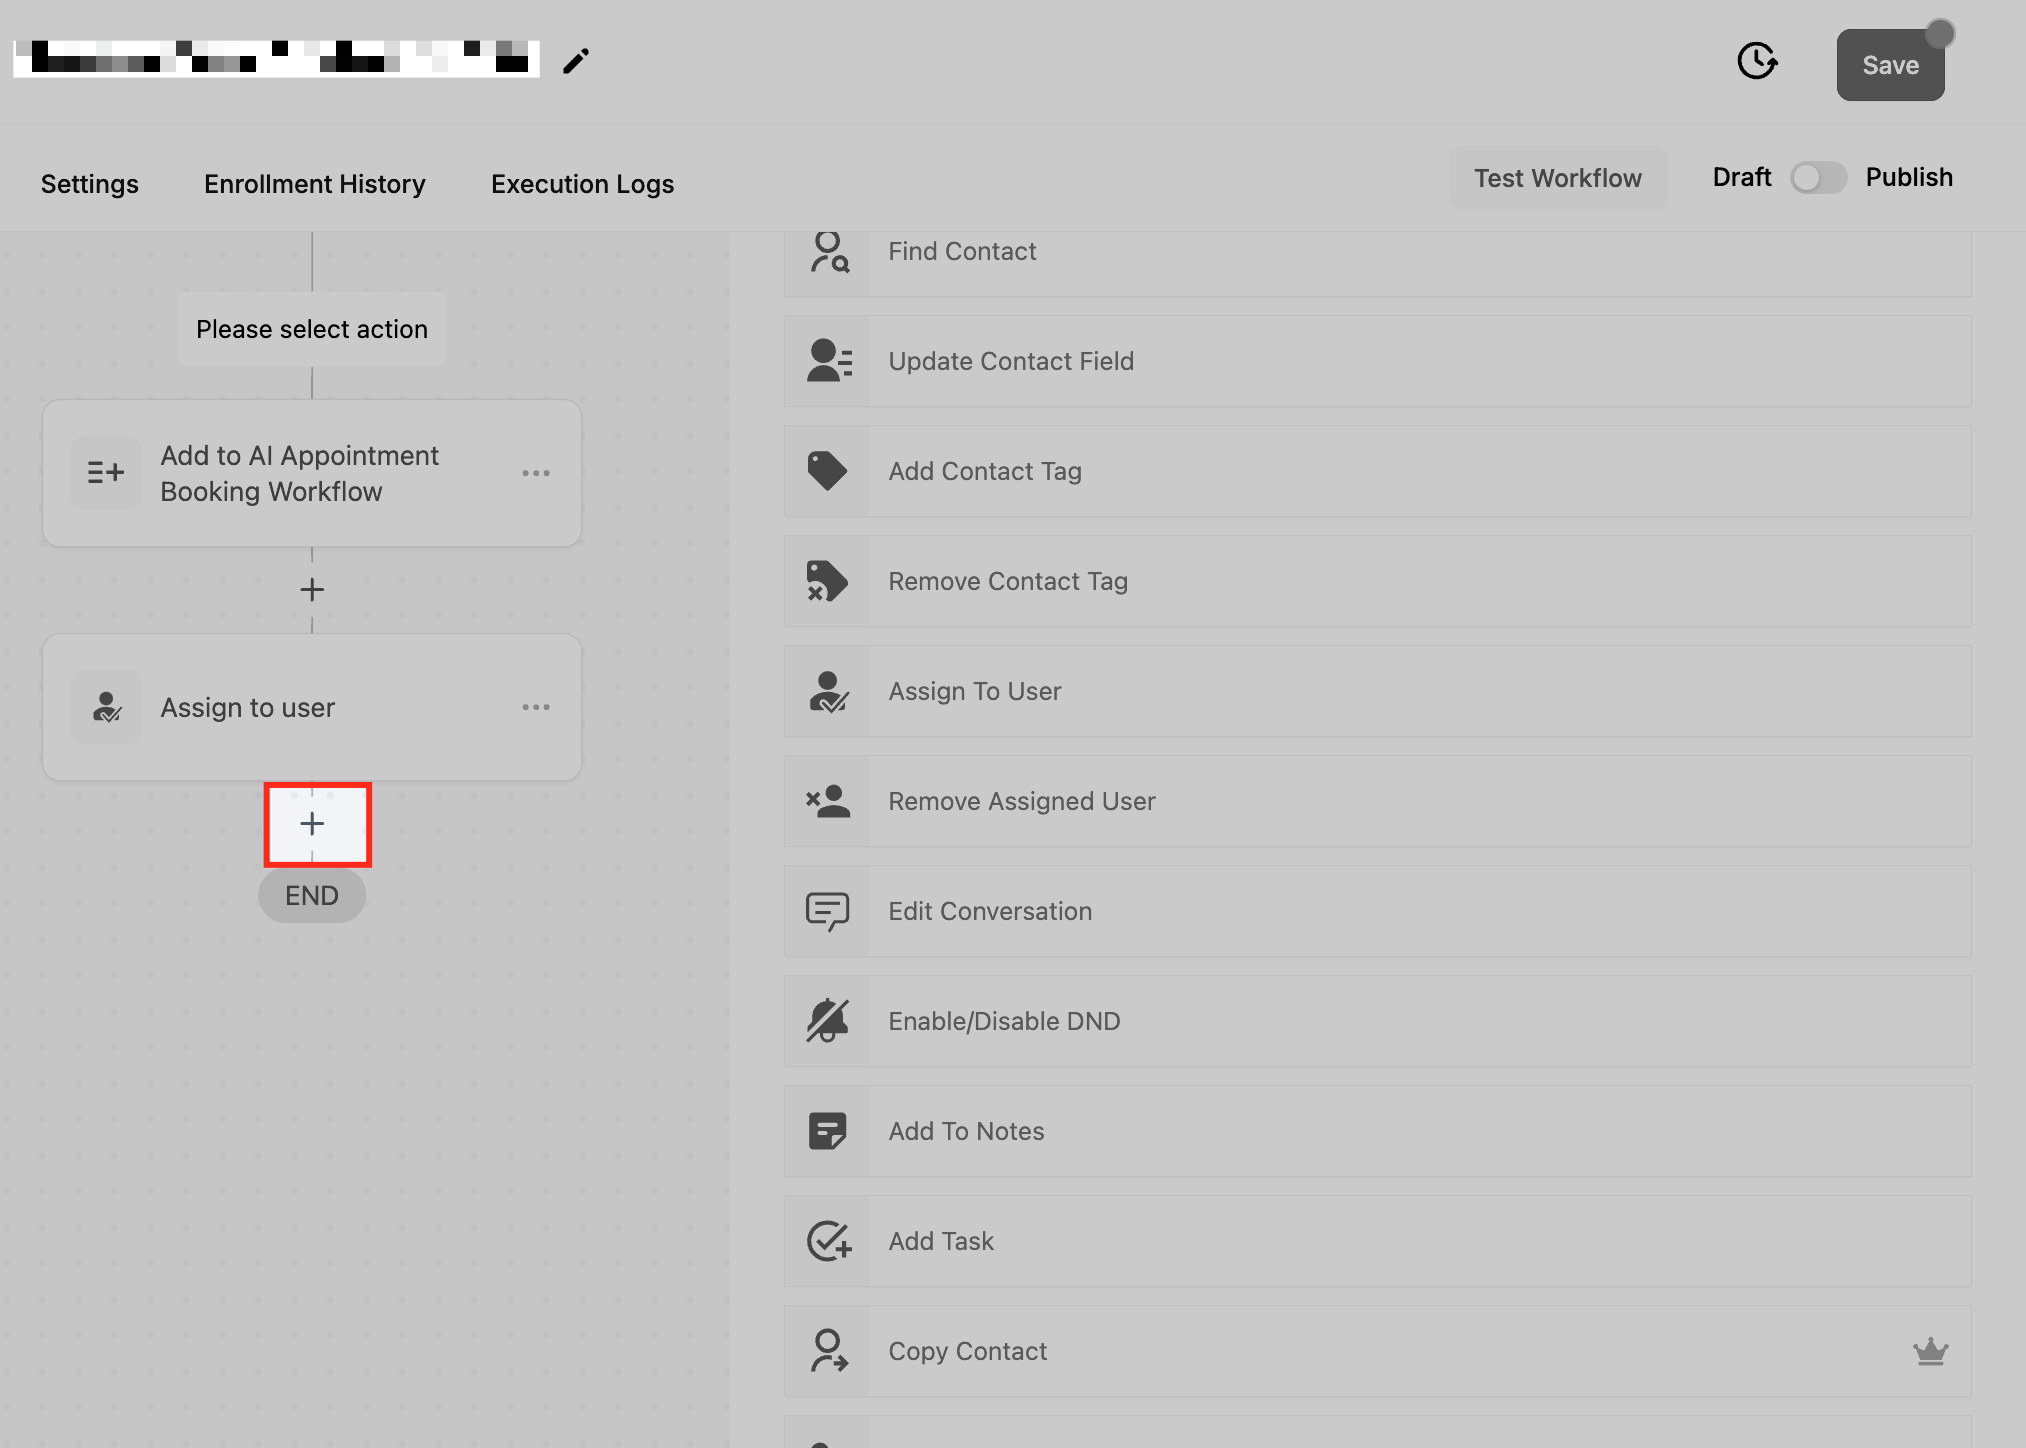
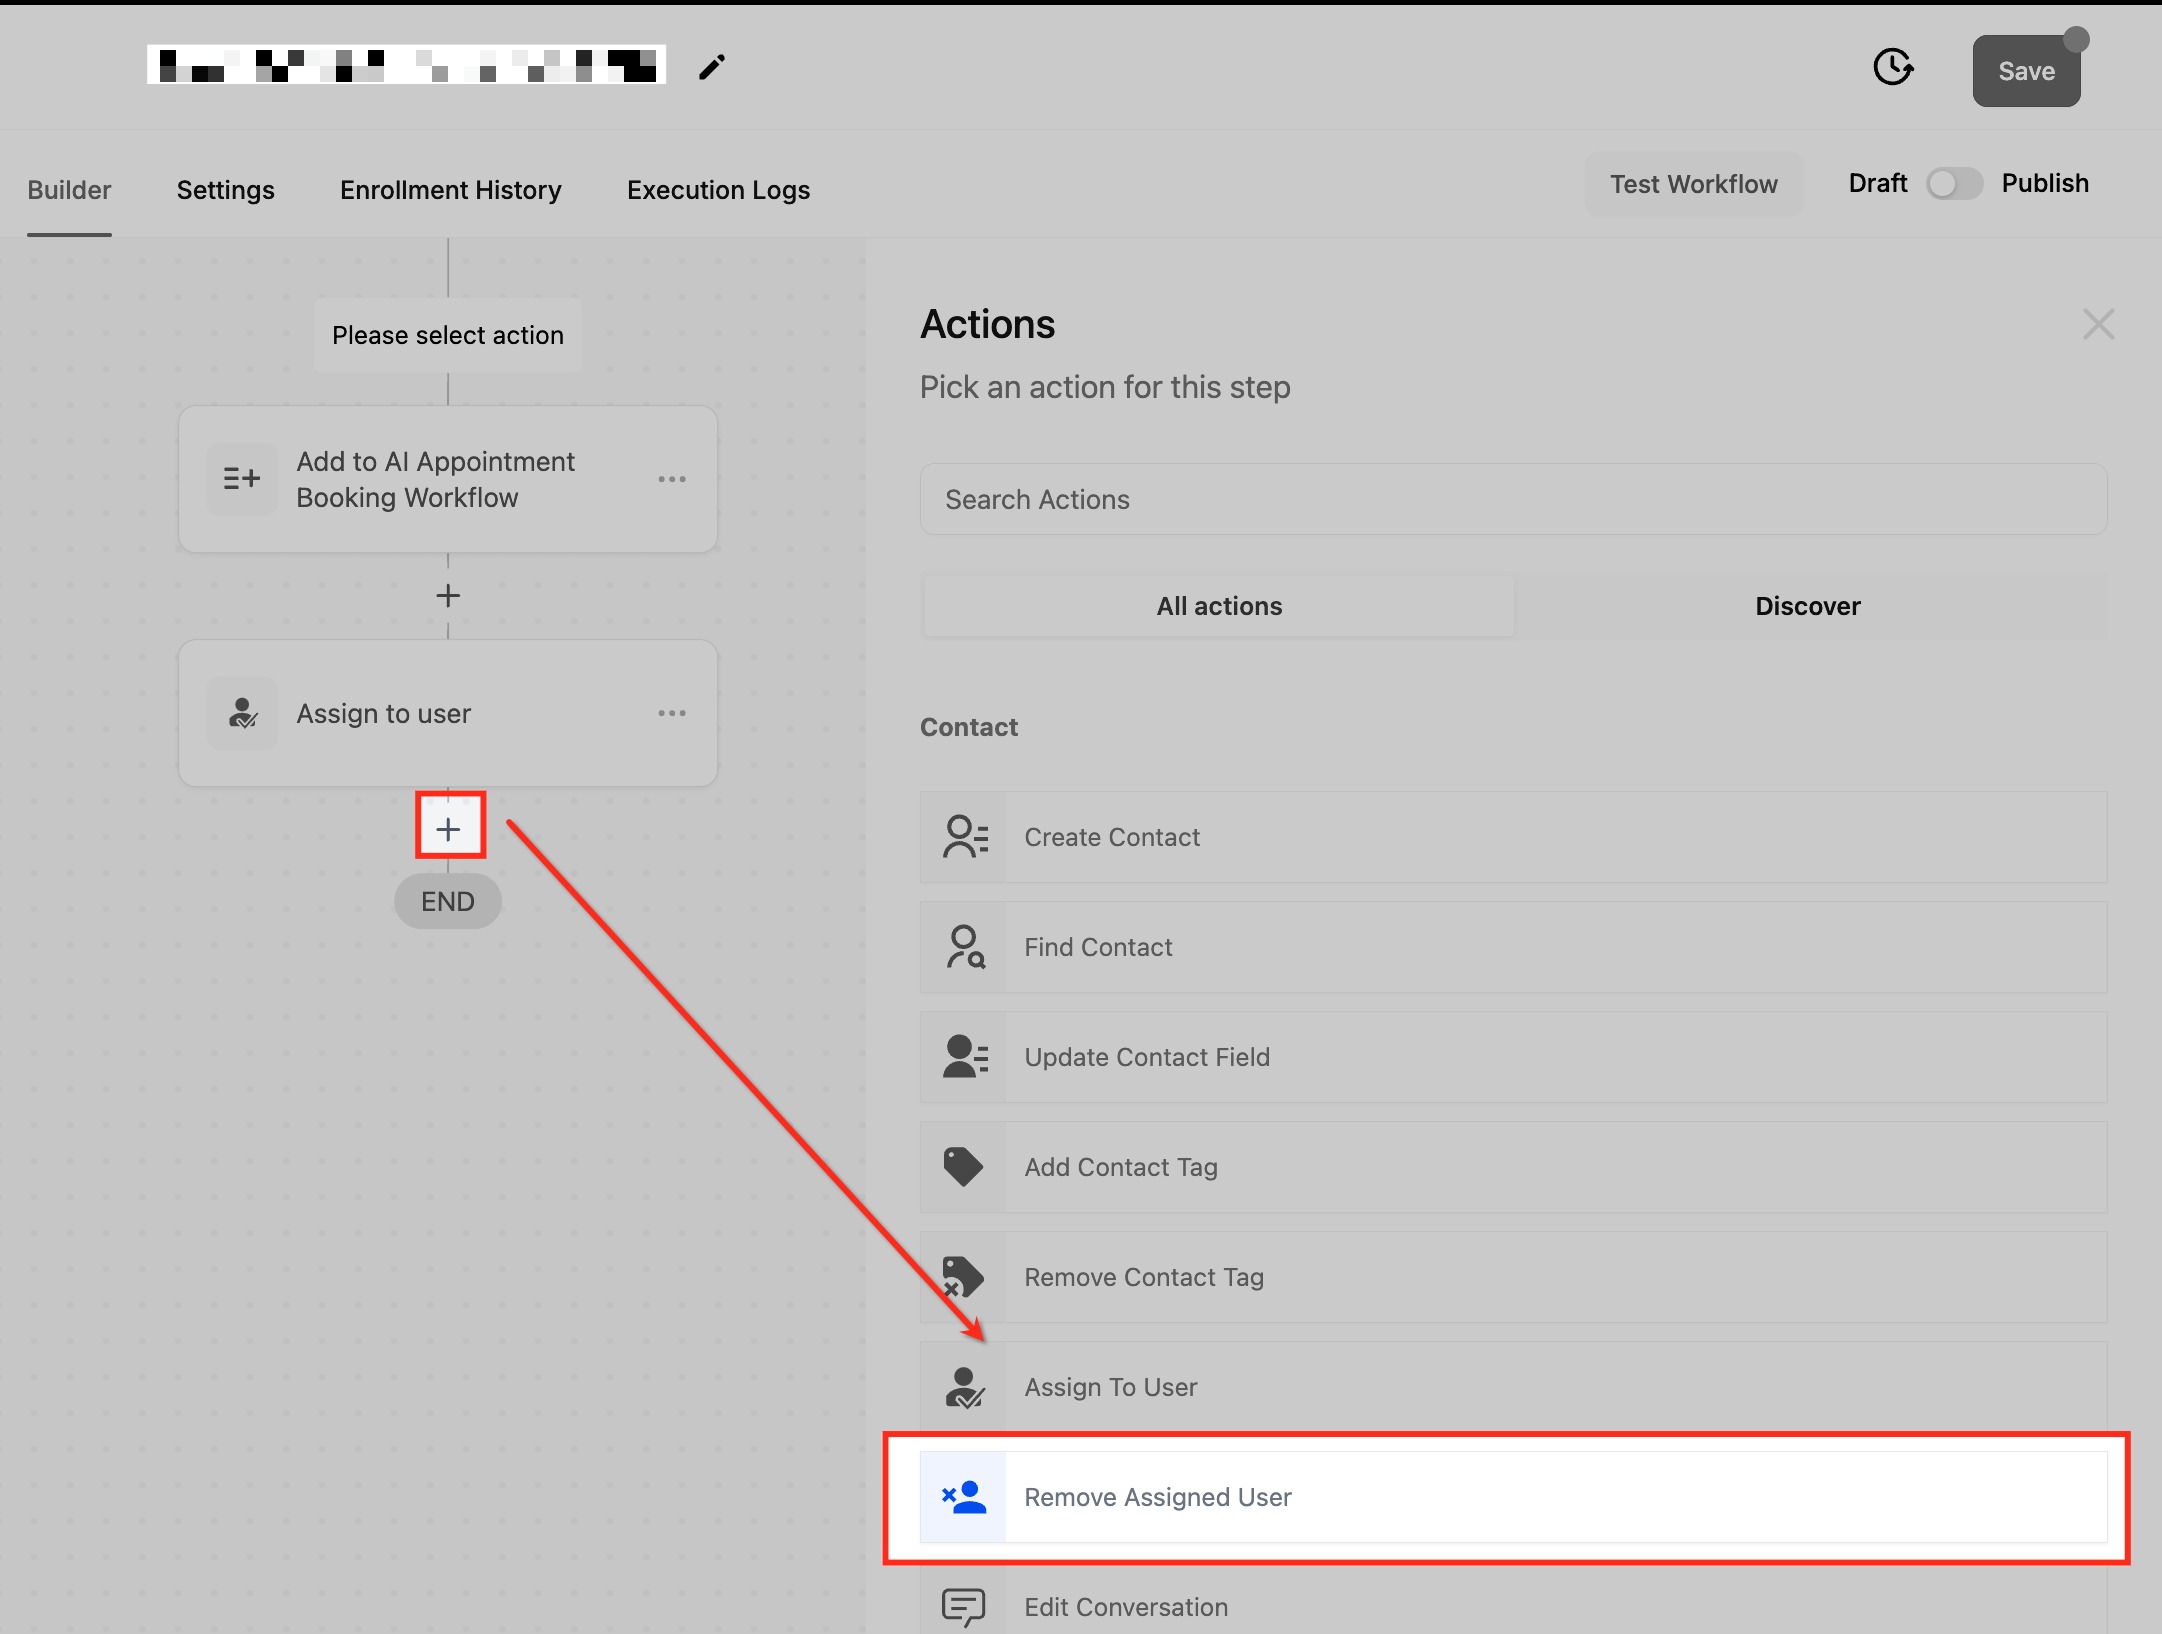
- Open the workflow builder and click the plus icon to add a new step.
- Select "Remove Assigned User" from the list of available actions.
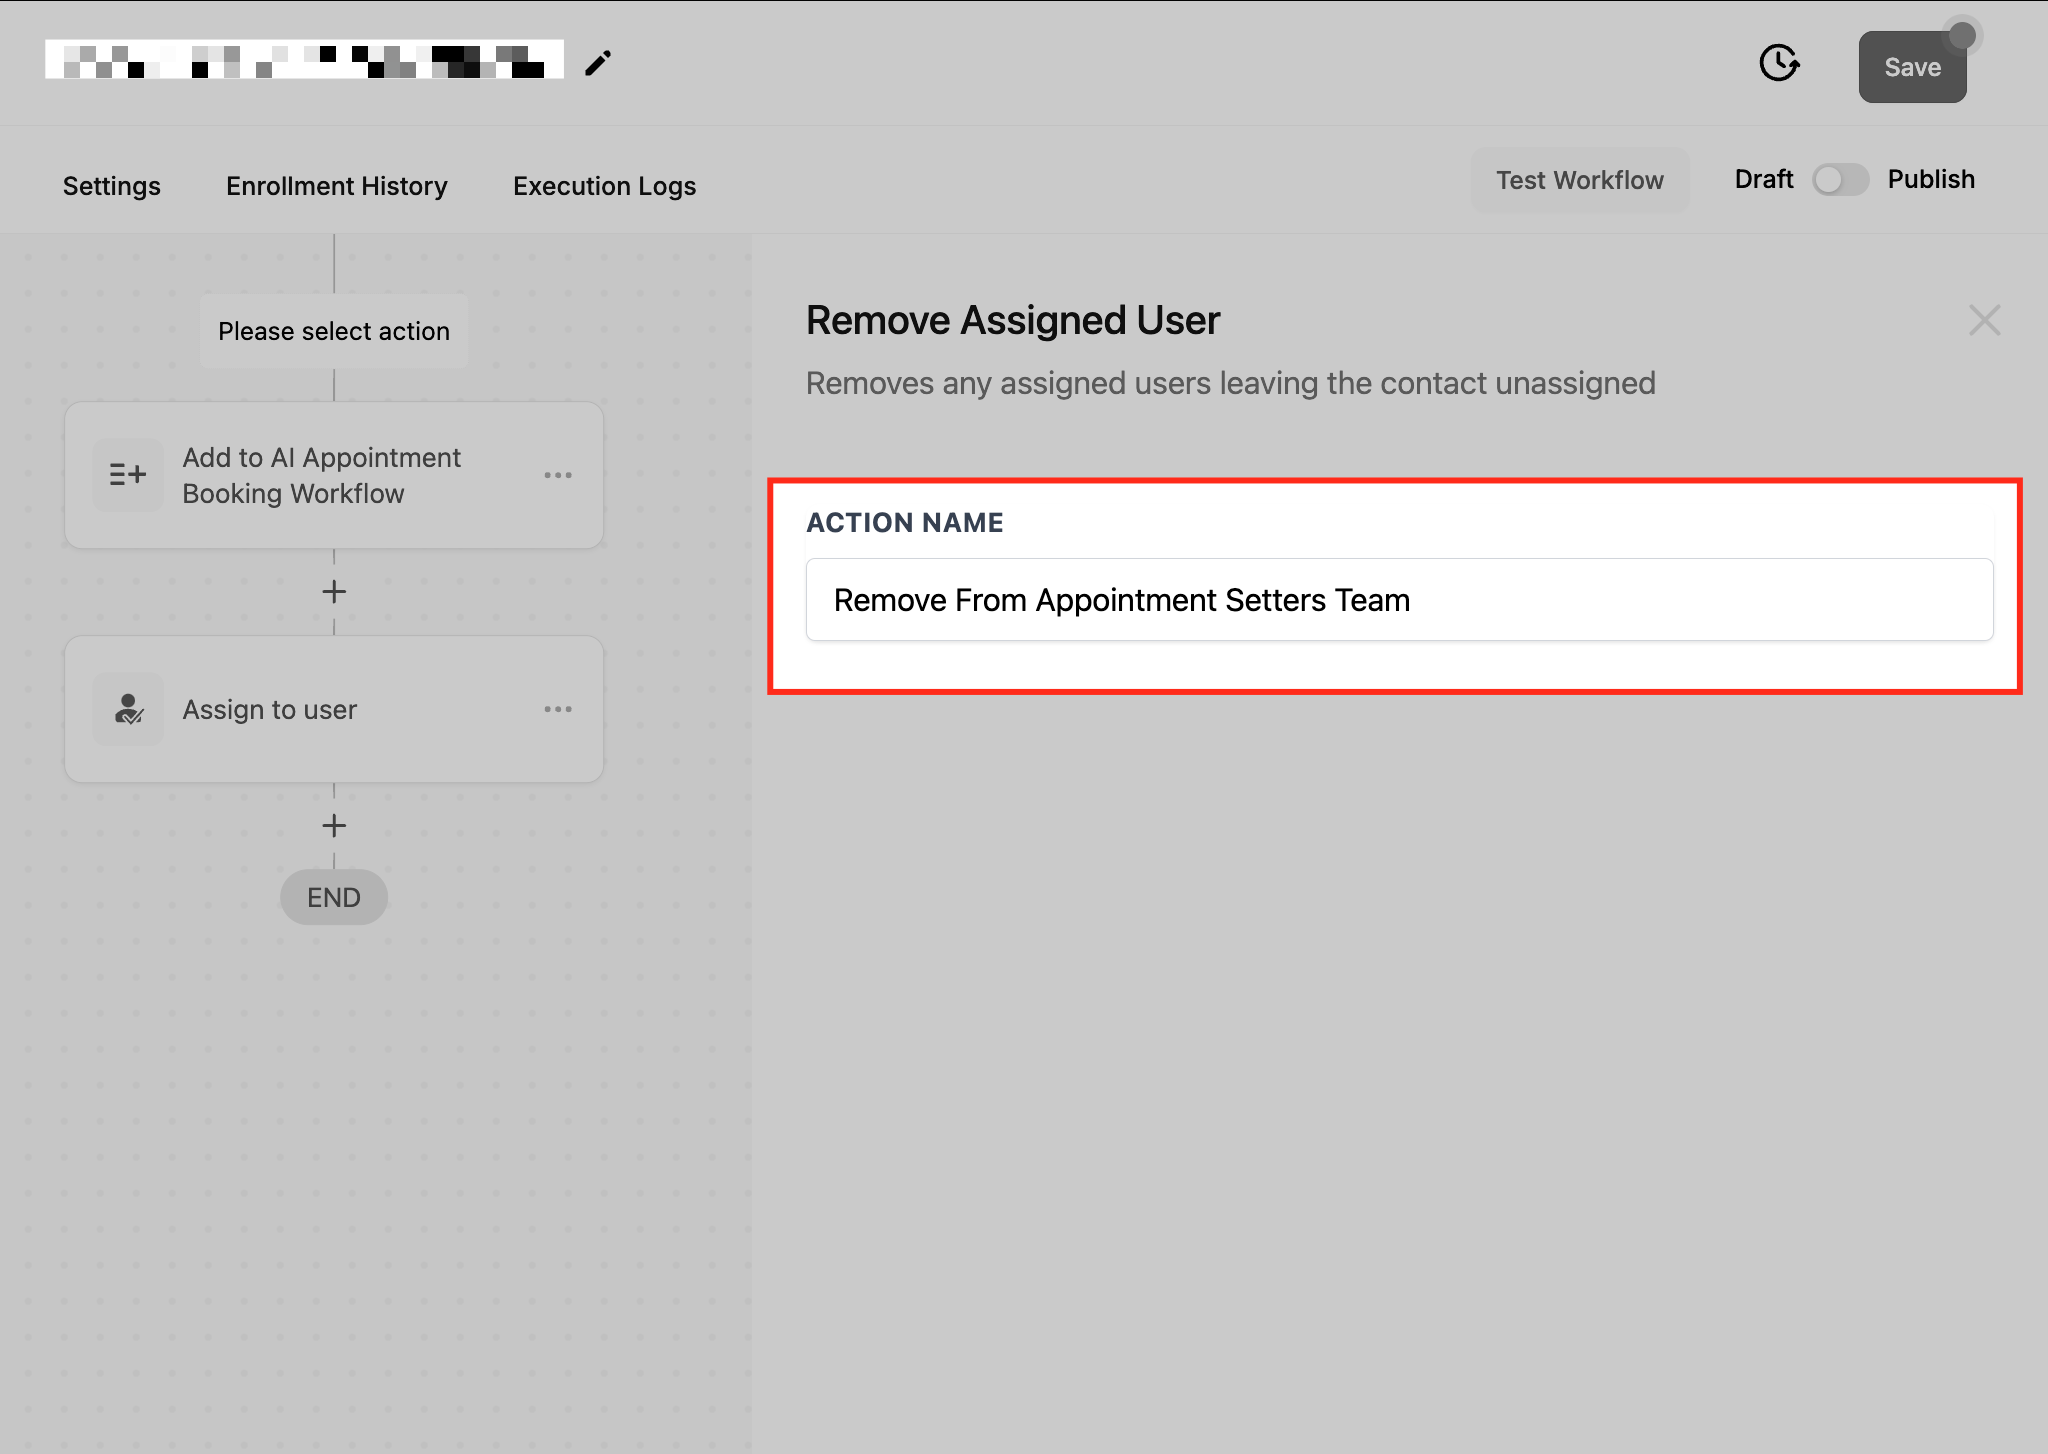
- Enter a descriptive label such as "Clear Assigned User" for the step.
- Click the Save button; no further fields need to be filled.
- Run a test of the workflow and toggle Publish to activate the automation.
05What it looks like in HighLevel
06Settings that matter
- Action name. Controls the label displayed for this step inside the workflow, helping you identify its purpose.
07How it connects to the rest of HighLevel
- Pair this action with Assign to User to reallocate contacts after removal. Assign to User action
- Add tags before or after removal to indicate the contact’s new state. Add Contact Tag
- Use the workflow introduction guide to understand trigger options. Workflow basics
- Start a free trial to test this action in a sandbox environment. 30 day trial
Michael's take

The Remove Assigned User action is a quick win for any small business that wants to keep its sales and support pipelines tidy without extra manual steps. It frees up team members by automatically clearing assignments when a contact no longer needs personal attention.
Don’t forget to test the workflow before publishing to avoid unintentionally unassigning contacts that other processes still depend on.