
01Who this is for
- Marketing managers benefit because the action keeps lead information current without manual entry.
- Sales teams gain up to date contact records, reducing time spent searching for correct details.
- Customer support staff receive accurate profiles, helping them respond faster.
02Create contact workflow actions, explained
The Create Contact action lets a workflow either generate a fresh contact record or amend an existing one whenever the defined trigger fires. It works by checking fields such as email or phone to decide if a record already exists, then updates it instead of duplicating it.
Both the platform’s built in fields, like name, email, phone, and address, and any custom fields you have created can be filled by this action. You decide which pieces of information to map when you configure the step.
The action sits inside the workflow builder under the automation area. After you add it to a workflow, you can chain additional steps such as sending emails or assigning tasks to build a complete automation.
03How businesses use create contact workflow action
- Ecommerce store. When an order is completed, the store adds a Create Contact step that updates the buyer’s profile with the latest purchase data and tags them as an active customer. The workflow runs inside HighLevel without external tools.
- Event organizer. Registrants submit a form for an event; the workflow creates a contact for each attendee, stores the event name in a custom field, and tags the record. All of this happens automatically within HighLevel.
- Fitness membership club. New members sign up through a web form, triggering a Create Contact action that records their personal details and membership tier. The contact is then assigned to an onboarding specialist for follow up.
04Before you start
- Access to the workflow builder in the automation section of HighLevel is required.
05How to set up and use create contact workflow action in HighLevel
Set up create contact action
- Open the automation area, launch the workflow builder, and start a new workflow or edit an existing one.
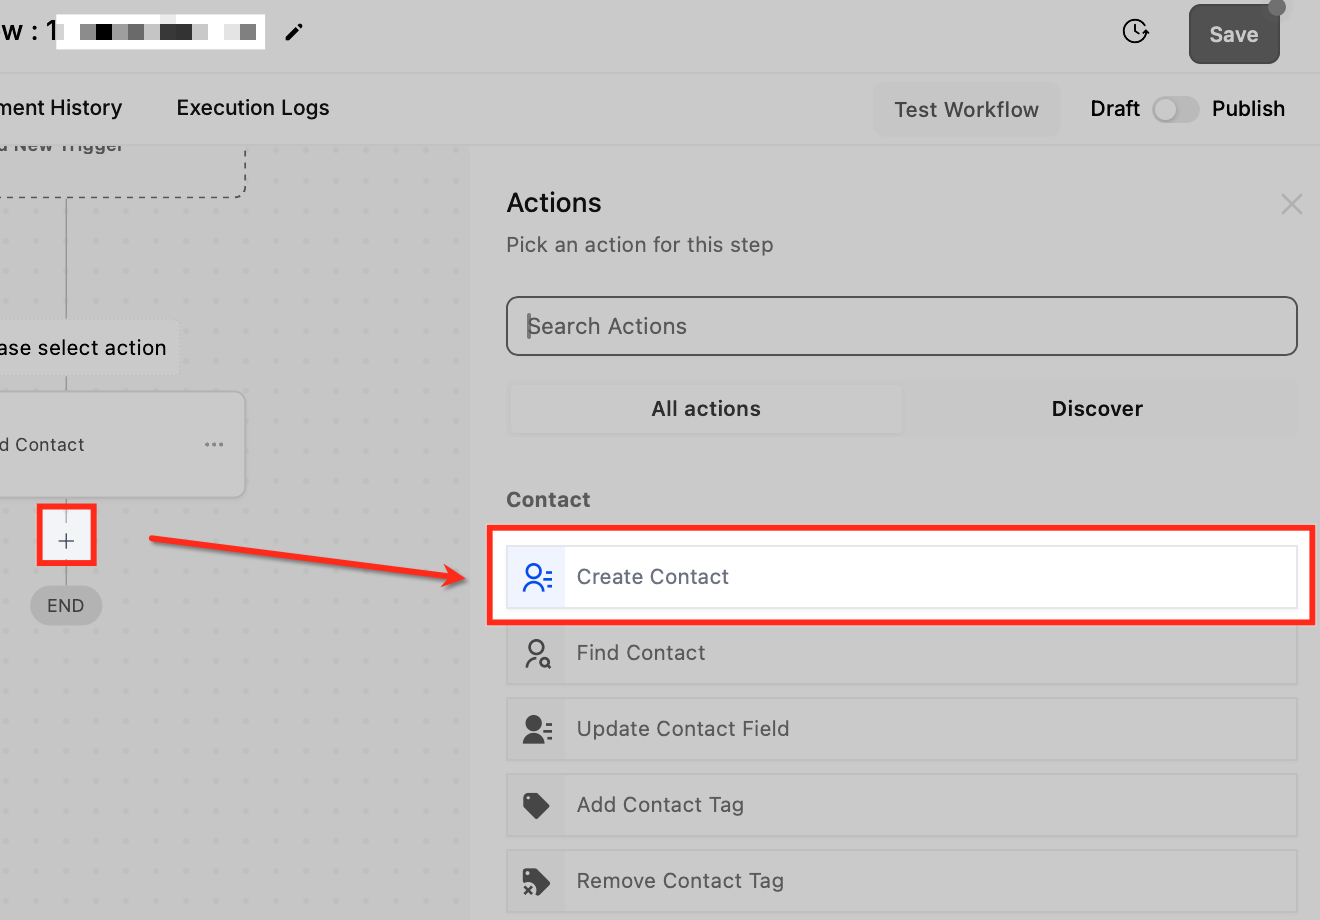
- Press the plus icon and select the Create Contact option from the list.
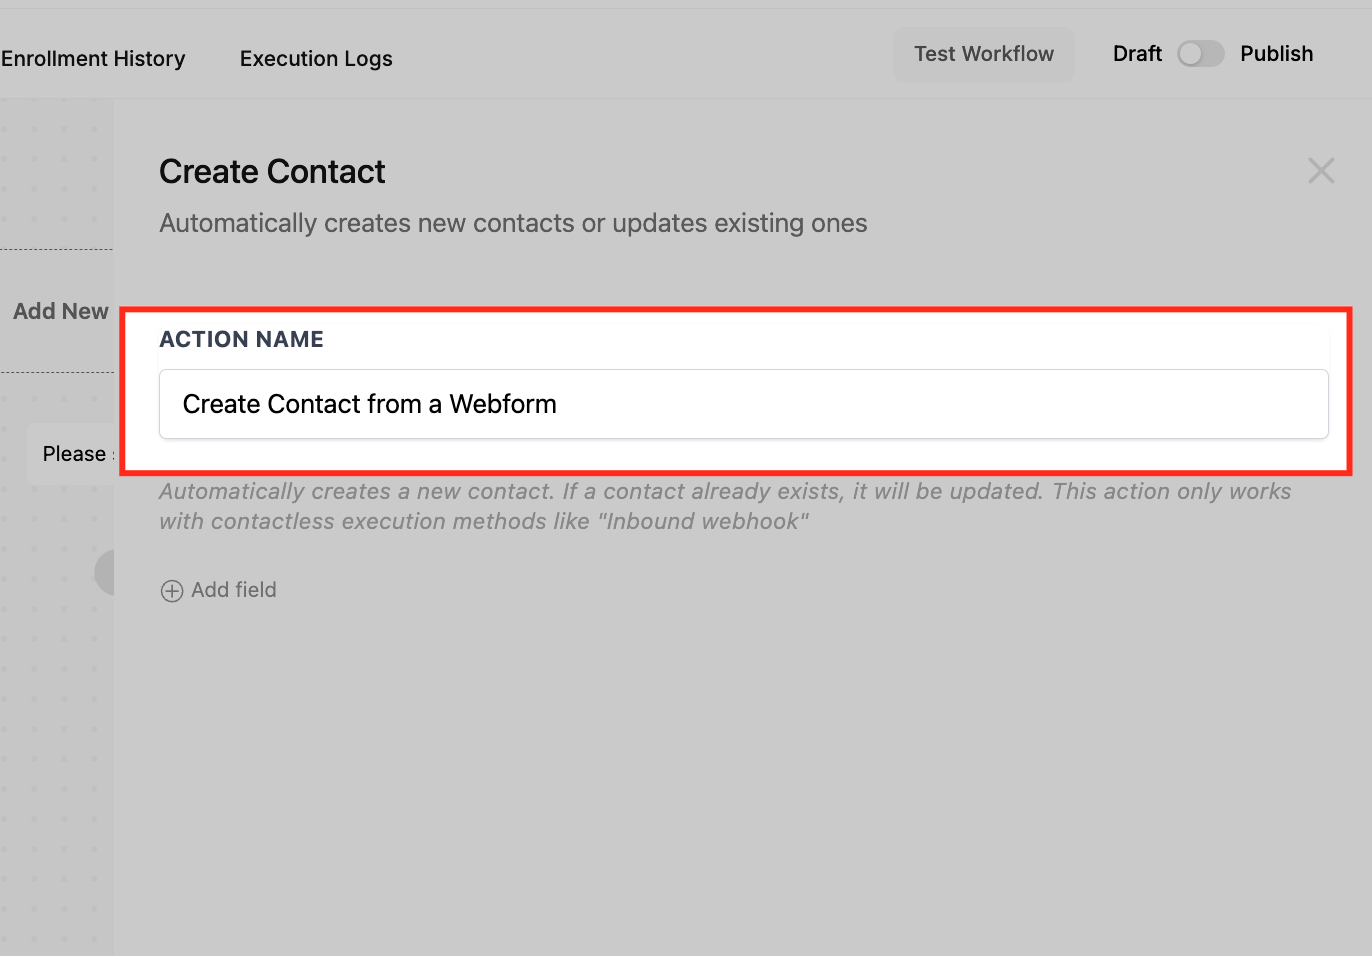
- Enter a clear name for the step, for example Create Contact from Web Form.
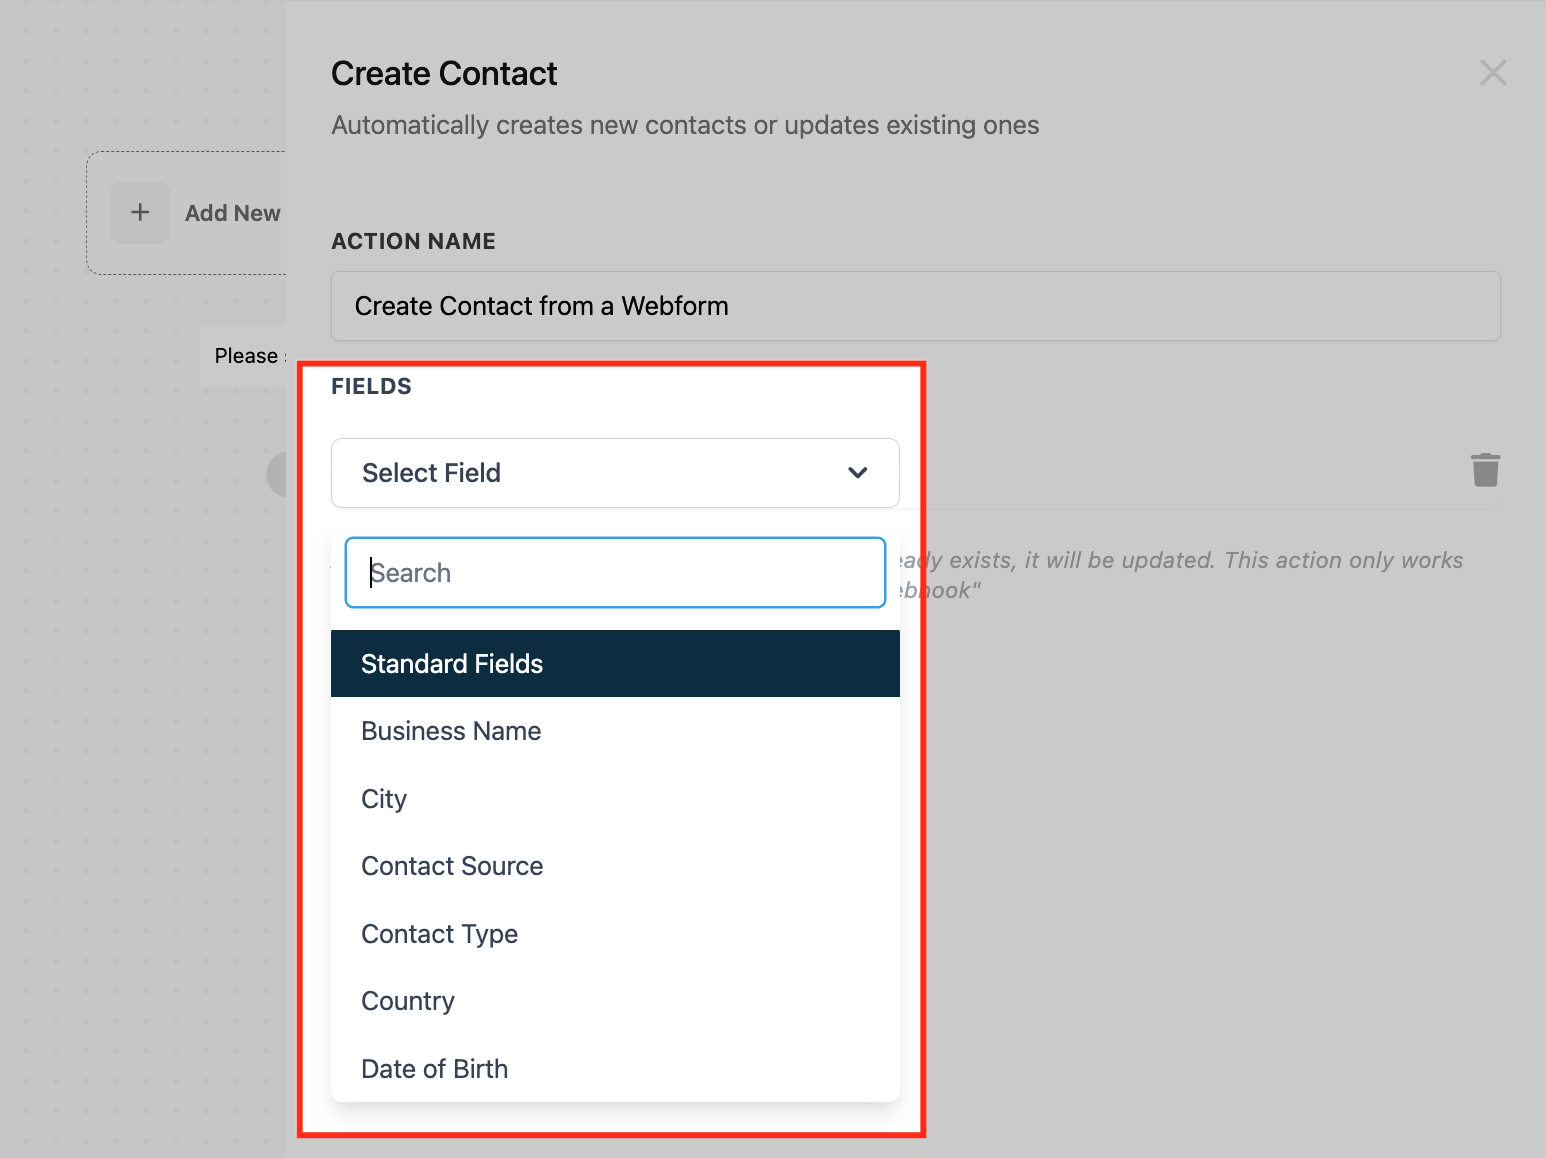
- Choose which fields will be populated during the contact creation or update.
- Add any standard fields such as First Name, Last Name, Email, Phone, and Address.
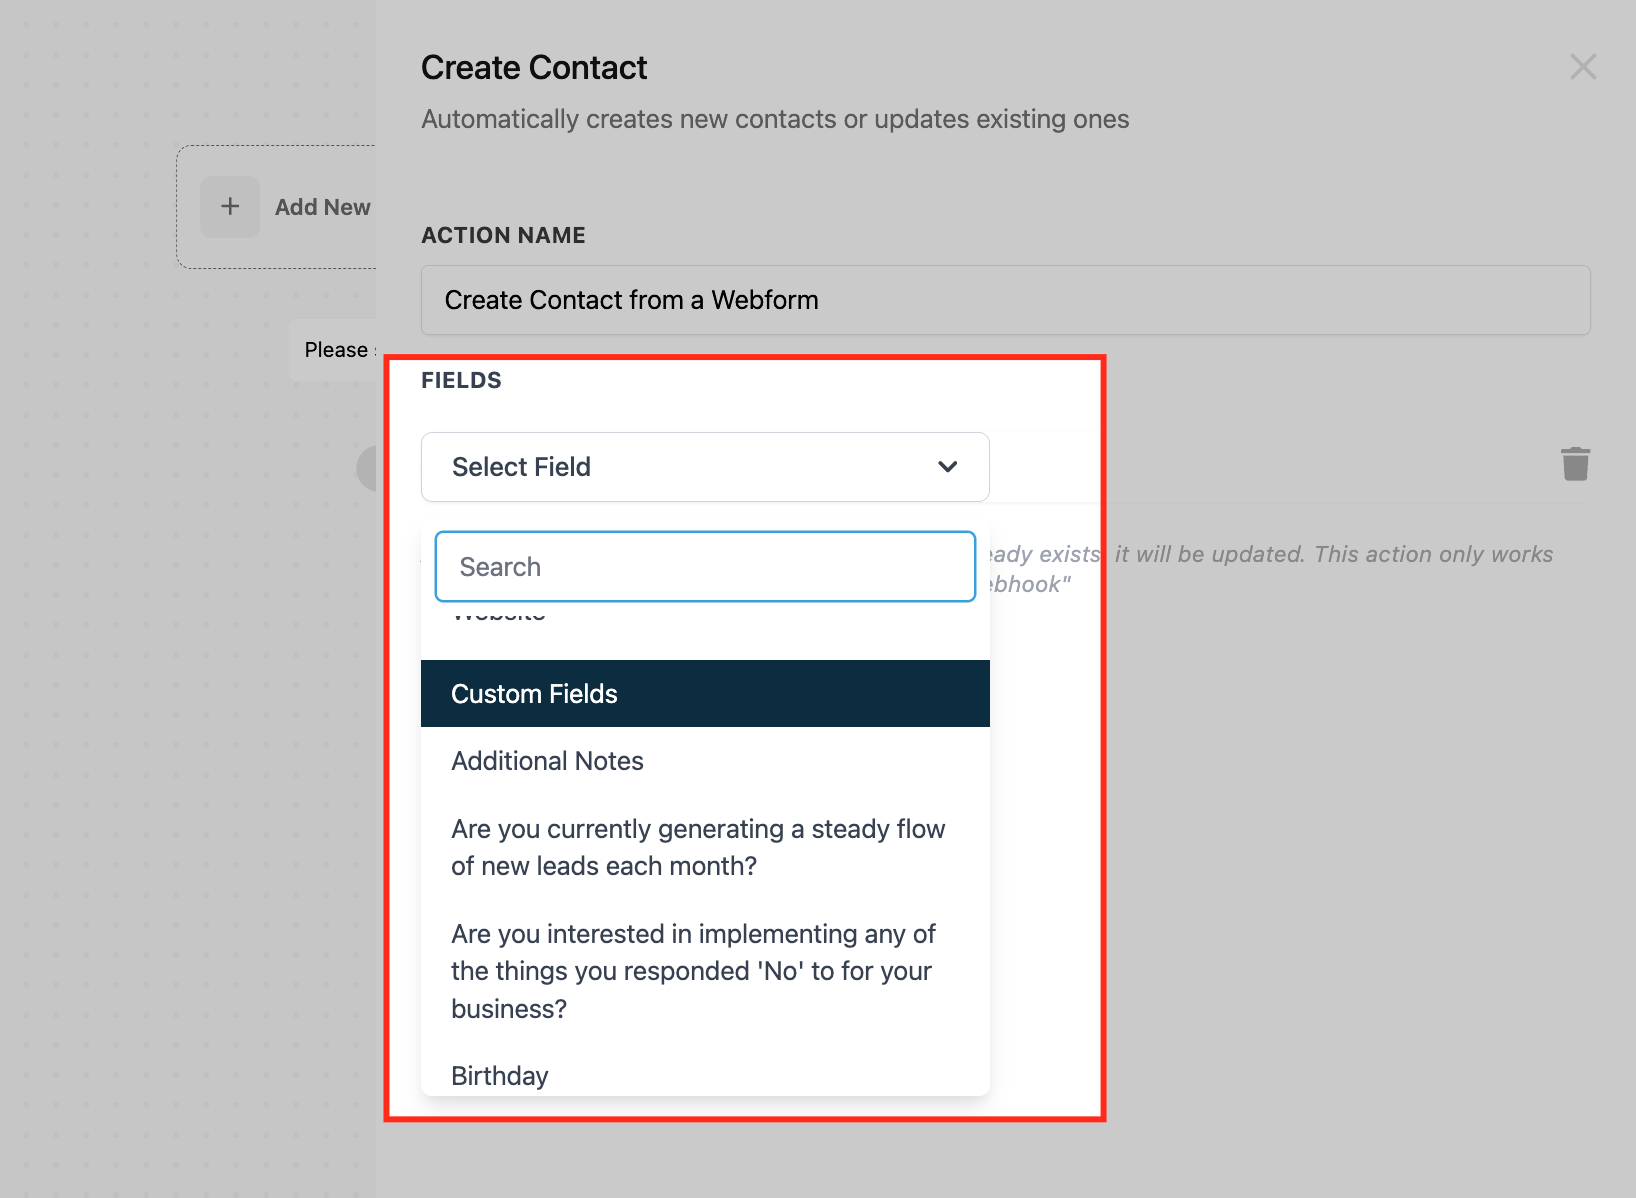
- Insert any custom fields required, like Membership ID or Referral Source.
- Click the Save button to store the configuration.
- Run a test with sample data, then flip the Publish toggle to activate the workflow.
06What it looks like in HighLevel
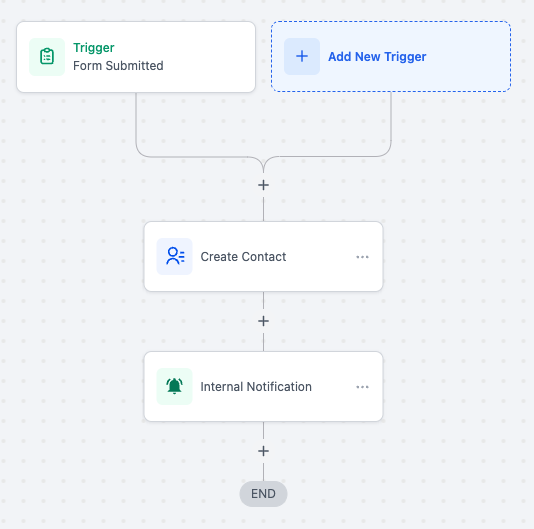
07Settings that matter
- Create Contact. Selects the action that either adds a new contact record or updates an existing one based on matching criteria.
- Standard Fields. Specifies which built in contact attributes (name, email, phone, etc.) will be supplied by the workflow.
- Custom Fields. Allows you to map additional data points unique to your business into the contact record.
- Publish toggle. Controls whether the workflow containing the action is active and processing triggers.
08Things to know before you rely on it
- The action checks email or phone to identify existing contacts and prevents duplicate records.
- Both standard and custom fields are supported, but only those defined in the account can be used.
- The action runs only within a workflow built in the automation section.
09How it connects to the rest of HighLevel
- Add Contact Tag action can tag contacts created with Create Contact Add Contact Tag
- Find Contact action can locate contacts before creating or updating them Find Contact
- Update Contact Field action lets you modify fields after a contact is created Update Contact Field
- Learn the basics of building workflows that include Create Contact Workflow basics
Michael's take

How do I keep my contact list tidy without spending hours manually editing it? The Create Contact workflow action does the heavy lifting by adding new leads or refreshing existing records whenever a trigger fires, so your HighLevel account stays current without double clicking.
If I were setting up a new subscription service, I’d start the workflow with a web form capture, map the subscriber’s name, email, and tier to Custom Fields, then let the action handle the rest. It gives me confidence the data is accurate before I hand it off to onboarding.