
01Who this is for
- Marketing agencies that need to block spam calls and texts from unwanted contacts, keeping their pipelines clean.
- Service businesses that must honor a client’s request to stop promotional messages while still sending appointment reminders.
- Support teams that want to pause outbound outreach after a task is completed, then re enable communication automatically.
02DND Contact actions, explained
The DND Contact action controls Do Not Disturb settings for an individual contact. It can enable or disable DND for inbound messages, outbound messages, or both. You may apply the setting to every communication channel or limit it to specific channels such as SMS or calls.
When the action runs, HighLevel records the change in the Conversations tab and activity logs, indicating whether DND was set by a workflow, a user, or the contact themselves. This logging works across all supported channels.
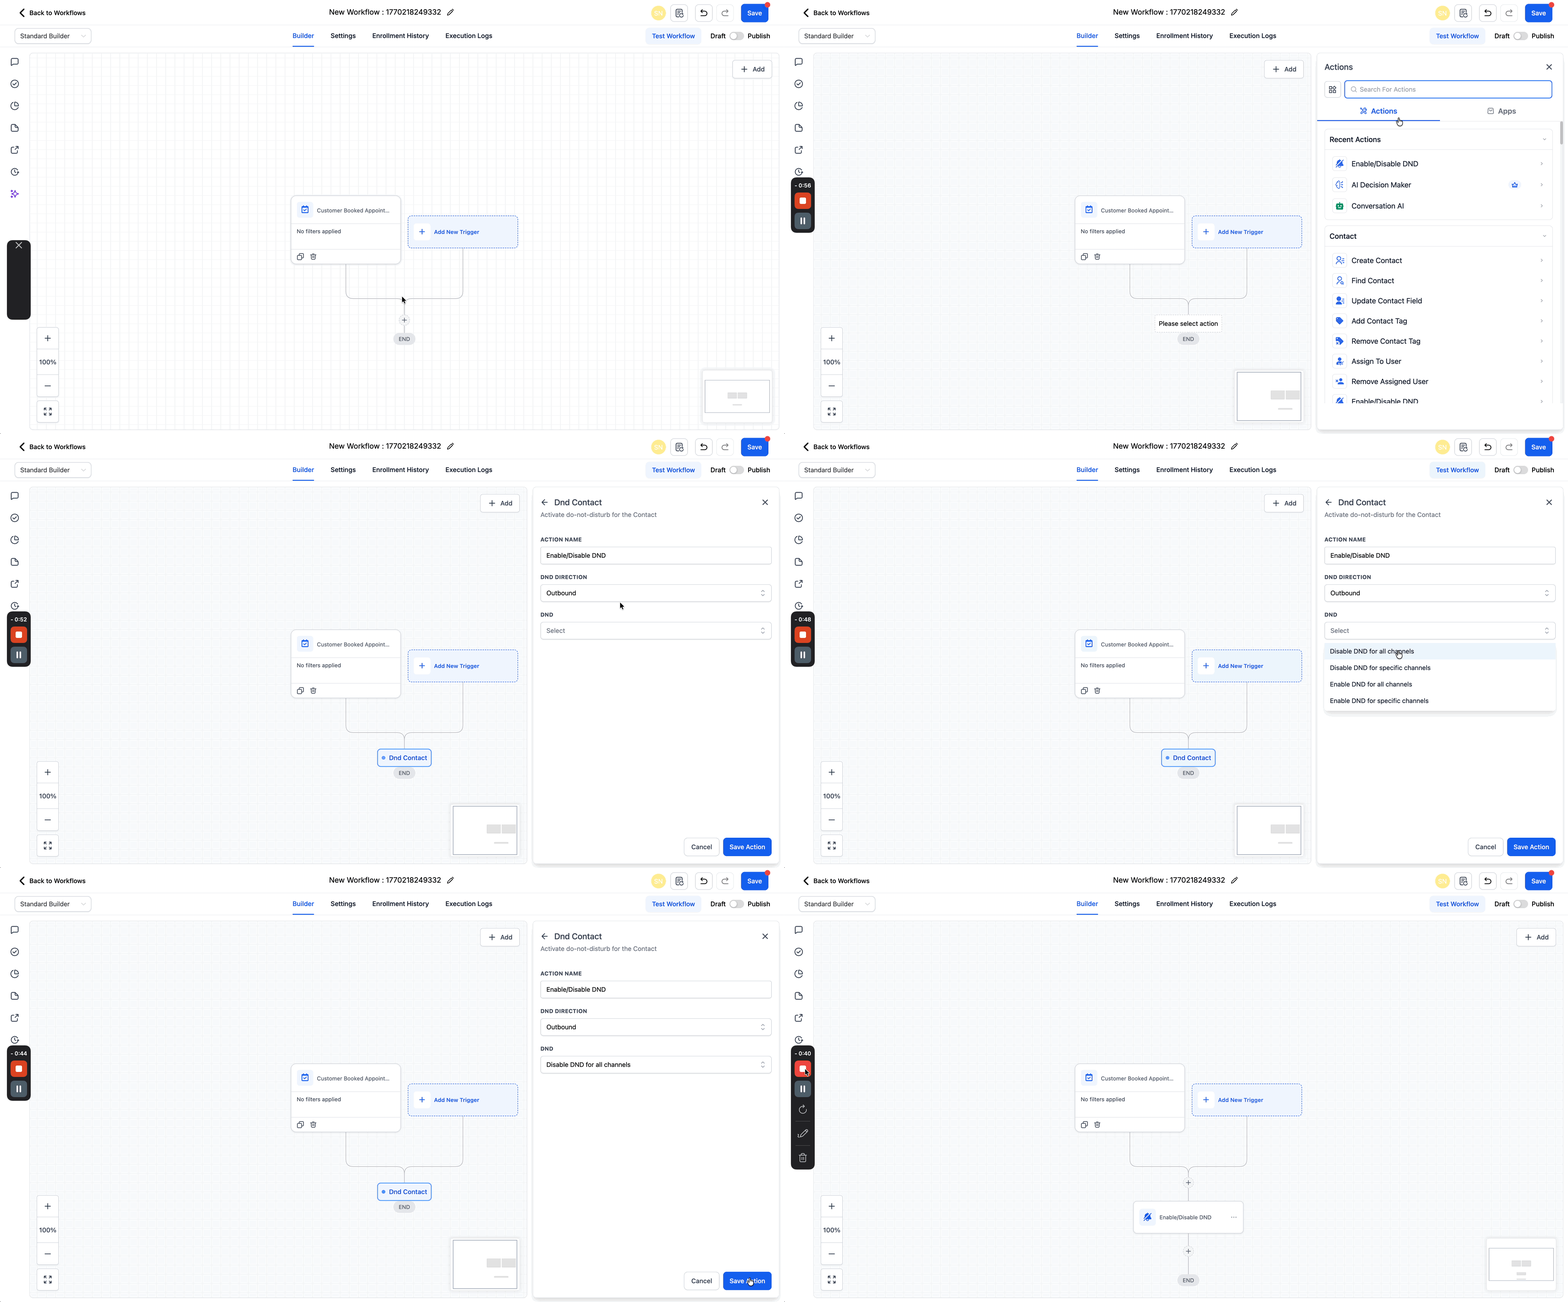
The action is available inside the workflow builder under Automations > Workflows. After adding a trigger, you insert the DND Contact action, choose direction, enable or disable, and specify channels before publishing the workflow.
03How businesses use the DND Contact action
- Marketing agency. Create a workflow that fires when a contact is tagged as spam. Add the DND Contact action, set direction to Inbound, and enable DND for all channels. This prevents further inbound calls and texts from the spam contact.
- Medical clinic. Set a trigger for when a patient opts out of SMS reminders. Insert the DND Contact action, enable DND for the SMS channel only, and keep email and voice channels active so the patient still receives essential updates.
- Consulting firm. Use the Task Completed trigger after a post appointment follow up task finishes. Add the DND Contact action to disable DND for both inbound and outbound channels, allowing normal communication to resume automatically.
04Before you start
- You must be logged in to a HighLevel subaccount.
05How to set up and use the DND Contact action in HighLevel
Set up DND Contact workflow action
- Log in to your subaccount.
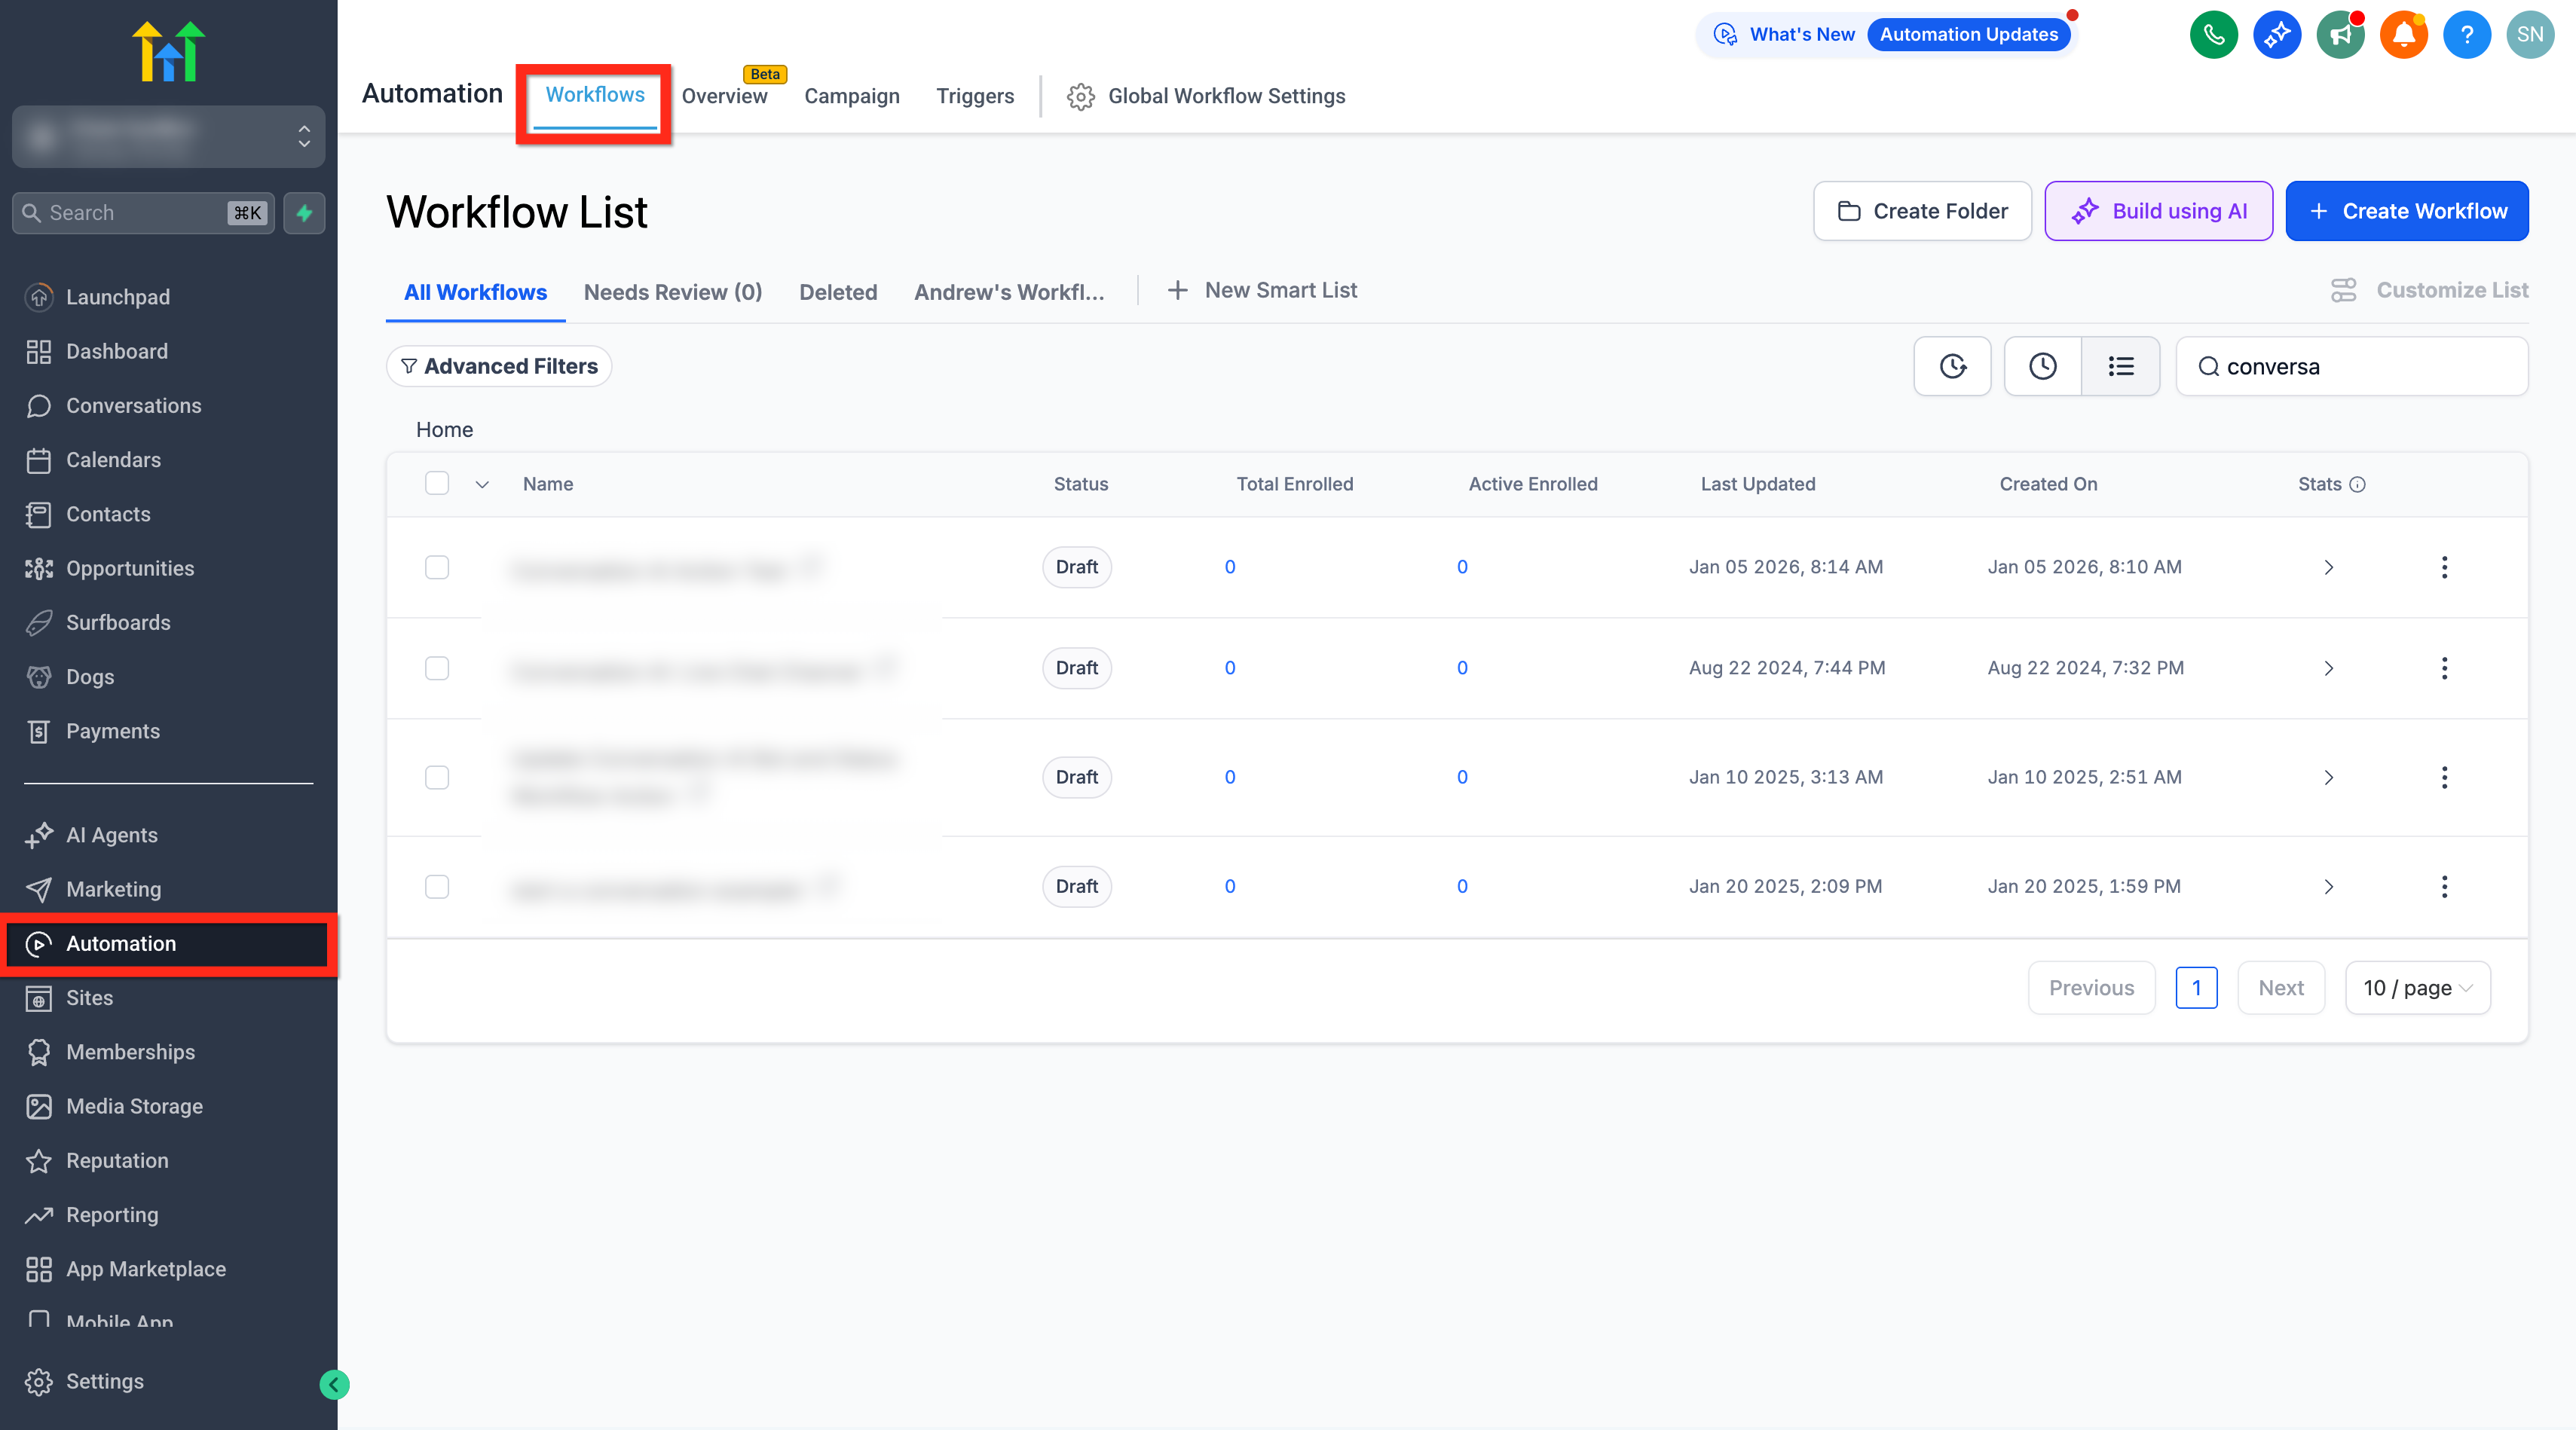
- Navigate to Automations > Workflows.
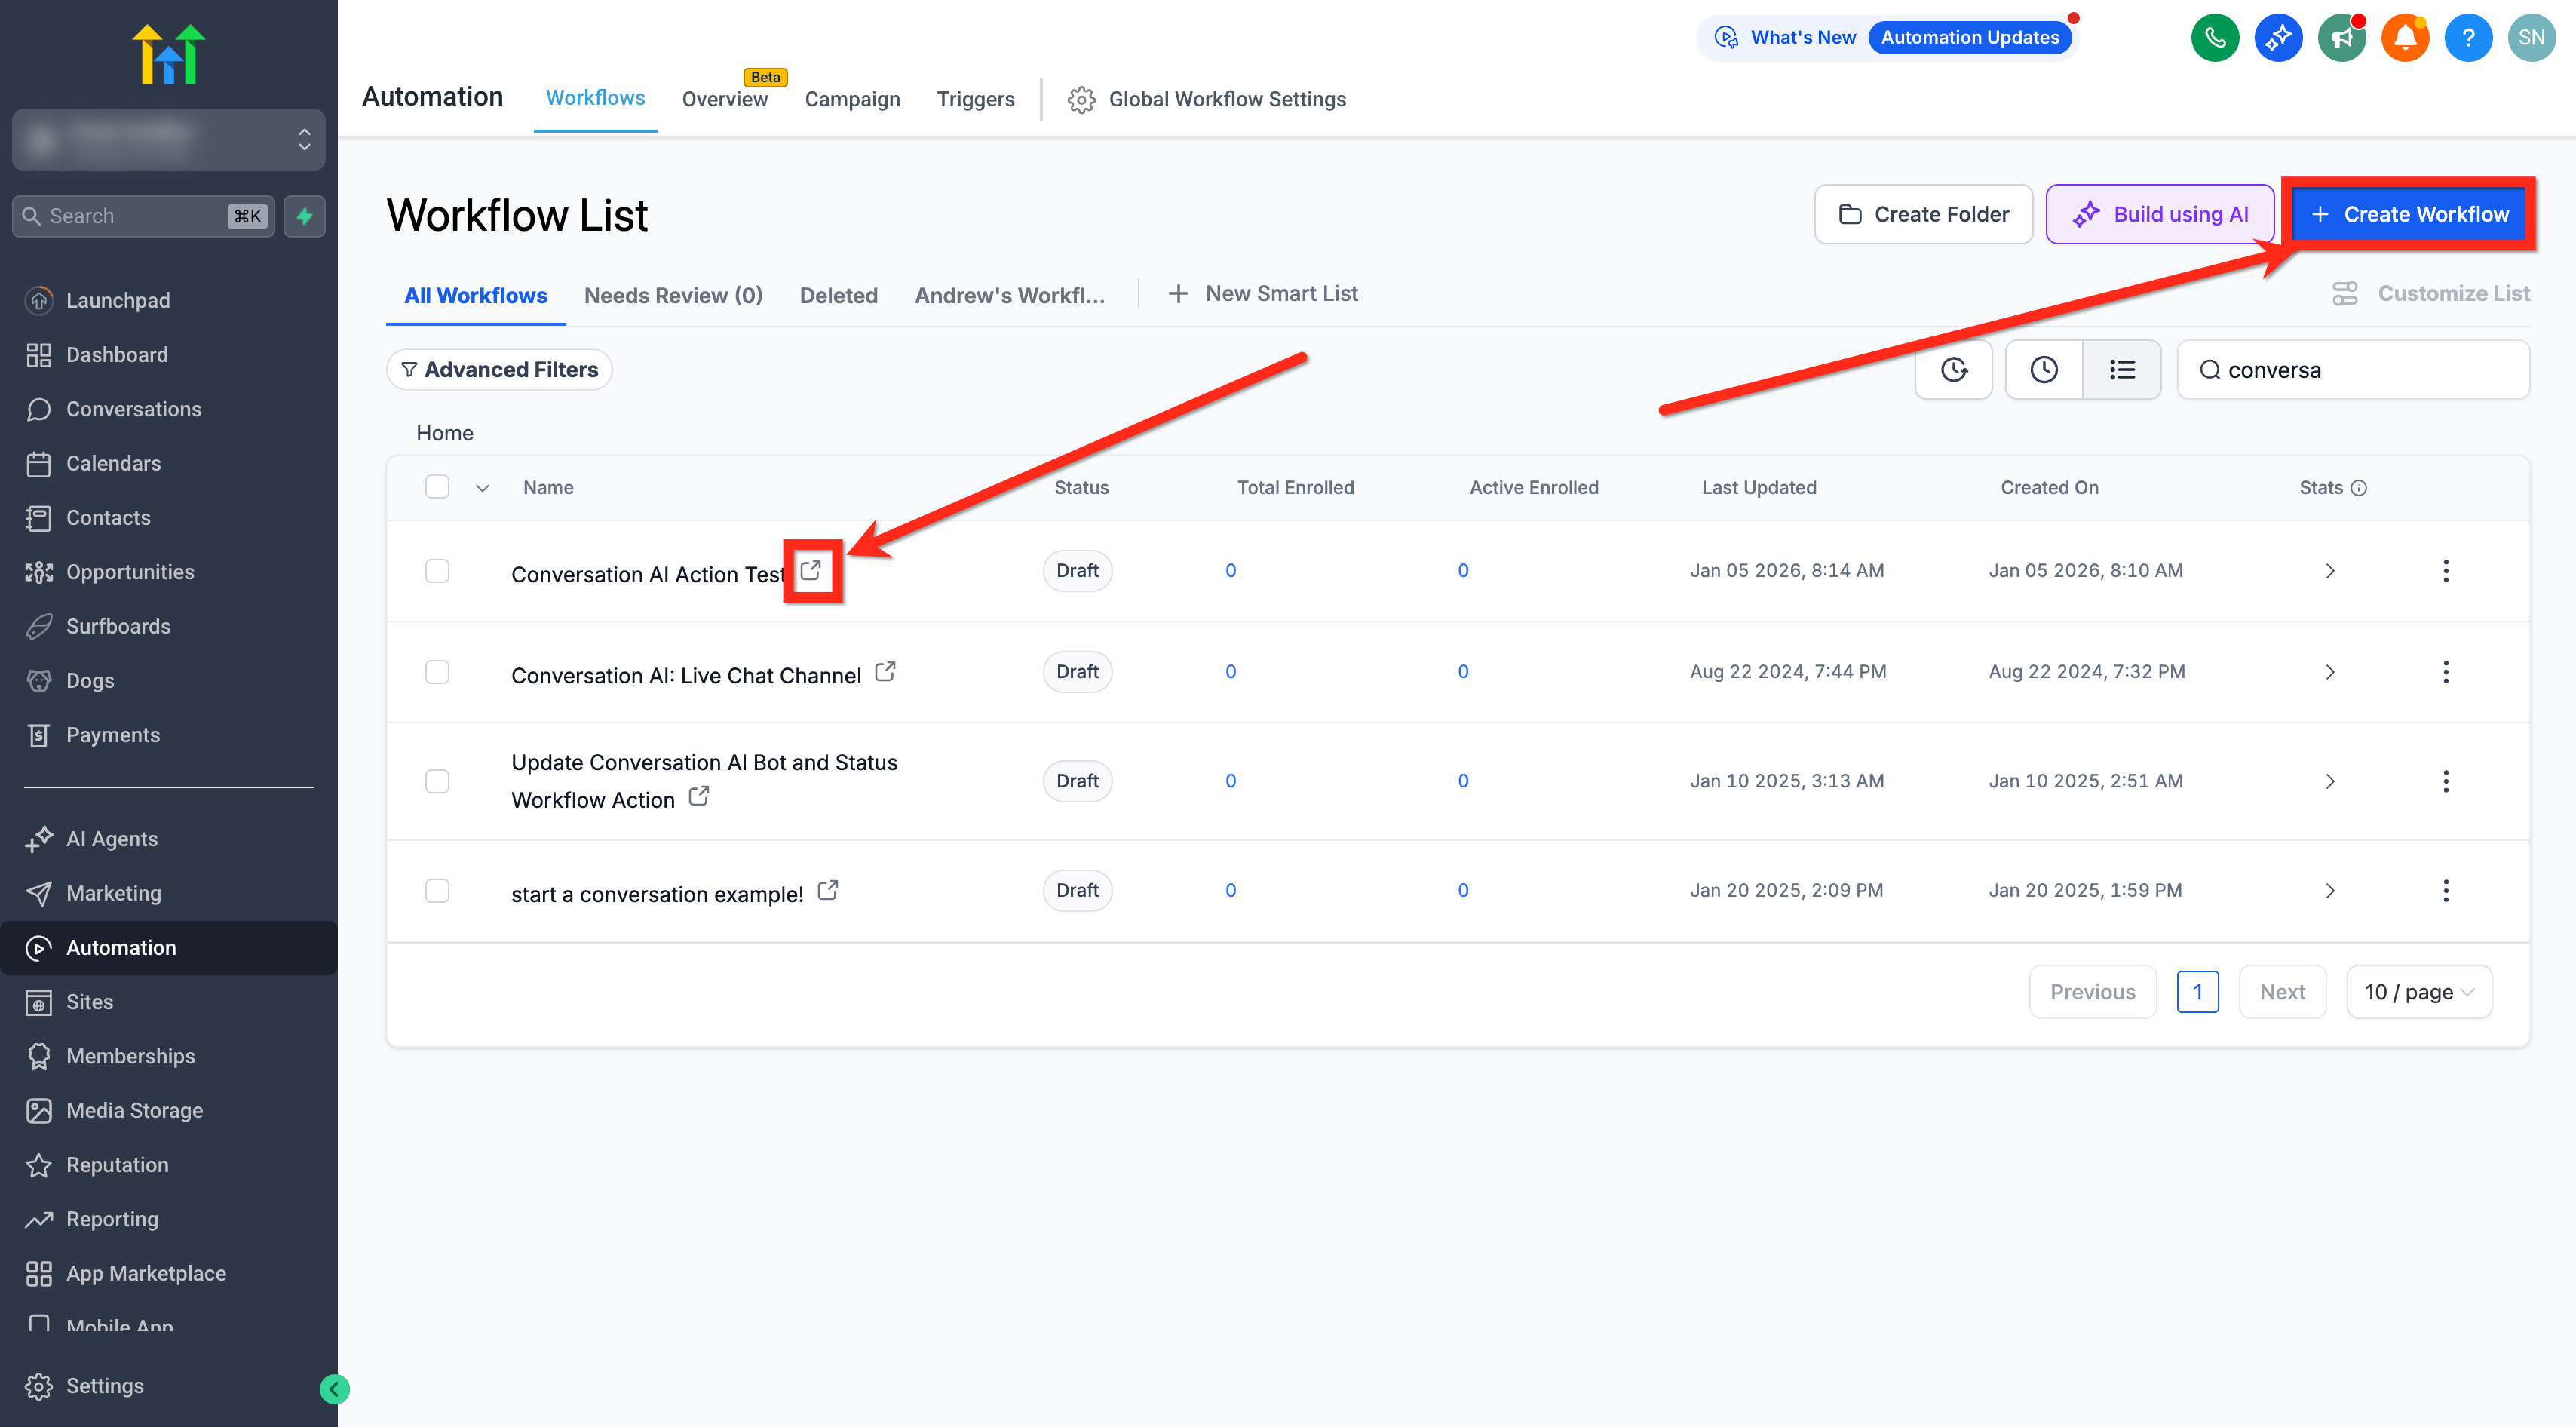
- Create a new workflow or open an existing one.
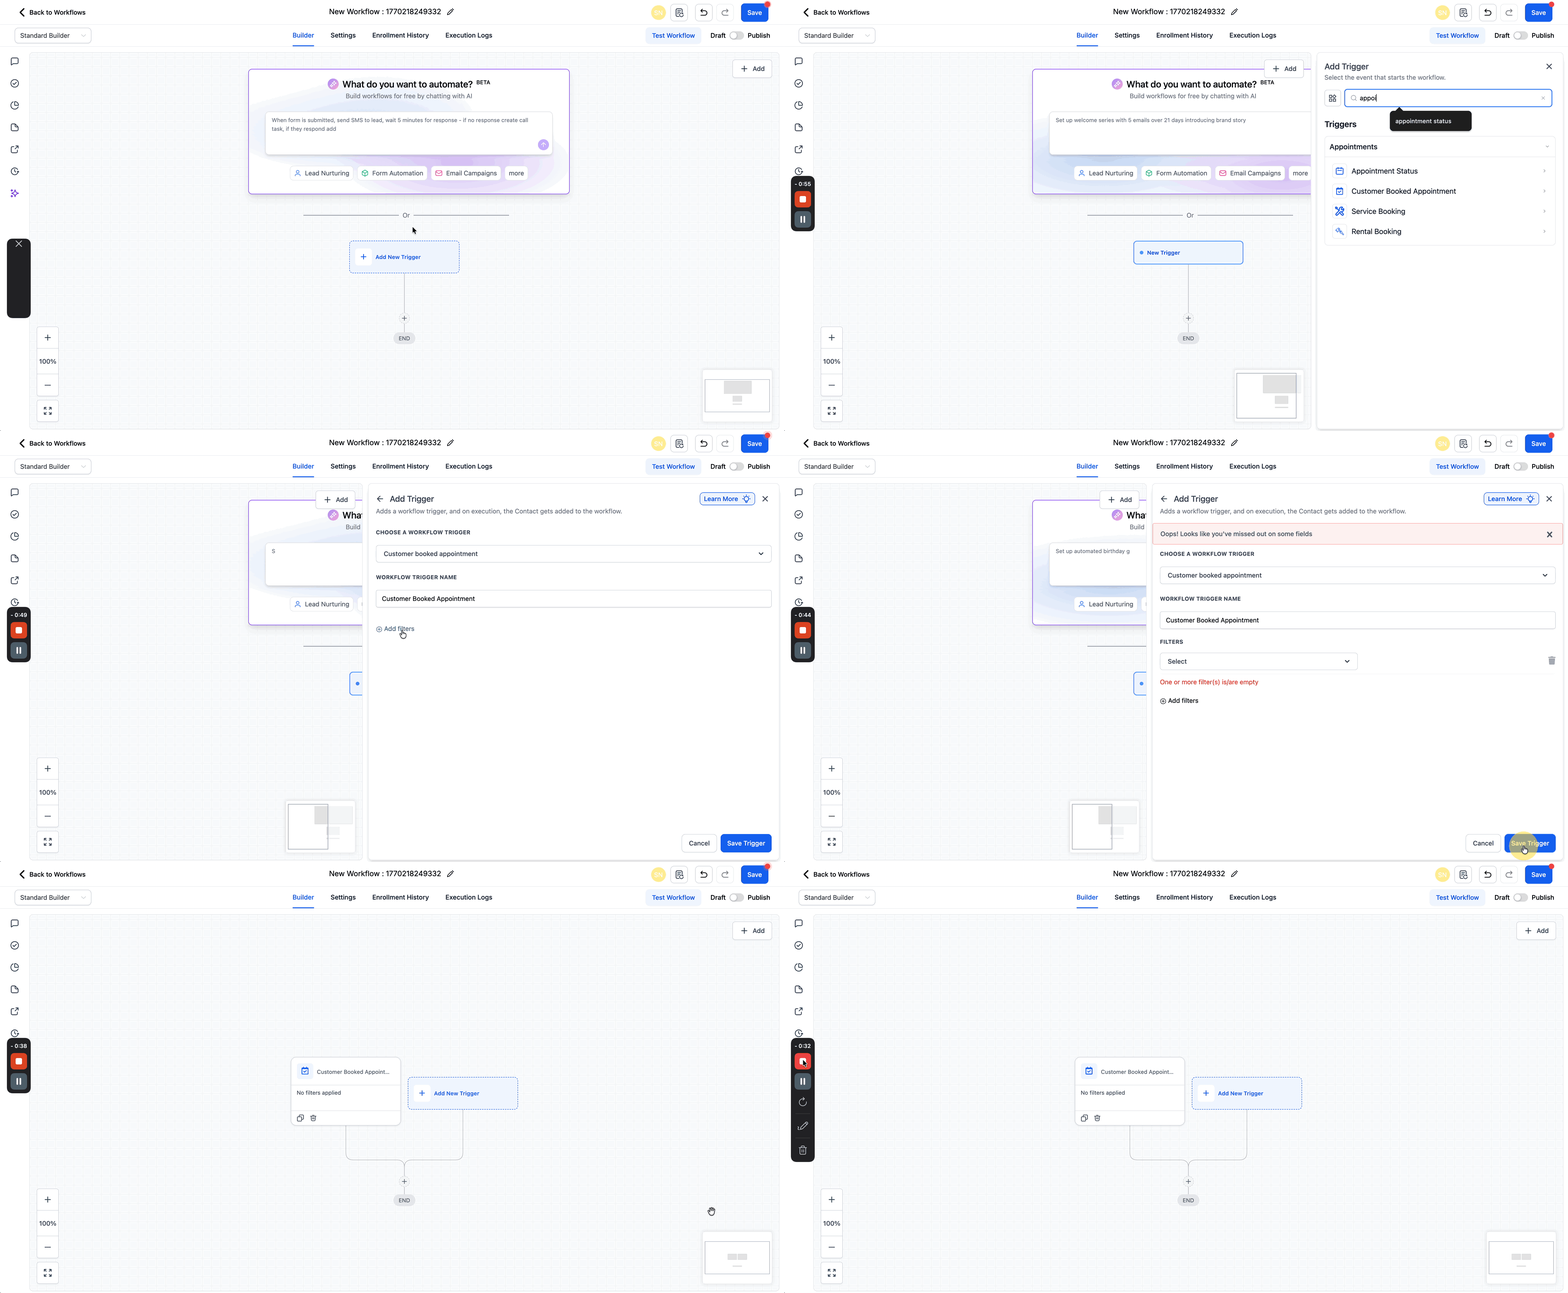
- Click the + Add New Trigger button and choose a trigger such as Customer Booked Appointment.
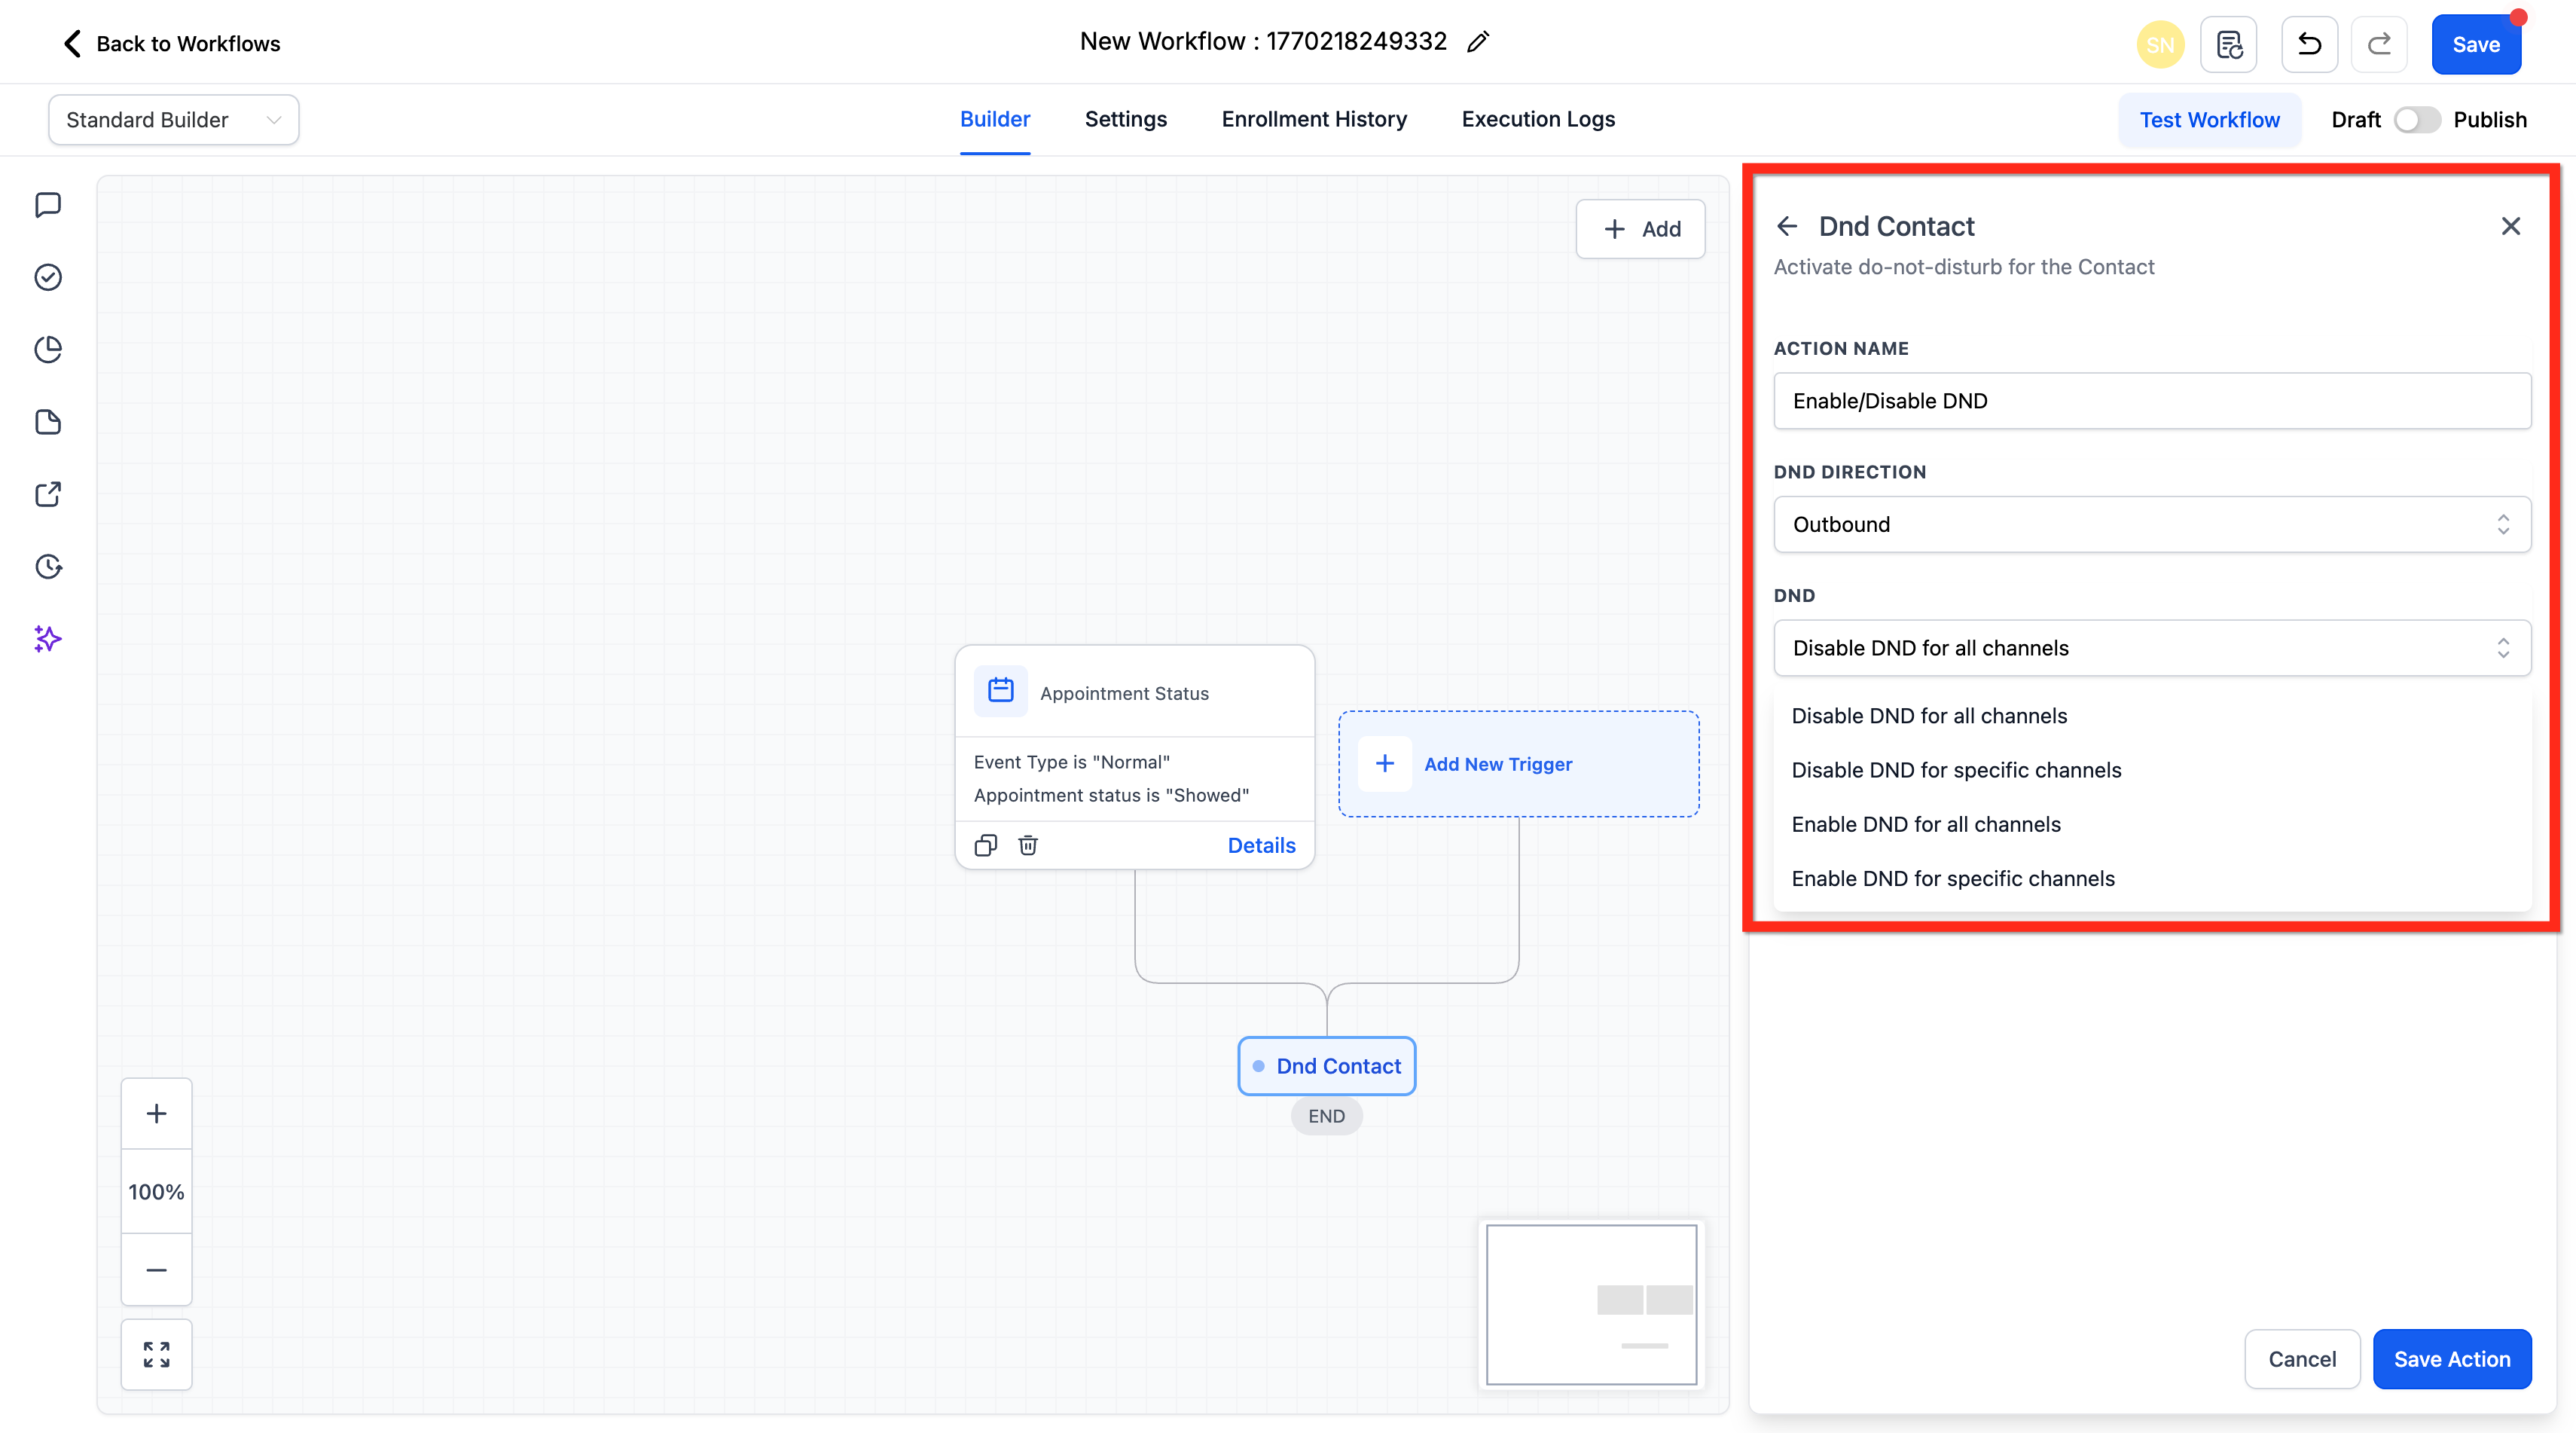
- Click the + button to add an Action and search for Enable/Disable DND.
- Enter a name for the Action.
- Select the DND Direction, choosing Inbound or Outbound.
- Choose Enable or Disable and decide whether to apply it to Selected or All Channels.
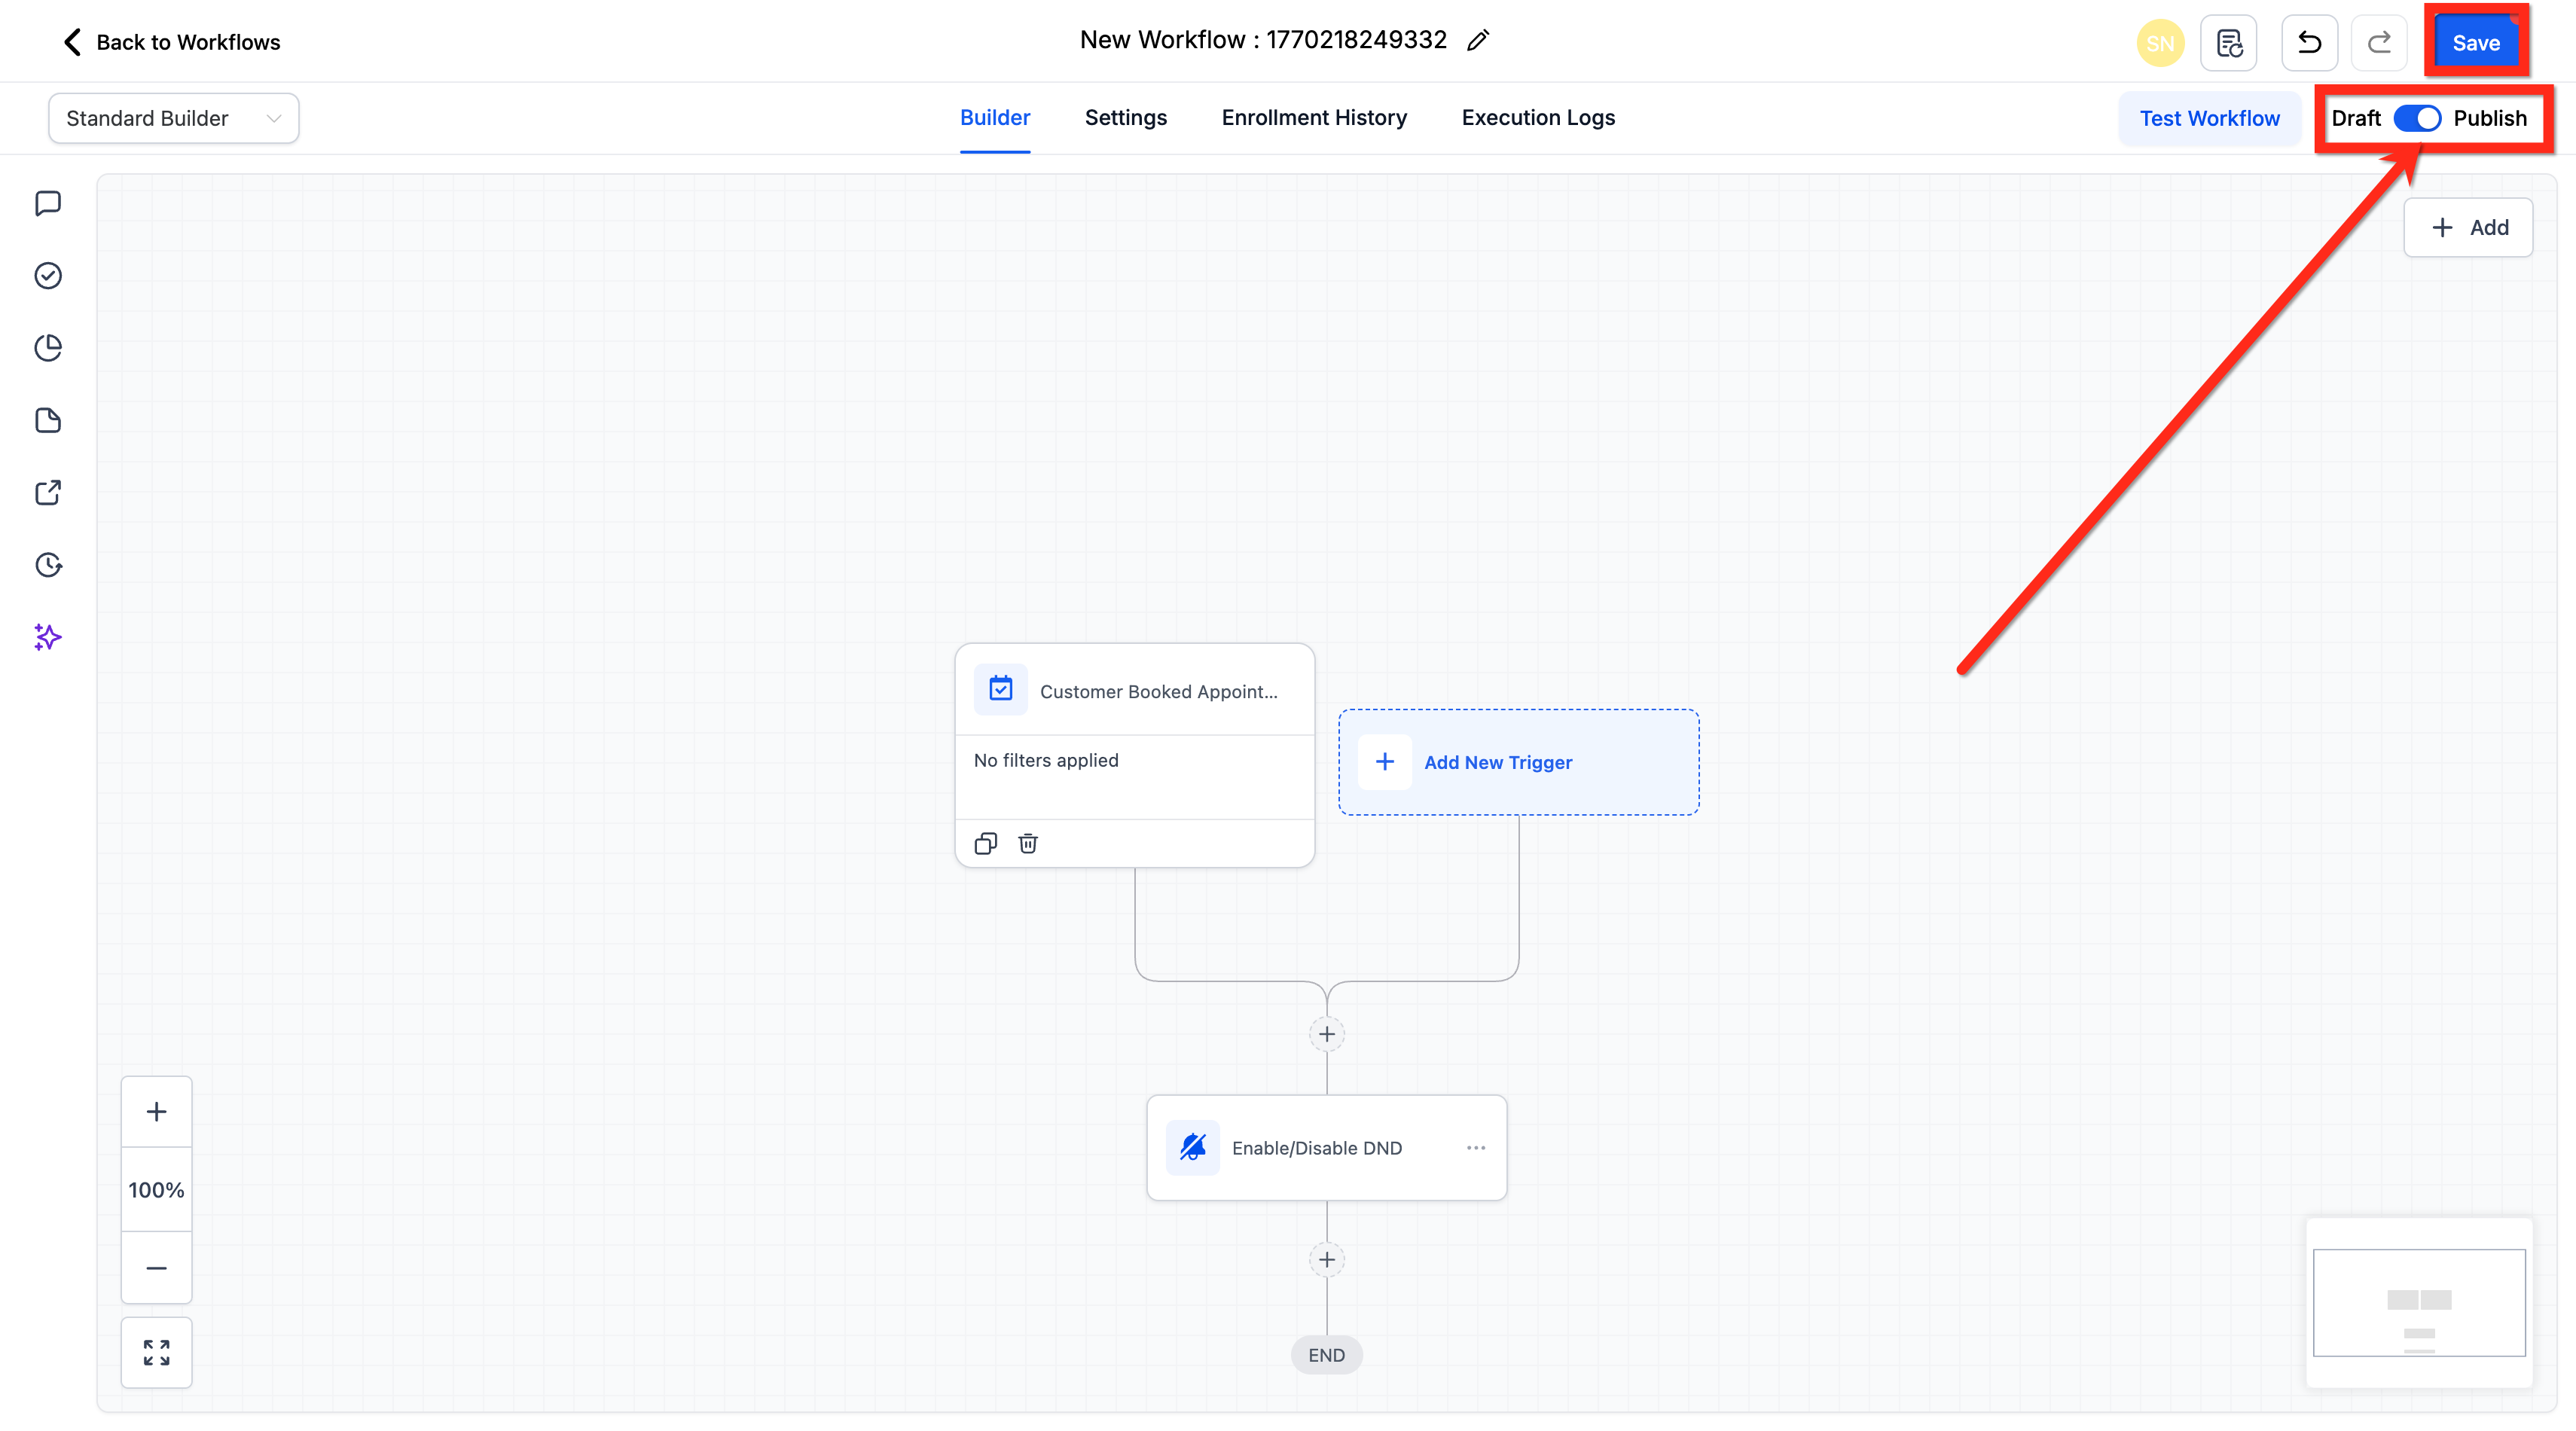
- Publish and Save the Workflow.
06What it looks like in HighLevel
07Settings that matter
- Mark as Read or Unread. Determines whether the conversation linked to the contact is marked as read, unread, or left unchanged.
- DND Direction. Selects whether the Do Not Disturb setting applies to inbound messages, outbound messages, or both.
- Enable or Disable for Selected or All Channels. Controls whether DND is turned on or off for every communication channel or only for specific channels you choose.
- Name the Action. Provides a label for the DND Contact step within the workflow for easy identification.
08Things to know before you rely on it
- The action can target either all channels or a subset of channels, but cannot mix enable and disable settings in a single step.
09How it connects to the rest of HighLevel
- Learn how to add tags to contacts within a workflow and combine tagging with DND settings. Add Contact Tag
- Explore the workflow trigger that reacts to a contact’s DND status change. Workflow basics
- Review HighLevel pricing and plan options to ensure your account includes workflow automation. Pricing
Michael's take

The DND Contact action feels like a small but handy convenience. It lets you respect a contact’s wishes without hunting through individual records, and it keeps your automation tidy.
A marketing agency that runs dozens of outbound campaigns will love this. They can automatically mute incoming spam calls after a lead is flagged, then lift the block once the lead is qualified, keeping the pipeline clean and the outreach focused.