
01Who this is for
- Automation specialists who build complex workflows benefit because Go To lets them reuse actions and keep flows tidy.
- Ecommerce teams can reduce repeated steps when handling abandoned carts or post purchase follow ups.
- Service providers with multiple appointment pathways can route contacts back to common confirmation steps.
02Go to actions, explained
The Go To action creates a link from its location in a workflow to another action inside the same automation. When a contact reaches the Go To step, the platform immediately moves the contact to the selected destination action.
The action must sit at the very end of a workflow branch. It cannot be placed between existing actions, and it does not move contacts to a different workflow. You can disconnect an existing Go To link and point it to a new action whenever needed.
You find the Go To option while editing a workflow under Automation > Workflows. After adding the action, you choose the target step by clicking the highlighted action that should receive the contact.
03How businesses use Go To
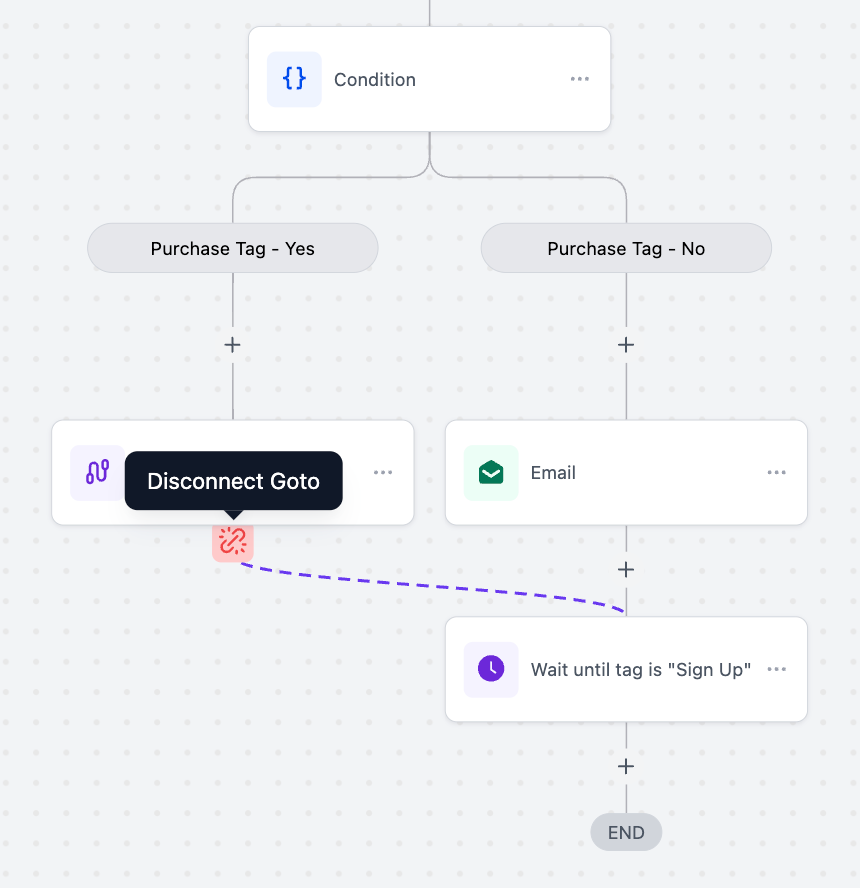
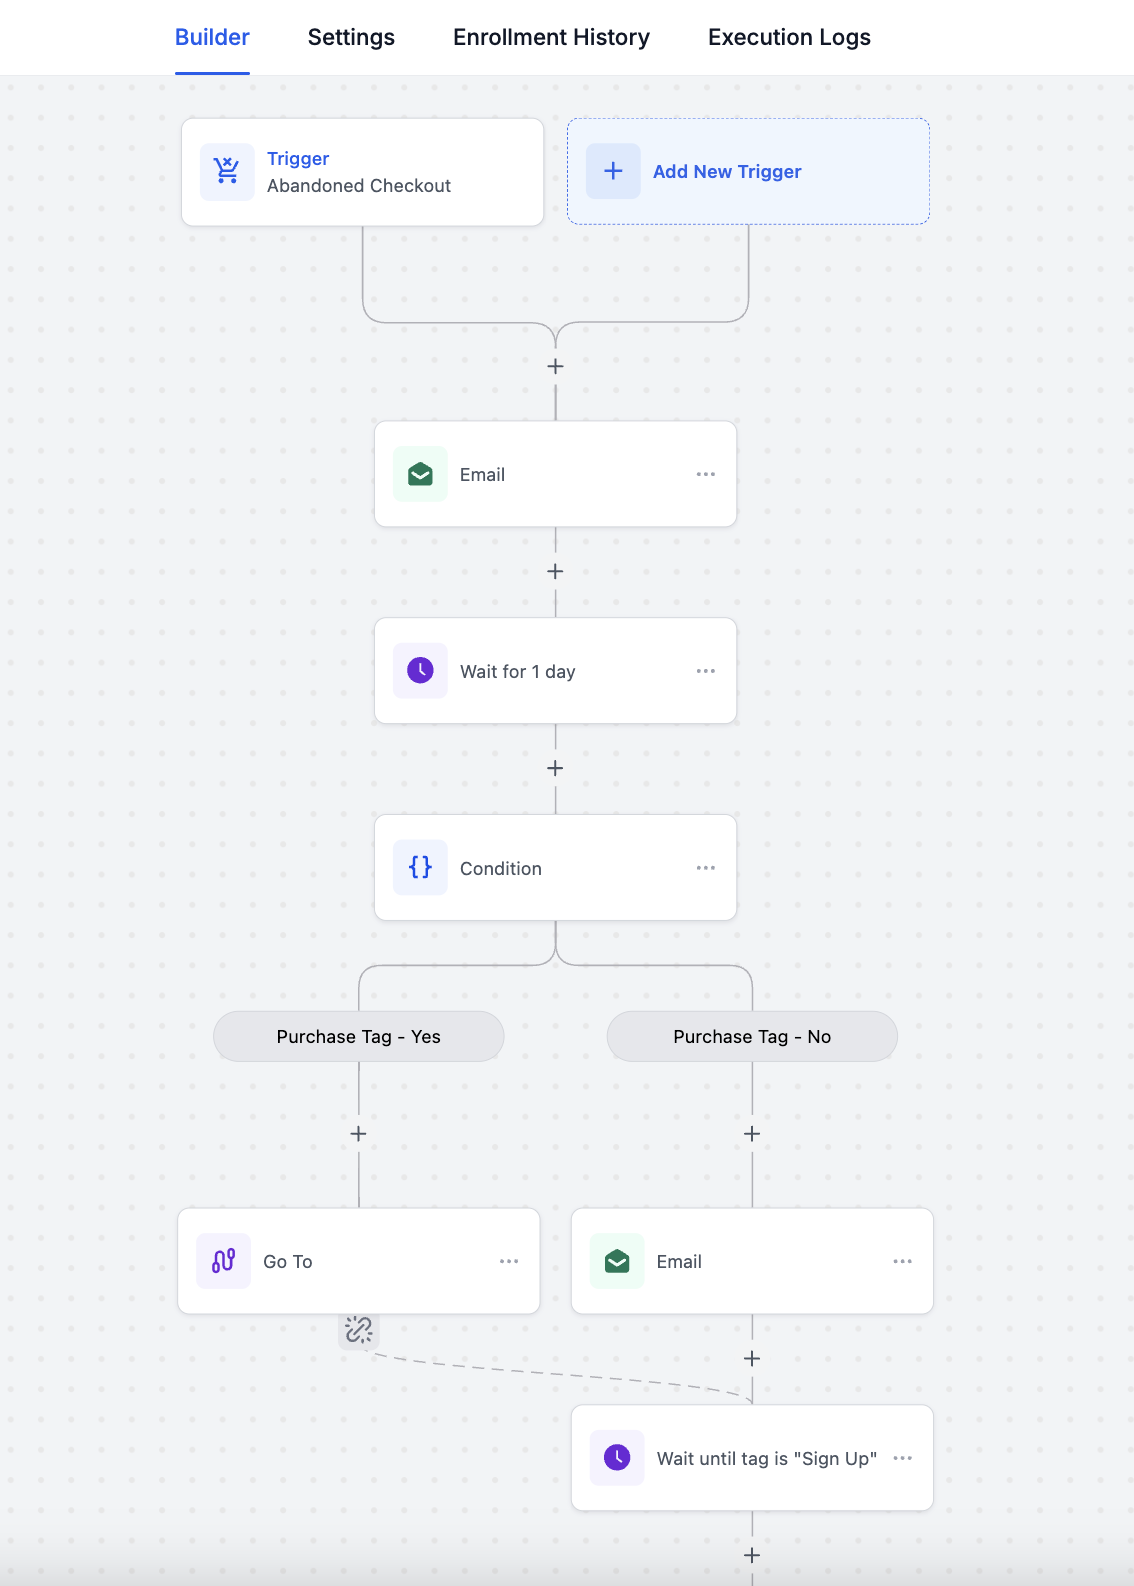
- Online retailer. Add a Go To step at the end of a branch that checks for a "Purchased" tag. Connect it to the wait step in the alternative branch so customers who have bought are sent directly to the follow up sequence without receiving another email.
- Membership site. Place a Go To action after an email welcome sequence to redirect members who already have a "Active" tag to the renewal reminder step, avoiding duplicate onboarding messages.
- Dental practice. Use Go To at the end of a missed appointment reminder branch to send contacts back to the initial appointment confirmation step, keeping the scheduling flow consistent.
04How to set up and use Go To in HighLevel
Add Go To action
- Open Automation > Workflows in the HighLevel subaccount.
- Select the workflow you wish to edit.
- At the end of a branch, click the + icon to add a new action.
- Search for Go To and select it from the list of workflow actions.
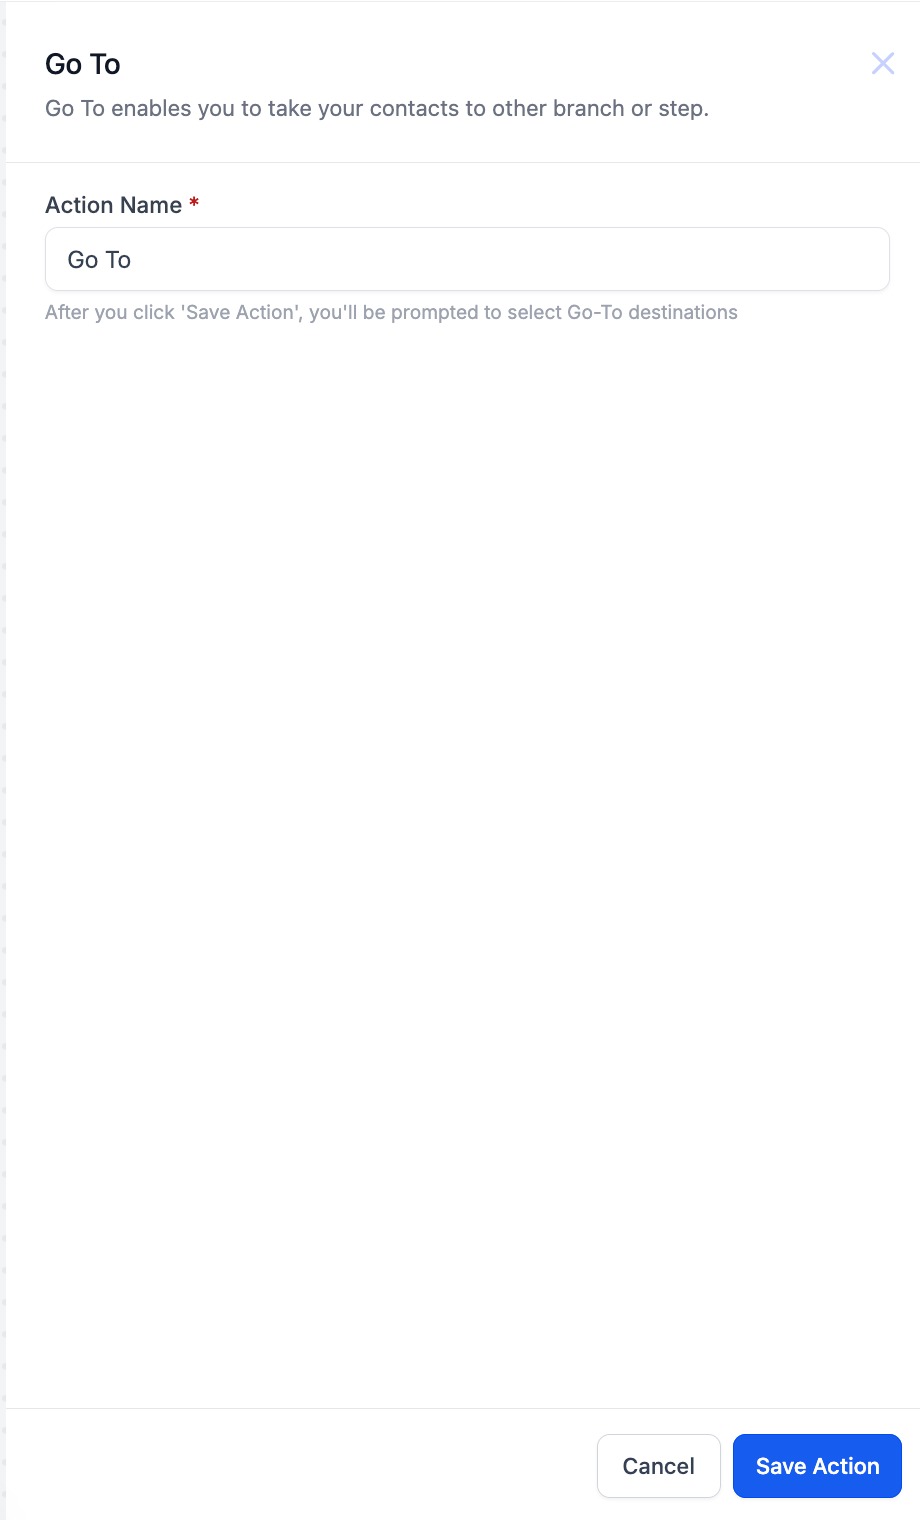
- Enter a clear name for the Go To step and click Save Action.
- Click the highlighted action that should receive the contact, then save the workflow changes.
05What it looks like in HighLevel
06Settings that matter
- Go To. Specifies the action that redirects contacts to another step within the same workflow.
- Disconnect GoTo. Removes the existing connection so the Go To step can be linked to a different destination action.
07Things to know before you rely on it
- The Go To action must be the last step in a workflow or branch; it cannot sit between other actions.
- It only redirects contacts within the same workflow and cannot add contacts to a separate workflow.
- Redirecting to an earlier action may create a Loop Lock if the workflow lacks an appropriate exit condition.
08If something goes wrong
- Loop Lock when contacts repeatedly cycle through the same actions. Review the Go To destination and any conditions that send the contact back. Ensure the workflow includes an exit condition to stop endless loops.
- Unable to place Go To between actions. Move the Go To step to the end of the branch; it cannot be inserted between existing actions.
09How it connects to the rest of HighLevel
- Add to Workflow action for moving contacts to a different workflow Add to Workflow
- If/Else branch action for conditional routing If/Else
- Wait action used together with Go To for timing control Wait action
Michael's take

Wondering if you really need a Go To step in your automation? It’s a handy shortcut when a contact should skip ahead or loop back.
If I were setting up a cart abandonment flow, I’d use Go To to jump a buyer who already purchased straight to the final thank you step, keeping the sequence clean.