
01Who this is for
- Founders who need to log batch data from a single form submission, keeping records organized in one sheet.
- Marketing teams that want to sync grouped campaign metrics to Google Sheets without manual copying.
02Create & update multiple rows in Google Sheets, explained
The action is part of the Google Sheets Premium workflow library. It can write many rows at once or edit a range of existing rows during a single automation run. When the workflow receives an array of objects, each object becomes a separate spreadsheet row. If only one record is present, only one row is added.
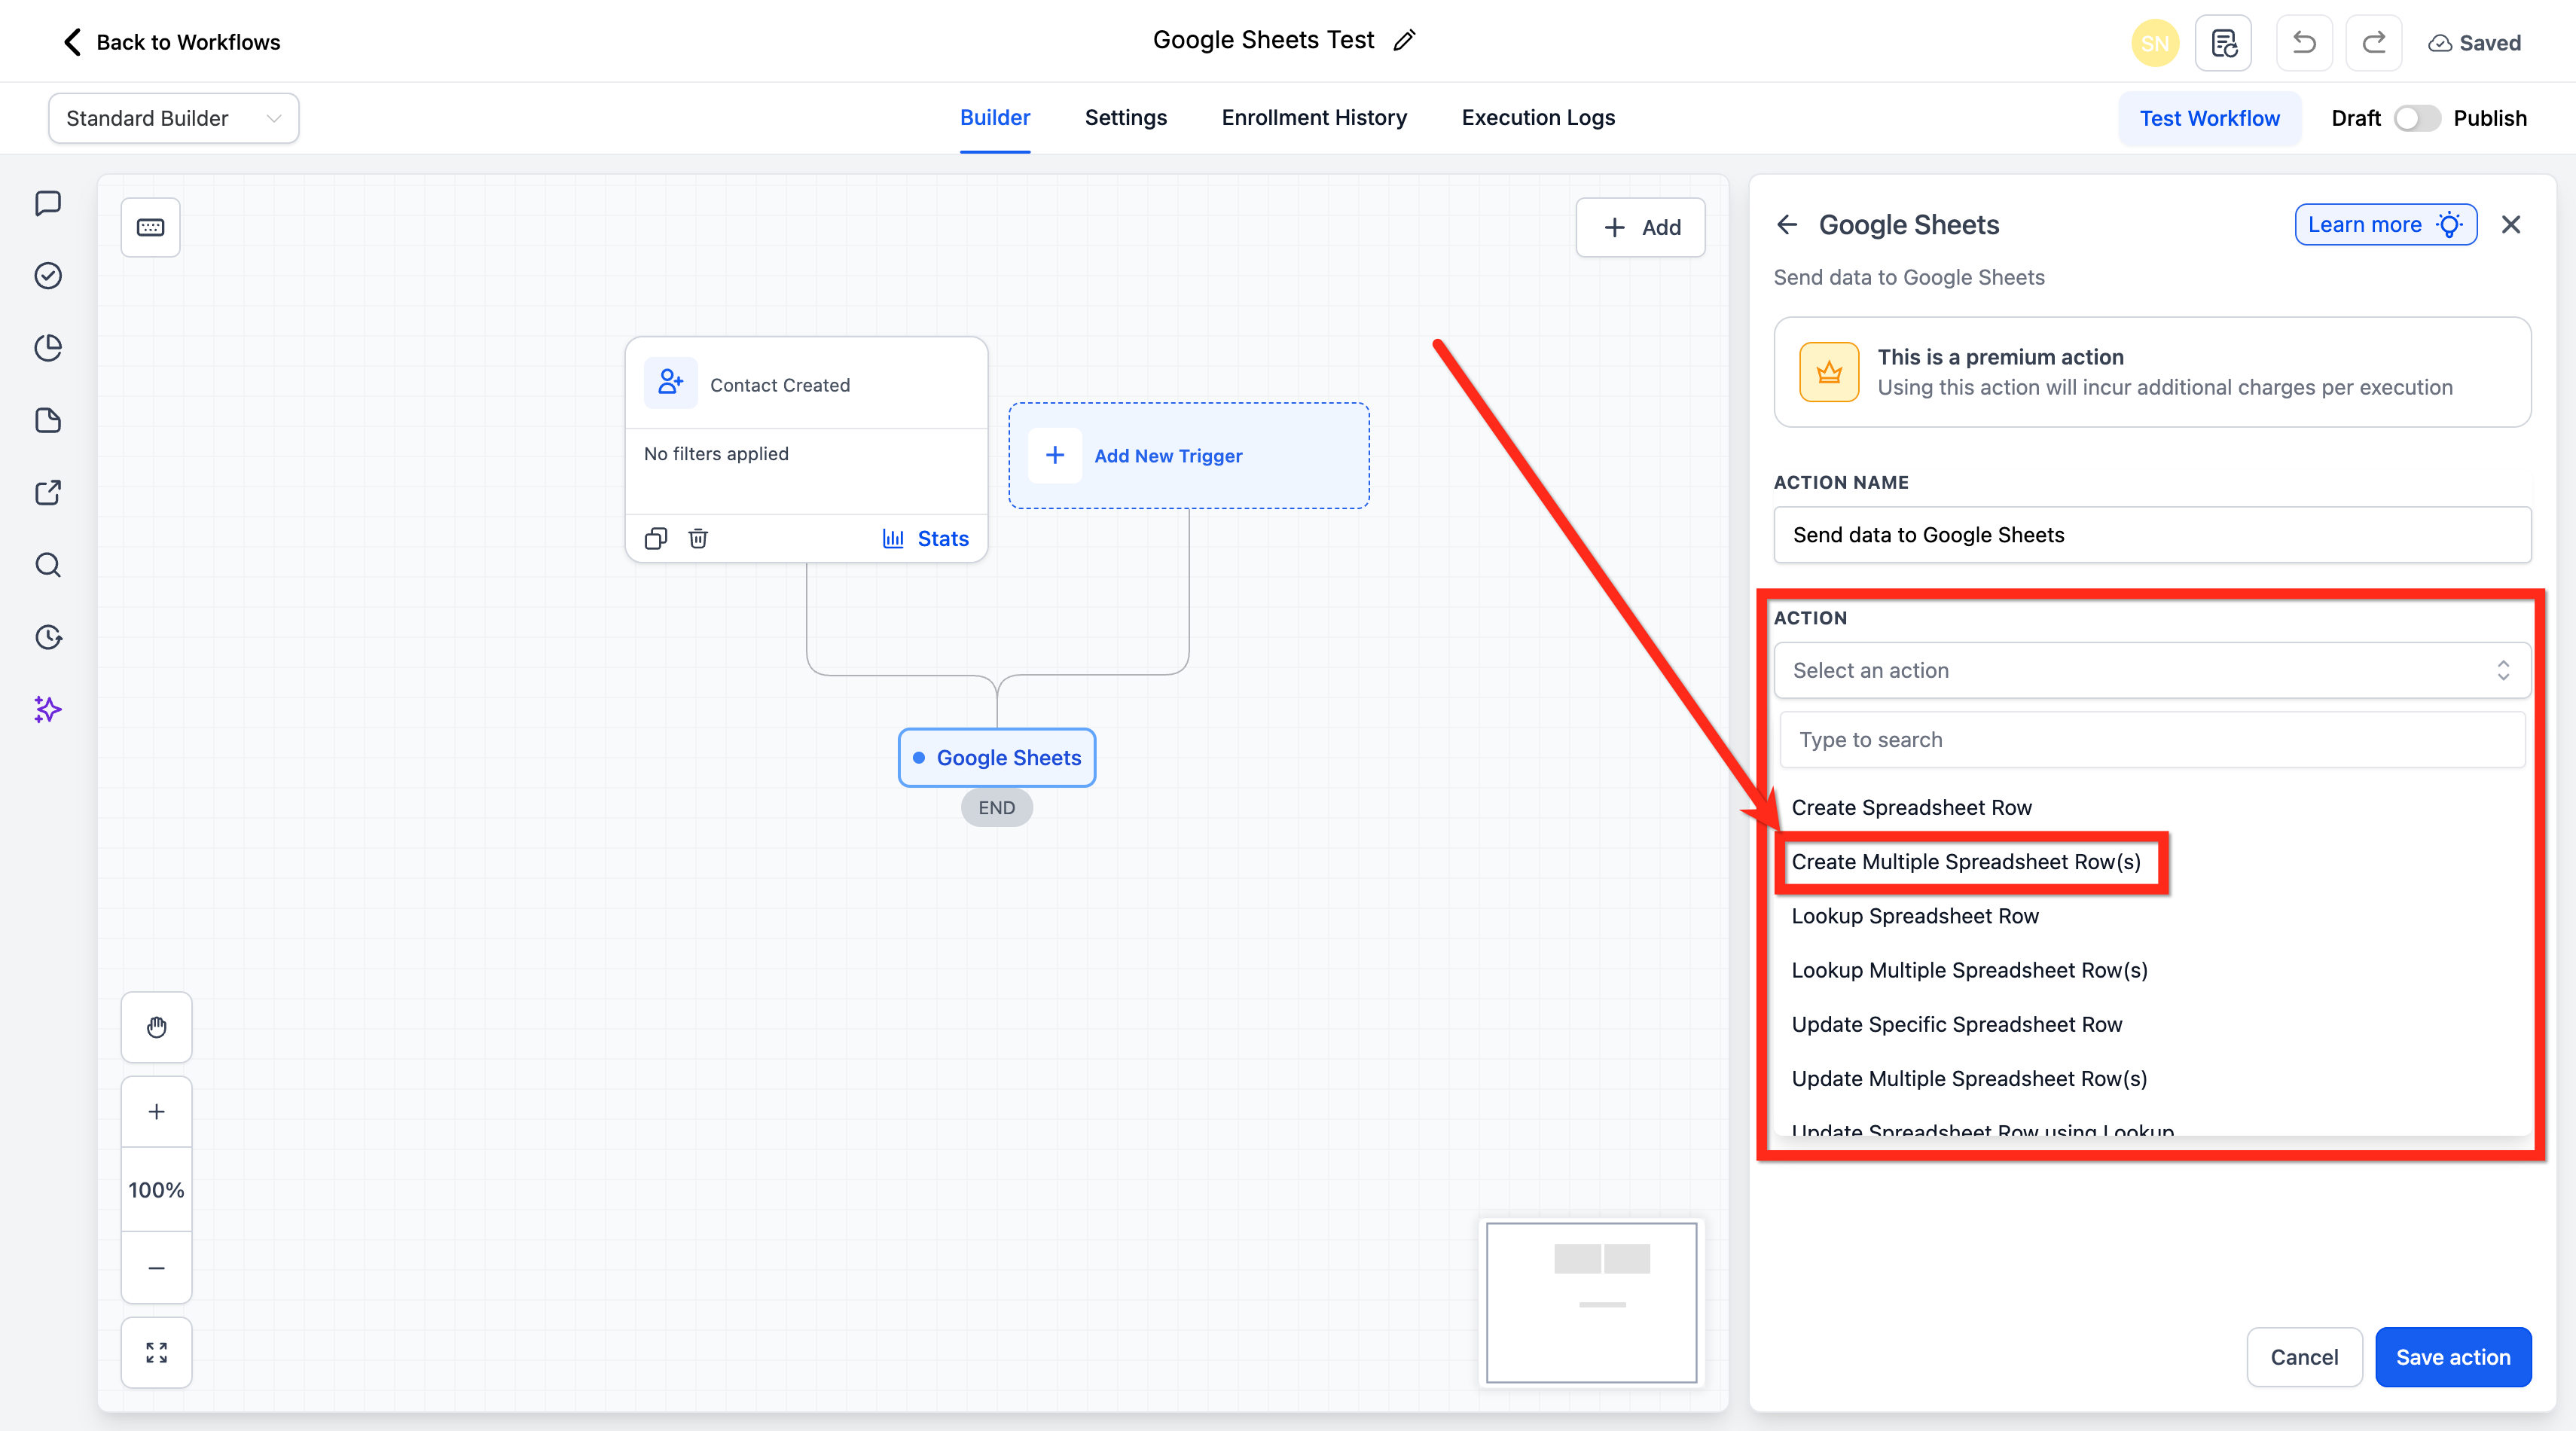
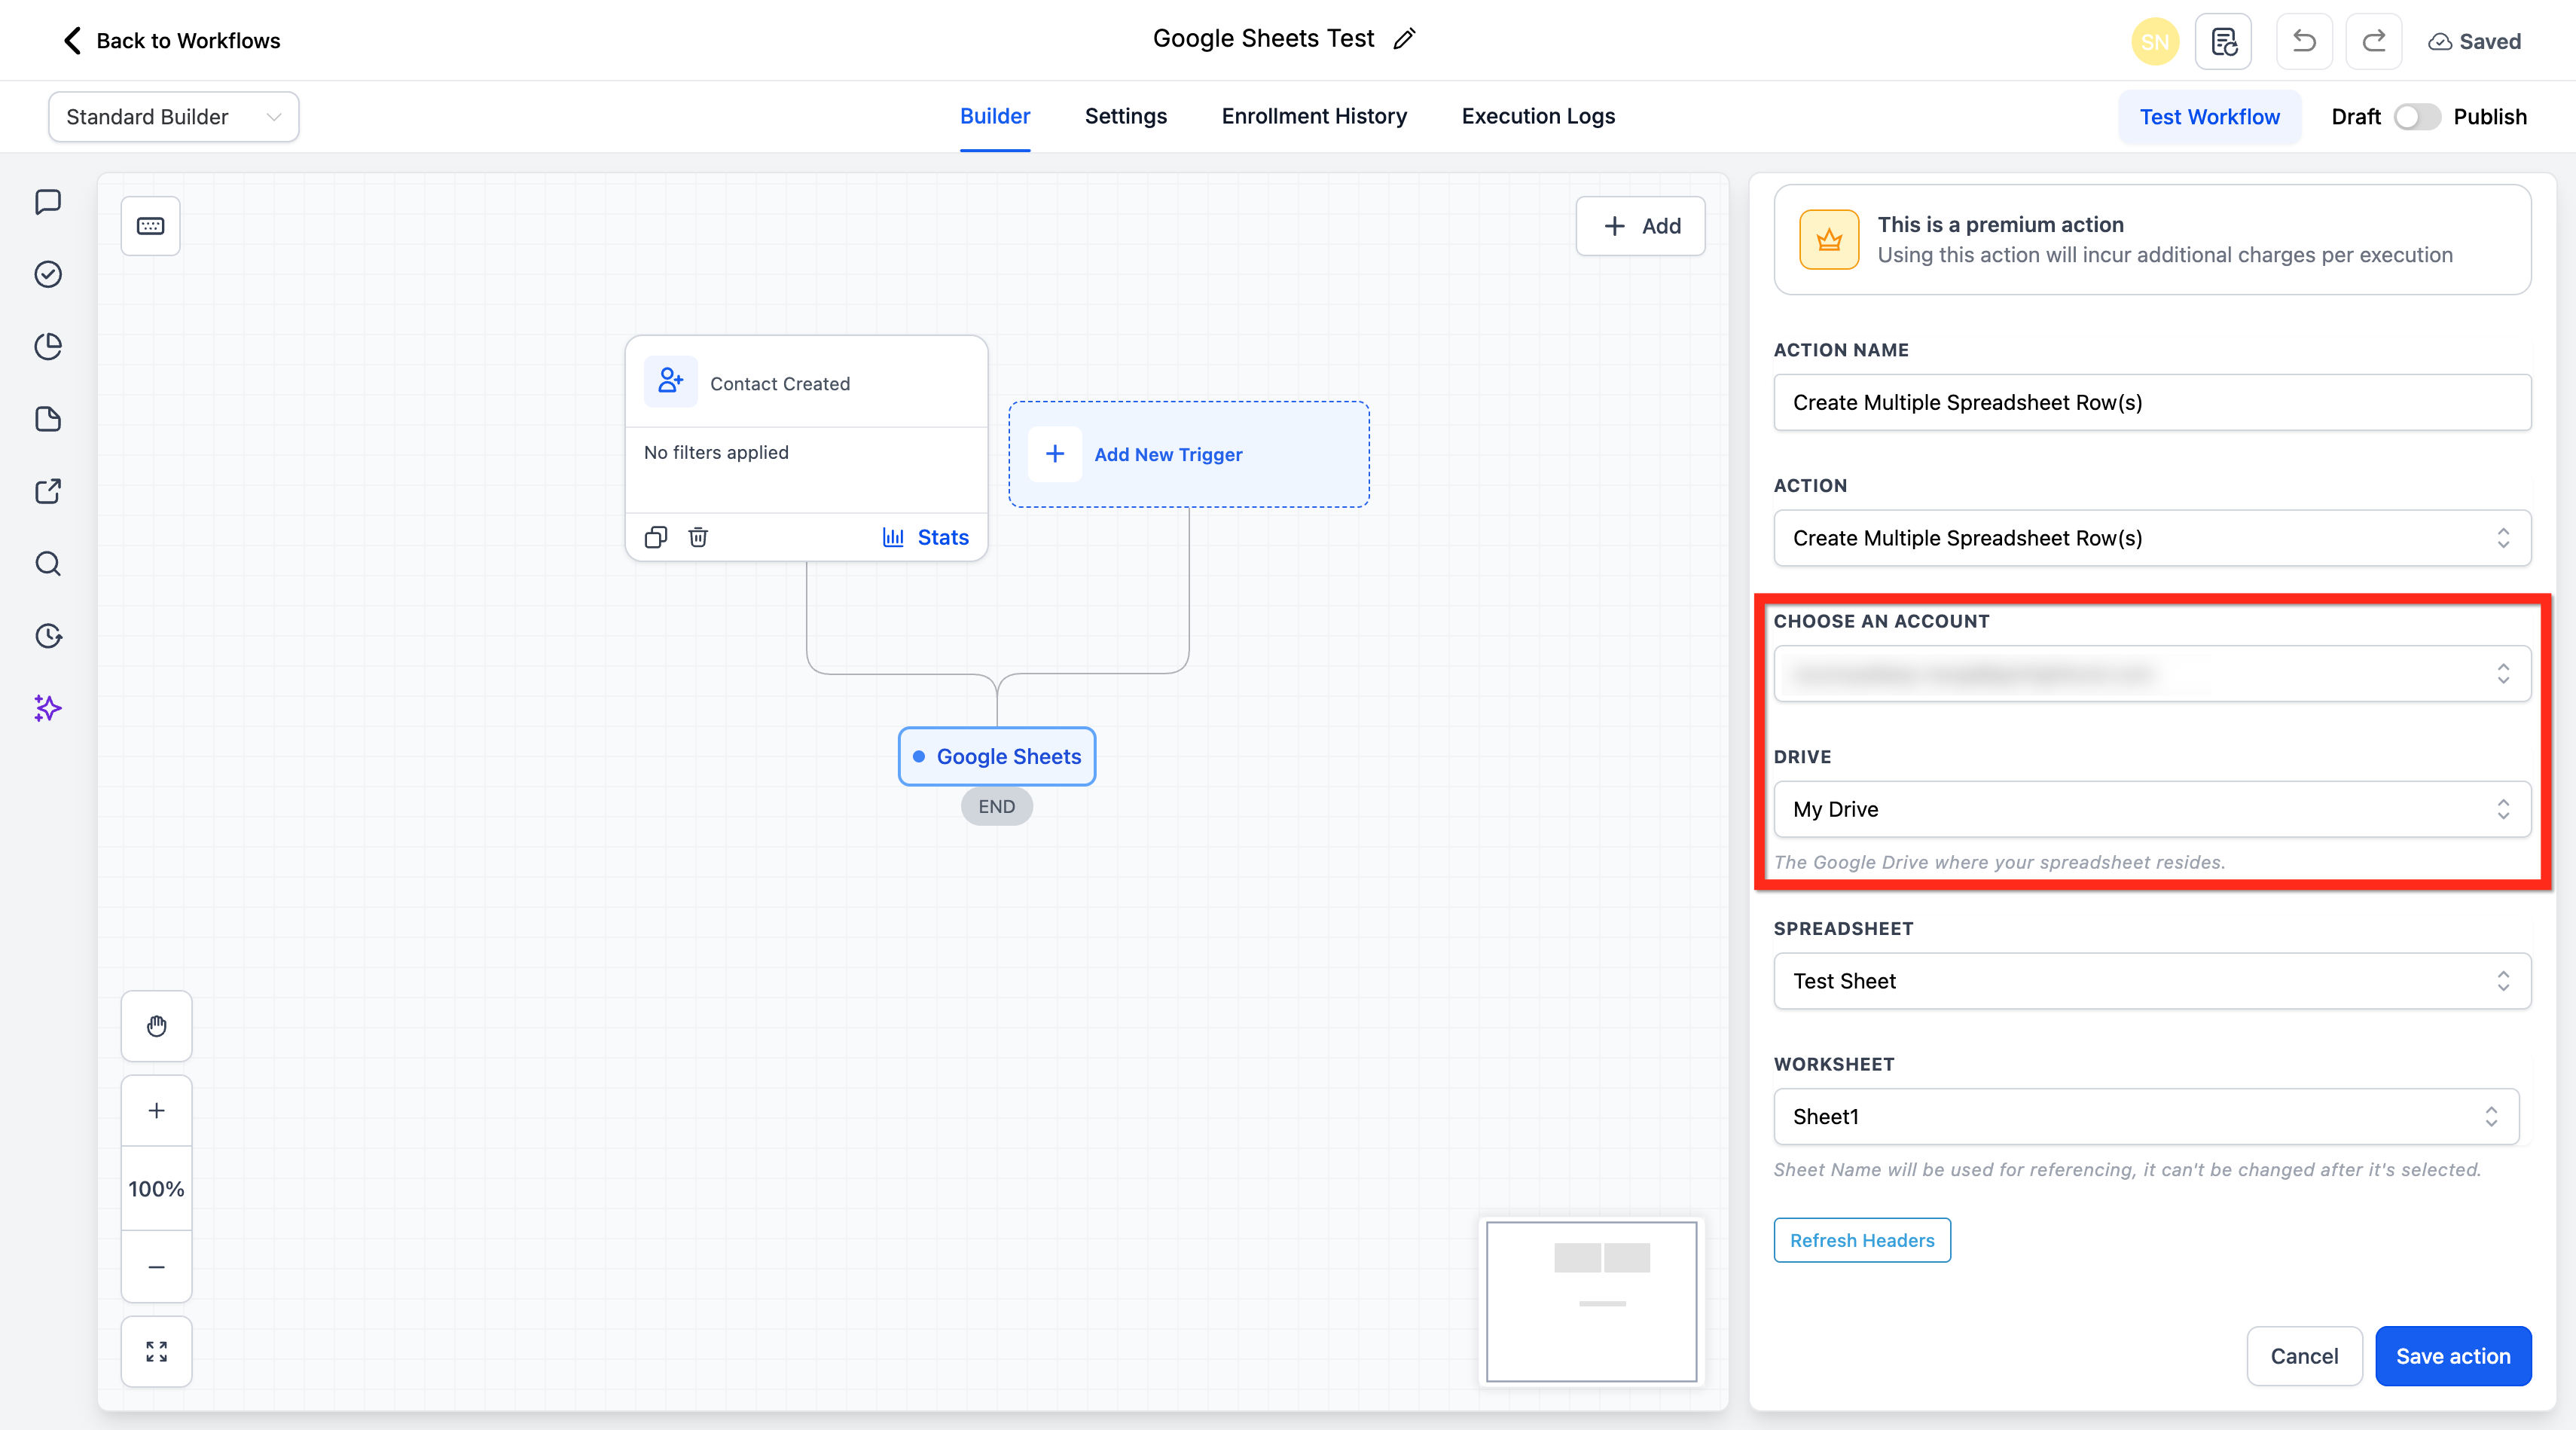
You locate the action inside any workflow under the Add Action menu. After selecting the Google Sheets option, you choose either Create Multiple Spreadsheet Row(s) or Update Multiple Spreadsheet Row(s). The action then asks for the Google account, drive, spreadsheet, worksheet, column range and, for updates, a starting row number.
All column headers must be in the first row of the sheet. The system treats that row as the header row and uses the names to map workflow data. You can refresh the header list at any time to capture changes made in the sheet.
03How businesses use create & update multiple rows in Google Sheets
- Ecommerce store. When an order includes several items, the store’s workflow builds an array of product objects and passes it to the Create Multiple Spreadsheet Row(s) action. Each product appears as its own row in the sales log sheet.
- Real estate agency. The agency’s workflow updates the status column for multiple property listings at once by selecting the Update Multiple Spreadsheet Row(s) action, entering the first row number, and defining the column range that contains status values.
- Event organizer. After an event registration webhook delivers a JSON array of attendees, the organizer’s workflow maps that array to the Create Multiple Spreadsheet Row(s) action, automatically adding each attendee to a master attendance sheet.
04The numbers and rules that matter
- This is a premium action and incurs additional charges per execution.
05Before you start
- Connect your Google account in HighLevel.
- Make sure the spreadsheet is stored in the correct Google Drive.
- Add clear column headers in the first row of the worksheet.
- Confirm the worksheet tab name before selecting it.
- Enable Google Sheets premium workflow actions for the account if required.
06How to set up and use create & update multiple rows in Google Sheets in HighLevel
Create multiple rows in Google Sheets via workflow
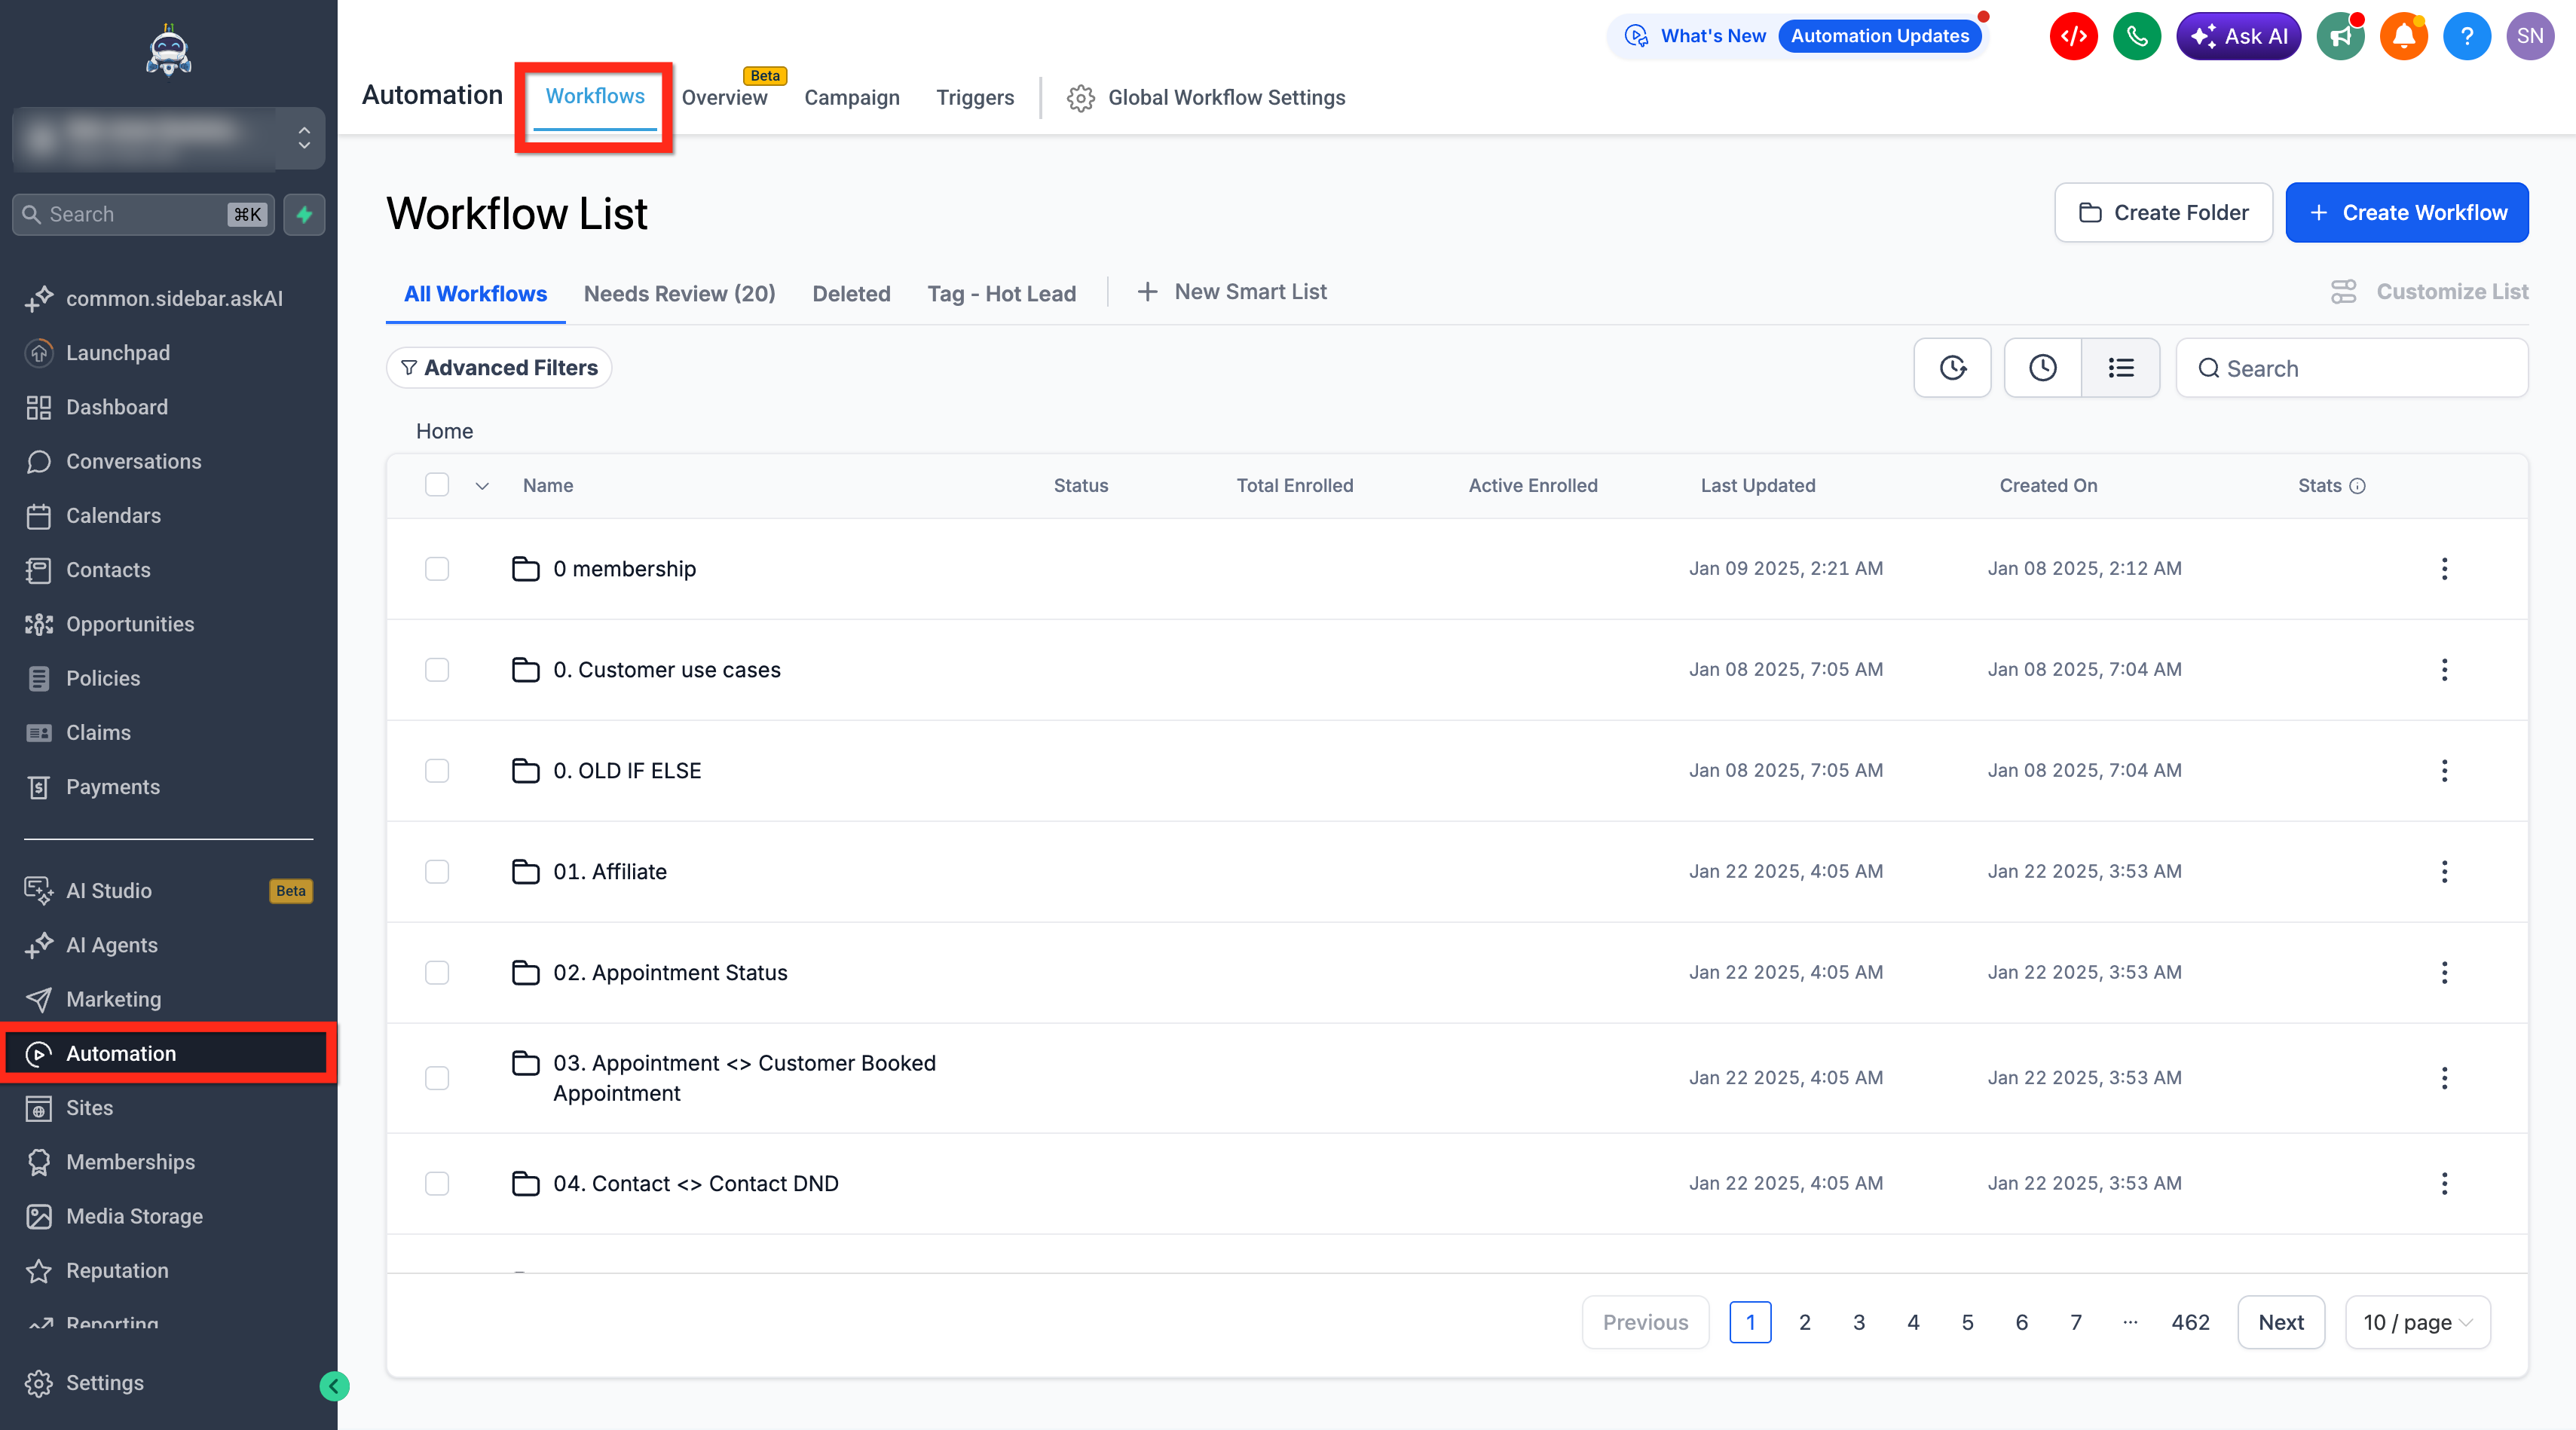
- Open Automations and choose Workflows.
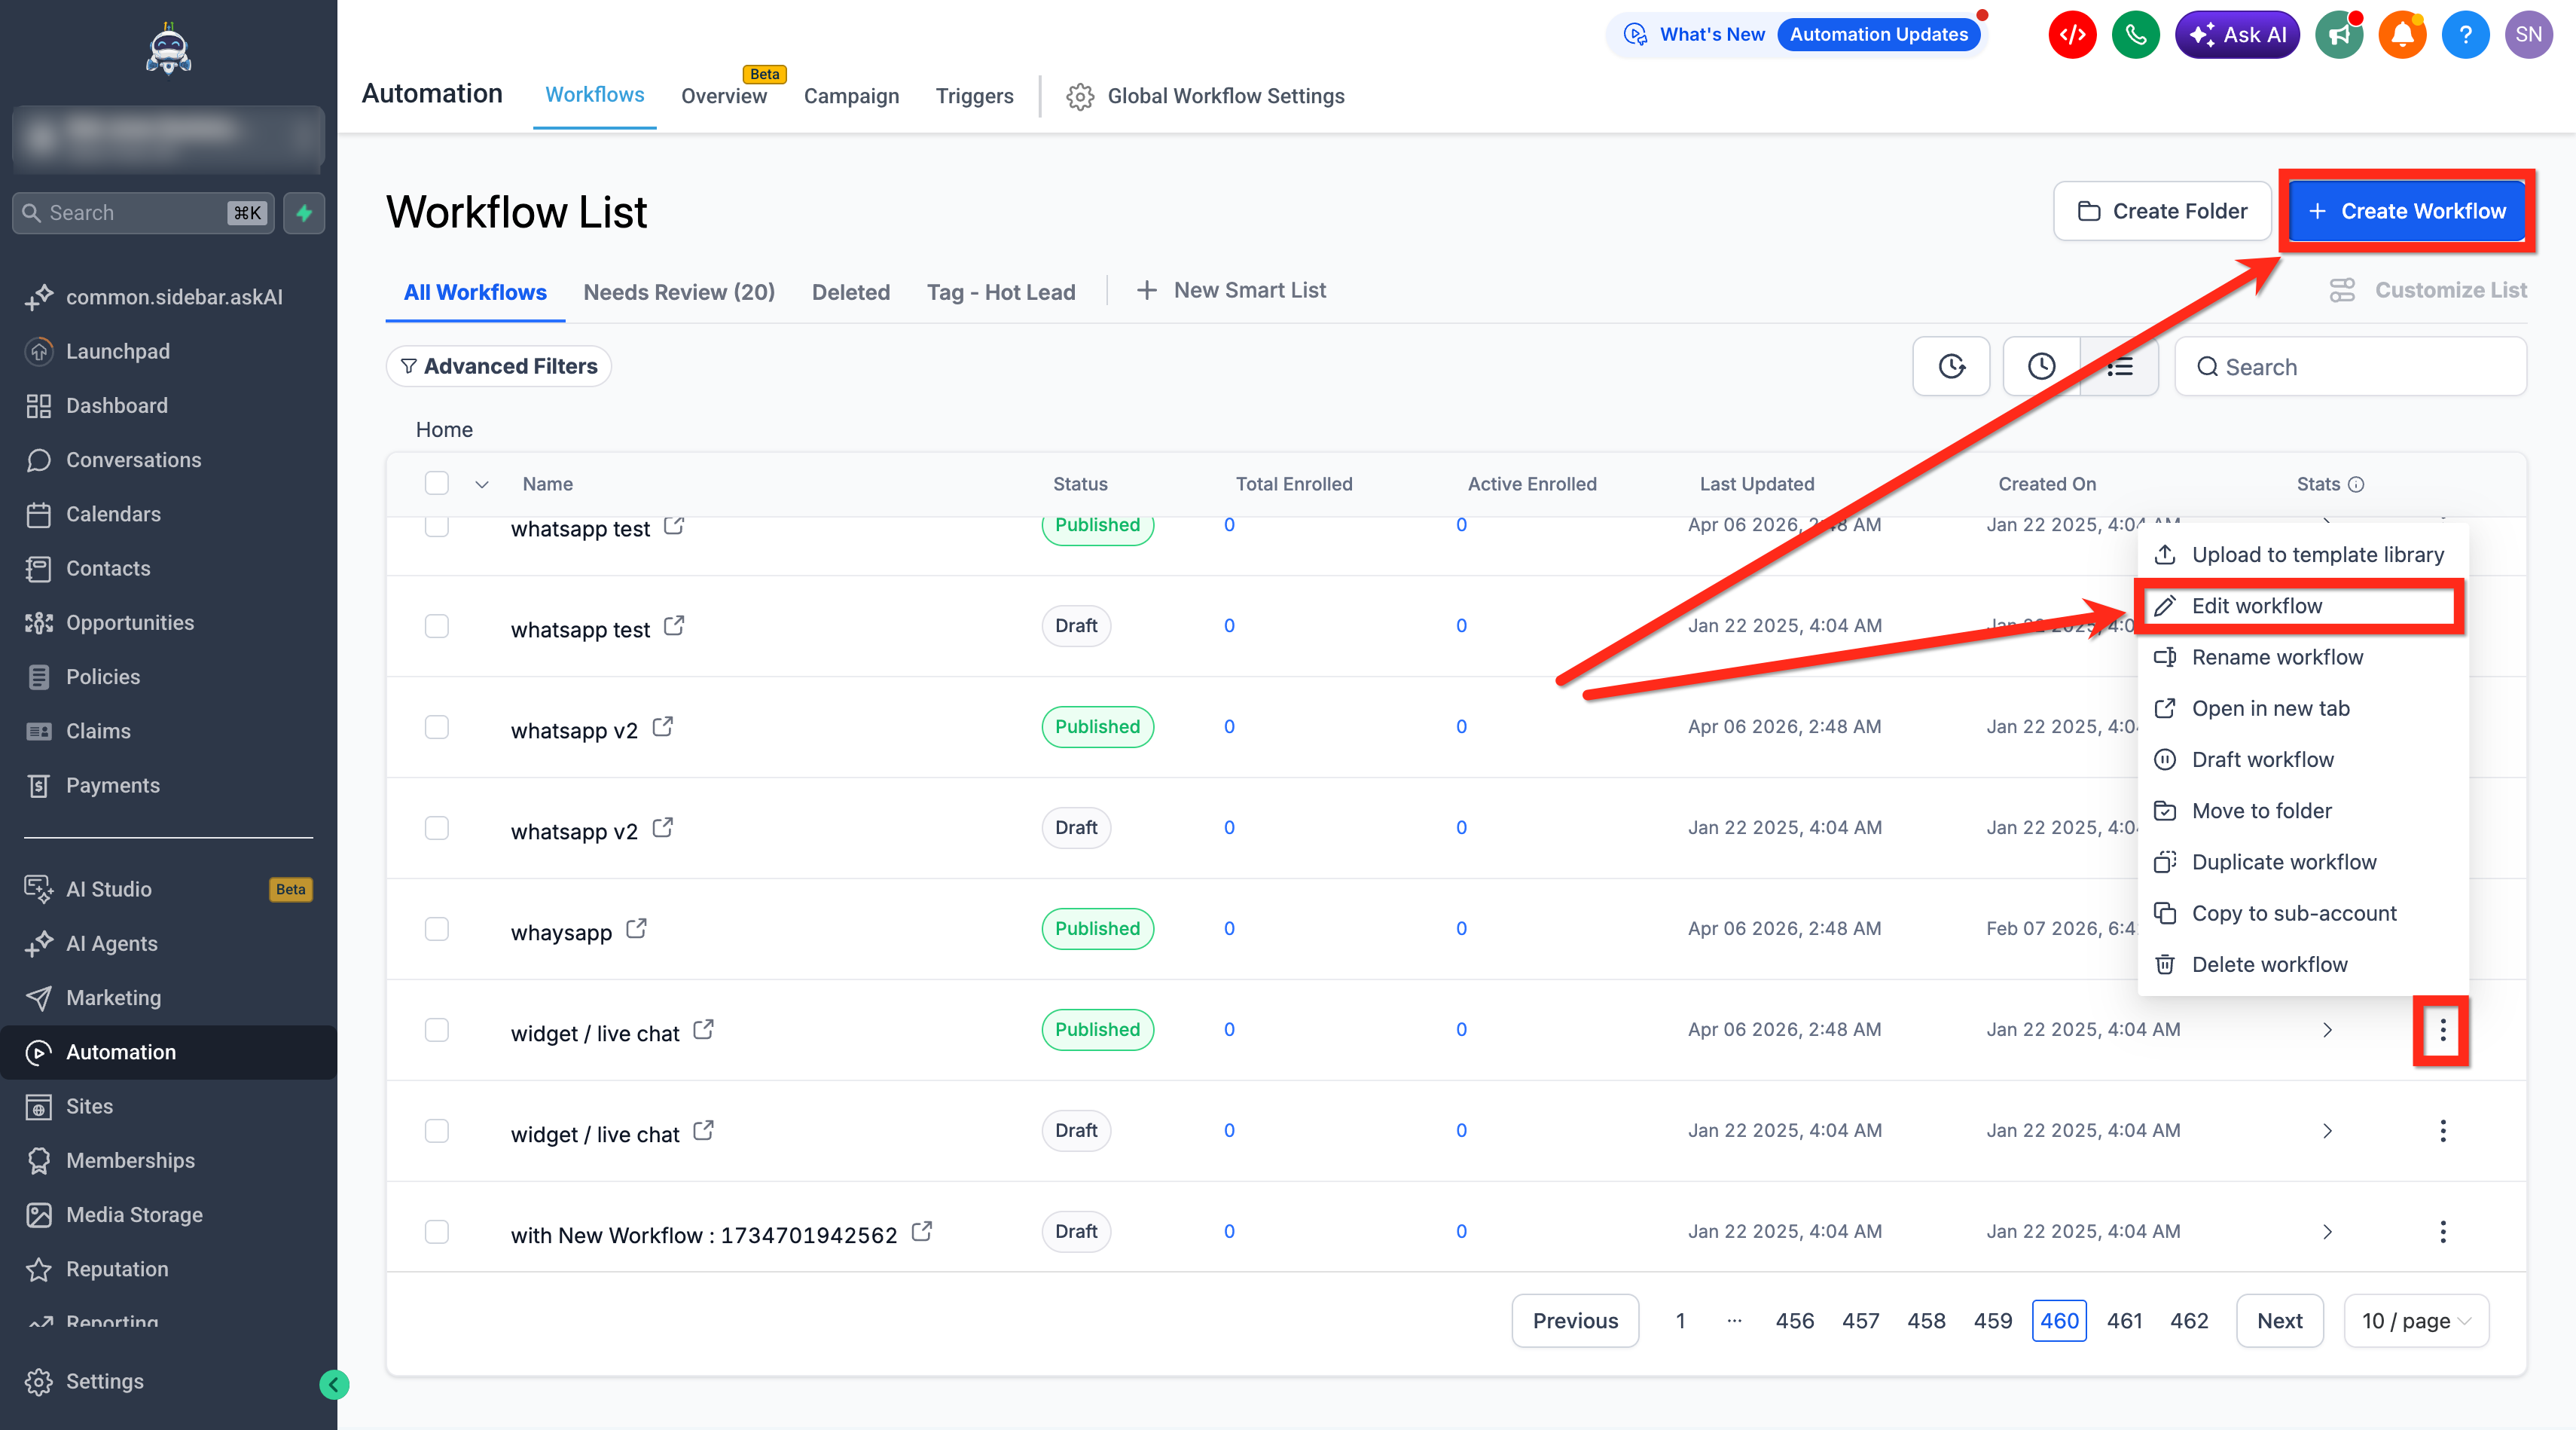
- Start a new workflow or edit an existing one.
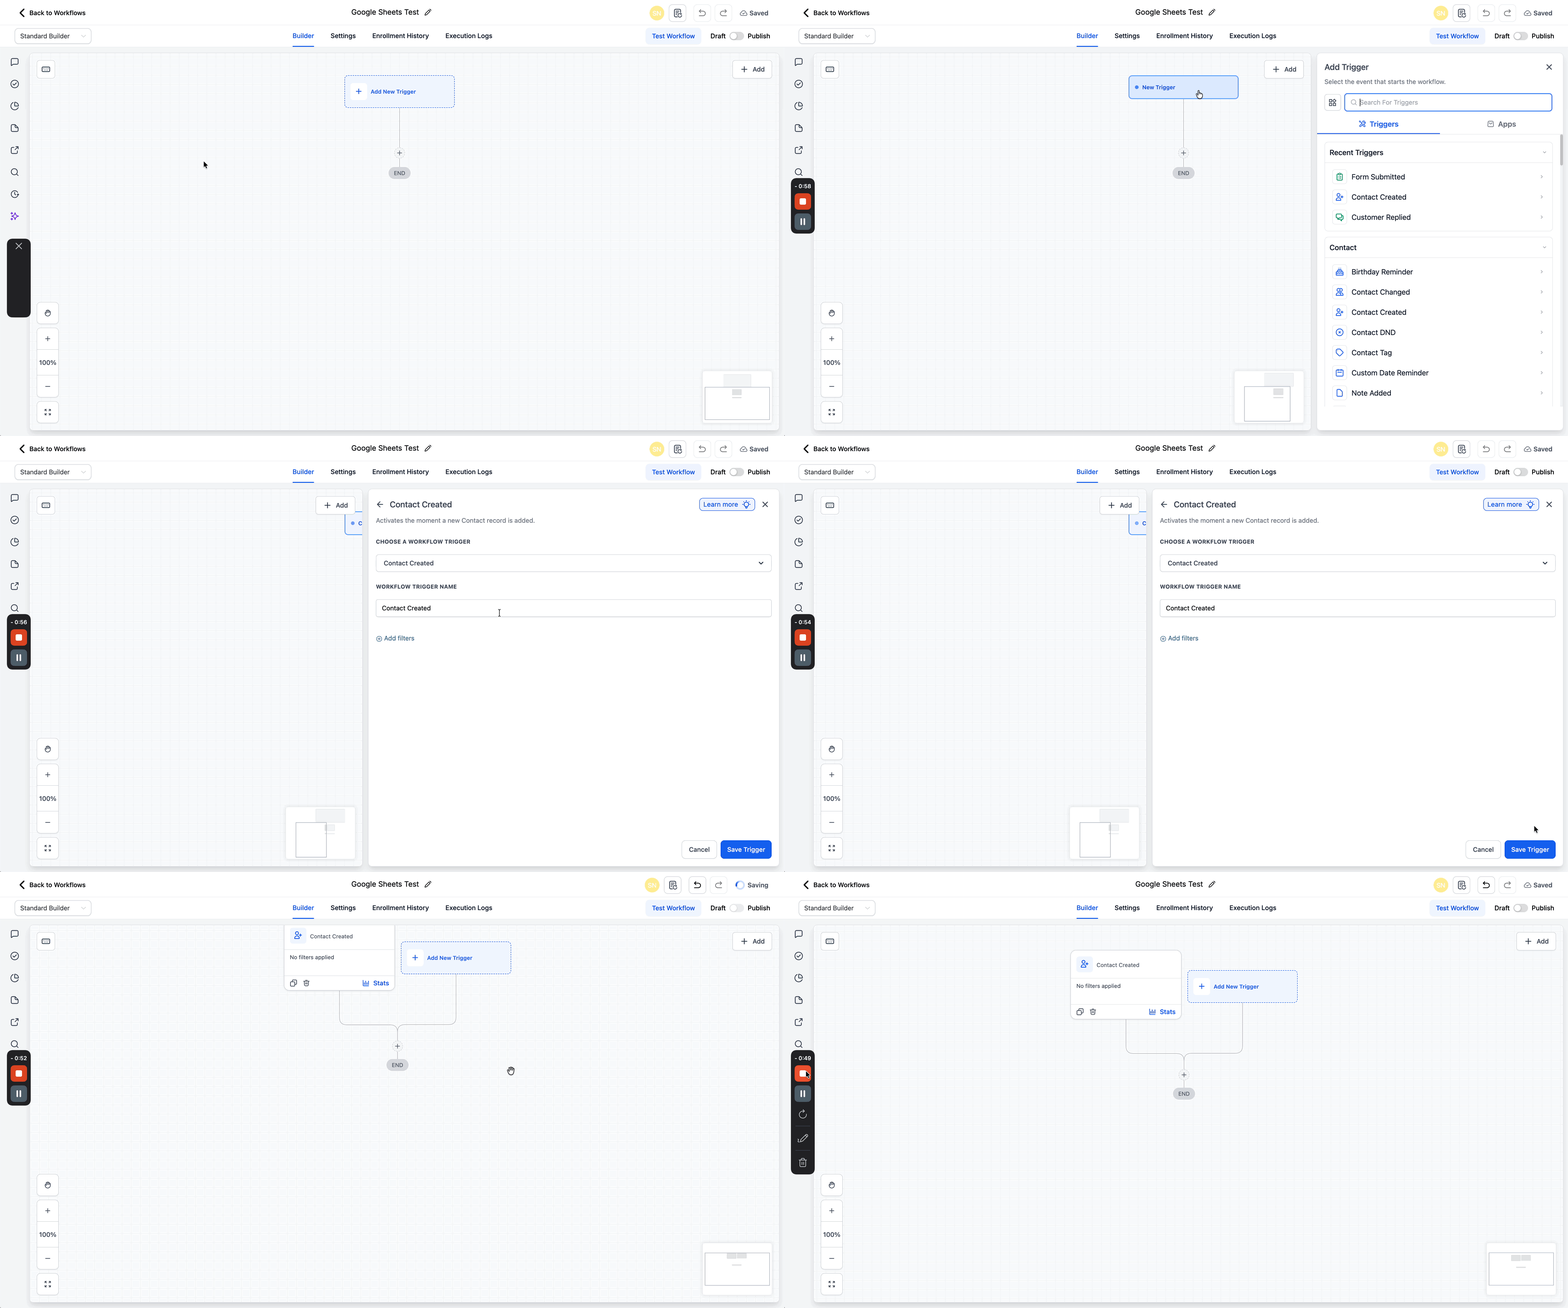
- Add a trigger such as Contact Created or Form Submitted.
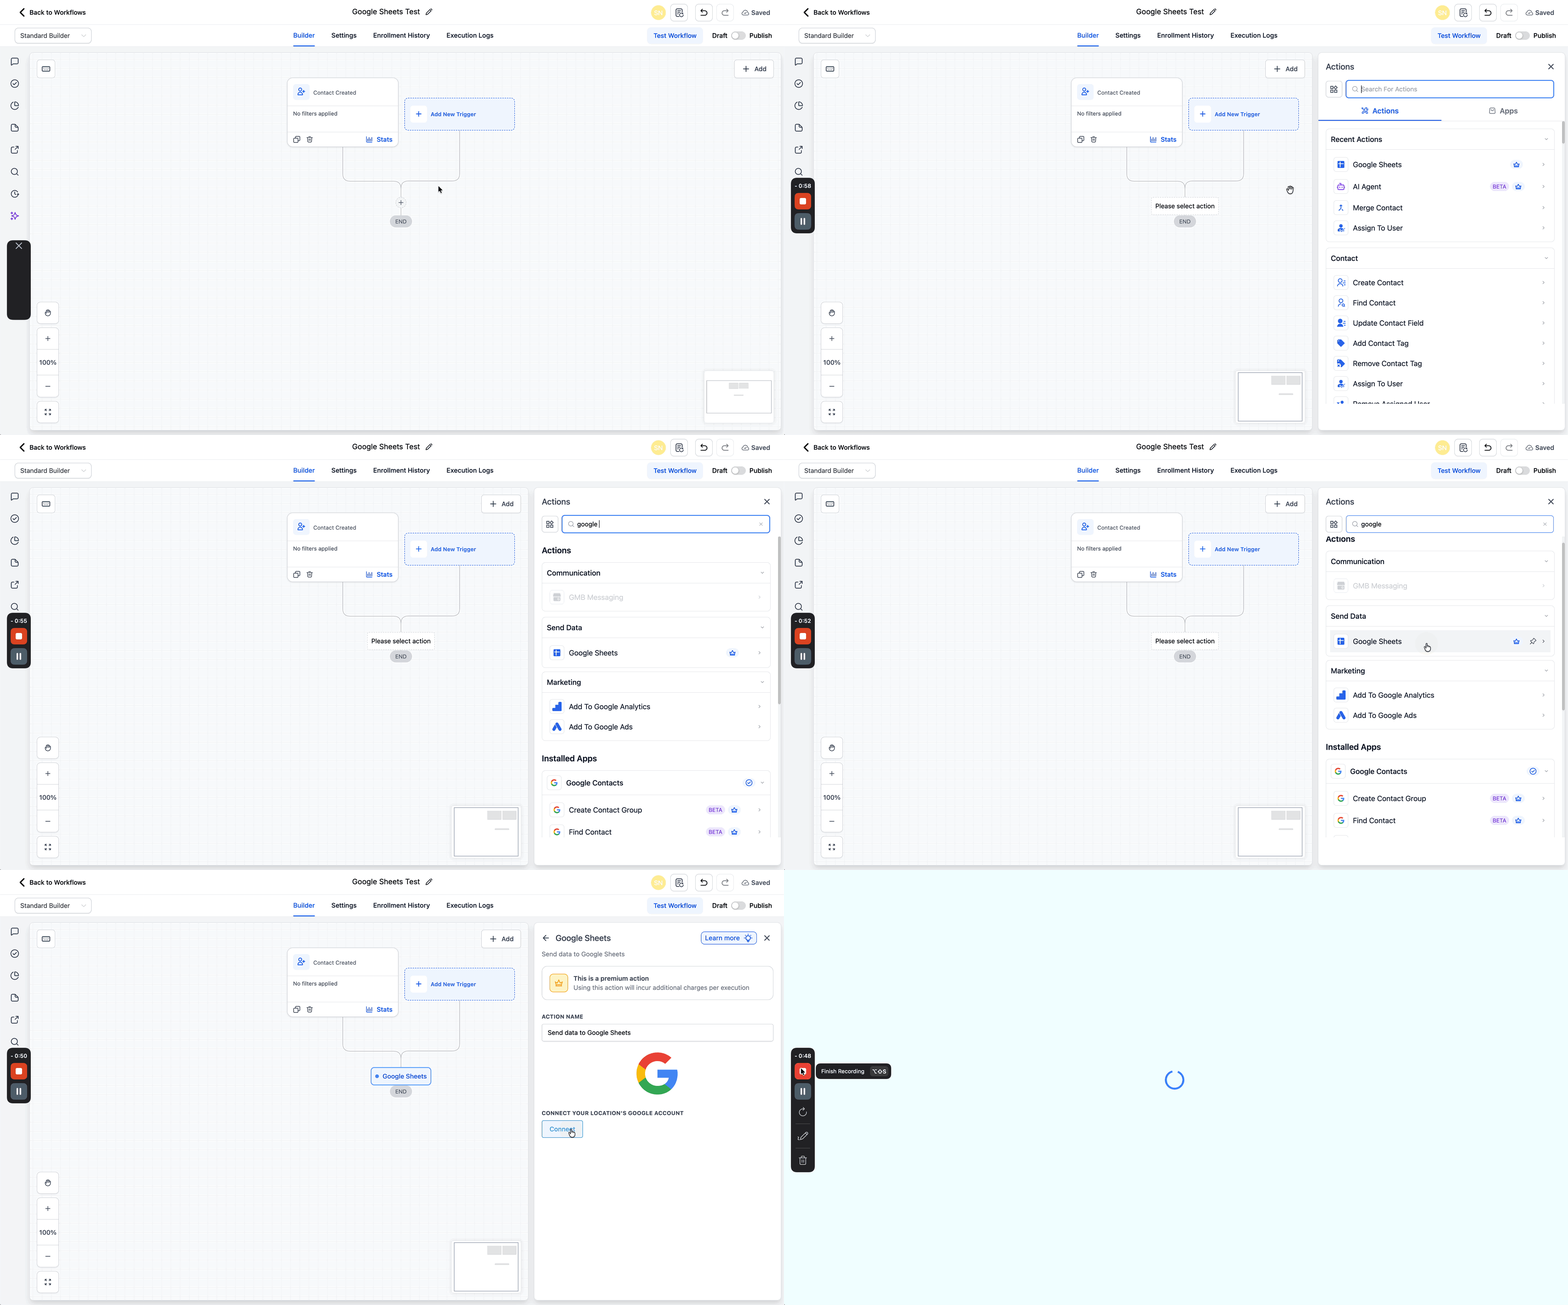
- Click the plus icon to insert a new action.
- Search for Google Sheets and select the Google Sheets action.
- Connect the location’s Google account.
- Pick Create Multiple Spreadsheet Row(s) from the action dropdown.
- Choose one of the displayed Google accounts for the subaccount.
- Select the Drive that holds the target spreadsheet.
- Choose the spreadsheet file and then the worksheet tab.
- If column headers have changed, click Refresh Headers to reload them.
- Set the Start column and End column for the data range and save the action.
Update multiple rows in Google Sheets via workflow
- Open Automations and choose Workflows.
- Start a new workflow or edit an existing one.
- Add a trigger such as Contact Created or Form Submitted.
- Click the plus icon to insert a new action.
- Search for Google Sheets and select the Google Sheets action.
- Connect the location’s Google account.
- Pick Update Multiple Spreadsheet Row(s) from the action dropdown.
- Choose one of the displayed Google accounts for the subaccount.
- Select the Drive that holds the target spreadsheet.
- Choose the spreadsheet file and then the worksheet tab.
- Enter the row number where the update should begin.
- Set the Start column and End column, and refresh headers if needed.
- Save the action.
07What it looks like in HighLevel
08Settings that matter
- Start column. Defines the first column that will be included in the data mapping.
- End column. Defines the last column that will be included in the data mapping.
- Refresh Headers. Updates the list of column names inside the action after sheet changes.
- Row number. Specifies the initial row index for the Update Multiple Spreadsheet Row(s) action.
09Things to know before you rely on it
- The action is premium and adds extra charges per execution.
- Rows are created only when the workflow run already contains an array of row objects.
- Workflows do not automatically batch contacts that enter at different times.
- Headers must exist in the first sheet row; missing headers cause mapping errors.
- Choosing the wrong worksheet tab can cause data to be written to an unintended location.
10If something goes wrong
- New column does not appear in the action mapping list. Click Refresh Headers after adding or renaming the column in the sheet.
11How it connects to the rest of HighLevel
- Set up the Google Sheets Premium workflow action for detailed configuration steps. Google Sheets premium action guide
- Use an inbound webhook to send a JSON array of rows to the Create Multiple Spreadsheet Row(s) action. Inbound webhook trigger
- Learn how to create a workflow, add triggers, filters, and actions in HighLevel. Workflow creation overview
Michael's take

People often think they can drop a list of contacts into the action and HighLevel will gather them over time. It doesn’t. The workflow must already contain an array of row objects before the action runs.
If I were setting this up, I would build the array in a preceding webhook step, refresh the sheet headers, and then map the fields. That way the bulk write happens in one clean pass.