
01Who this is for
- Founders who run recurring campaigns need to prevent duplicate messages by toggling re entry options.
- Marketing teams that send nationwide emails rely on contact specific timezones to hit each inbox at the right hour.
- Sales managers handling multiple deals per contact use the multiple opportunities setting to run separate sequences for each pipeline stage.
02Workflow settings, explained
Workflow Settings sit in a dedicated tab inside the workflow builder. They govern how contacts move through the automation, when messages are sent, and which sender information is applied. Each setting applies to the entire workflow, not to individual steps.
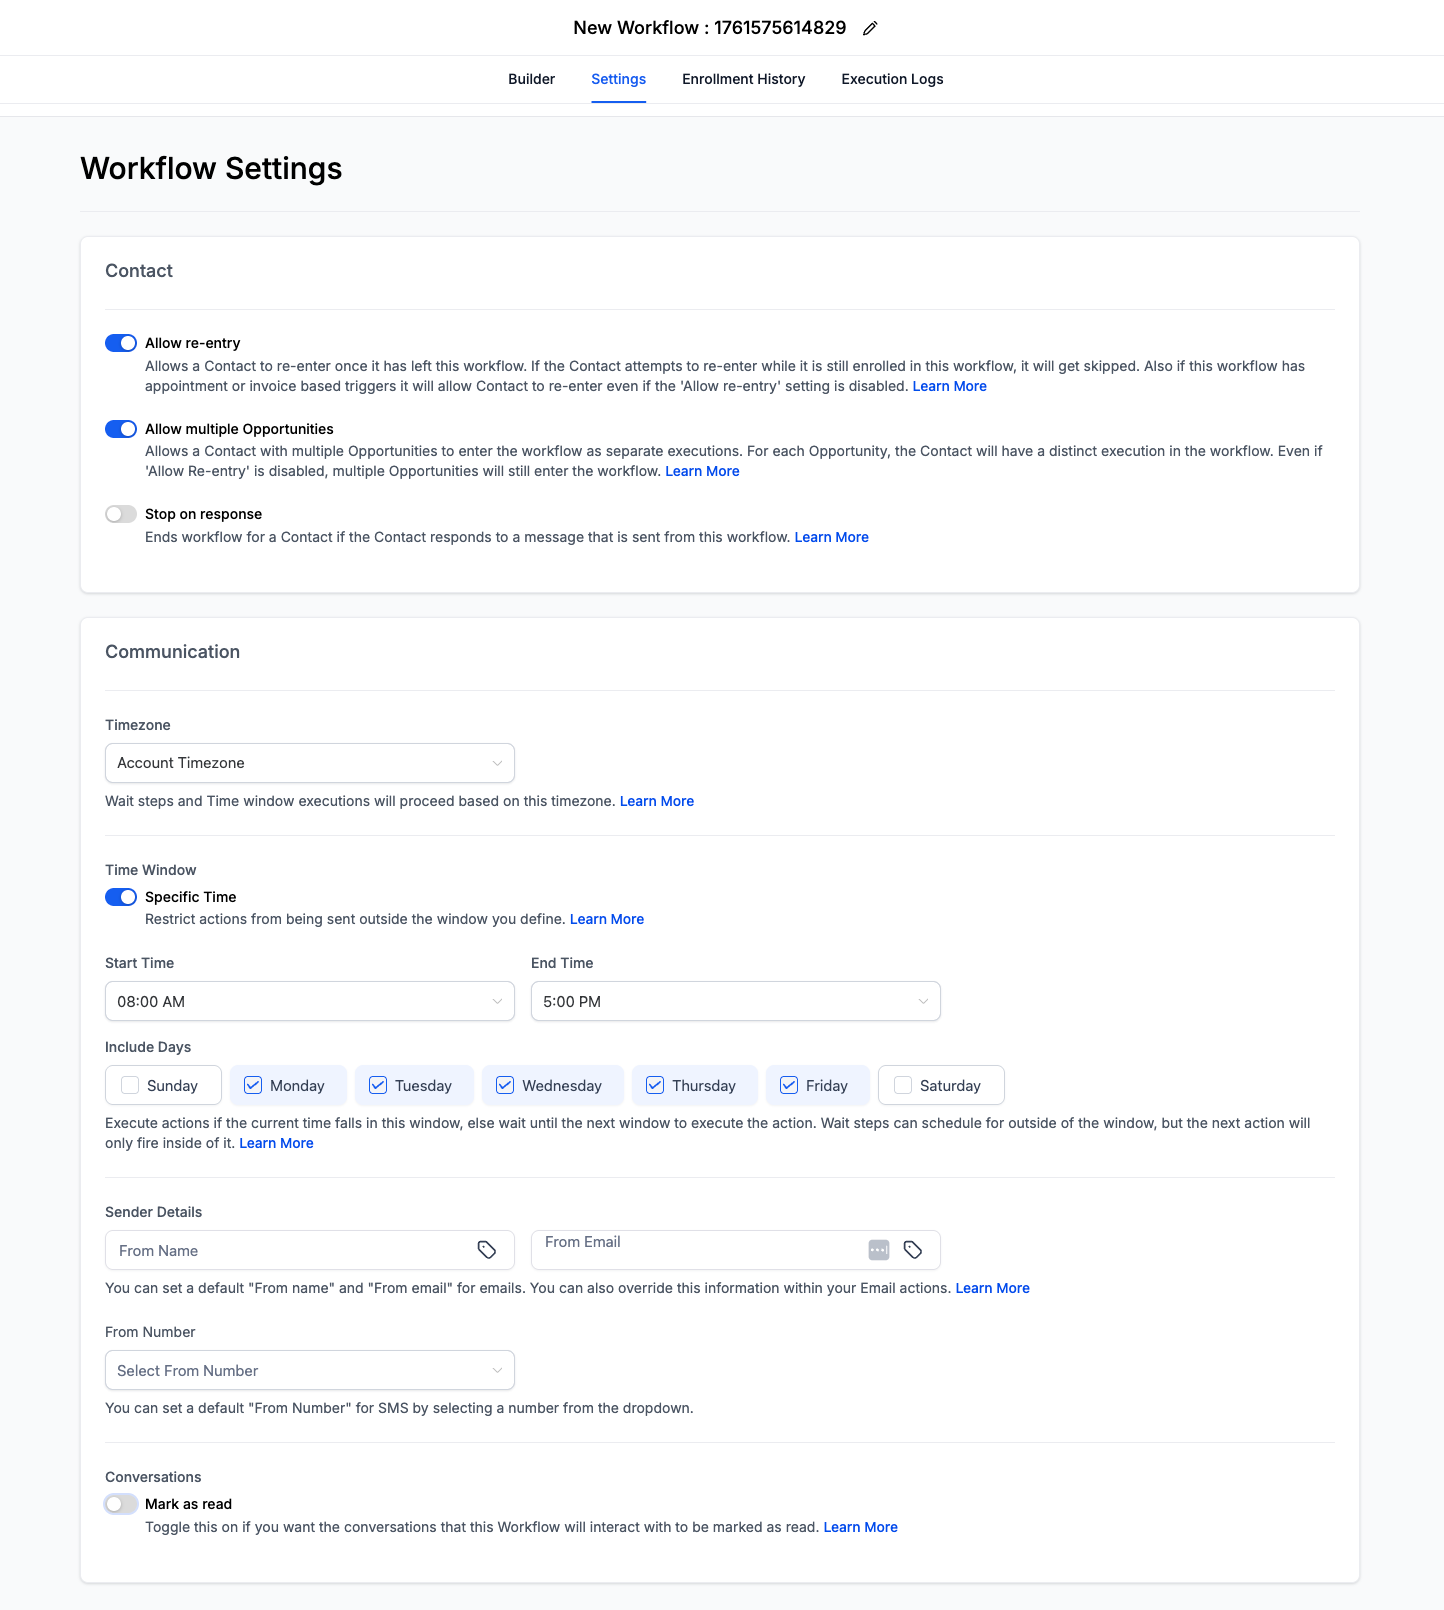
The settings group includes Contact Settings (re entry, multiple opportunities, stop on response), Communication Settings (timezone, time window, sender details, mark as read), and a FAQ section. Adjusting these options ensures consistent behavior, reduces duplicate outreach, respects contact availability, and keeps brand details uniform across all outgoing communications. The tab is accessed from the Automation area of the HighLevel dashboard.
03How businesses use workflow settings
- Dental practice. Enable "Allow Re entry" for appointment reminder workflows so patients receive a reminder each time they book a new visit. Set the Time Window to business hours to avoid night time calls.
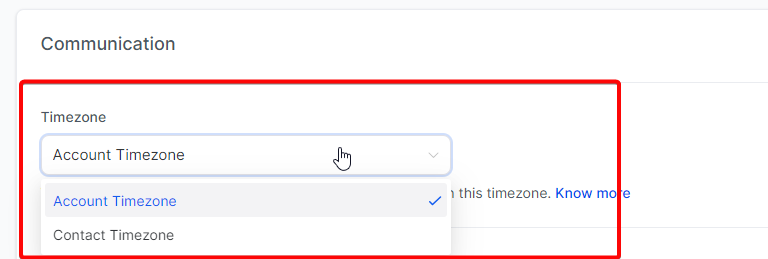
- Online course provider. Turn on "Allow multiple Opportunities" so each enrollment triggers its own welcome sequence. Choose "Contact Timezone" so emails arrive at 9 AM in each learner’s local time.
- Real estate agency. Activate "Stop on Response" so when a prospect replies to a property preview SMS, the automation halts and a human agent takes over. Configure the sender domain to use a dedicated email address for professional outreach.
04The numbers and rules that matter
- Allow multiple Opportunities toggle: Enabled allows a new workflow instance per opportunity; Disabled limits to the first opportunity that meets the trigger criteria.
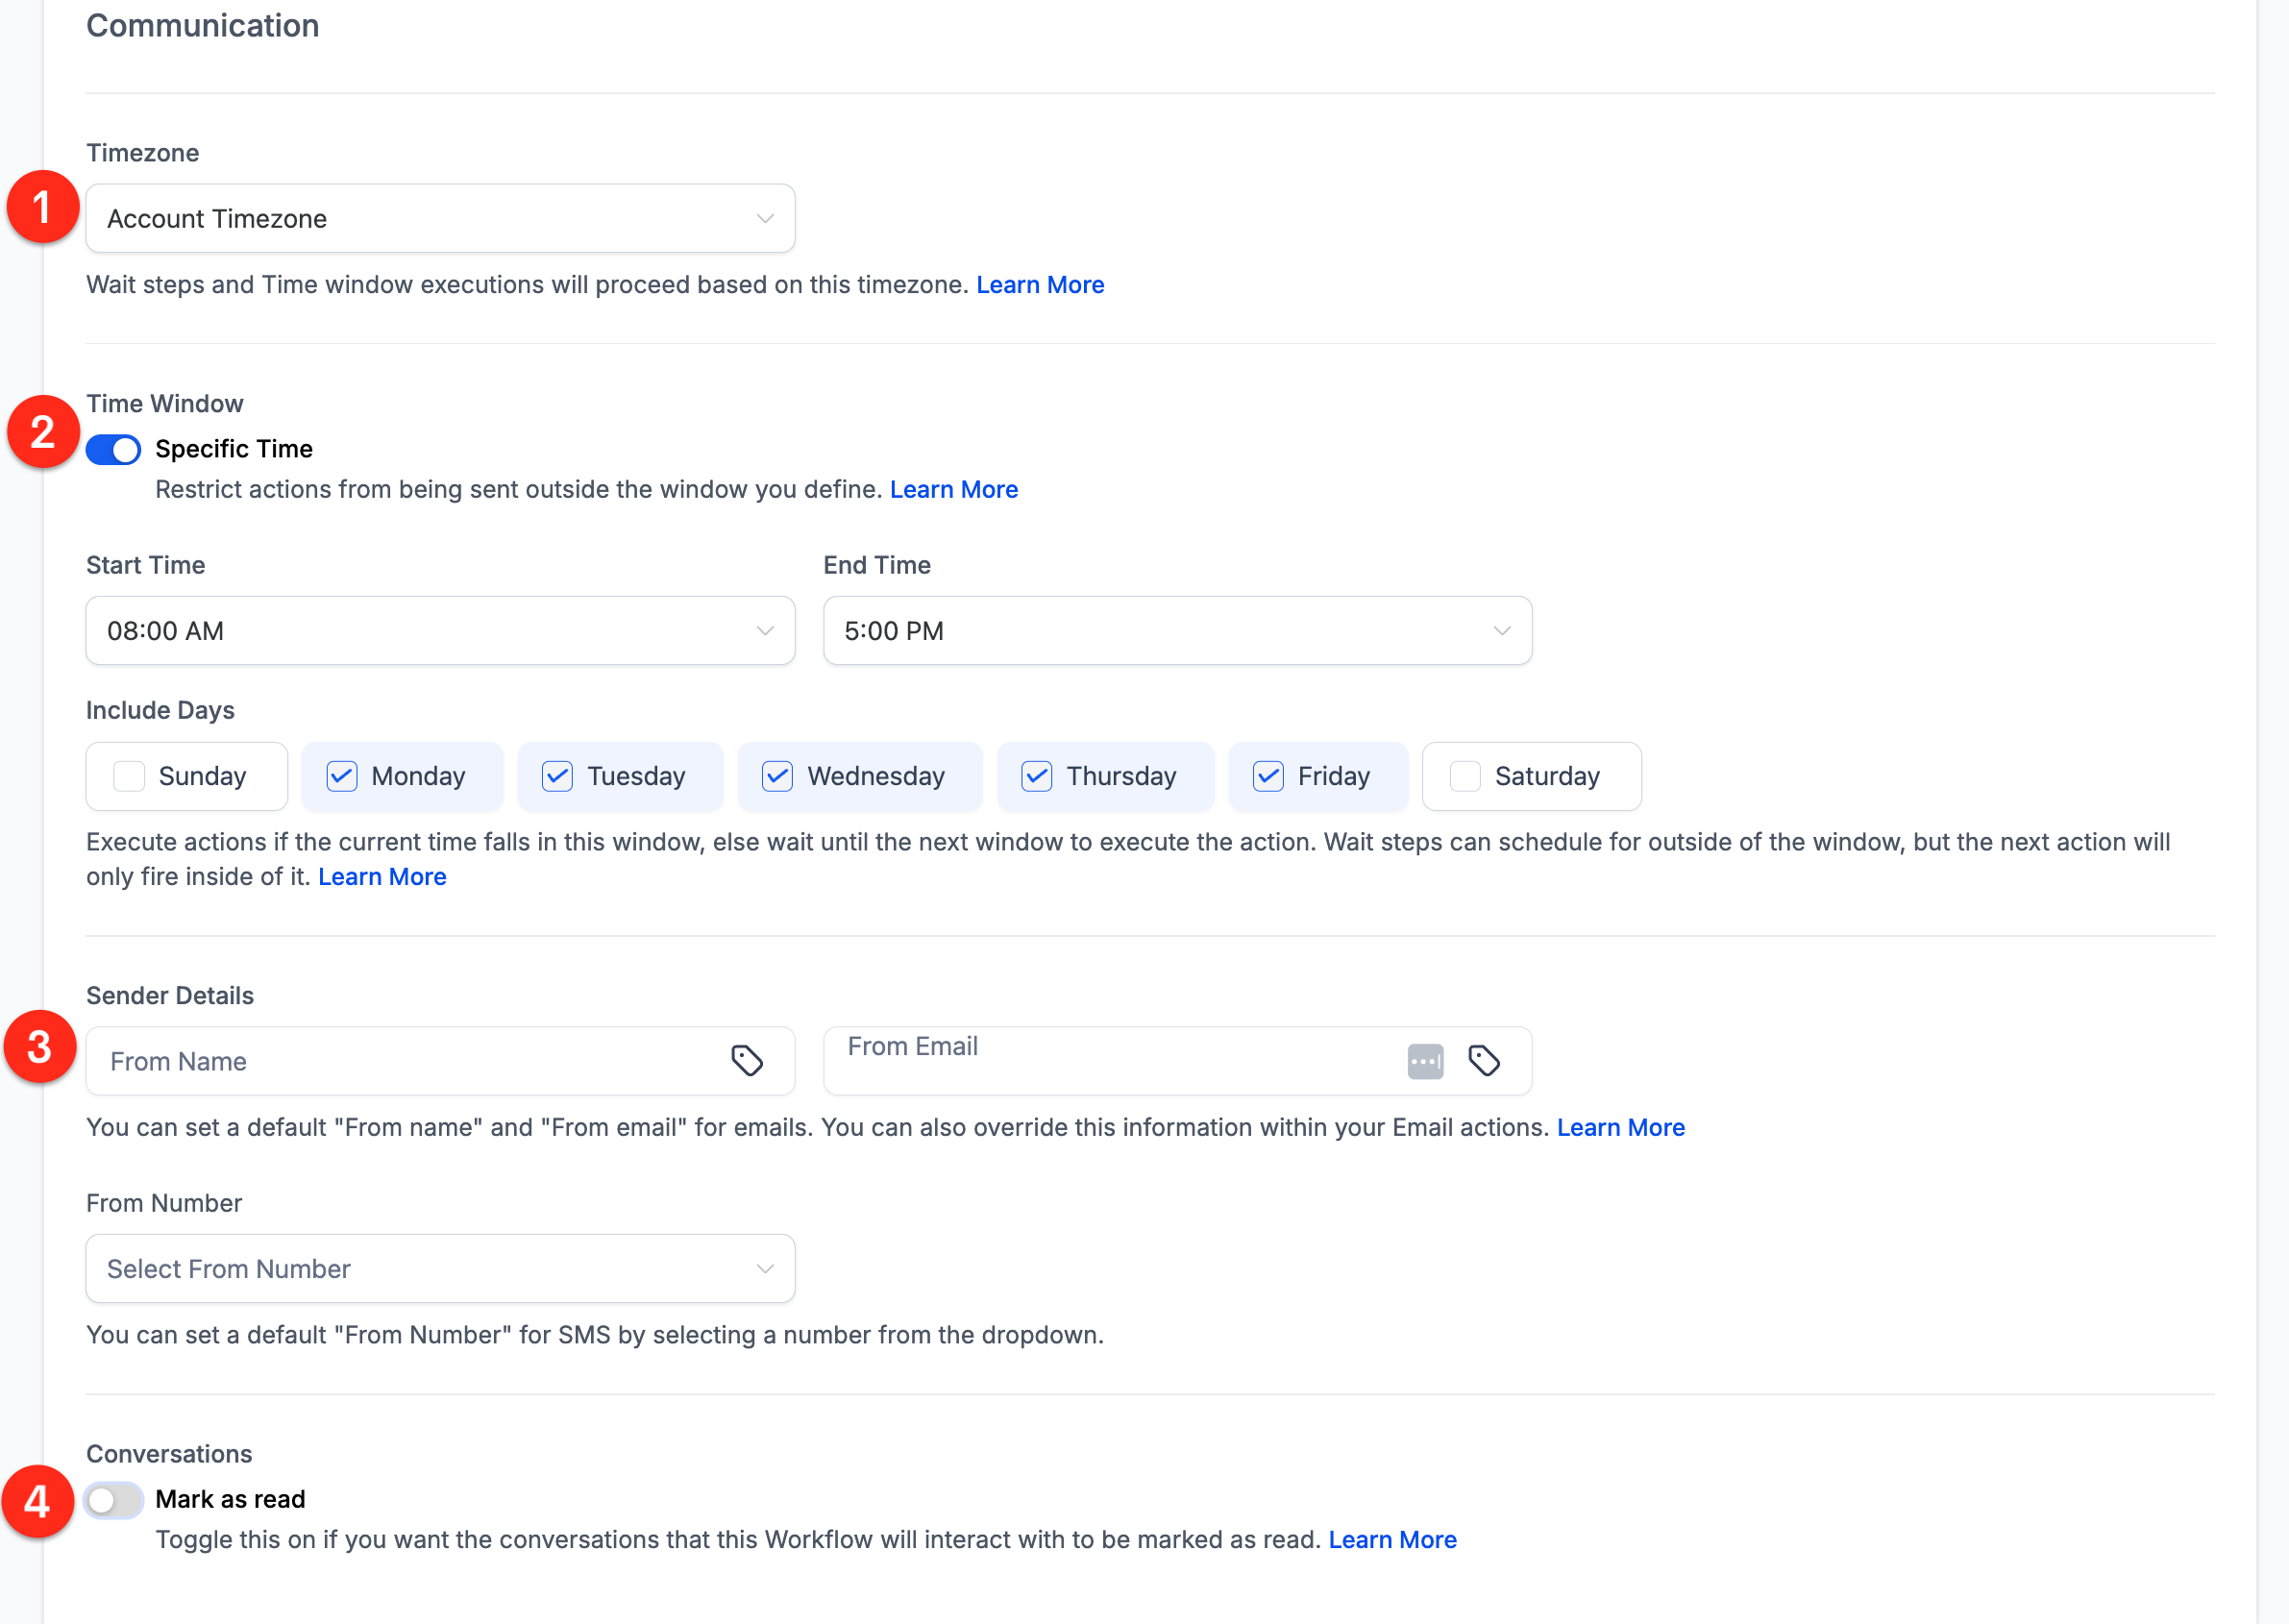
- Time Window: Start Time, End Time, Include Days; applies to communication actions.
05How to set up and use workflow settings in HighLevel
Access workflow settings
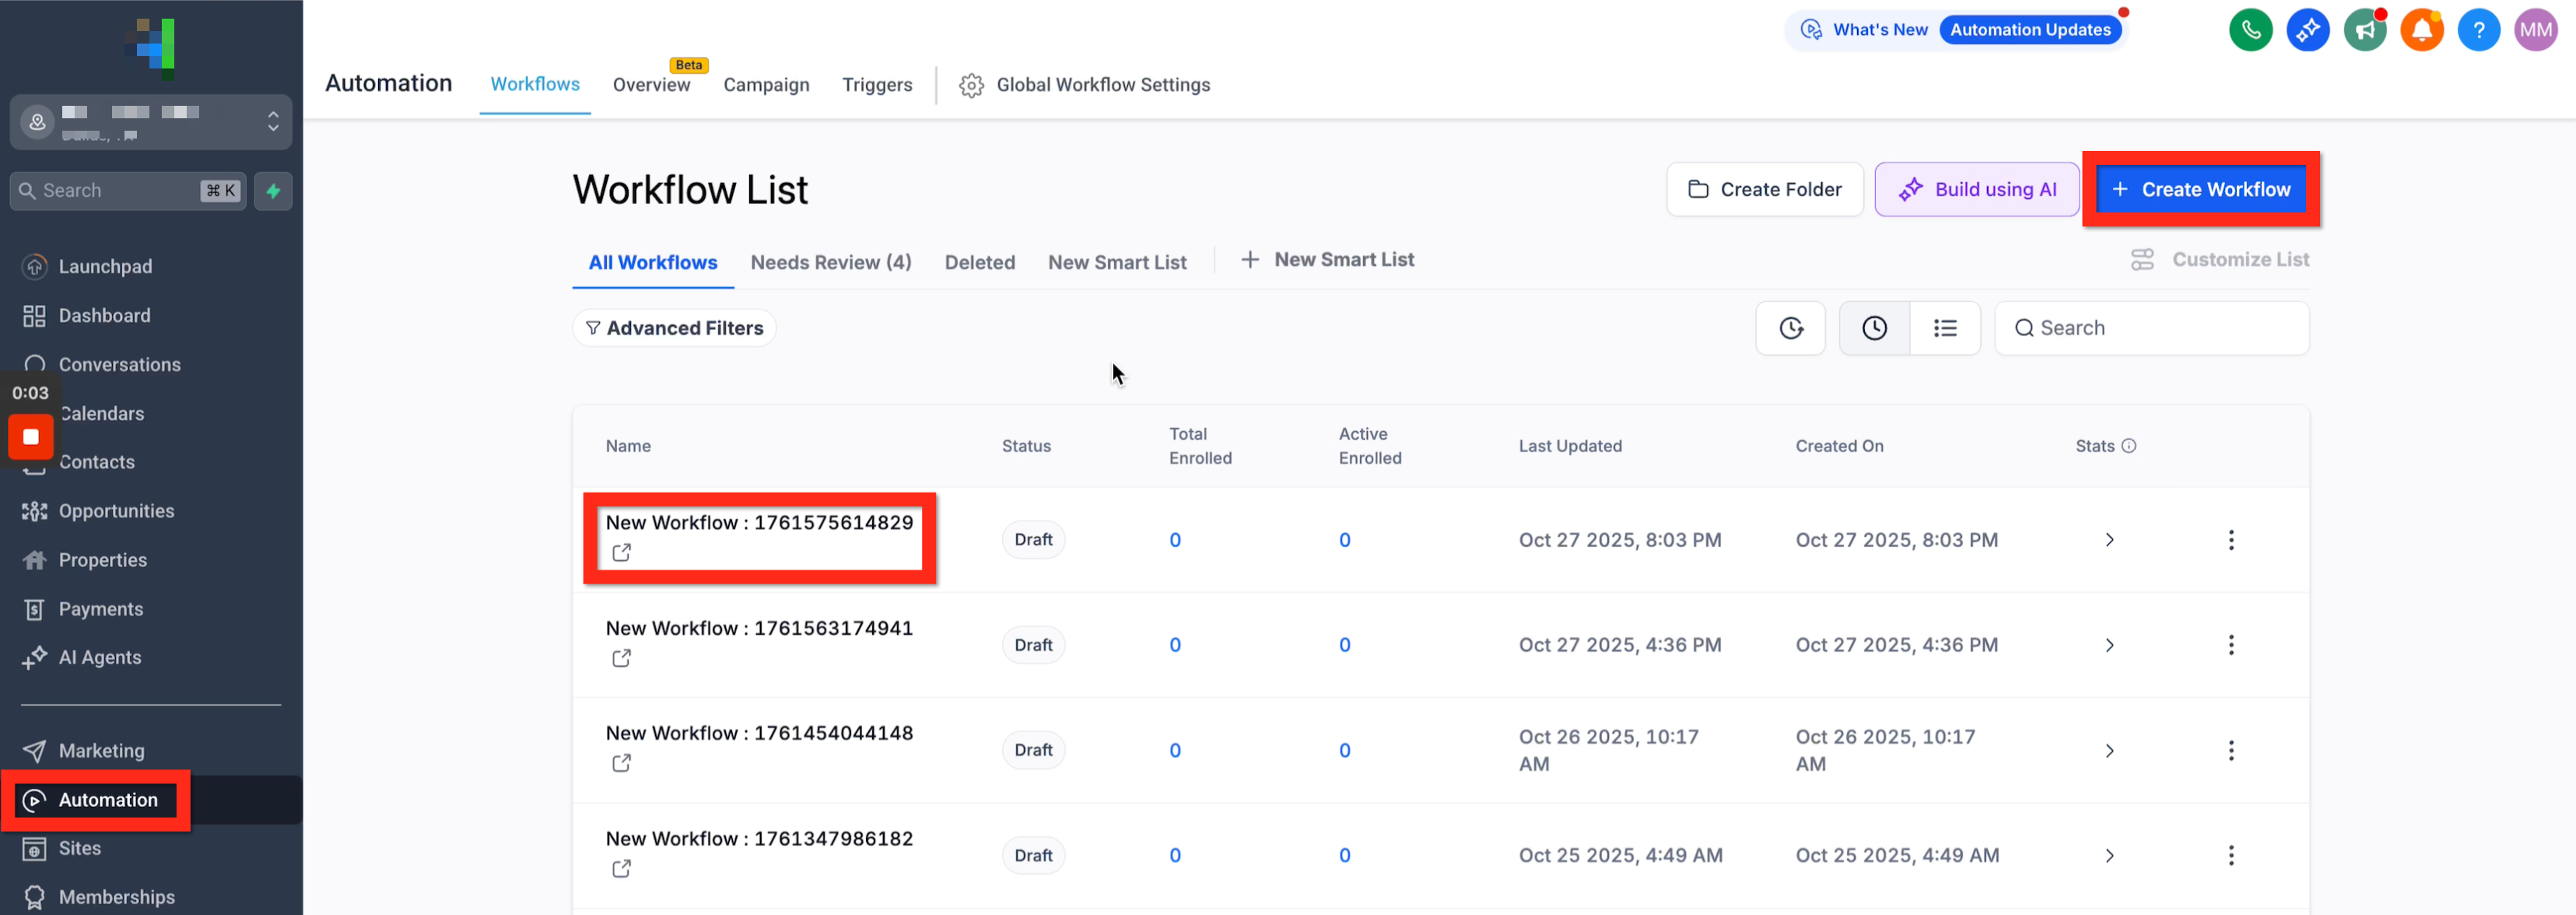
- Open the Automation section from the HighLevel dashboard.
- Select an existing workflow or create a new one.
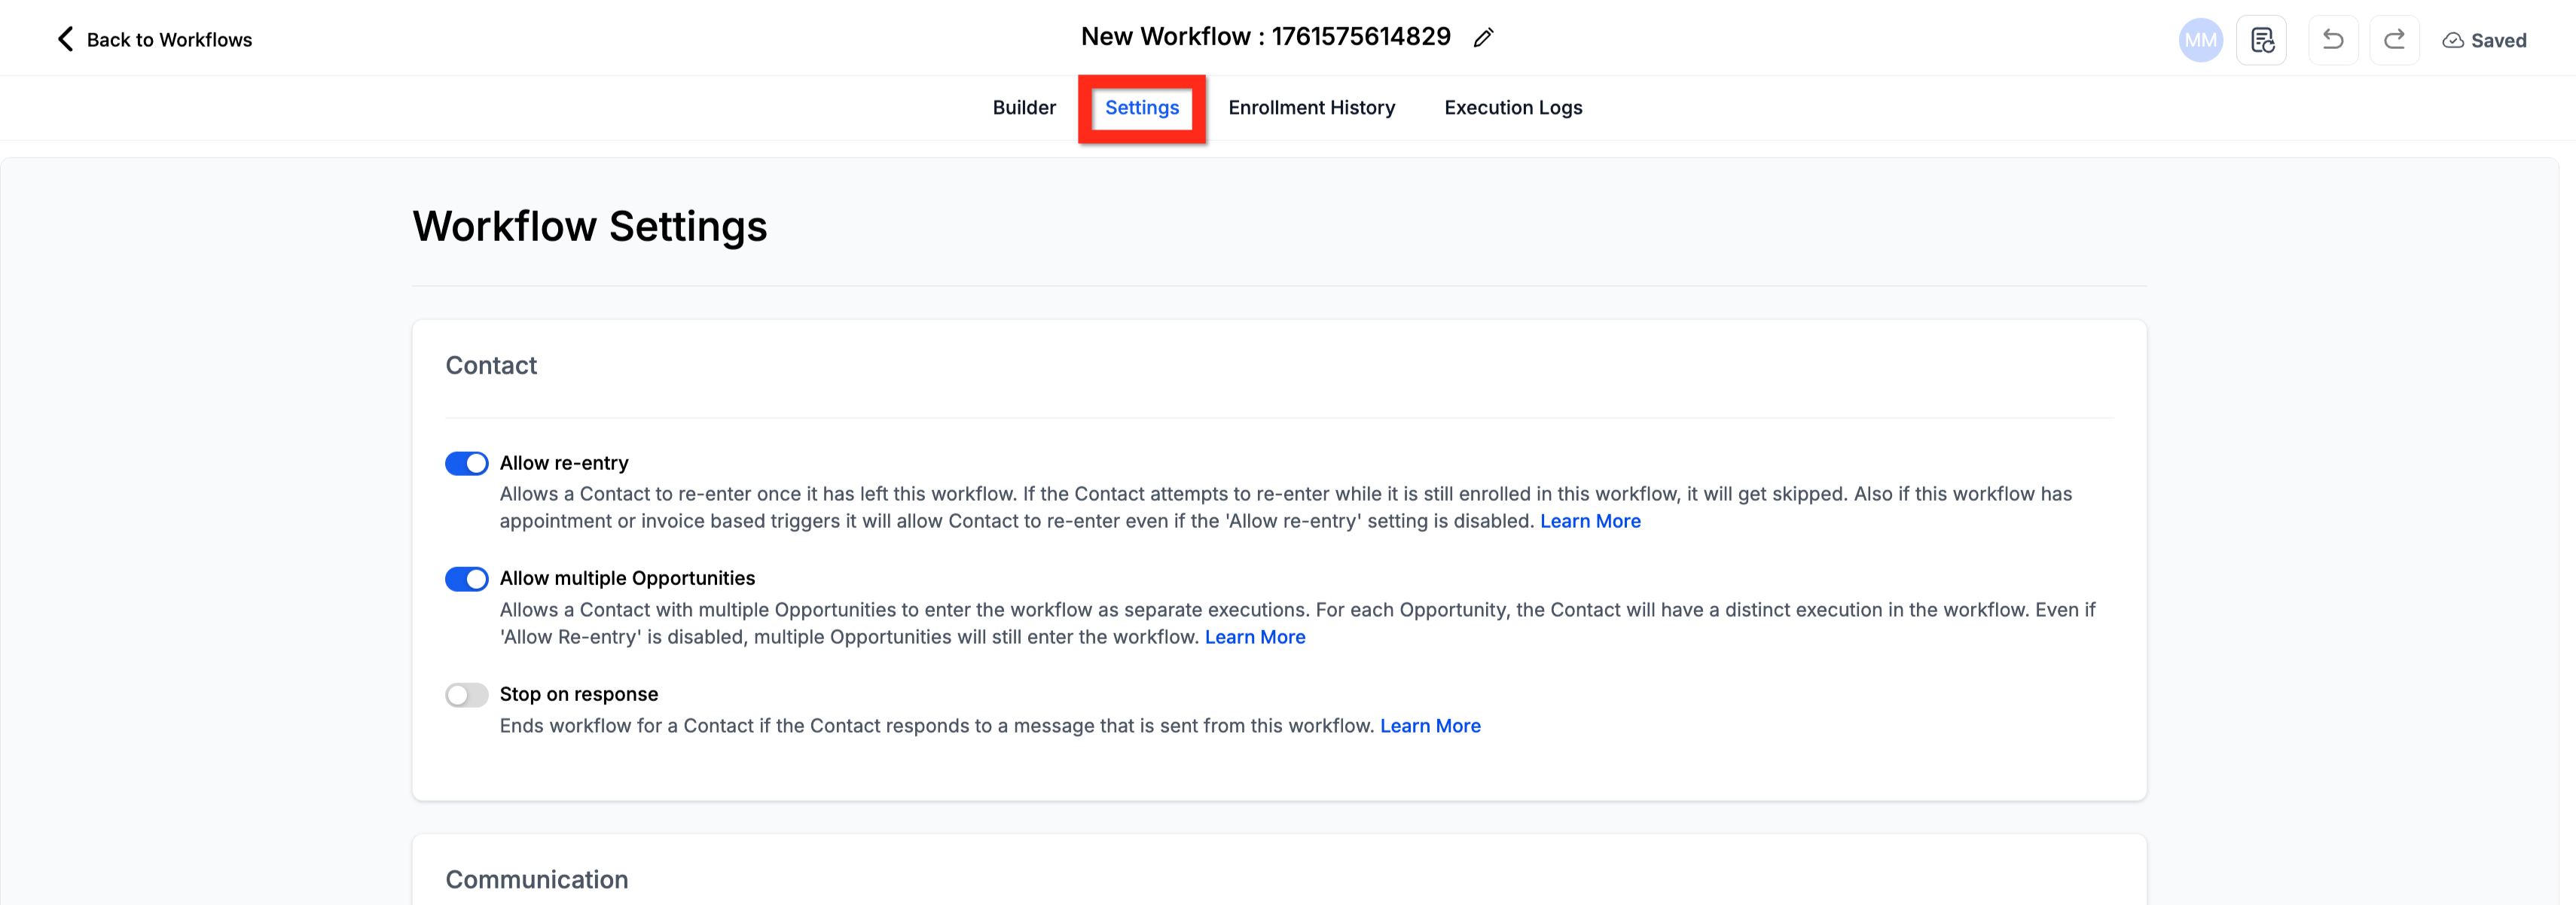
- Click the Settings tab at the top of the workflow builder.
06What it looks like in HighLevel
07Settings that matter
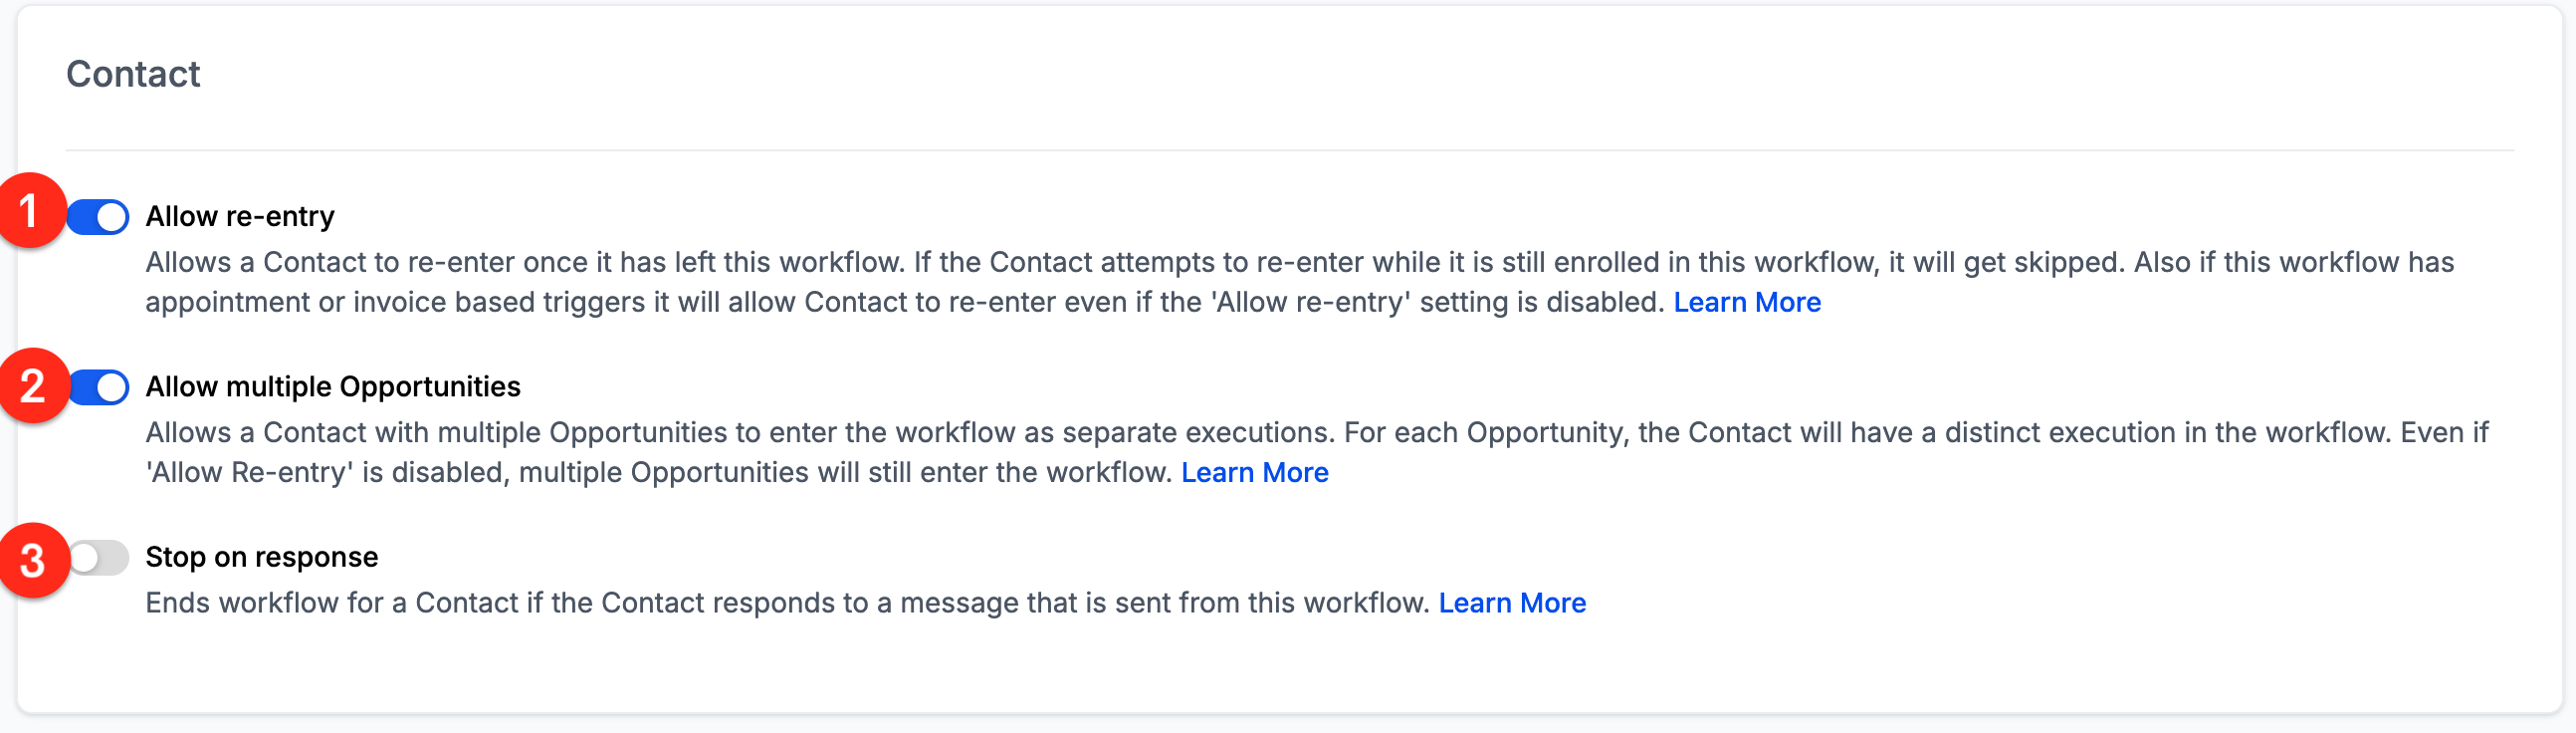
- Allow Re entry. Controls whether a contact can enter the same workflow more than once after completing it or being manually removed.
- Allow multiple Opportunities. Determines if each opportunity a contact has can start a separate instance of the workflow.
- Stop on Response. Automatically removes a contact from the workflow when they reply to any message sent by that workflow.
- Timezone. Sets the timezone used for all time based actions in the workflow, either the account’s default or each contact’s own timezone.
- Time Window. Limits when communication actions can run, based on a start time, end time, and selected days of the week.
- Sender Details. Defines default sender name, email address or prefix, and phone number for all email and SMS actions in the workflow, with optional dedicated sending domain.
- Conversations - Mark as Read. When enabled, any conversation generated by the workflow is automatically marked as read in the platform’s inbox.
08Things to know before you rely on it
- Workflows that use appointment or invoice triggers always allow re entry, regardless of the Allow Re entry toggle.
- For workflows created before the multiple opportunity feature, the default is disabled; new workflows default to enabled.
- Changing the account timezone does not affect contacts already running through a workflow; it only applies to new entries.
- Time Window affects only communication actions (email, SMS, call) and cannot be set differently for individual days within the same workflow.
- Selecting a specific sender domain shows a mismatch warning if the From Email address does not belong to that domain.
- Individual Send Email actions override the workflow level Sender Details, and dedicated domain email headers take precedence over workflow settings.
09If something goes wrong
- Sender Details will not save. Verify the From Email is a complete, valid address and matches the selected dedicated domain. Ensure the correct domain is chosen if multiple are configured, and check for any action level overrides that may conflict.
- Contact stuck in a Wait action. Review the Wait action’s behavior and the Execution Logs to see why the contact is not progressing. Remember that edits to a Wait step do not affect contacts already paused in that step.
10How it connects to the rest of HighLevel
- Getting started with HighLevel workflows Workflow basics
- How to add a workflow action step by step Add actions
- HighLevel pricing and plans Pricing
- Start a 30 day HighLevel trial Free trial
- The HighLevel Founder Plan Founder Plan
Michael's take

Skipping workflow settings can leave your automations sending duplicate messages, hitting contacts at odd hours, or breaking brand consistency. Those hidden pitfalls can quickly turn a smooth campaign into a headache.
When you get the settings right, the workflow runs like a well tuned clock: Contacts get only the messages they need, at the right time, from the right sender, and stop automatically once they reply. That level of control is what lets a small team behave like a large, organized operation.