
01Who this is for
- Founders who design complex automations need visual separation to keep workflows understandable.
- Marketing teams that run multiple nurture tracks benefit from isolated clusters that can be tested without affecting other paths.
- Operations managers can add or remove entire branches without redrawing the main flow, simplifying maintenance.
02Delinked nodes, explained
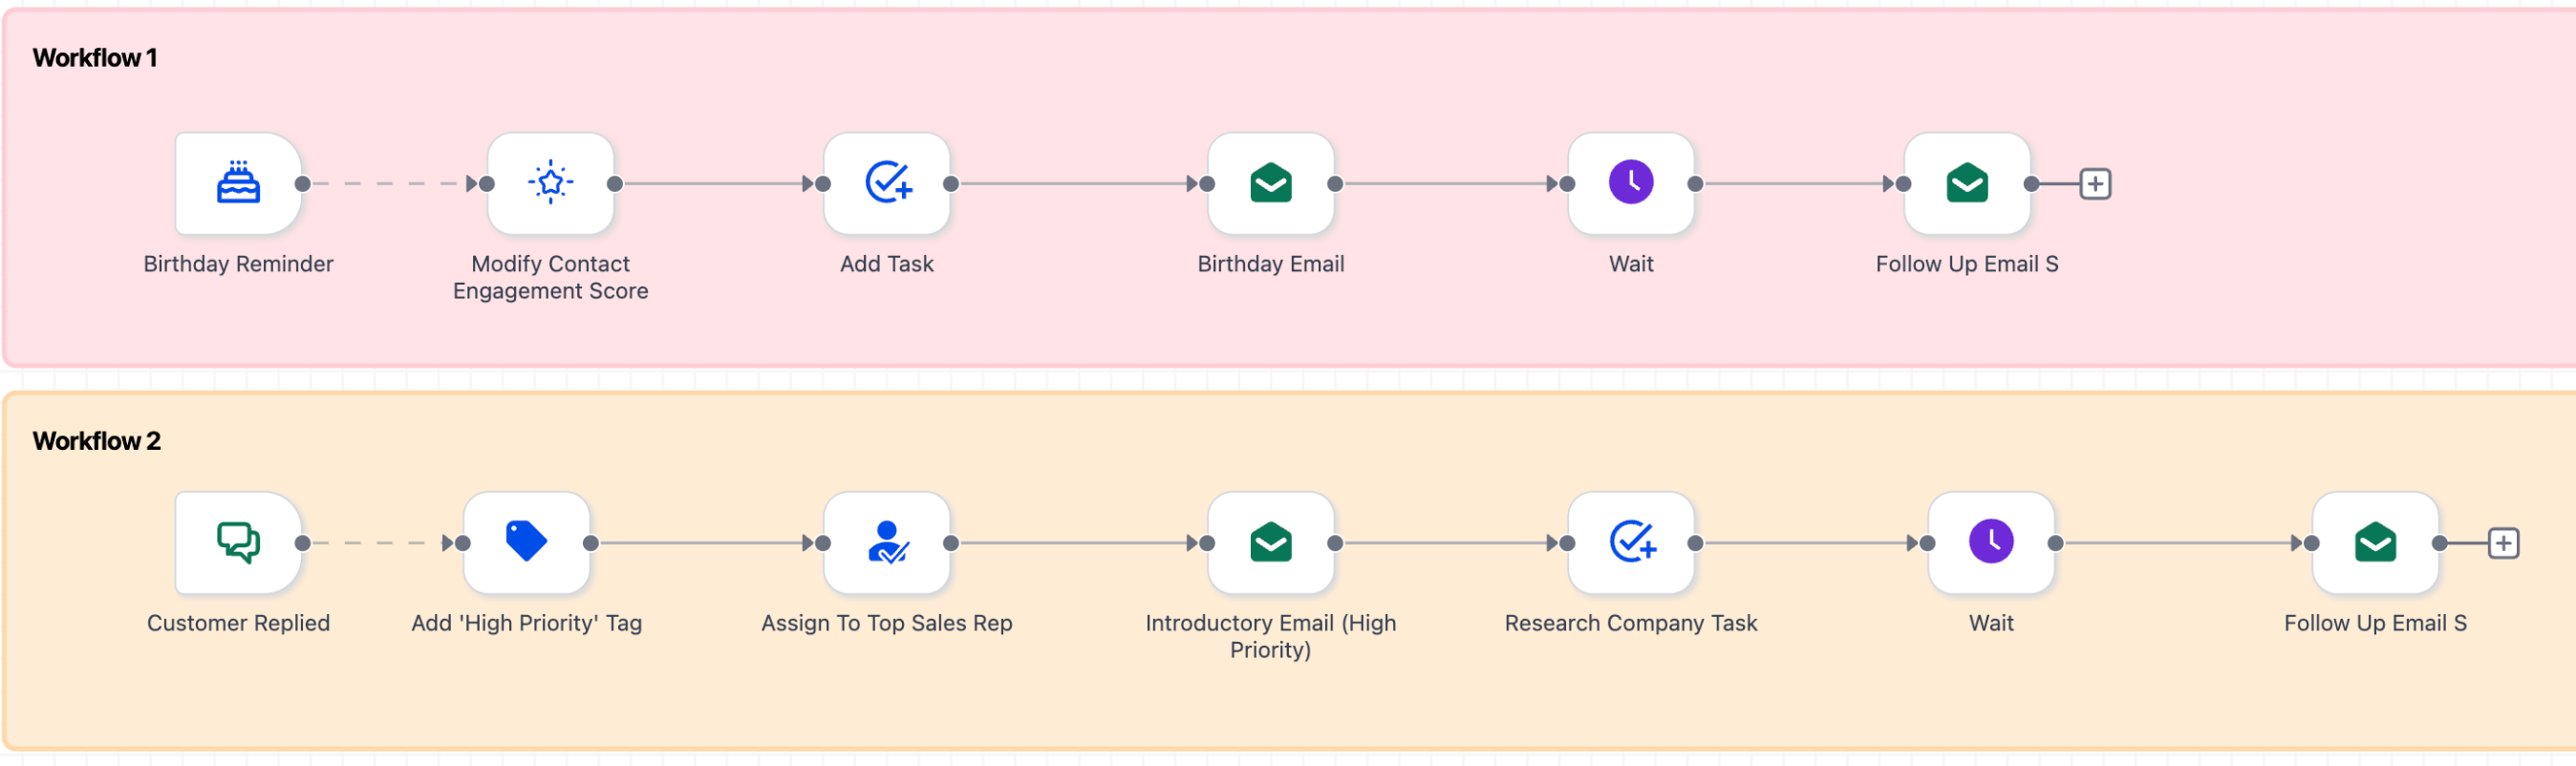
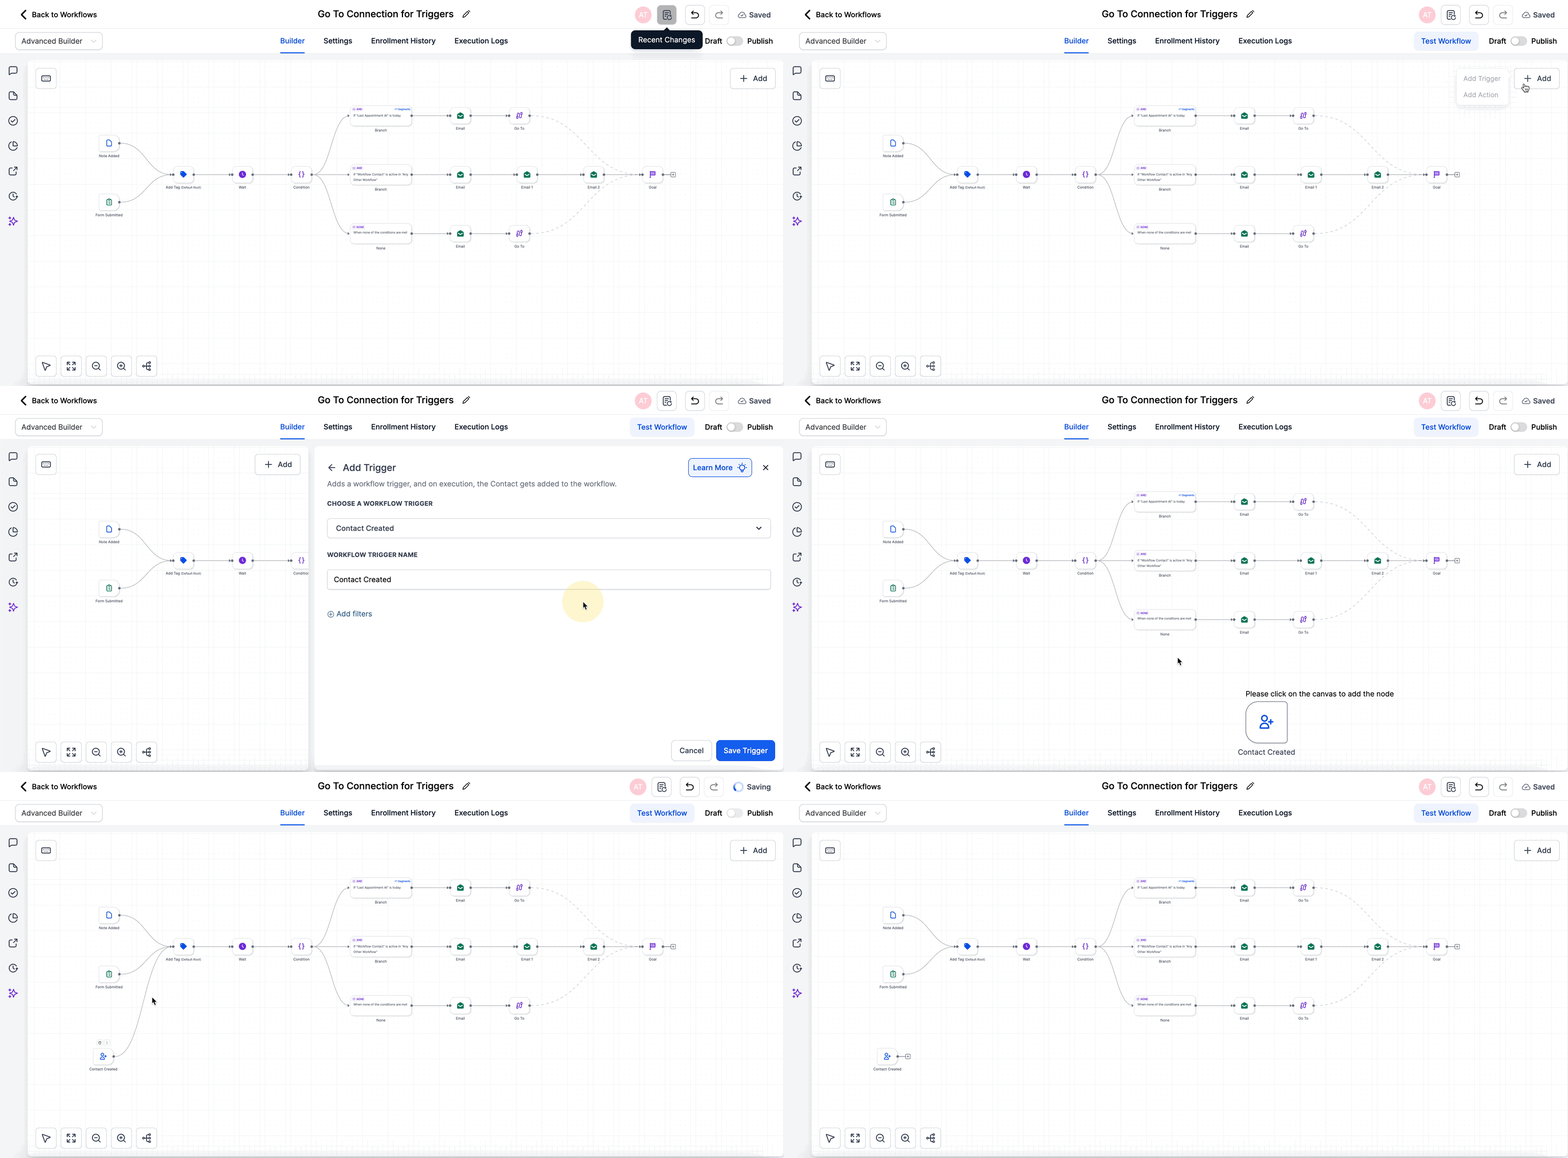
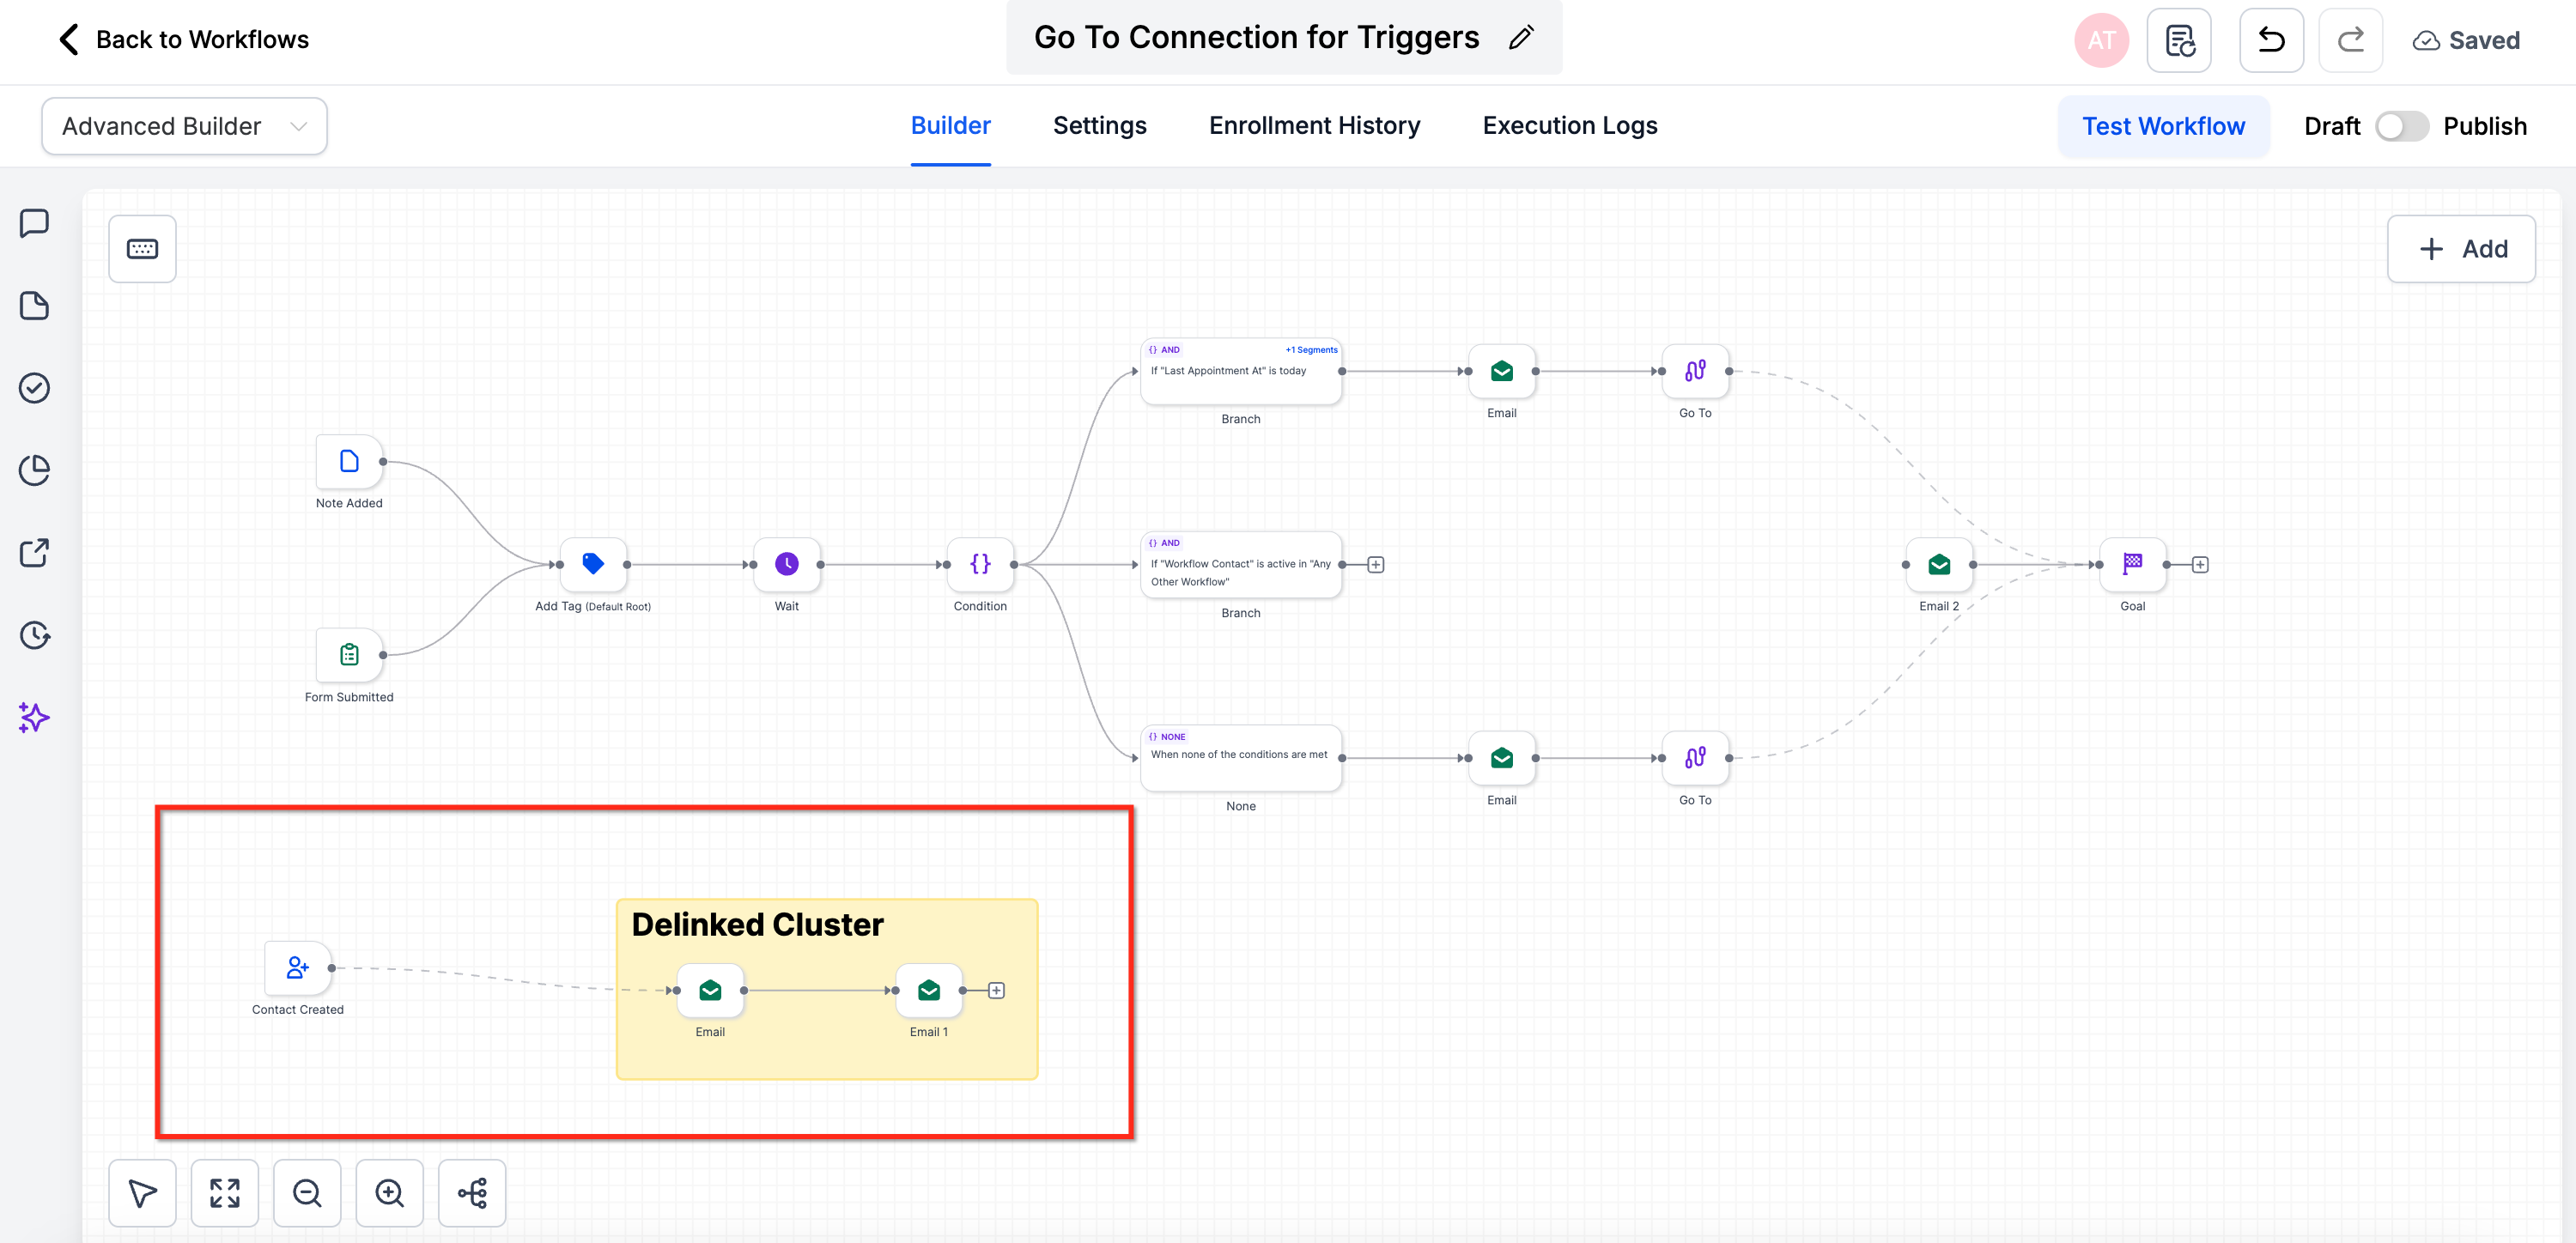
Delinked nodes are groups of actions arranged as independent clusters on the workflow canvas. They do not execute on their own; a trigger or another node must point to the first action in the cluster using a dashed Go To connector. Once the connection is in place, the cluster runs within the same workflow context as any other step.
These clusters can be placed anywhere on the canvas, allowing side by side design of parallel paths. The visual layout stays readable because each branch is separate, and you can label them with sticky notes or colors. The feature is available only in the Advanced Builder, so you must be working in that mode to use it.
When a contact follows a route, only one branch runs at a time. If you need to merge branches later, you can draw a standard connection from any action in one cluster to the start of another. Removing the Go To link deactivates the branch until it is re connected.
03How businesses use delinked nodes
- Digital agency. The agency creates a delinked cluster for each client onboarding stage, linking the main trigger to the appropriate cluster with a Go To connector. Team members label each cluster with sticky notes to keep the process clear for new staff.
- Ecommerce store. The store builds separate clusters for cart abandonment, post purchase upsell, and win back campaigns. Each cluster is started from a distinct trigger, allowing the owner to test each path without disturbing the others.
- Co working space. The space sets up a delinked cluster for trial members and another for full time members. A single trigger routes leads to the appropriate cluster, making the workflow easy to modify as membership rules change.
04The numbers and rules that matter
- A contact will not run through multiple branches concurrently in the same workflow (single enrollment per contact).
05Before you start
- You must be using the Advanced Builder, as delinked nodes are not available in the Standard Builder.
06How to set up and use delinked nodes in HighLevel
Set up delinked nodes in a workflow
- Select the trigger you want to use on the canvas.
- Drag the dashed Go To connector from that trigger to the first action of the cluster you wish to start.
- Optionally add sticky notes or color labels to identify the cluster for teammates.
- Save the workflow and publish it to activate the new branch.
07What it looks like in HighLevel
08Things to know before you rely on it
- Delinked nodes are exclusive to the Advanced Builder.
- A contact can only be enrolled in one branch at a time within the same workflow.
- A cluster will not run unless a trigger or another node is connected to its first action.
- Switching back to the Standard Builder requires removing all delinked nodes and other Advanced only features.
09How it connects to the rest of HighLevel
- Get started with workflow basics before adding delinked nodes. Workflow basics guide
- Use the AI Builder to quickly generate actions for a new cluster. Workflow AI Builder
- Check plan eligibility for the Advanced Builder and other premium features. Pricing and plans
Michael's take

Delinked nodes are a niche feature; skip them if you never need parallel or side by side branches.
If you do need them, start by labeling each cluster with sticky notes so teammates can fast see the purpose of each mini flow.