
01Who this is for
- Sales managers who need contacts to flow from lead capture into a dedicated nurturing workflow, reducing manual handoffs.
- Service appointment coordinators who want booked clients to enter a follow up sequence without extra steps.
- Marketing teams that require consistent data when moving prospects between campaign automations.
02Add to Workflow action, explained
The Add to Workflow action is an automation step that places a contact into a different workflow chosen by the user. It can be added anywhere inside a workflow builder and runs when the surrounding automation reaches that point. When enabled, the optional Pass Input Trigger Parameters option copies the original trigger’s payload, such as appointment details or form fields, into the receiving workflow, allowing downstream actions to use that data.
The action lives within the workflow builder under the list of available actions. After selecting it, users give the step a name, pick the target workflow, and optionally toggle the data passing feature. Saving the step stores the configuration, and the workflow can be tested before being published for real contacts.
03How businesses use add to Workflow action
- Dental practice. After a patient books an appointment, the practice adds the contact to a "Post Visit Follow Up" workflow. The optional data pass brings the appointment date into reminder emails, ensuring the messages reference the correct visit.
- Real estate agency. When a lead completes a property inquiry form, the agency adds the lead to a "Buyer Nurture" workflow. Form submission fields are passed forward, allowing personalized listings to be sent without recreating the data.
- SaaS startup. A trial signup triggers an automation that adds the new user to an "Onboarding" workflow. The original signup details travel with the contact, so welcome emails can include the user's name and trial start date.
04How to set up and use add to Workflow action in HighLevel
Set up Add to Workflow action
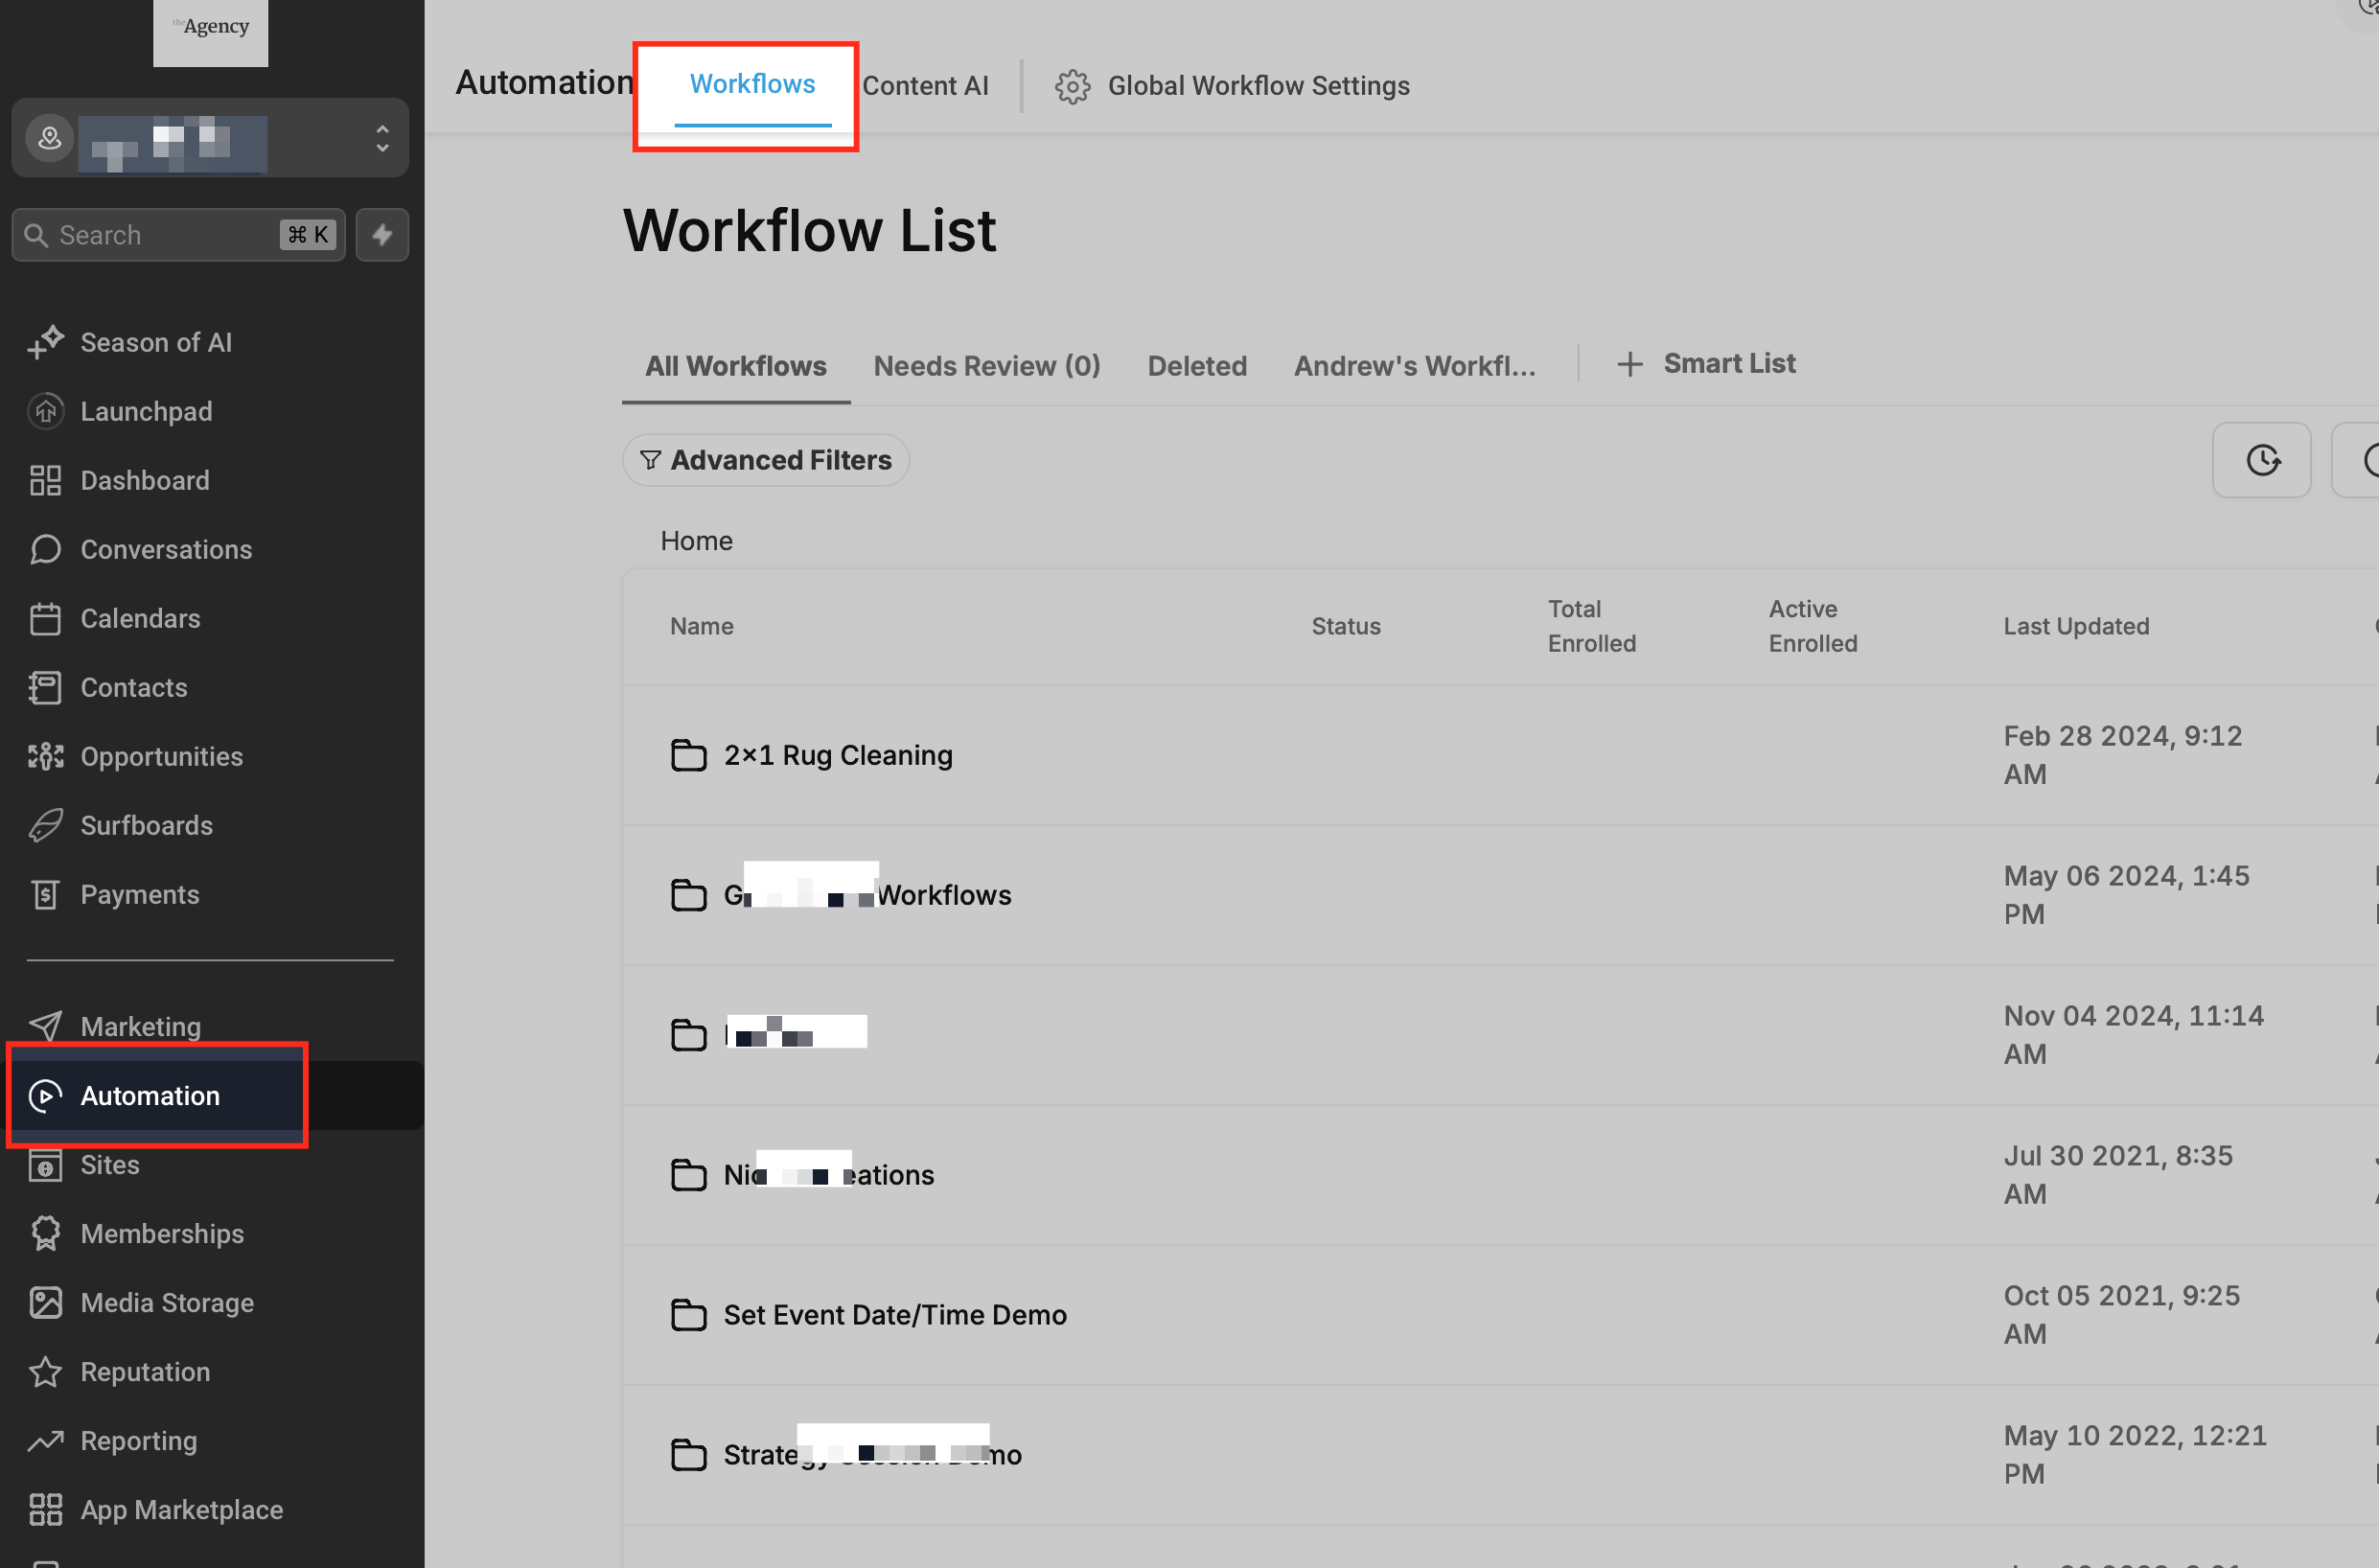
- Open the Automation section and select the Workflows menu.
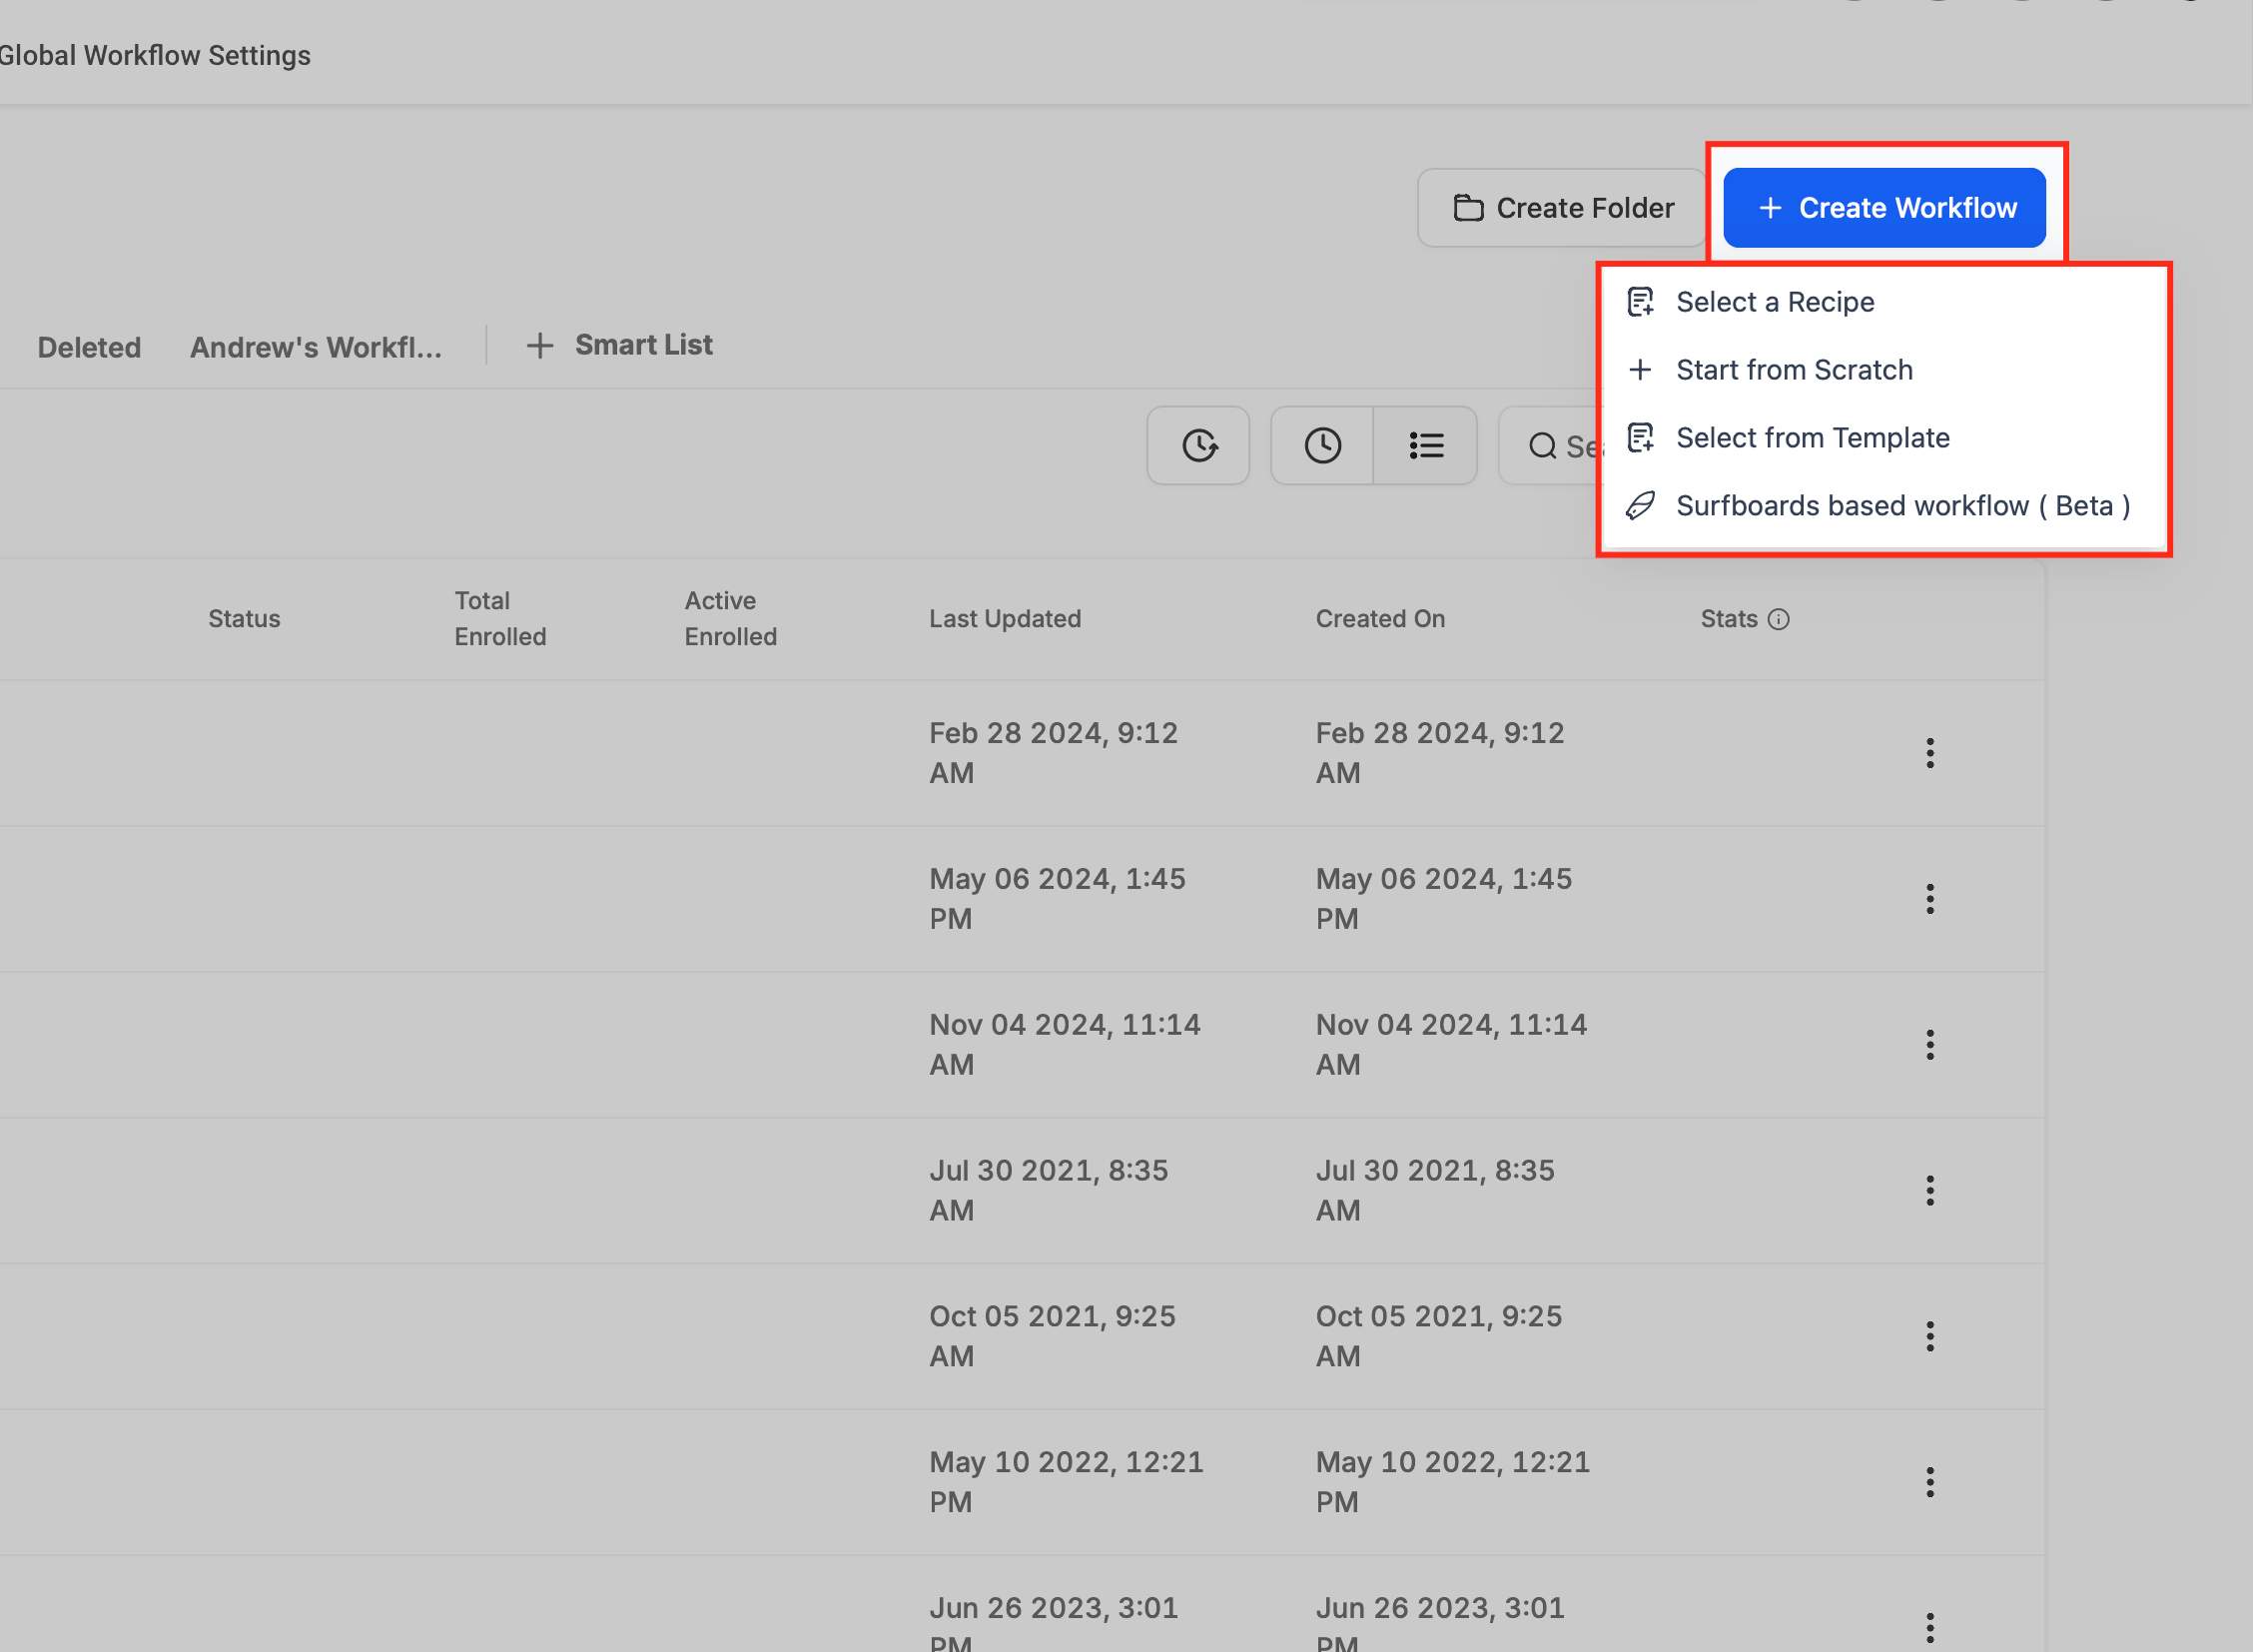
- Click the + Create Workflow button at the top right corner.
- Choose the + Start from Scratch option from the dropdown.
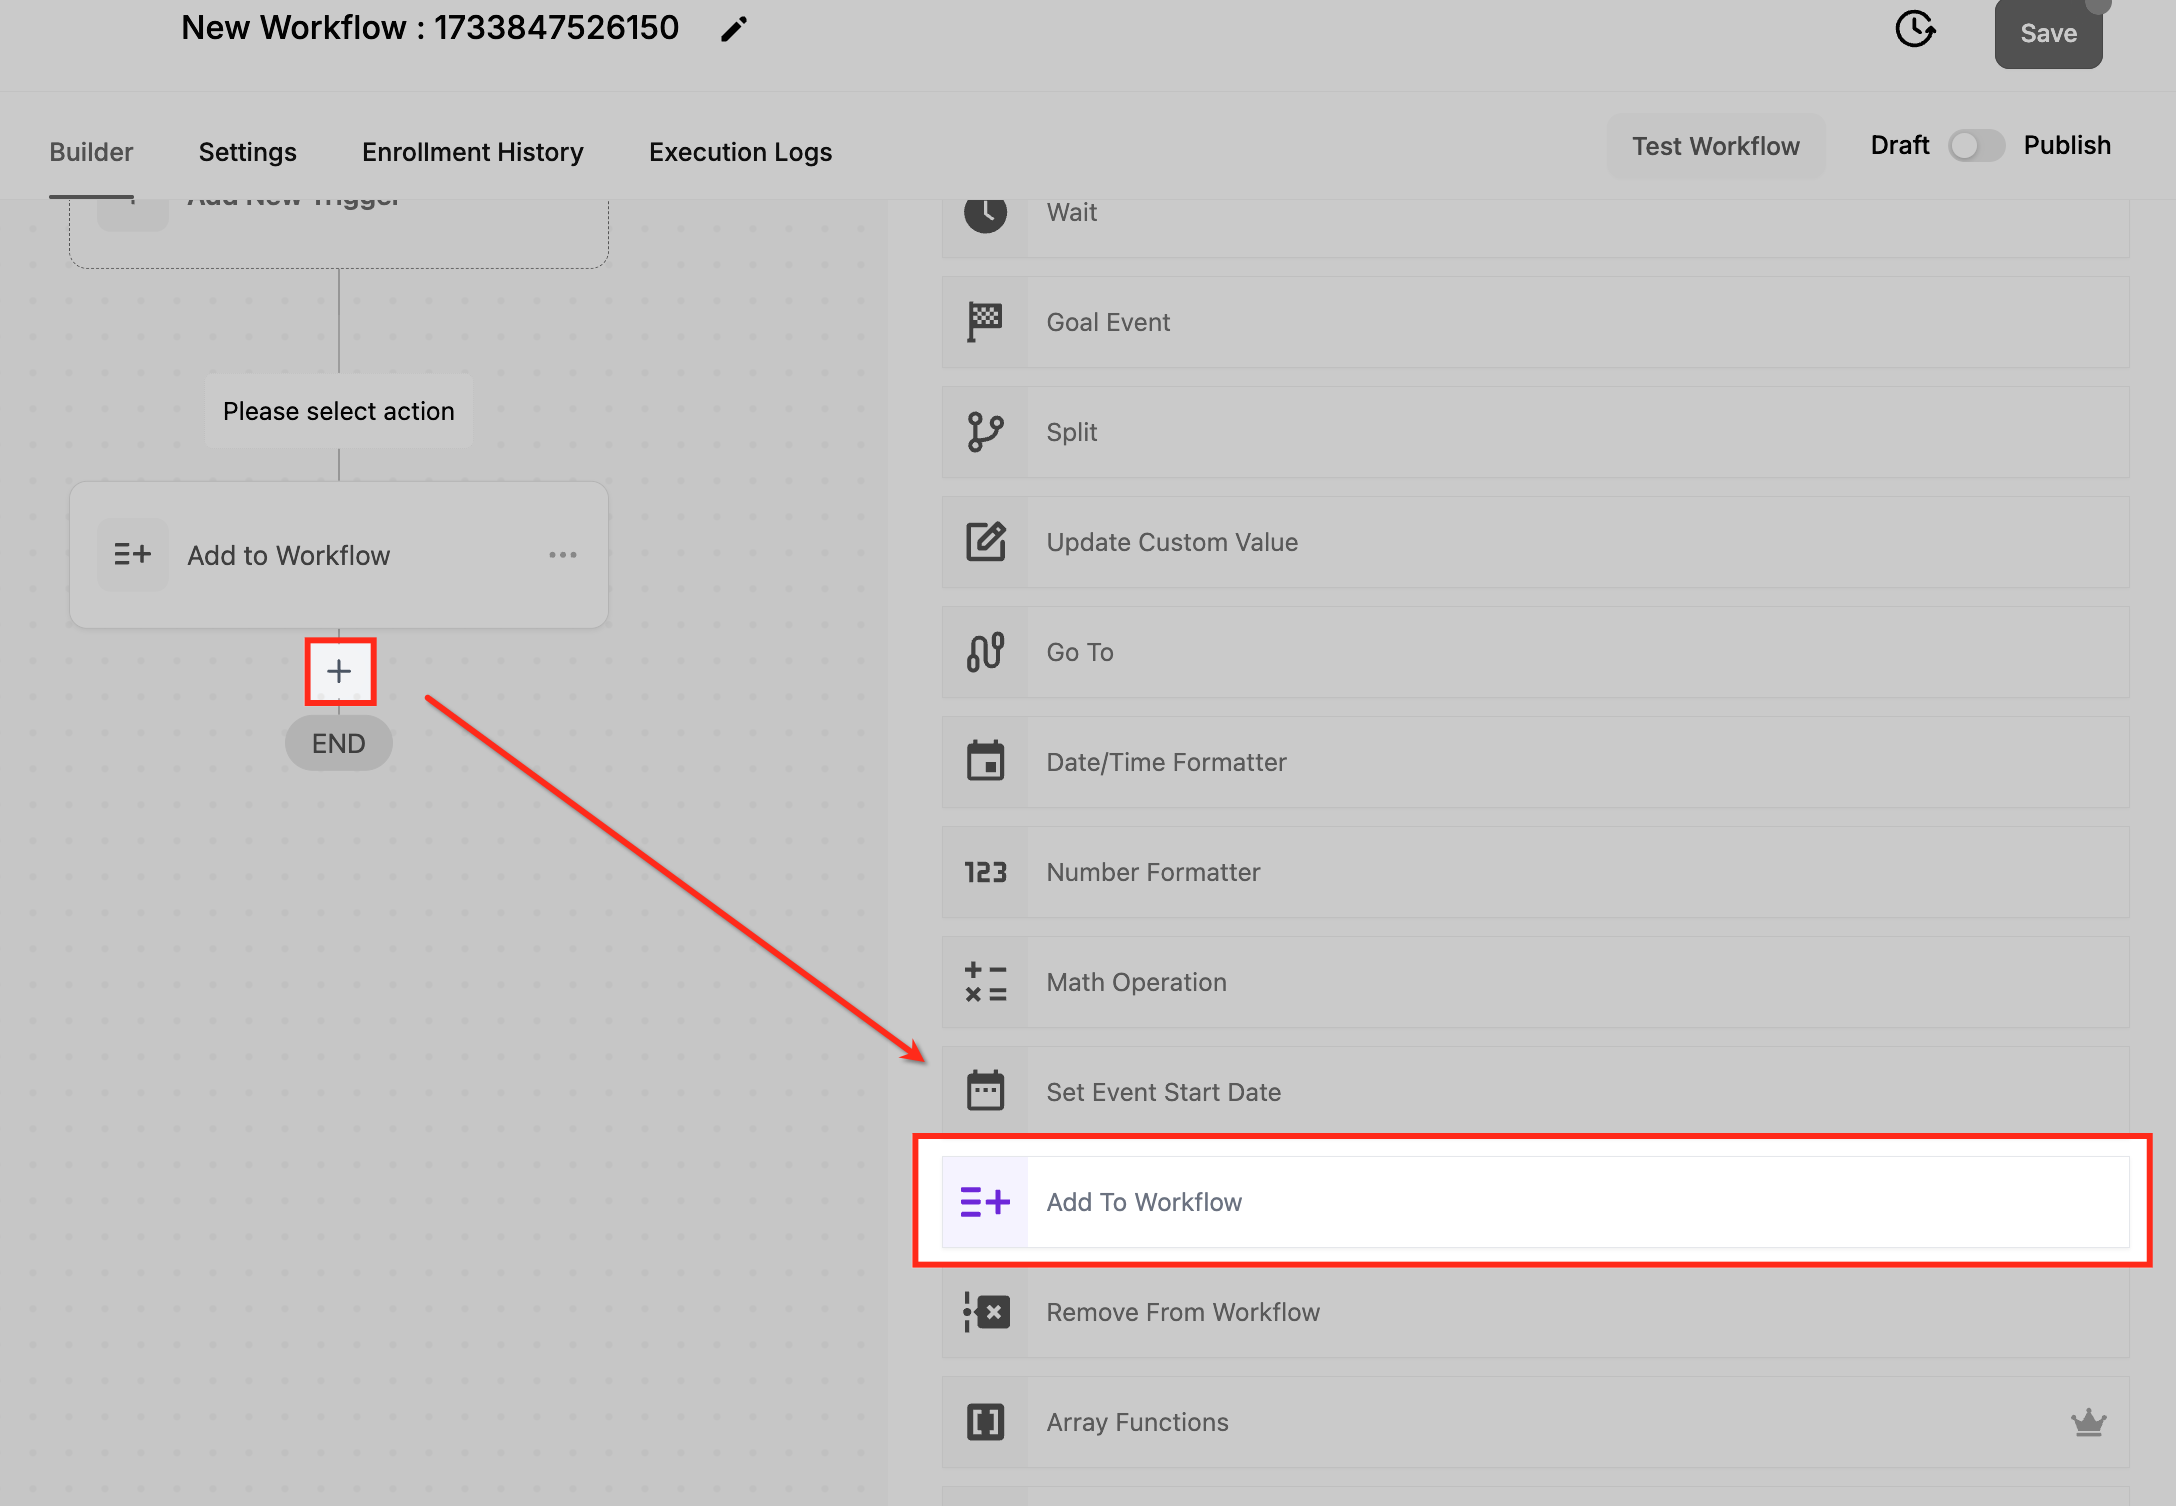
- Inside the workflow builder, click the + button to open the actions list.
- Scroll down and click the Add to Workflow option.
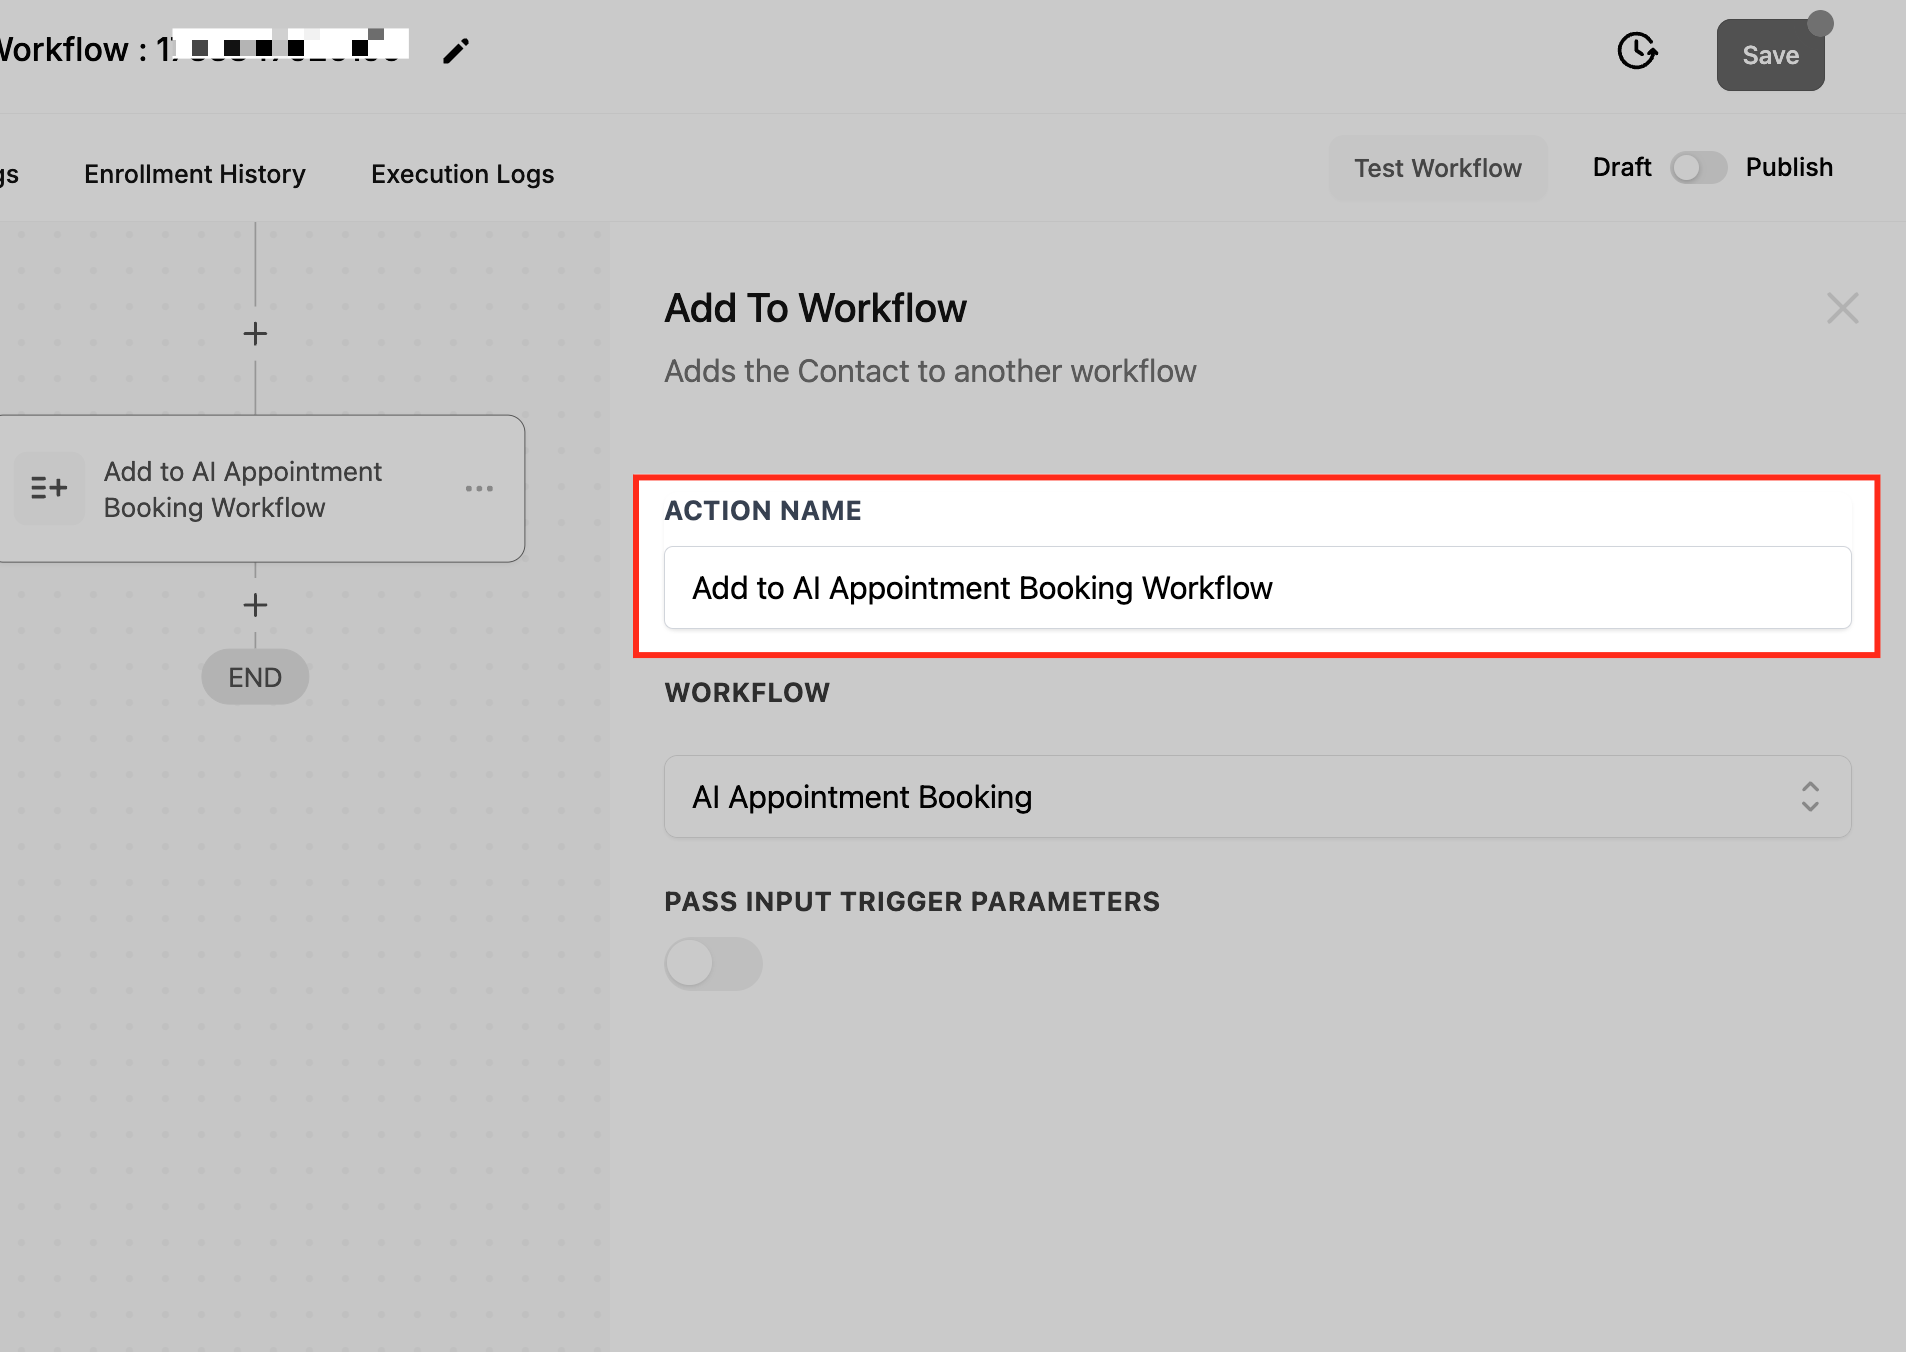
- Enter a descriptive name for the action.
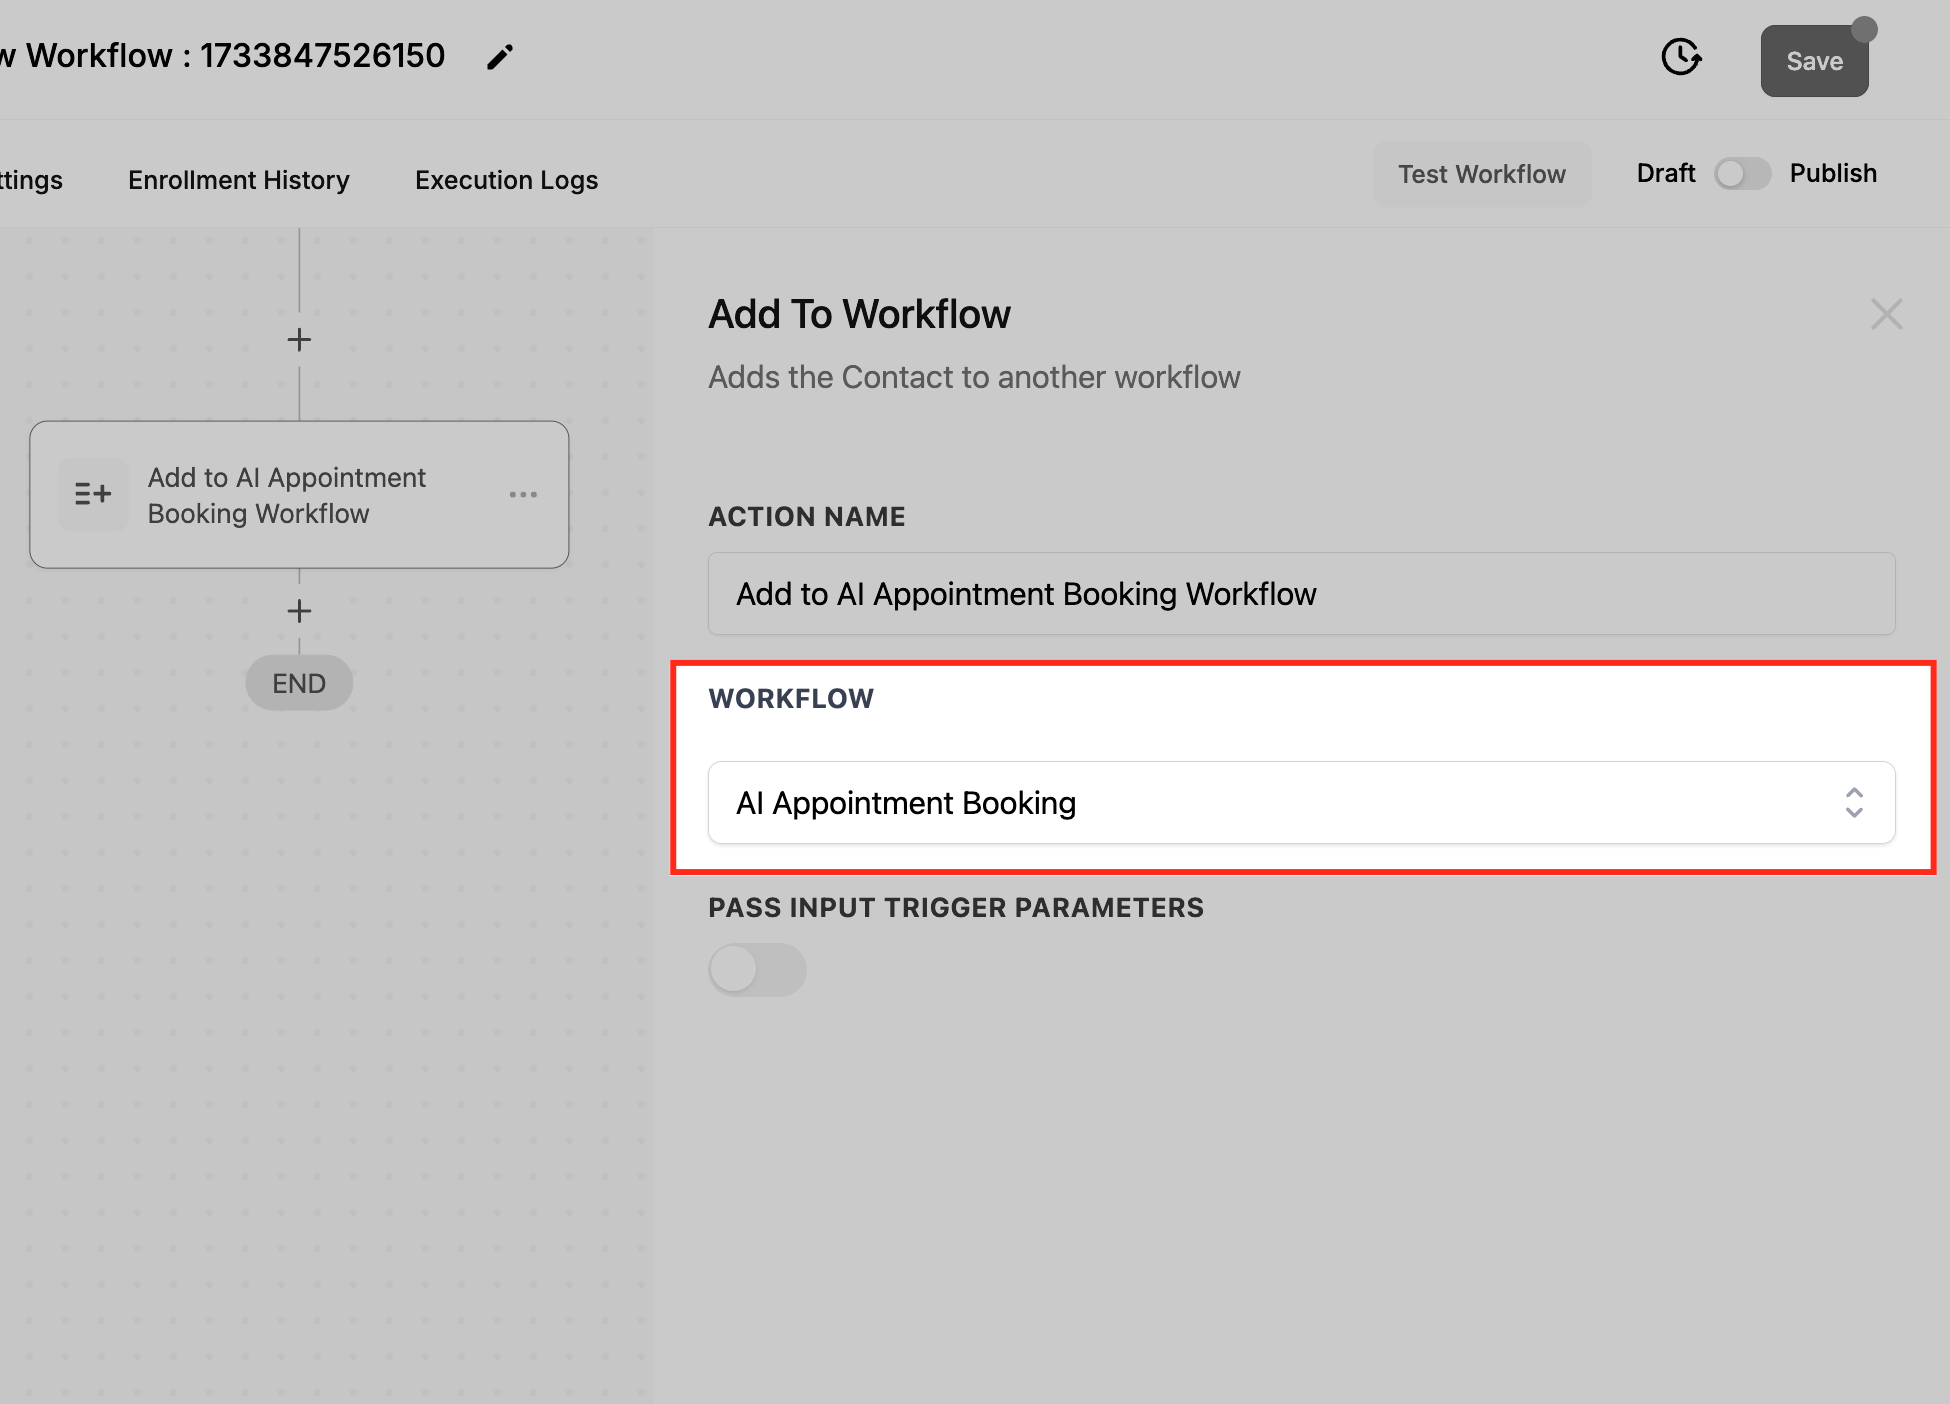
- Select the target workflow that the contact should be added to.
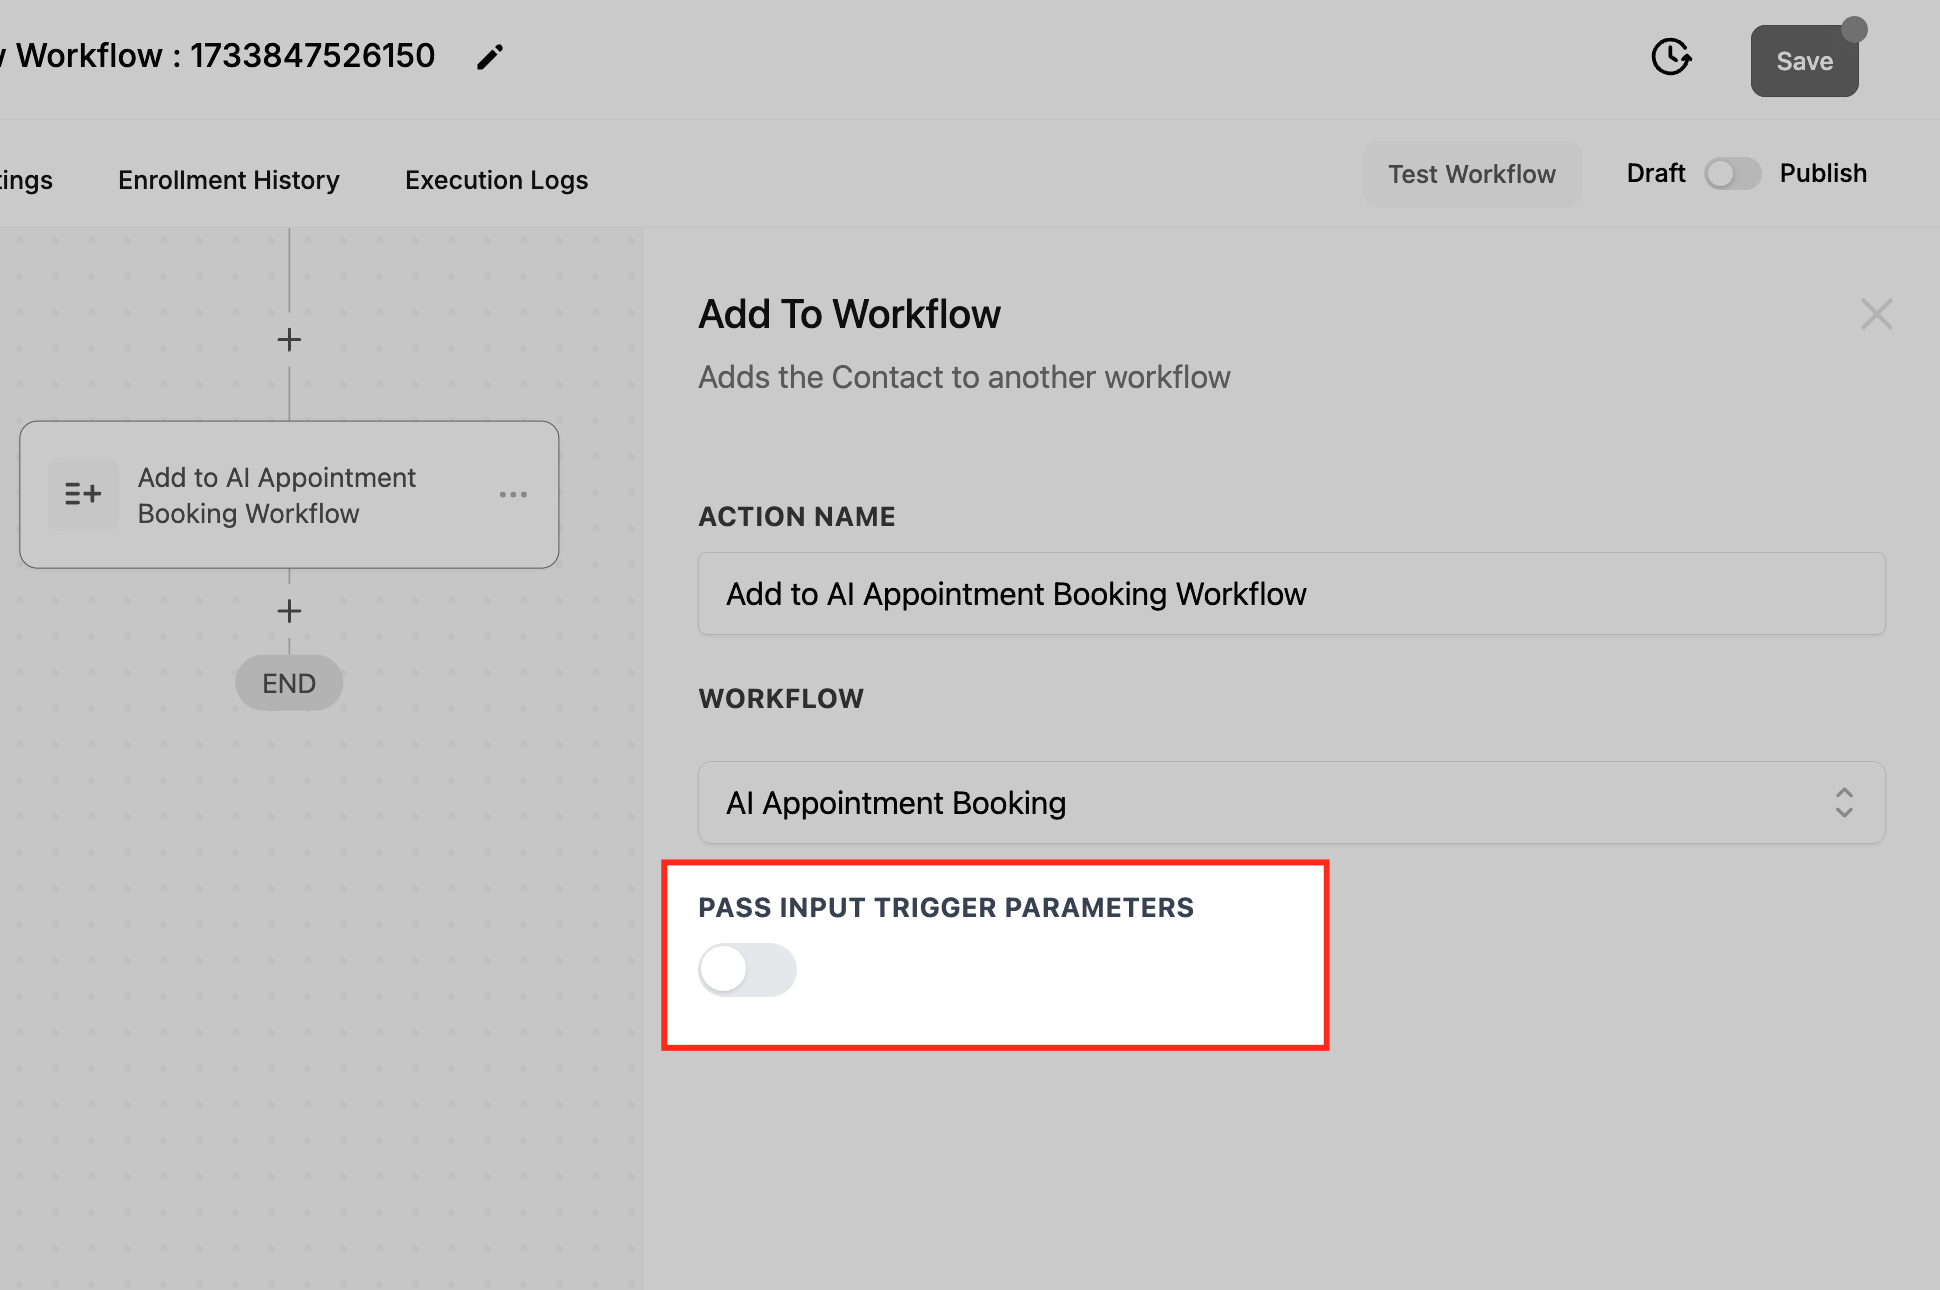
- If desired, enable the Pass Input Trigger Parameters toggle.
- Press the Save Action button at the bottom of the pane before returning to the builder.
- Run a test to verify that the contact is added as expected.
- Save the workflow draft before exiting the builder so you can resume later.
- Publish the workflow by switching the activation toggle on.
05What it looks like in HighLevel
06Settings that matter
- Action name. Provides a label for the Add to Workflow step so it can be identified later.
- Target Workflow. Specifies which existing workflow the contact will be moved into.
- Pass Input Trigger Parameters. When turned on, copies the original trigger’s payload into the new workflow for personalized actions.
07Things to know before you rely on it
- A contact can be added to only one workflow per Add to Workflow action.
- The Pass Input Trigger Parameters option transfers only the initial trigger data, not outputs from later actions such as Custom Code.
- Multiple Add to Workflow actions can be chained if a contact needs to enter several workflows sequentially.
08How it connects to the rest of HighLevel
- Learn how to set a Wait action for timed pauses in a workflow. Wait action guide
- Explore the If/Else action to branch automation based on contact data. If/Else action guide
- Review HighLevel’s workflow pricing tiers to ensure your plan includes this action. Workflow pricing
Michael's take

I find the Add to Workflow action useful for moving contacts between automation stages without manual steps.