
01Who this is for
- Founders who want a friction free way for prospects to ask questions without dialing a phone number.
- Marketing agencies that need to embed a voice first lead capture widget on client sites.
- Support teams looking for a quick, hands free triage option inside a chat window.
02Voice AI chat widgets, explained
The Voice AI Chat Widget creates a voice only conversation zone inside the standard chat bubble. Visitors click the mic icon, grant microphone access, and speak to an AI agent that replies in real time through the browser. All audio streams via WebRTC, so no PSTN, SIP trunk, or softphone is required.
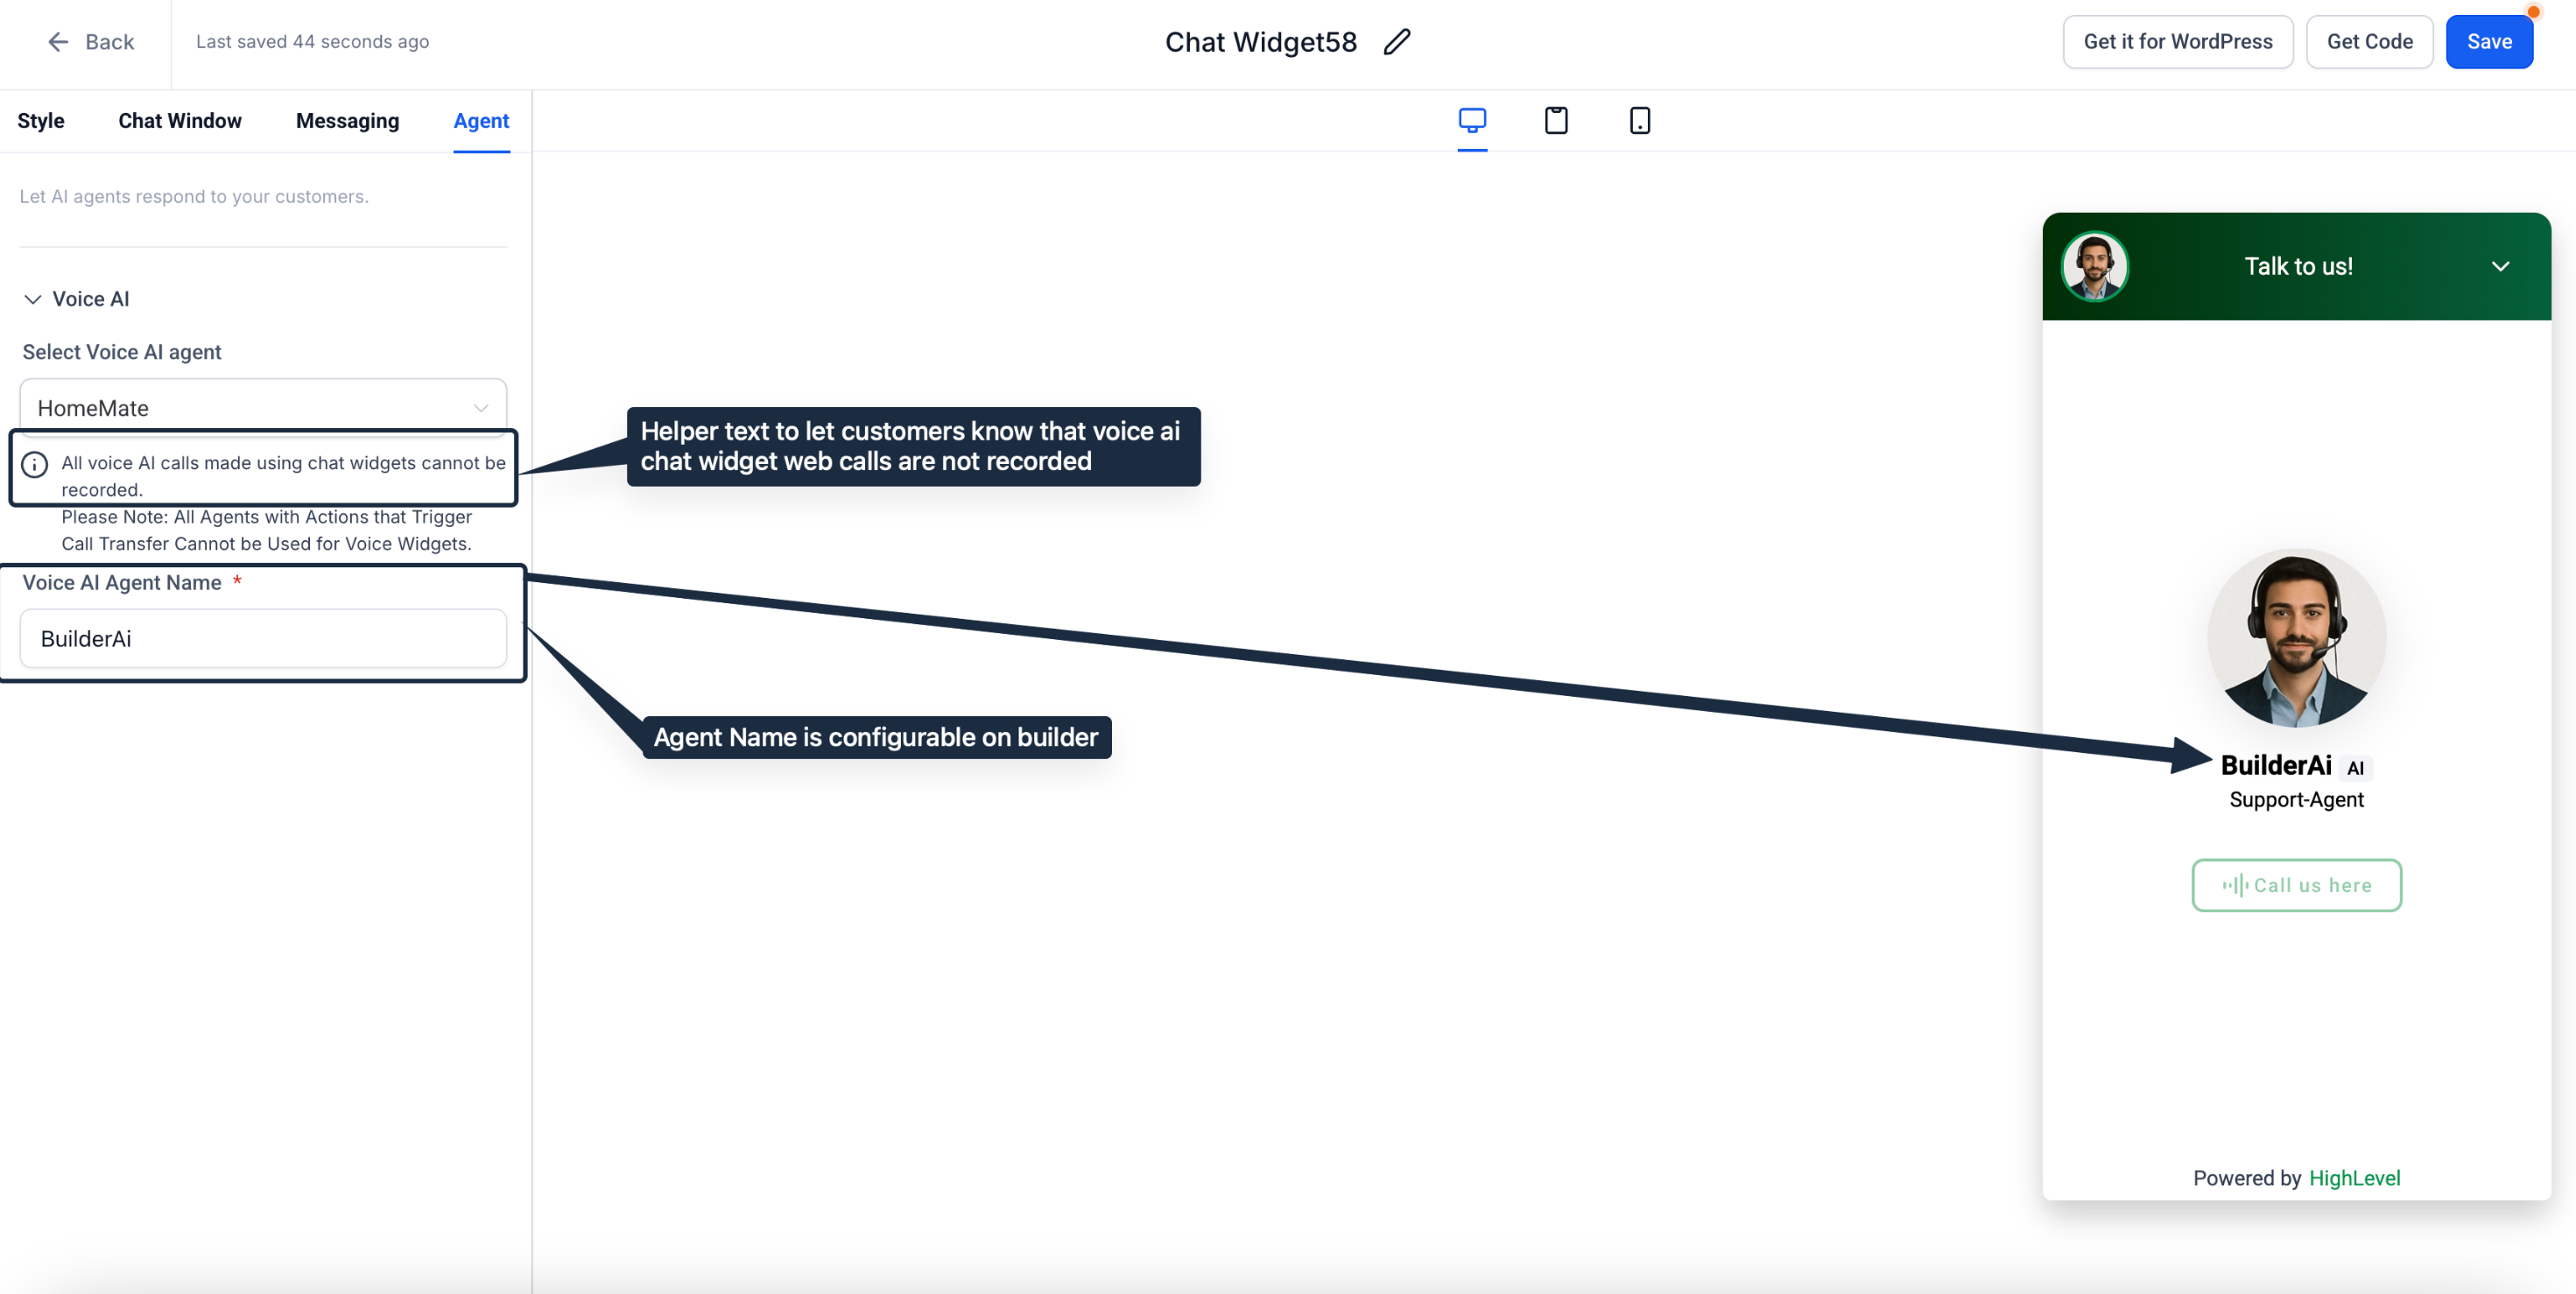
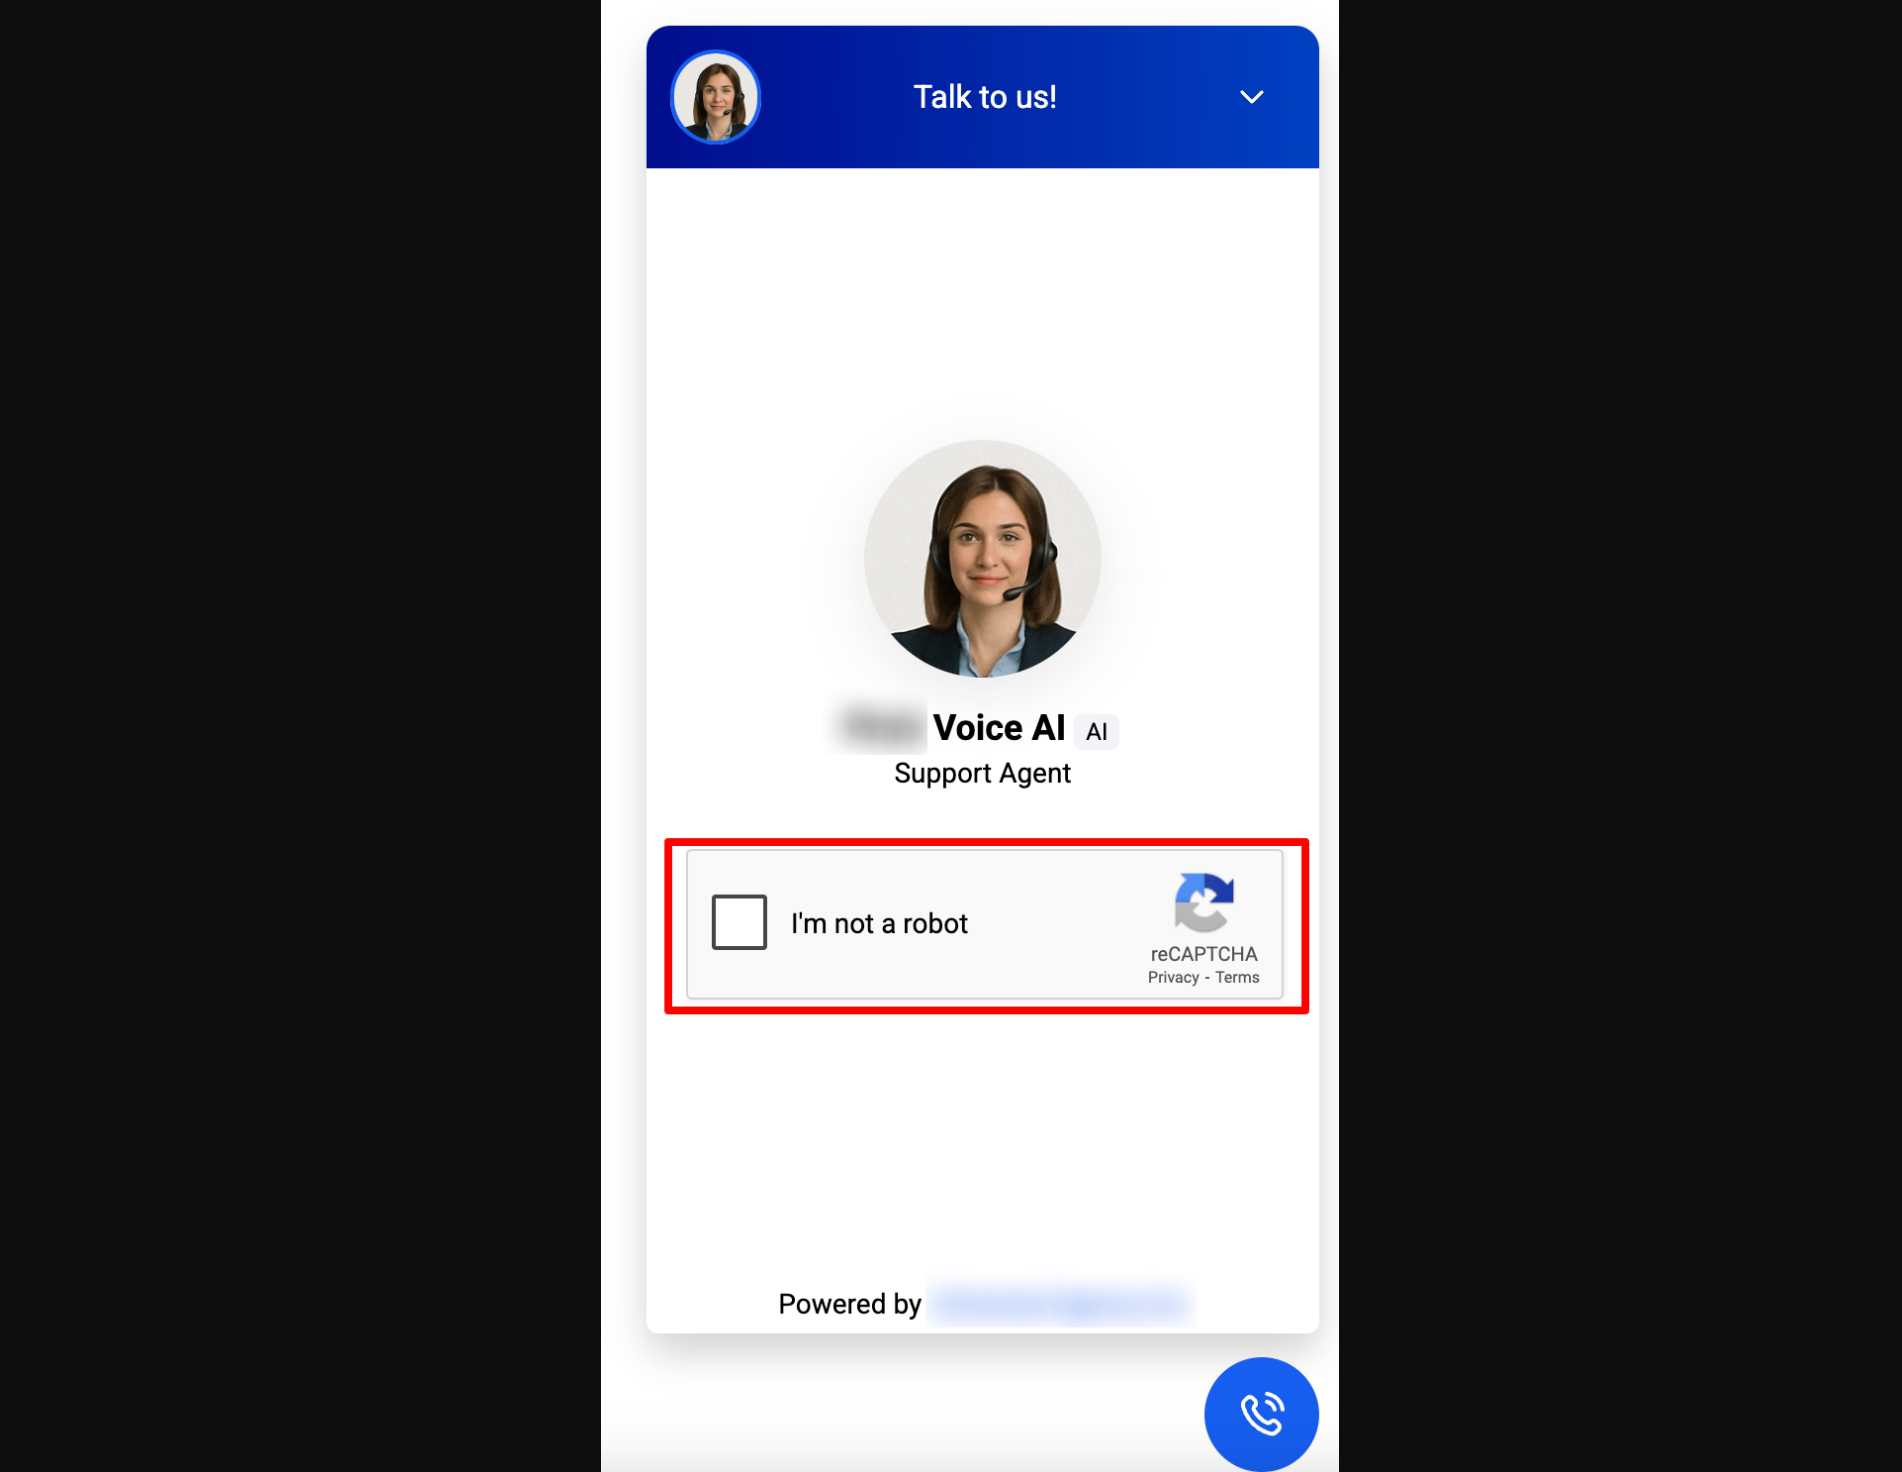
The widget lives in the Sites section of HighLevel under Chat Widget. When you select the Voice AI type, a script is generated that you embed on any site, funnel, or portal. The widget includes a banner noting that calls cannot be recorded, and reCAPTCHA triggers if a visitor connects or disconnects ten times within a minute.
The agent’s display name can be changed in the widget builder, allowing you to brand the voice personality. Up to 100 distinct Voice AI agents can be created, but only twenty calls may run at the same time per subaccount.
03How businesses use Voice AI chat widget
- Real estate brokerage. Embed the voice widget on property listing pages so prospects can ask for details and schedule showings without picking up a phone. The agent name can be set to the brokerage’s brand for a consistent experience.
- SaaS startup. Place the widget on the pricing page to let visitors request a demo by speaking their needs. The AI gathers contact info and can hand off the lead to a human follow up workflow.
- Healthcare clinic. Add the widget to the appointment portal for patients to describe symptoms and receive triage guidance. The voice only mode keeps the interaction private and hands free.
04The numbers and rules that matter
- Up to 100 Voice AI Agents can be created.
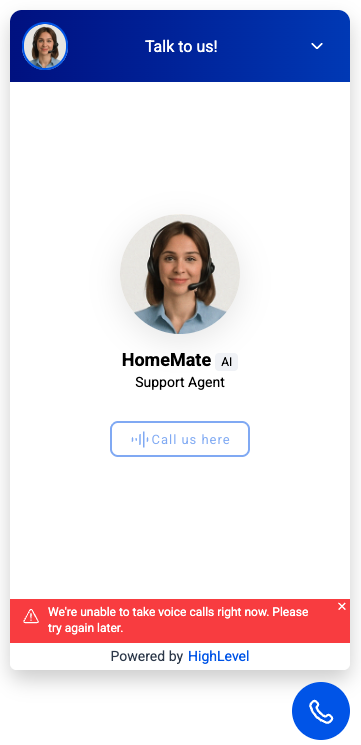
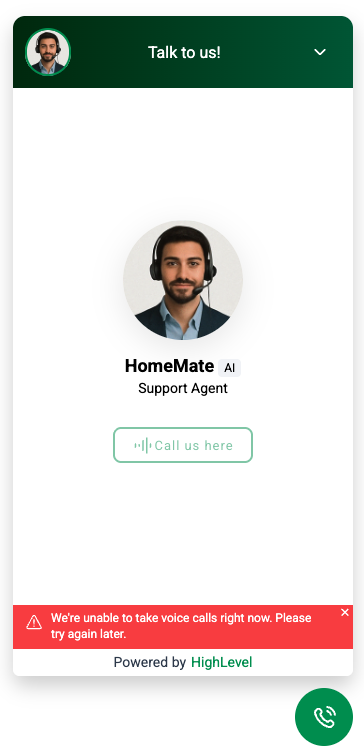
- Concurrent call limit is 20; call #21 shows a red banner.
- ReCAPTCHA triggers after 10 connects or disconnects within 60 seconds.
- Supported browsers: Safari (iOS 16+), Chrome, Edge.
05Before you start
- The Voice AI feature must be enabled in Labs by the Agency for the relevant subaccount.
06How to set up and use Voice AI chat widget in HighLevel
Set up the voice widget
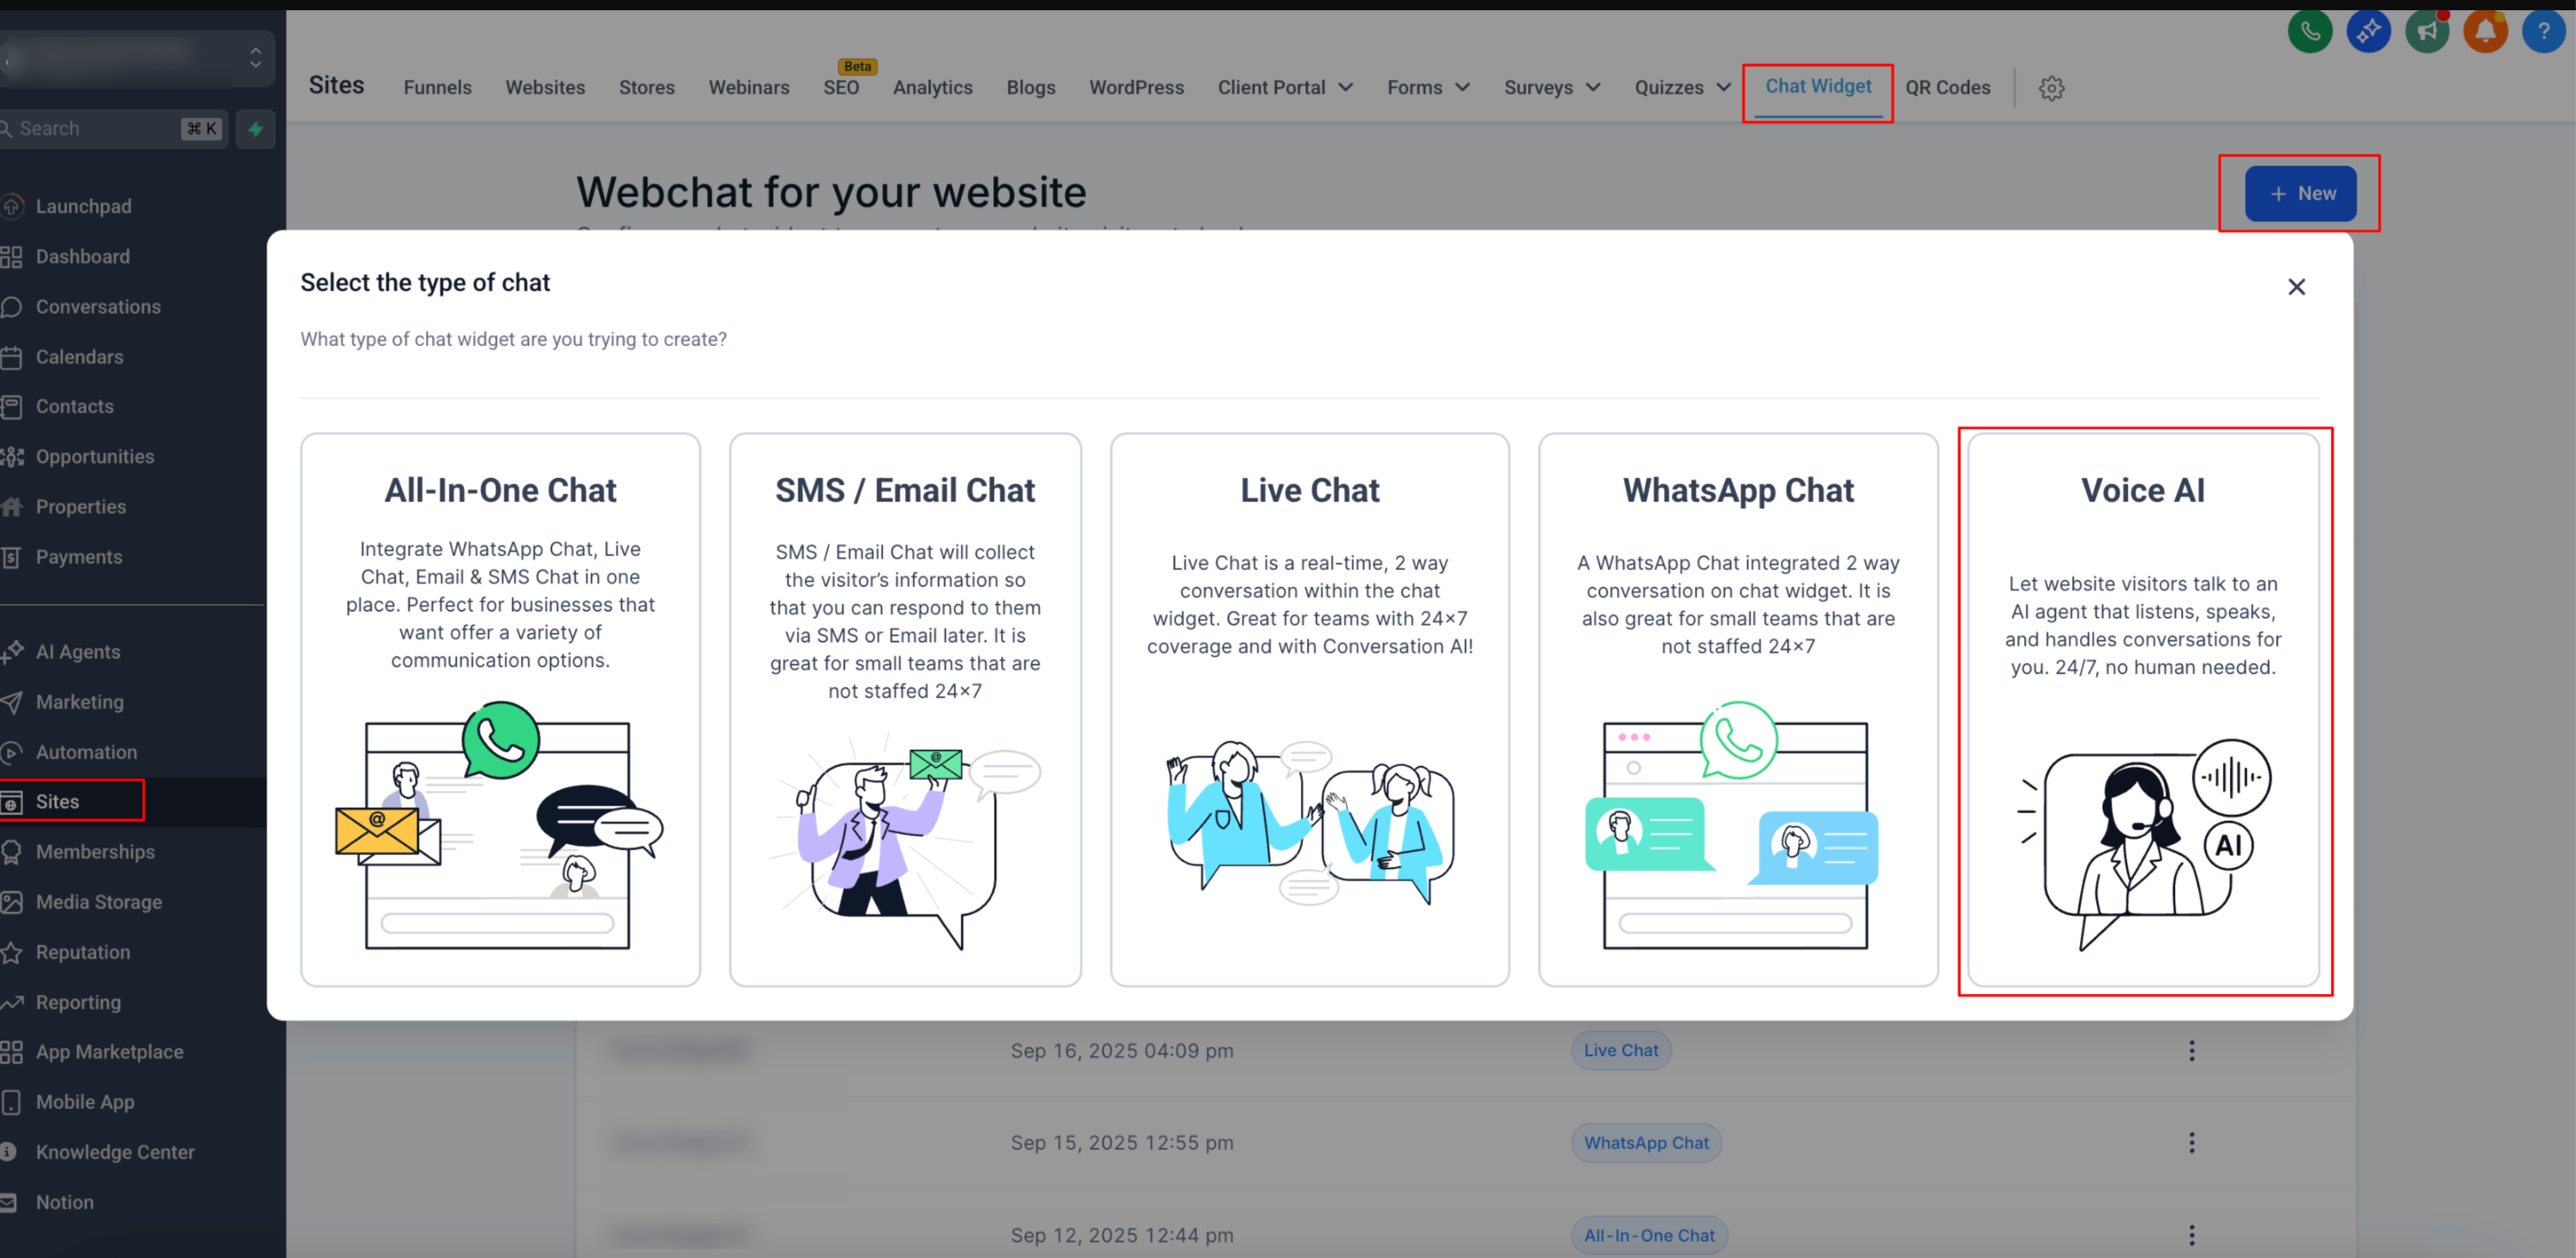
- Open Sites, choose Chat Widget, click New, and select Voice AI as the widget type.
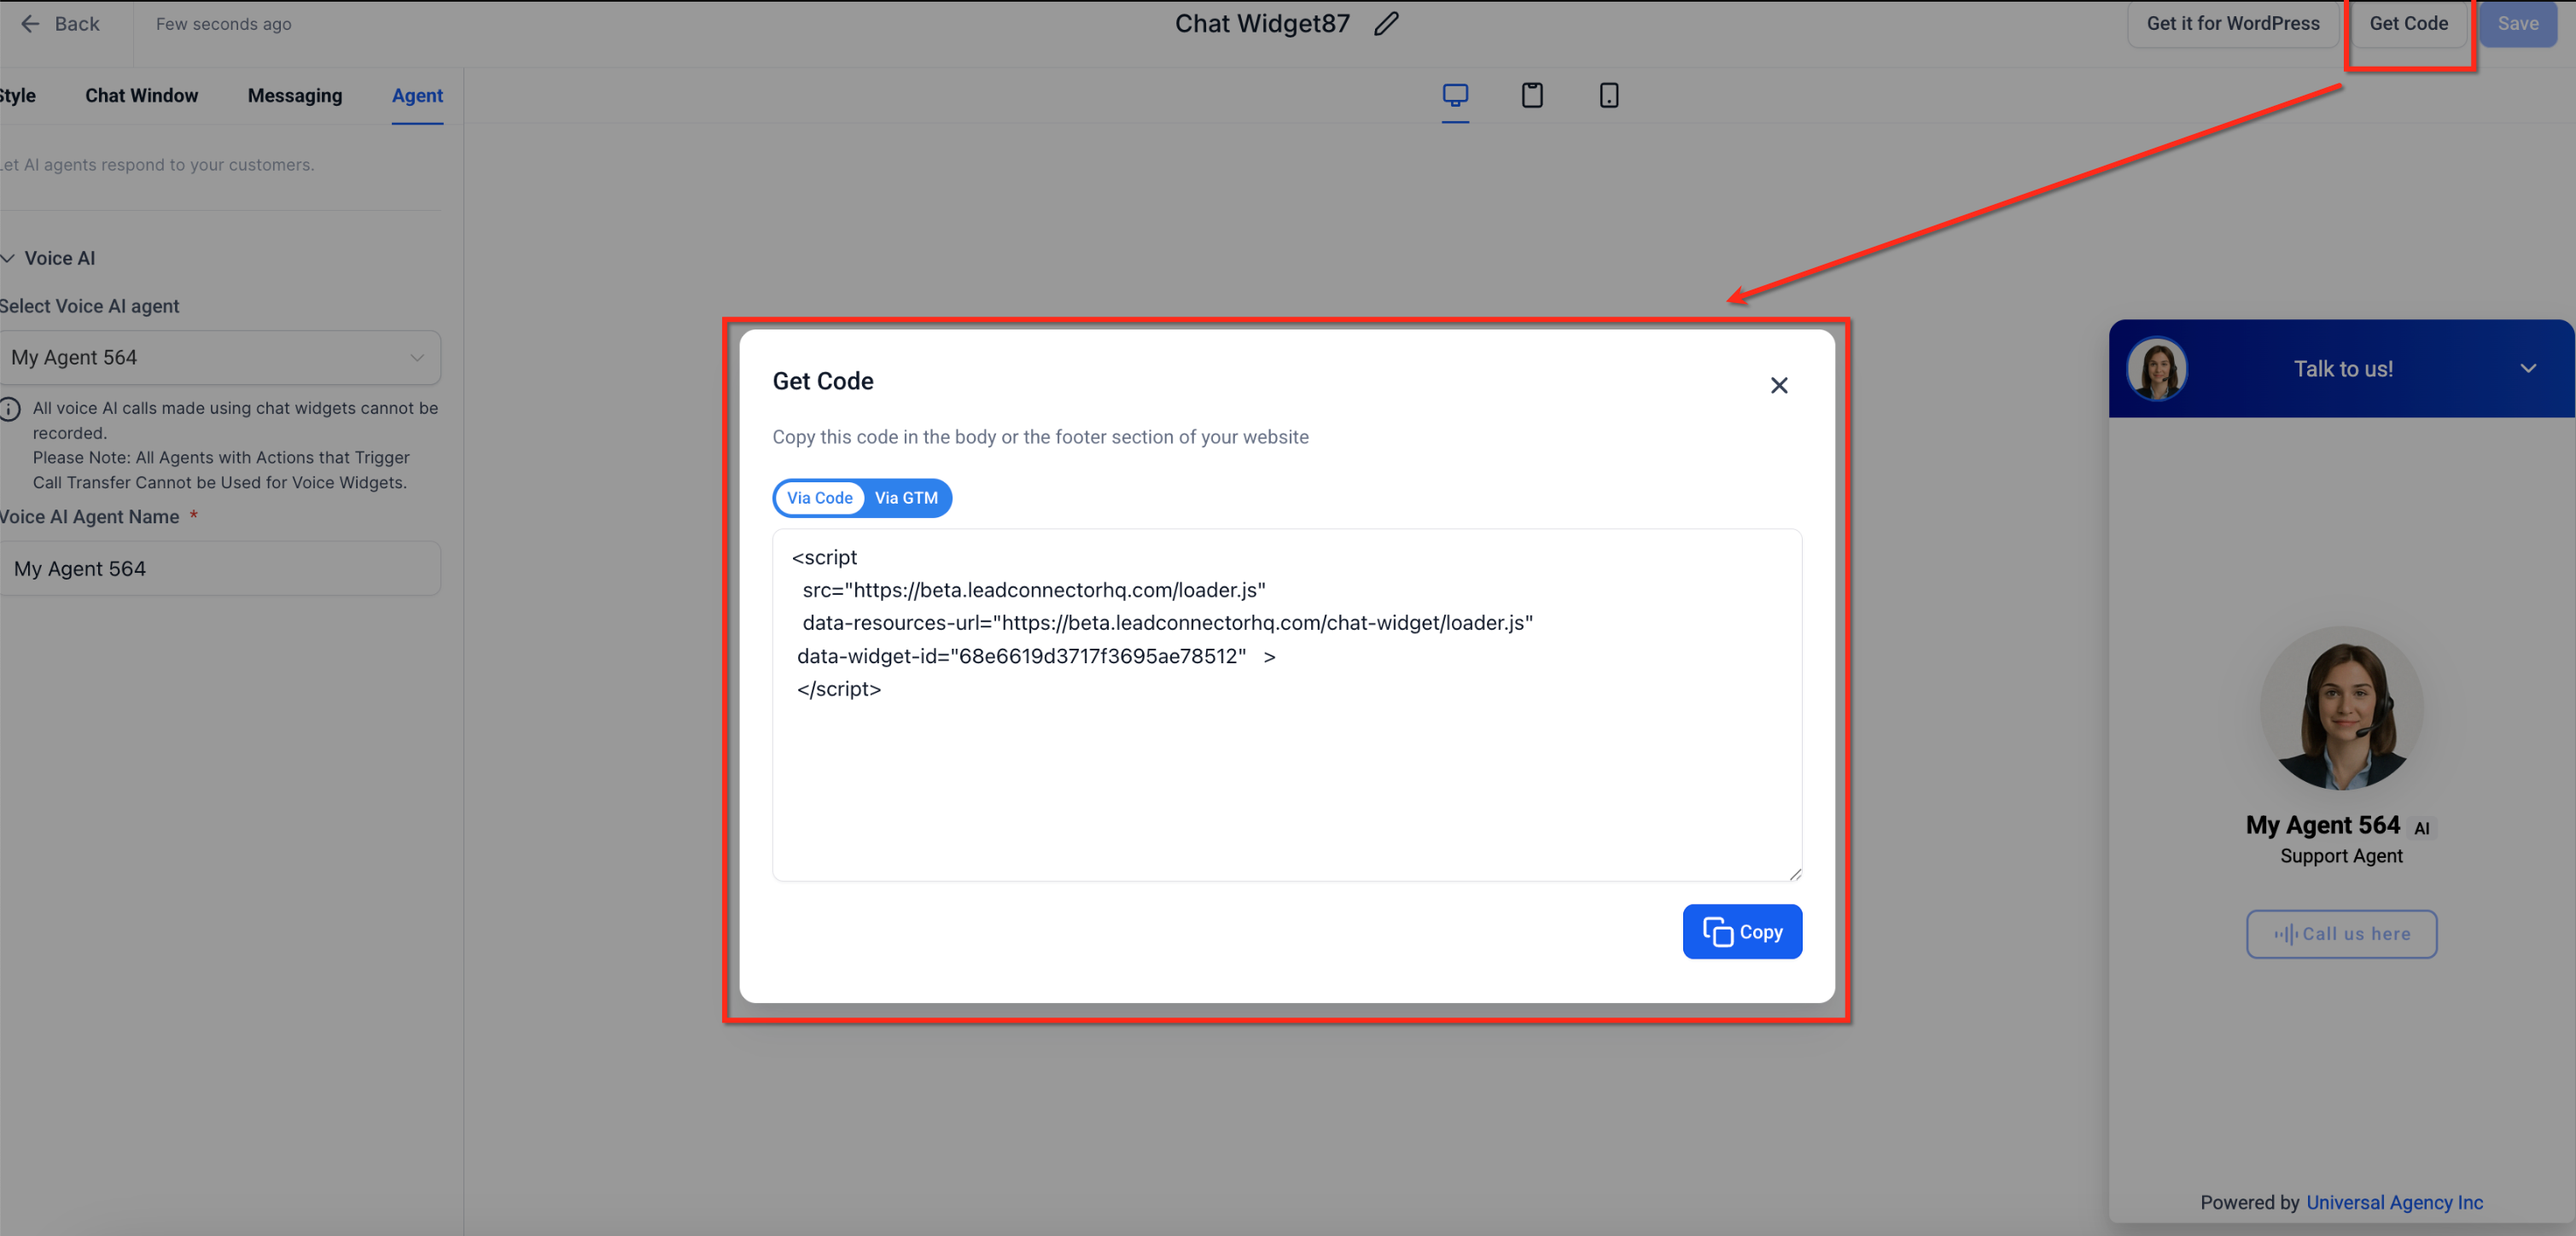
- Find the Get Code button and copy the script that is displayed.
- Insert the copied script into the <head> or <footer> of your website’s HTML.
- If using Wix, Shopify, or Squarespace, paste the script via the platform’s custom code embed feature.
- Save the changes, publish the site, and verify the widget works by starting a voice call on the live page.
Change the AI agent name
- From the dashboard, go to Sites then Chat Widgets.
- Select the widget you want to edit to open its editor.
- Switch to the Agent tab within the editor.
- Enter the desired name in the Voice AI Agent Name box.
- Click the blue Save button at the top right to apply the new name.
07What it looks like in HighLevel
08Settings that matter
- Voice AI Agent Name. Controls the display name shown for the AI agent in every voice reply.
09Things to know before you rely on it
- A maximum of 100 Voice AI agents can be created per account.
- Only 20 concurrent voice calls are allowed; a 21st call shows a red warning banner.
- If a visitor connects or disconnects ten times within 60 seconds, reCAPTCHA appears to verify humanity.
- Call transfer is not supported while the widget remains in beta.
- The feature is currently in Labs and requires Agency activation for subaccounts.
10How it connects to the rest of HighLevel
- Install the HighLevel chat widget and configure its workflow Chat widget installation
- Add the HighLevel chat widget to a Wix website Wix integration
- View HighLevel pricing and plans Pricing page
Michael's take

The Voice AI chat widget is a neat way to add instant, hands free conversations to a site.
If you don’t need voice first engagement or prefer text only, you can skip it.