
01Who this is for
- Marketing managers can use the widget to start real time conversations with site visitors.
- Small business owners can embed the chat to capture leads directly from their Wix pages.
- Customer support teams can provide instant assistance without leaving the website.
02Chat widget, explained
The chat widget is a piece of code that creates a live chat window on your website. Once the code is added, the widget appears on the pages you choose and lets visitors type messages that are routed to HighLevel.
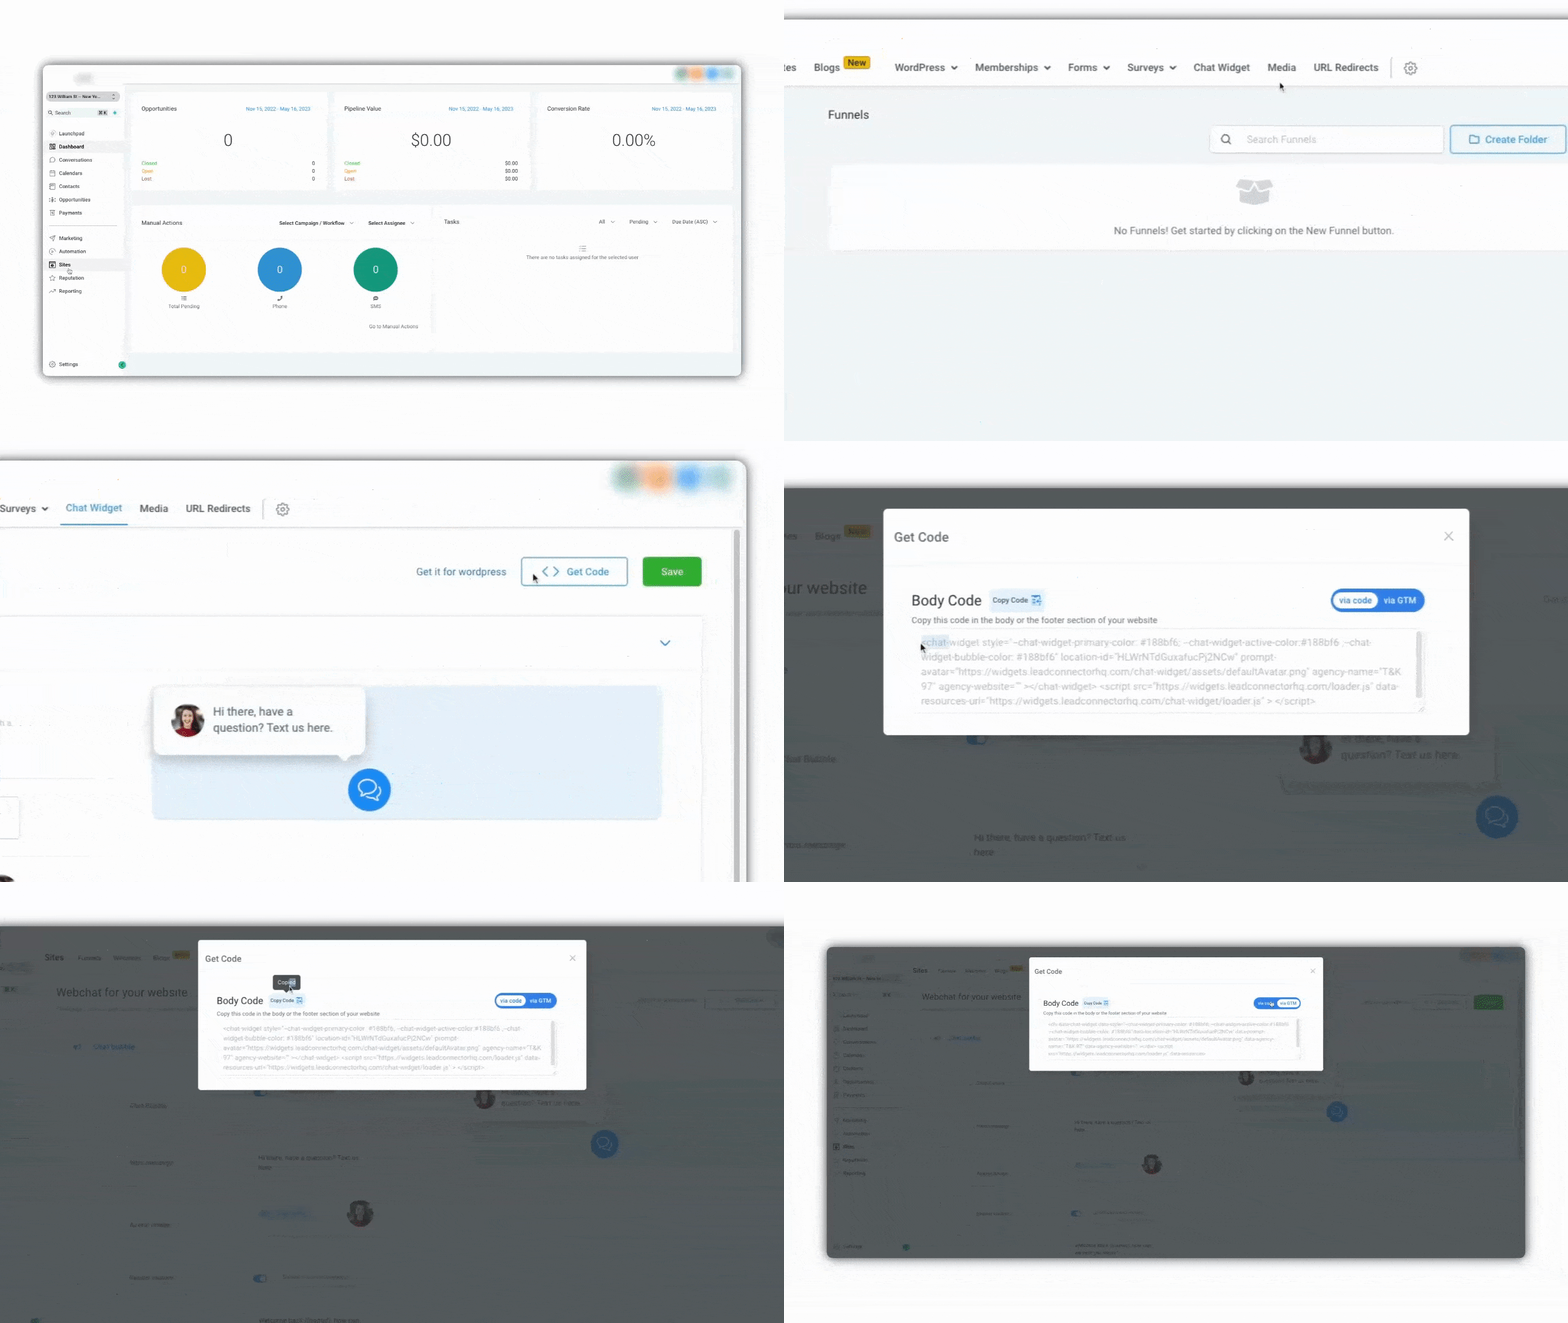
To obtain the code, open HighLevel and go to Sites > Chat Widget > Get Code. The code can then be placed on a Wix site using either the platform’s custom code settings or an HTML embed element. The widget will load on every page according to the placement options you select.
In the custom code method you tell Wix to load the script in the page head and to apply it to all pages. In the HTML embed method the widget sits inside a box you add to a specific page layout.
03How businesses use chat widget
- Ecommerce store. Copy the widget code from HighLevel and add it via custom code so the chat appears on every product page. Shoppers can then ask questions directly while browsing.
- Real estate agency. Use the HTML embed box on a property listing page, paste the widget code, and update the box. Prospective buyers can message the agent about a listing without leaving the site.
- Fitness studio. Insert the widget through custom code so the chat shows on the class schedule page. Visitors can request more information or schedule a trial class right away.
04Before you start
- A Wix account with access to the site’s dashboard.
- The HighLevel chat widget embed code copied from Sites > Chat Widget > Get Code.
05How to set up and use chat widget in HighLevel
Add widget using custom code
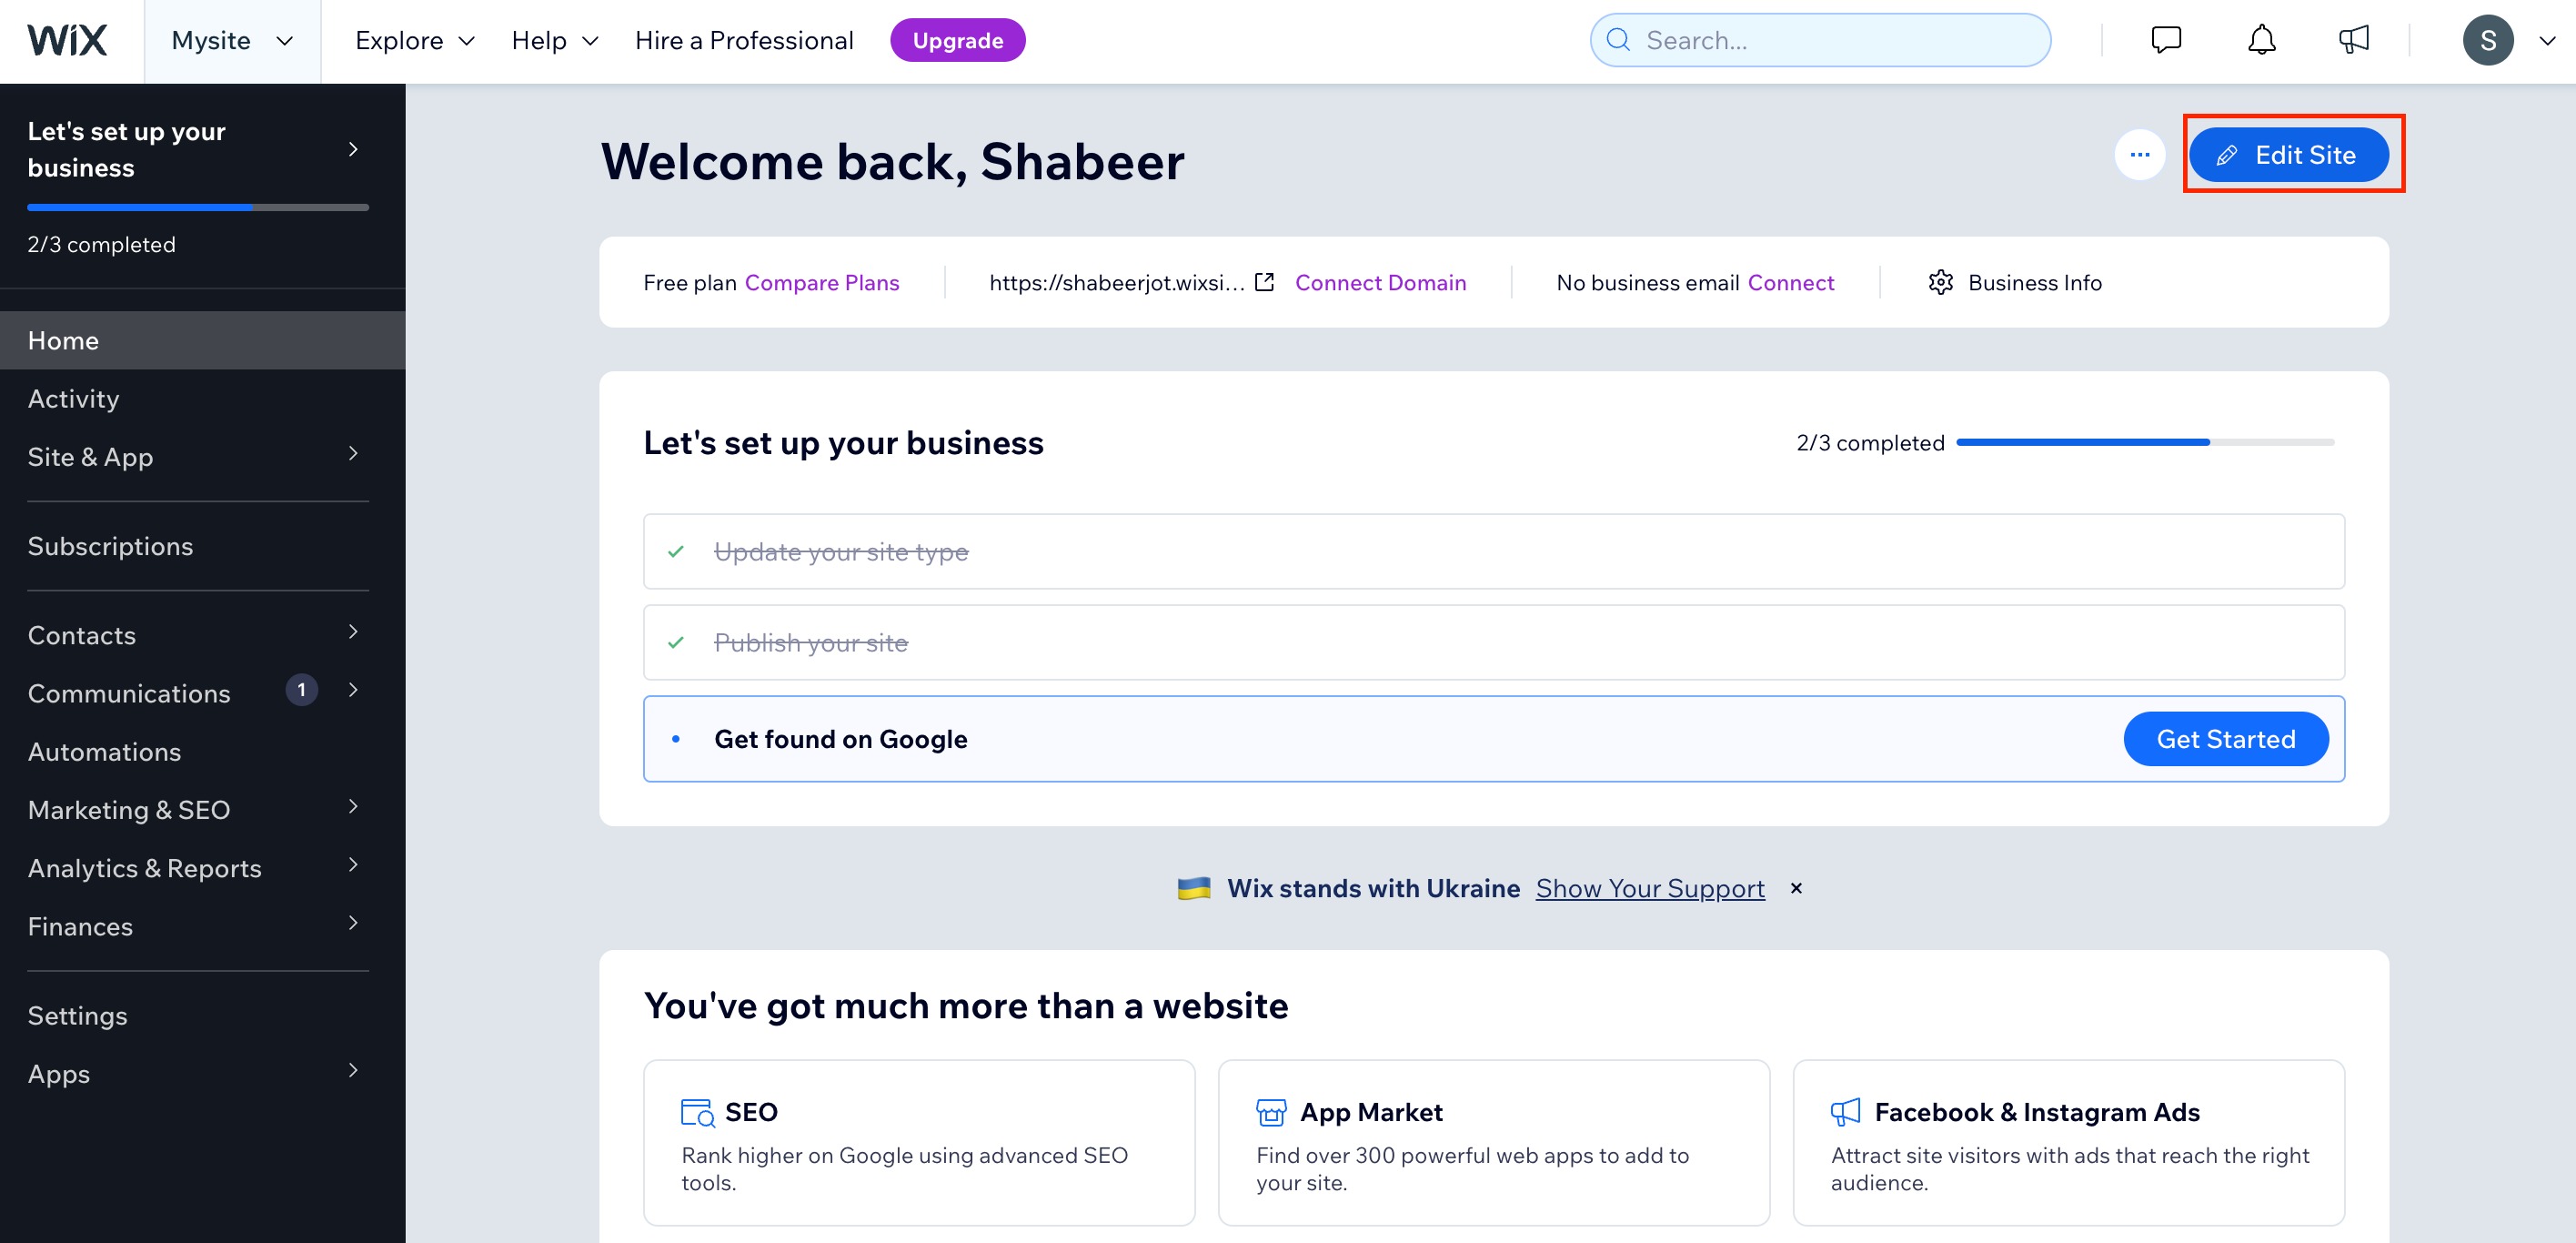
- Log in to your Wix account and open the website’s dashboard.
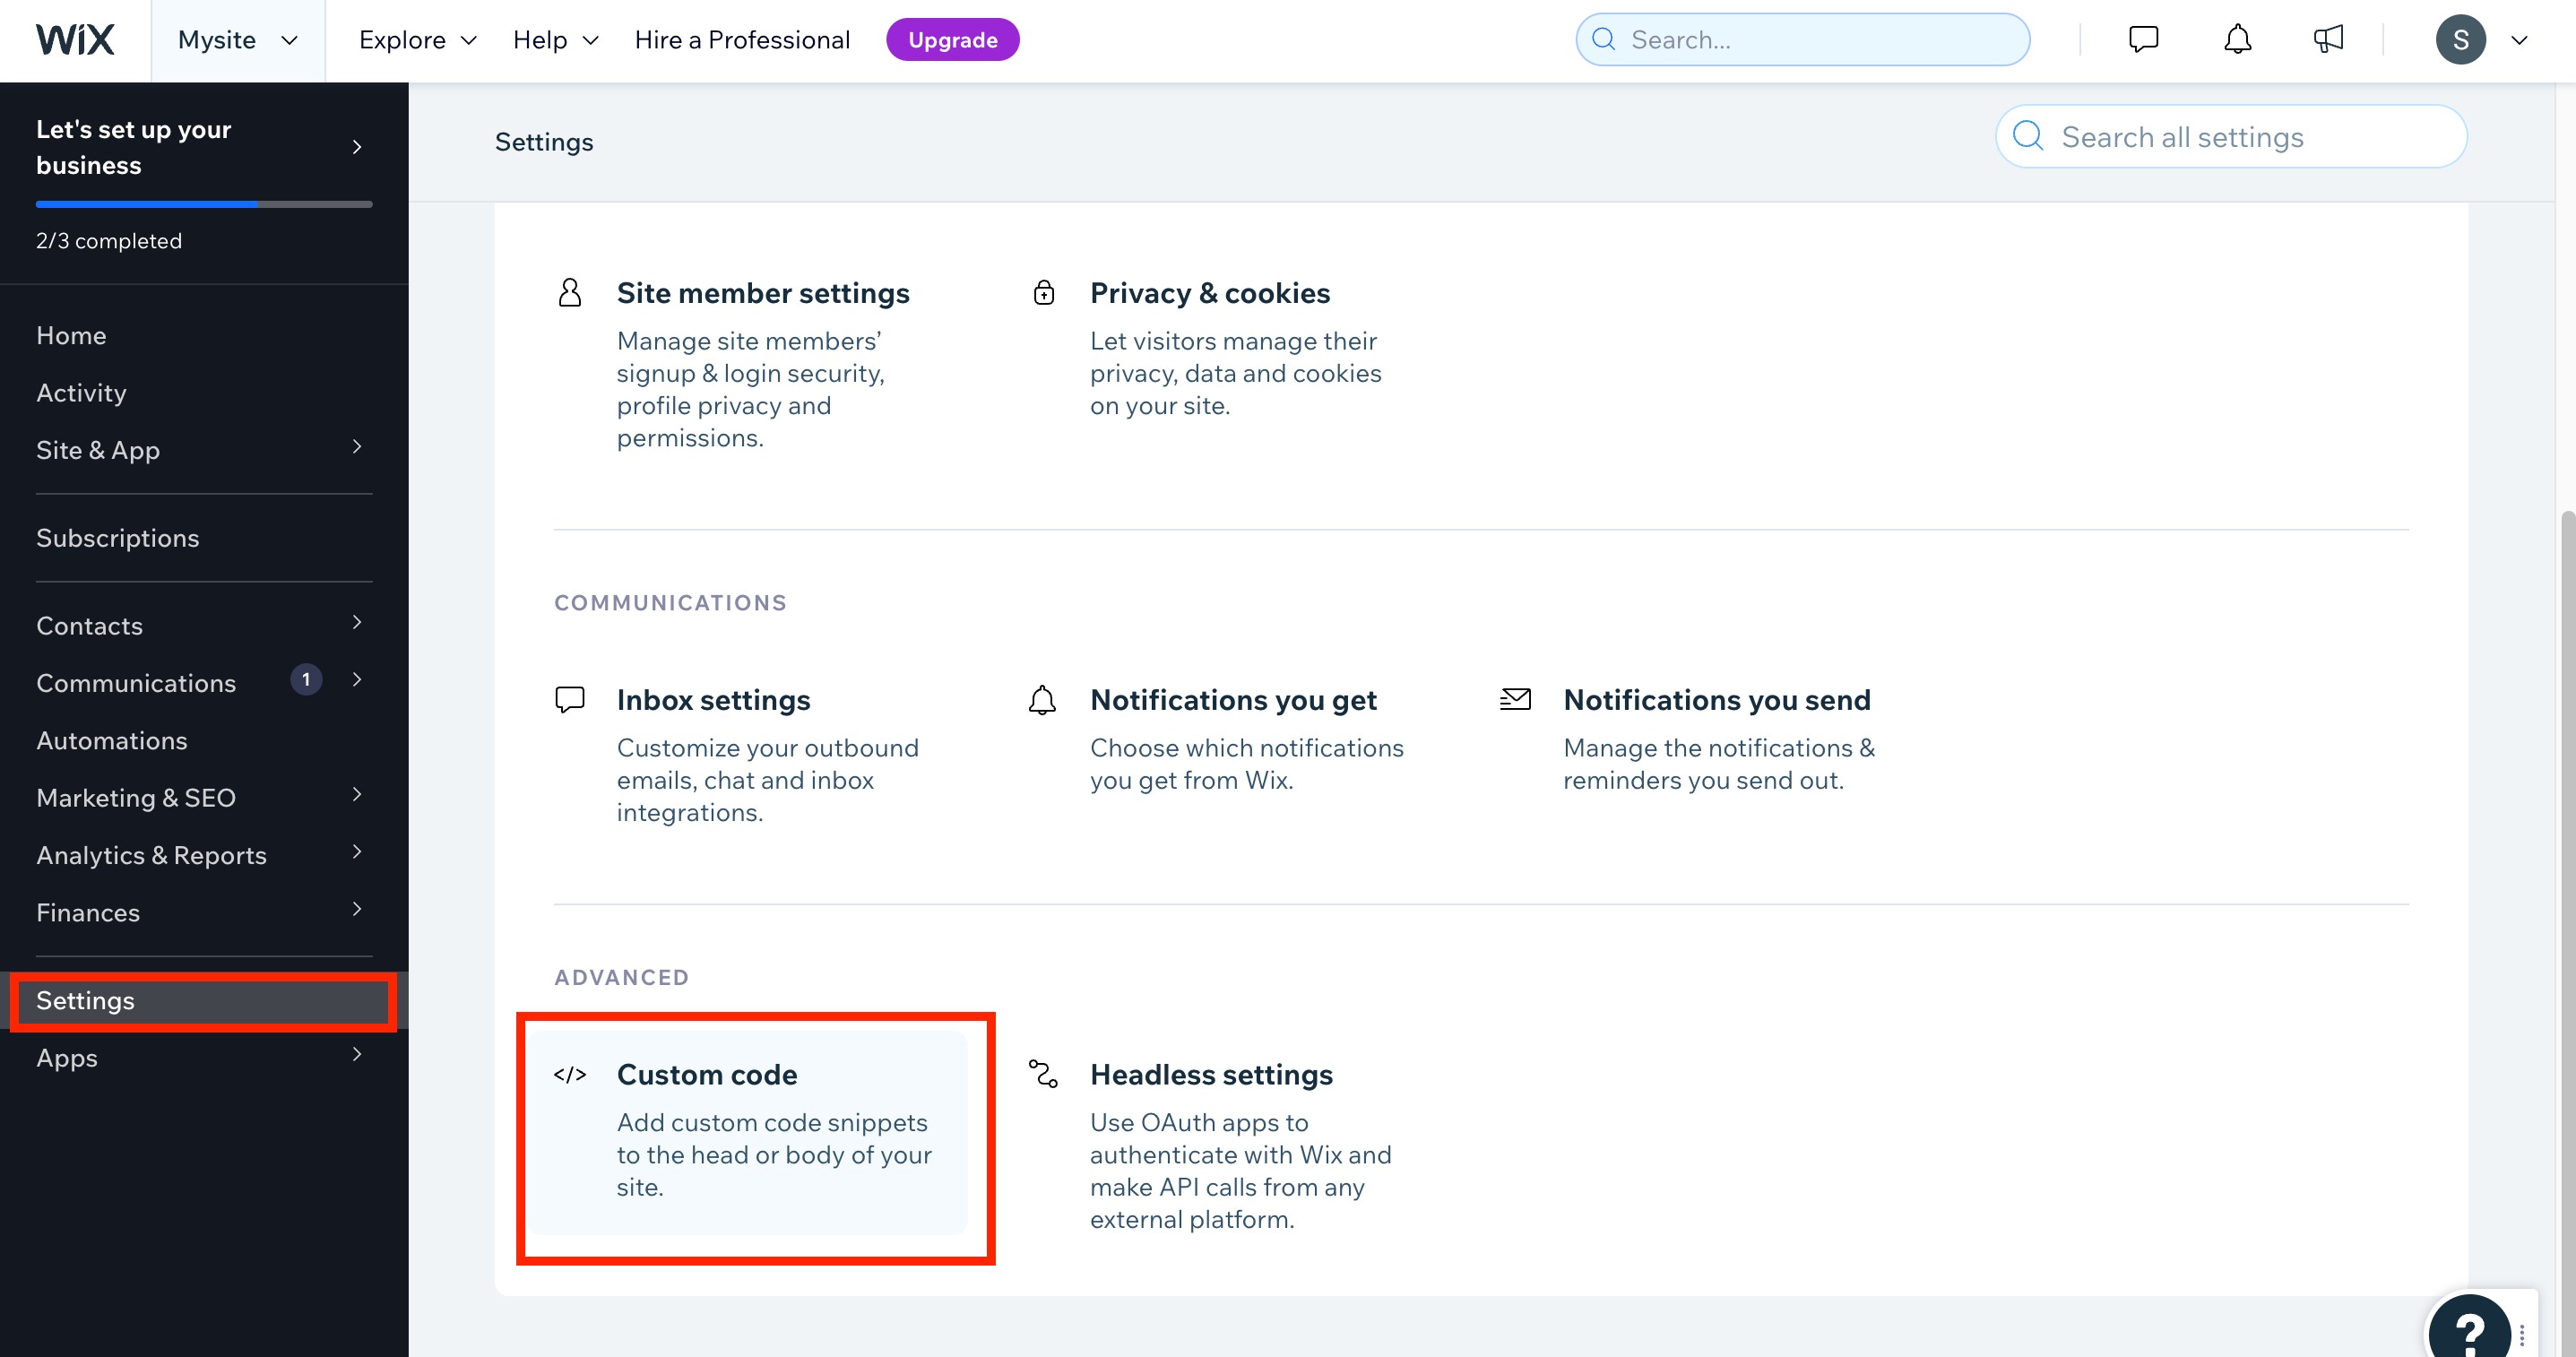
- Select Settings in the left menu, then choose Custom Code under the Advanced tab.
- Click Add Custom Code.
- Paste the HighLevel widget snippet into the Code Settings field.
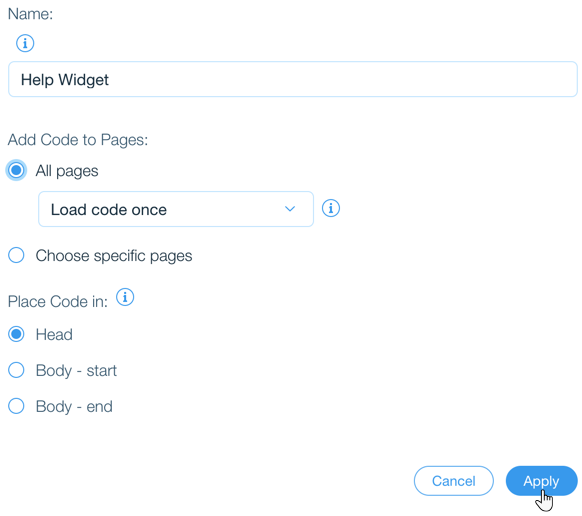
- Enter a name for the code entry.
- Set Add Code to Pages to All Pages and choose Load code once.
- Select Place Code In as Head.
- Click Apply to save the changes.
Add widget using HTML embed
- Sign in to Wix and launch the Wix Editor by clicking Edit Site from the dashboard.
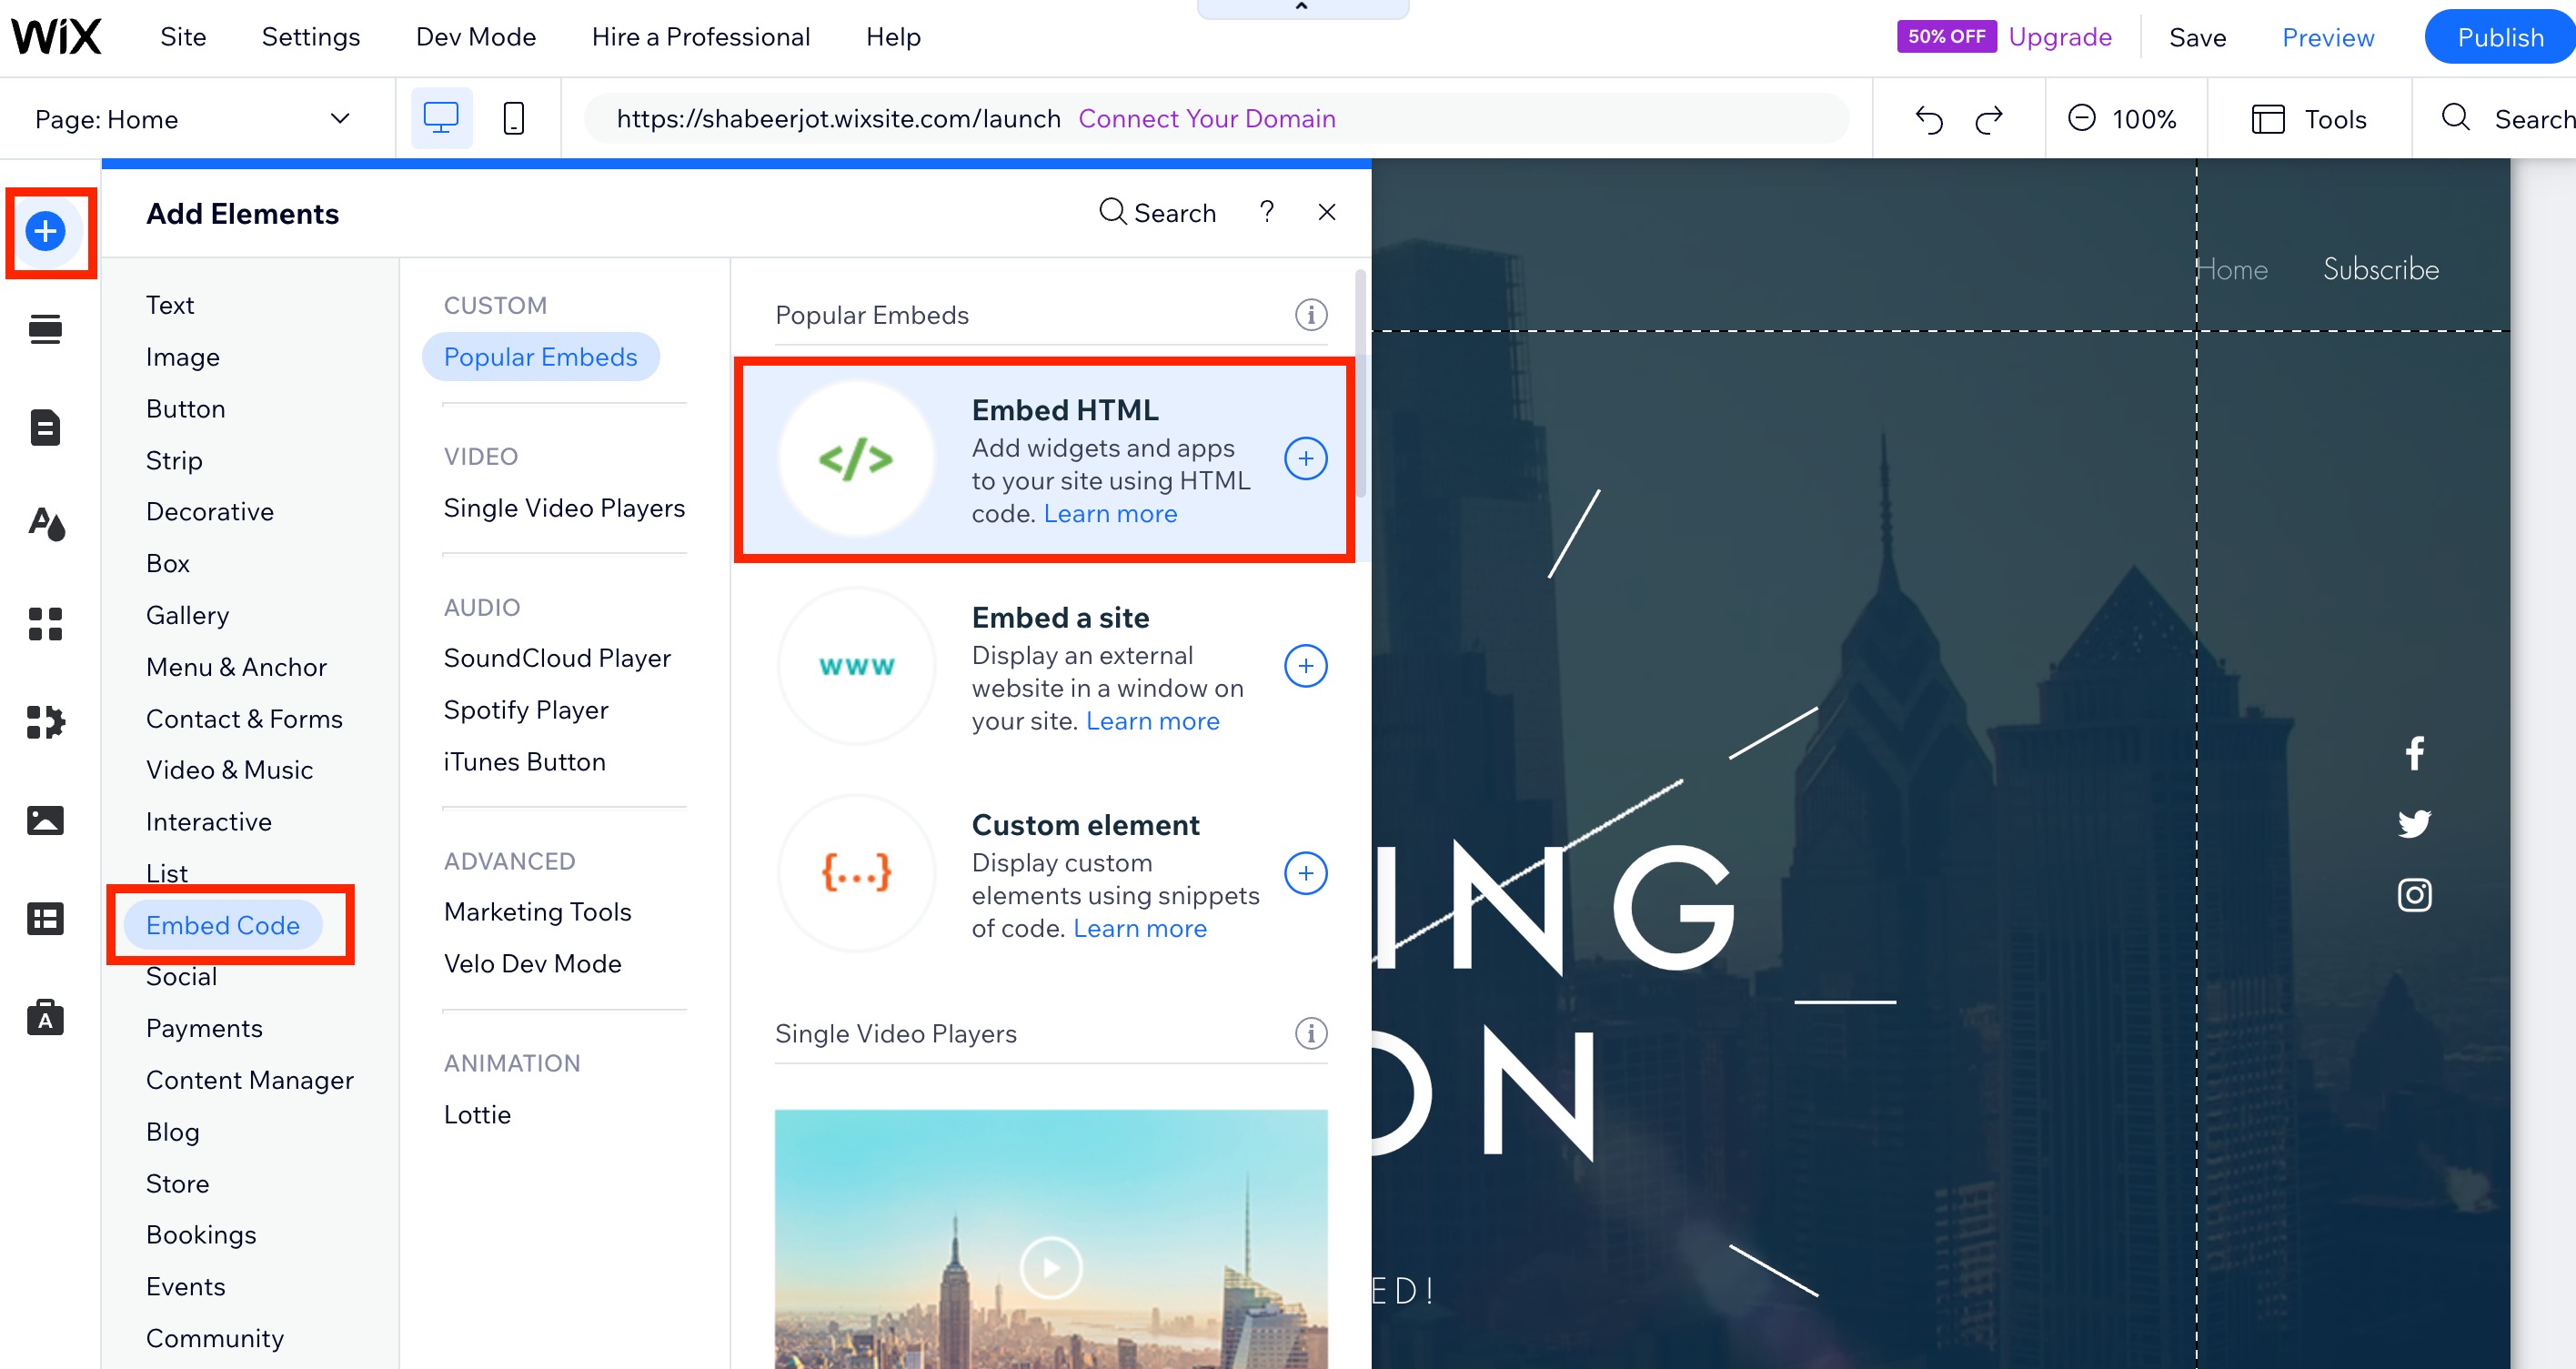
- Click the plus (+) icon in the left side menu to open Add Elements.
- Choose Embed from the left sidebar.
- Select Embed HTML under Popular Embeds.
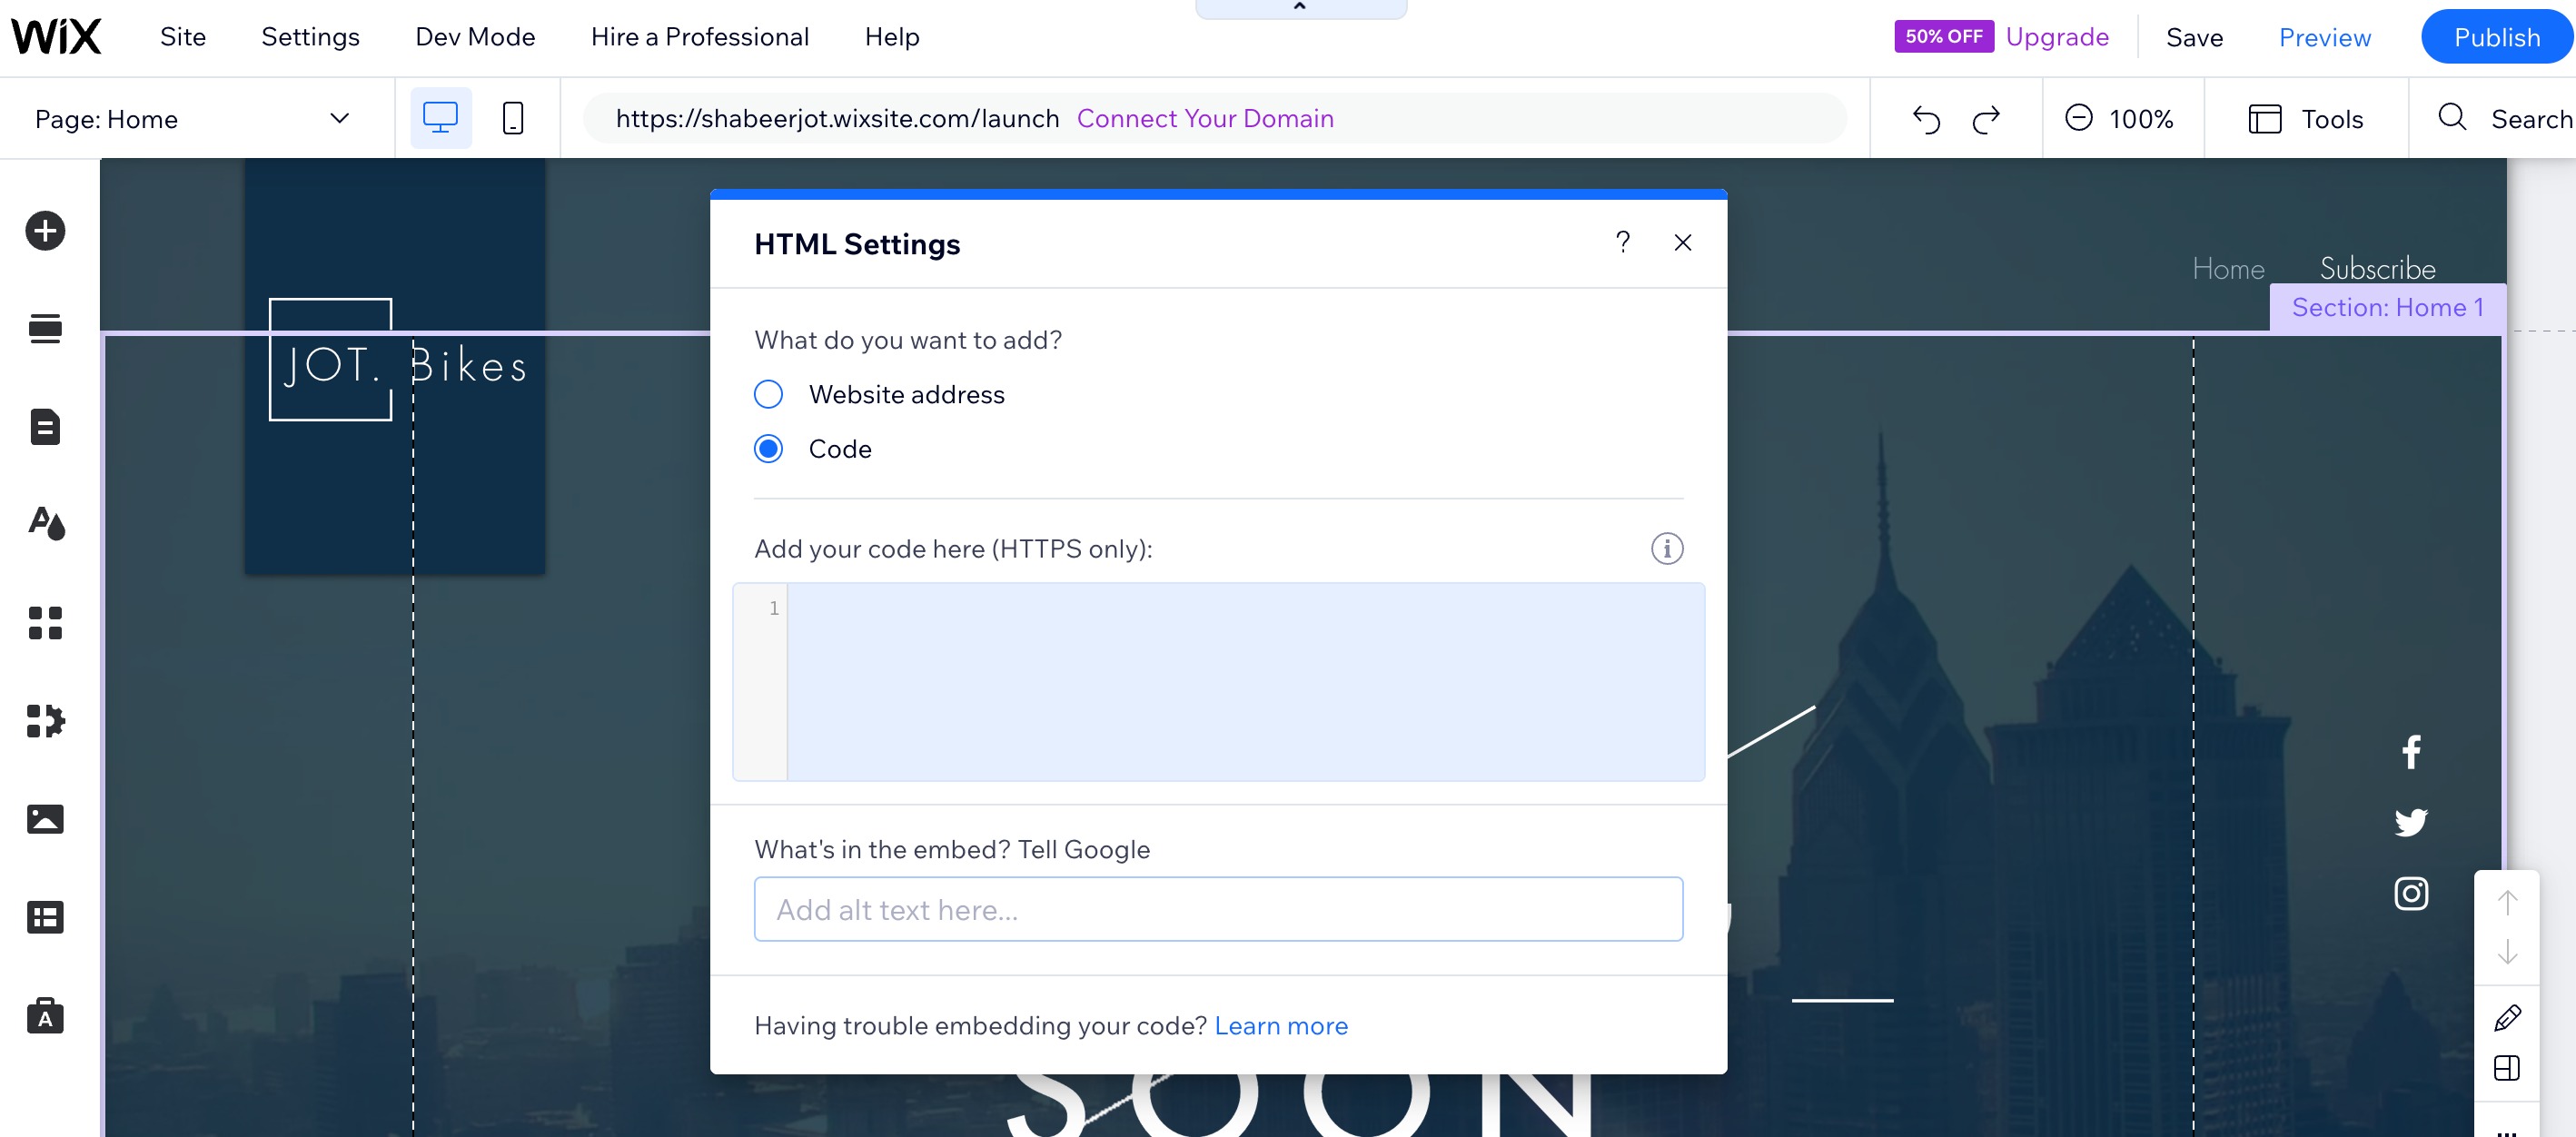
- Click Code in the new HTML box that appears.
- Paste the widget code into the text field.
- Press Update.
- Close the HTML Settings box.
06What it looks like in HighLevel
07Settings that matter
- Name. The label you give to the custom code entry for identification.
- Add Code to Pages. Controls which pages the widget script runs on; selecting All Pages applies it site wide.
- Place Code In. Specifies where in the page the script is injected; choosing Head loads it at the top of the page.
08Things to know before you rely on it
- The article does not list specific limits; no restrictions on the number of widgets or pages are mentioned.
09How it connects to the rest of HighLevel
- Installing HighLevel chat widget and configuring its workflow Chat widget workflow
- How to set up HighLevel chat widget tracking with GA4 Chat widget GA4 tracking
- How to use the All in One Chat widget in HighLevel All in One chat widget
Michael's take

Most people try to add the widget by fiddling with third party plugins or editing site files, thinking it’s a complicated process. The real trick is to treat the HighLevel snippet just like any other embed code and let Wix handle the placement.
If I were setting this up, I'd grab the code from Sites > Chat Widget > Get Code, then drop it into Wix via the Custom Code panel for a site wide chat, or use the HTML embed box for a single page placement. That way the widget works straight out of the box without extra steps.