
01Who this is for
- Users with permission to access Sites > Chat Widget can create and edit the All in One Chat widget.
- Businesses that need to offer multiple communication channels from a single widget benefit from a unified experience.
02All in One chat widgets, explained
The widget lives under Sites > Chat Widget. After creating a new widget you select the All in One type and then configure which communication channels are exposed; each channel appears only when its prerequisite (connected Facebook page, Instagram account, Voice AI widget, or WhatsApp number) is satisfied.
Placement options are found in the Style tab. Sticky keeps the bubble fixed in a corner, while Embedded / Inline renders the full chat interface inside page content and removes the floating bubble; the embedded version cannot be minimized.
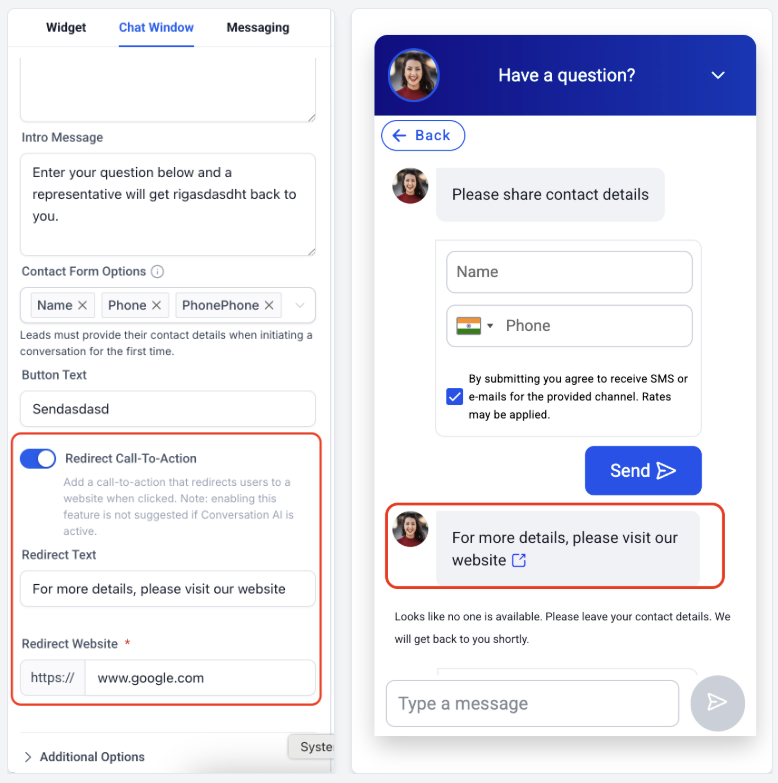
Additional options in the Chat Window tab let you add a redirect call to action with custom text and a target URL. General settings let you name the widget and set a brand colour that applies to every channel.
03How businesses use the All in One Chat widget
- Dental practice. Select Live Chat and SMS/Email in the Chat Type list, set the practice name as the display name, and add a greeting that invites patients to book appointments. The widget appears as a sticky bubble on the website.
- Ecommerce store. Enable WhatsApp and Facebook in the widget, configure the WhatsApp number, and set a redirect call to action that points to a product page. The widget can be placed Embedded / Inline on the checkout page.
- Real estate agency. Choose Live Chat, Instagram and Voice AI, then customize the initial message to ask visitors which property type they are interested in. The unified colour matches the agency’s branding.
04Before you start
- User must have permission to create or edit chat widgets in the account.
- A Facebook Page must be linked to the subaccount to see the Facebook option.
- An Instagram account must be connected to the subaccount to see Instagram.
- A Voice AI widget must be configured in the subaccount to see Voice AI.
- A WhatsApp number must be added and a WhatsApp chat widget must exist to enable WhatsApp.
05How to set up and use the All in One Chat widget in HighLevel
Set up the All in One Chat widget
- Log in to your HighLevel account.
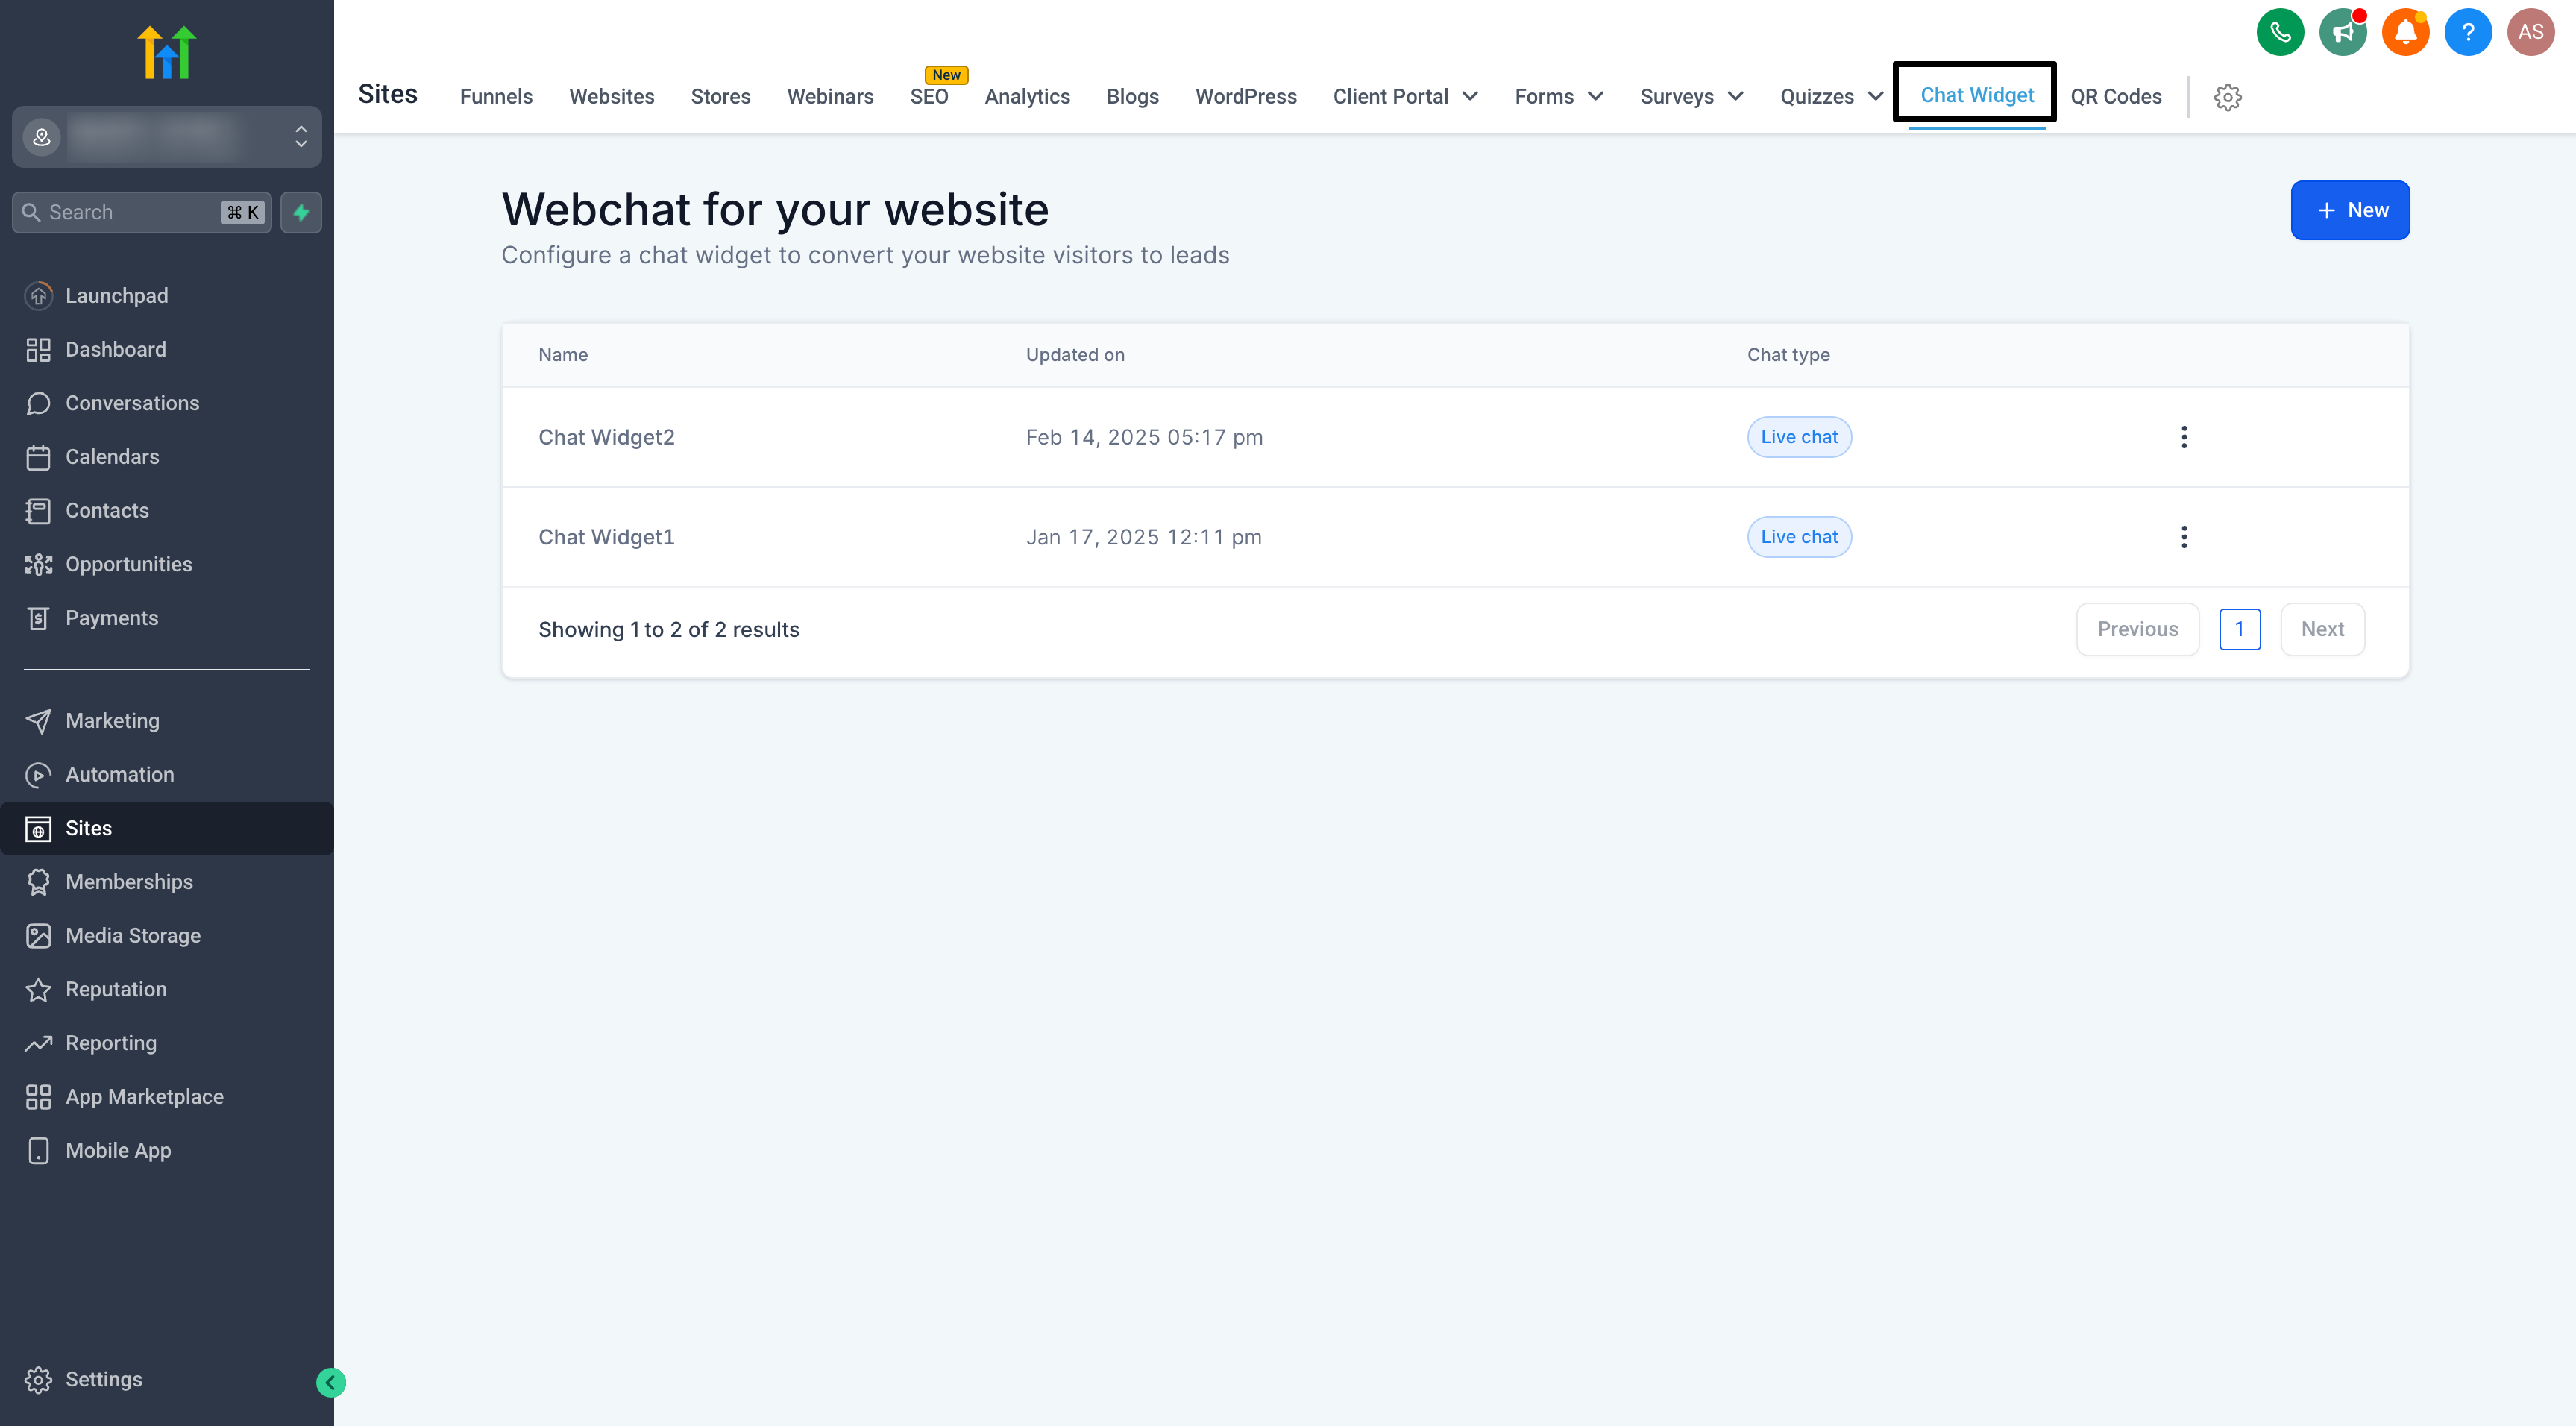
- Navigate to Sites > Chat Widget in the left menu.
- Click the Create New Chat Widget button.
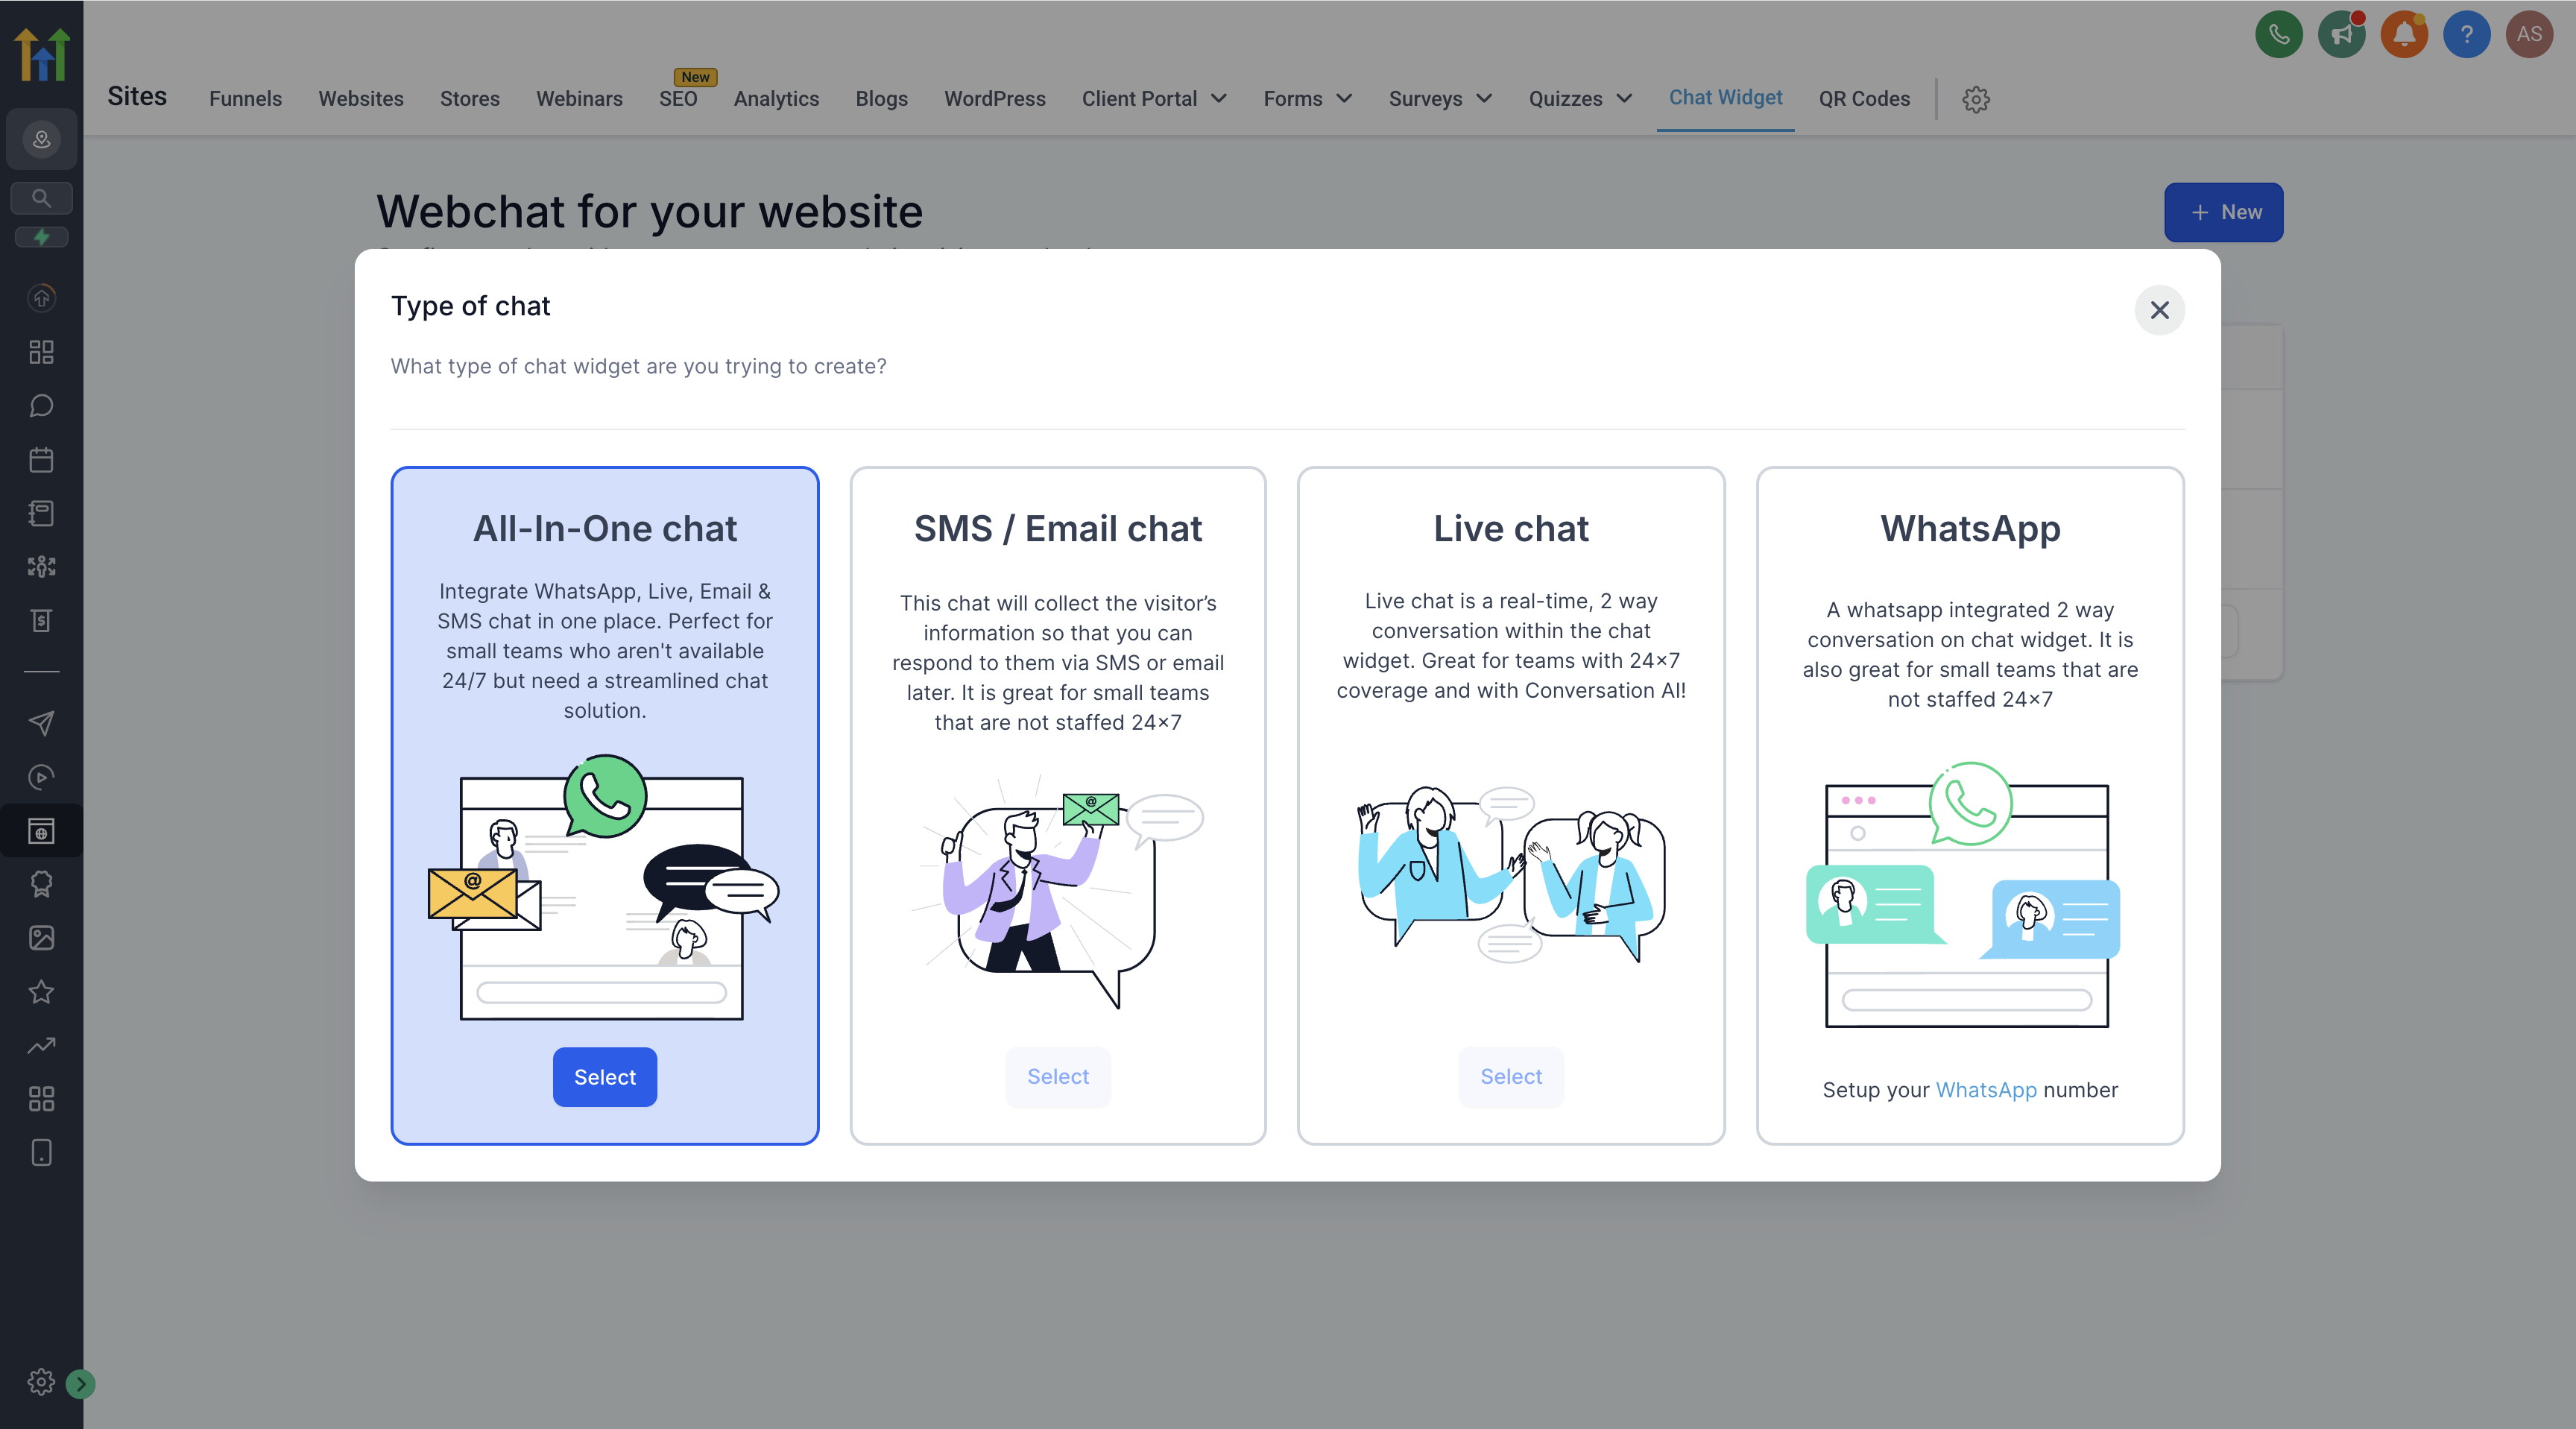
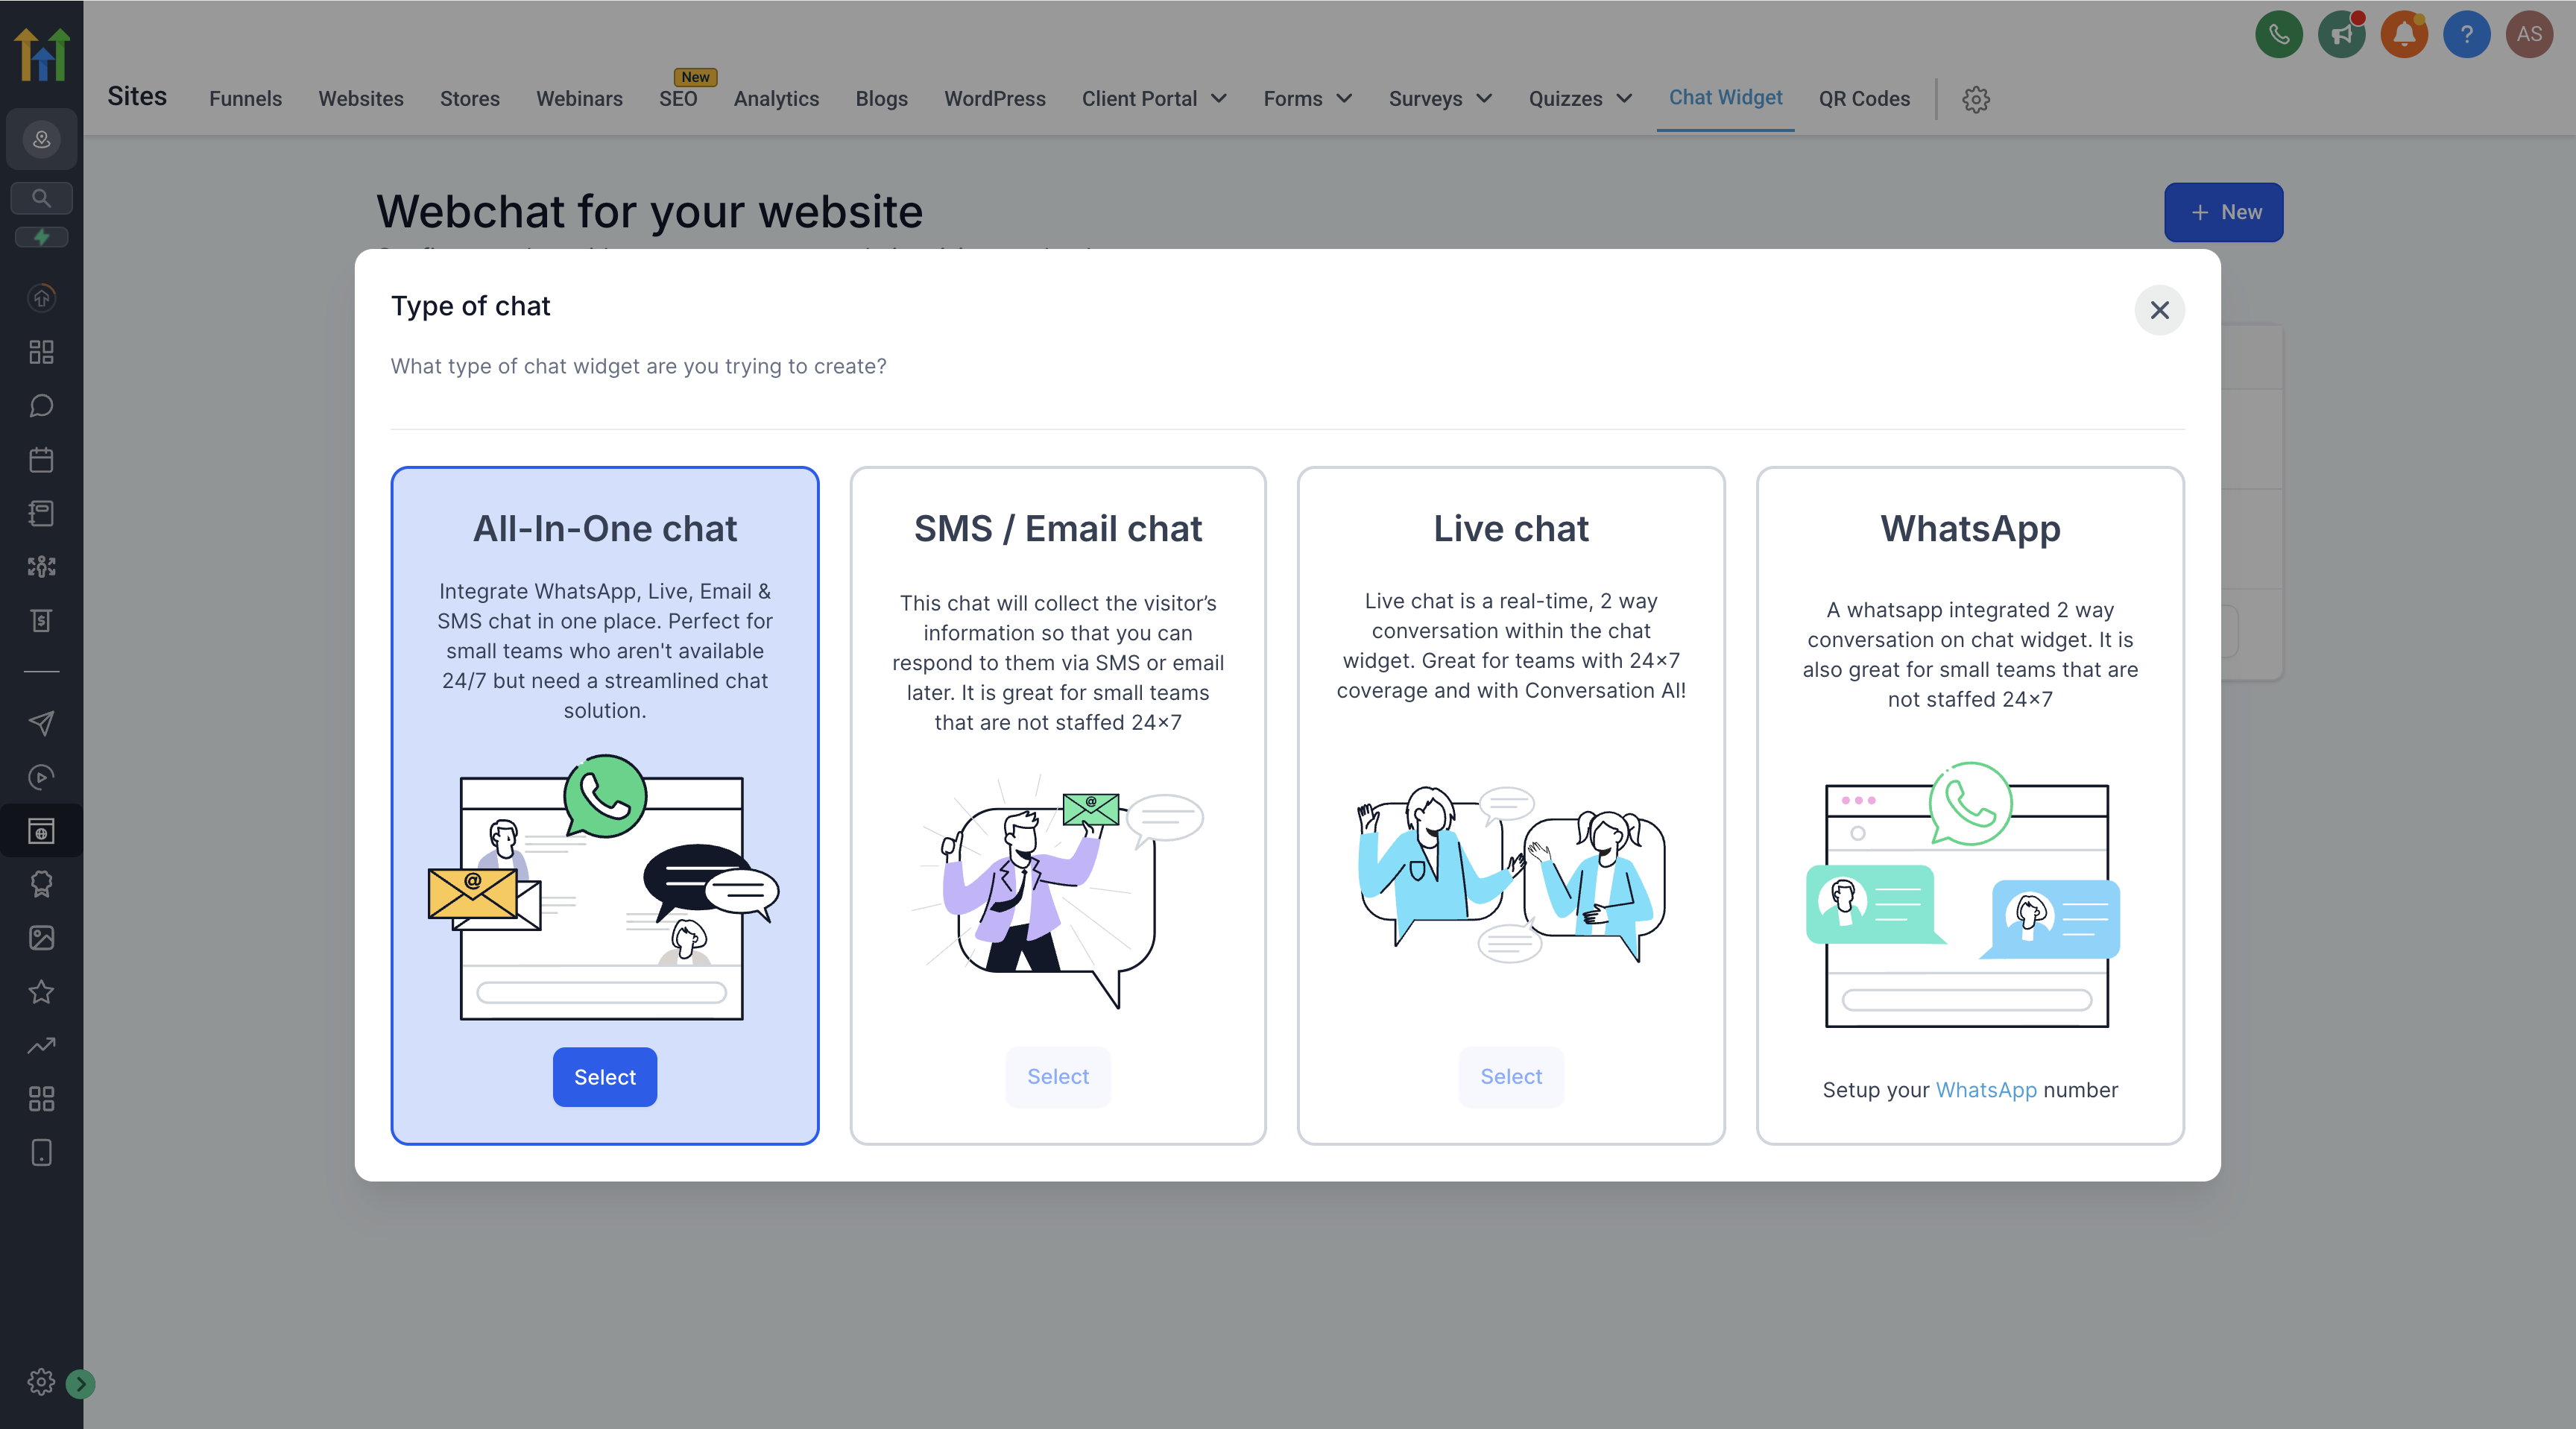
- Choose All in One Chat from the list of widget types.
- If All in One Chat is not visible, ensure your account has the latest updates, then refresh or log out and back in.
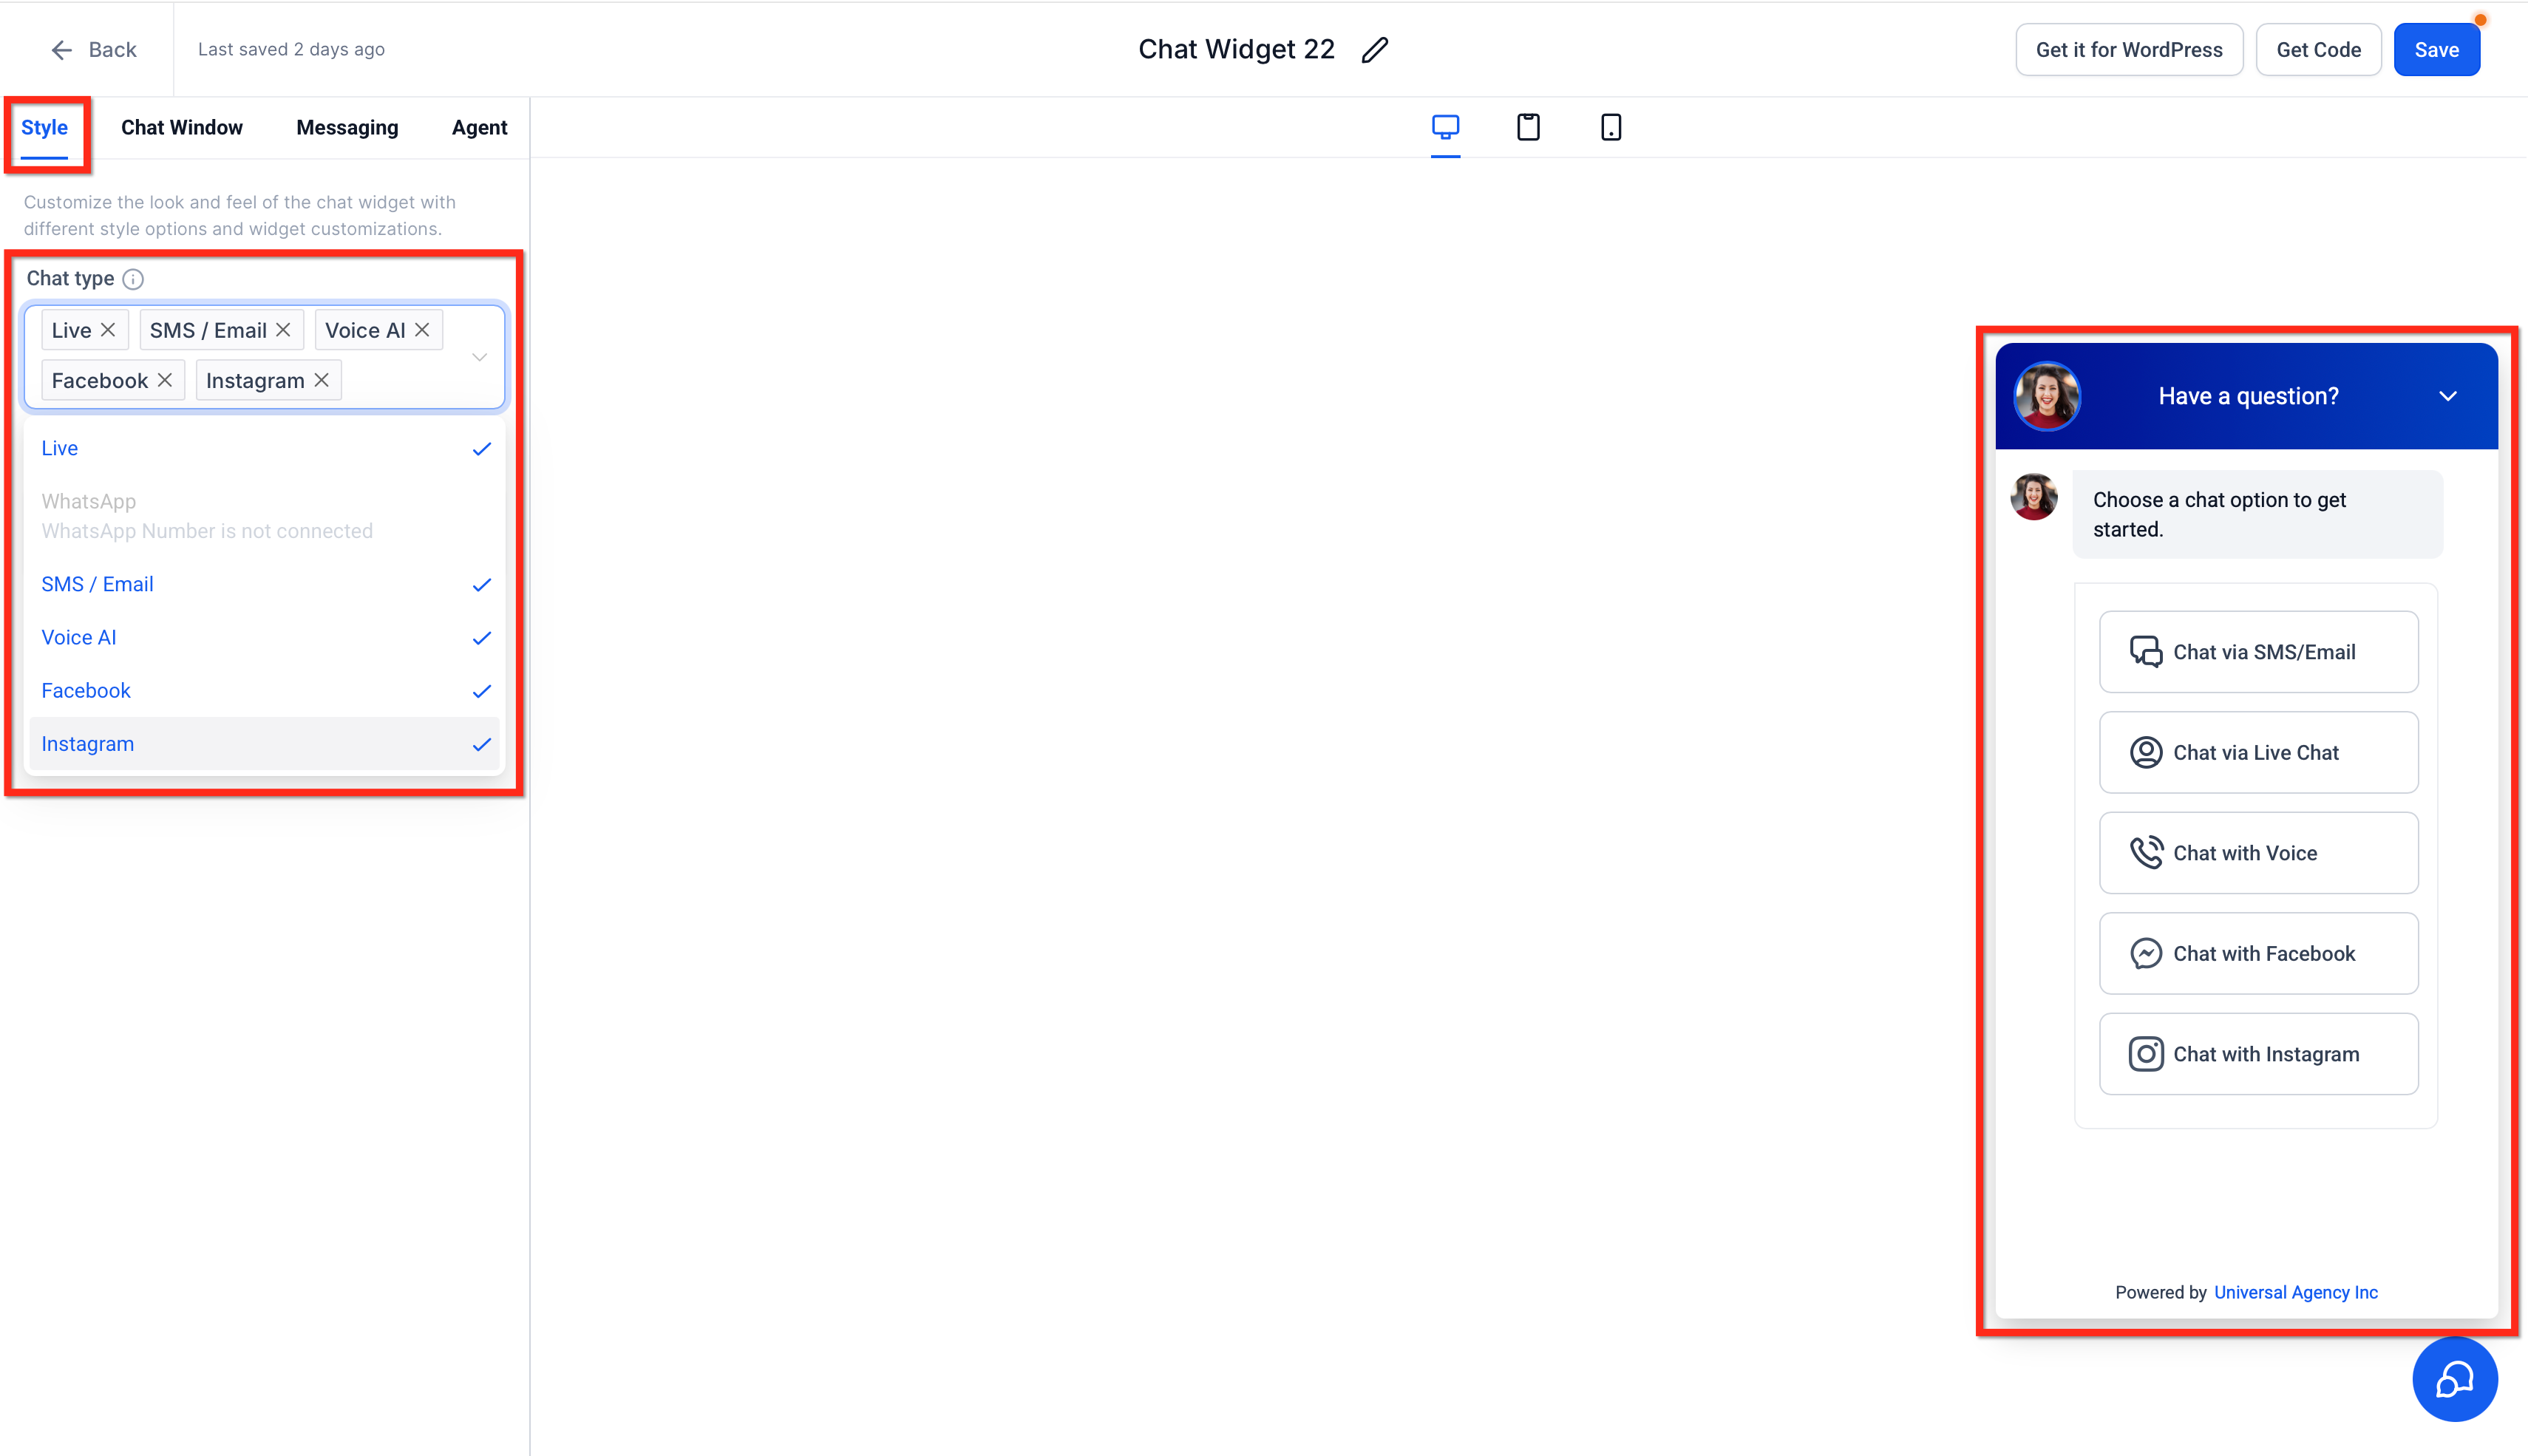
- Open the new widget and select the Style tab.
- In the Chat Type multi select, pick any combination of channels you want to show.
- Under Widget Placement, choose either Sticky or Embedded / Inline.
- Go to the Chat Window tab and enable Redirect Call To Action.
- Enter the redirect text that visitors will see and the destination URL.
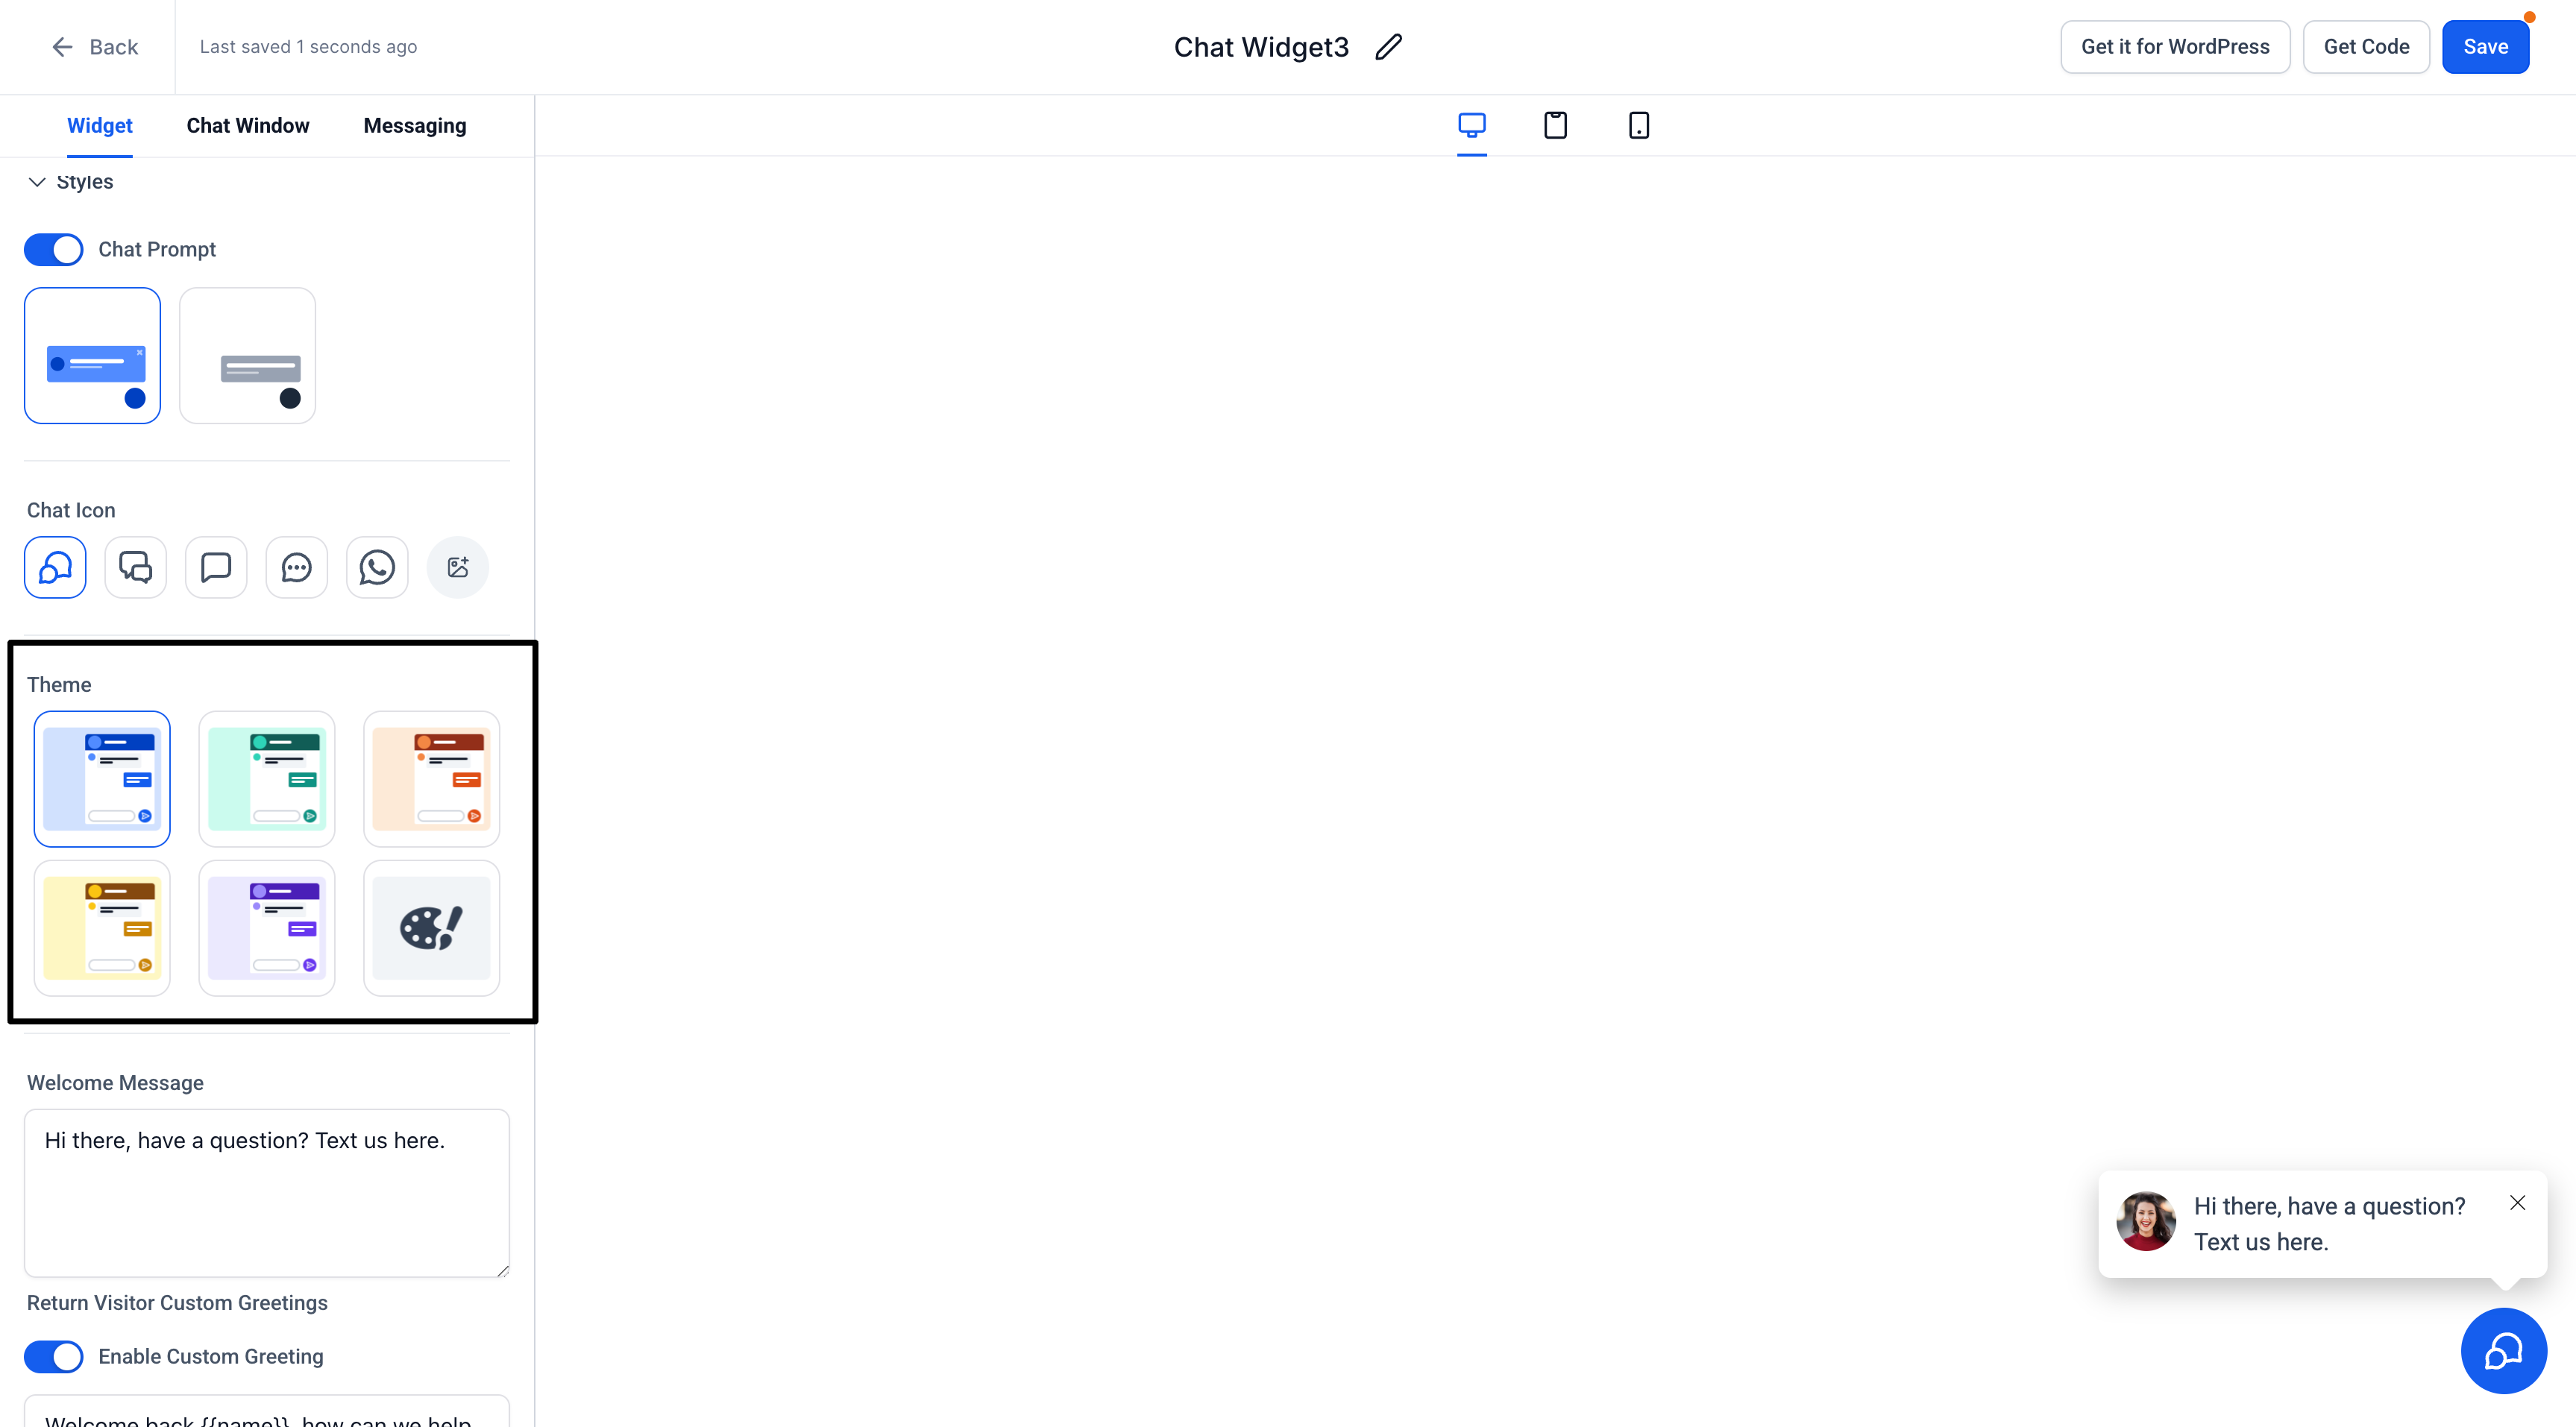
- Fill in General Settings (widget name, colour) and each channel’s specific settings.
- Click Save and then use the Preview option to verify the widget works as expected.
06What it looks like in HighLevel
07Settings that matter
- Chat Type. Controls which communication channels appear in the widget; options include Live Chat, SMS/Email, Voice AI, Facebook, Instagram and WhatsApp.
- Widget Placement. Determines whether the widget floats as a sticky bubble or is rendered inline within page content.
- Redirect Call, To, Action. When turned on, shows a clickable message that sends visitors to an external website.
- Redirect Text. The message displayed for the call to action link.
- Redirect Website. The URL that visitors are taken to when they click the call to action.
- General Settings, Name. A friendly label for the widget to identify it inside HighLevel.
- General Settings, Colour. Sets a single brand colour that is applied to every enabled channel.
- Live Chat, Display name. The name shown to visitors when they start a live chat session.
- Live Chat, Greeting message. The first text visitors see after opening the live chat portion of the widget.
- Live Chat, Offline behavior. Defines what happens when live agents are not available.
- Email Chat, Form messages. Customizable text that appears on the email contact form.
- WhatsApp, Number and greeting. Specifies the connected WhatsApp number and the default greeting shown to users.
08Things to know before you rely on it
- Channels only appear in the Chat Type selector when their specific prerequisites are met.
- The All in One Chat option may be hidden if the account does not have the latest updates; a refresh or re login may be required.
- Embedded / Inline placement does not show the floating chat bubble and cannot be minimized.
- A single unified colour scheme is applied to all channels; individual channel colours are not supported.
09If something goes wrong
- Widget not showing up. Verify that the widget code has been embedded on your website; locate the code under Sites > Chat Widget > Install Code.
- WhatsApp not available. Make sure an active WhatsApp number is connected and that the WhatsApp chat widget exists in the subaccount.
- Email not sending. Confirm that the email address is verified and correctly configured in your account settings.
10How it connects to the rest of HighLevel
- How to install the HighLevel chat widget and set its workflow Install widget
- Track chat widget activity with Google Analytics 4 GA4 tracking
- Add the HighLevel chat widget to a Wix website Wix integration
- View all Sites features that work with chat widgets All Sites features
- Start a 30 day HighLevel trial 30 day trial
Michael's take

From my perspective, having a single widget for all channels keeps the setup straightforward and maintains consistent branding.
If you only need Live Chat or Email, the extra options might feel unnecessary and could add complexity.