
Connect a Conversation AI agent to your site's live chat widget right from AI Studio. Pick an agent, see who's answering and under which tag conditions, and edit or remove it, all without leaving your site's settings.
Michael's take
I like this update because it’s a modest tweak that cuts a few clicks out of the workflow.
If you’re already building sites in AI Studio, you can now pick a Conversation AI agent right in the widget settings instead of opening the separate Conversation AI app.
I’d give it a run by connecting an agent, checking the tag conditions show up, then swapping it out to make sure the removal confirmation works as expected.
In practice you could have a new lead come to your site, get answered instantly by the AI, and still see at a glance which tag rules are driving the response.
Technology should stay out of the way and let you focus on the conversation, not on juggling screens.
It’s worth a look for anyone already using AI Studio chat widgets.
Why it matters for Founders
When you add a chat widget to an AI Studio site, you usually want an AI agent answering visitors. Until now, connecting one meant leaving AI Studio, opening Conversation AI, finding the agent and setting up its Live chat channel for that particular widget. The widget settings in AI Studio didn't show whether an agent was connected, or which one.
- Faster setup:Go from a new site to AI powered live chat without switching tools.
- Full visibility:Always know which agent answers your website visitors, and for which contacts.
- Same experience everywhere:Managing an agent in AI Studio works the same way as in the Chat Widget builder.
- Stay in control:Swap or remove the agent anytime, with a confirmation before anything changes.
What changed
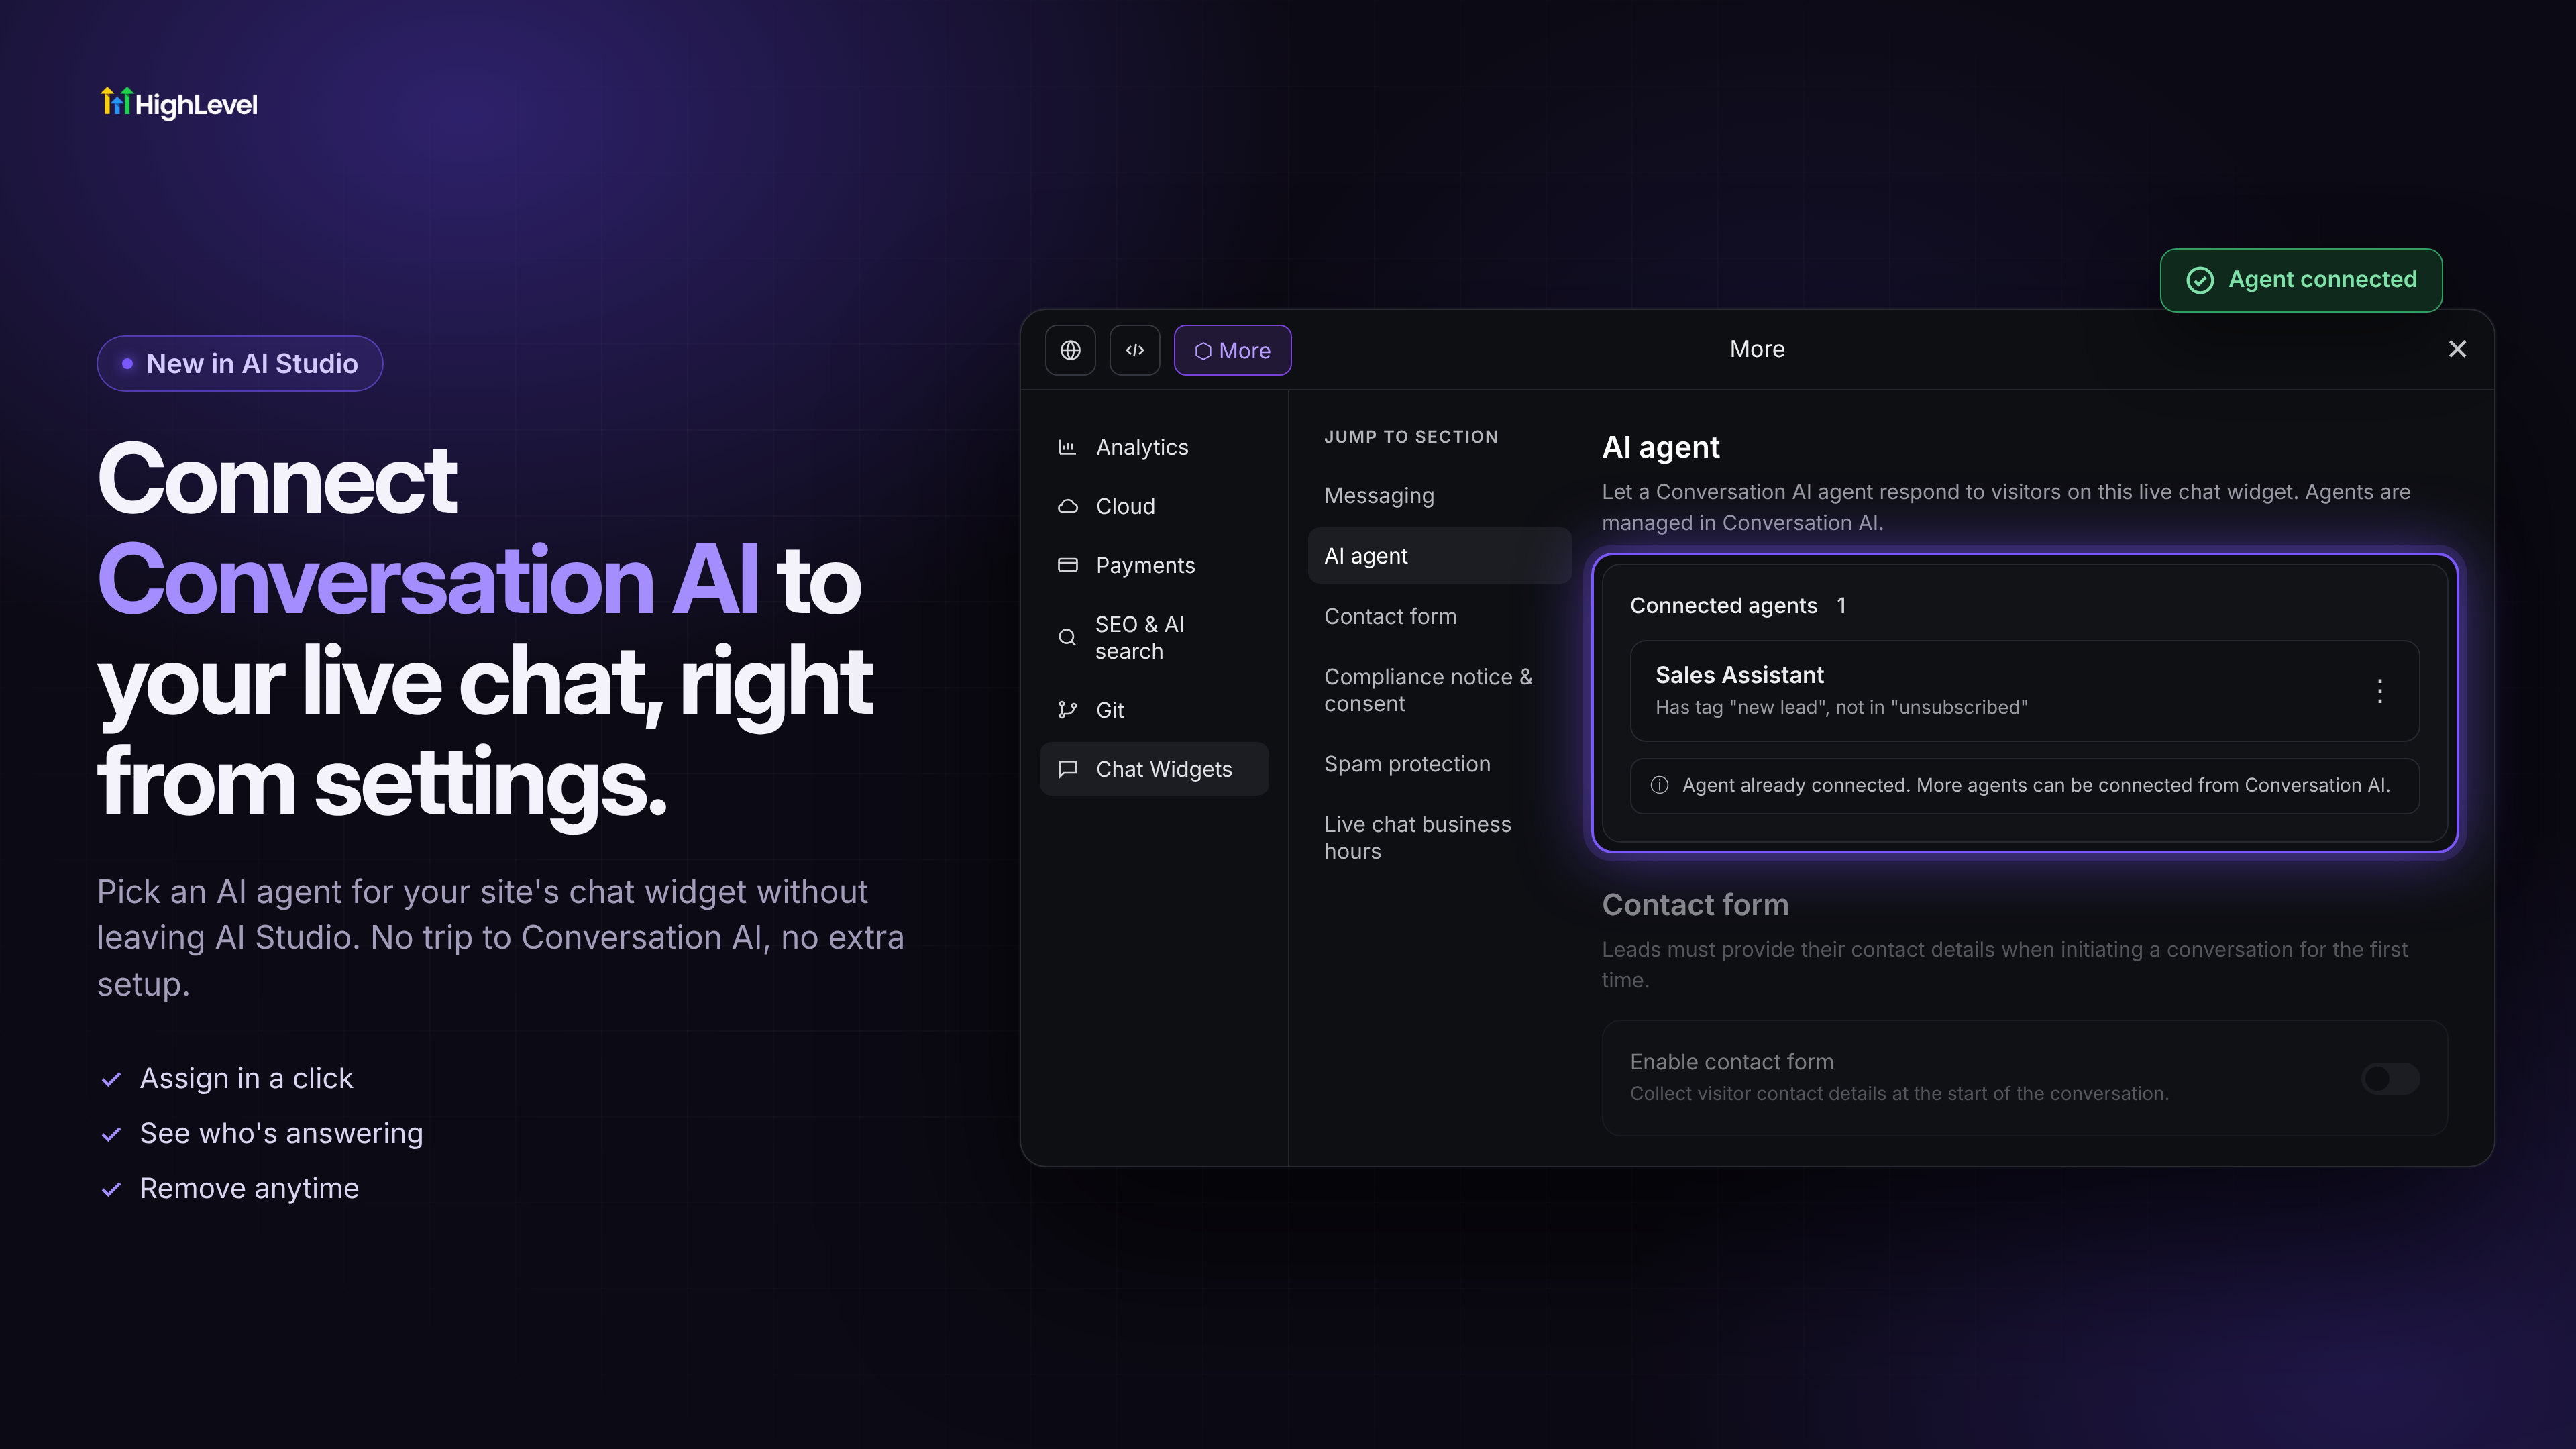
A newAI agentsection in your site's chat widget settings (More > Chat Widgets > AI agent) works the same way as the Agent tab in the Chat Widget builder:
- Connect an agent:Choose any Conversation AI agent from the Agent dropdown and save. The agent starts replying to visitors on that live chat widget.
- See who's answering:The connected agent shows under Connected agents with its tag conditions, for example Has tag "new lead", not in "unsubscribed".
- Edit or remove:Use the ⋮ menu on the agent. Edit agent opens it in Conversation AI, and Remove connection disconnects it from the widget after you confirm.
- Edit tags in one click:Tag conditions are managed in Conversation AI, and Edit tags takes you straight to the Conversation AI agent's settings.
How to turn it on
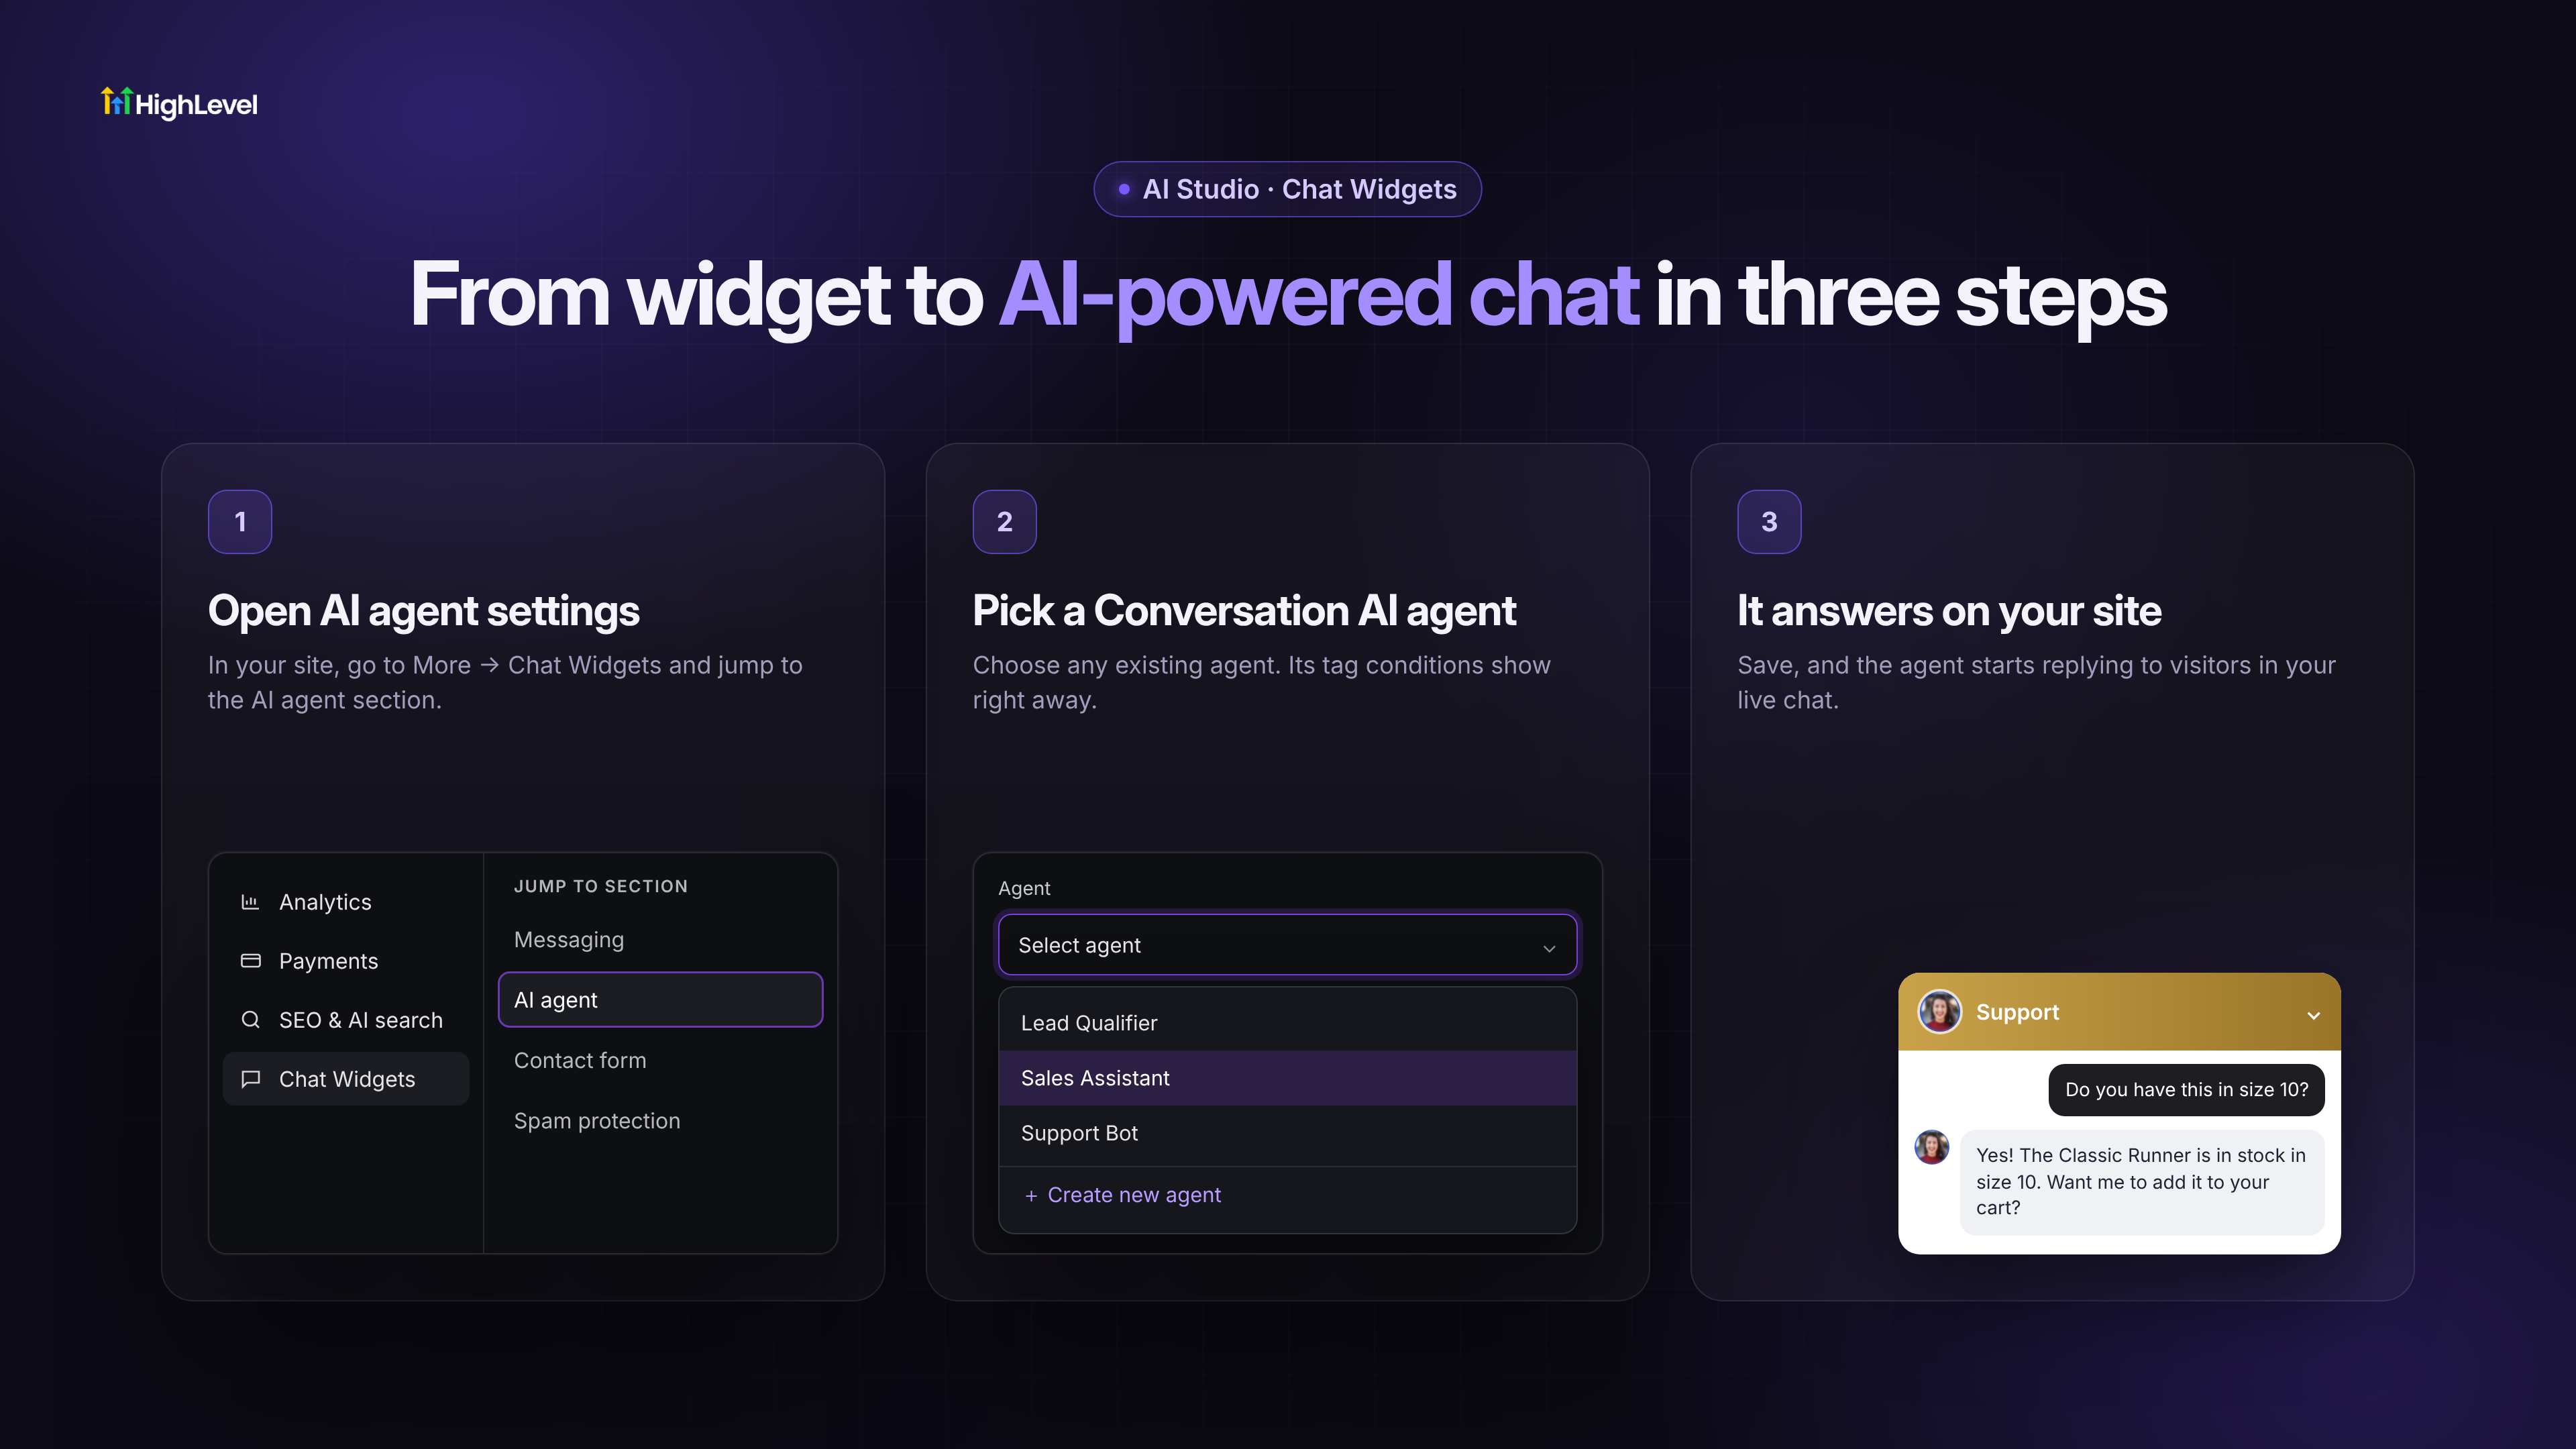
- Navigate:Open your site in AI Studio, click More and go to Chat Widgets, then jump to the AI agent section.
- Activate:Pick a Conversation AI agent from the Agent dropdown, check its tag conditions and save.
- Enjoy:Visitors chatting on your site get answers from your AI agent. Use the ⋮ menu to edit or remove it anytime.
Notes and availability
- Works with live chat widgets only.
- One agent can be connected from AI Studio. More agents can be connected from Conversation AI.
- Tags can't be edited in AI Studio. Use Edit tags to change them in Conversation AI.
- Agents are created and trained in Conversation AI. AI Studio connects an existing agent to your widget.
Questions Founders ask
What did HighLevel release in "AI Studio: Connect Conversation AI to Your Live Chat Widget from Settings"?
Connect a Conversation AI agent to your site's live chat widget right from AI Studio. Pick an agent, see who's answering and under which tag conditions, and edit or remove it, all without leaving your site's settings.
What should a Founder do with AI Studio: Connect Conversation AI to Your Live Chat Widget from Settings?
Open a site in AI Studio, go to More > Chat Widgets, and link a Conversation AI agent to test the new flow. Founders who already use AI Studio chat widgets and want to attach an AI agent without hopping between tools.
How do I turn on AI Studio: Connect Conversation AI to Your Live Chat Widget from Settings in HighLevel?
In HighLevel: Navigate: Open your site in AI Studio, click More and go to Chat Widgets, then jump to the AI agent section. Then Activate: Pick a Conversation AI agent from the Agent dropdown, check its tag conditions and save. Then Enjoy: Visitors chatting on your site get answers from your AI agent. Use the ⋮ menu to edit or remove it anytime.
Why does AI Studio: Connect Conversation AI to Your Live Chat Widget from Settings matter?
When you add a chat widget to an AI Studio site, you usually want an AI agent answering visitors. Until now, connecting one meant leaving AI Studio, opening Conversation AI, finding the agent and setting up its Live chat channel for that particular widget. The widget settings in AI Studio didn't show whether an agent was connected, or which one.
How do I get this feature with setup help?
Start a free HighLevel trial through Michael Reimer's link and the CRM Pros team helps with setup in your first 7 days, with an onboarding call, three live calls every week and the affiliate community included.
Get More InformationOpens in a new tab Published November 6, 2026. Screenshots belong to HighLevel.