
01Who this is for
- Founders who run several marketing funnels and need a distinct chat experience per funnel.
- Agency marketers managing client sites who require separate branding for each client’s chat widget.
- Small business owners with both a storefront website and a support portal, wanting tailored widgets for each.
02Multiple chat widgets, explained
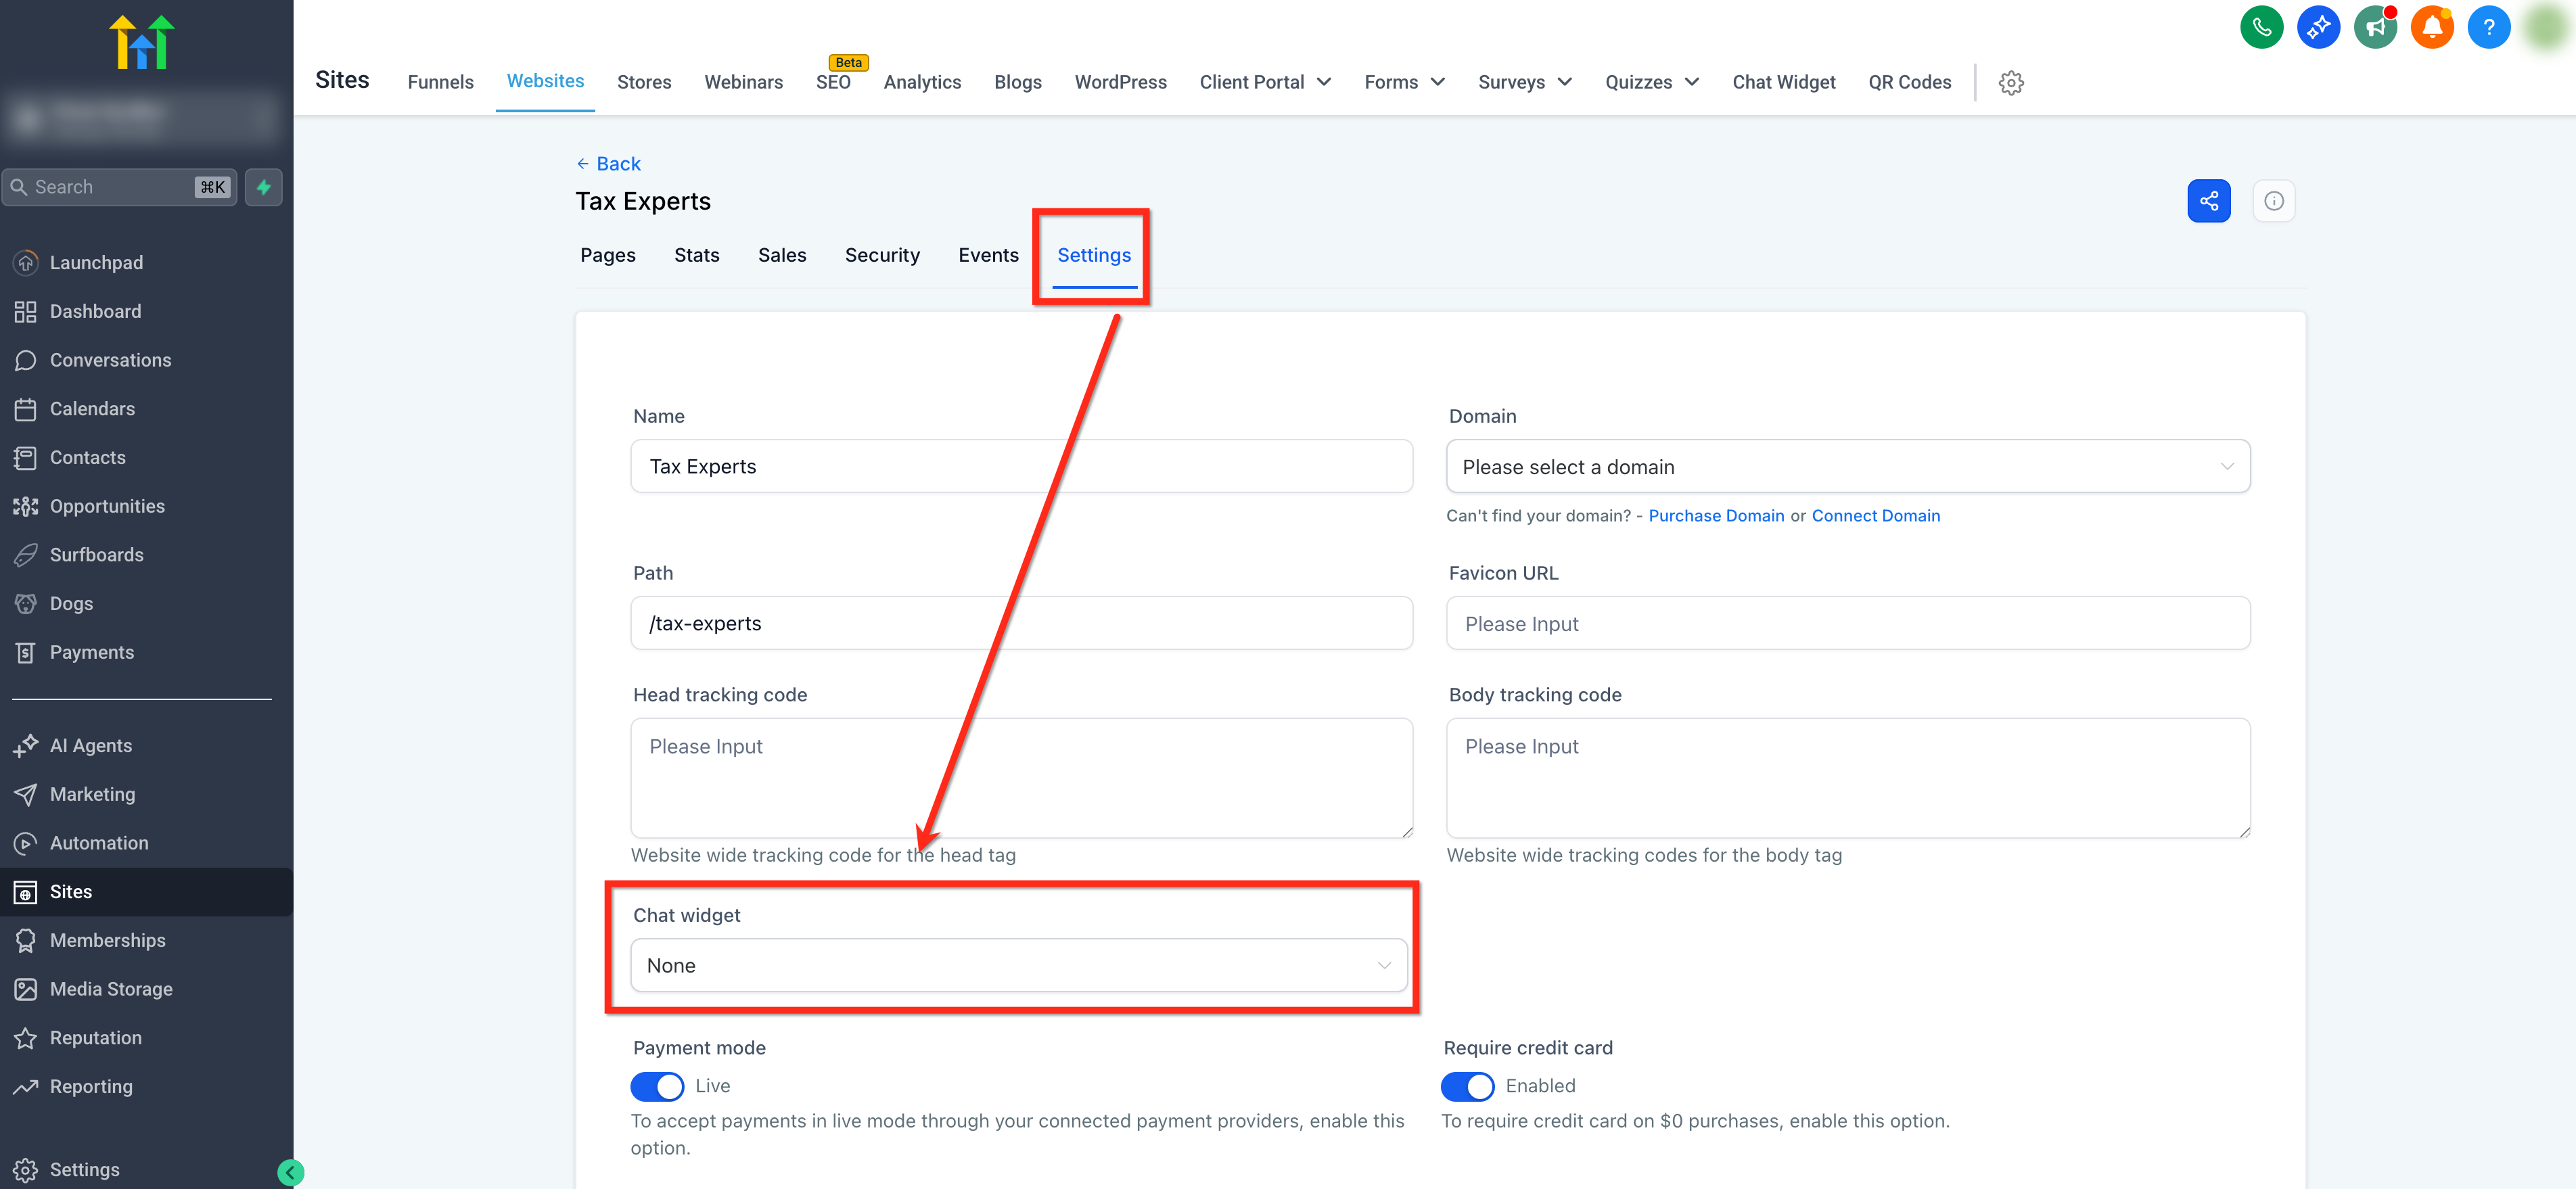
The feature lets you create more than one chat widget within the same HighLevel account. After a widget is created, it can be set as the default for an entire website or funnel, or embedded on individual pages for granular control. Widgets are managed from the Sites area; the Chat Widget list holds every widget you create. Site wide assignment uses a dropdown in the Settings tab of a website or funnel. Page specific placement uses a code embed copied from the widget’s Get Code action. Updates to a widget’s design or channels automatically appear wherever the widget is used, eliminating the need to reinstall code after changes.
03How businesses use multiple chat widgets
- Ecommerce store. Create one widget for sales inquiries and another for post purchase support. Assign the sales widget site wide, then embed the support widget on the order status page using a code element.
- Digital marketing agency. Build a uniquely branded widget for each client’s landing page. Set each client’s site wide widget in the Settings tab, and use per page embeds for special promotion pages.
- Local service business. Design a widget with appointment scheduling for the services page and a separate widget with contact info for the about page. Use the site wide setting for the main site and embed the second widget on the about page only.
04Before you start
- Create each chat widget you plan to use before assigning them to sites or pages.
05How to set up and use multiple chat widgets in HighLevel
Create multiple chat widgets
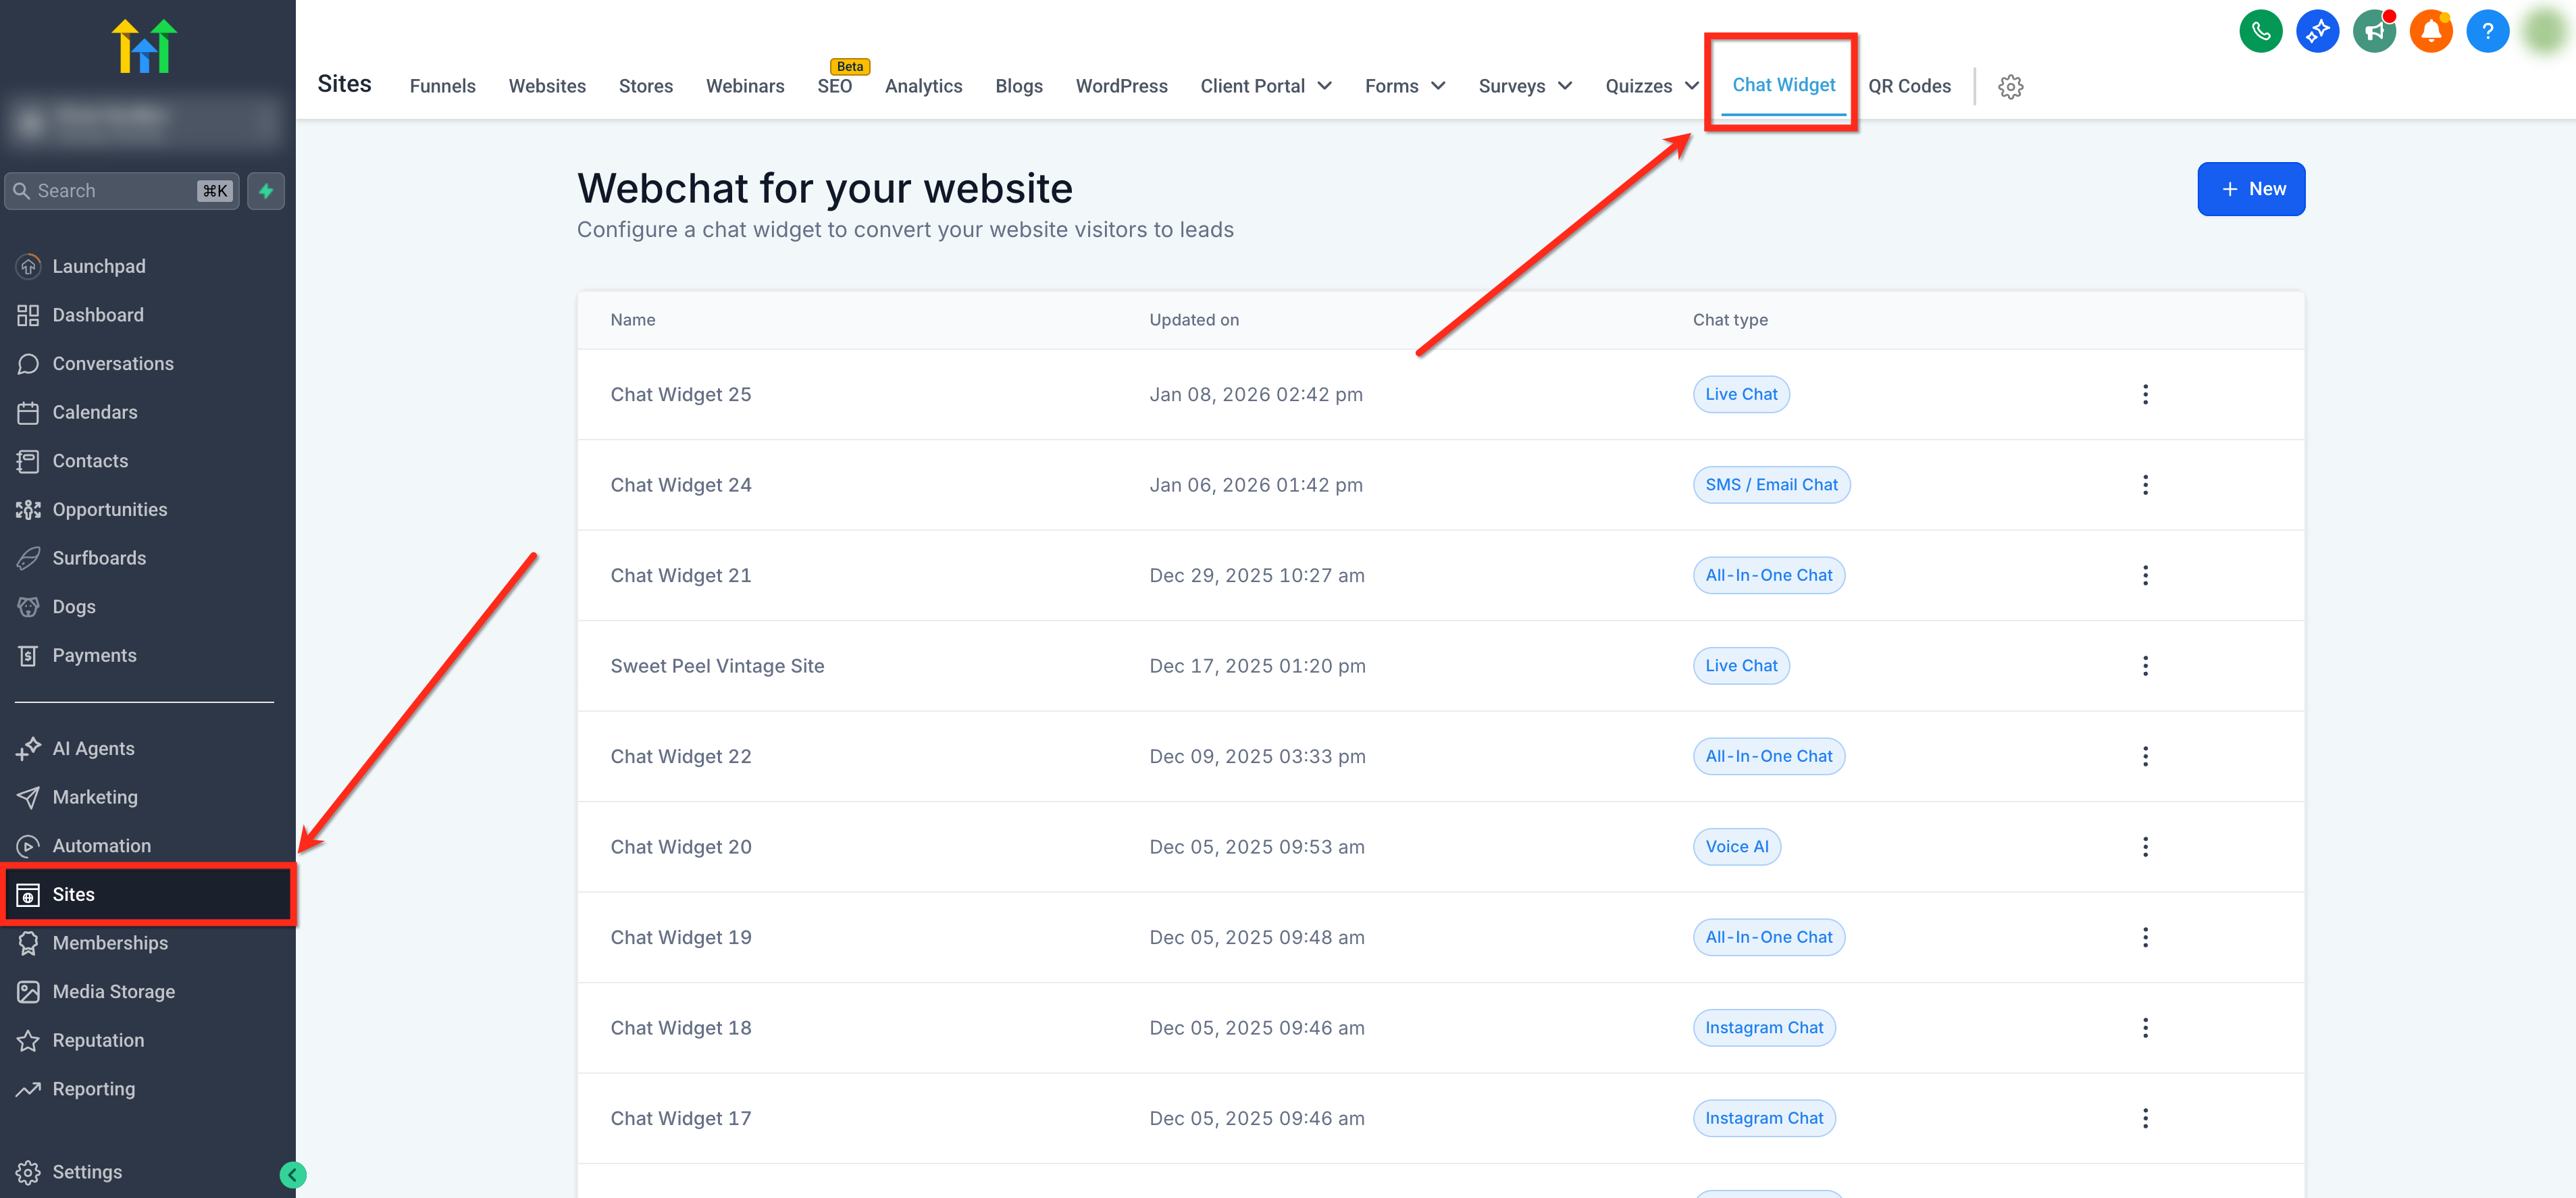
- Navigate to Sites > Chat Widget.
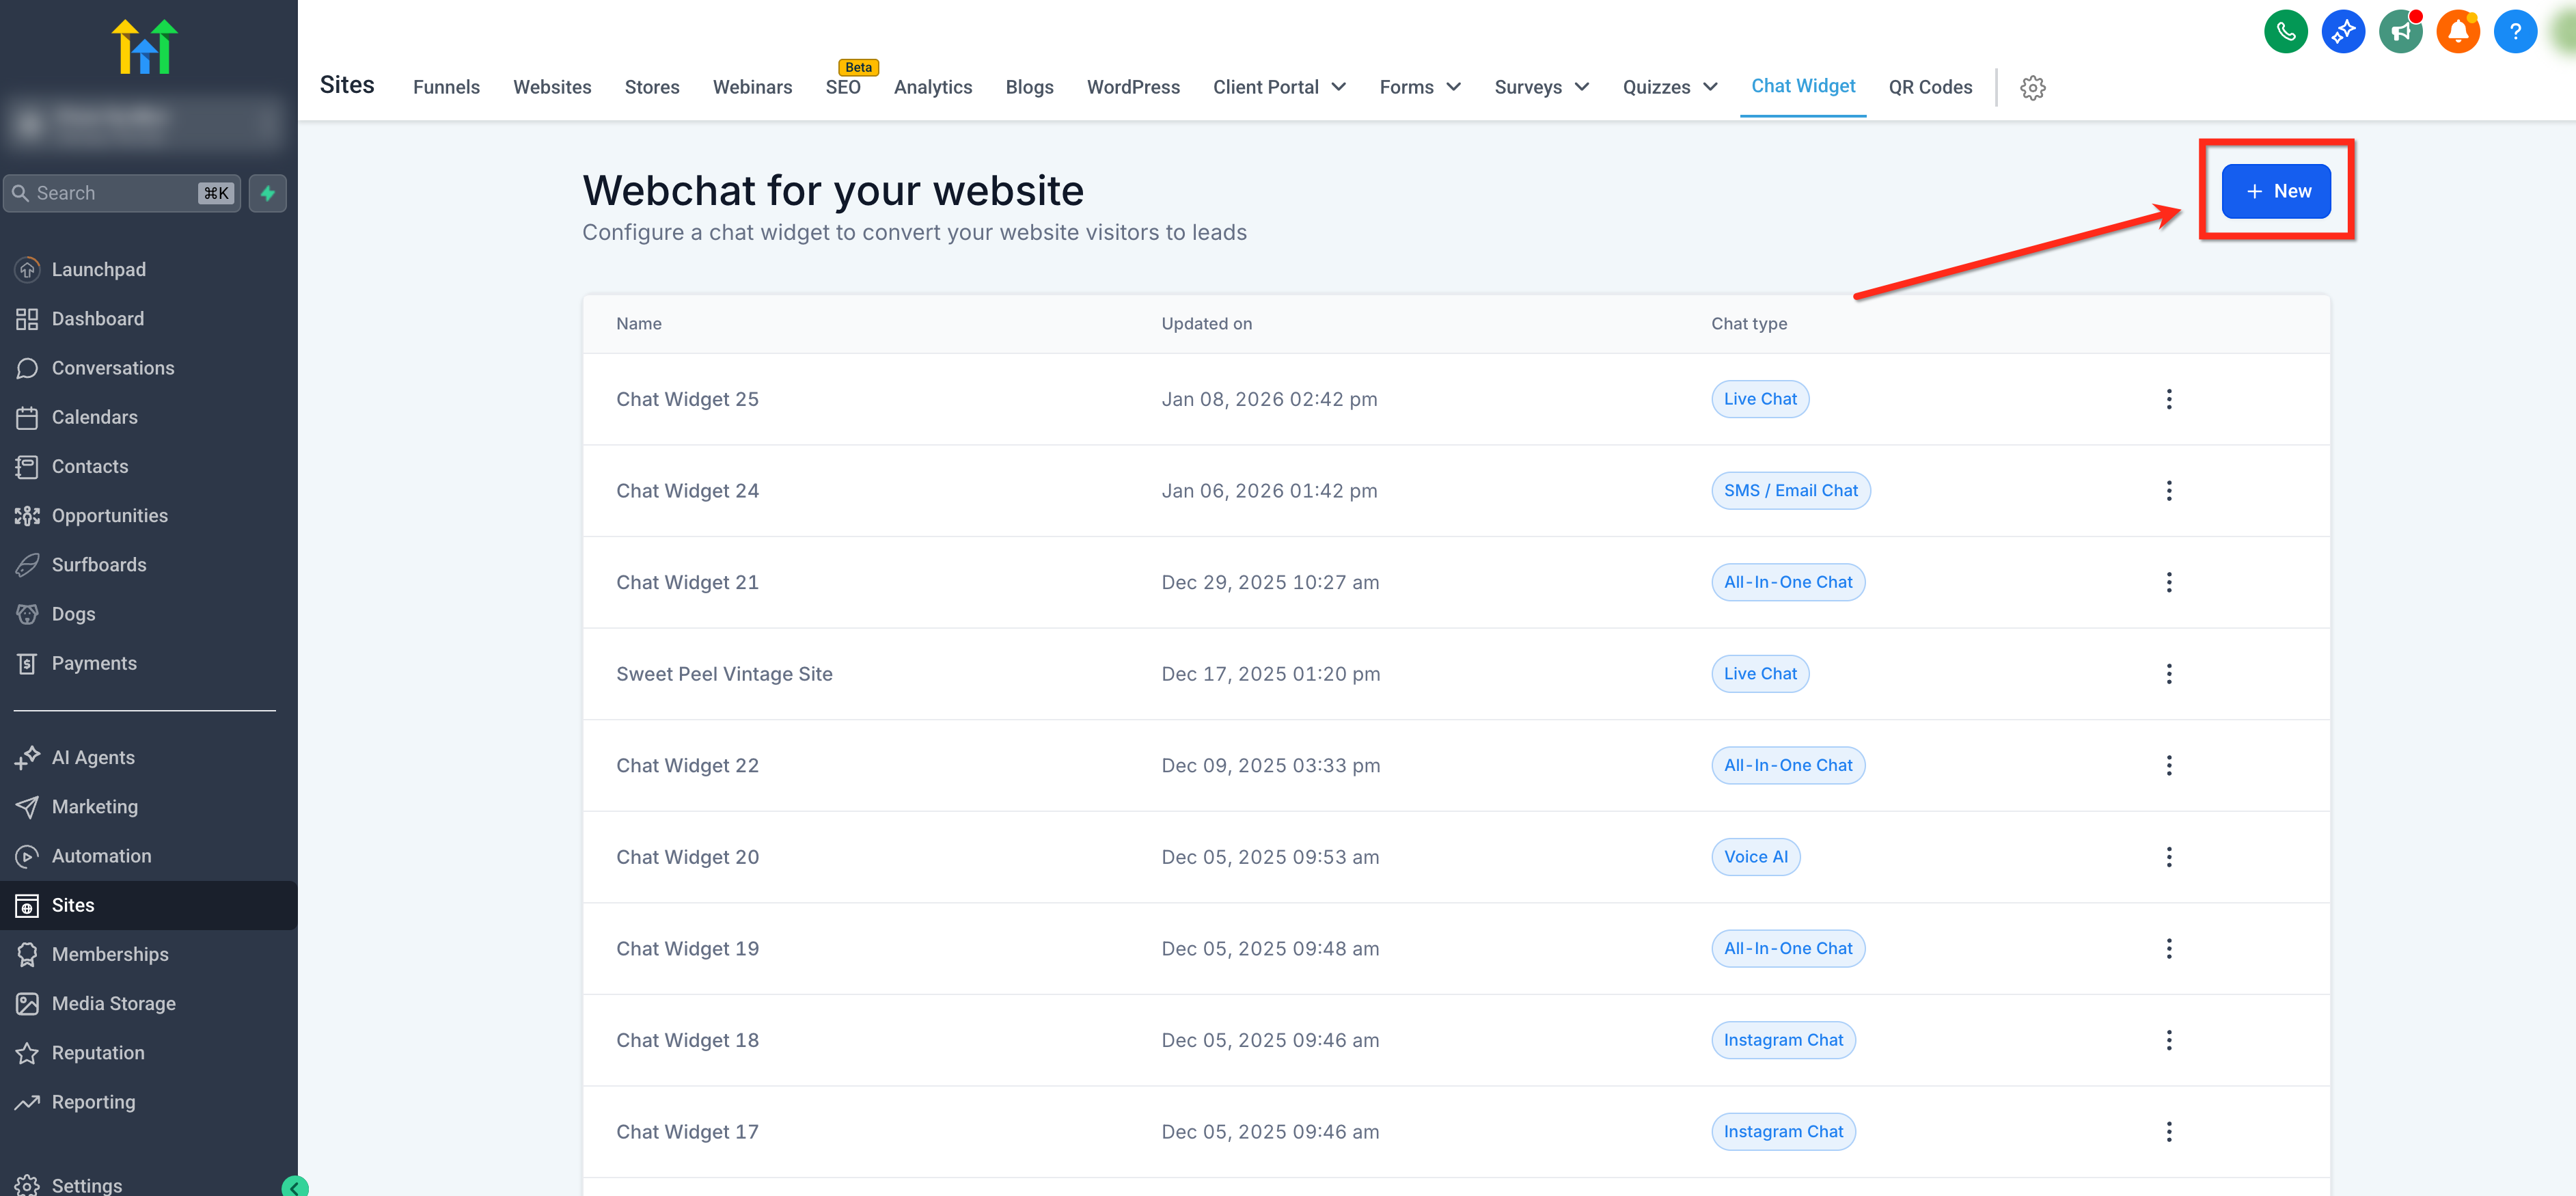
- Click the blue + New button.
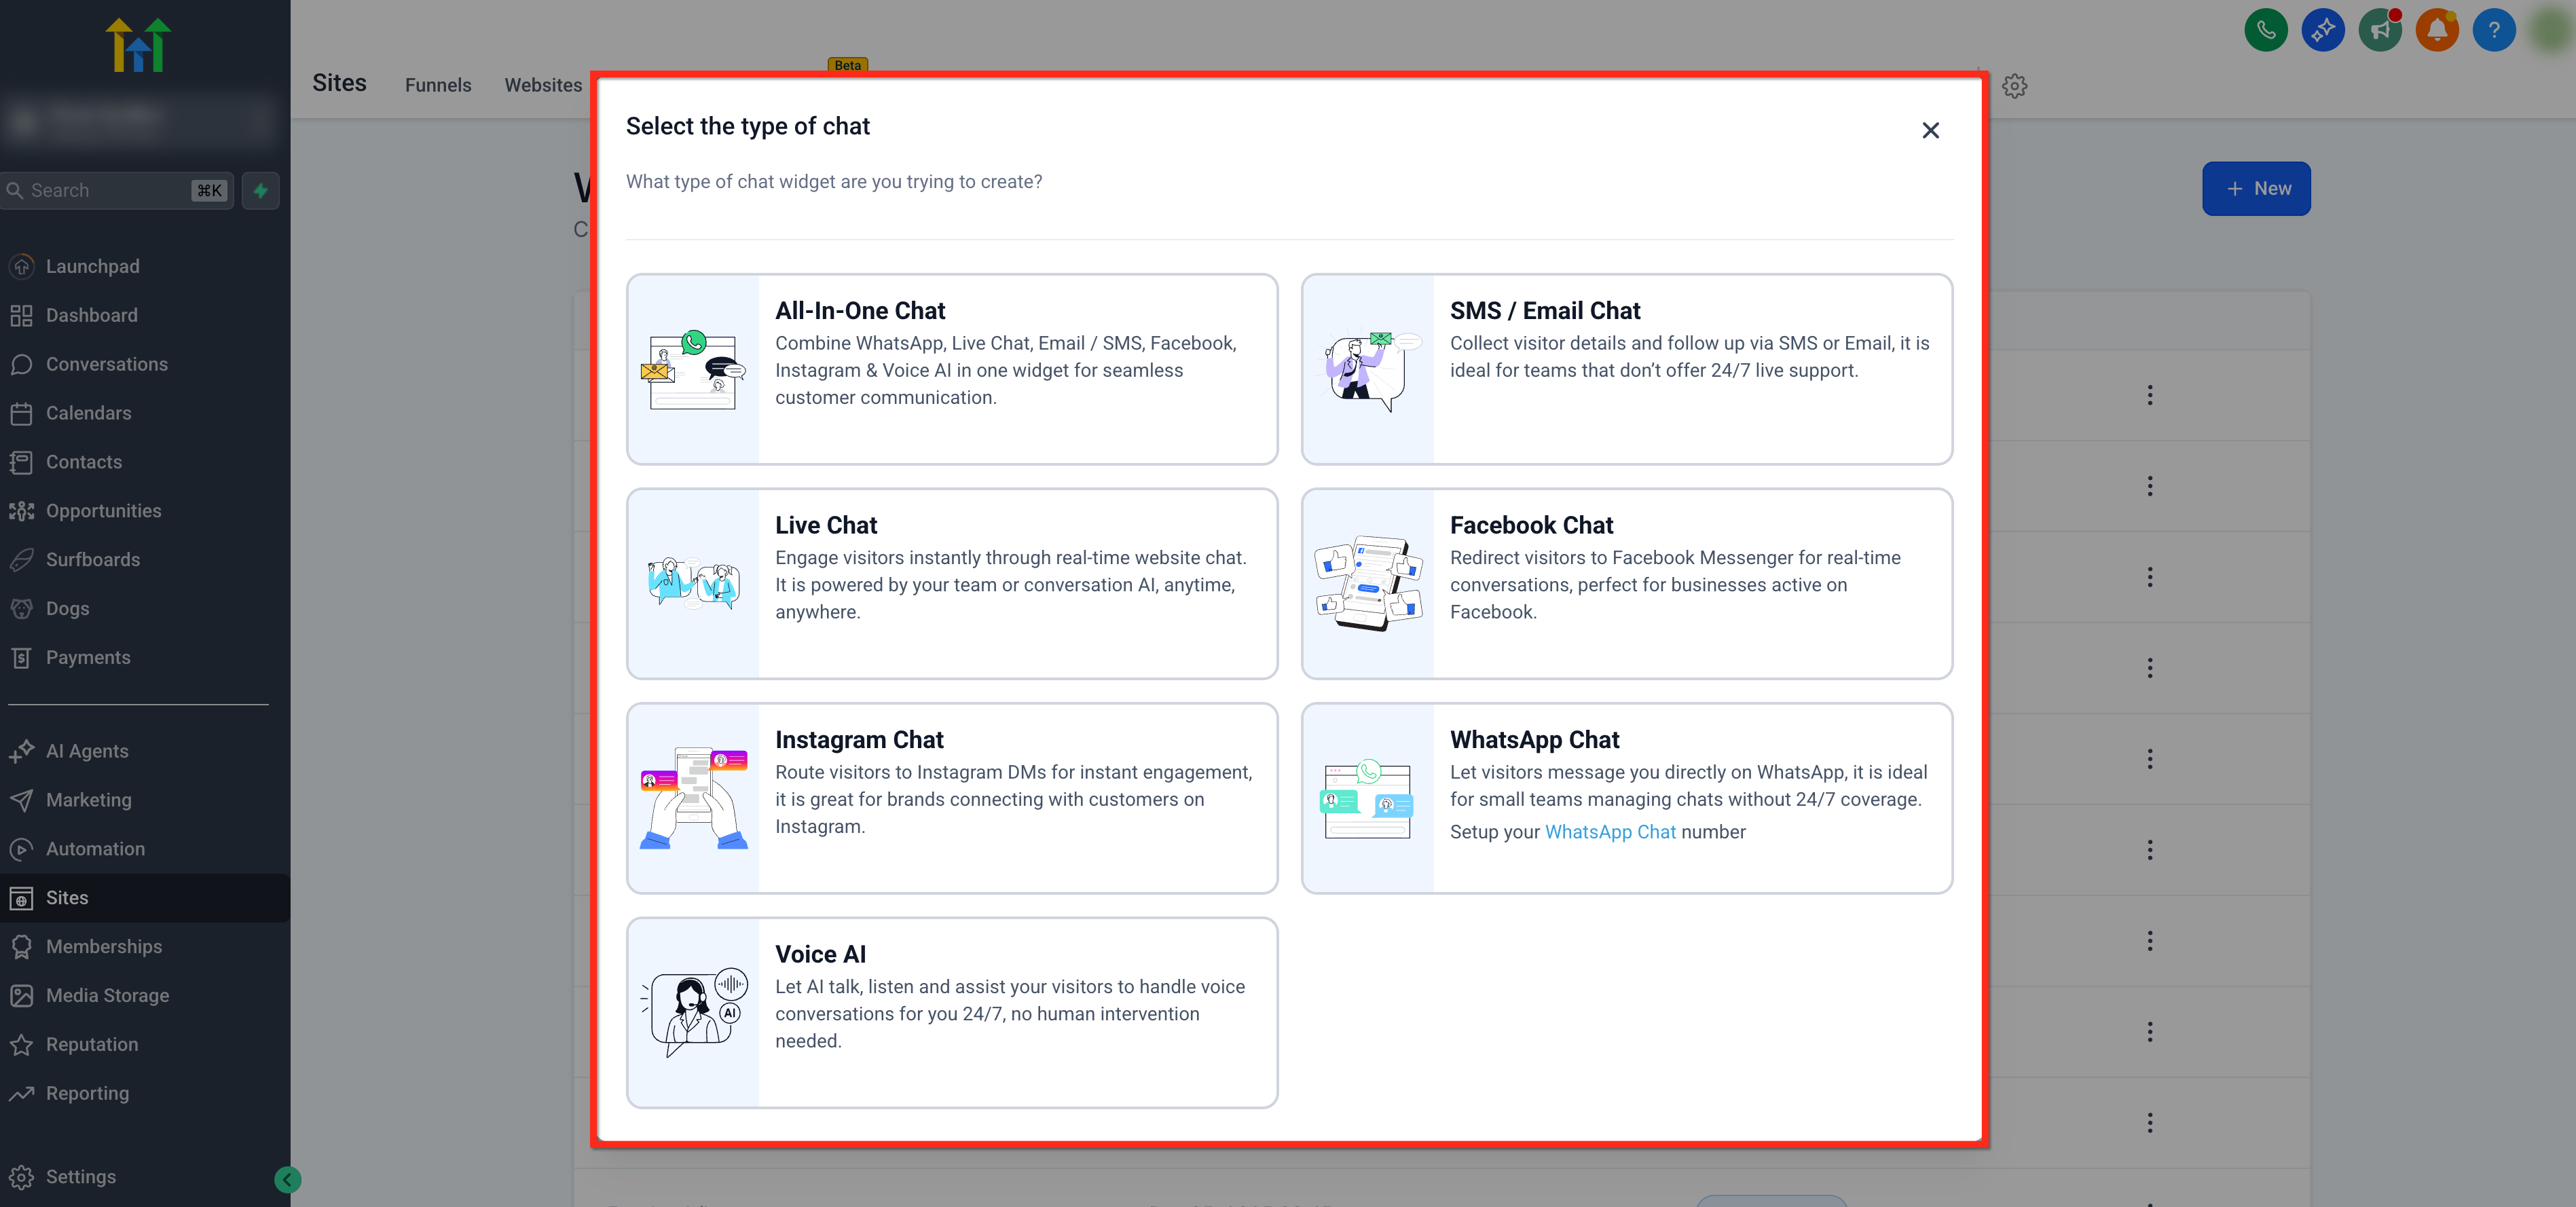
- Select the type of chat widget you want to create.
Set the site wide chat widget
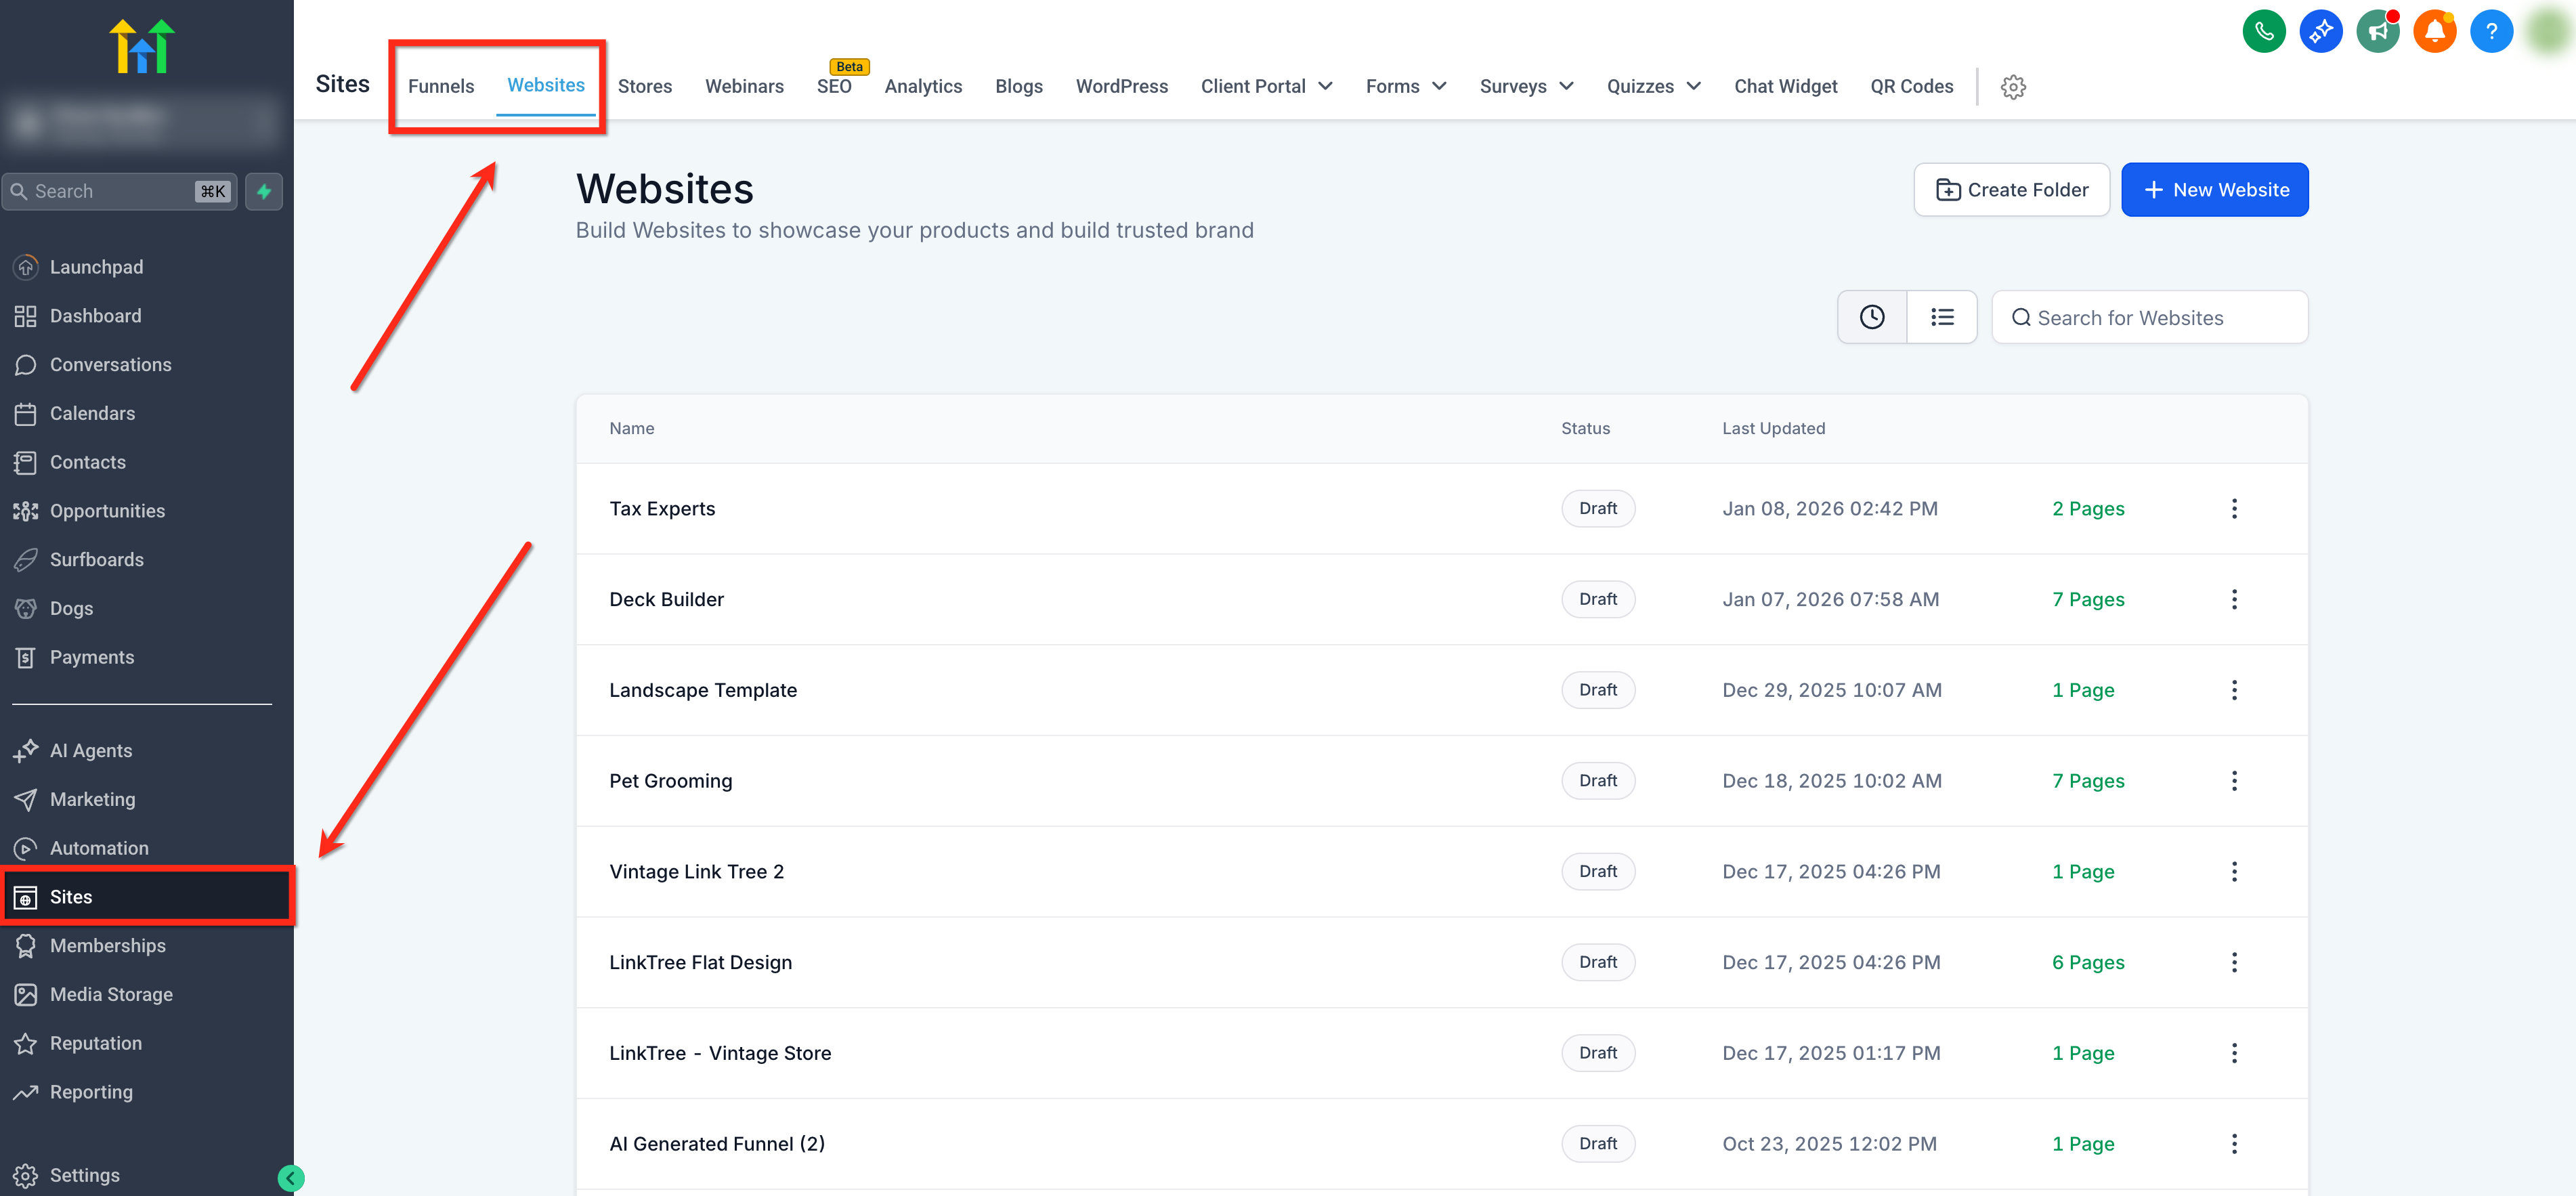
- Open Sites > Websites or Funnels and choose the site you want to edit.
- Select the Settings tab for that site.
- Use the Chat Widget dropdown to pick the widget that will appear across the entire site.
Assign a page specific chat widget
- Open Sites > Websites or Funnels and select the site to edit.
- In Settings, set the Chat Widget dropdown to "None" and click Save.
- Go to Sites > Chat Widgets, open the desired widget, click Get Code, and copy the snippet.
- In the Page Editor for the target page, add a Code element.
- Open the Code editor for that element, paste the copied snippet, and click Save.
06What it looks like in HighLevel
07Settings that matter
- Chat Widget dropdown. Determines which chat widget is displayed for the whole site or disables the site wide widget when set to "None", allowing per page widgets via code.
08Things to know before you rely on it
- Only one widget can be selected at the site level; that selection overrides any page level code embeds.
09How it connects to the rest of HighLevel
- Install and configure a chat widget Install chat widget
- Use the All in One Chat widget All in One widget
- View HighLevel pricing and plans Pricing
Michael's take

Adding multiple chat widgets feels like a small convenience that can become a real shift for businesses that run several marketing funnels. It lets you keep each funnel’s look and feel while still pulling all conversations into a single inbox.
A health coach with a free lead funnel and a paid program funnel will love this. One widget can showcase a free download offer, the other can push a premium program signup. I’d test each widget on its own page first, then watch the automatic updates so I do not have to paste new code again.