
01Who this is for
- Freelance consultants can generate invoices on the go and capture payments without switching platforms.
- Small retail businesses can create point of sale invoices from the mobile app and record cash or card receipts right away.
02Invoices, explained
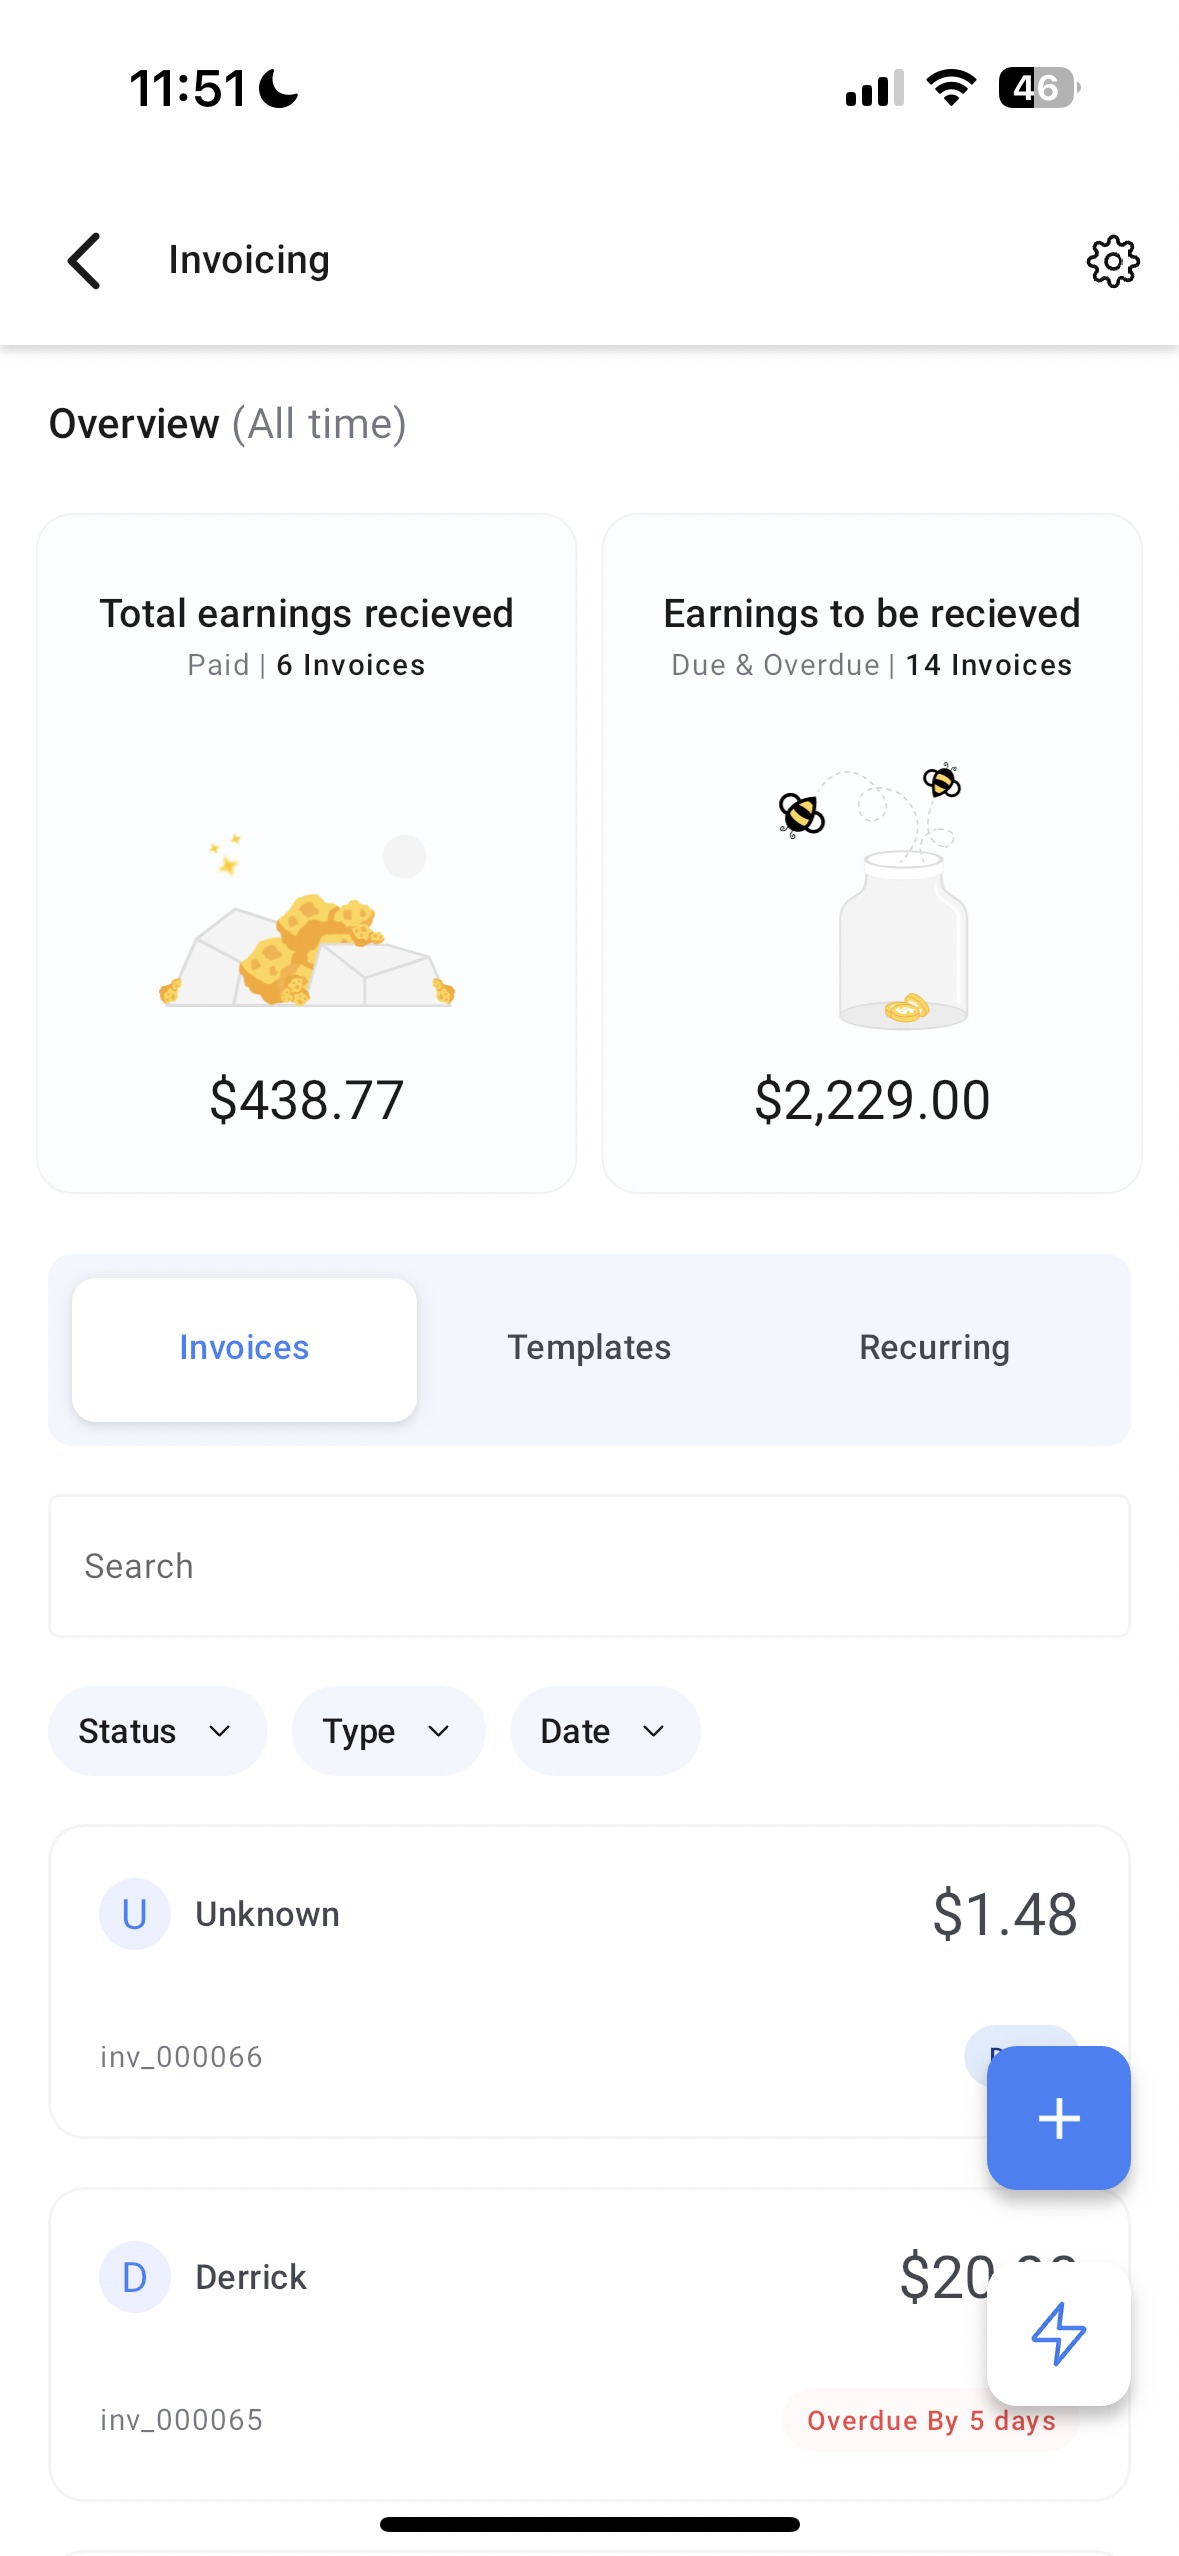
In the HighLevel mobile app, the Invoices section provides a dashboard that separates collected earnings from pending amounts. A list of all invoices, draft, due, paid, appears, regardless of where they were created. Interacting with an invoice card uses taps for the primary action, long press for all actions, and left swipe to reveal the two most significant actions and the option to view more.
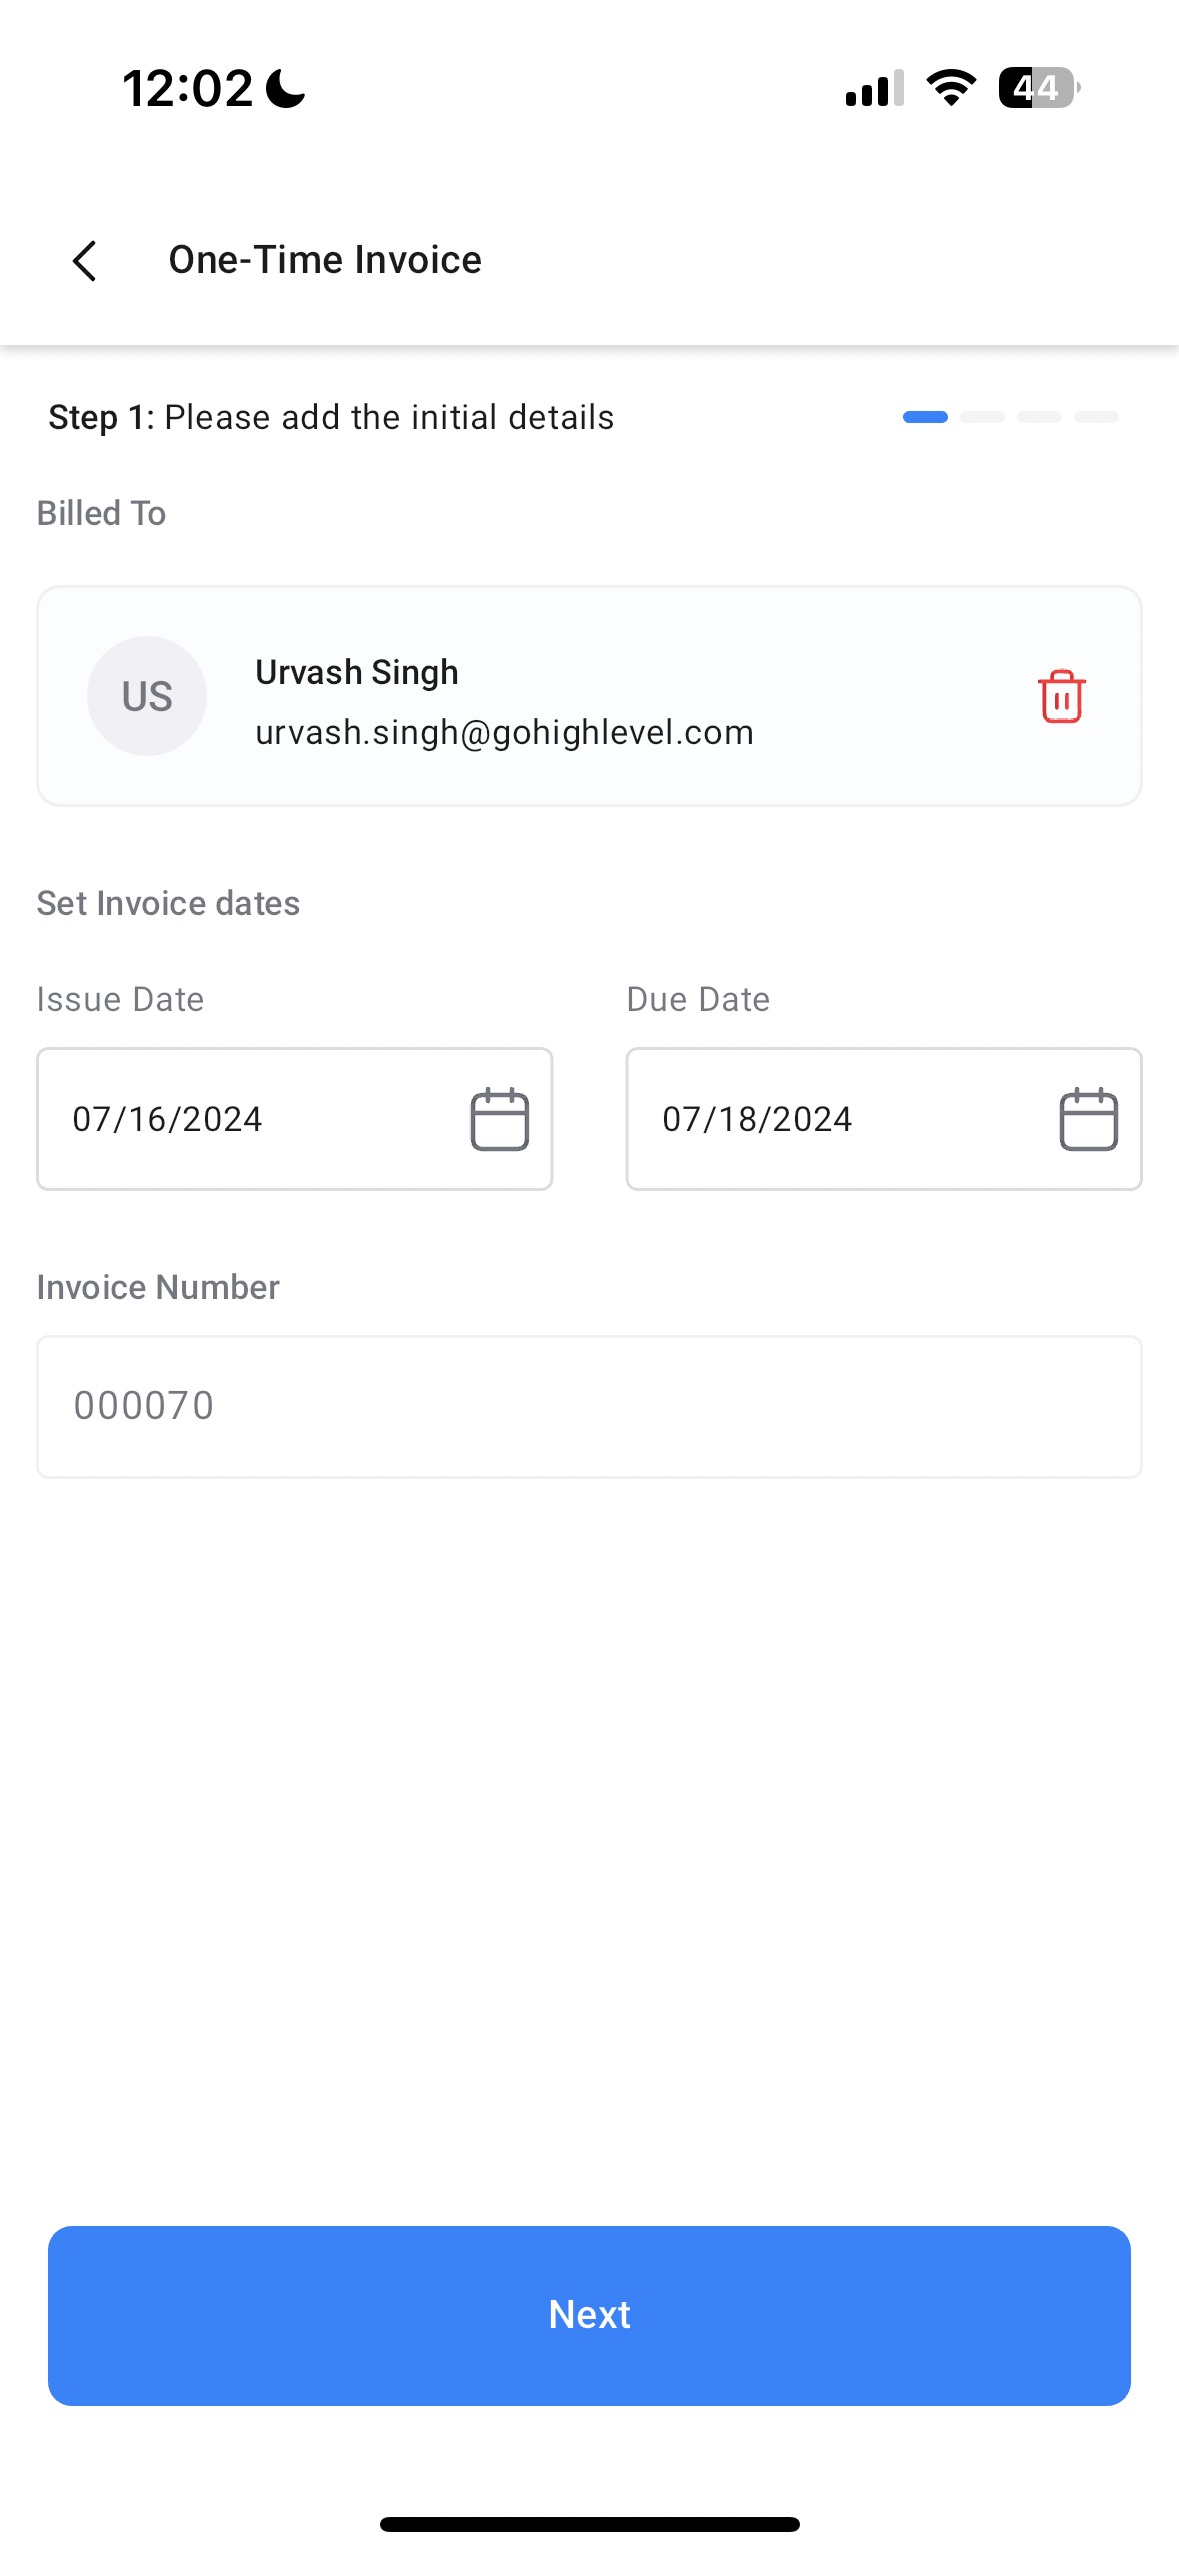
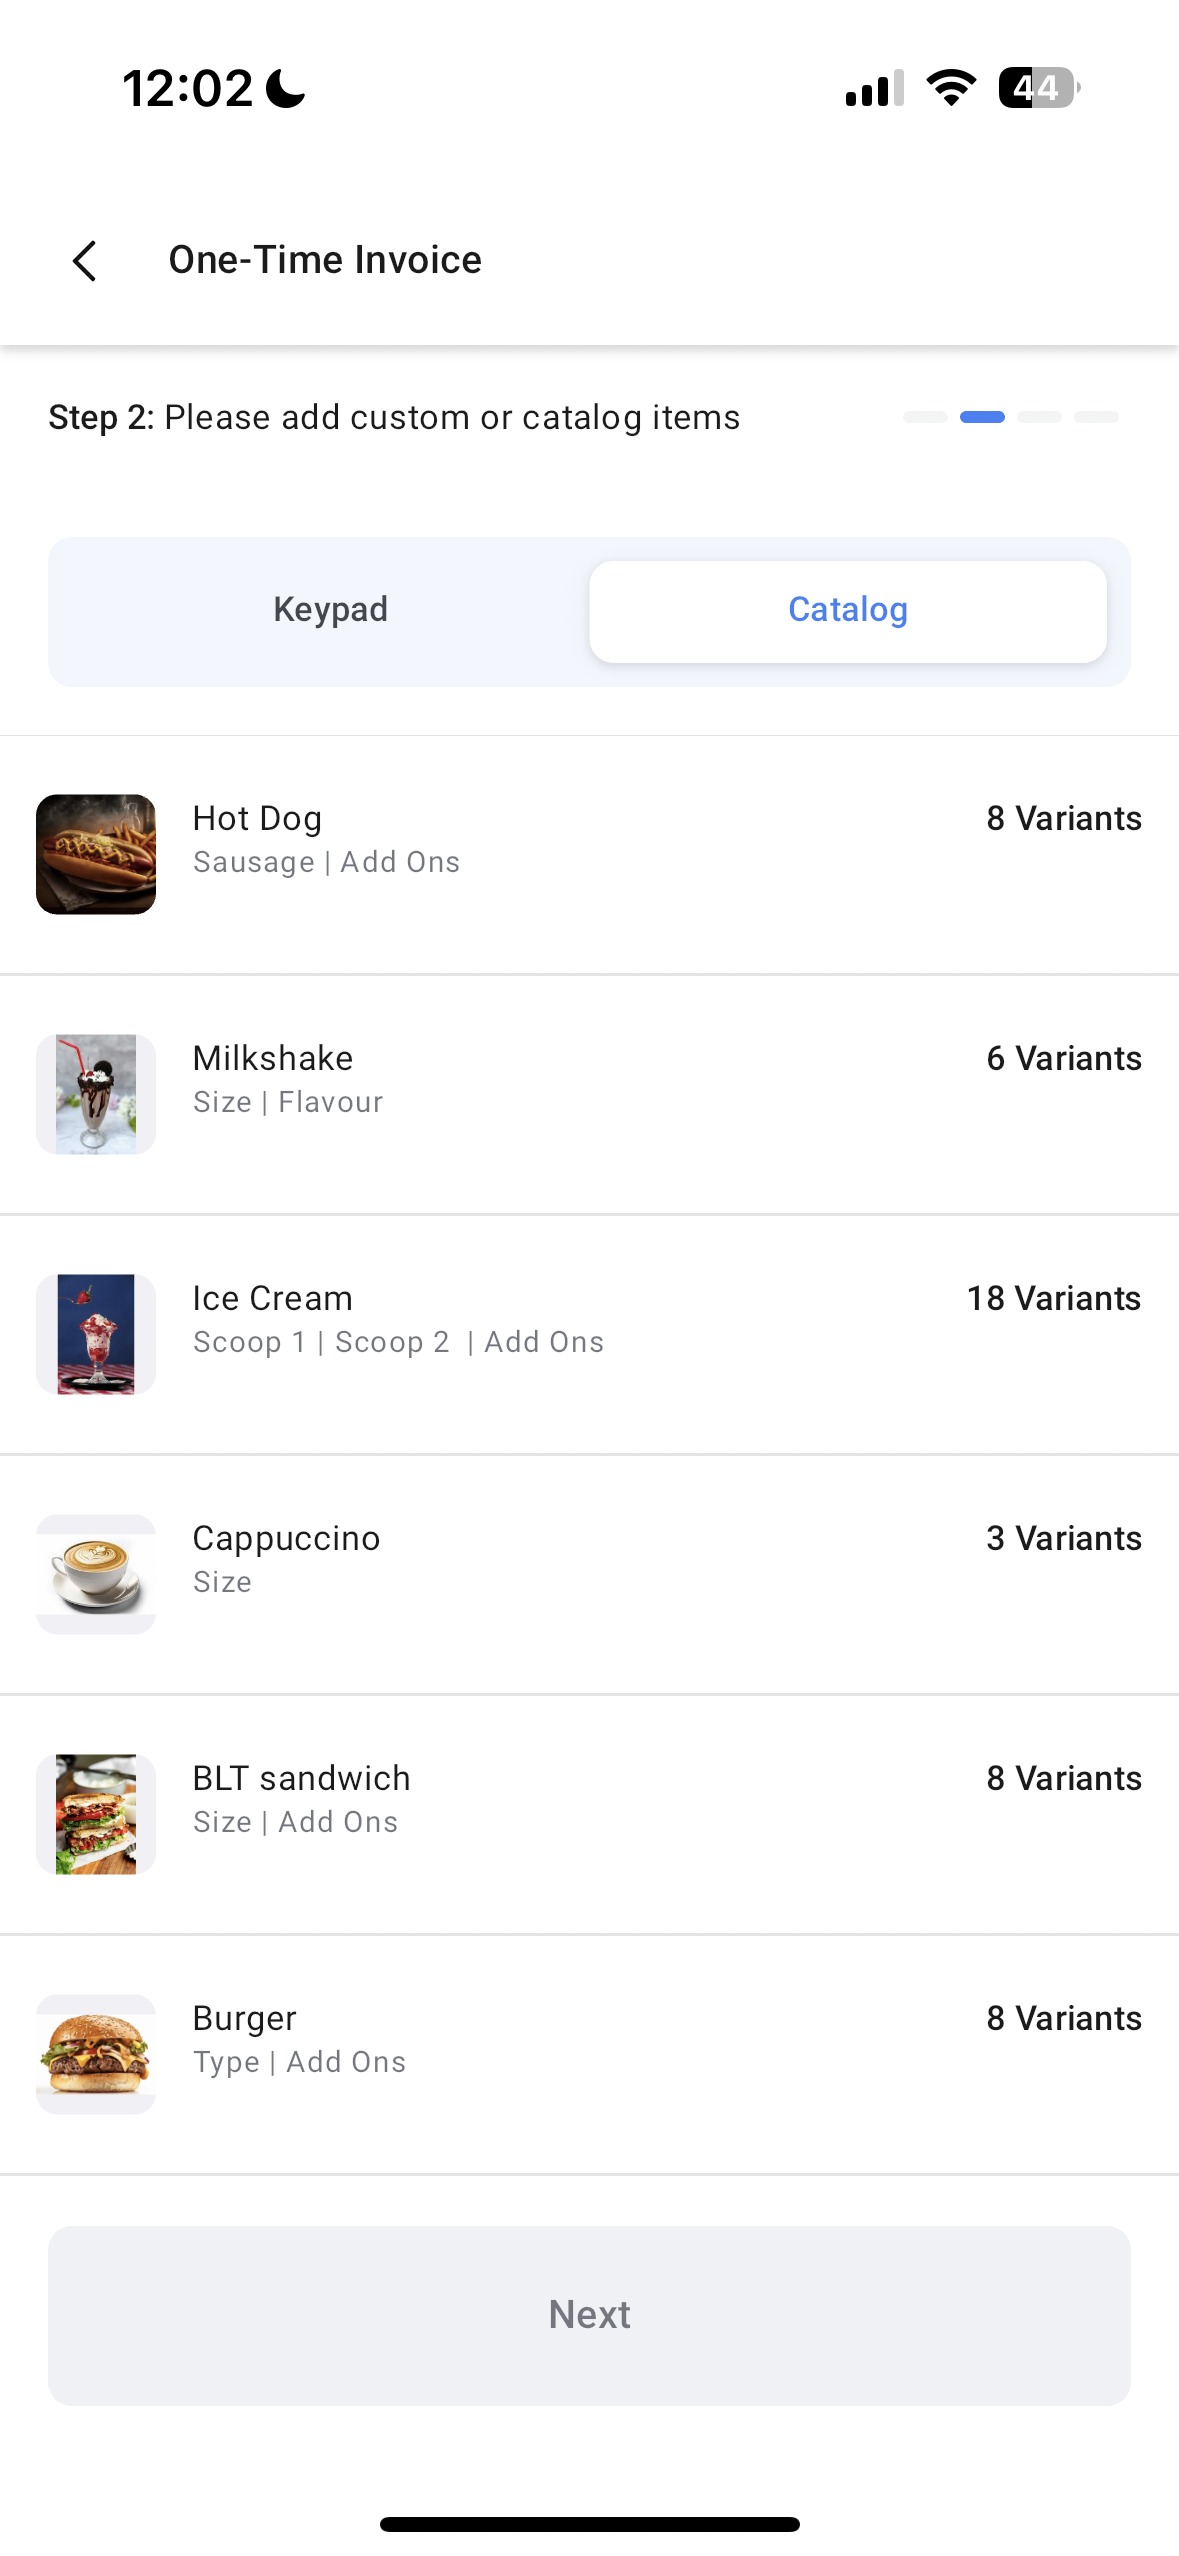
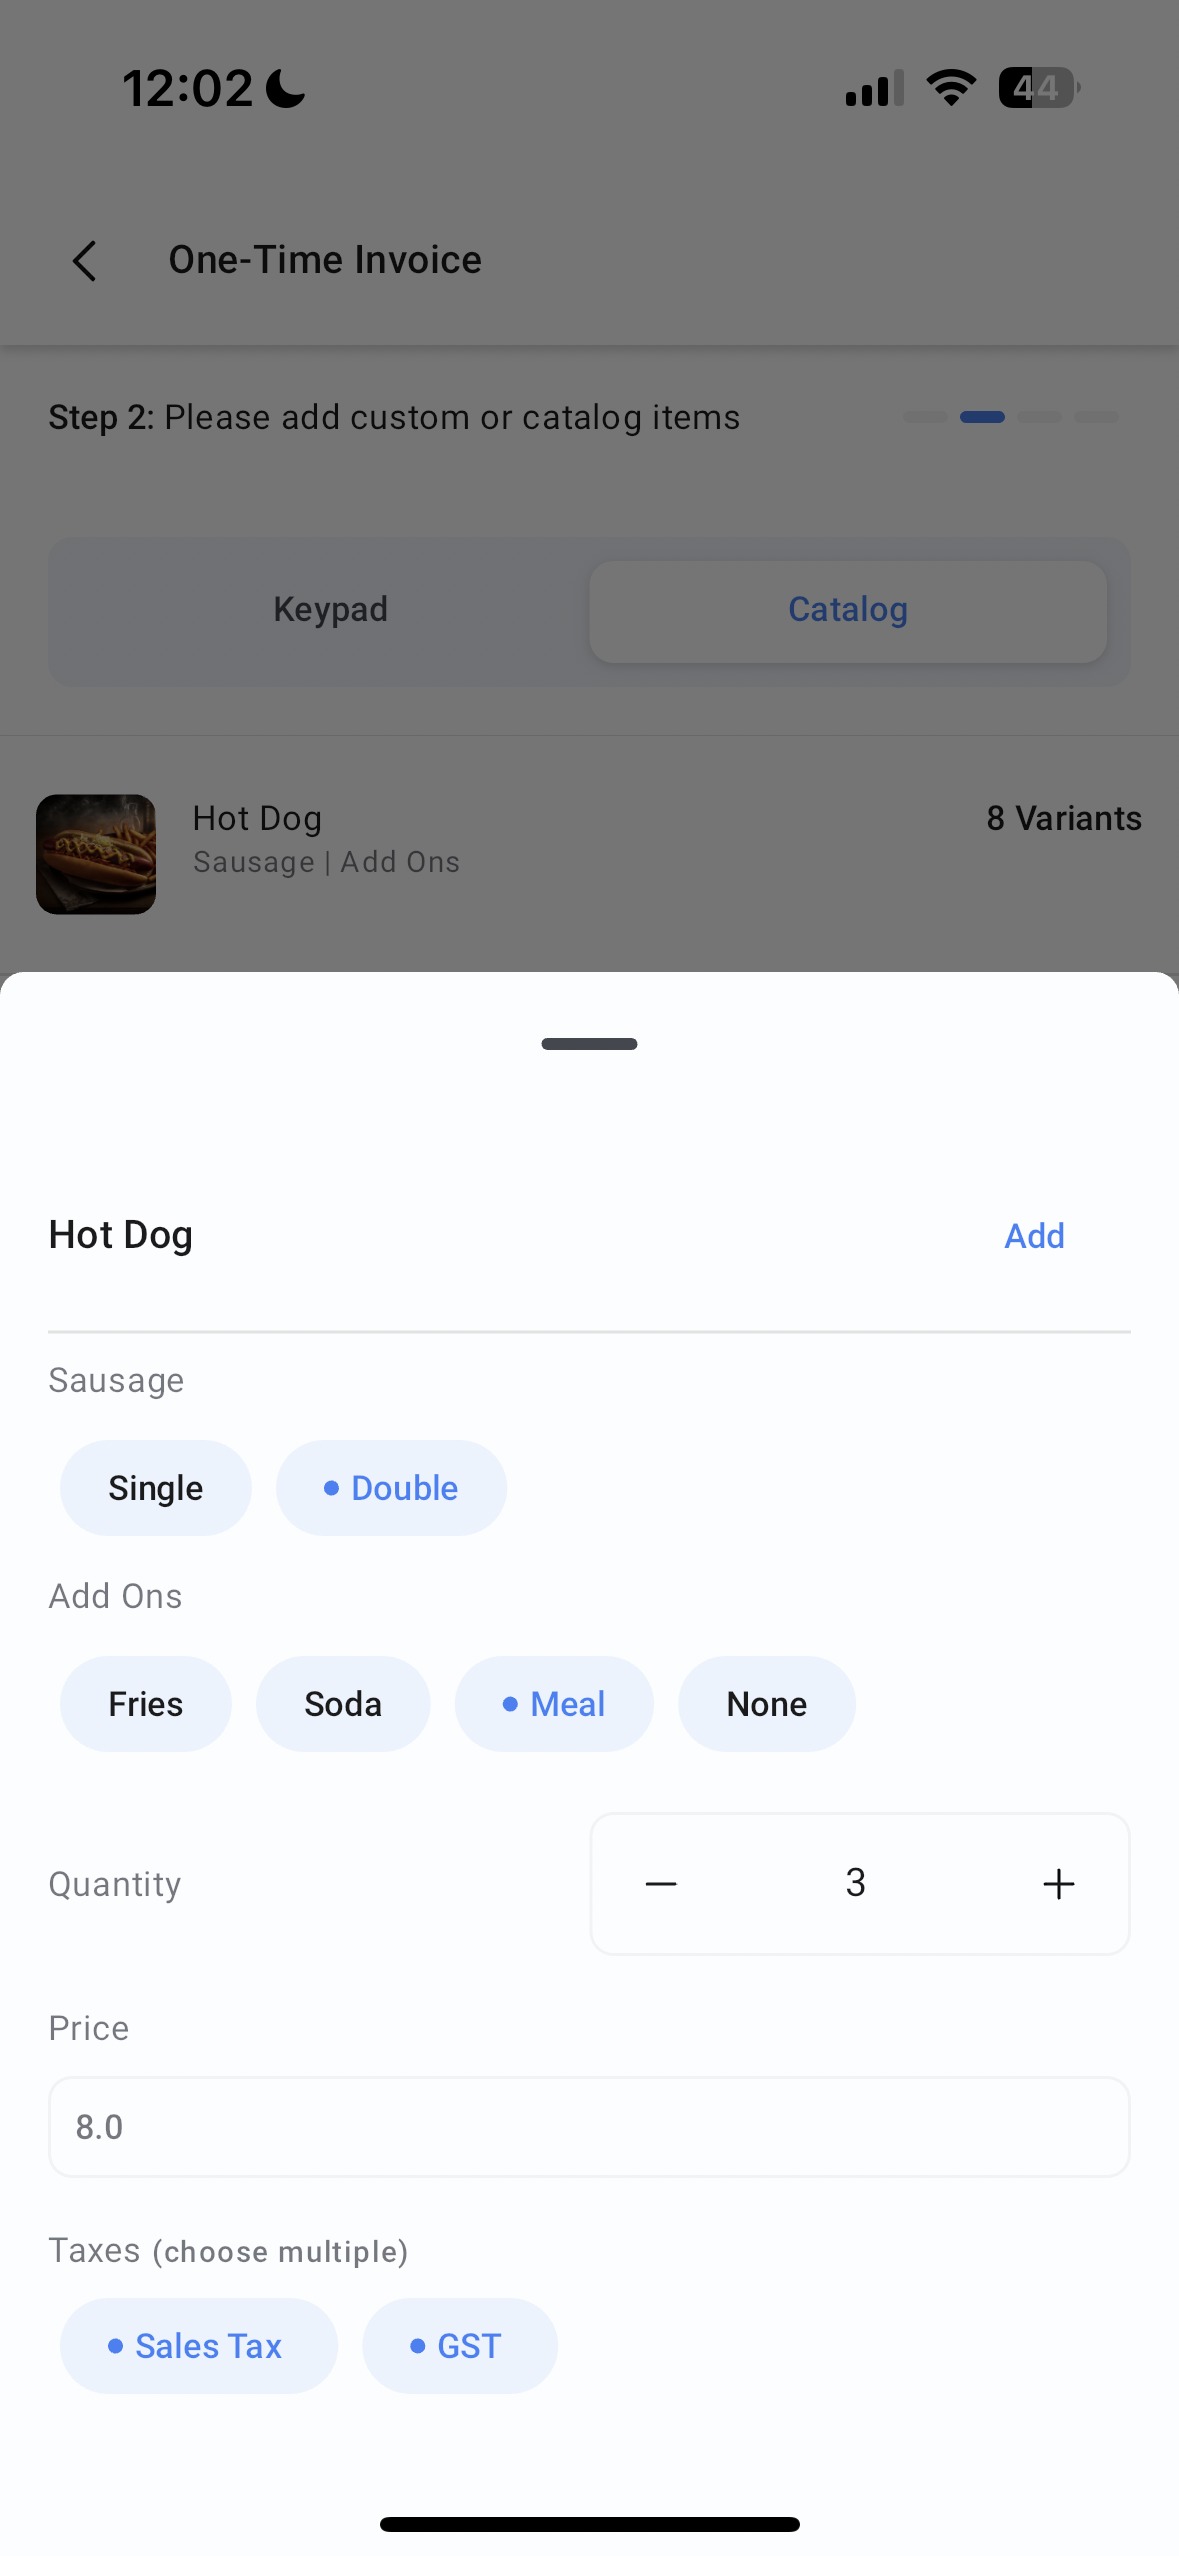
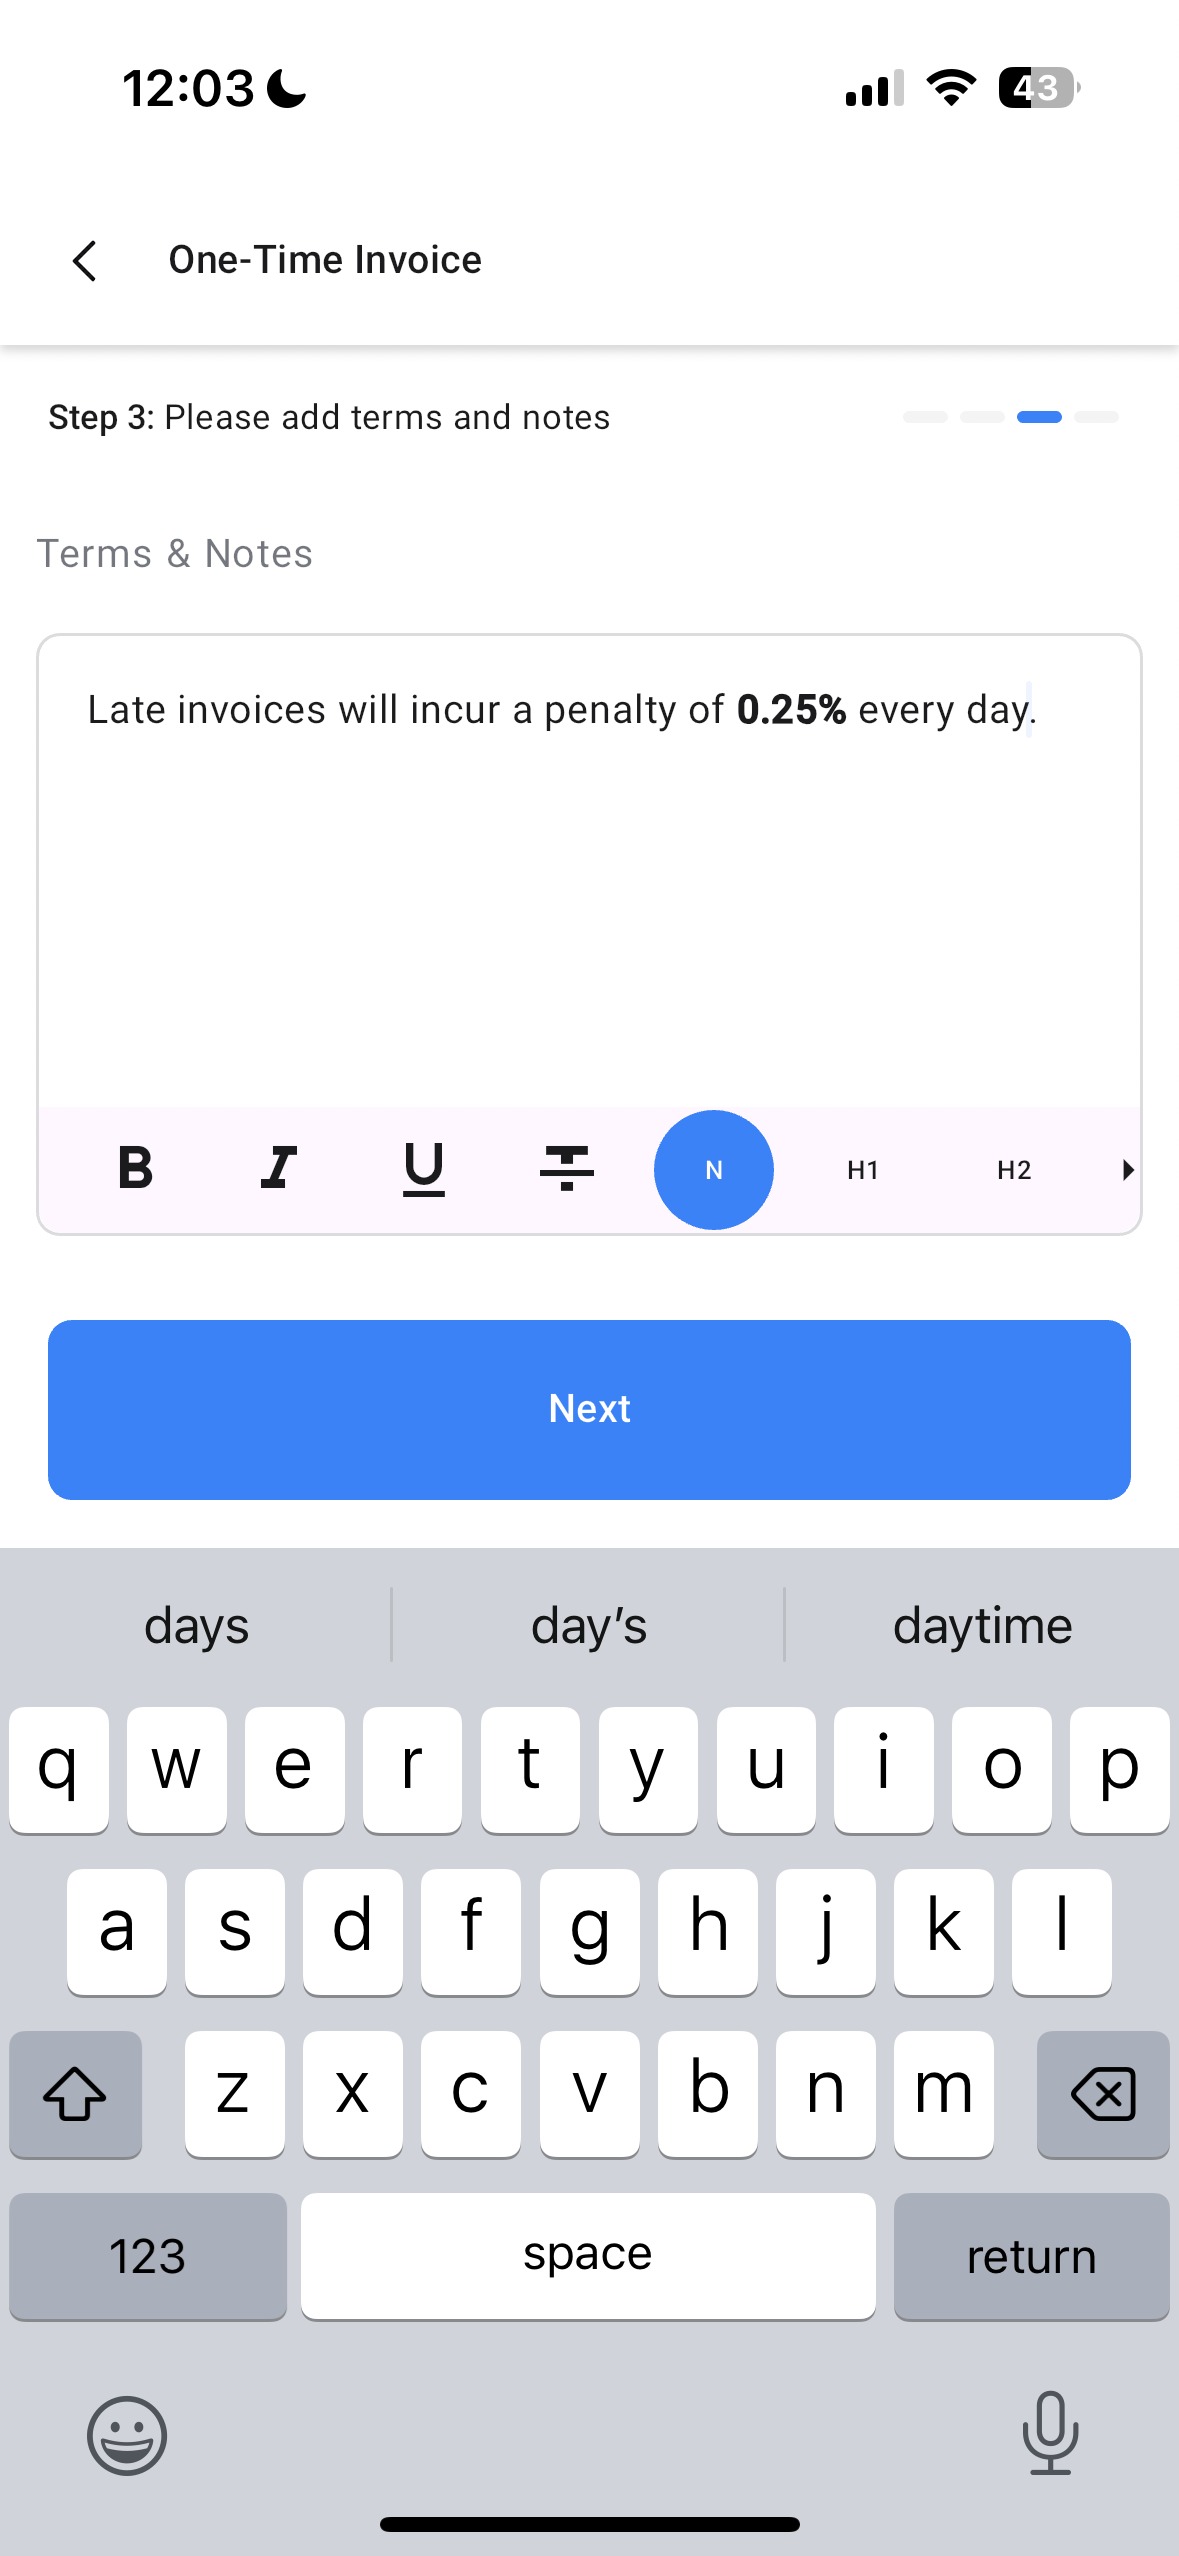
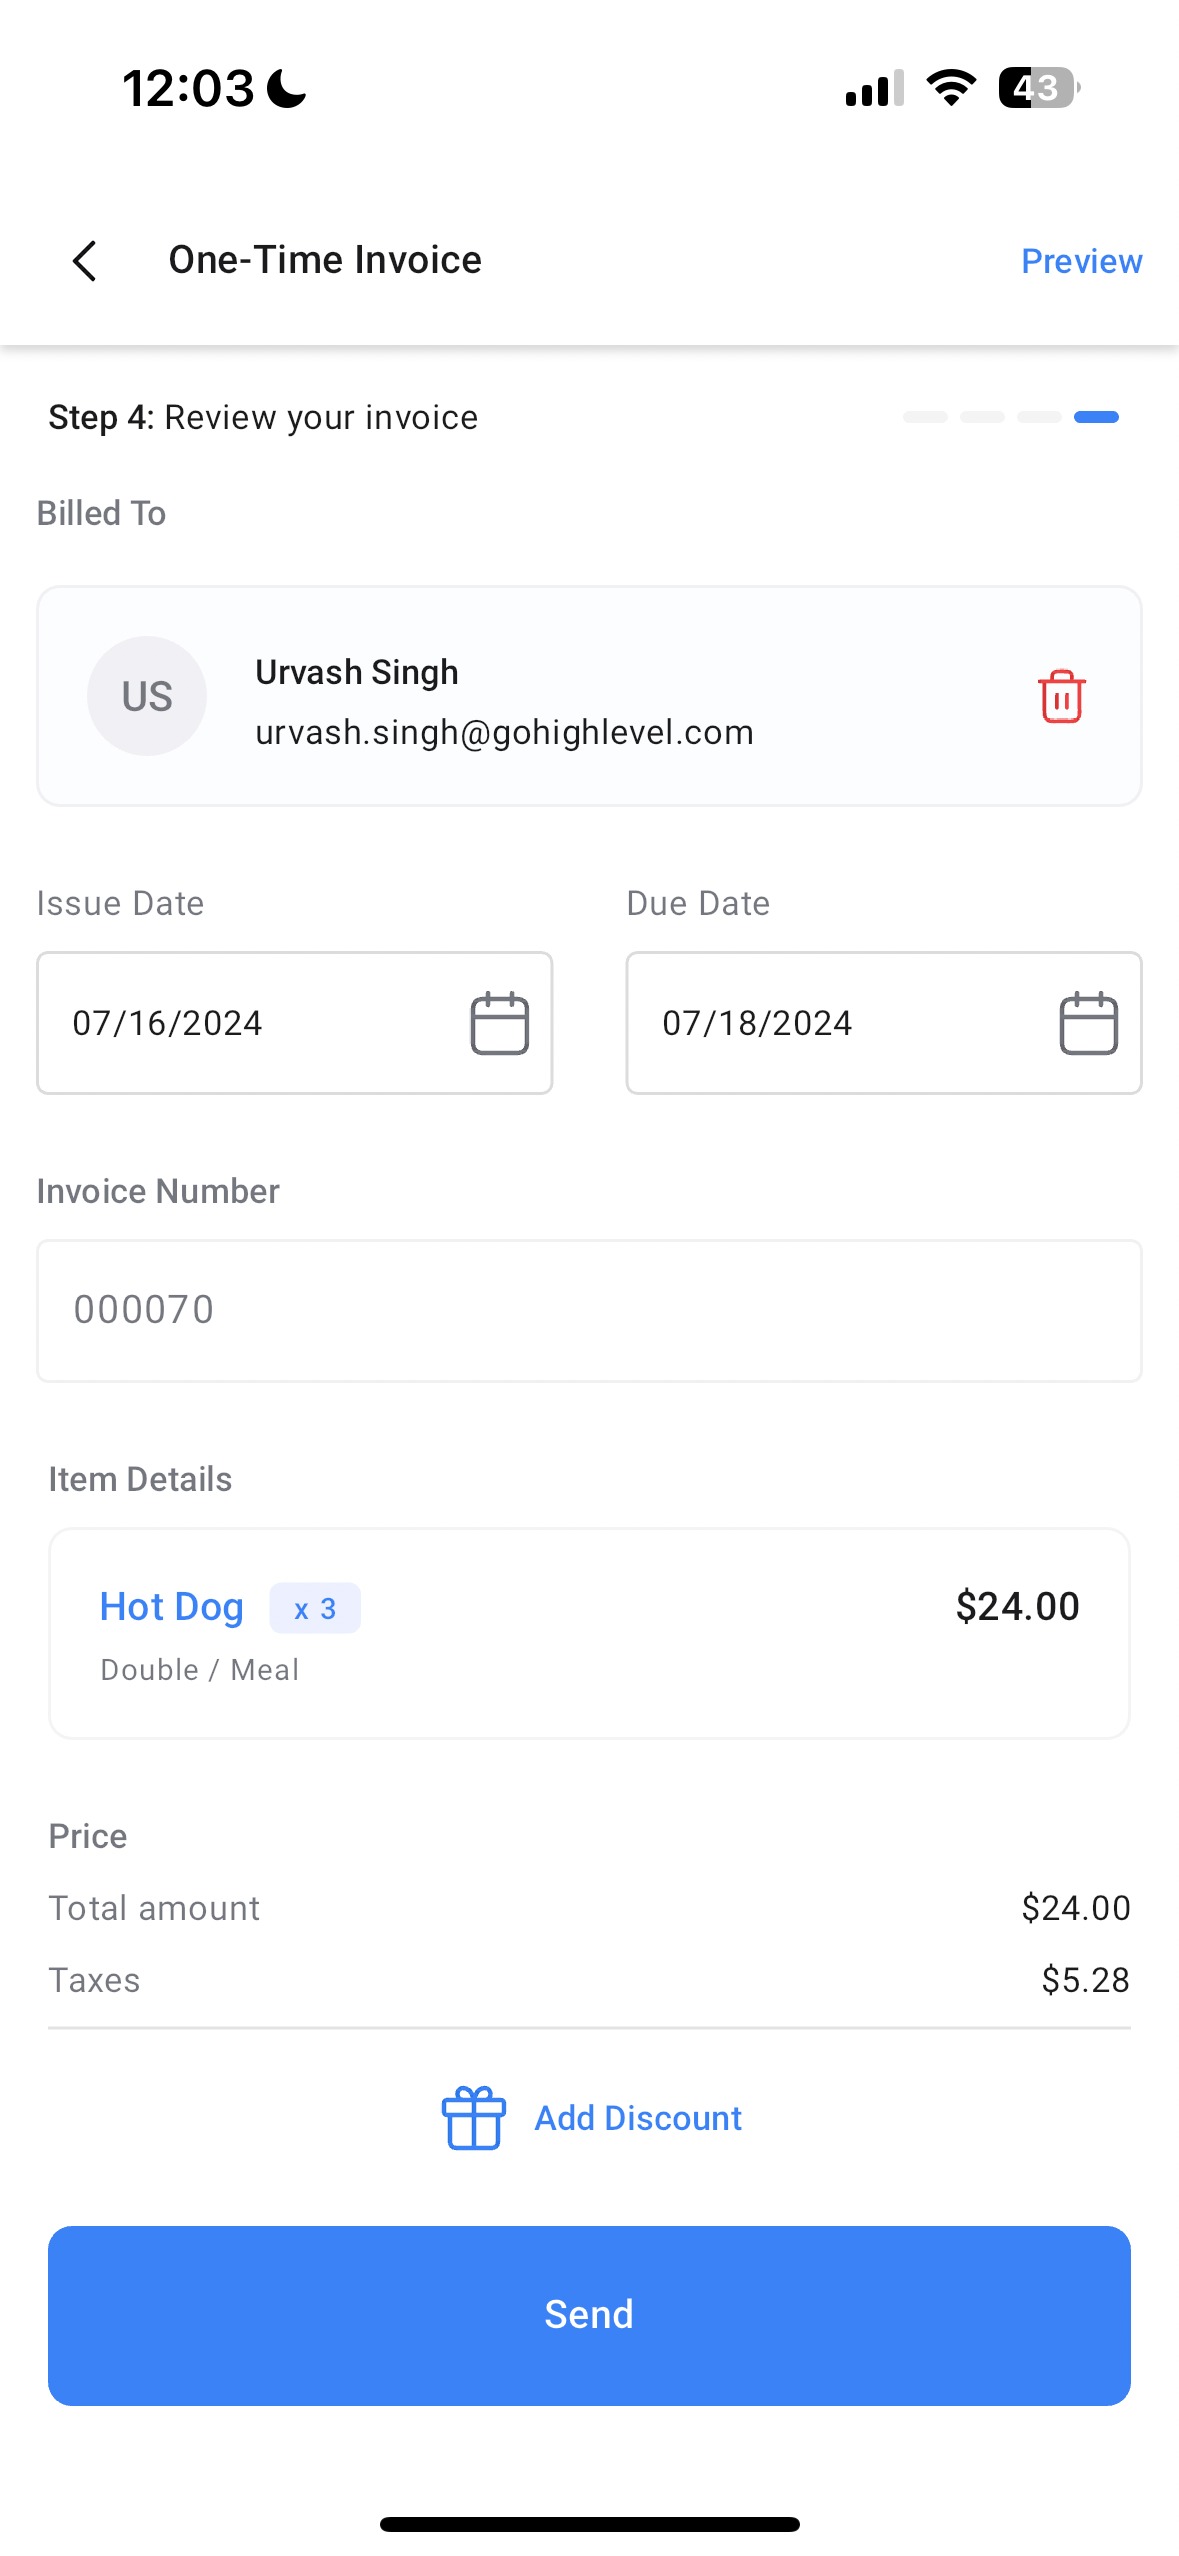
The invoice builder follows a four step flow. First, users enter recipient details, start date, due date and, for recurring invoices, the payment frequency. Second, items are added from the product catalog or entered manually, with variant selection, quantity (including partial amounts) and tax choice. Third, terms and notes are reviewed. Finally, the complete invoice can be edited, discounted and previewed before sending via email, SMS or both.
Payments are logged directly from the invoice list. Swiping a due invoice reveals a Record Payment action, after which a choice of tap to pay, cash, saved cards or manual entry records the transaction.
03How businesses use invoices
- Fitness studio. The studio owner opens the Invoices section, creates a new invoice with the member’s membership fee, applies the applicable tax, and sends it by email. When the member pays via card tap to pay, the owner swipes the invoice card and records the payment.
- Digital marketing agency. An account manager adds a custom line item for a consulting hour, selects a partial quantity for a fraction of a service, attaches terms about late fees, and delivers the invoice through both email and SMS. After the client pays by bank transfer, the manager records the payment manually.
- Home repair service. A technician uses the mobile POS to add parts and labor as items, converts the POS transaction to an invoice, chooses a due date, reviews the terms, and sends the invoice via SMS. Once cash is received, the technician records the cash payment from the invoice list.
04The numbers and rules that matter
- Four step invoice builder flow can be completed in under 45 seconds.
- Partial quantity support allows up to 2 decimal places (e.g., 1.25, 6.83).
- Feature available on HighLevel, LeadConnector, and White labelled mobile apps (update must be requested).
05Before you start
- Taxes must be linked to products using the Products module on mobile or Payment settings > Taxes on the web.
- Contacts need an email address and phone number to use both email and SMS delivery options.
- A product catalog should contain the items you intend to invoice.
06How to set up and use invoices in HighLevel
Create a new invoice using the HighLevel mobile app
- Open the mobile app and tap the hamburger menu in the top left.
- Select Invoices to view the dashboard and invoice list.
- Tap the floating + button at the bottom right of the screen.
- Choose whether the invoice is one time or recurring.
- Enter the recipient, start date, due date, and, if recurring, set the payment frequency.
- Add items by selecting from the catalog or entering custom items, then pick variants, set quantity (including partial amounts) and select applicable taxes.
- Review and edit terms and notes, including any late fee information.
- Adjust quantities, recipient details, add discounts if needed, and preview the invoice by tapping the Preview button on the top right.
- Tap Send, then pick email, SMS, or both as the delivery channel and confirm sending.
Record a payment for an existing invoice
- Open the mobile app and navigate to the Invoices section.
- Locate the invoice you want to update in the list.
- Left swipe the invoice card to reveal actions.
- Tap Record Payment.
- Select a payment method such as tap to pay, cash, a saved card, or manual entry and complete the recording.
07What it looks like in HighLevel
08Settings that matter
- Frequency. Controls how often payments are scheduled for a recurring invoice.
- Taxes. Determines which tax rates are available to apply to items when building an invoice.
09Things to know before you rely on it
- The new invoice flow is available on HighLevel, LeadConnector and white labelled mobile apps; white labelled versions require a request.
- Partial quantities support up to two decimal places only.
- Real time tax selection works only if taxes are linked to products in the appropriate settings.
10How it connects to the rest of HighLevel
- Accept payments with Stripe hardware terminals through the mobile POS. Stripe mobile POS
- View all features available in the HighLevel mobile and desktop apps. All mobile features
- Check HighLevel pricing and plan options for using invoices on mobile. Pricing
Michael's take

Running a service business means you’re often chasing payments while you’re on the road. The mobile invoices feature lets you draft, send, and track invoices from the same screen you use to check earnings. The first setting I’d get right is linking your taxes to products, so the real time tax picker works without extra steps.
Once the tax links are in place, I’d jump straight into creating a quick one time invoice from the floating plus button. The builder follows a four step flow that this page says can be completed in under 45 seconds, giving you a quick view of what’s still owed versus what’s already collected.