
01Custom Fields, explained
Custom Fields are fields you create to store information specific to your business. They let you go beyond standard record fields such as name, email or phone and capture details like preferences, budgets, dates or any other data your team needs.
Once created, Custom Fields can be used in many supported areas. Forms, surveys, workflows, pipelines, Smart Lists, reporting and personalization. Their availability depends on the object (Contact or Opportunity) and the field type you choose.
02How businesses use Custom Fields
- Collect client preferences. Create a Contact custom field such as "preferred contact method" or "customer preferences". Add it to your intake form so the information is stored on each contact record and can be referenced in email merge fields.
- Track deal specifics. Create an Opportunity custom field like "budget" or "projected closing date". Use the field in workflow conditions to trigger follow up actions when a budget exceeds a certain amount.
03The numbers and rules that matter
- Available field types can include text, numbers, monetary values, dropdowns, radio selections, checkboxes, dates, file uploads, signatures, and other supported input types.
04Before you start
- Before creating a new field, search the existing field list to make sure an equivalent field does not already exist.
05How to set up and use Custom Fields in HighLevel
Create a custom field
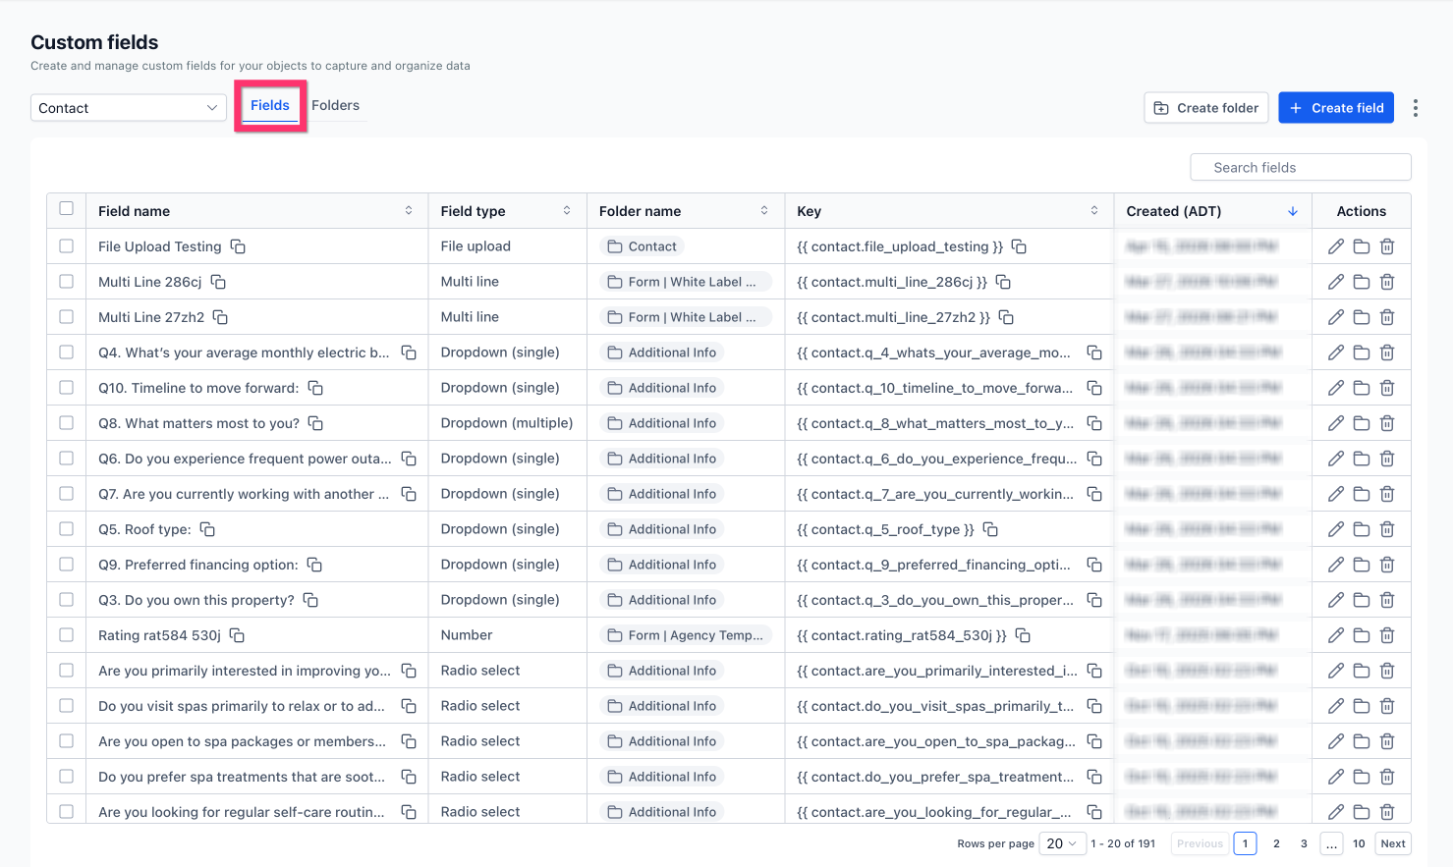
- Open Settings > Custom Fields.
- Select the object you want to manage and stay on the Fields tab.
- Click Create field.
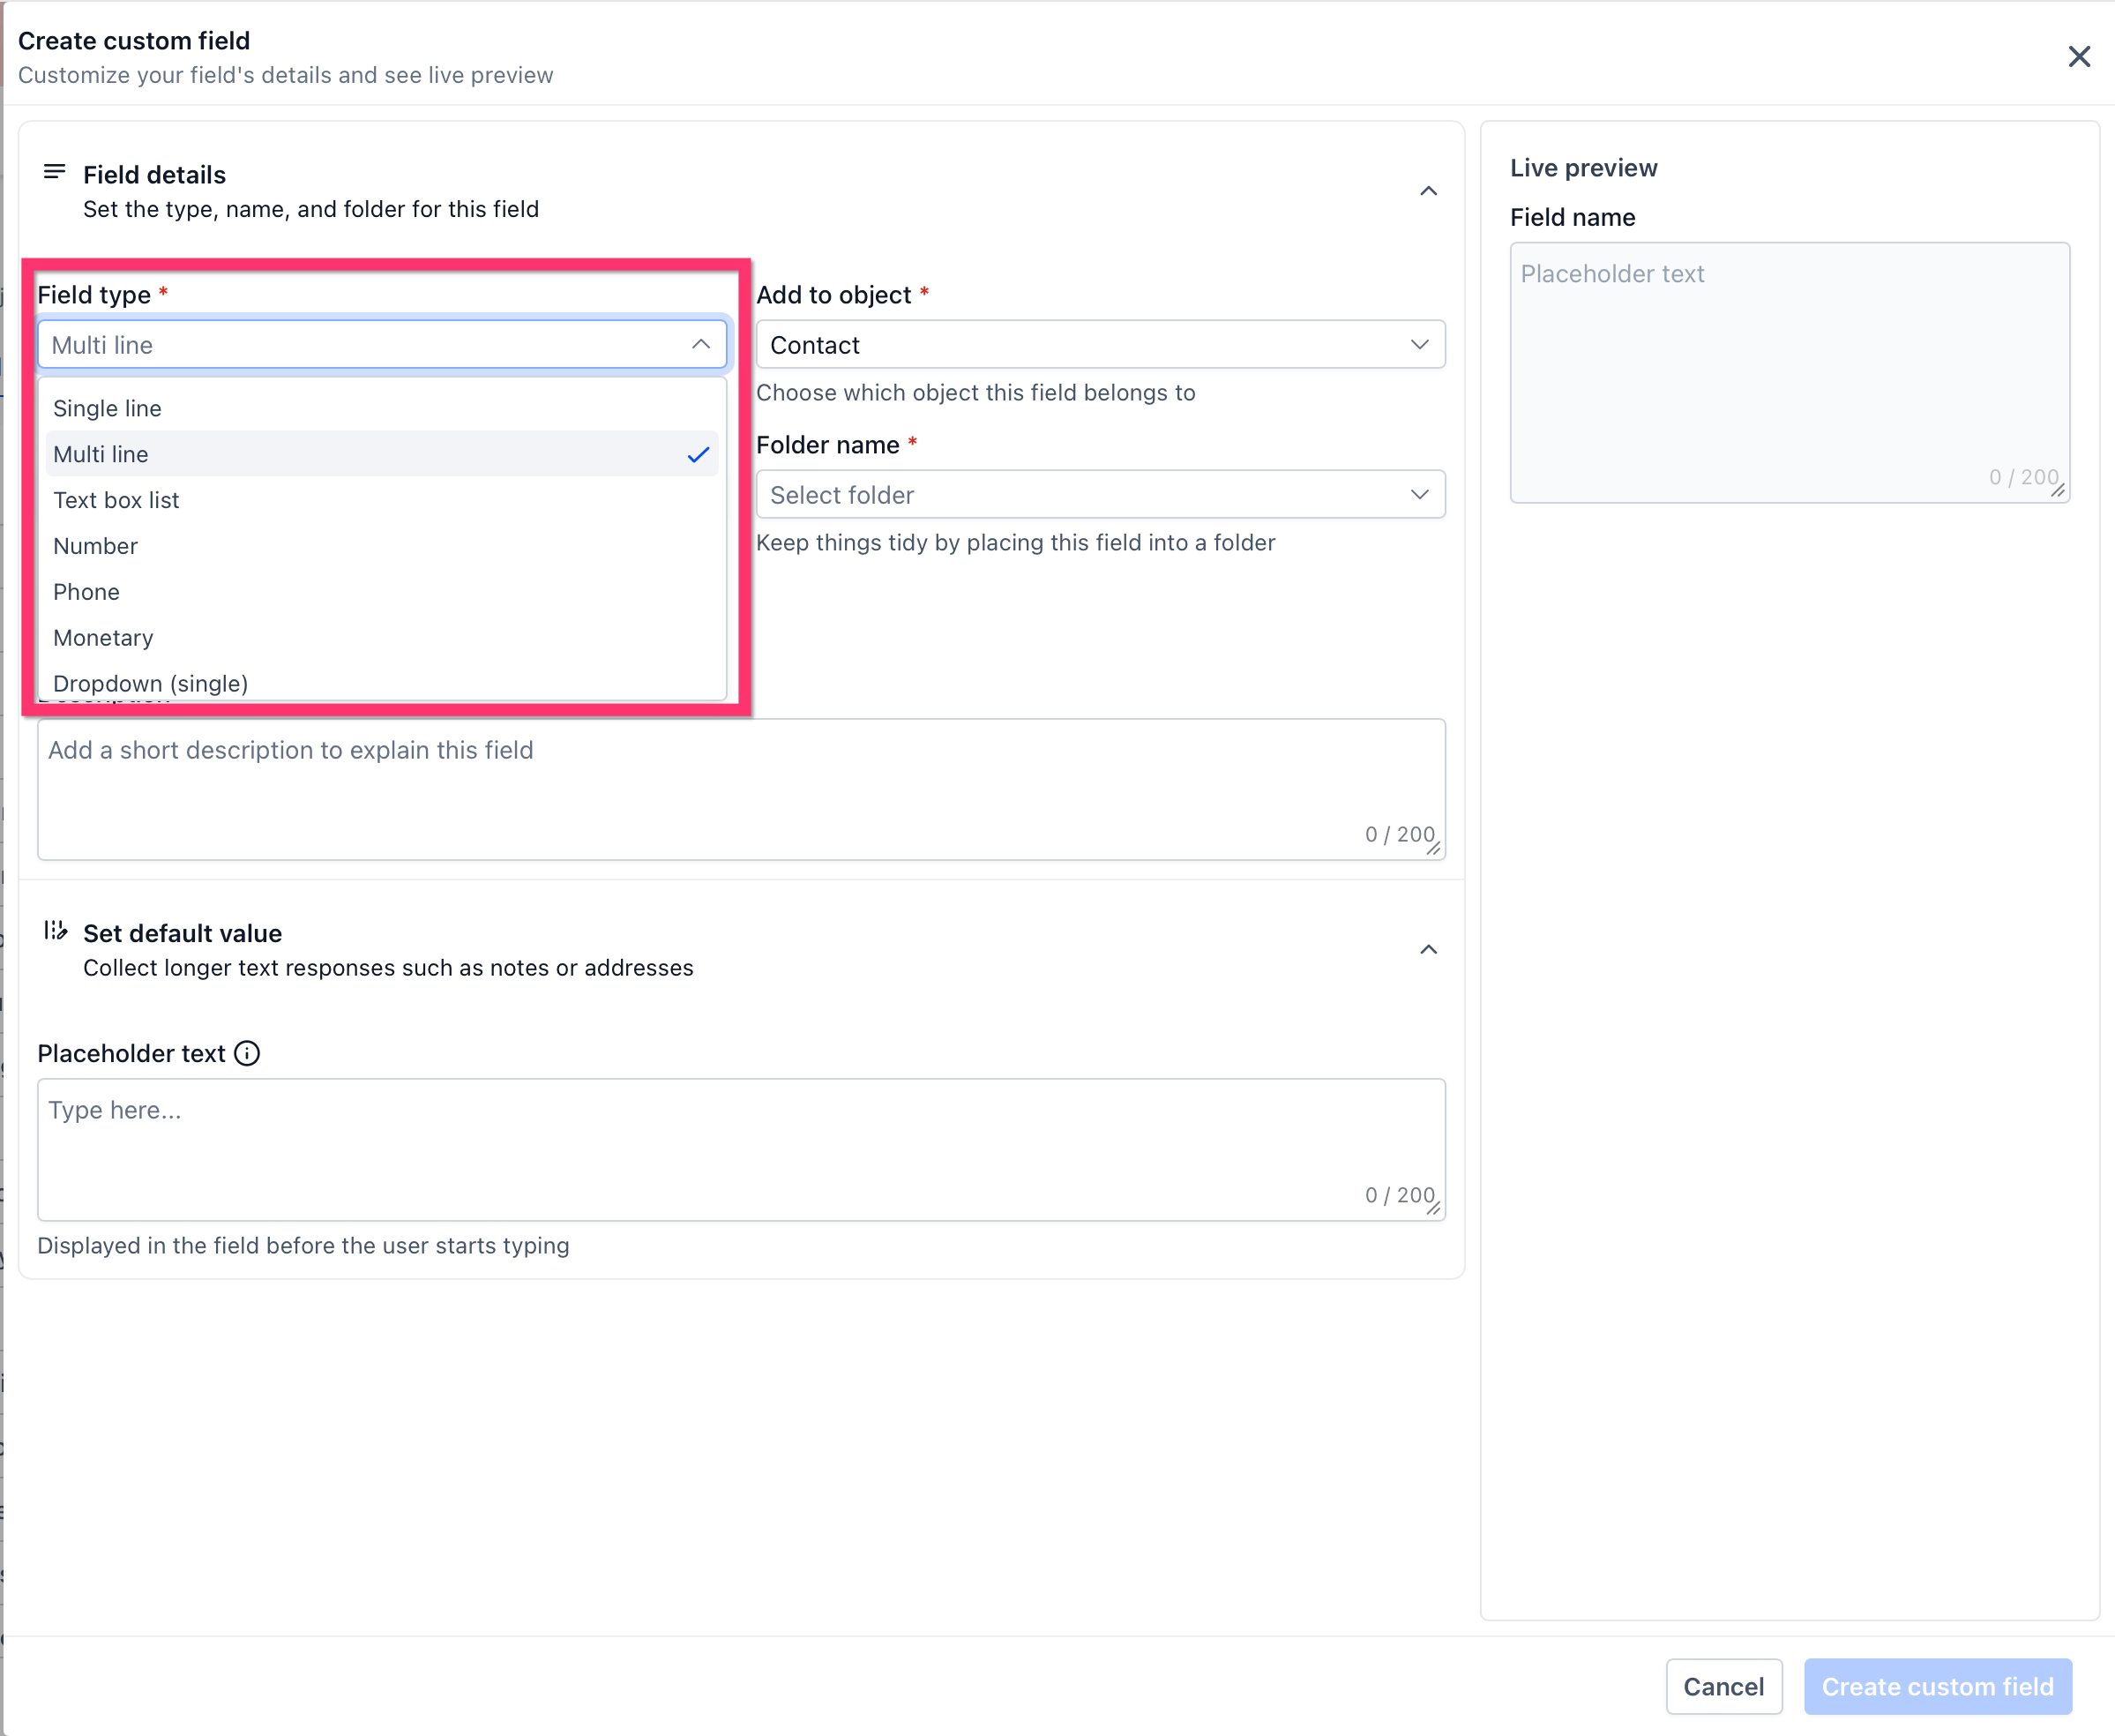
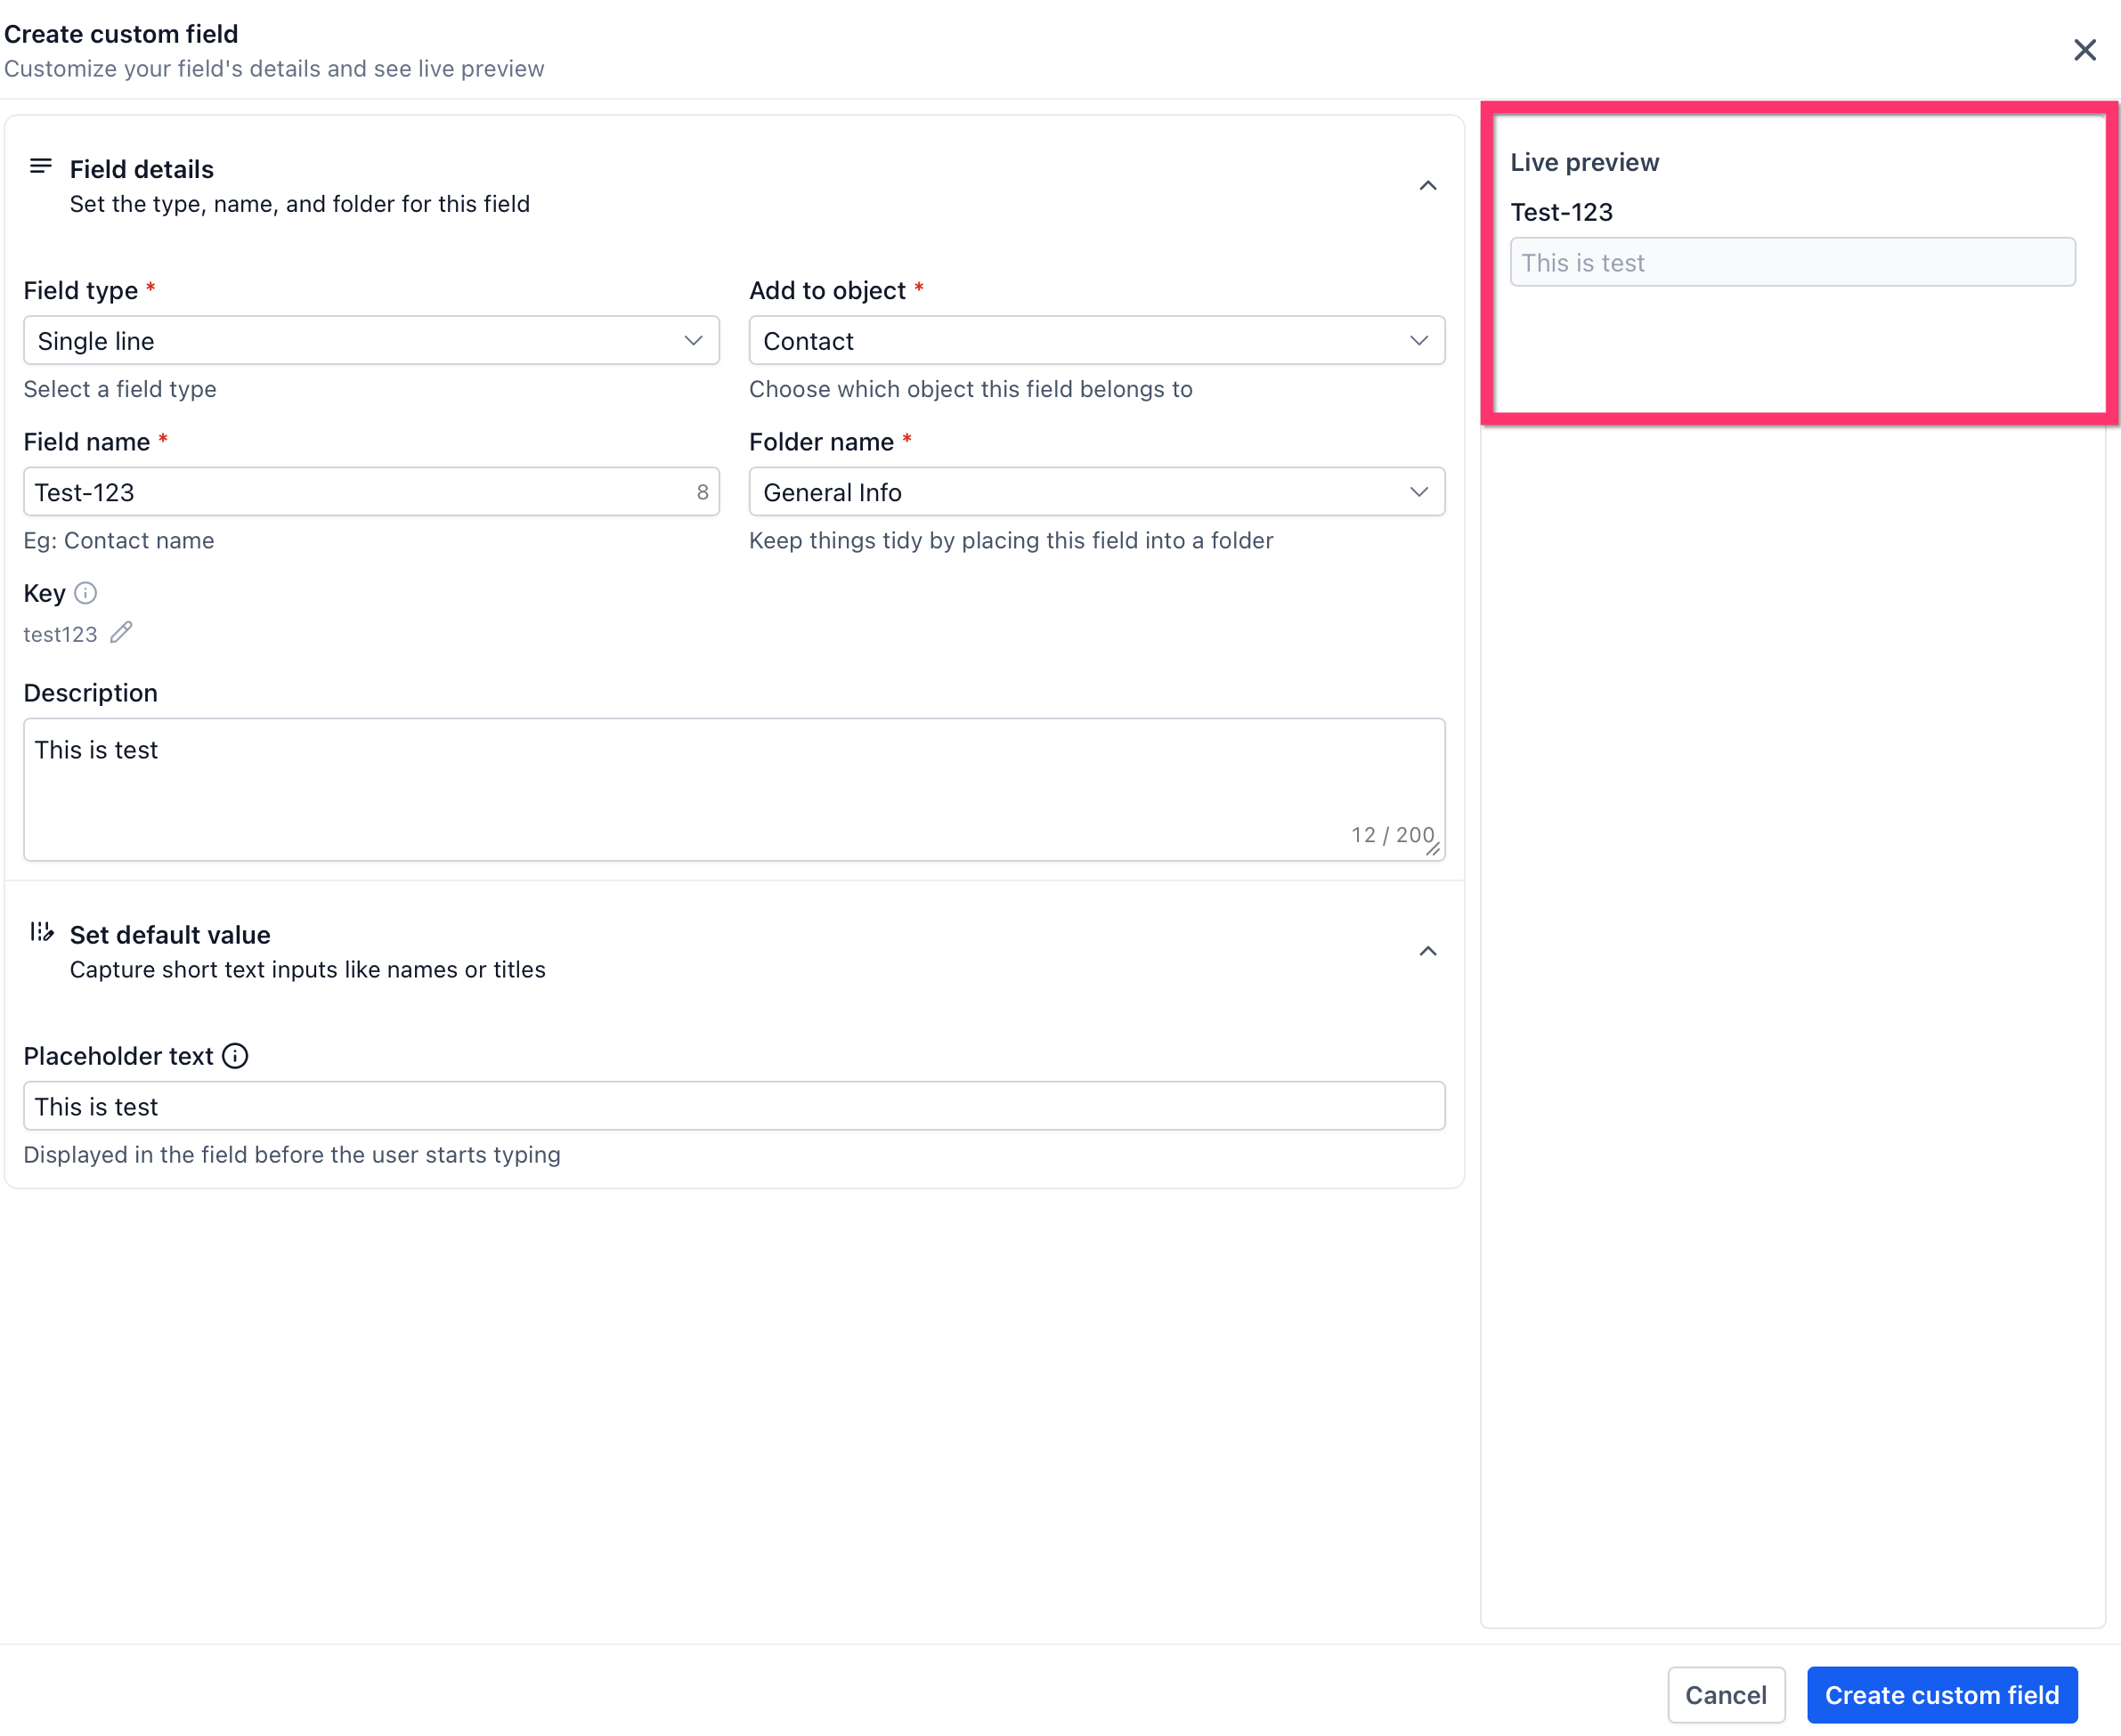
- Select the field type that matches the information you need to collect.
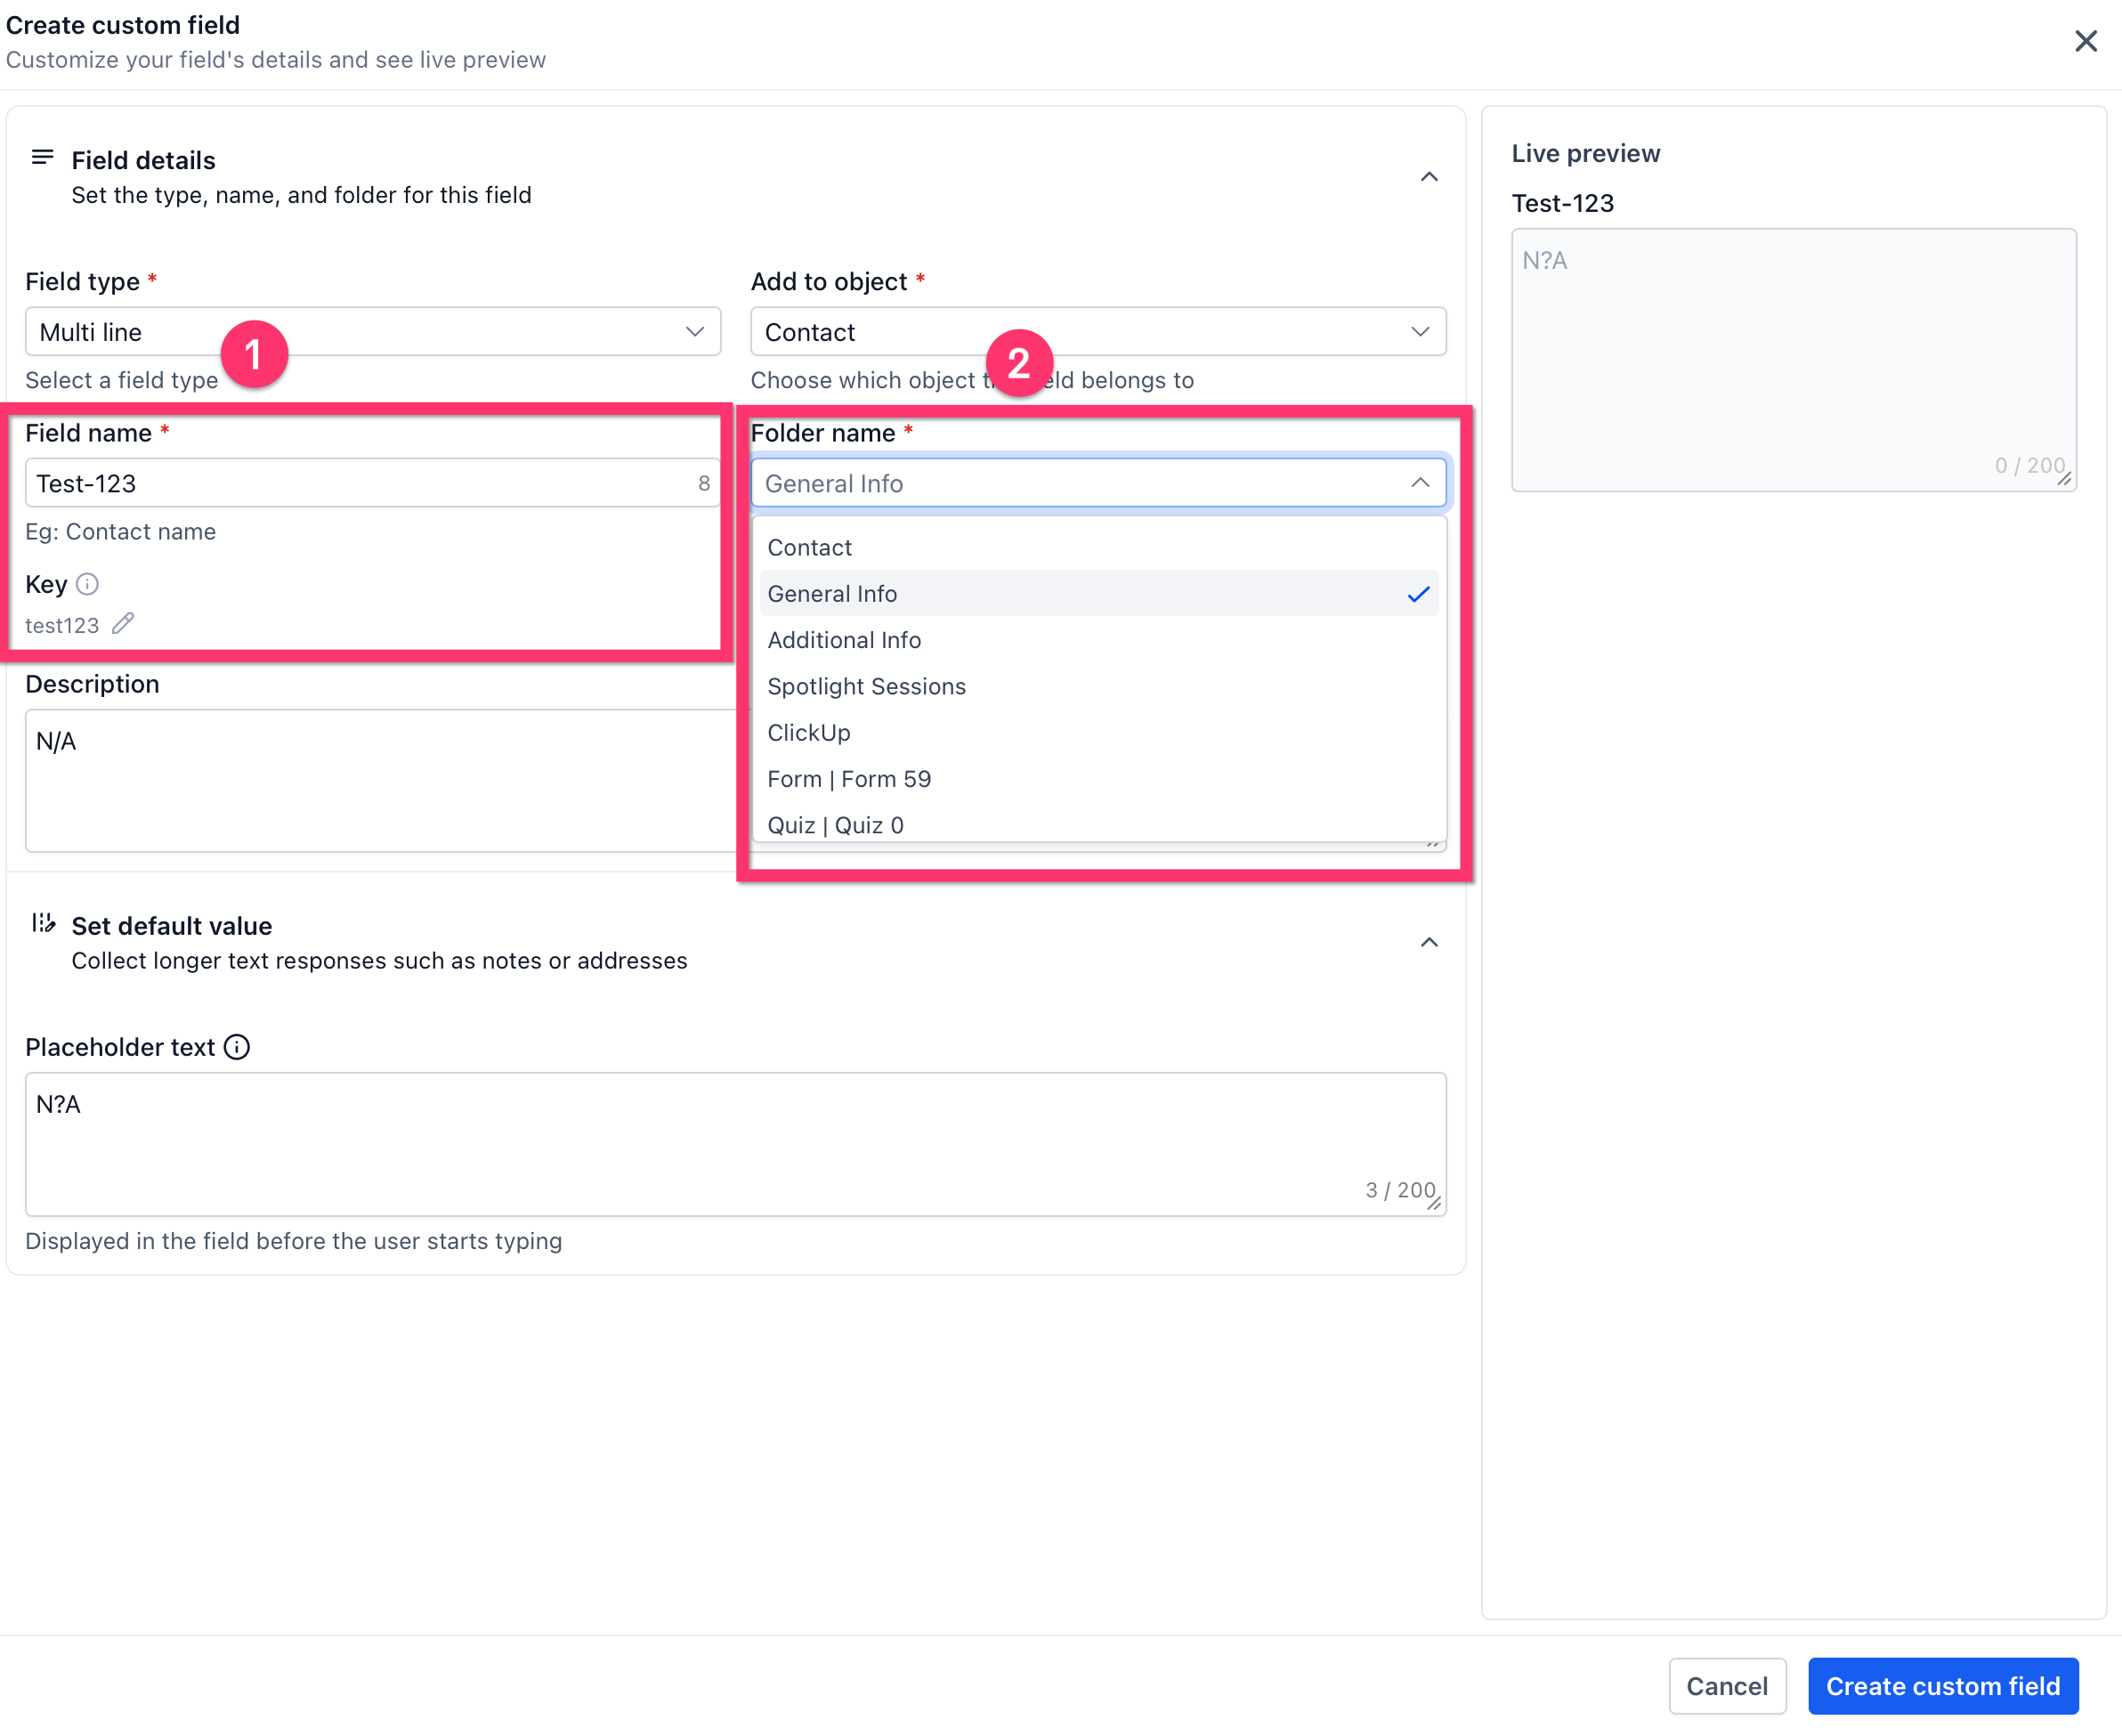
- Enter a clear Field name, confirm the correct object, and choose the folder where the field should appear.
- Add a description or placeholder text if it helps users understand what to enter.
- Review the Live preview to confirm appearance and formatting.
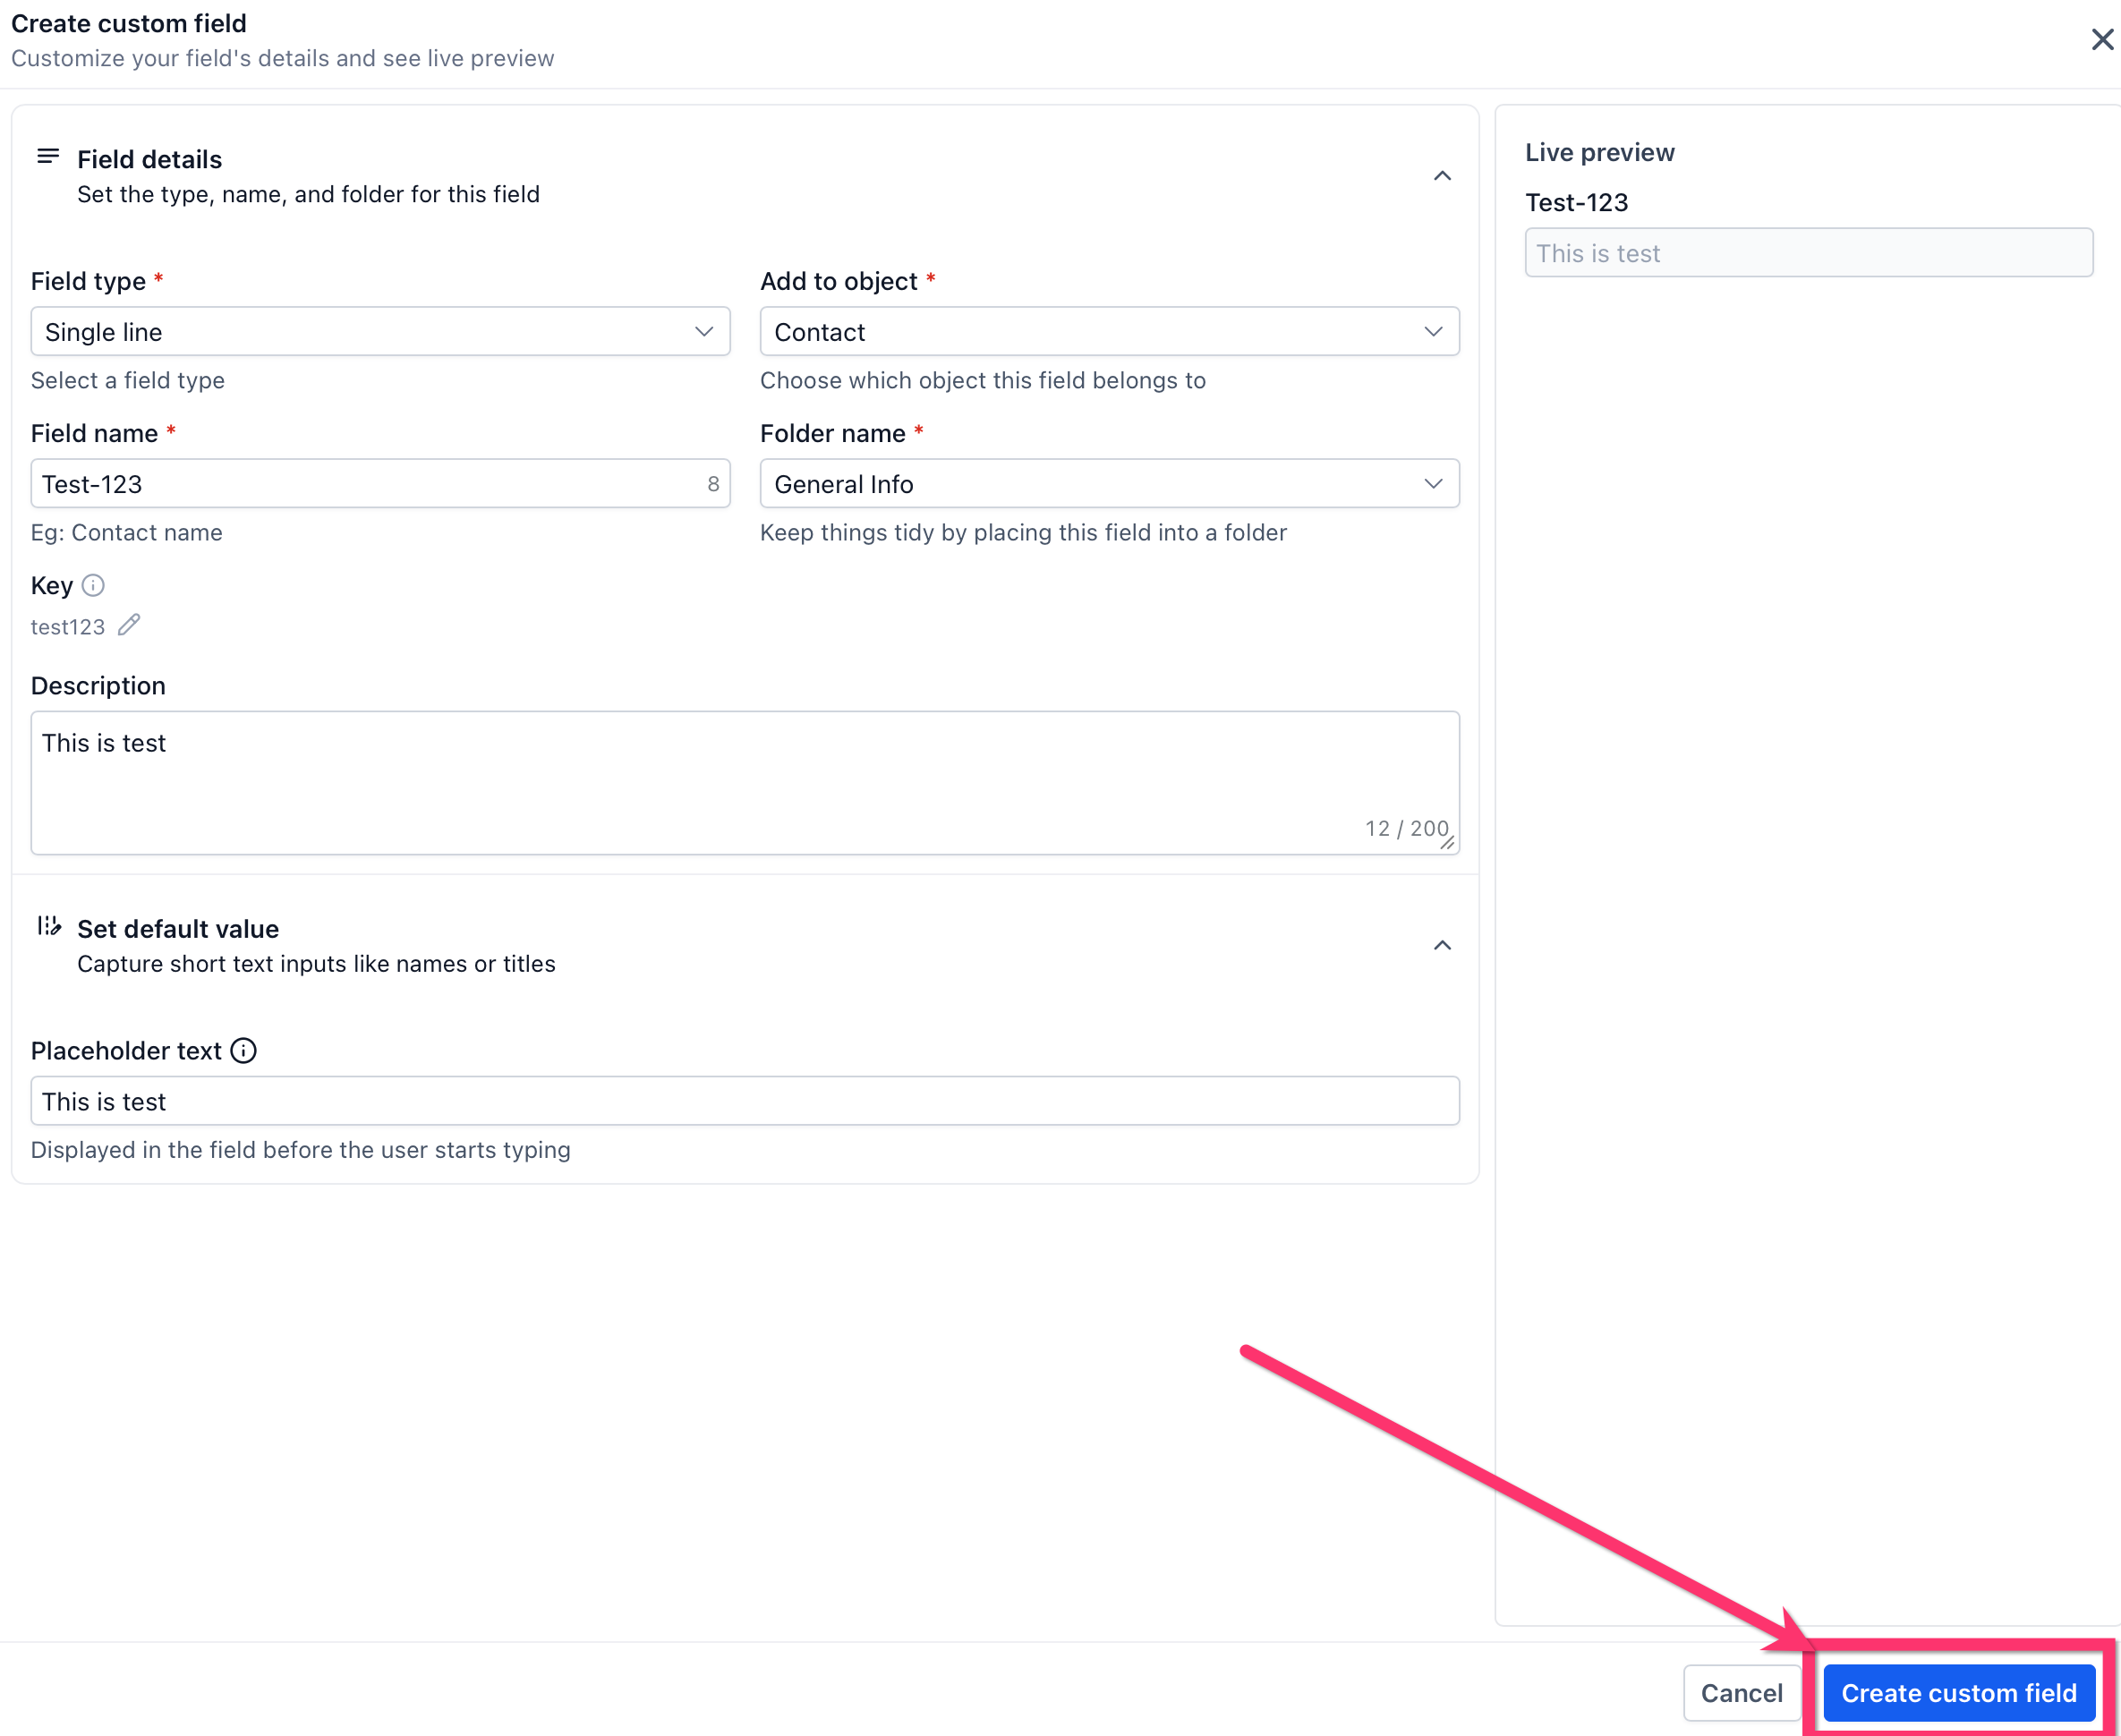
- Click Create custom field.
Organize Custom Fields with folders
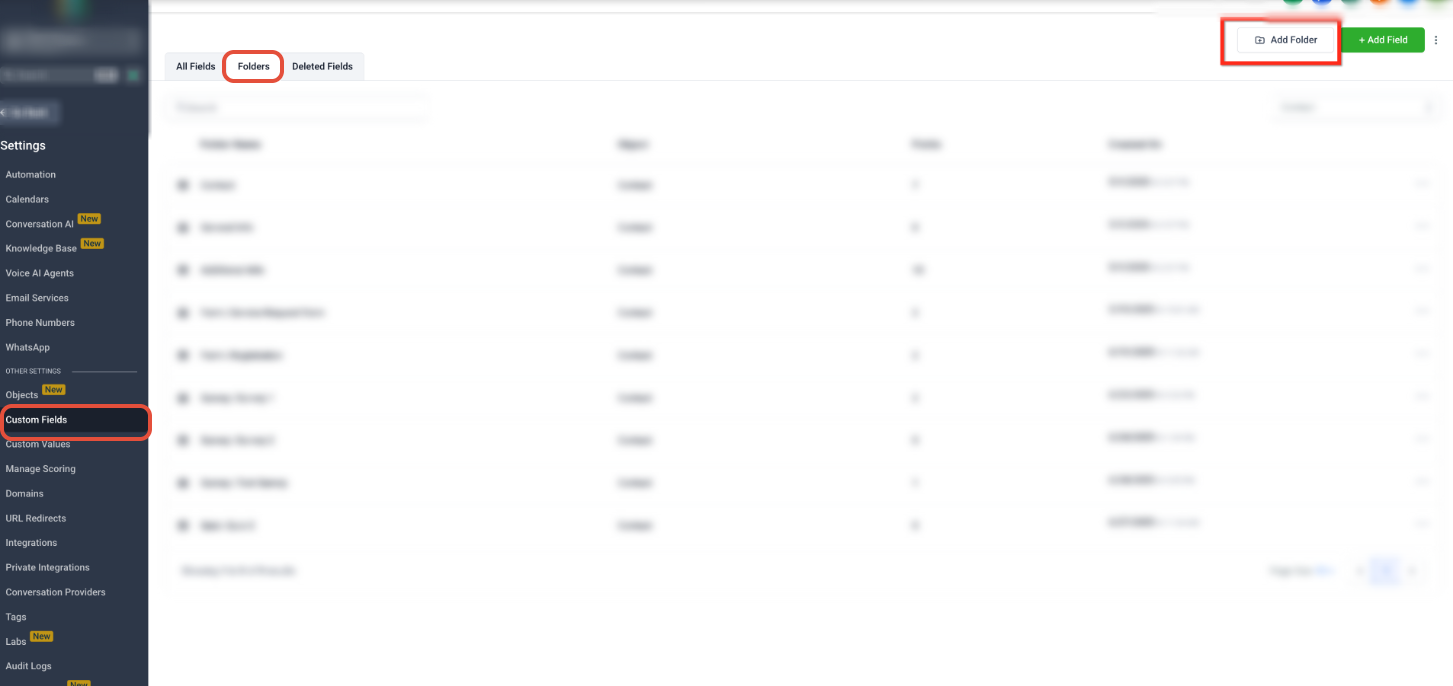
- Open Settings > Custom Fields > Folders.
- Select Create folder.
- Enter a descriptive folder name such as "General Information" or "Qualification Details".
- Save the folder.
- When creating or editing a field, select the folder name to group the field with related information.
06What it looks like in HighLevel
07Settings that matter
- Add to object. Determines which type of record (Contact or Opportunity) owns the field.
- Field name. The label users see when the field is displayed.
- Folder name. Groups the field with related Custom Fields for easier navigation.
- Key. Identifies the custom field for supported merge field and automation uses.
- Description. Explains the purpose of the field.
- Placeholder text. Displays guidance before a user enters a value.
- Additional settings. Options vary depending on the field type, such as predefined options for dropdowns.
08Things to know before you rely on it
- A custom field is available only in areas that support its object and field type.
Michael's take

Custom Fields are a small convenience that can become a real shift for any business that needs data beyond the basics. They let you capture exactly the details your team cares about and surface those details wherever you need them. From a form on your website to a workflow that nudges a sales rep.
A real estate brokerage, for example, can add Opportunity fields for budget, property type and closing date, then use those values to segment leads and trigger automated follow ups. If I were setting this up, I’d start with a clear folder structure so the fields stay organized and the team can find them quickly.