
01Who this is for
- Marketing managers can tailor offers in a single email, reducing the number of campaigns they must maintain.
- Small business owners can automatically adjust greetings or images for each subscriber without manual segmentation.
02Conditional elements, explained
Conditional elements are rules attached to individual items in the Email Builder. When the rule evaluates to true for a contact, the element renders; otherwise it stays hidden. The evaluation uses contact fields, including custom fields and attachment fields, and supports several operators.
The feature lives in the Email Builder. After opening an email draft, select any element and access its Visibility tab or click the Conditional Element icon. From there you turn on Conditional Sending and define the field, condition and value that determine visibility.
New visibility operators, Is, Is Not, Is Empty and Is Present, give more precise control, especially for handling empty or missing values. This makes it possible to hide a greeting when a first name is empty or to show a download button only when an attachment field is present.
03How businesses use conditional elements
- Real estate agency. The agency adds a conditional image element that displays a property photo only when the contact’s location field matches the city of the listing. The image stays hidden for contacts outside that area.
- Ecommerce store. The store creates a text block that shows a special discount code when the customer’s "VIP" custom field is set to "Yes". If the field is empty, the code does not appear.
- Coaching business. A coach adds a button that links to a downloadable workbook. The button is set to appear only when an attachment field marked "Workbook" Is Present, ensuring only contacts with the file see the button.
04The numbers and rules that matter
- Supported field types: Single line text, number, radio select, and single select dropdown.
05How to set up and use conditional elements in HighLevel
Add a conditional element to an email
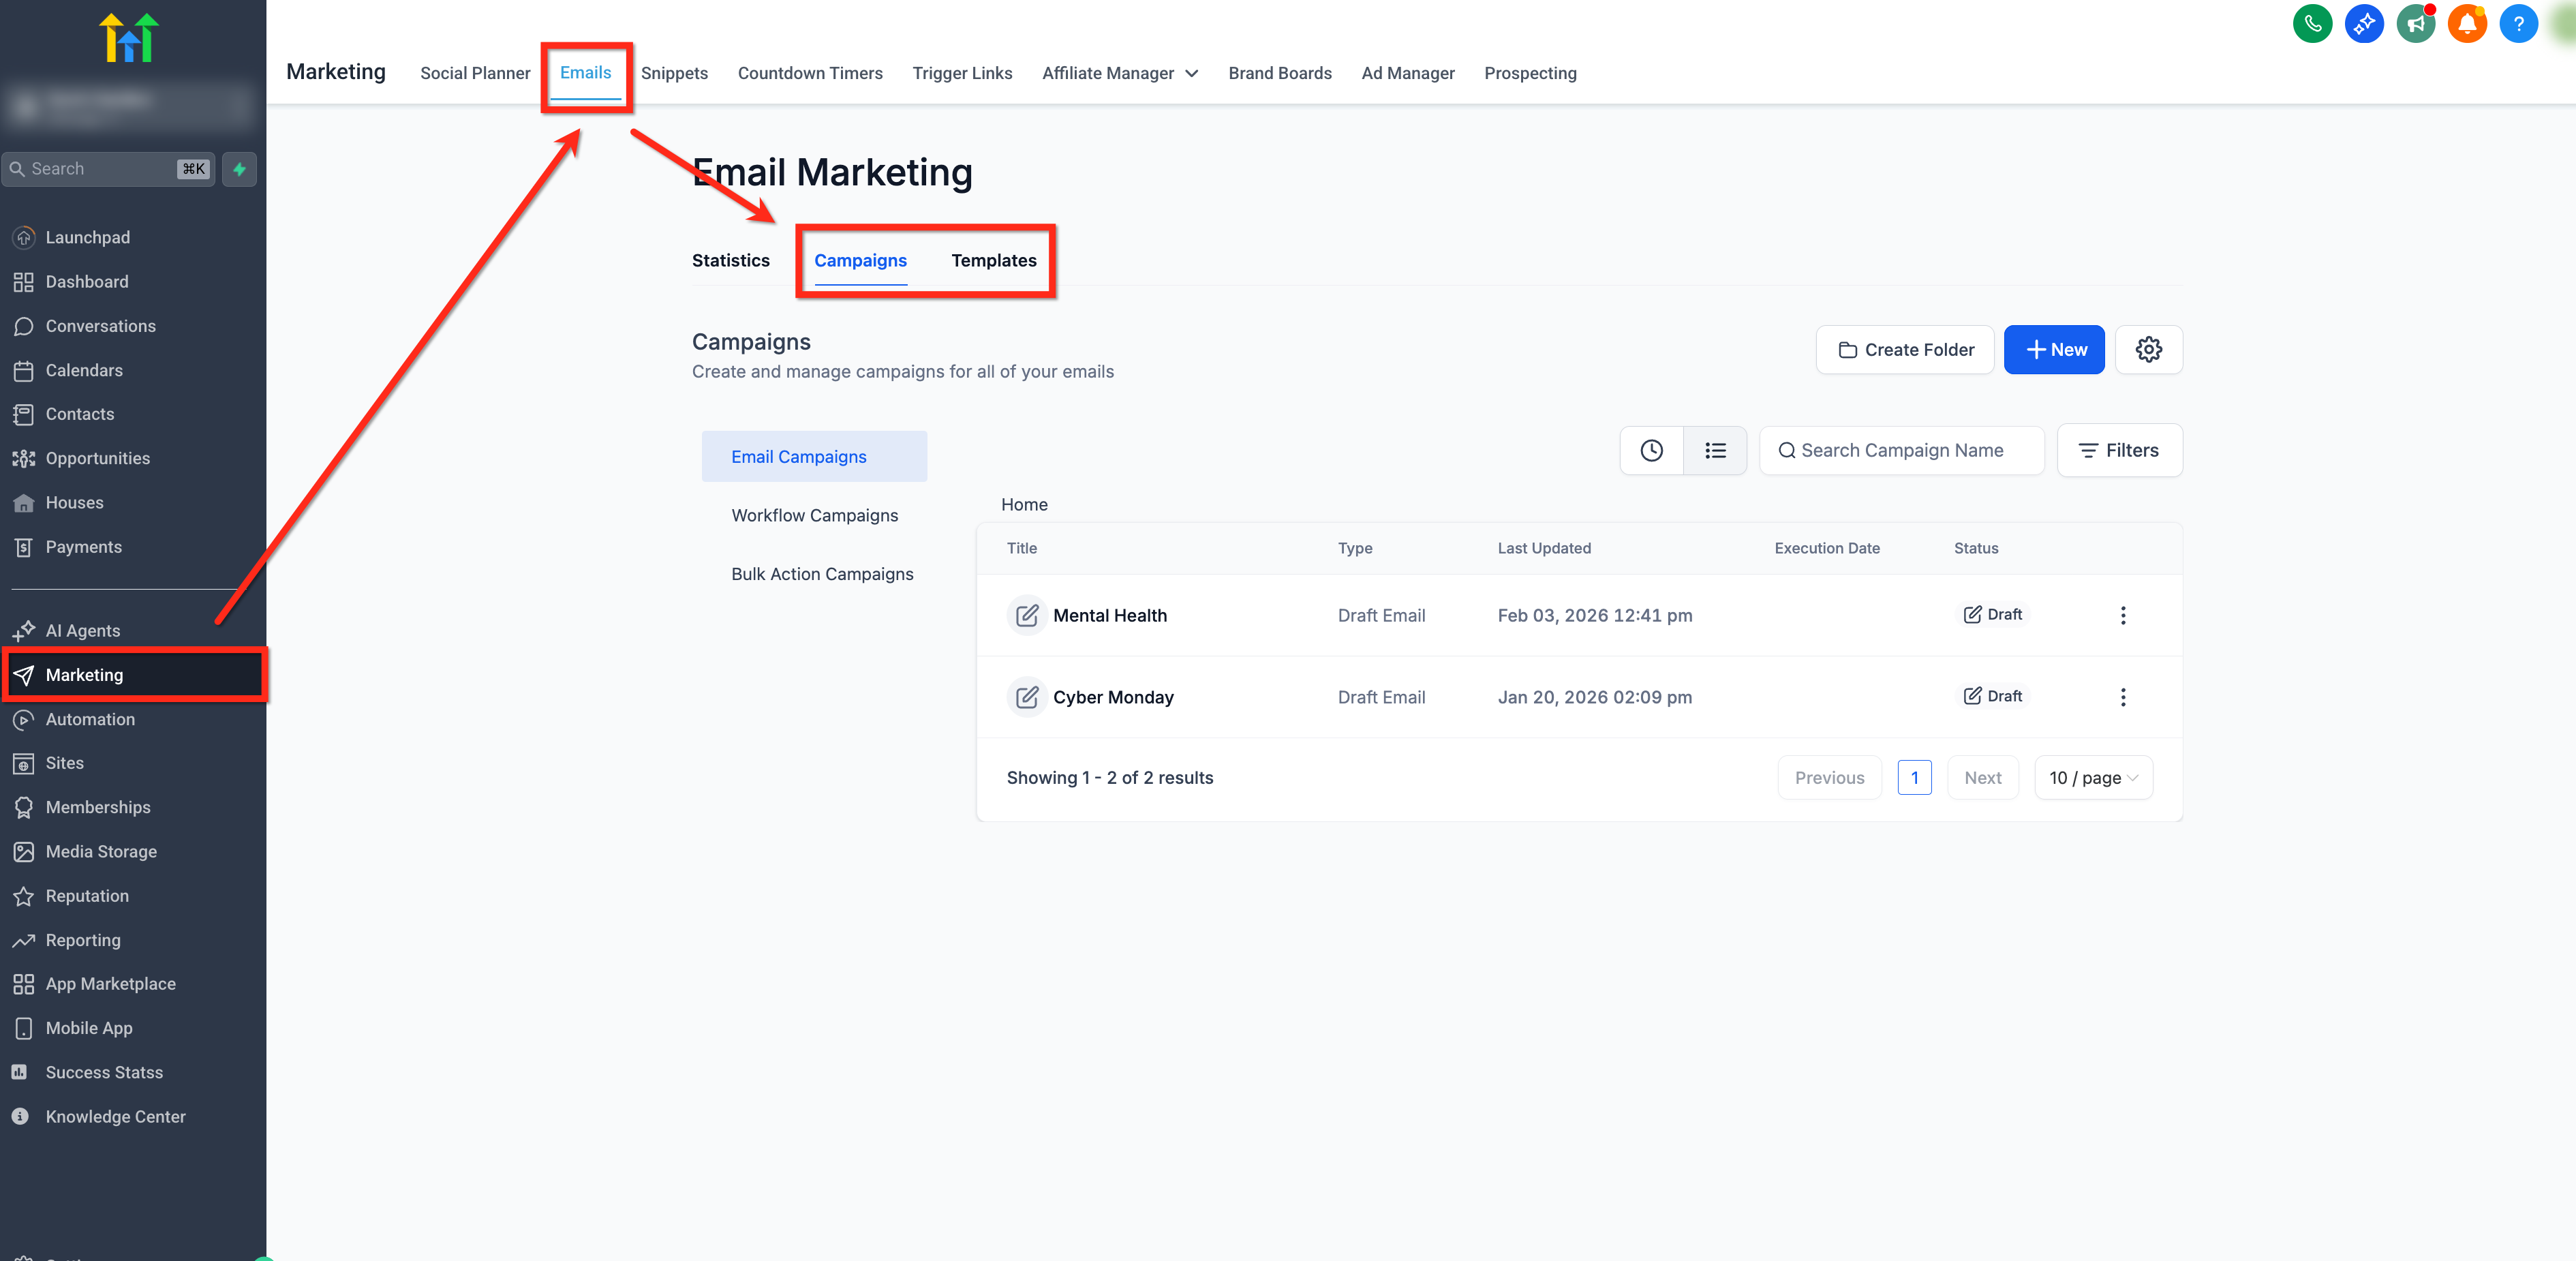
- Open the desired email in the Email Builder via Marketing > Emails > Campaigns or Templates.
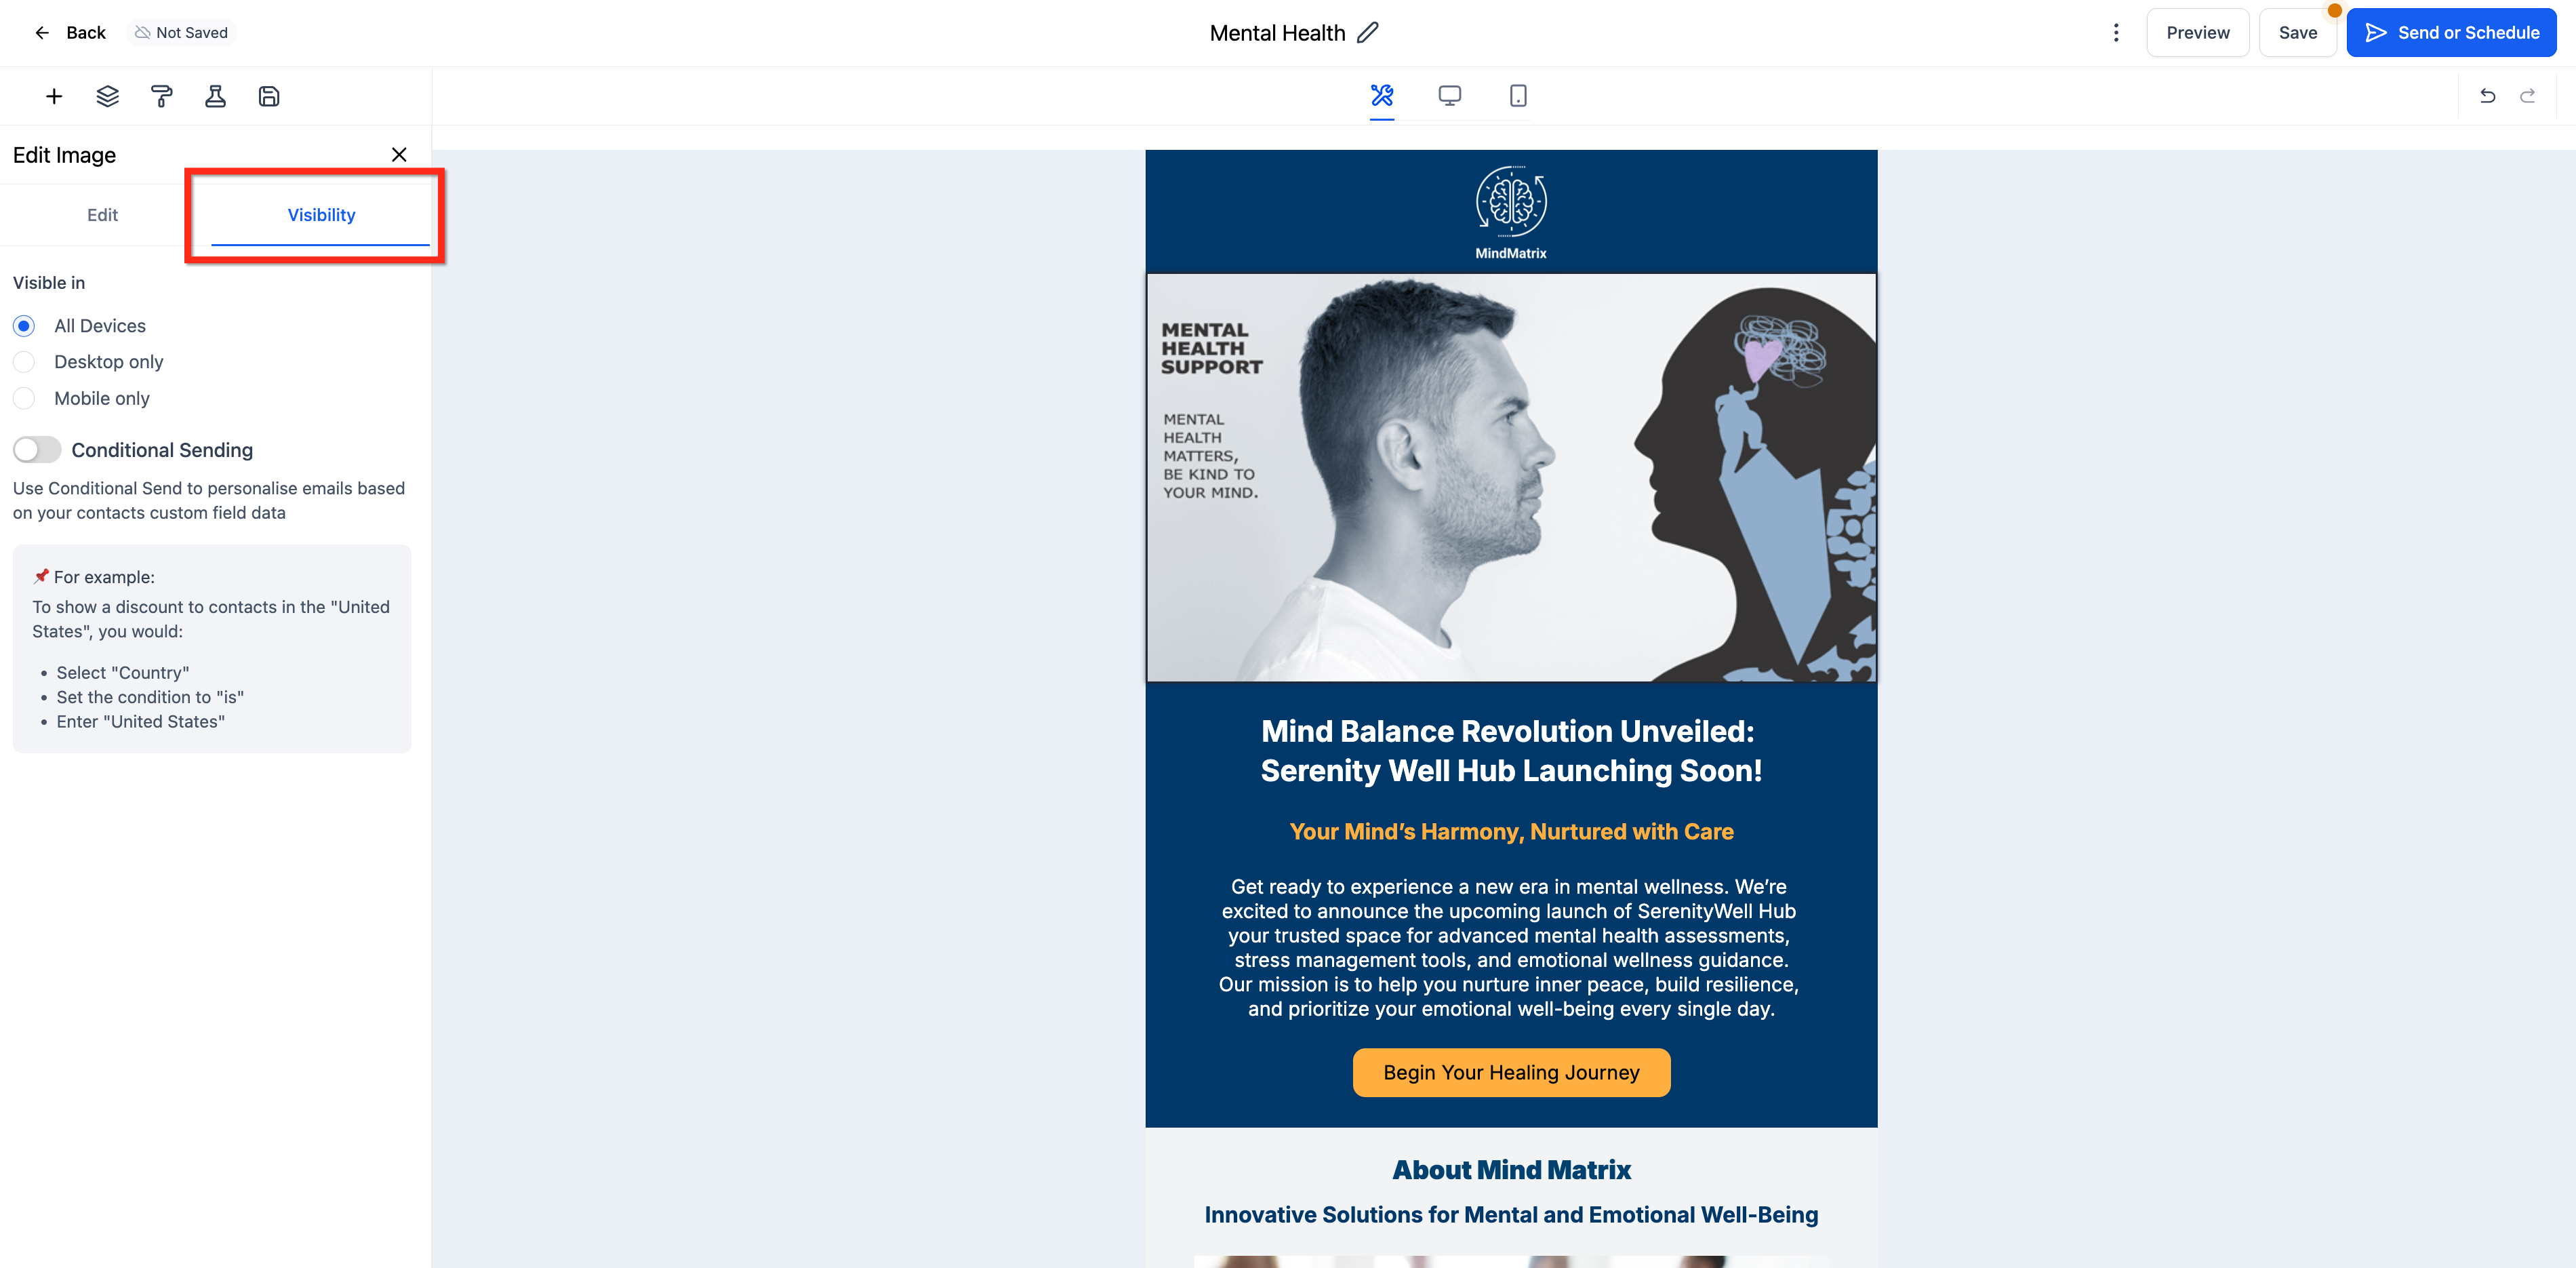
- Select the target element and open its Visibility tab, or click the Conditional Element icon on the element overlay.
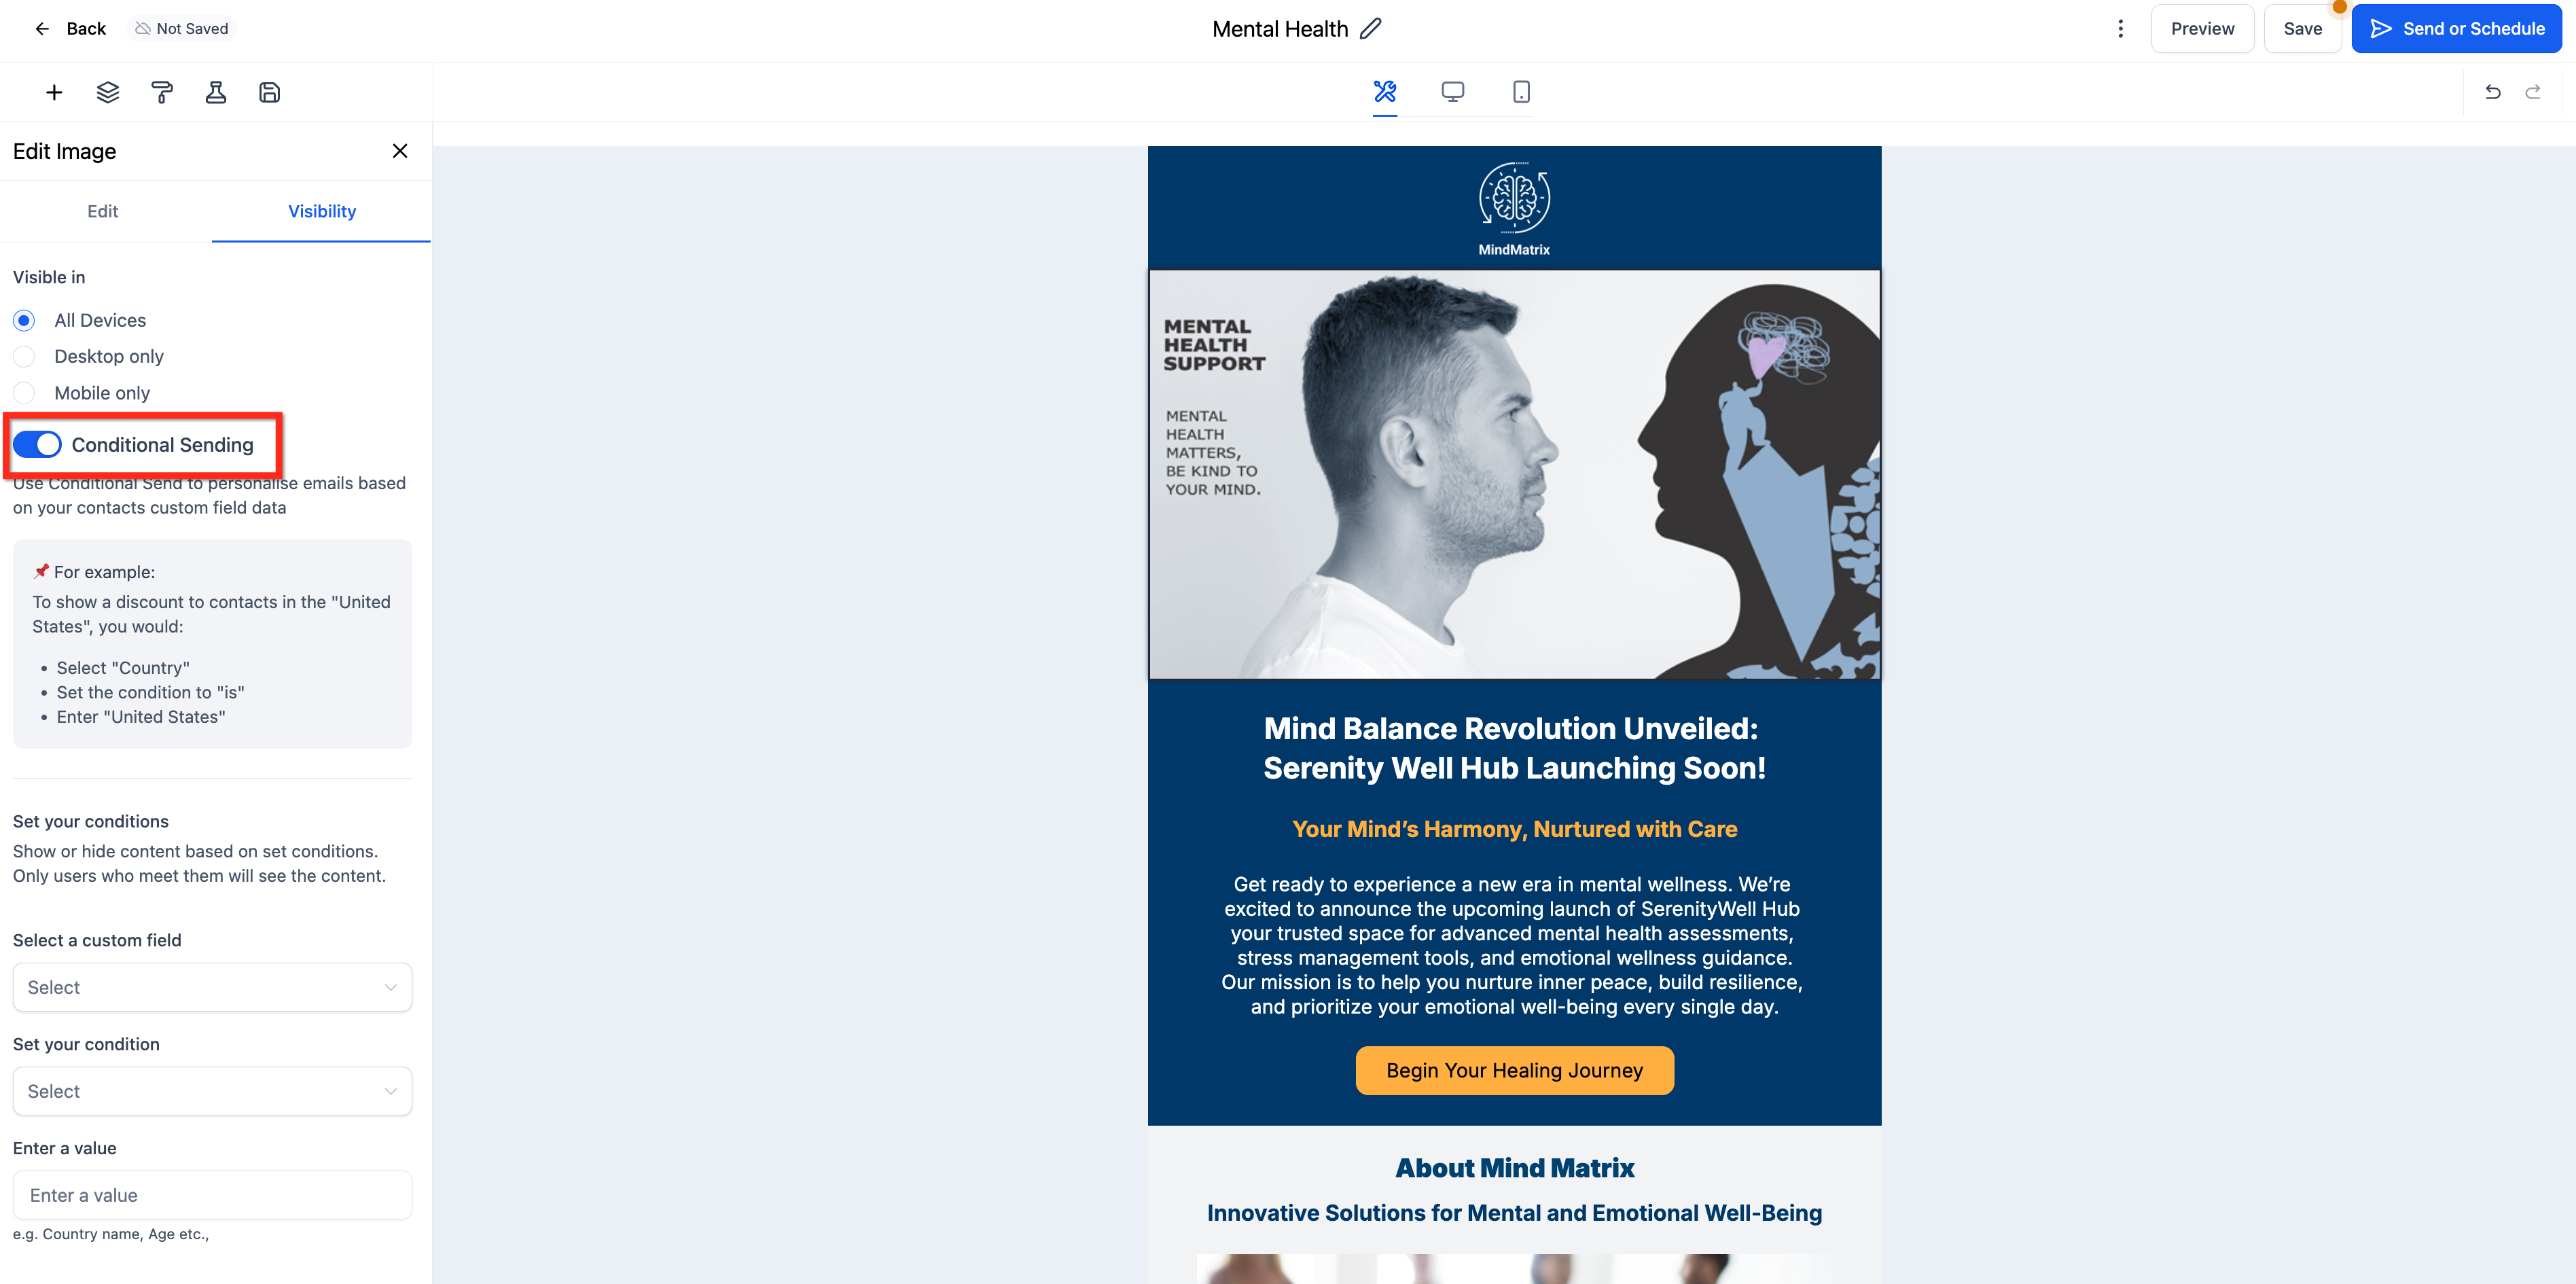
- Switch the Conditional Sending toggle to the on position.
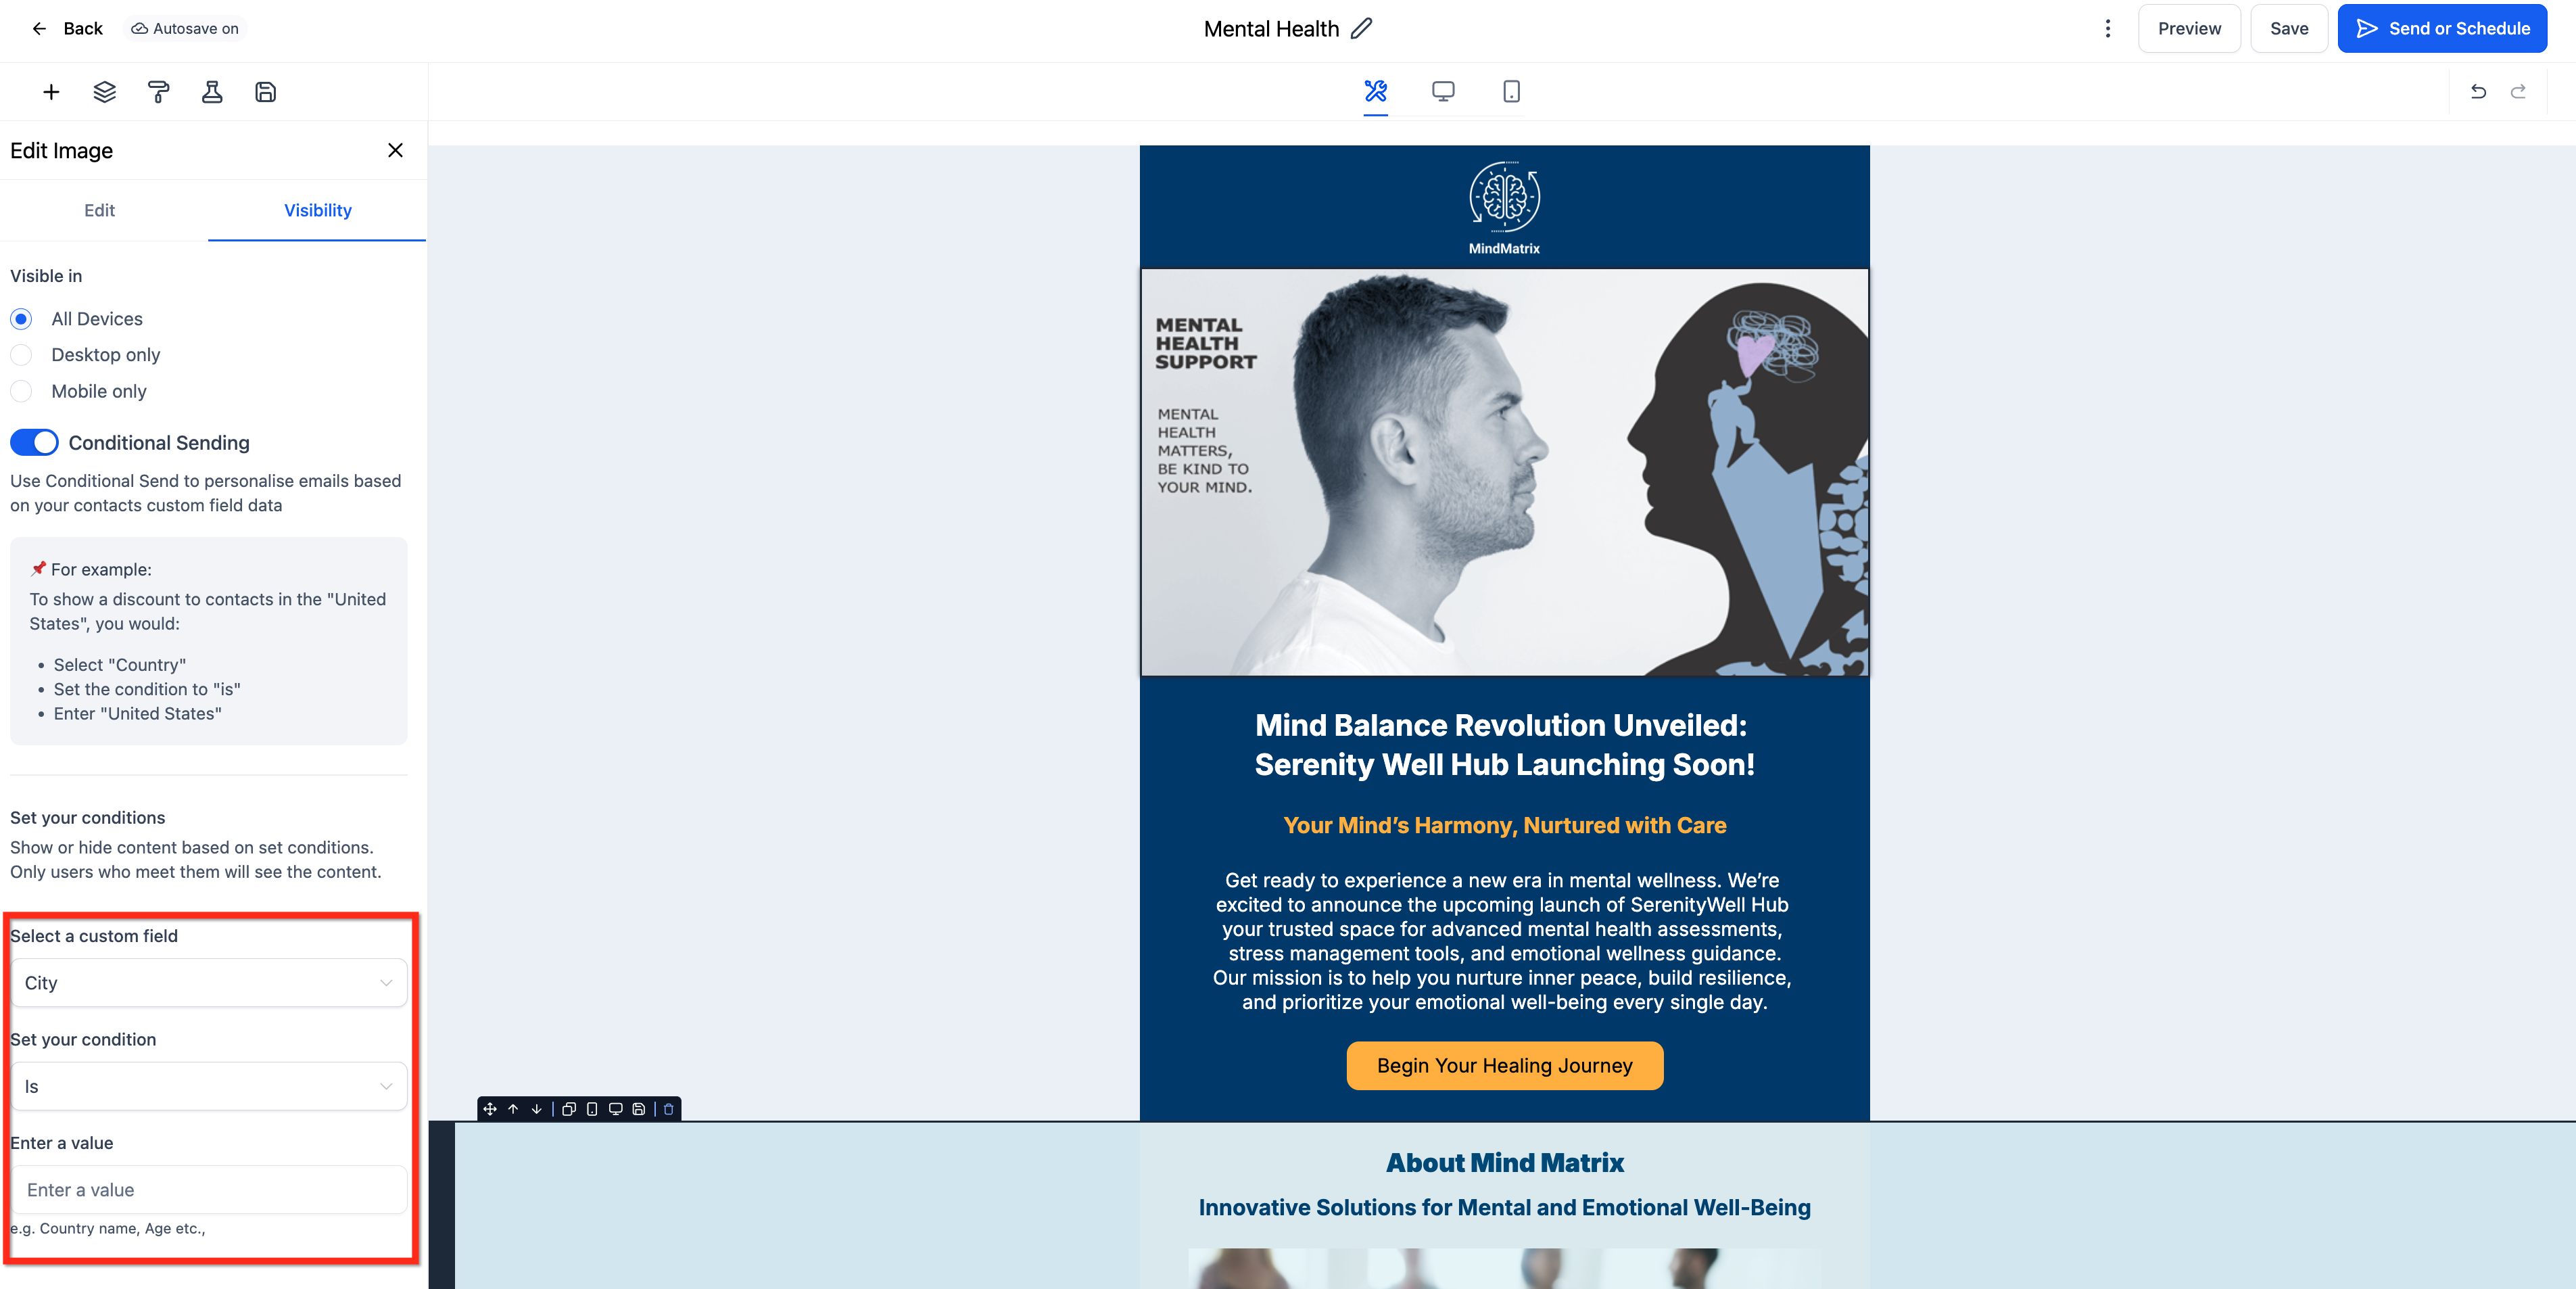
- Choose the contact field that will drive the rule.
- Select a condition such as Is, Is Not, Is Empty, or Is Present.
- Enter a value or leave it blank to match an empty field.
06What it looks like in HighLevel

07Settings that matter
- Conditional Sending. Enables the element to be shown or hidden based on the visibility rule you define.
08Things to know before you rely on it
- Supported field types are single line text, number, radio select and single select dropdown.
- For number fields, enter plain numeric values without symbols.
- Radio and single select fields must match the exact stored option value.
- Typing "NULL" does not match empty fields; leave the value blank and use the Is Empty operator.
- Conditional elements now evaluate reliably when a contact’s custom field is not set.
09If something goes wrong
- Typing "NULL" does not target empty fields. Leave the field blank and set the condition to Is Empty. Ensure the field contains no spaces or placeholder text.
10How it connects to the rest of HighLevel
- Move the Email Builder edit panel to improve workflow Edit panel positioning
- Hide email elements on mobile view to control mobile formatting Mobile visibility
- Preview custom field values inside the Email Builder before sending Preview custom fields
- Access the HighLevel template library for reusable email designs Template library
Michael's take

Conditional elements can feel risky if you rely on them without double checking your field data. A stray space or an unexpected value can cause content to disappear for the wrong audience.
When they work, they let you run a single email that morphs for every subscriber, saving time and boosting relevance.