
01Who this is for
- Ecommerce Founders who need a flexible checkout that can switch layouts without rebuilding pages.
- Coaches or course creators who want to gather extra client details via CRM custom fields at purchase.
- Service based businesses that sell add on offers and need order bumps styled separately from the main form.
02Order forms, explained
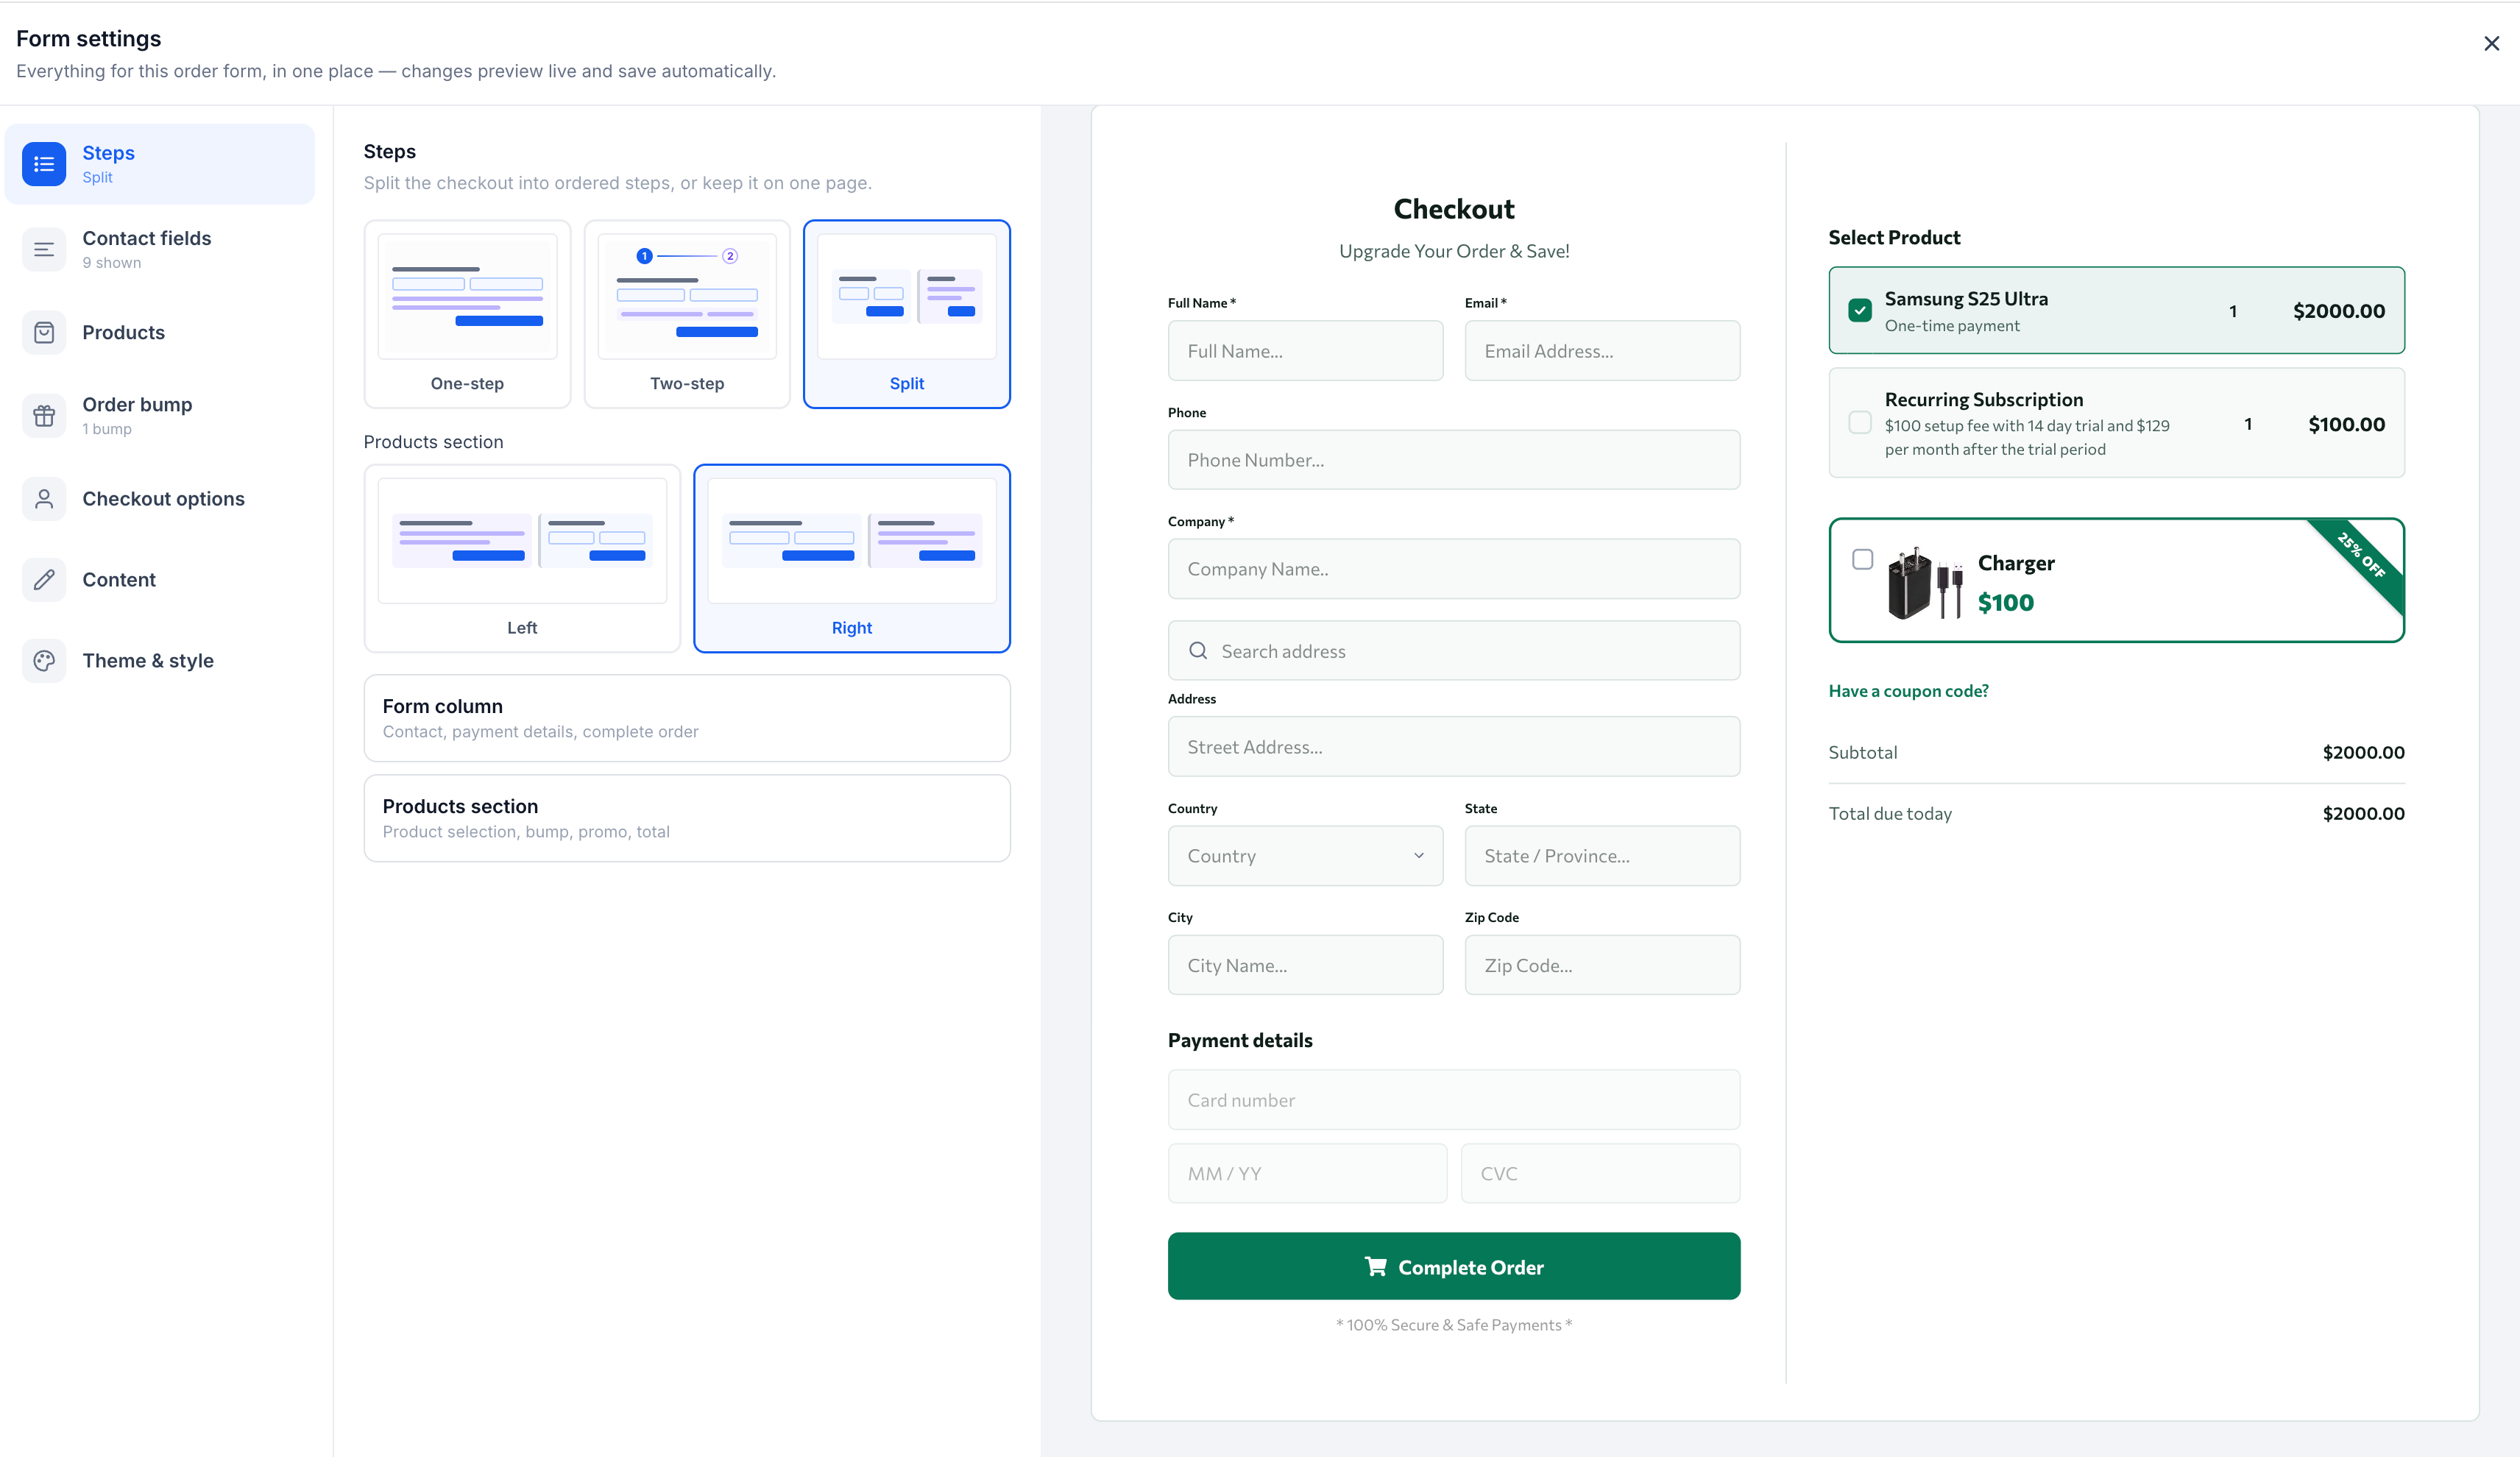
The redesigned Order Form element consolidates contact fields, product selection, order bumps, checkout behavior, content and visual styling into one workspace. You can pick between One step, Two step and Split layouts, add standard or supported CRM custom fields, and configure products, quantities, coupons and more. All changes appear in a live preview as you work.
The workspace lives inside the page builder for funnels or websites. After enabling the Labs feature, you add the Order Form element, open its customization panel and adjust settings such as fields, products, bumps, content, theme and styling. When finished, you save, publish the page and test the live checkout.
03How businesses use order forms
- Online boutique. The boutique adds the Order Form element to its product page, selects the Split layout to show images beside the form, then configures product rows for each clothing item, enables quantity limits and adds a coupon field for seasonal discounts.
- Fitness coaching program. A coach activates the new Order Form, adds a Two step layout, includes a CRM custom field for preferred training start date, and sets up an order bump offering a nutrition guide with its own styling preset.
- Digital marketing agency. The agency uses the One step layout for a service package checkout, makes Phone and Company required, adds a file upload custom field for client briefs, and styles the form with a brand color theme preset.
04The numbers and rules that matter
- More than 80 styling properties.
- Supported CRM custom field types: Text, Numeric, Phone, Monetary, Large text, Date, Option based fields, File upload, Signature.
05Before you start
- A subaccount must exist for the funnel or website where the checkout will be placed.
- Any CRM custom fields referenced in the Order Form must be created beforehand in HighLevel.
06How to set up and use order forms in HighLevel
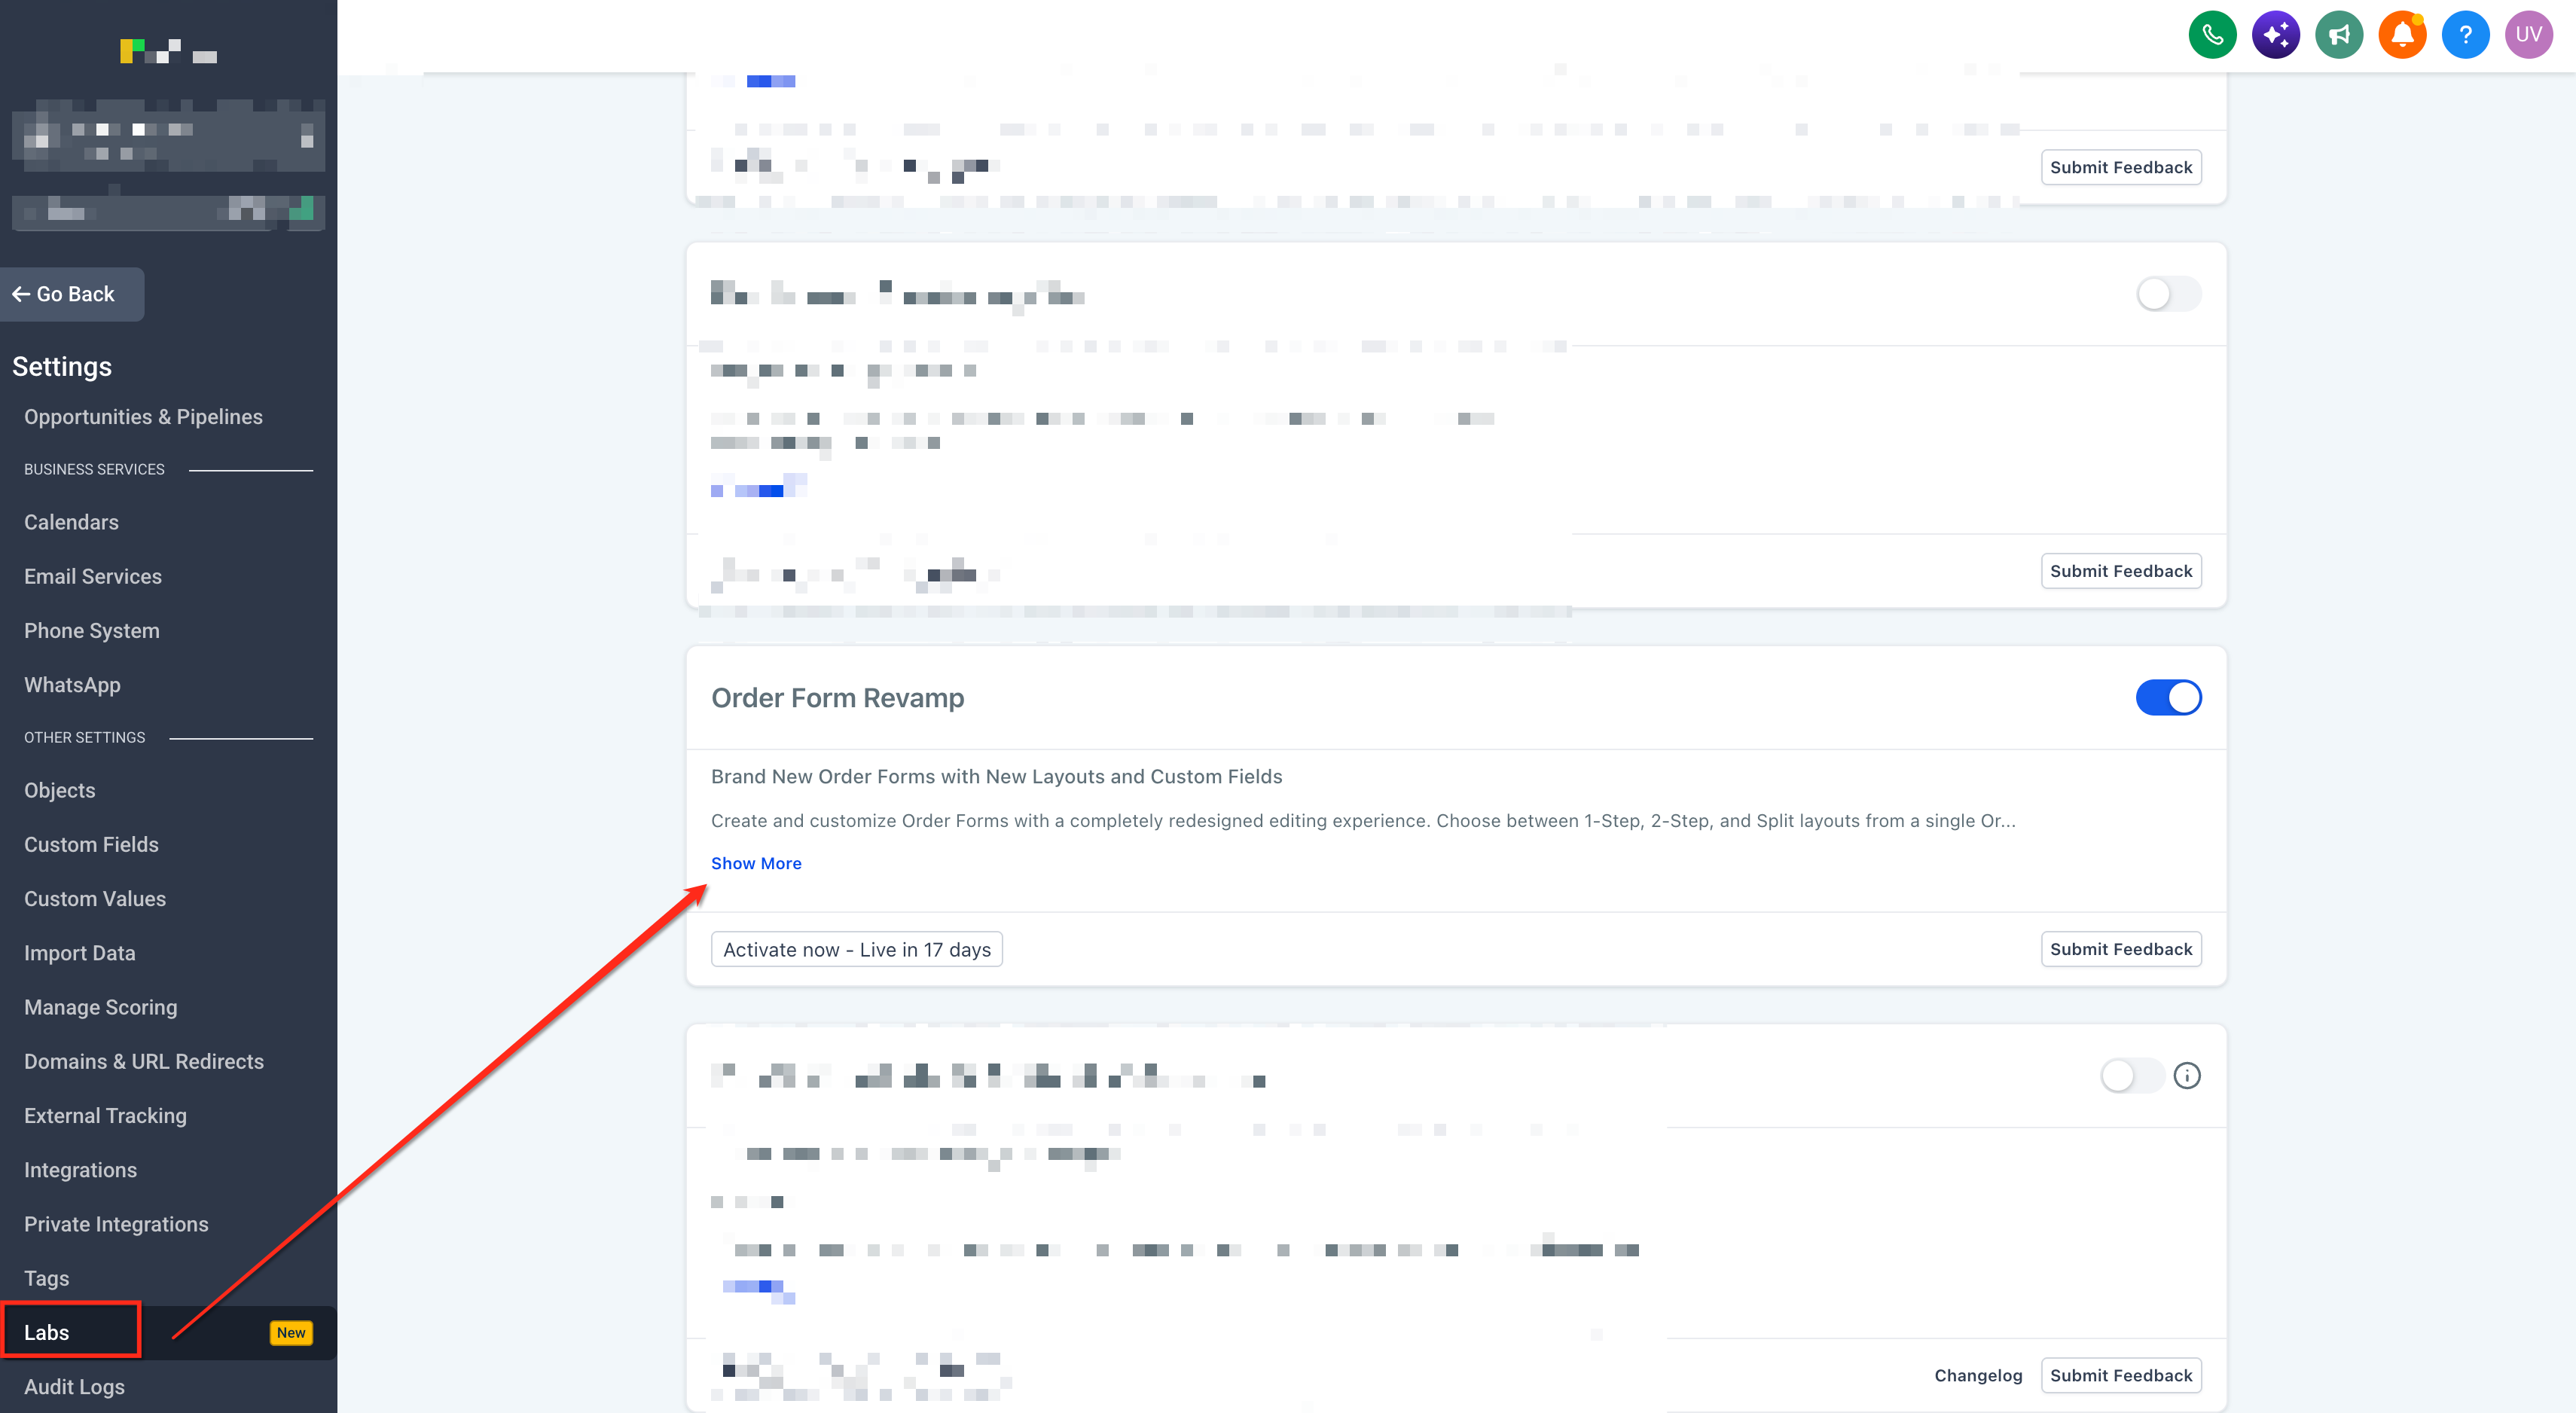
Enable new order form feature
- Open Agency Settings.
- Select Labs.
- Search for Brand New Order Forms with New Layouts and Custom Fields.
- Click Activate Feature.
Add order form to a page
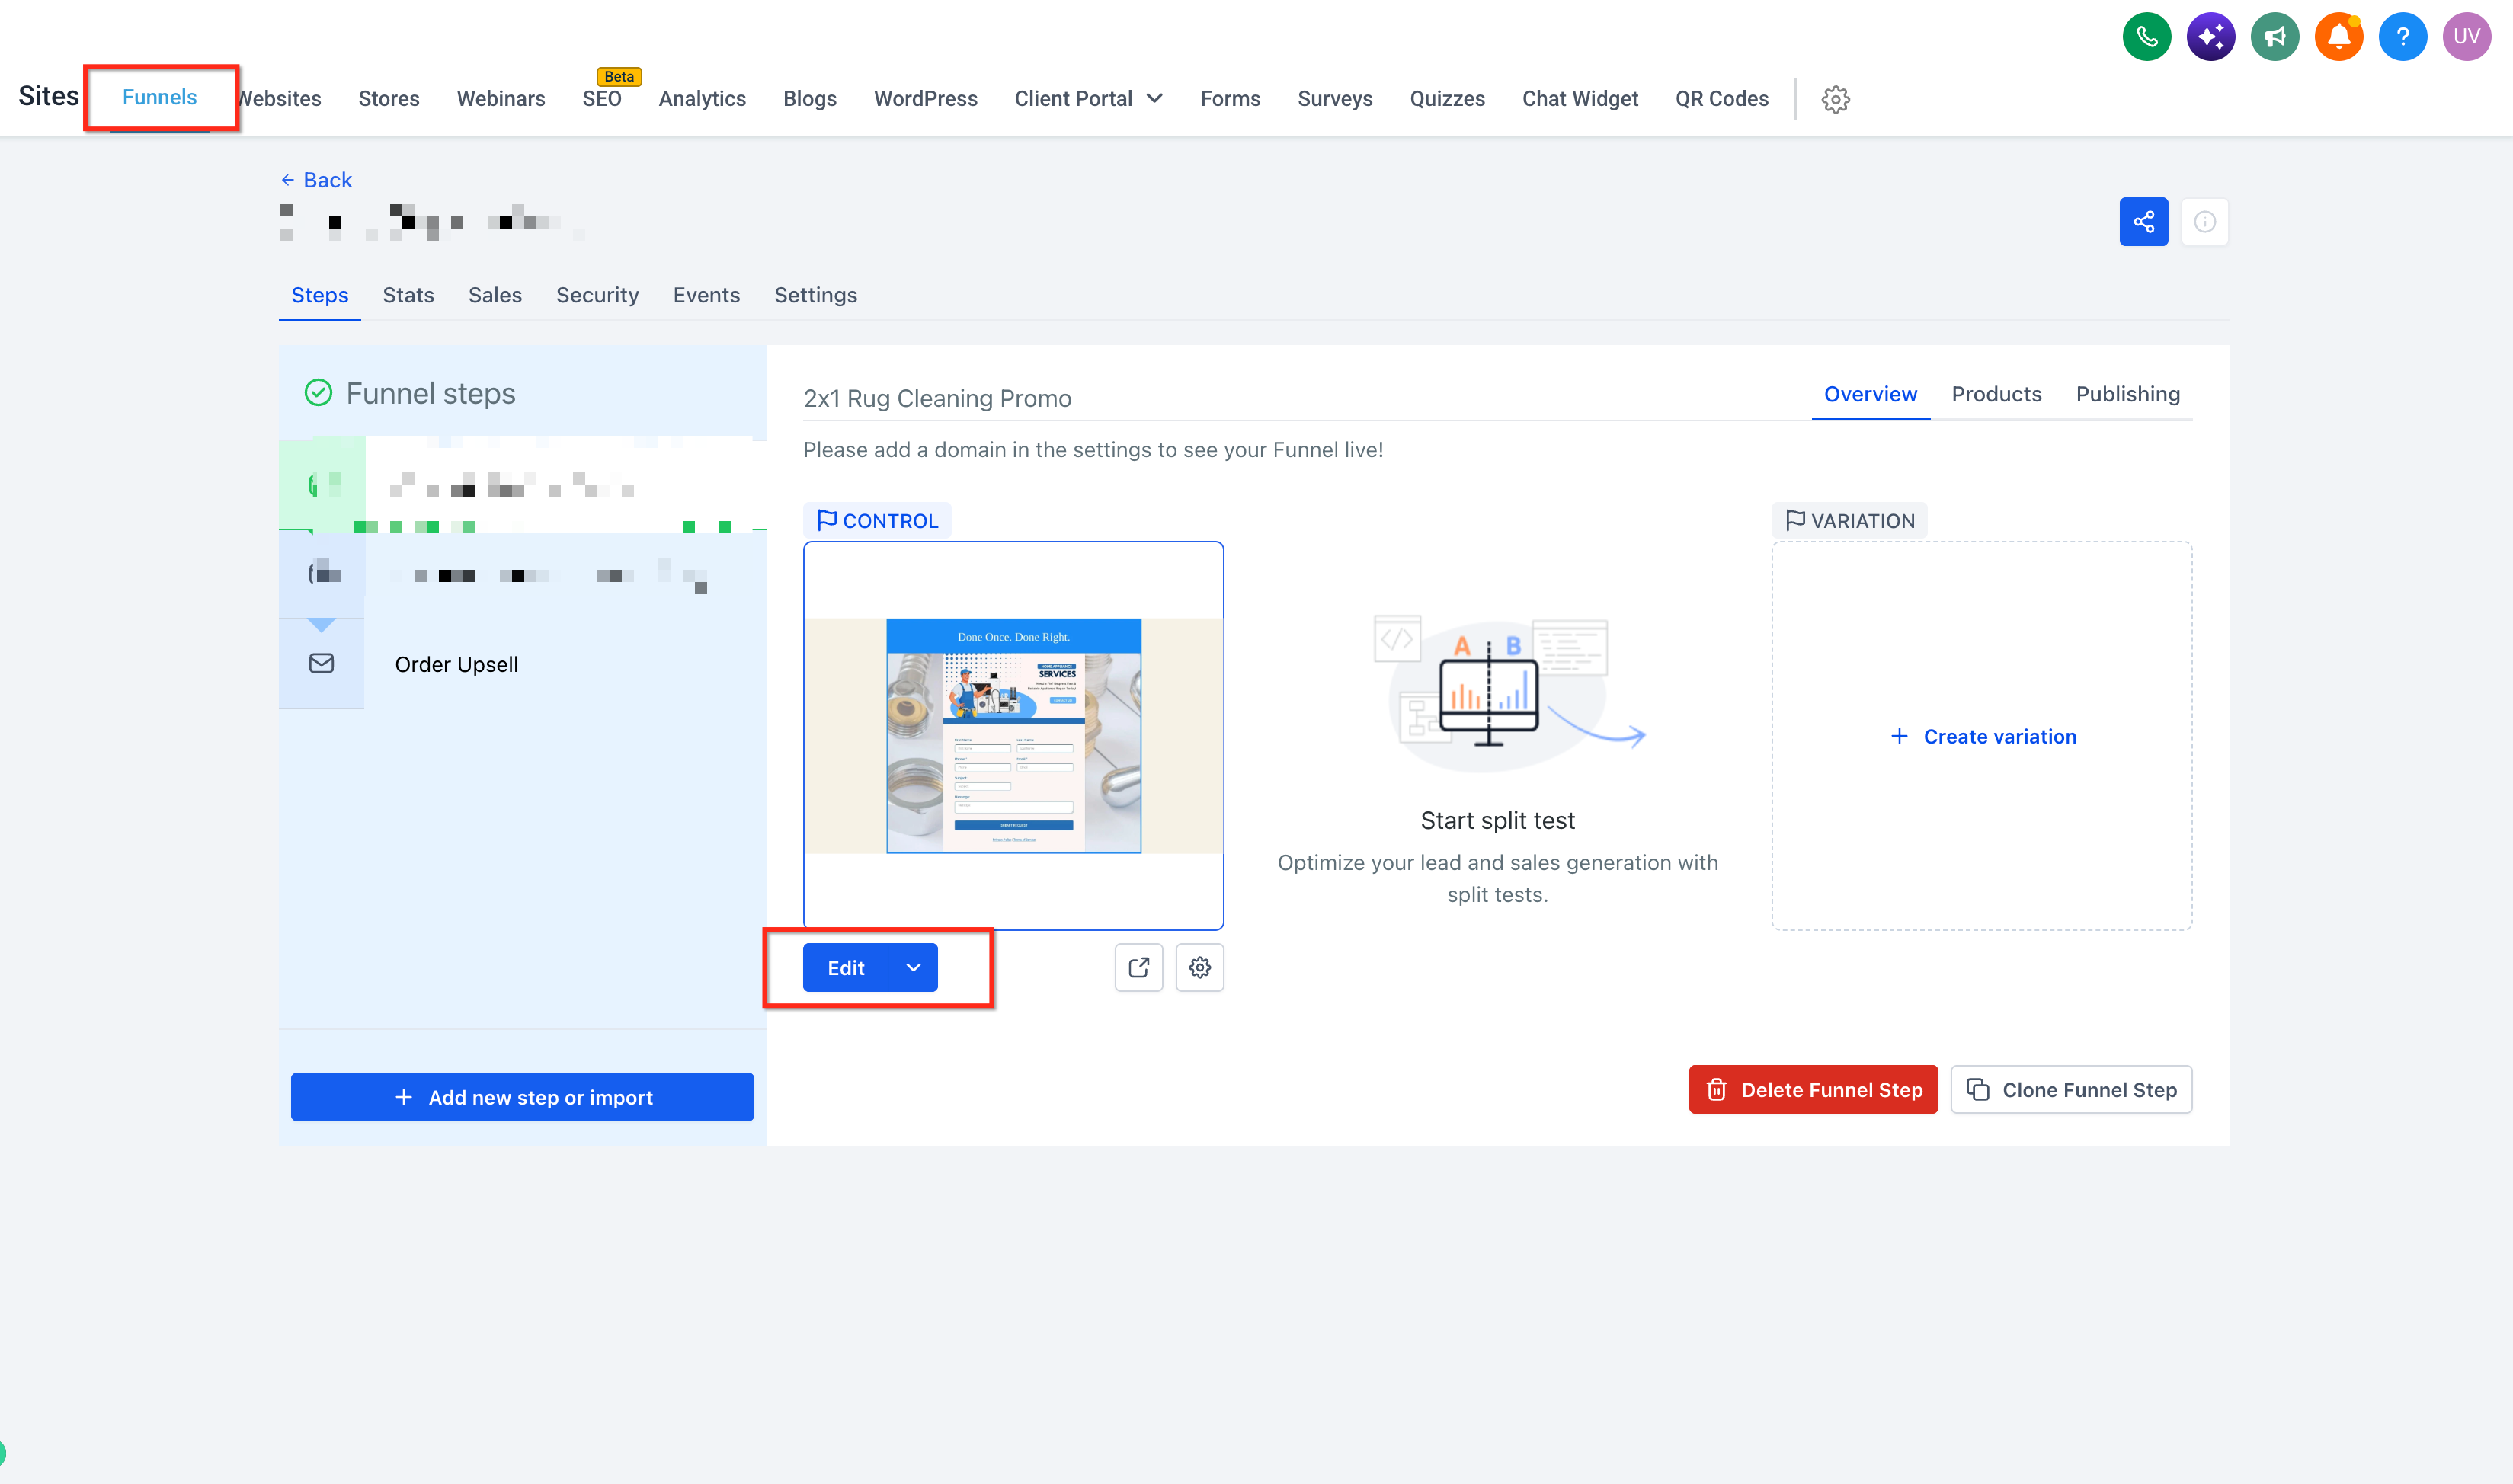
- Open the relevant subaccount.
- Go to Sites > Funnels (or the website builder).
- Choose the funnel or website that contains the checkout page.
- Select the page you want to edit.
- Launch the page builder.
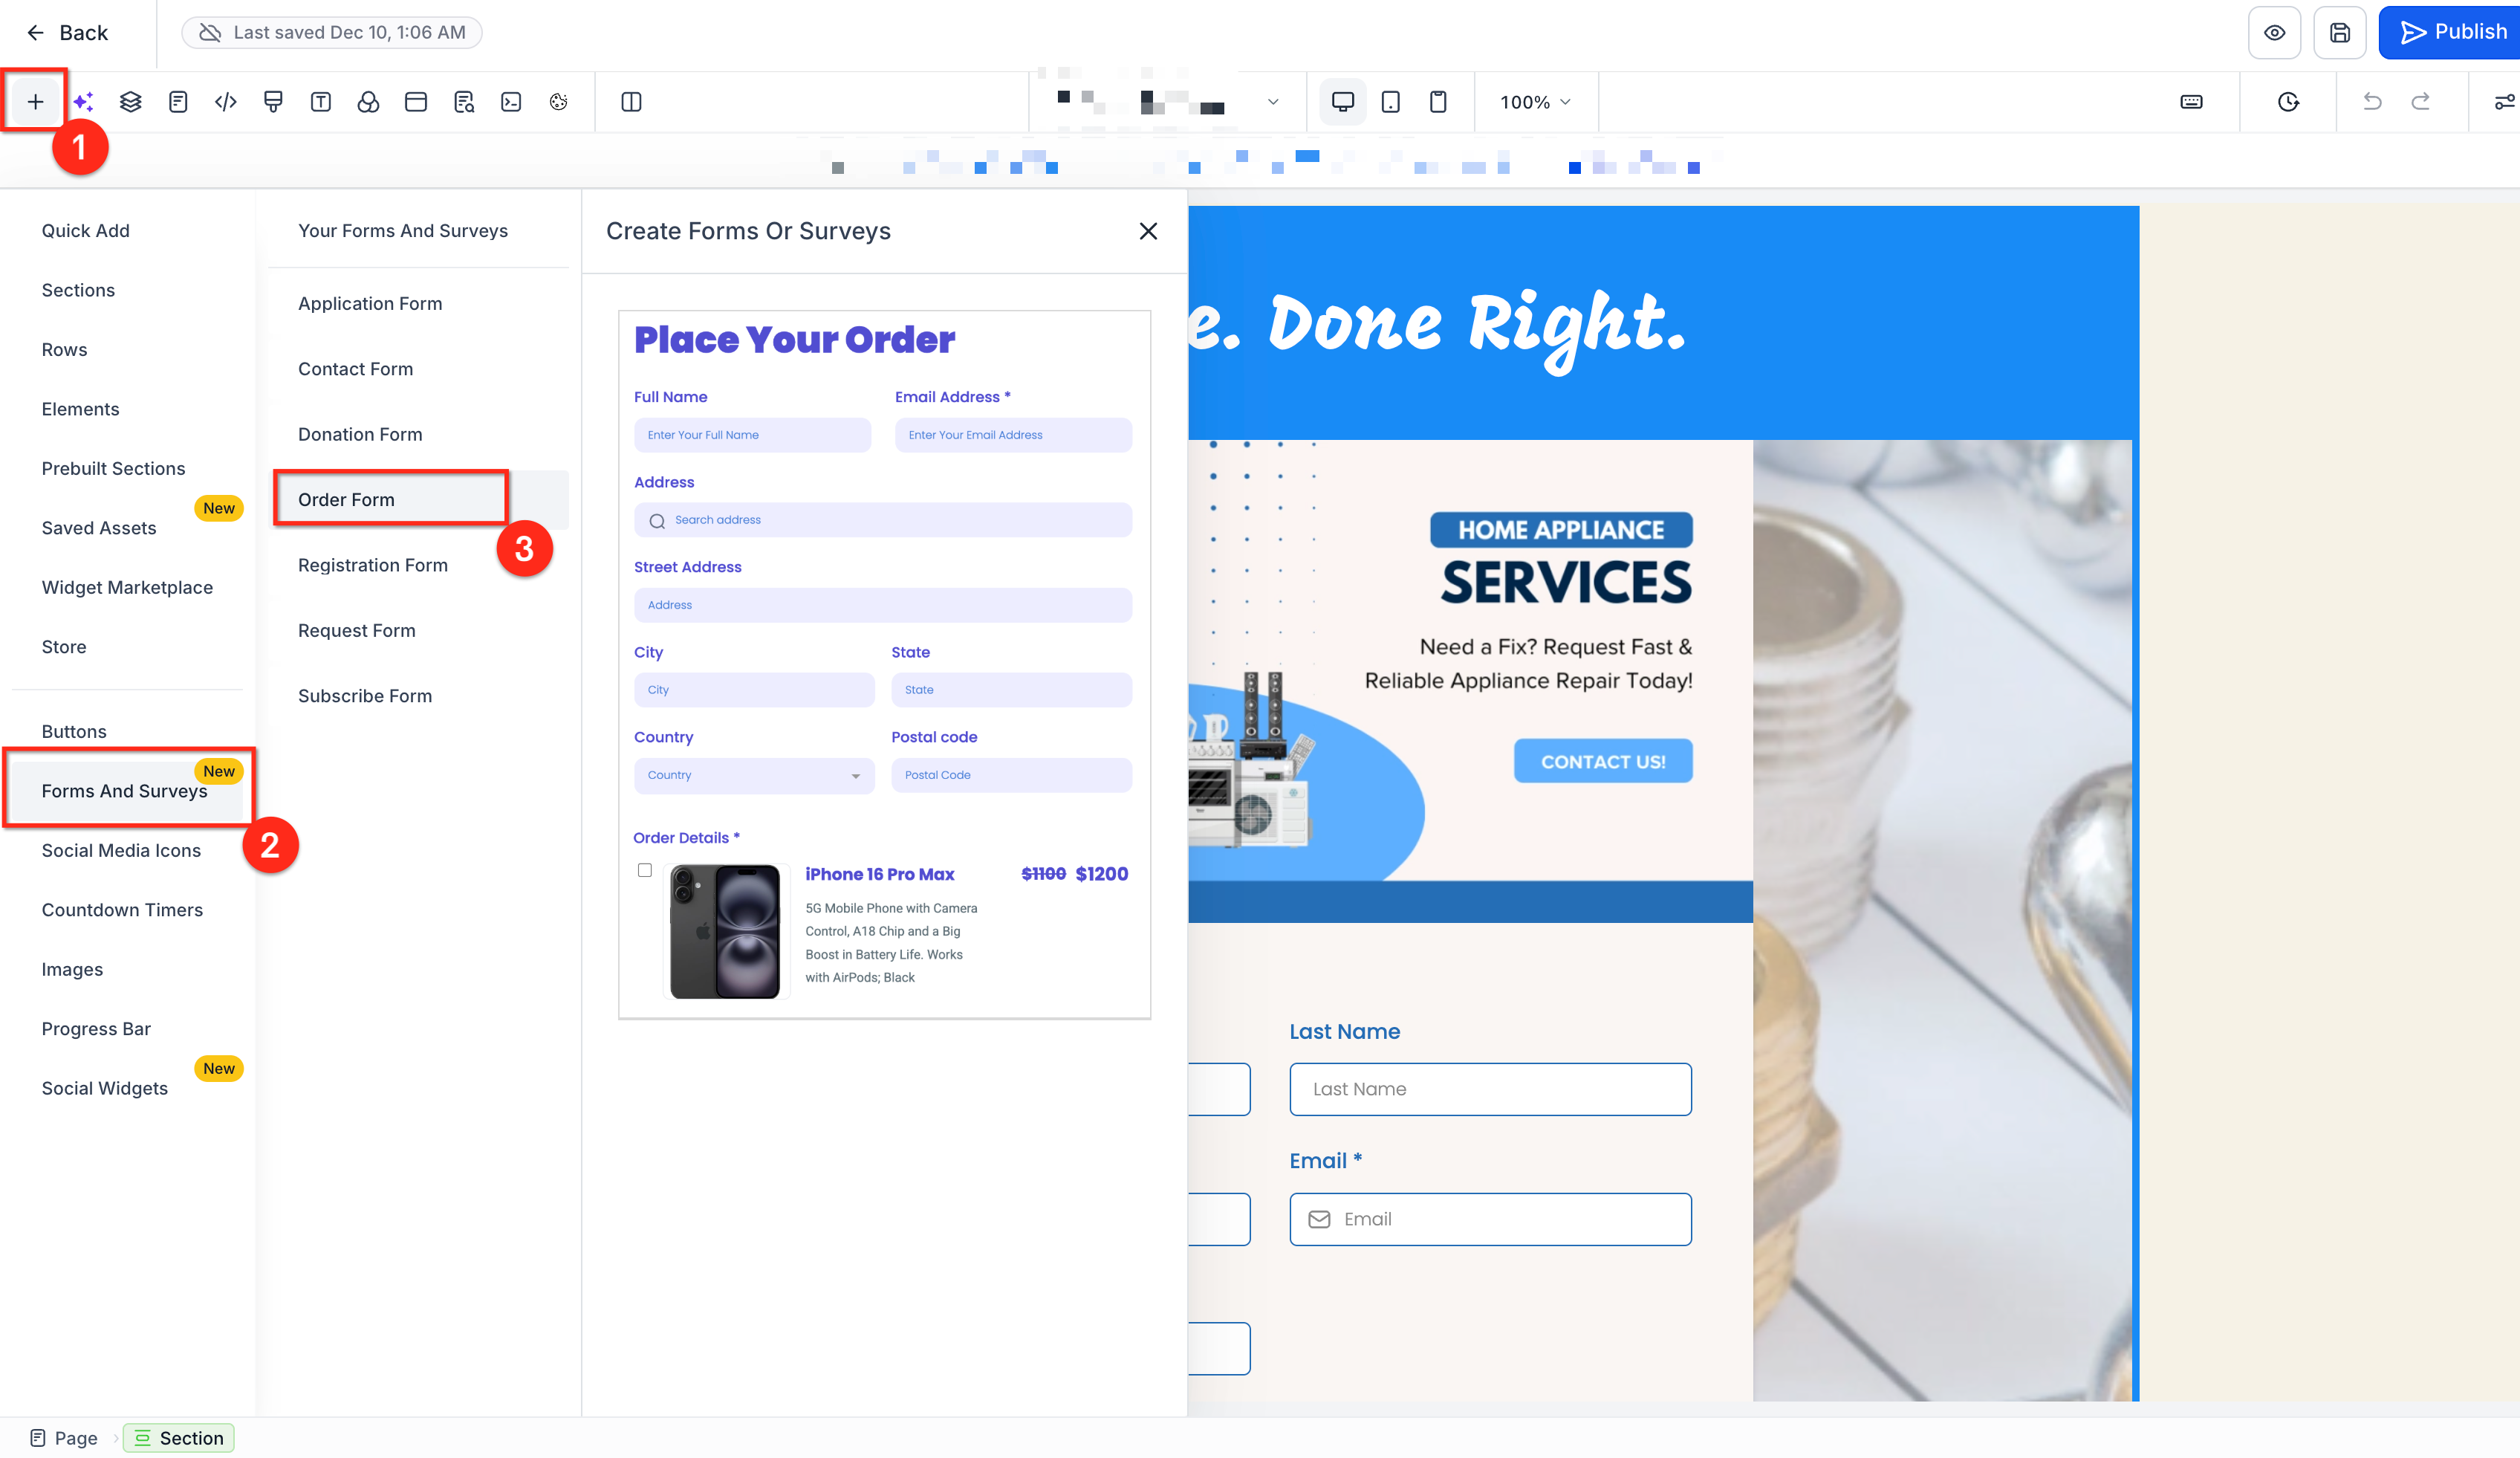
- Click Add Elements.
- Find and add the Order Form element.
- Select the element and click Customize order form.
Choose checkout layout
- In the customization workspace, open the Steps panel.
- Select One step, Two step or Split layout.
- Review the live preview to confirm the selection.
Configure contact fields
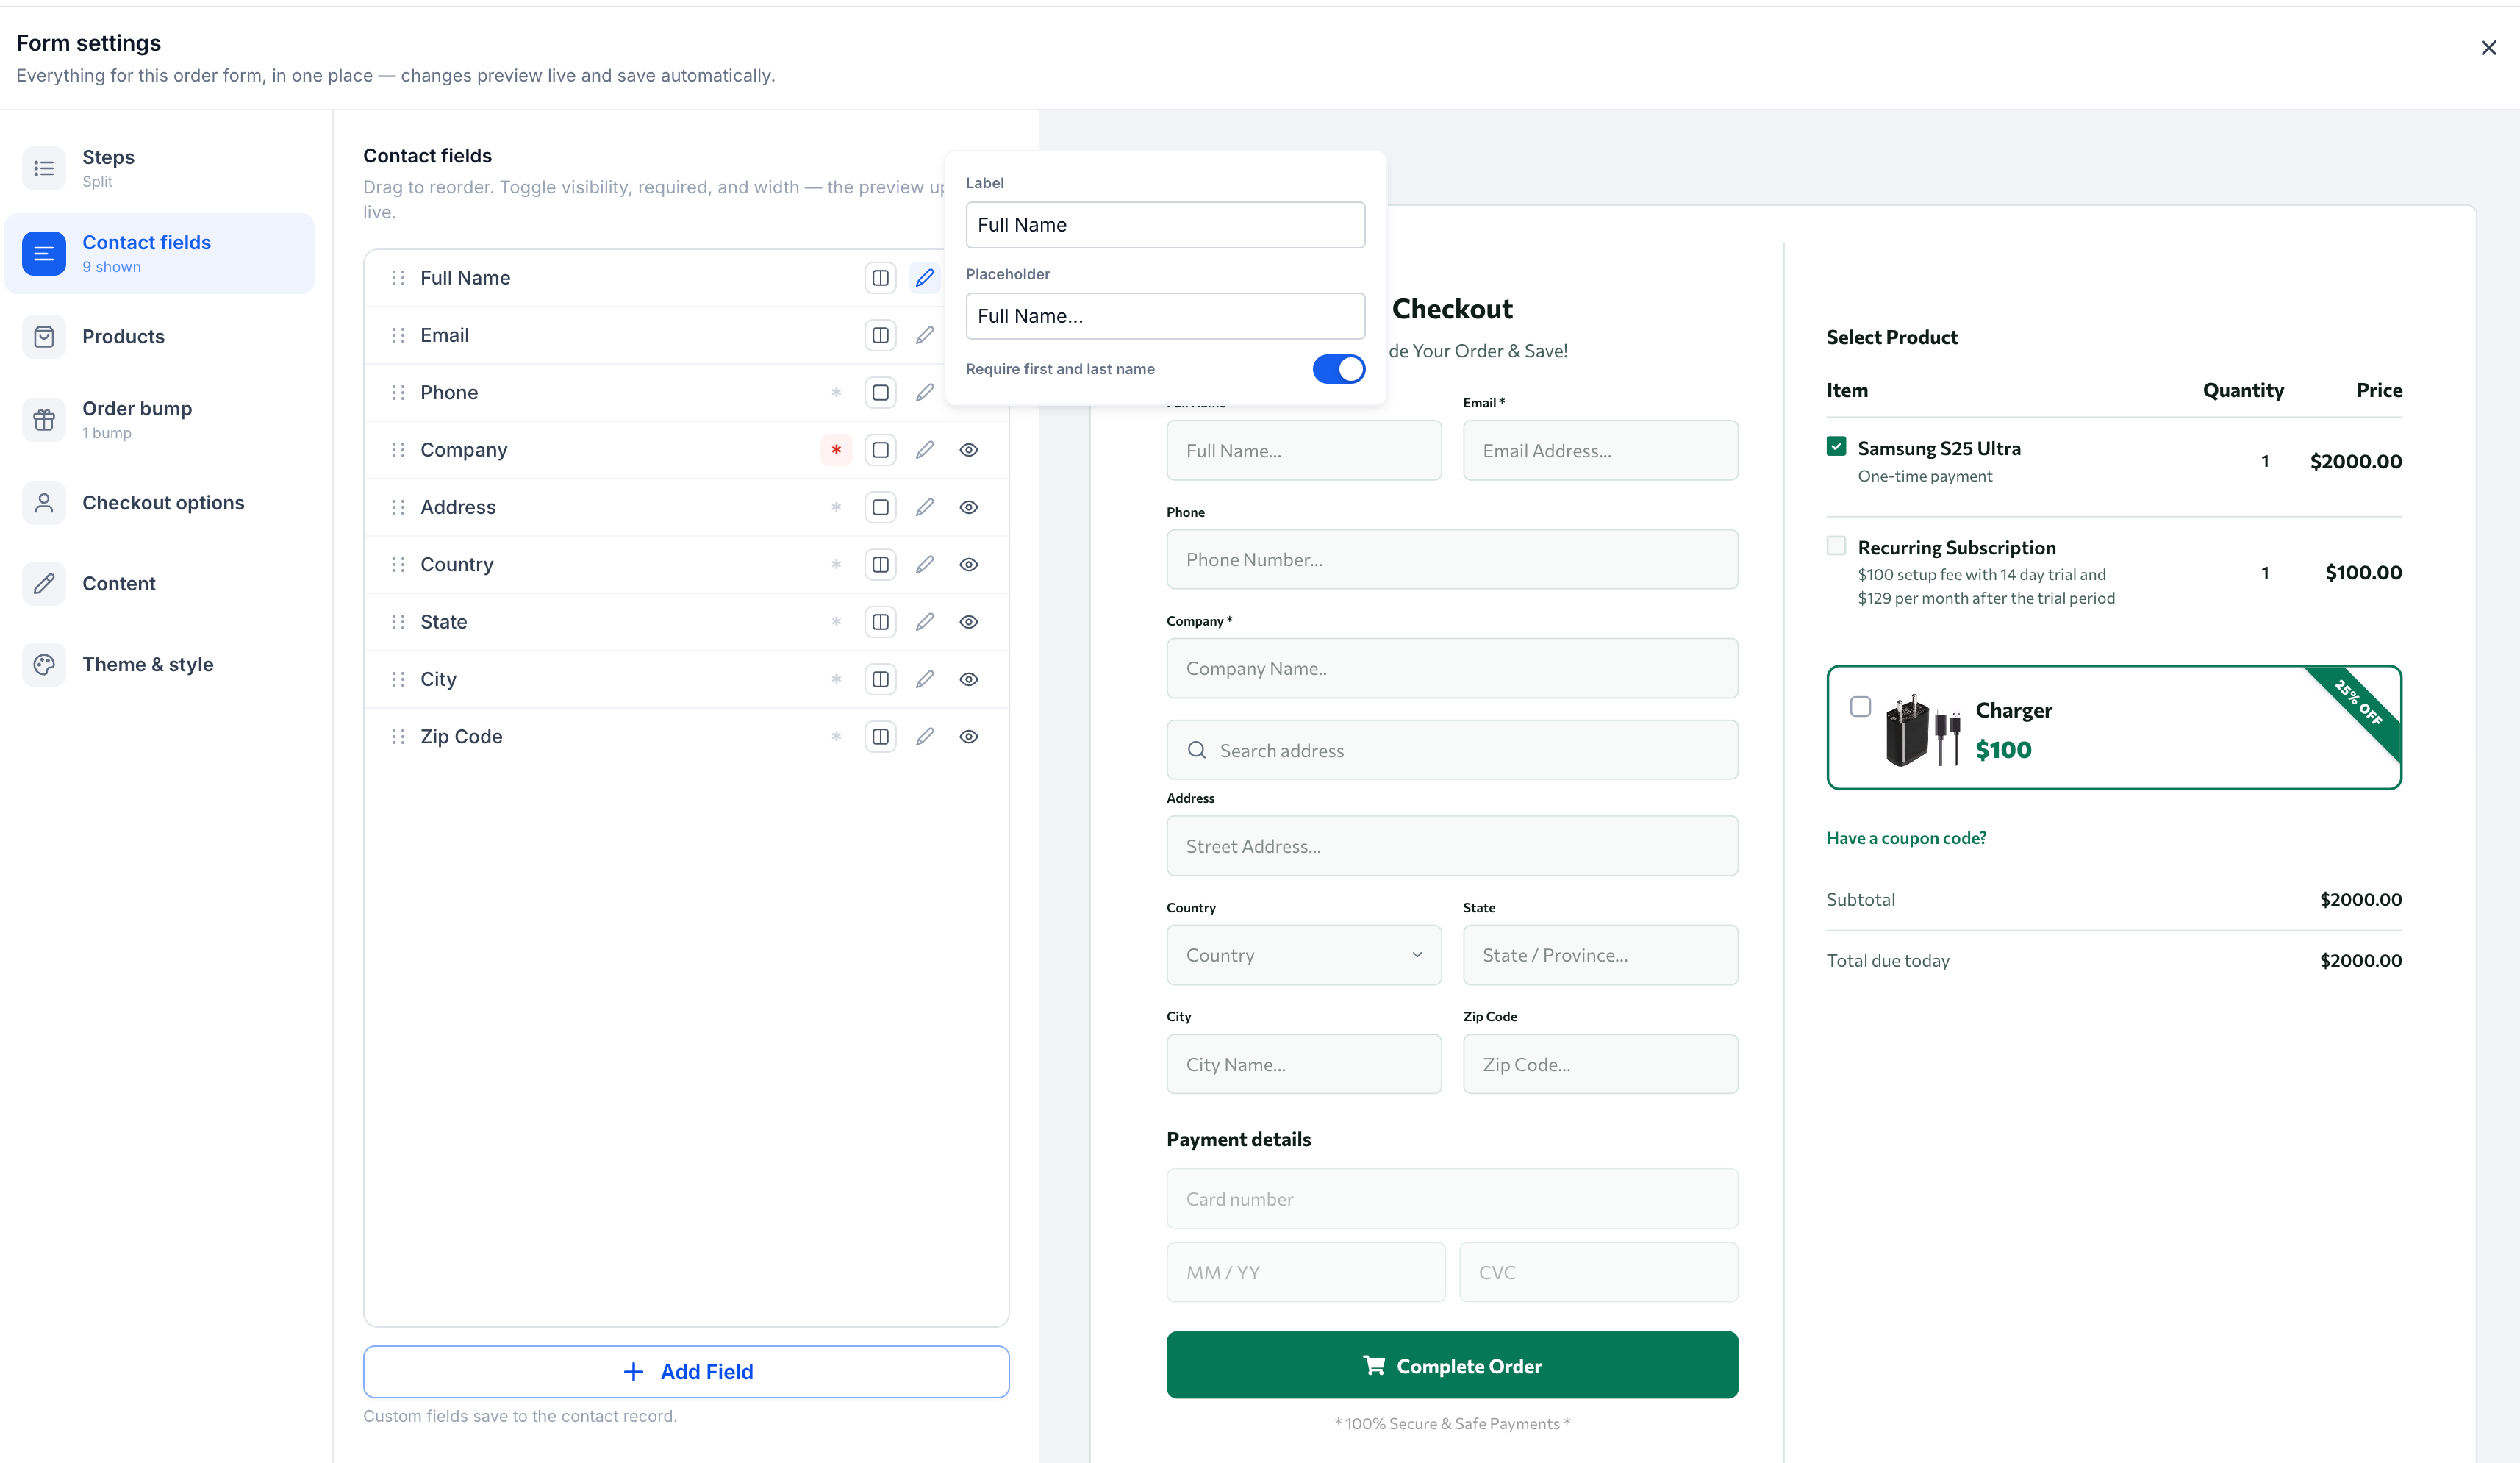
- Open the Contact fields section.
- Review the list of standard fields.
- Toggle visibility for any supported field.
- Mark fields as required where the option exists.
- Reorder fields to set their position.
- Choose full width or half width for each field.
- Add supported CRM custom fields using the field picker.
Configure products
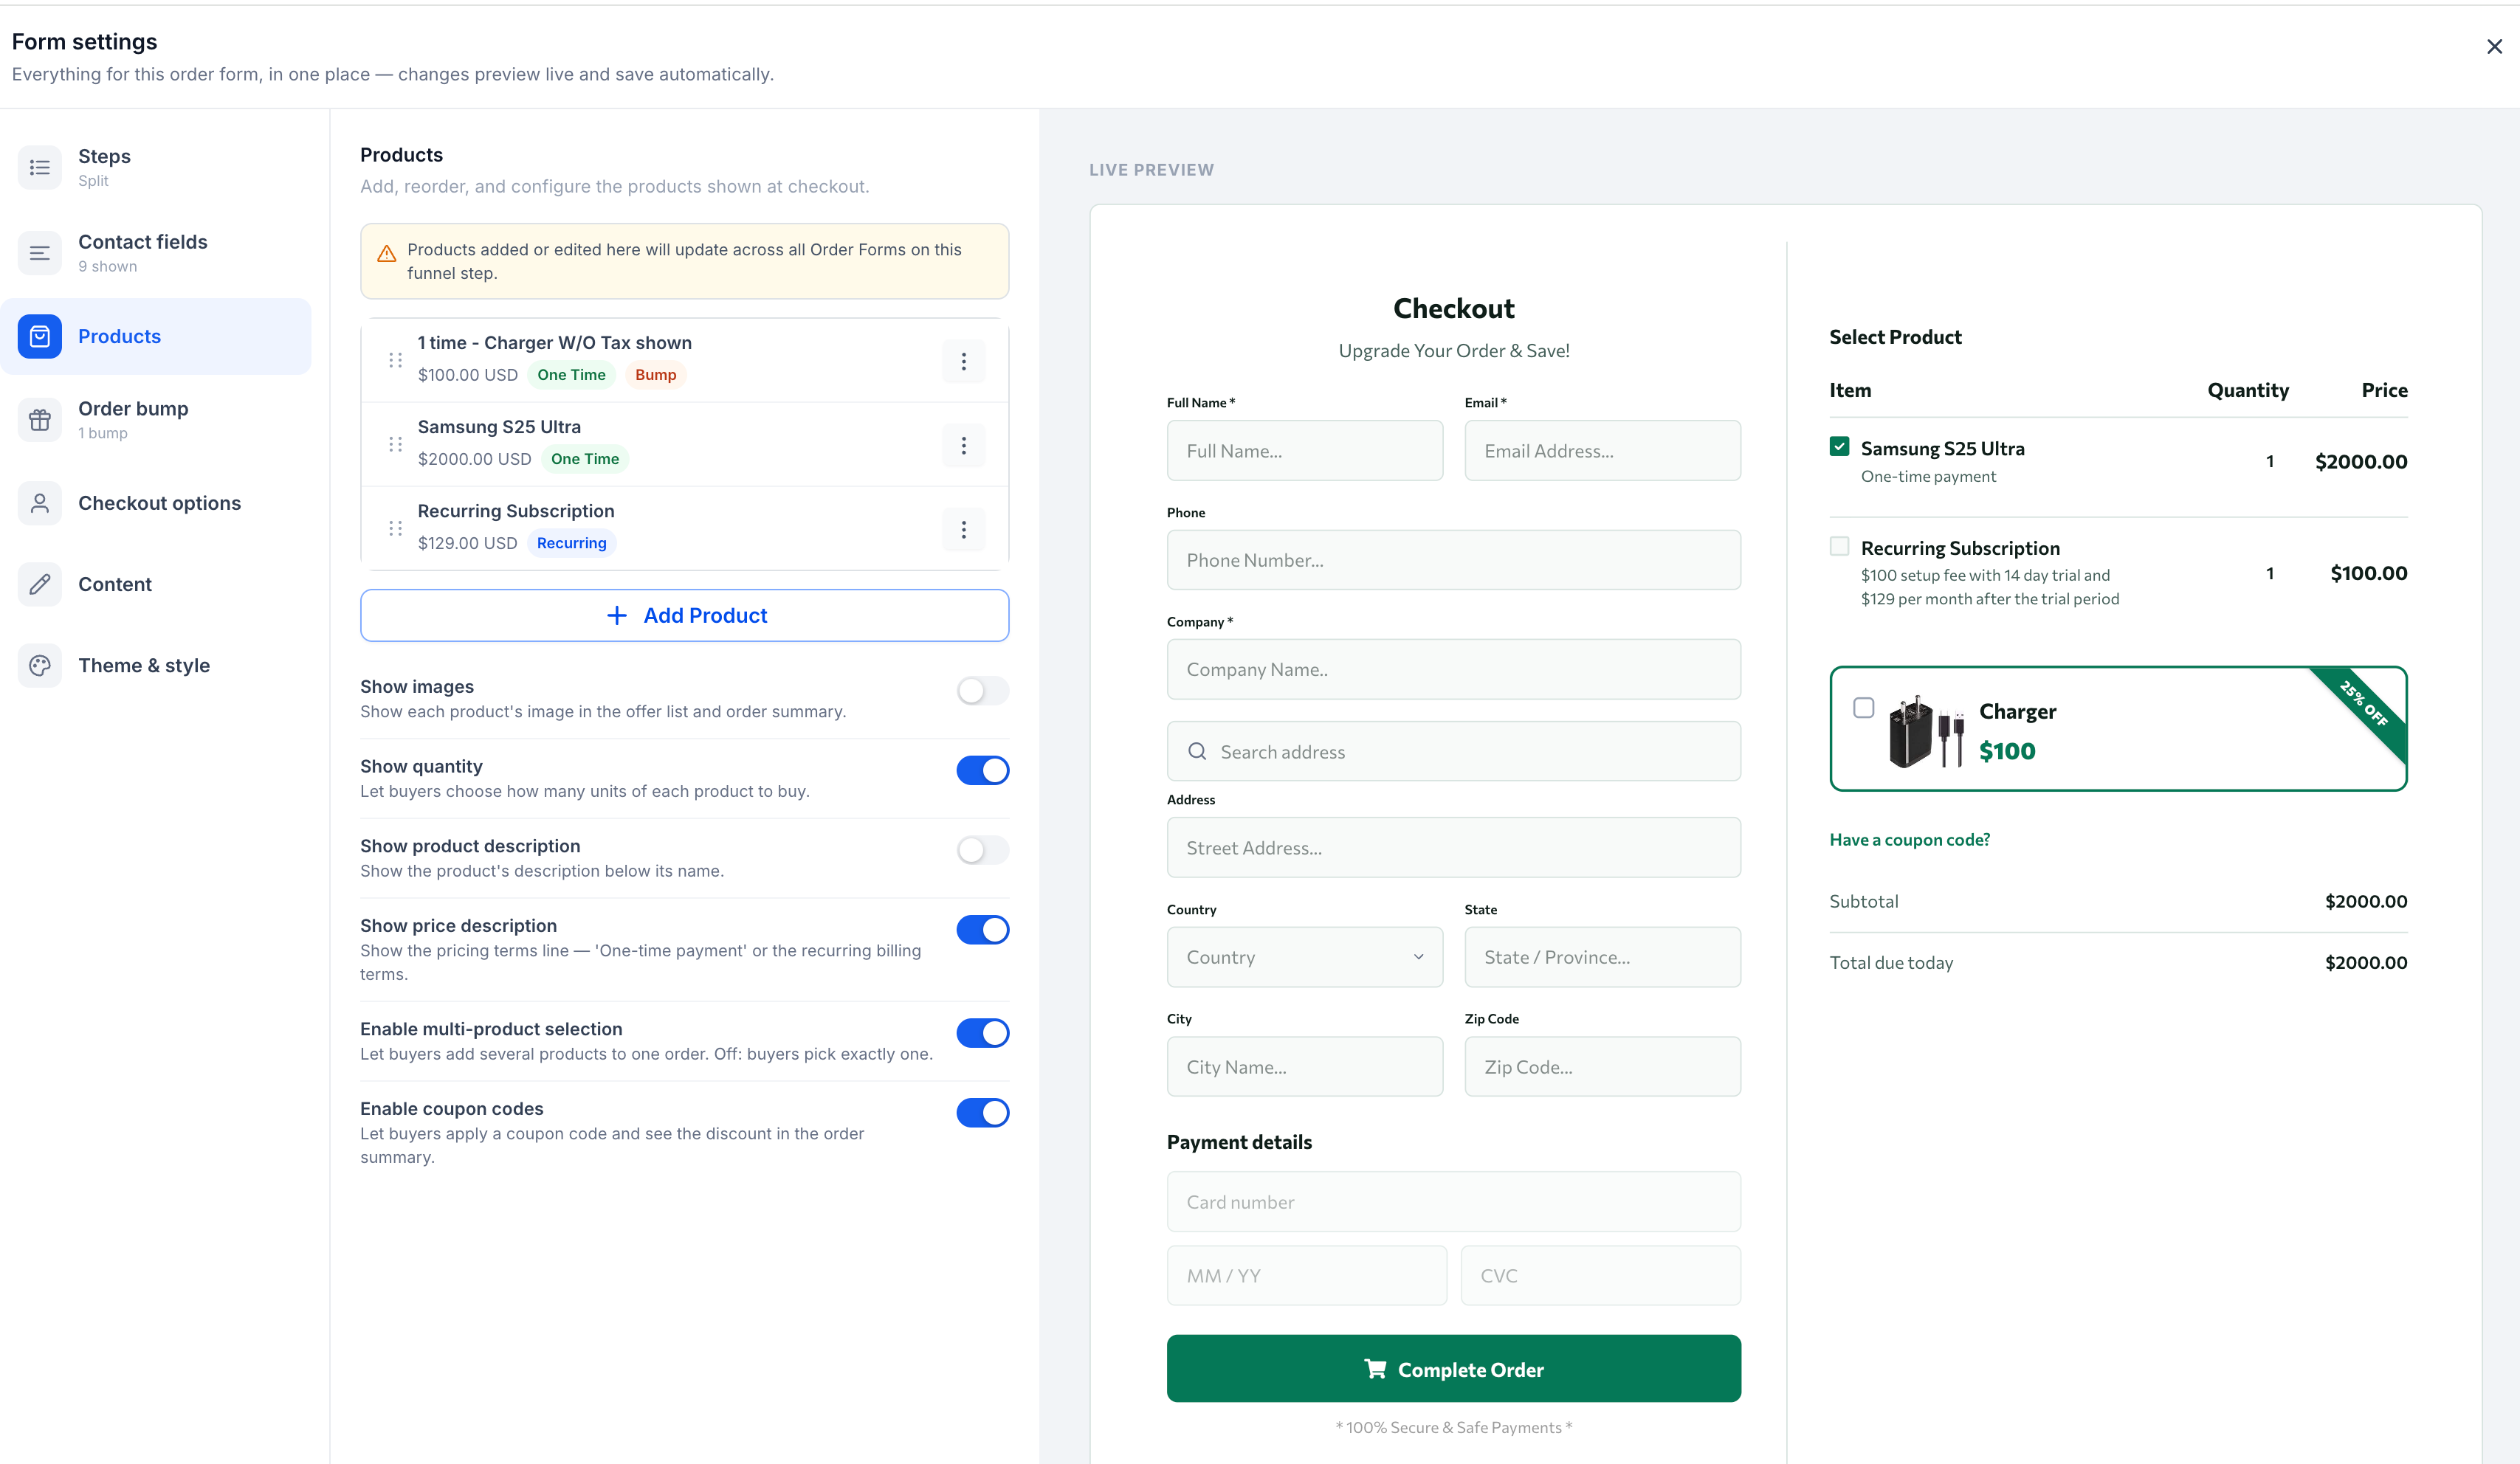
- Open the Products section.
- Search for and select the desired products and prices.
- Add the chosen products to the form.
- Edit, duplicate, reorder or remove product rows as needed.
- Enable multiple quantities and set a maximum limit.
- Choose whether to display product images, descriptions and enable coupon entry.
Configure order bumps
- Open the Order bump section.
- Select the product to offer as an additional purchase.
- Enter the order bump headline.
- Add supporting descriptive text.
- Set an image override if needed.
- Choose the initial selection state.
- Pick a bump styling preset.
- Adjust appearance with the dedicated styling controls.
Configure checkout options
- Open the Checkout options panel.
- Review the available behavior settings.
- Enable or disable options such as coupons, terms and other supported features.
Customize checkout content
- Open the Content section.
- Edit step headlines and supporting copy.
- Update field labels and placeholder text.
- Modify validation messages and payment related wording.
- Change the checkout button text and step navigation labels if using Two step.
Apply theme and style
- Open Theme & style.
- Select a theme preset.
- Set your brand colors.
- Adjust typography and input field styles.
- Customize buttons, product presentation and step indicators.
- Refine device specific sizing, spacing and alignment.
Save, publish and test
- Save the Order Form configuration.
- Save and publish the checkout page.
- Open the live published page.
- Verify the selected layout appears correctly.
- Confirm standard and custom fields display as expected.
- Test the checkout using the payment provider’s test process and review on desktop and mobile.
07What it looks like in HighLevel
08Settings that matter
- Brand New Order Forms with New Layouts and Custom Fields. Activates the redesigned Order Form element and its layout and custom field capabilities.
- Contact fields. Controls visibility, requirement, order, width and inclusion of standard and supported CRM custom fields in the checkout form.
- Products. Manages which products and prices appear, quantity options, image and description display, multi product selection and coupon entry.
- Order bump. Defines the additional product offer, headline, supporting text, image, default selection and styling preset.
- Checkout options. Enables or disables checkout behaviors such as coupon codes, terms and other supported features.
- Content. Sets shopper facing text including headlines, labels, placeholders, validation messages, product summary labels and button copy.
- Theme & style. Applies visual design through theme presets, brand colors, typography, inputs, buttons, product presentation and responsive layout controls.
09Things to know before you rely on it
- Three checkout layouts are available: One step, Two step and Split.
- Nine standard contact fields are supported; Full Name and Email are always required.
- Products are linked to the funnel step, so changes affect all Order Forms on that step.
- The builder preview shows placeholder payment fields and calculates totals locally; the published checkout may differ.
- The feature must be activated in Agency Settings > Labs before it appears in the builder.
10If something goes wrong
- Cannot locate the redesigned Order Form in the builder. Confirm that Brand New Order Forms with New Layouts and Custom Fields is activated in Agency Settings > Labs.
- Builder preview totals differ from live checkout. Remember the preview uses placeholder fields and local calculations; always verify pricing on the published checkout.
- Product changes affect another Order Form on the same funnel step. Products are associated with the funnel step, not a single element; changing them will impact every Order Form on that step.
11How it connects to the rest of HighLevel
- Integrate WooCommerce with your HighLevel store WooCommerce integration
- Set up a HighLevel ecommerce store from scratch Ecommerce store setup
- Connect Stripe to process payments in HighLevel Stripe connection
Michael's take

Most people jump straight into styling and assume the preview numbers are exact, only to find the live checkout shows different totals. The preview is just a visual aid; you must always test the published page with your payment provider’s test mode.
If I were setting this up, I would first enable the Lab feature, add the Order Form element, and then run a quick test checkout on both desktop and mobile. Confirm that the required fields and any custom CRM fields appear, then fine tune the layout before spending time on themes.