
01Who this is for
- Operations managers who maintain large sets of custom data can quickly prune test or outdated records.
- Sales teams that use custom objects for leads can keep their pipelines tidy without opening each entry.
02Bulk delete for Custom Objects, explained
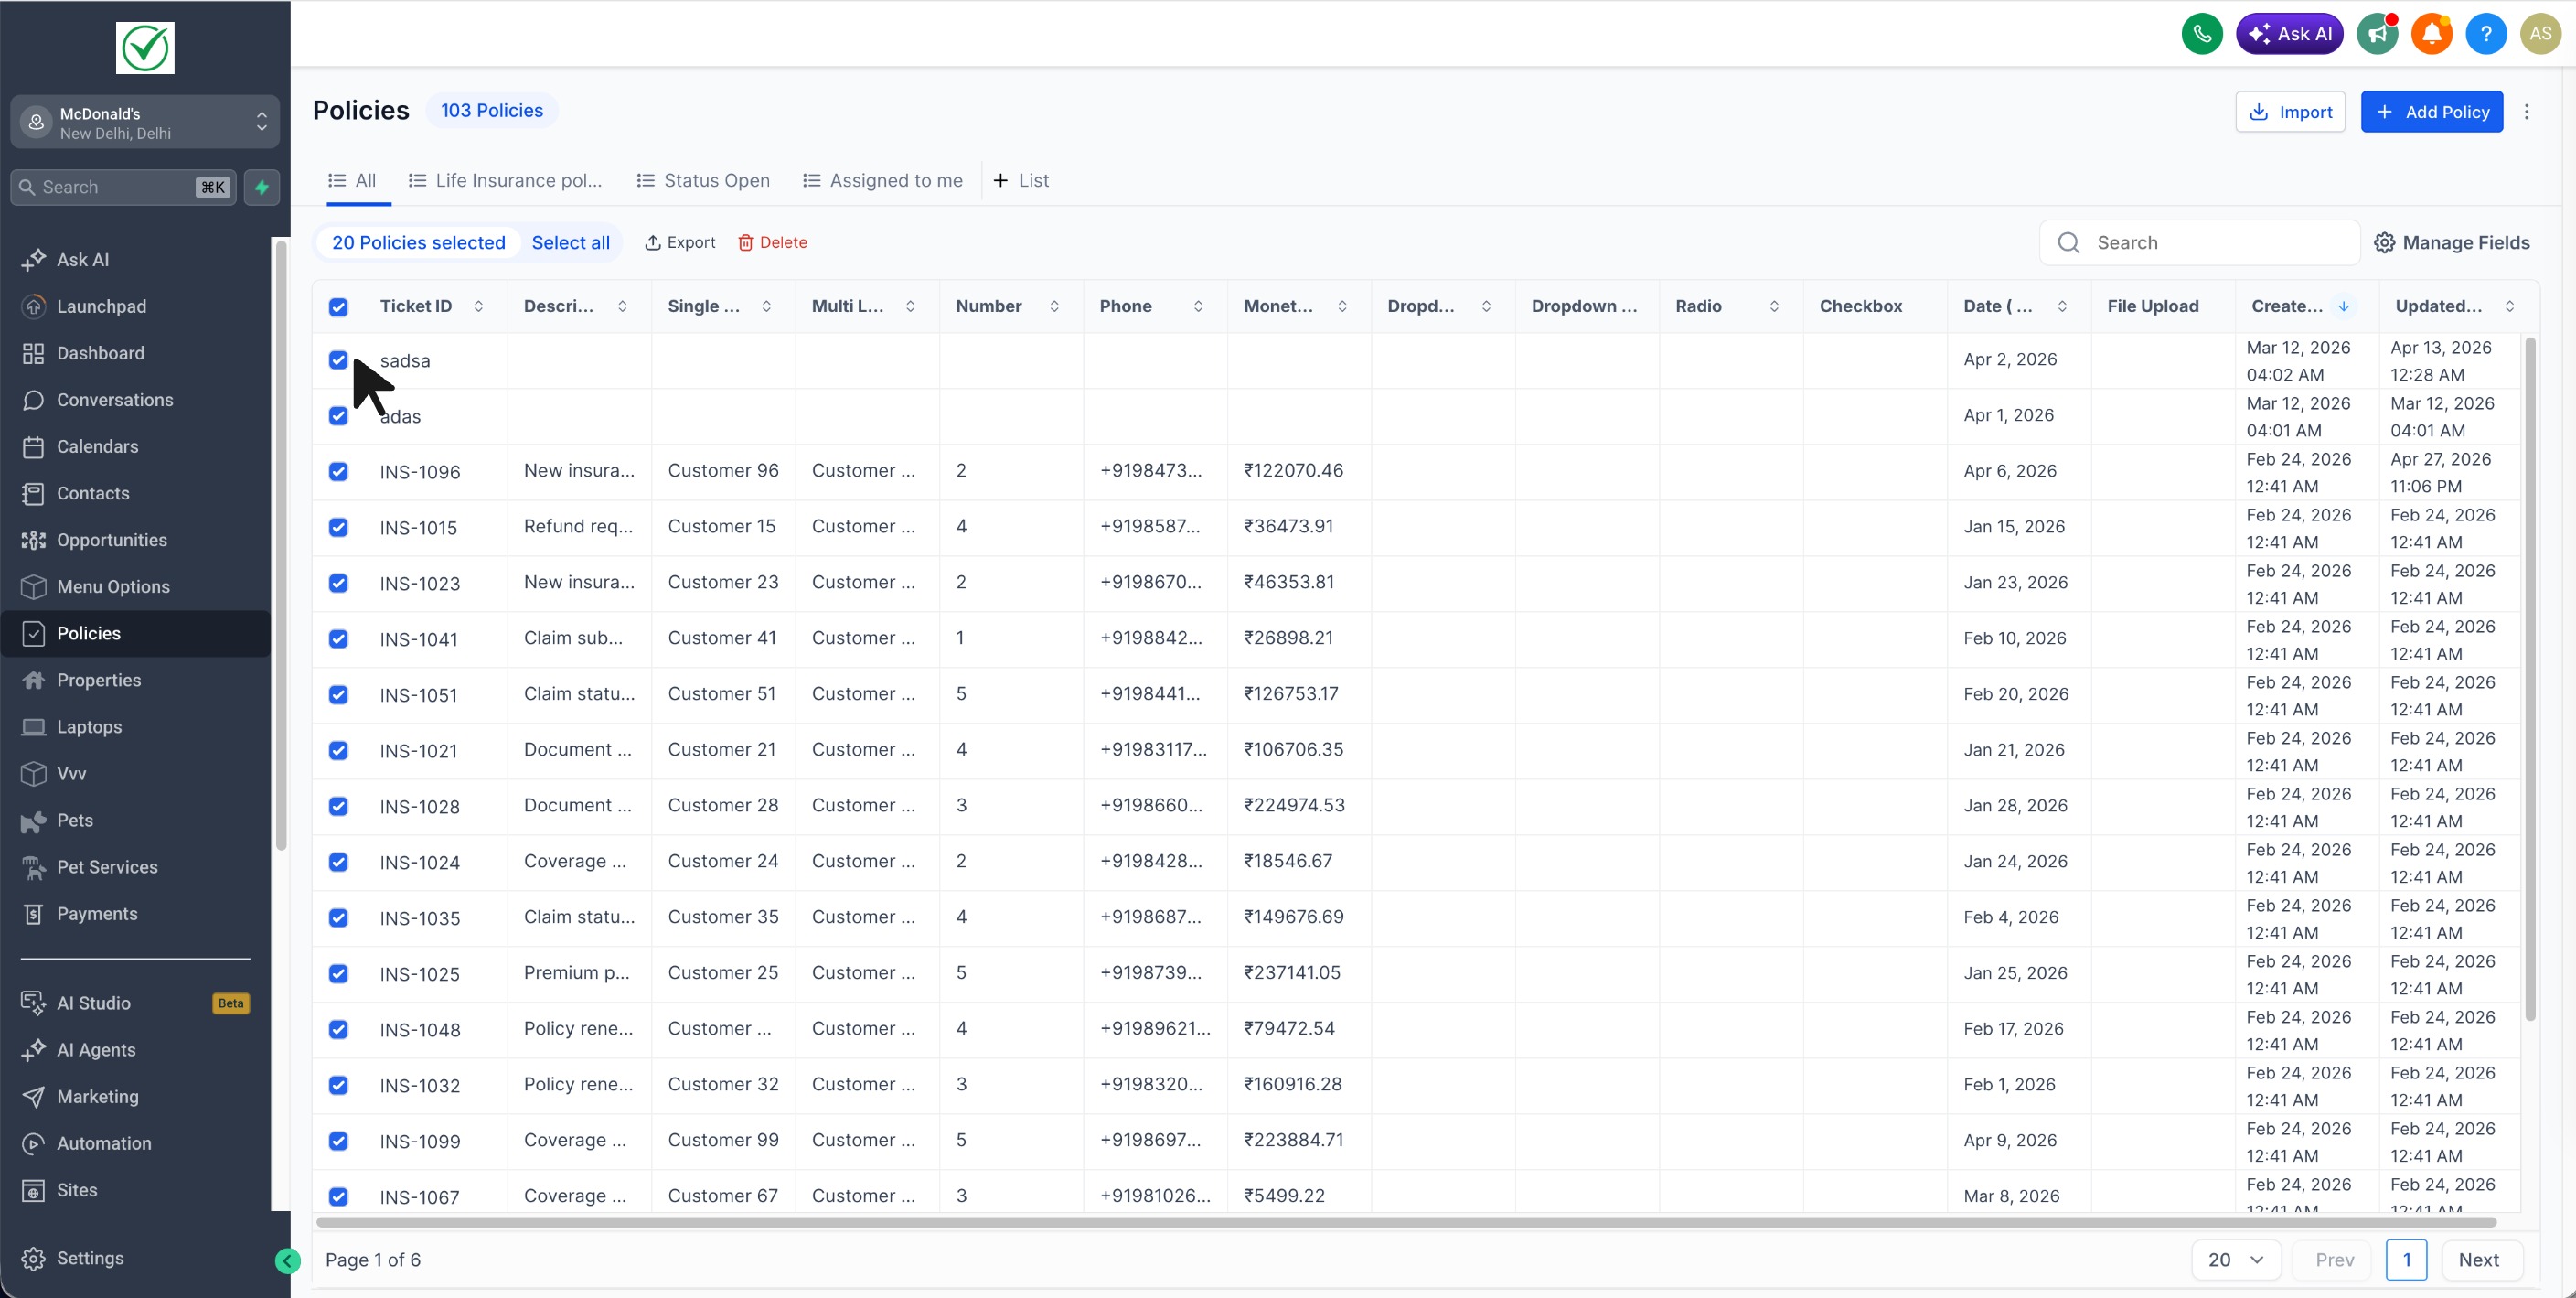
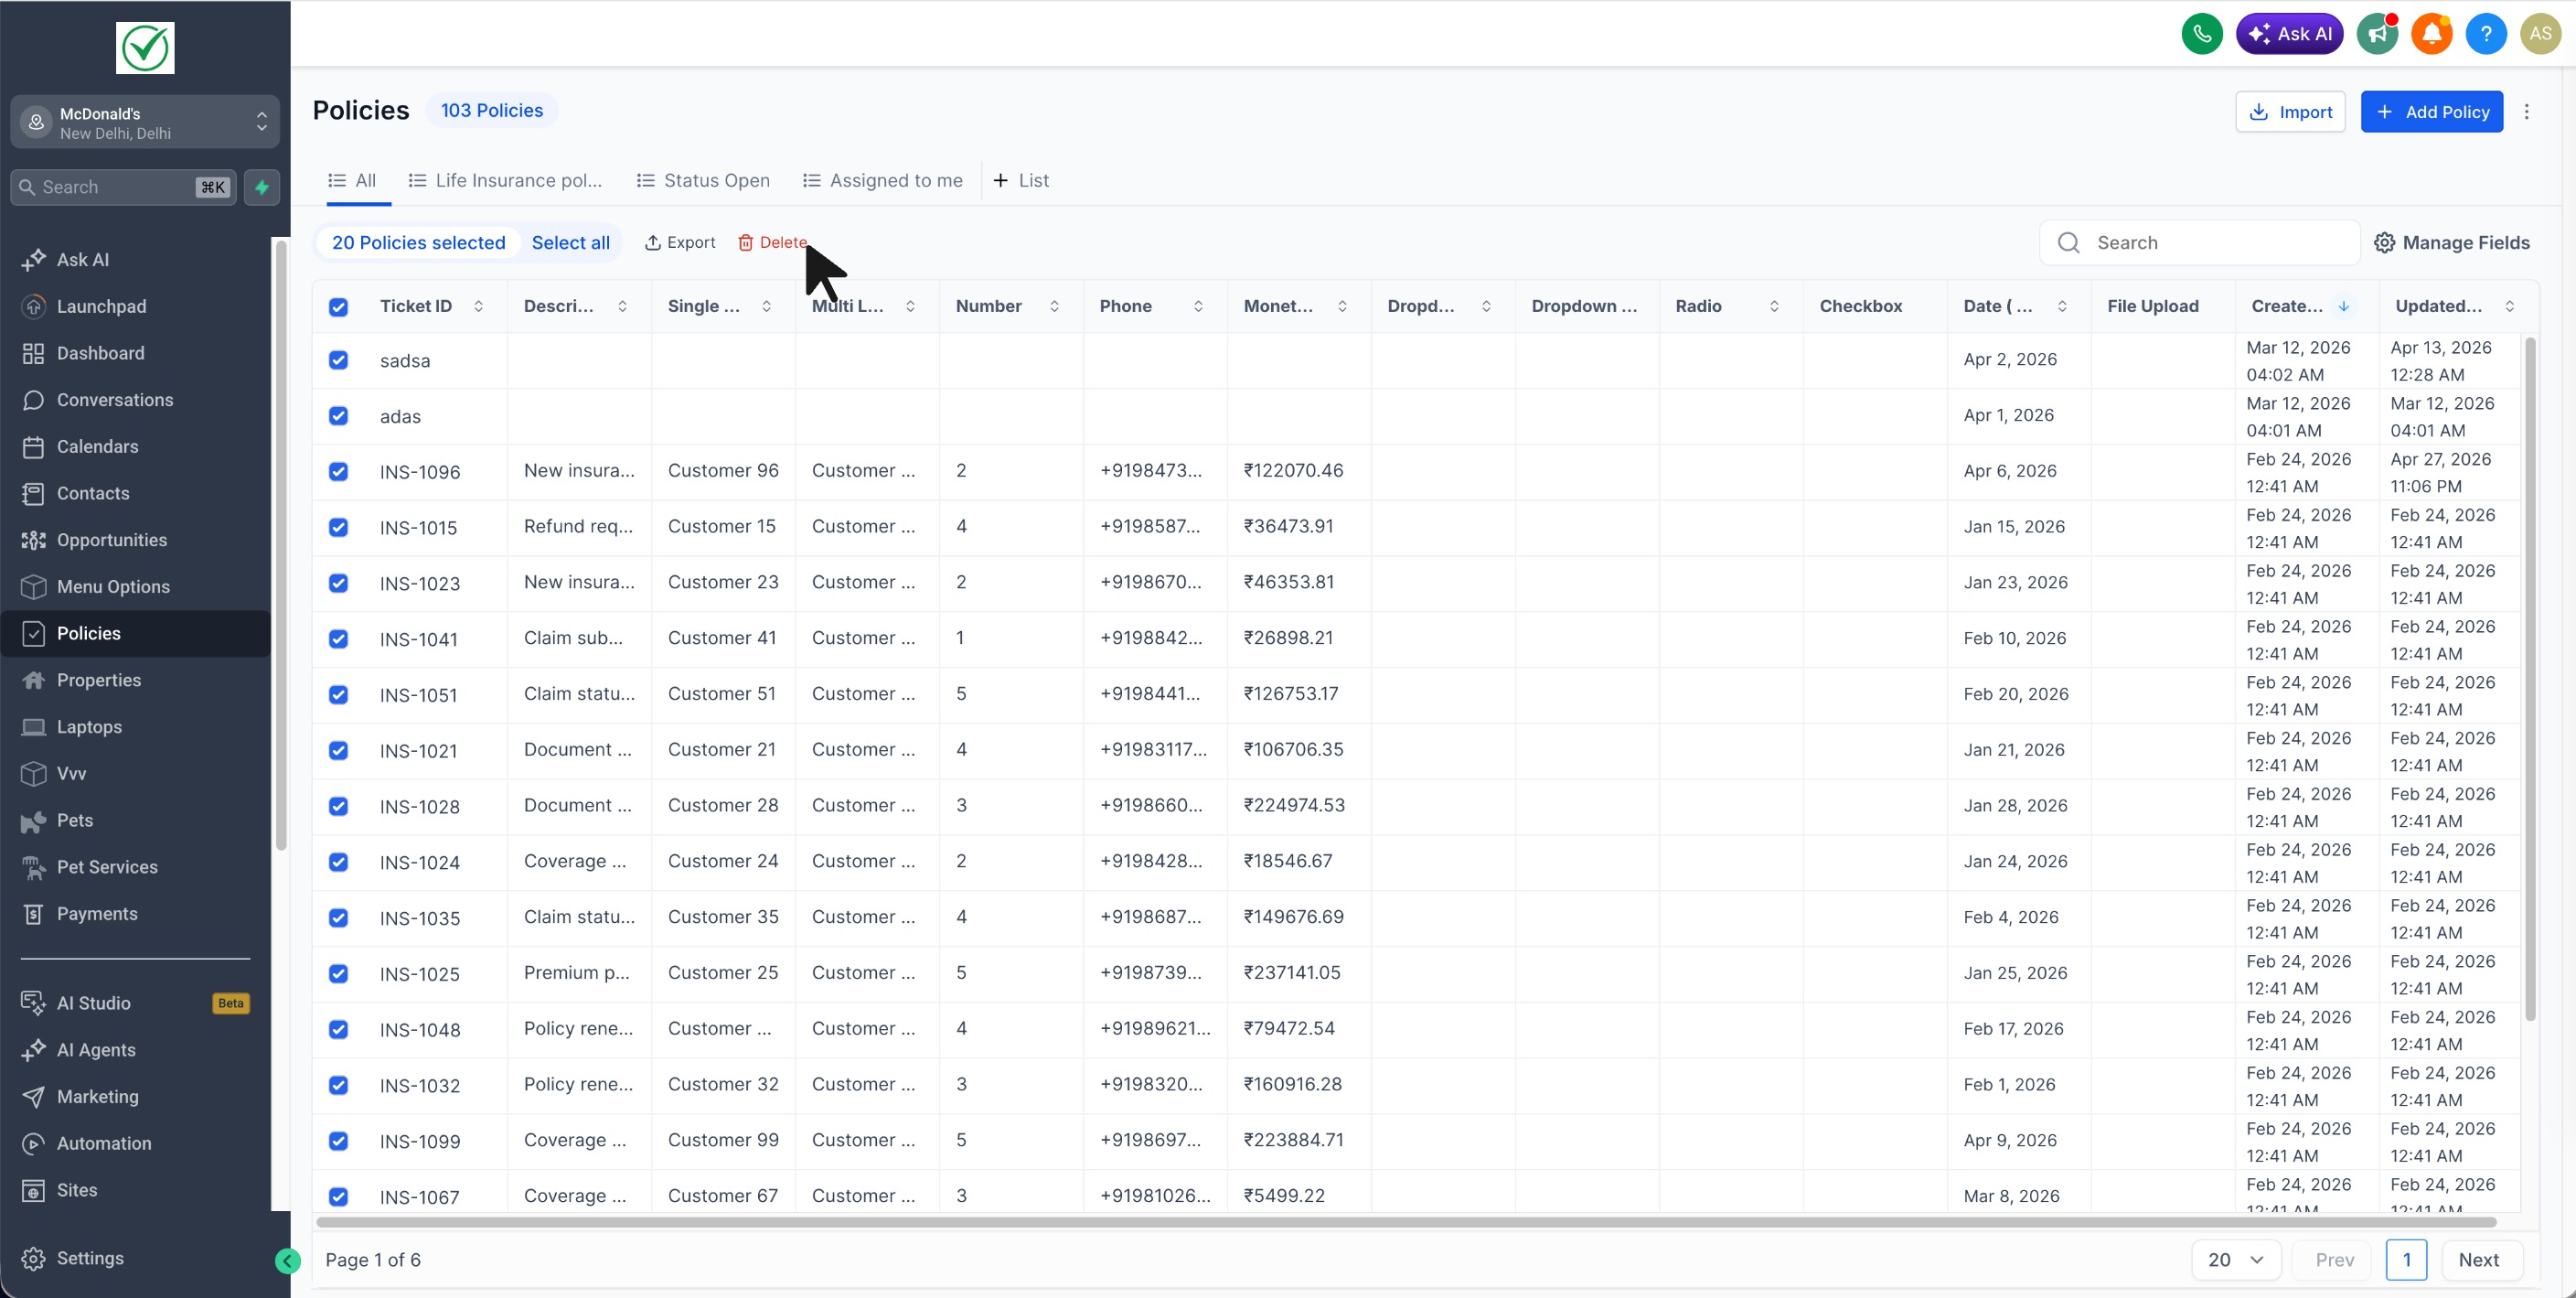
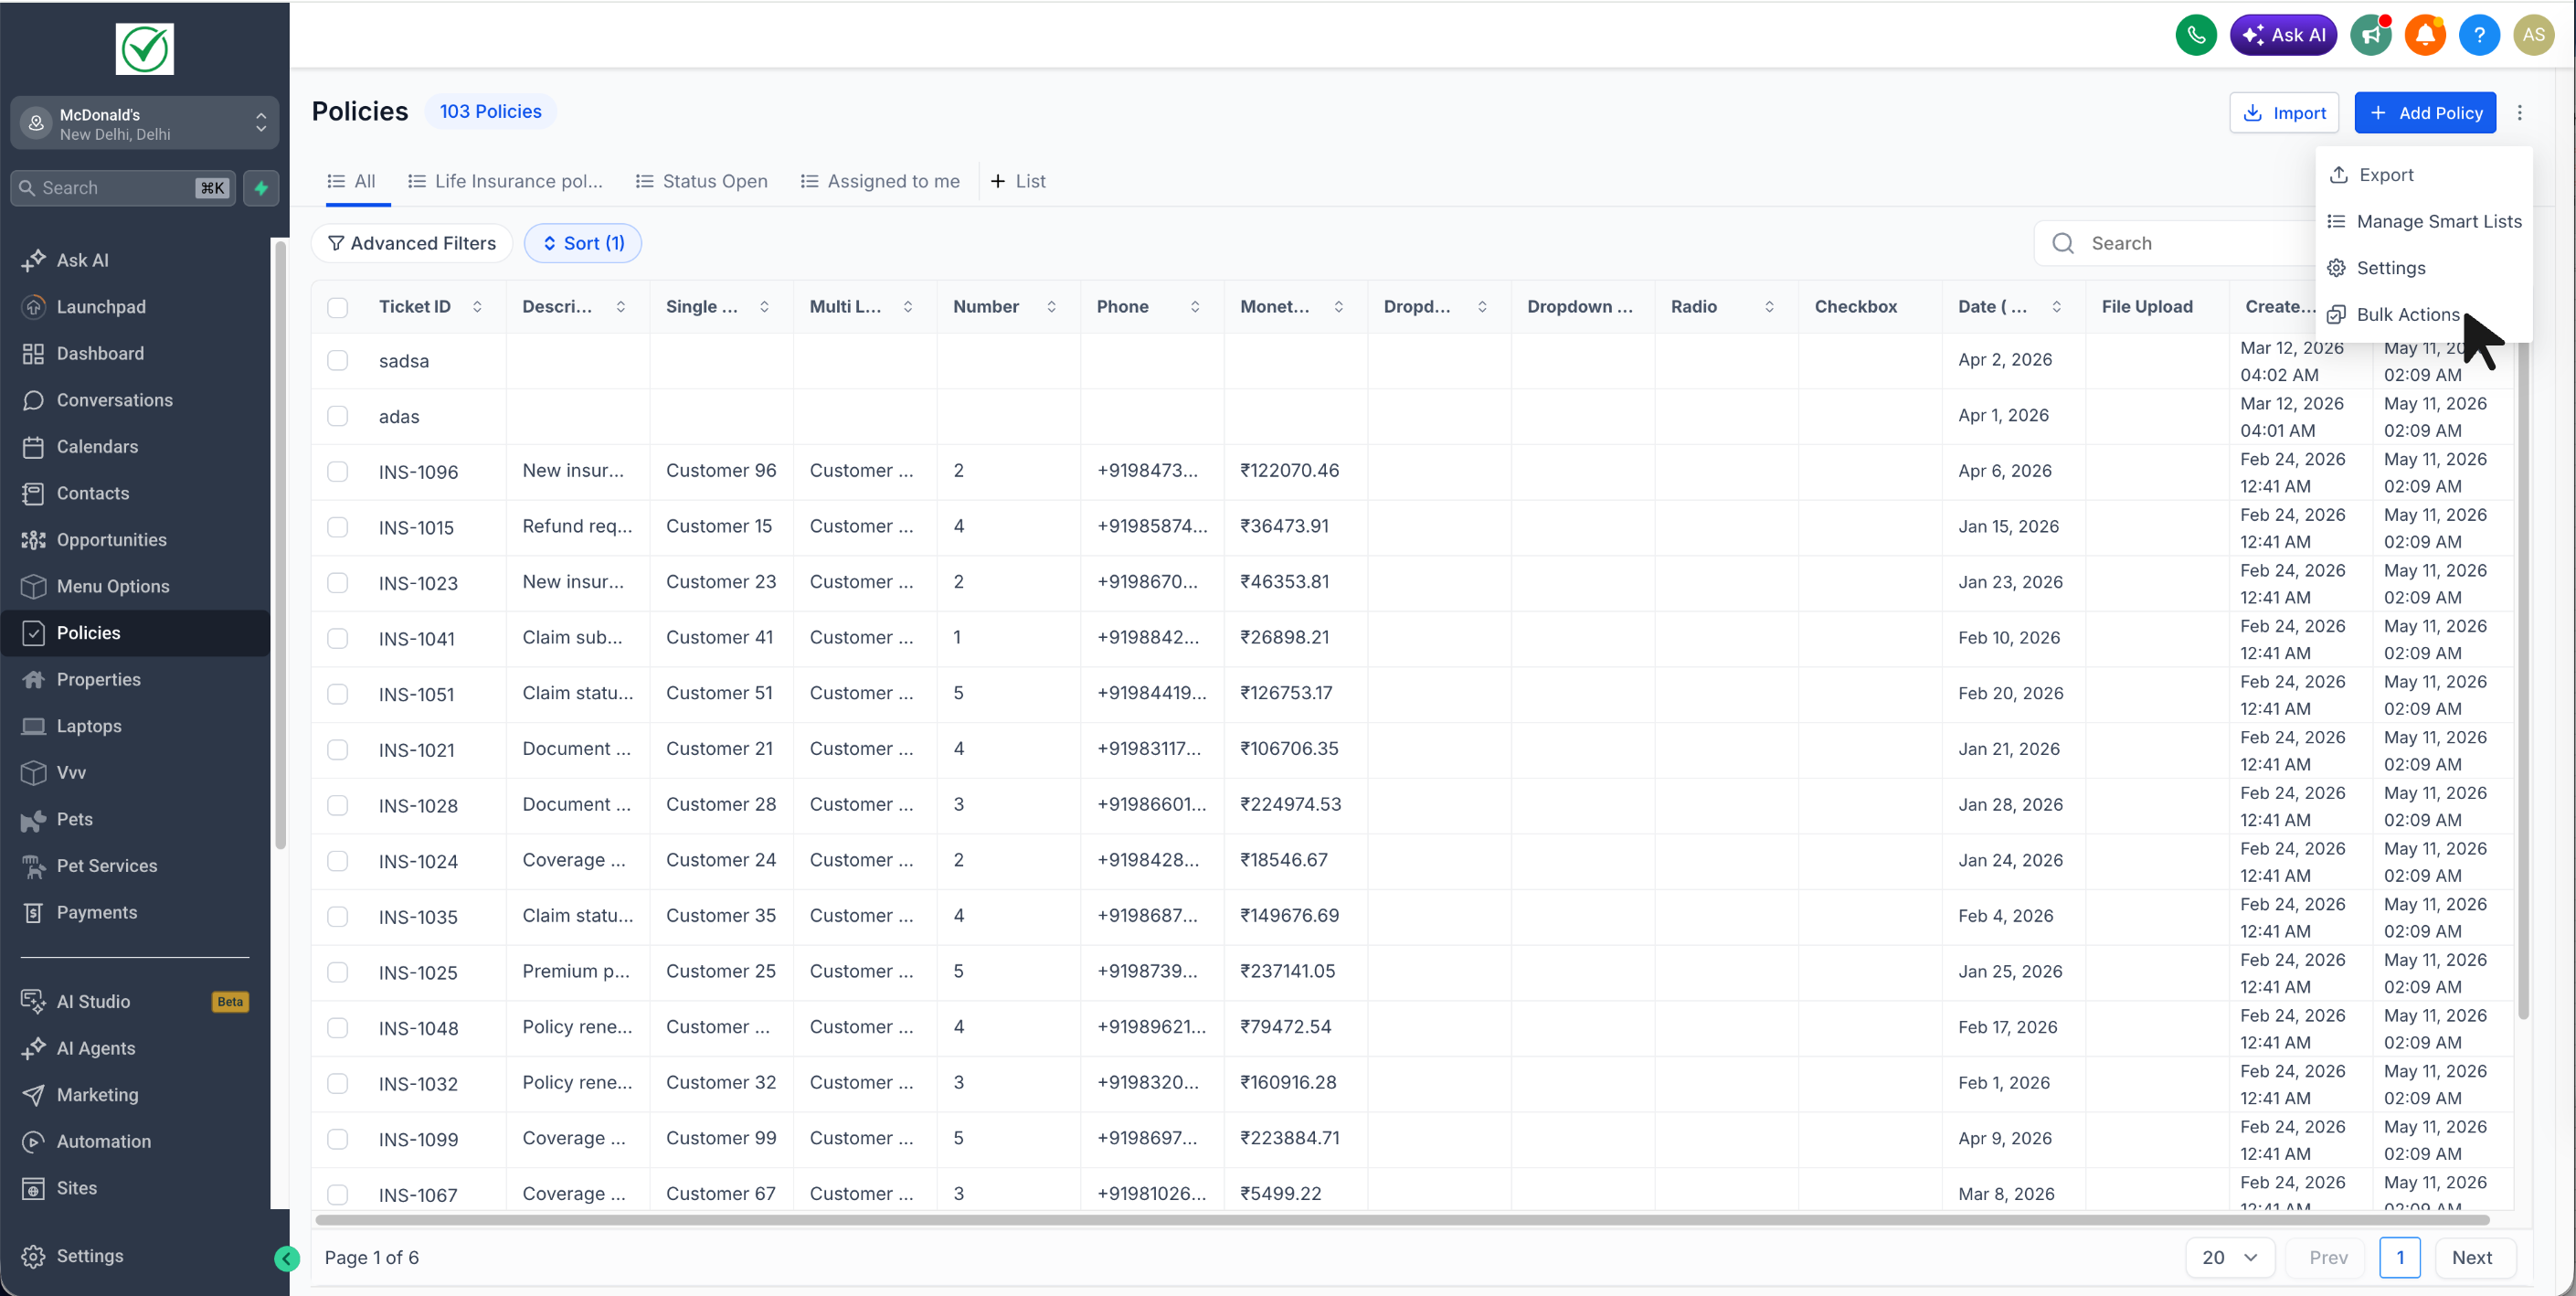
Bulk Delete appears on the list view of any Custom Object. It adds checkboxes beside each row and a bulk actions bar when one or more boxes are ticked. Selecting Delete launches a background job that erases the chosen records and their field values.
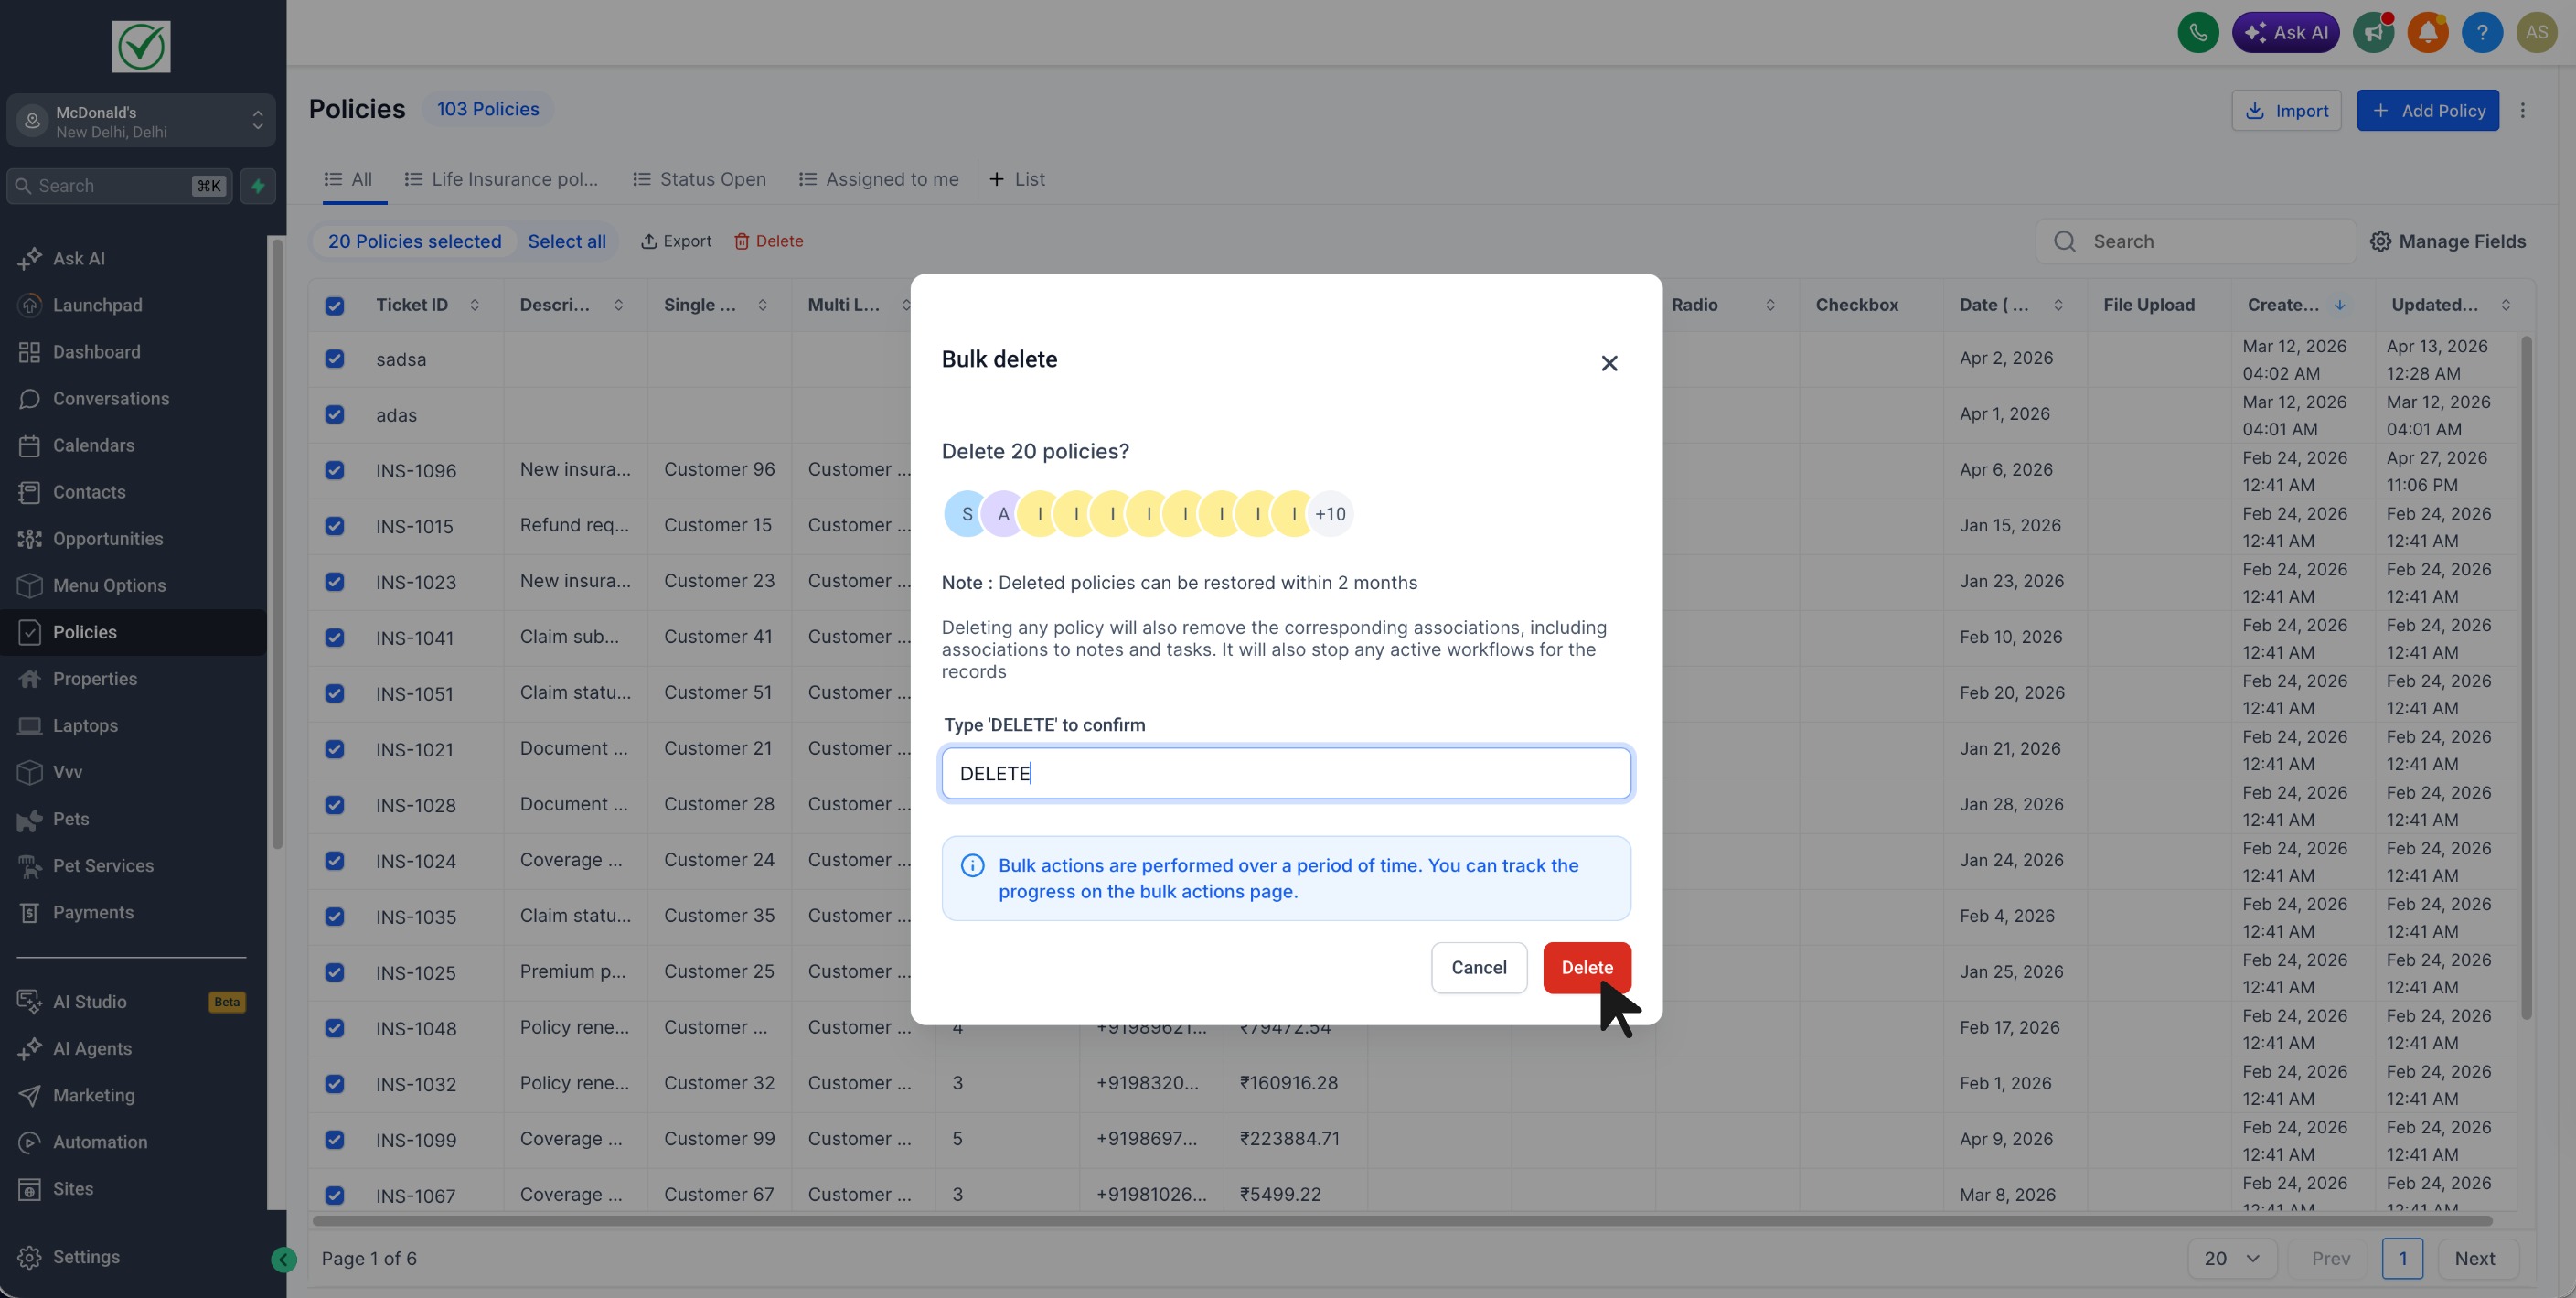
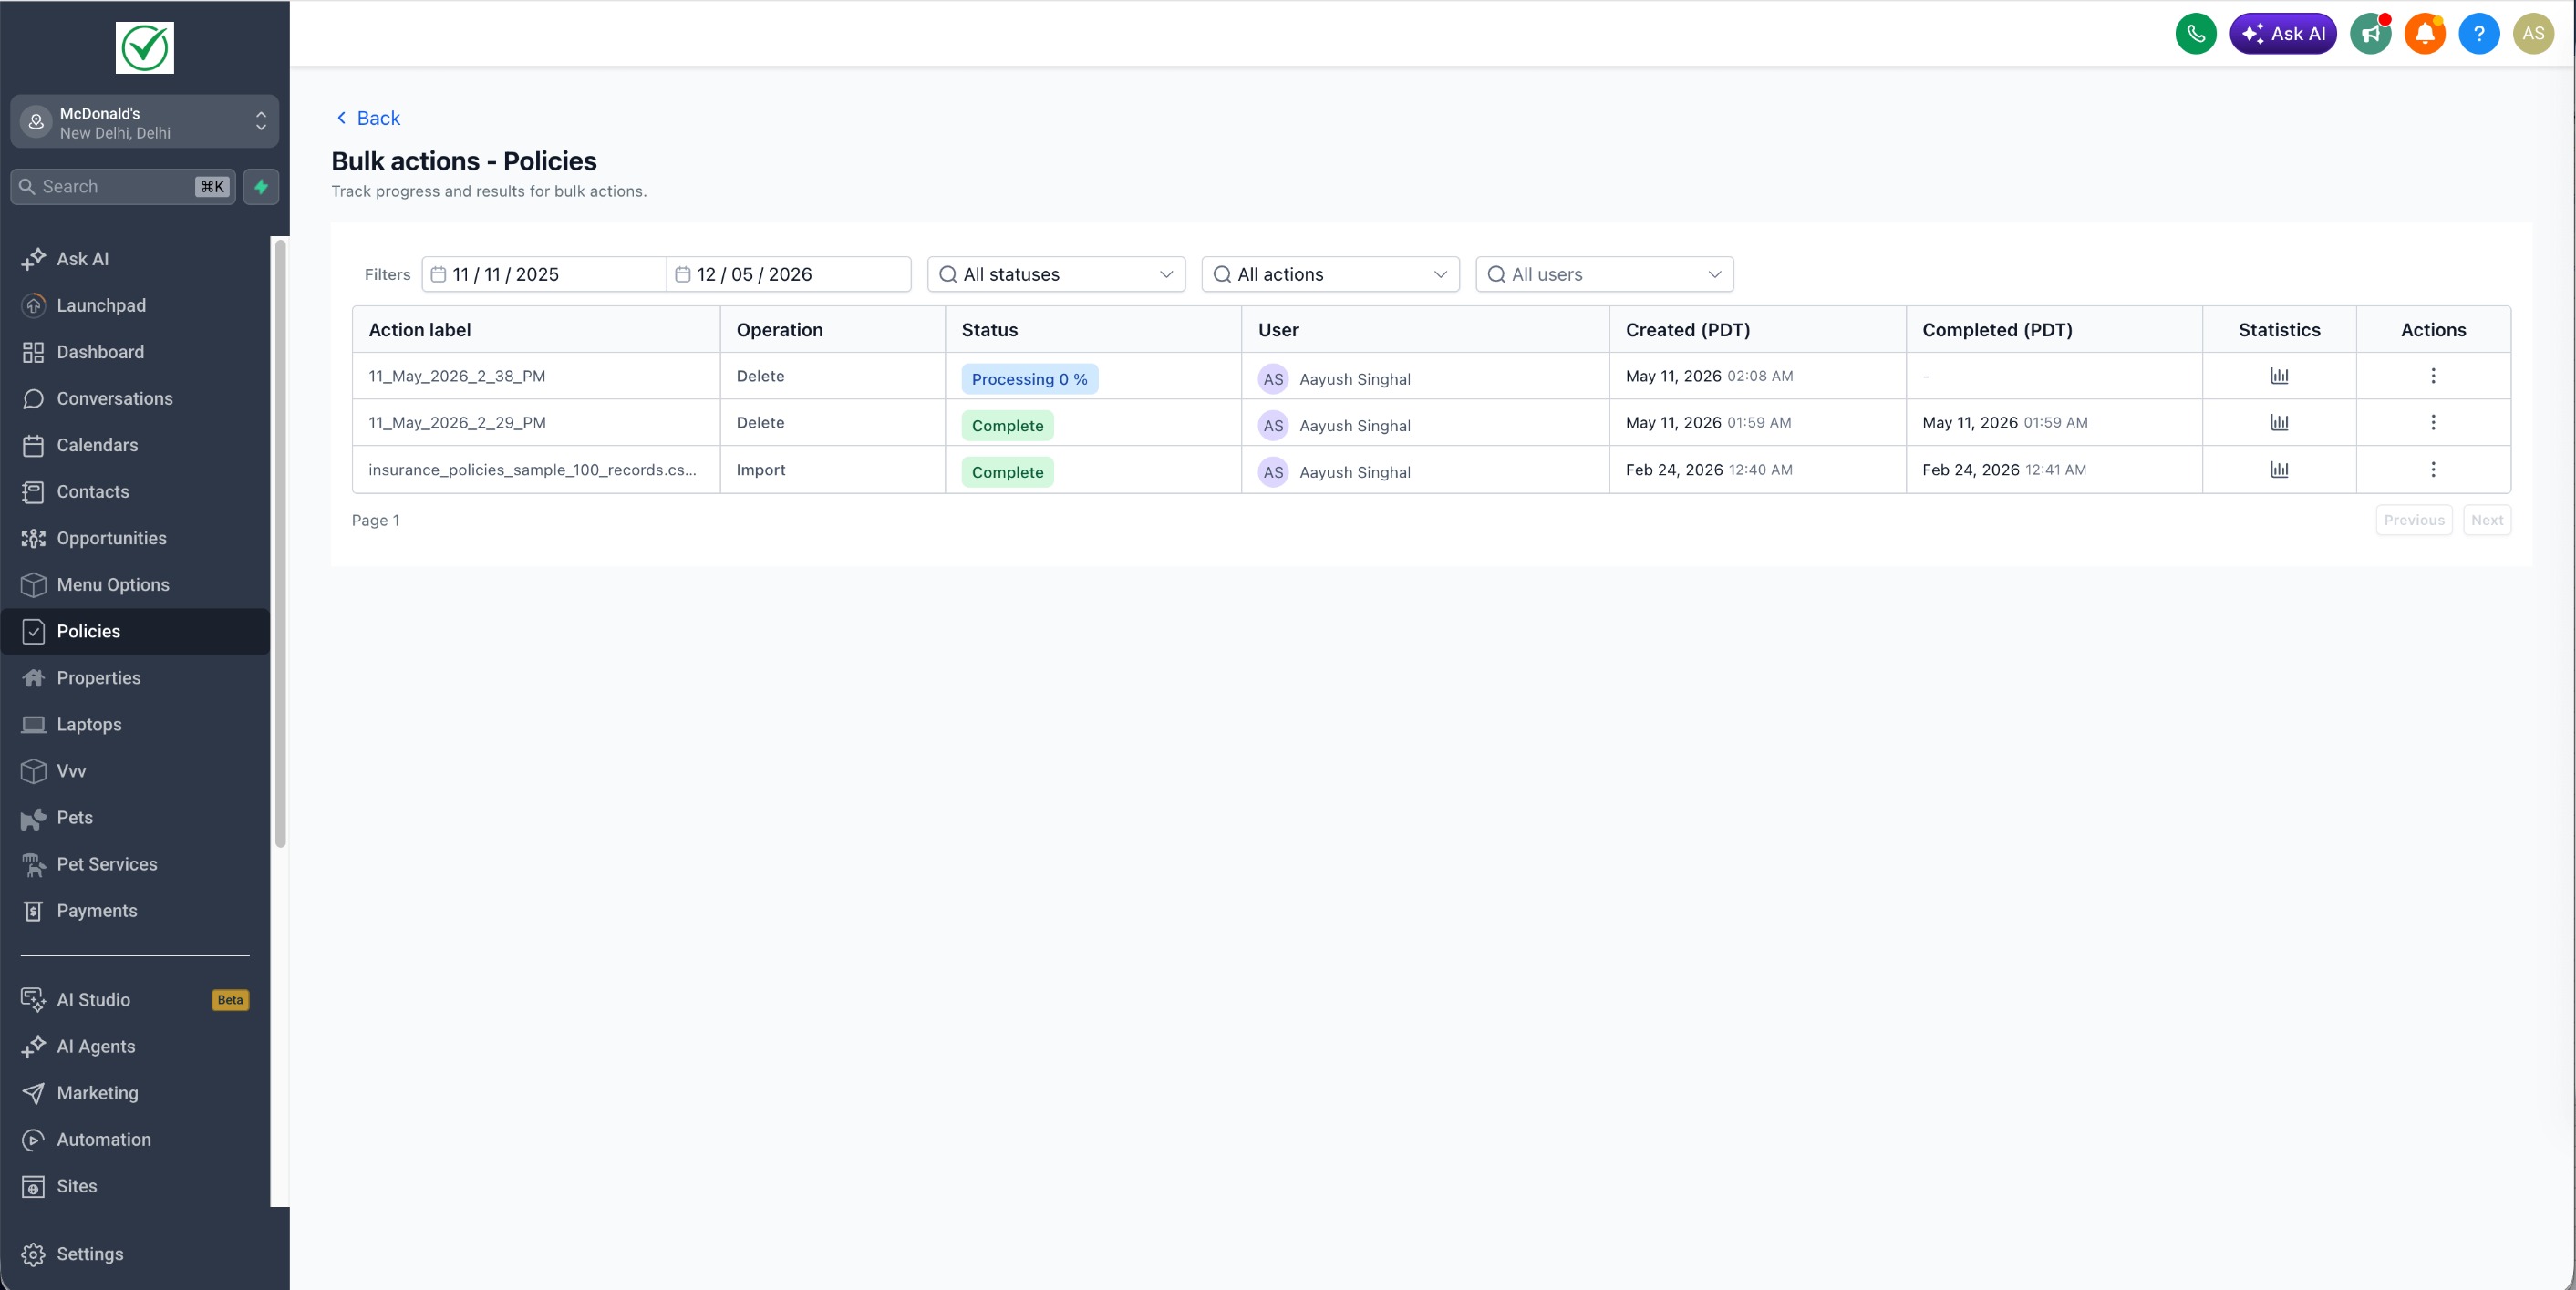
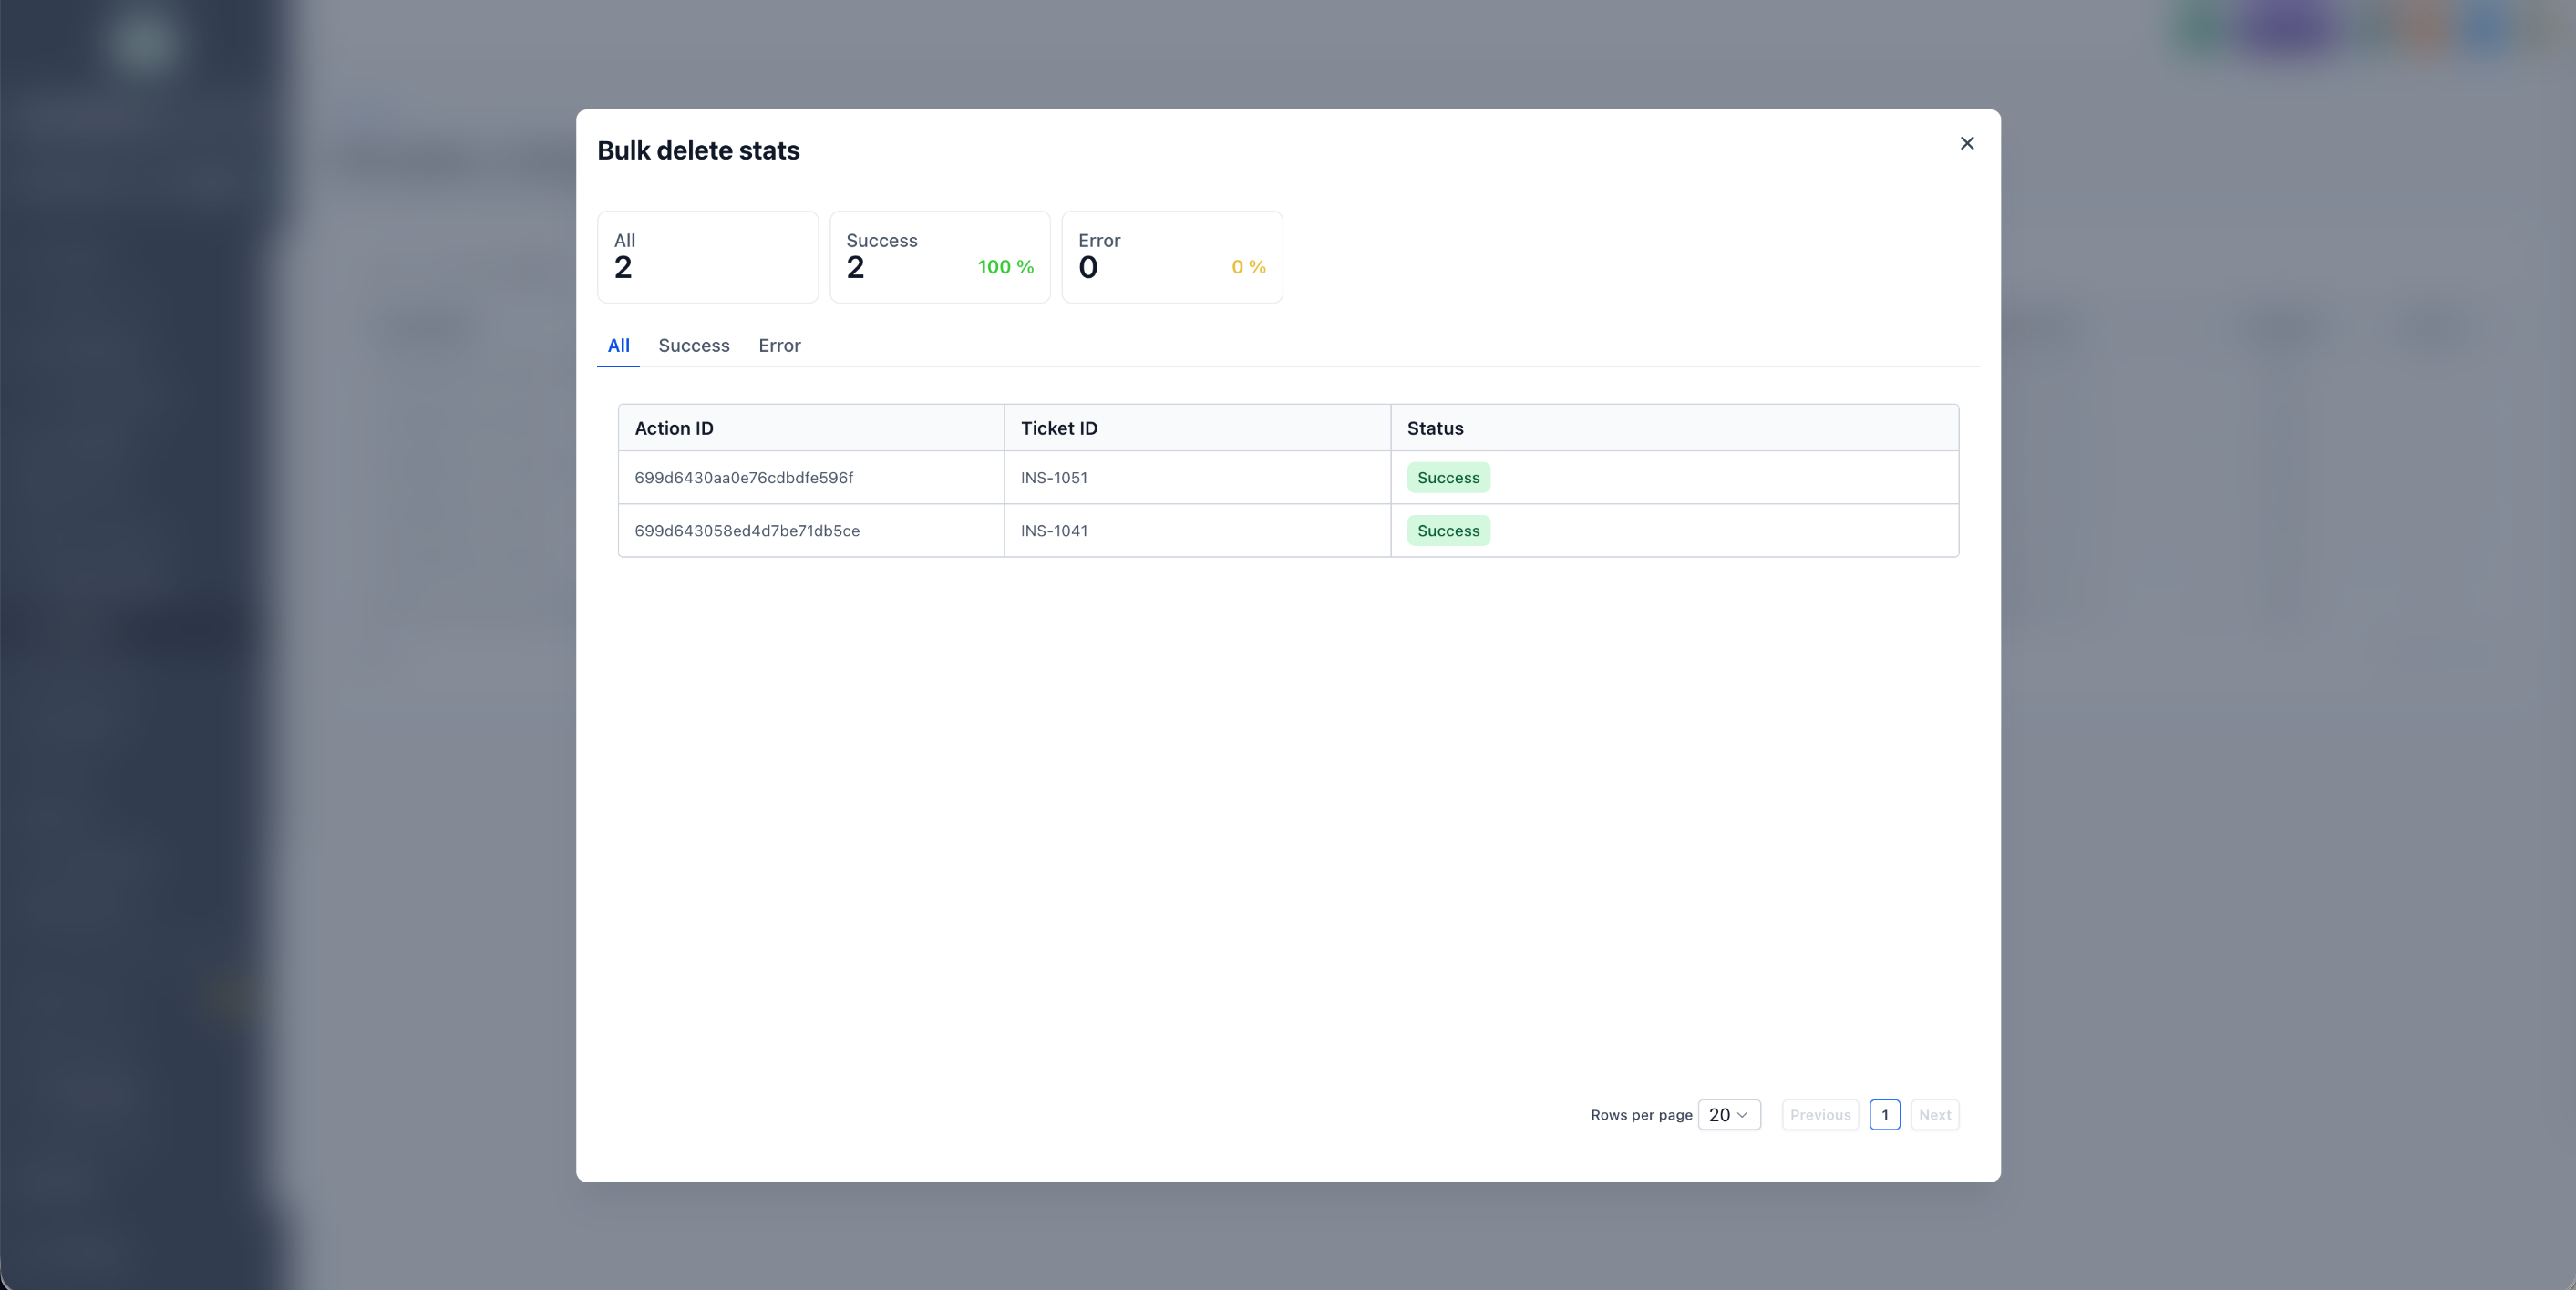
When a record is removed, all relationships to notes, tasks, contacts, companies, opportunities and other custom objects are broken, but the related items stay in the system. The platform records the deletion in the Bulk Actions page, where you can watch progress and see a log.
If you need the data back, the Bulk Actions page lets you restore a deletion job within 60 days. The restore runs as a new job and puts the records, their field values, and all previous associations back into the list view.
03How businesses use bulk delete for Custom Objects
- Real estate team. The team filters property listings by status, selects all records that are marked "expired," and uses Bulk Delete to remove them in one step. If a listing was removed by mistake, they restore it within the 60 day window from the Bulk Actions page.
- Digital marketing agency. During a client onboarding test, the agency imports dummy campaign objects. After validation, they check the boxes for the test rows and delete them with Bulk Delete, then verify the job log to confirm completion.
- Software startup. The product team runs a filtered view of feature request custom objects older than a year. They bulk delete those entries to declutter the database and, if needed, recover any mistakenly removed requests before the 60 day deadline.
04The numbers and rules that matter
- Recover deleted records within 60 days from the Bulk Actions page.
05Before you start
- Custom Objects must already exist in the subaccount.
06How to set up and use bulk delete for Custom Objects in HighLevel
Bulk delete custom object records
- Open the Custom Objects list view in your subaccount.
- Check the boxes next to each record you want to delete, or use the header box to select all on the page.
- Click the Delete button that appears in the bulk actions bar.
- Confirm the deletion in the dialog prompt.
- Visit the Bulk Actions page to watch the job’s progress and review its logs.
Recover deleted custom object records
- Navigate to the Bulk Actions page in your subaccount.
- Find the deletion job row, open the three dot menu on the right, and choose Restore.
- Confirm the restore action in the dialog.
- Allow the new restore job to finish; the records will reappear in the list view with their original data and links.
07What it looks like in HighLevel
08Things to know before you rely on it
- Deleted records lose their field values and all associations, though related notes, tasks, contacts, companies, opportunities, and other custom objects remain.
- Restoring records is only possible within 60 days of deletion; after that the data is permanently removed.
- Bulk Delete does not delete the associated notes or tasks themselves, only the connections to the removed record.
09How it connects to the rest of HighLevel
- Learn how to create and edit custom objects before using Bulk Delete. Create & edit custom objects
- Explore advanced filters to select exactly the records you need for bulk actions. Advanced filters
- Review how to sort and control columns in the list view for easier record selection. List view management
Michael's take

Bulk Delete feels like a small convenience for cleaning up data.
A SaaS startup that runs a support portal with custom ticket objects would benefit. They can purge hundreds of draft tickets after a sprint and still have the safety net of a 60 day restore window if something slips through.