
01Who this is for
- Admins who need to load large client lists quickly, because the feature handles bulk creation and updates.
- Sales teams that track opportunities, since both contacts and opportunity records can be imported together.
- Marketers who want to tag new contacts or add them to workflows during the import process.
02Importing contacts and opportunities, explained
HighLevel provides a bulk CSV import tool for contacts and opportunities. The importer reads a single sheet CSV file, matches each column to a field in the system, and either creates new records, updates existing ones, or does both. You can also decide not to update empty values, keep unmapped columns out of the import, and add tags, smart lists, or workflow enrollments as part of the process.
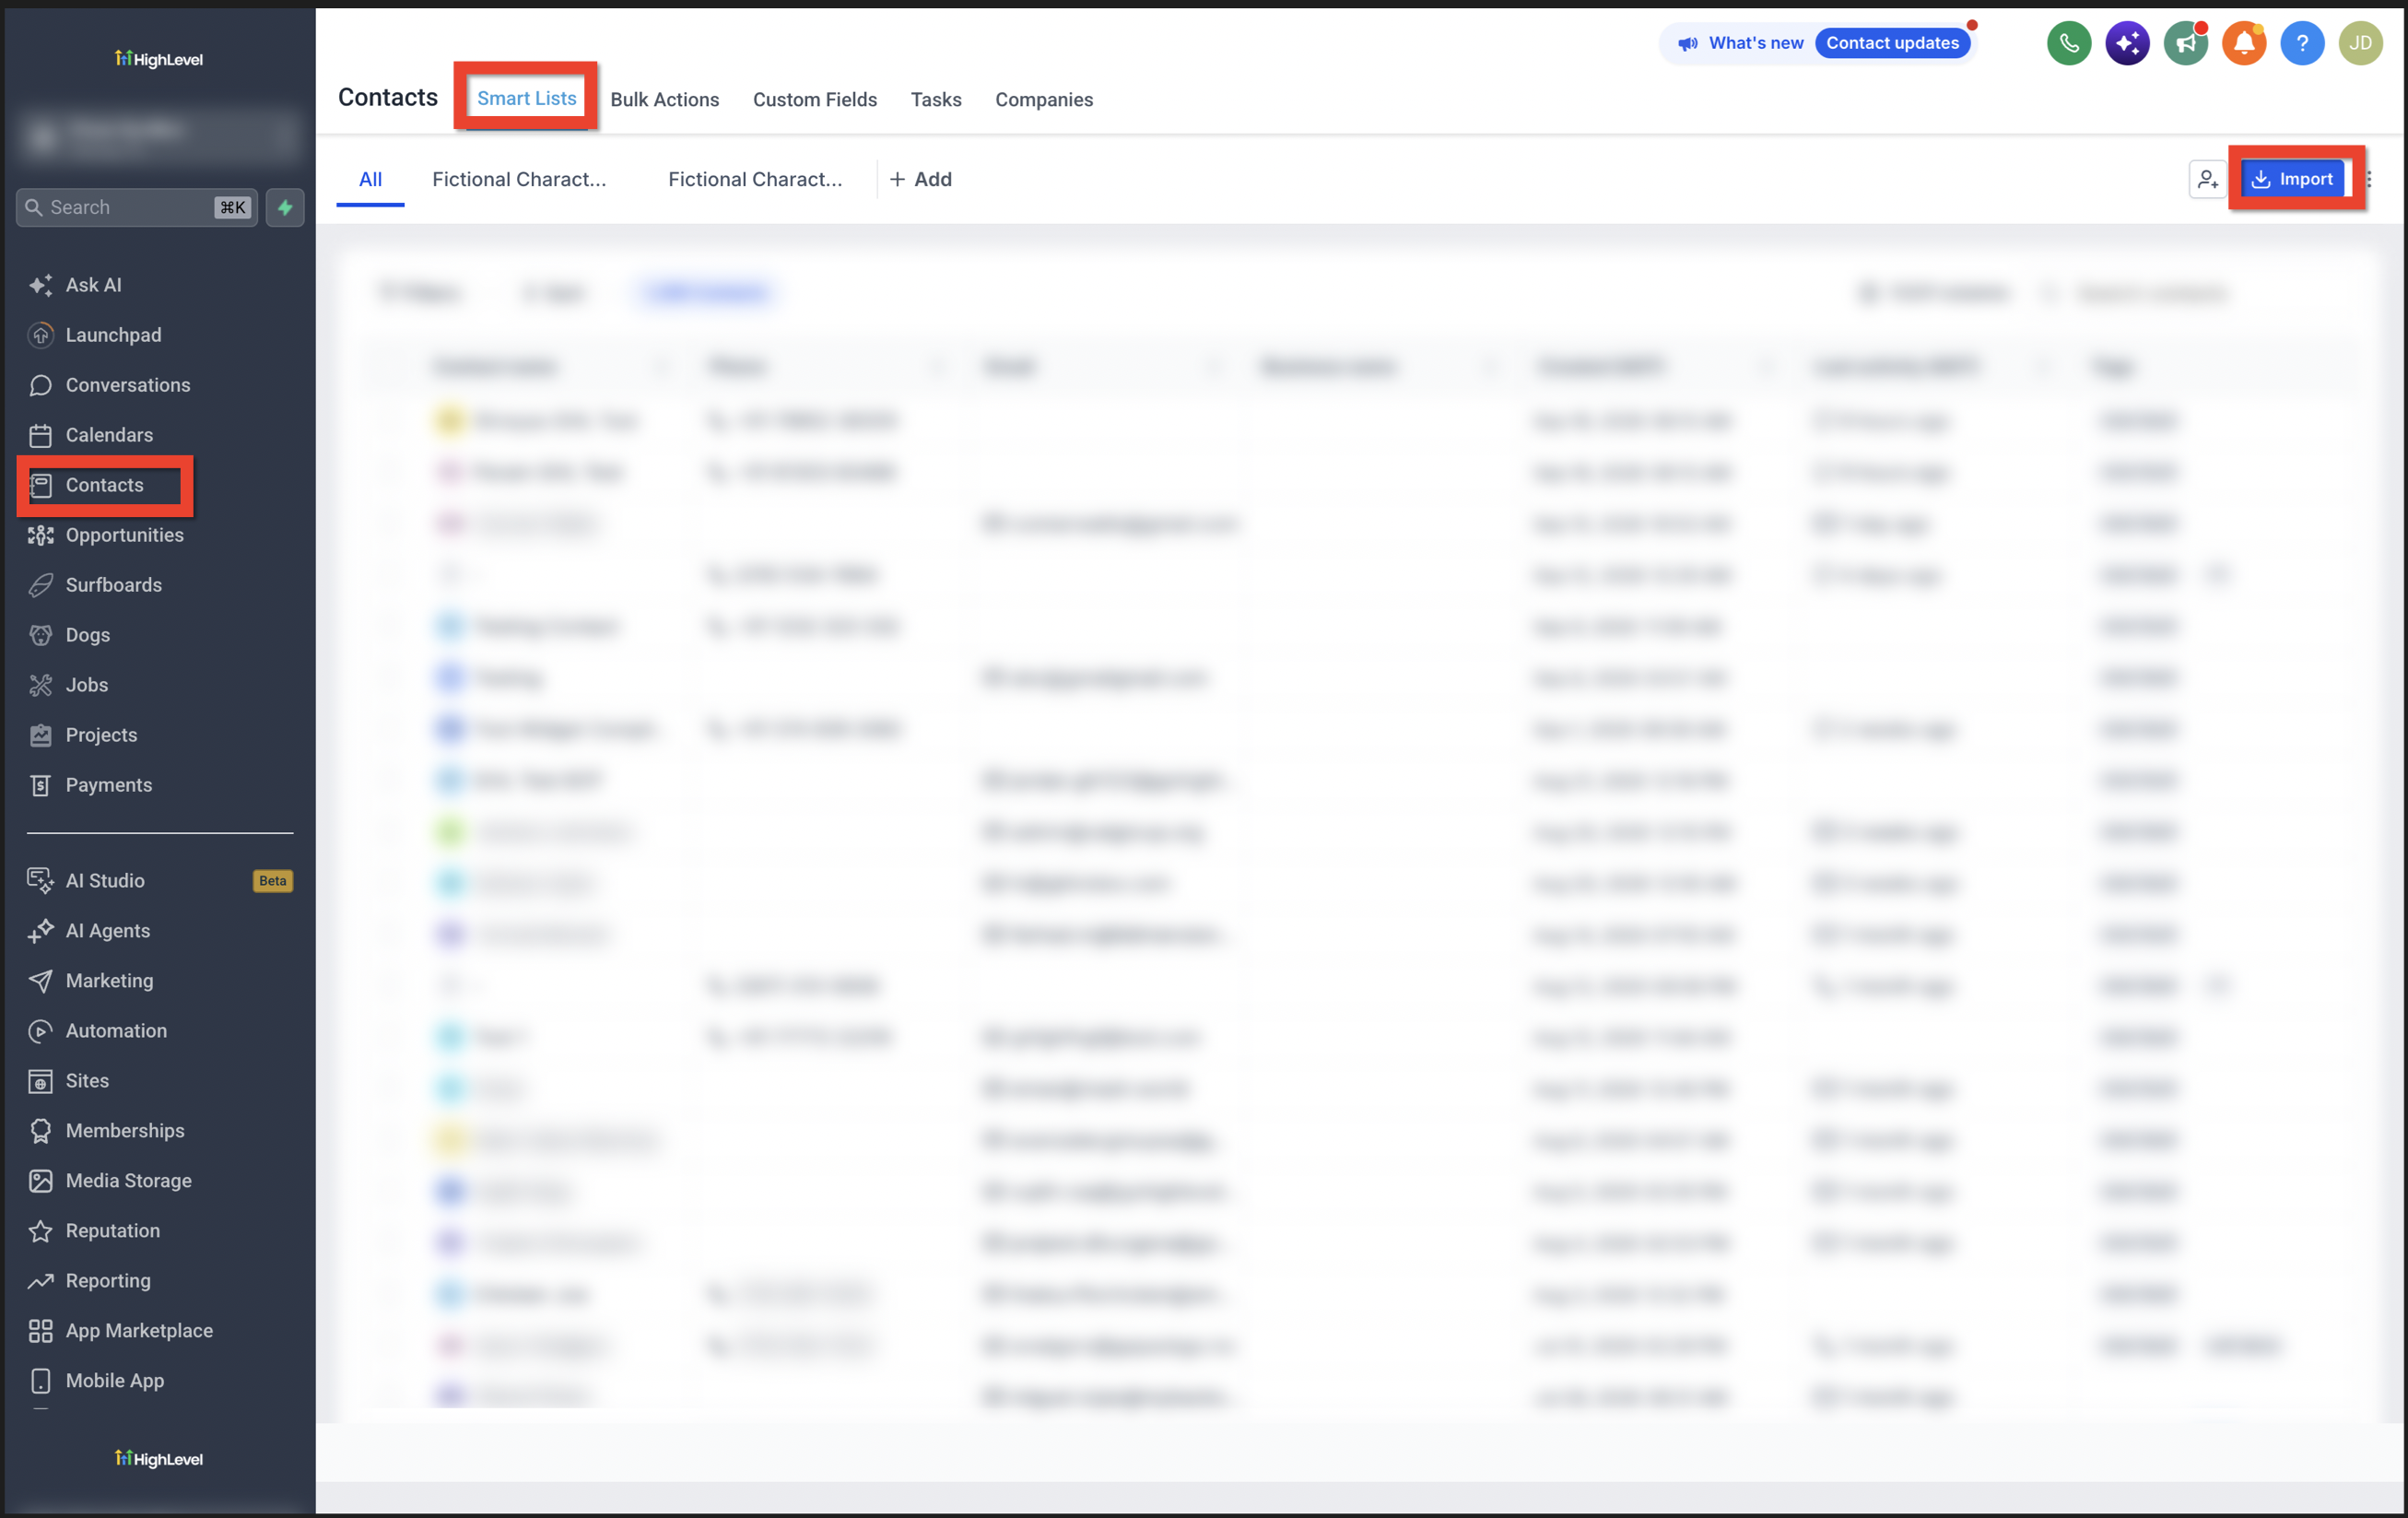
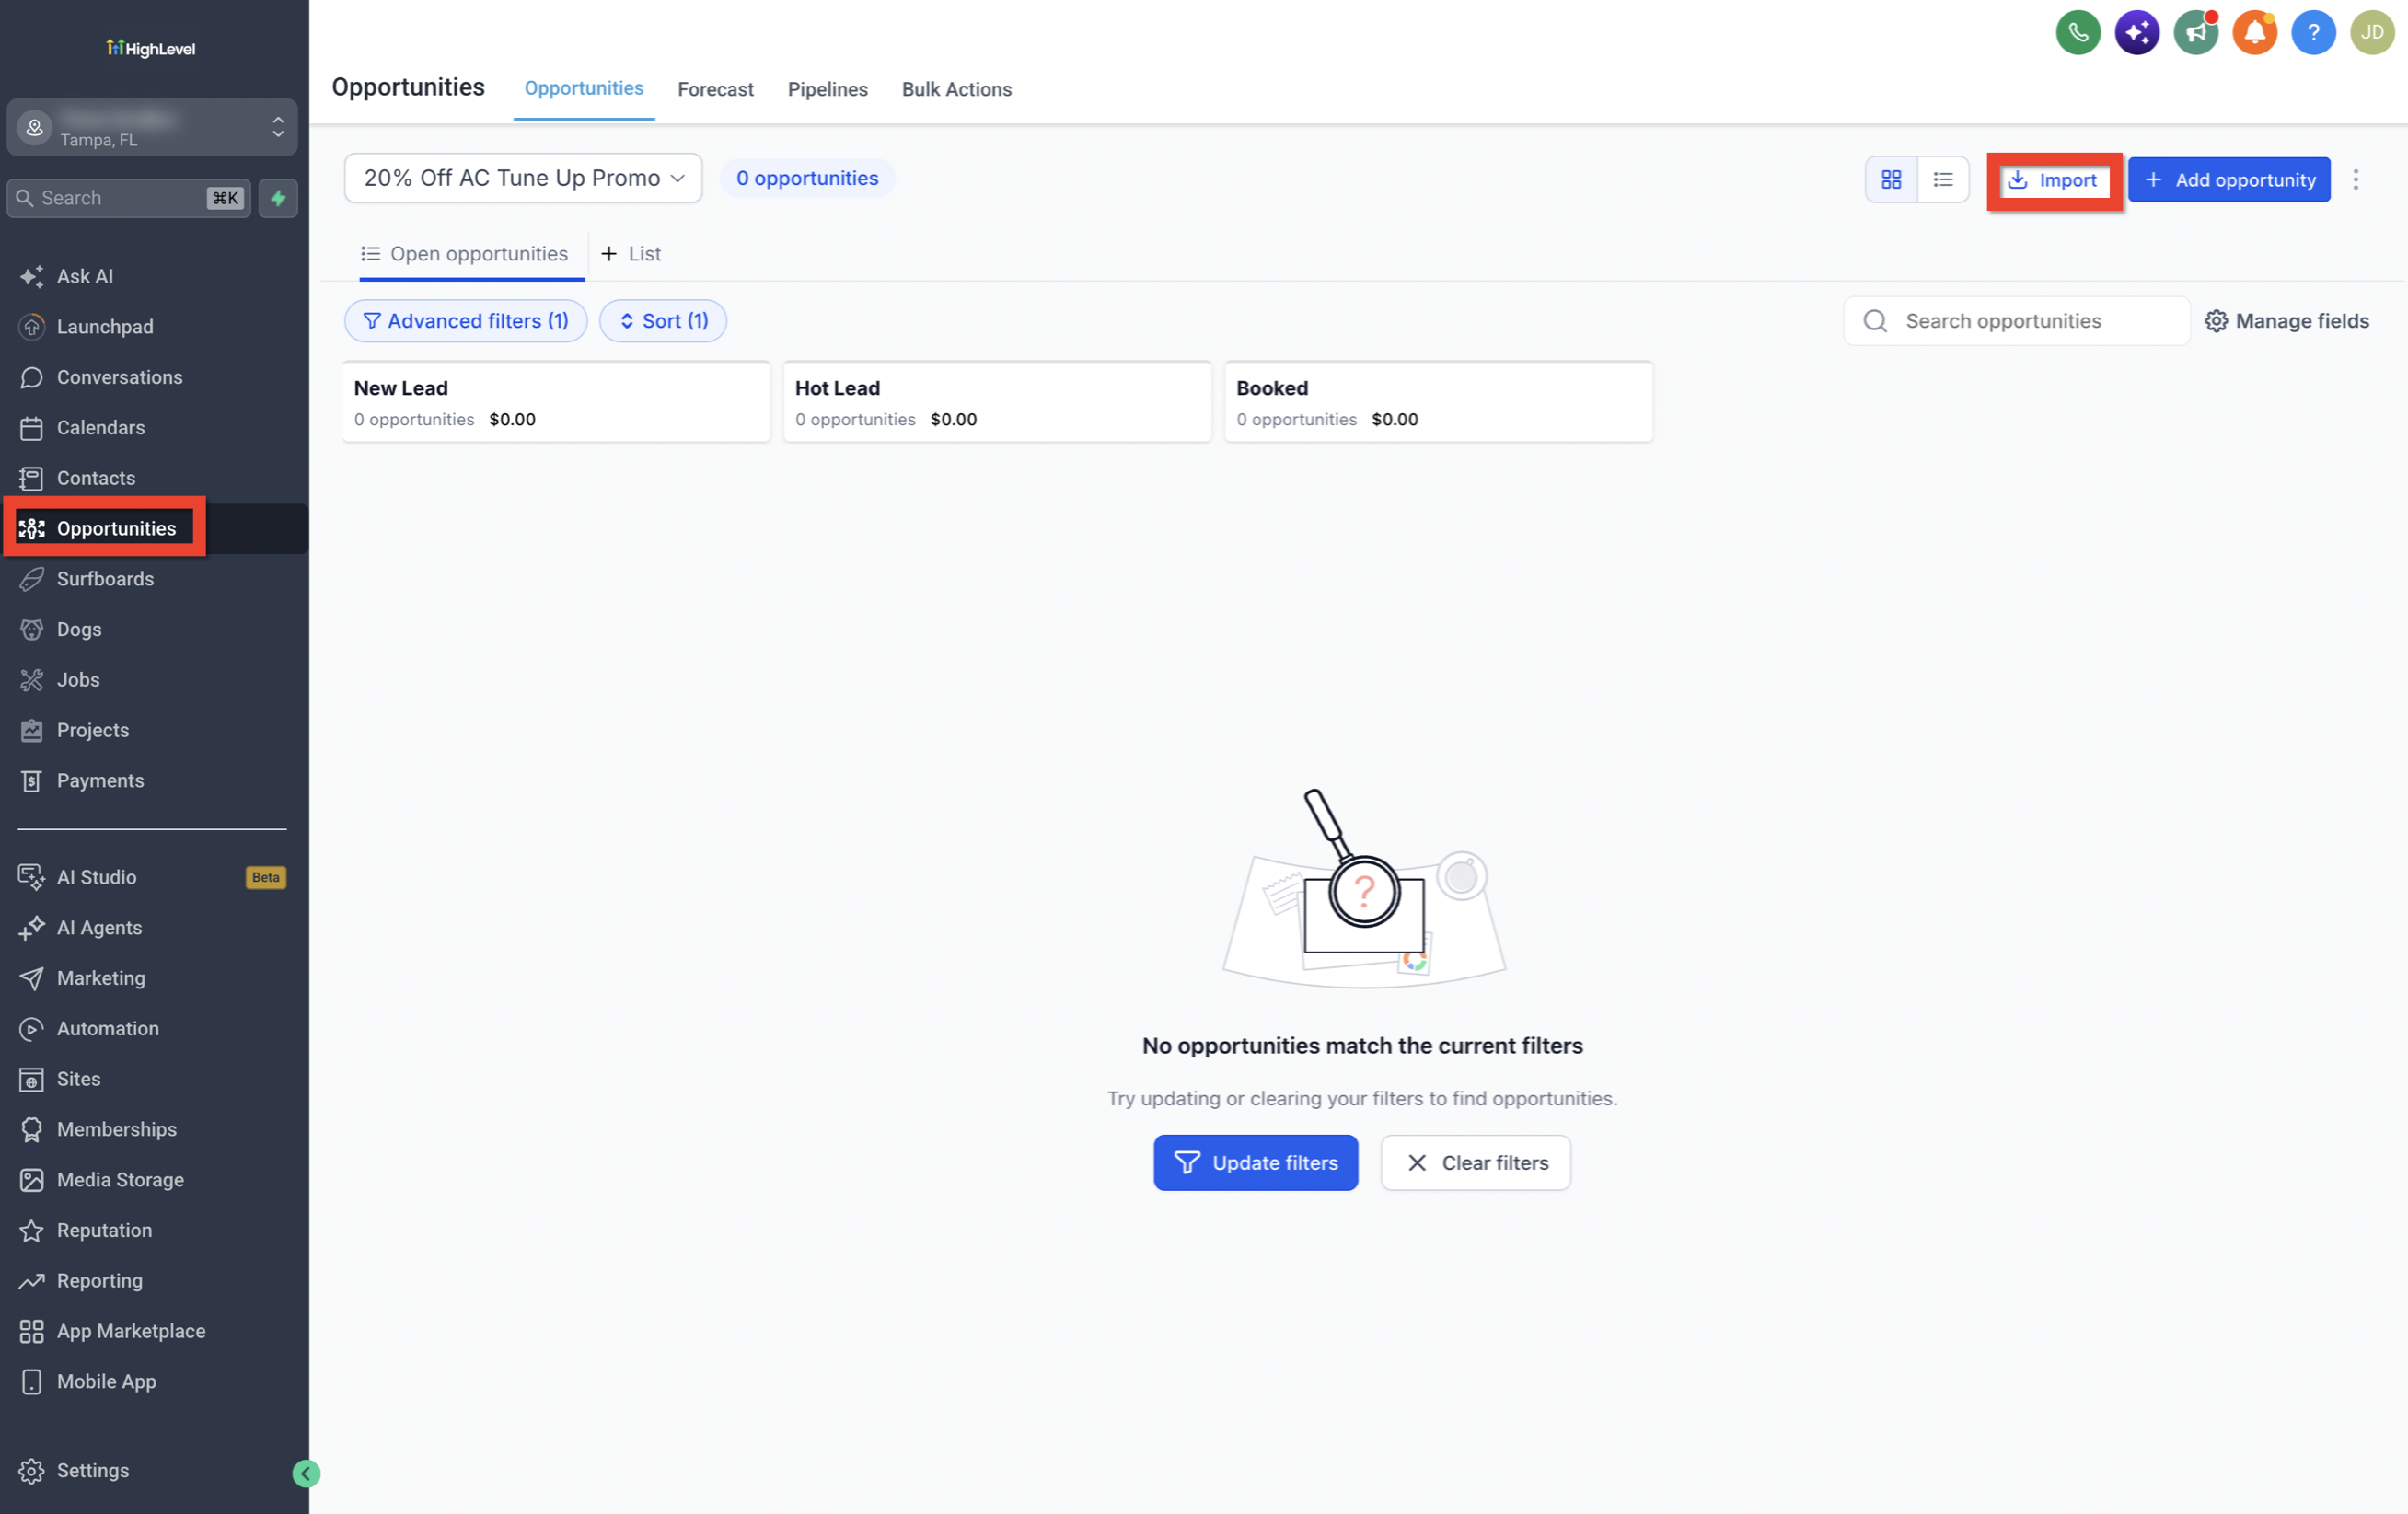
The import workflow is accessed from either the Contacts tab (Smart Lists > Import Contacts) or the Opportunities tab (top right Import button). After selecting what to import, you upload the CSV, choose the import mode, map columns, review options, and confirm to start. Progress and any errors appear on the Bulk Actions page for contacts and opportunities.
03How businesses use importing contacts and opportunities
- Real estate agency. The agency prepares a CSV of property leads with names, emails, and phone numbers. Using the import tool, they map these columns, select "Create & Update" to add new leads and refresh existing ones, and tag the imported contacts as "New Lead" for follow up workflows.
- Dental practice. The practice exports patient appointment data to CSV, includes multiple phone numbers, and imports it. The "Don't update Empty Values" option preserves existing patient notes while adding new contact details and linking opportunities for upcoming procedures.
- SaaS startup. The startup uploads a CSV of trial sign ups, maps the email and company fields, chooses "Update Only" to refresh trial statuses, and adds the contacts to a smart list for targeted email campaigns.
04The numbers and rules that matter
- CSV file should be under 30MB.
05Before you start
- User must have Admin access.
- CSV file must be in .csv format, under 30 MB, and contain only one sheet.
- First row must include a header; at least one column must match a system field.
- Each row needs at least one required identifier: name, email, or phone.
06How to set up and use importing contacts and opportunities in HighLevel
Import contacts and opportunities
- Open the Contacts tab or the Opportunities tab and click the Import button.
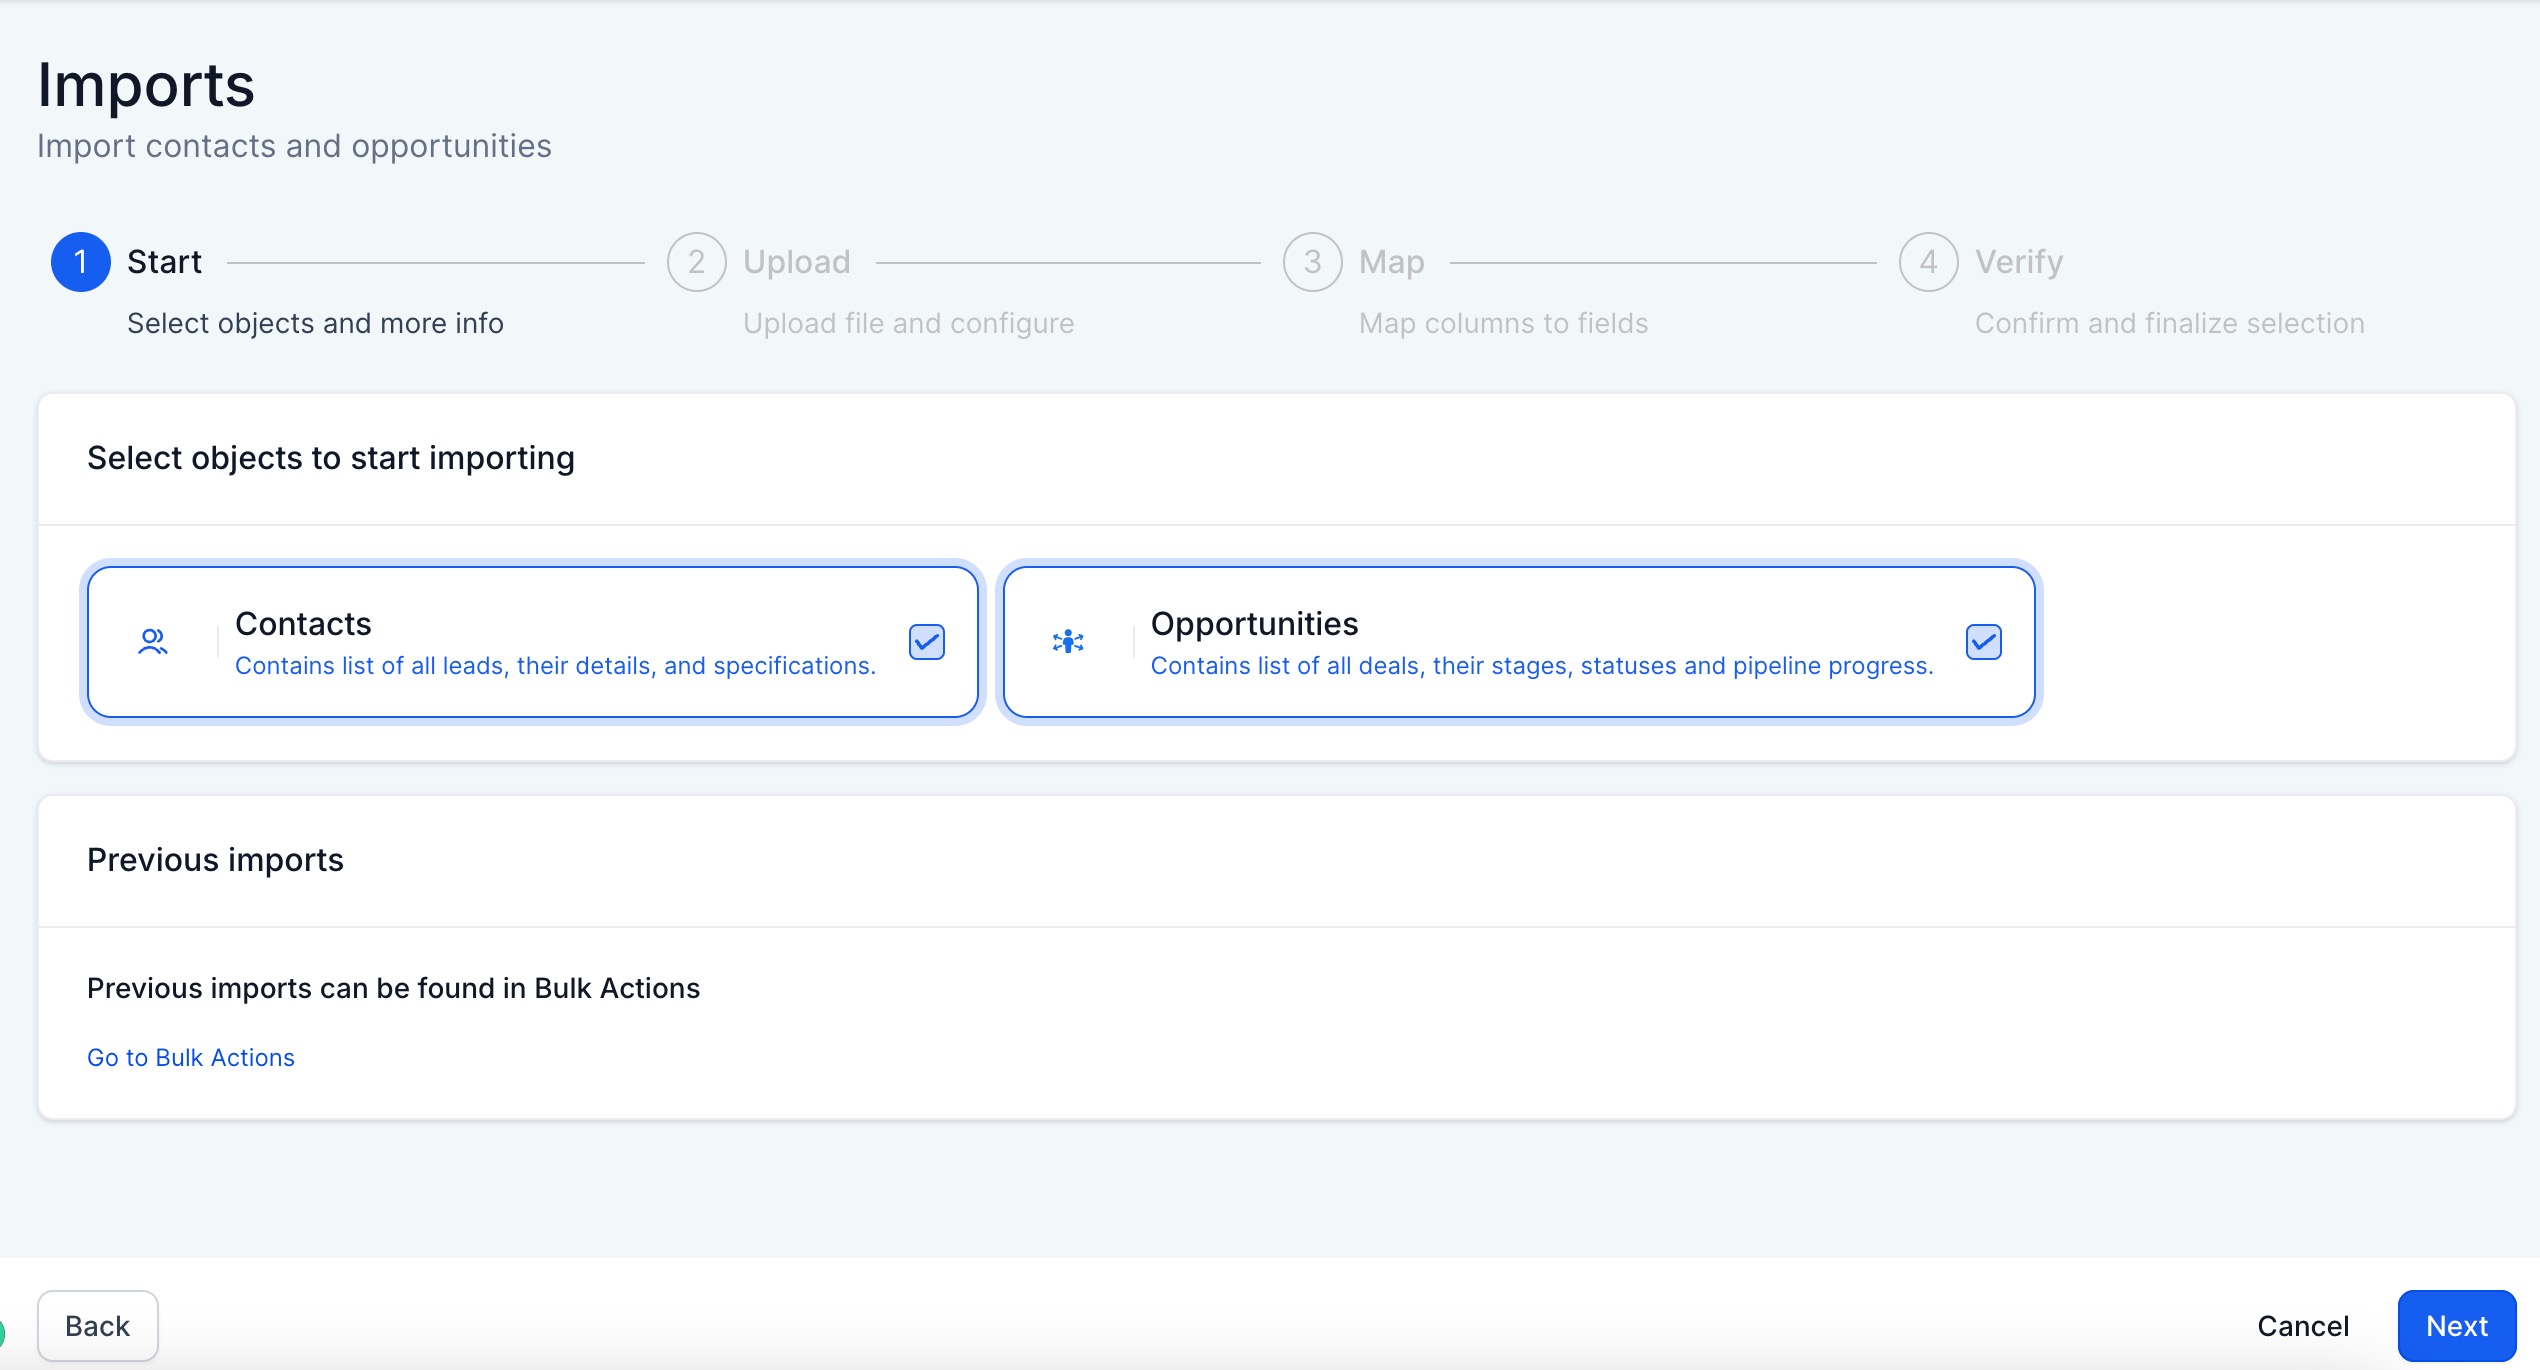
- Select whether to import Contacts, Opportunities, or both, then click Next.
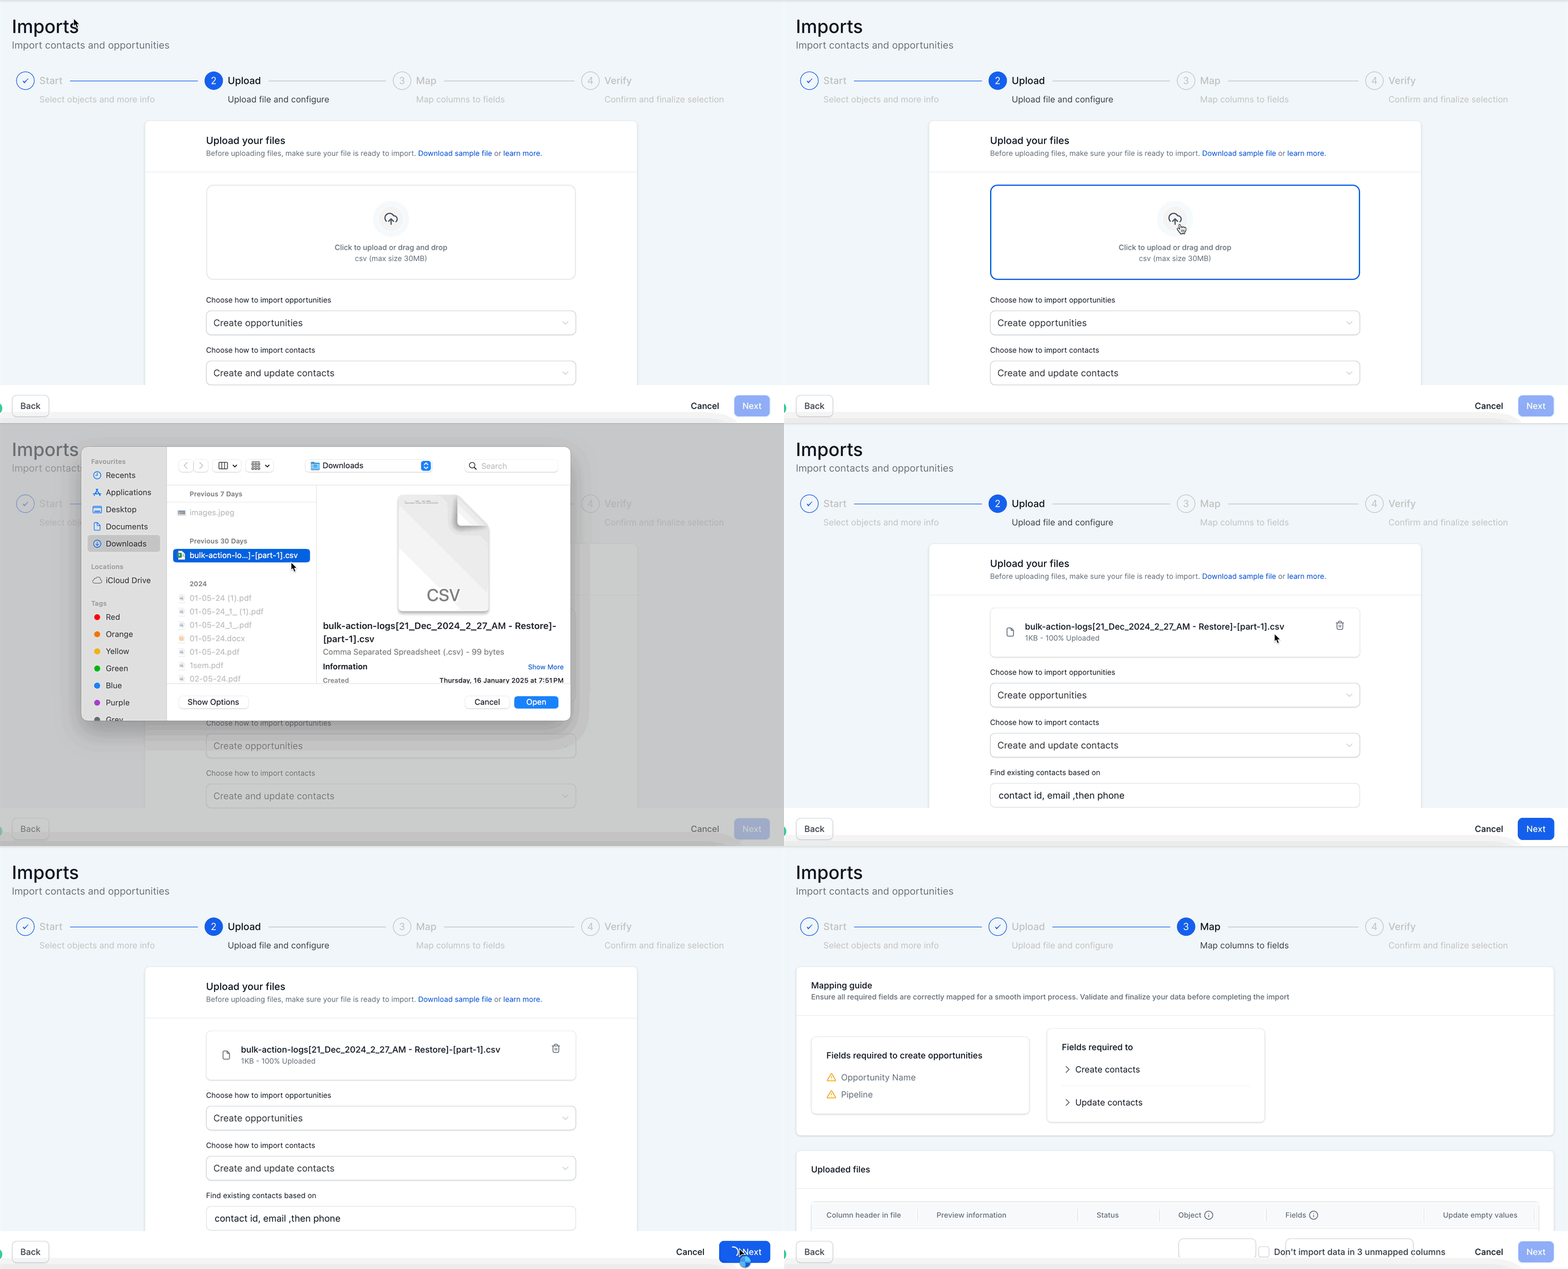
- Click Upload File and choose the CSV file from your computer.
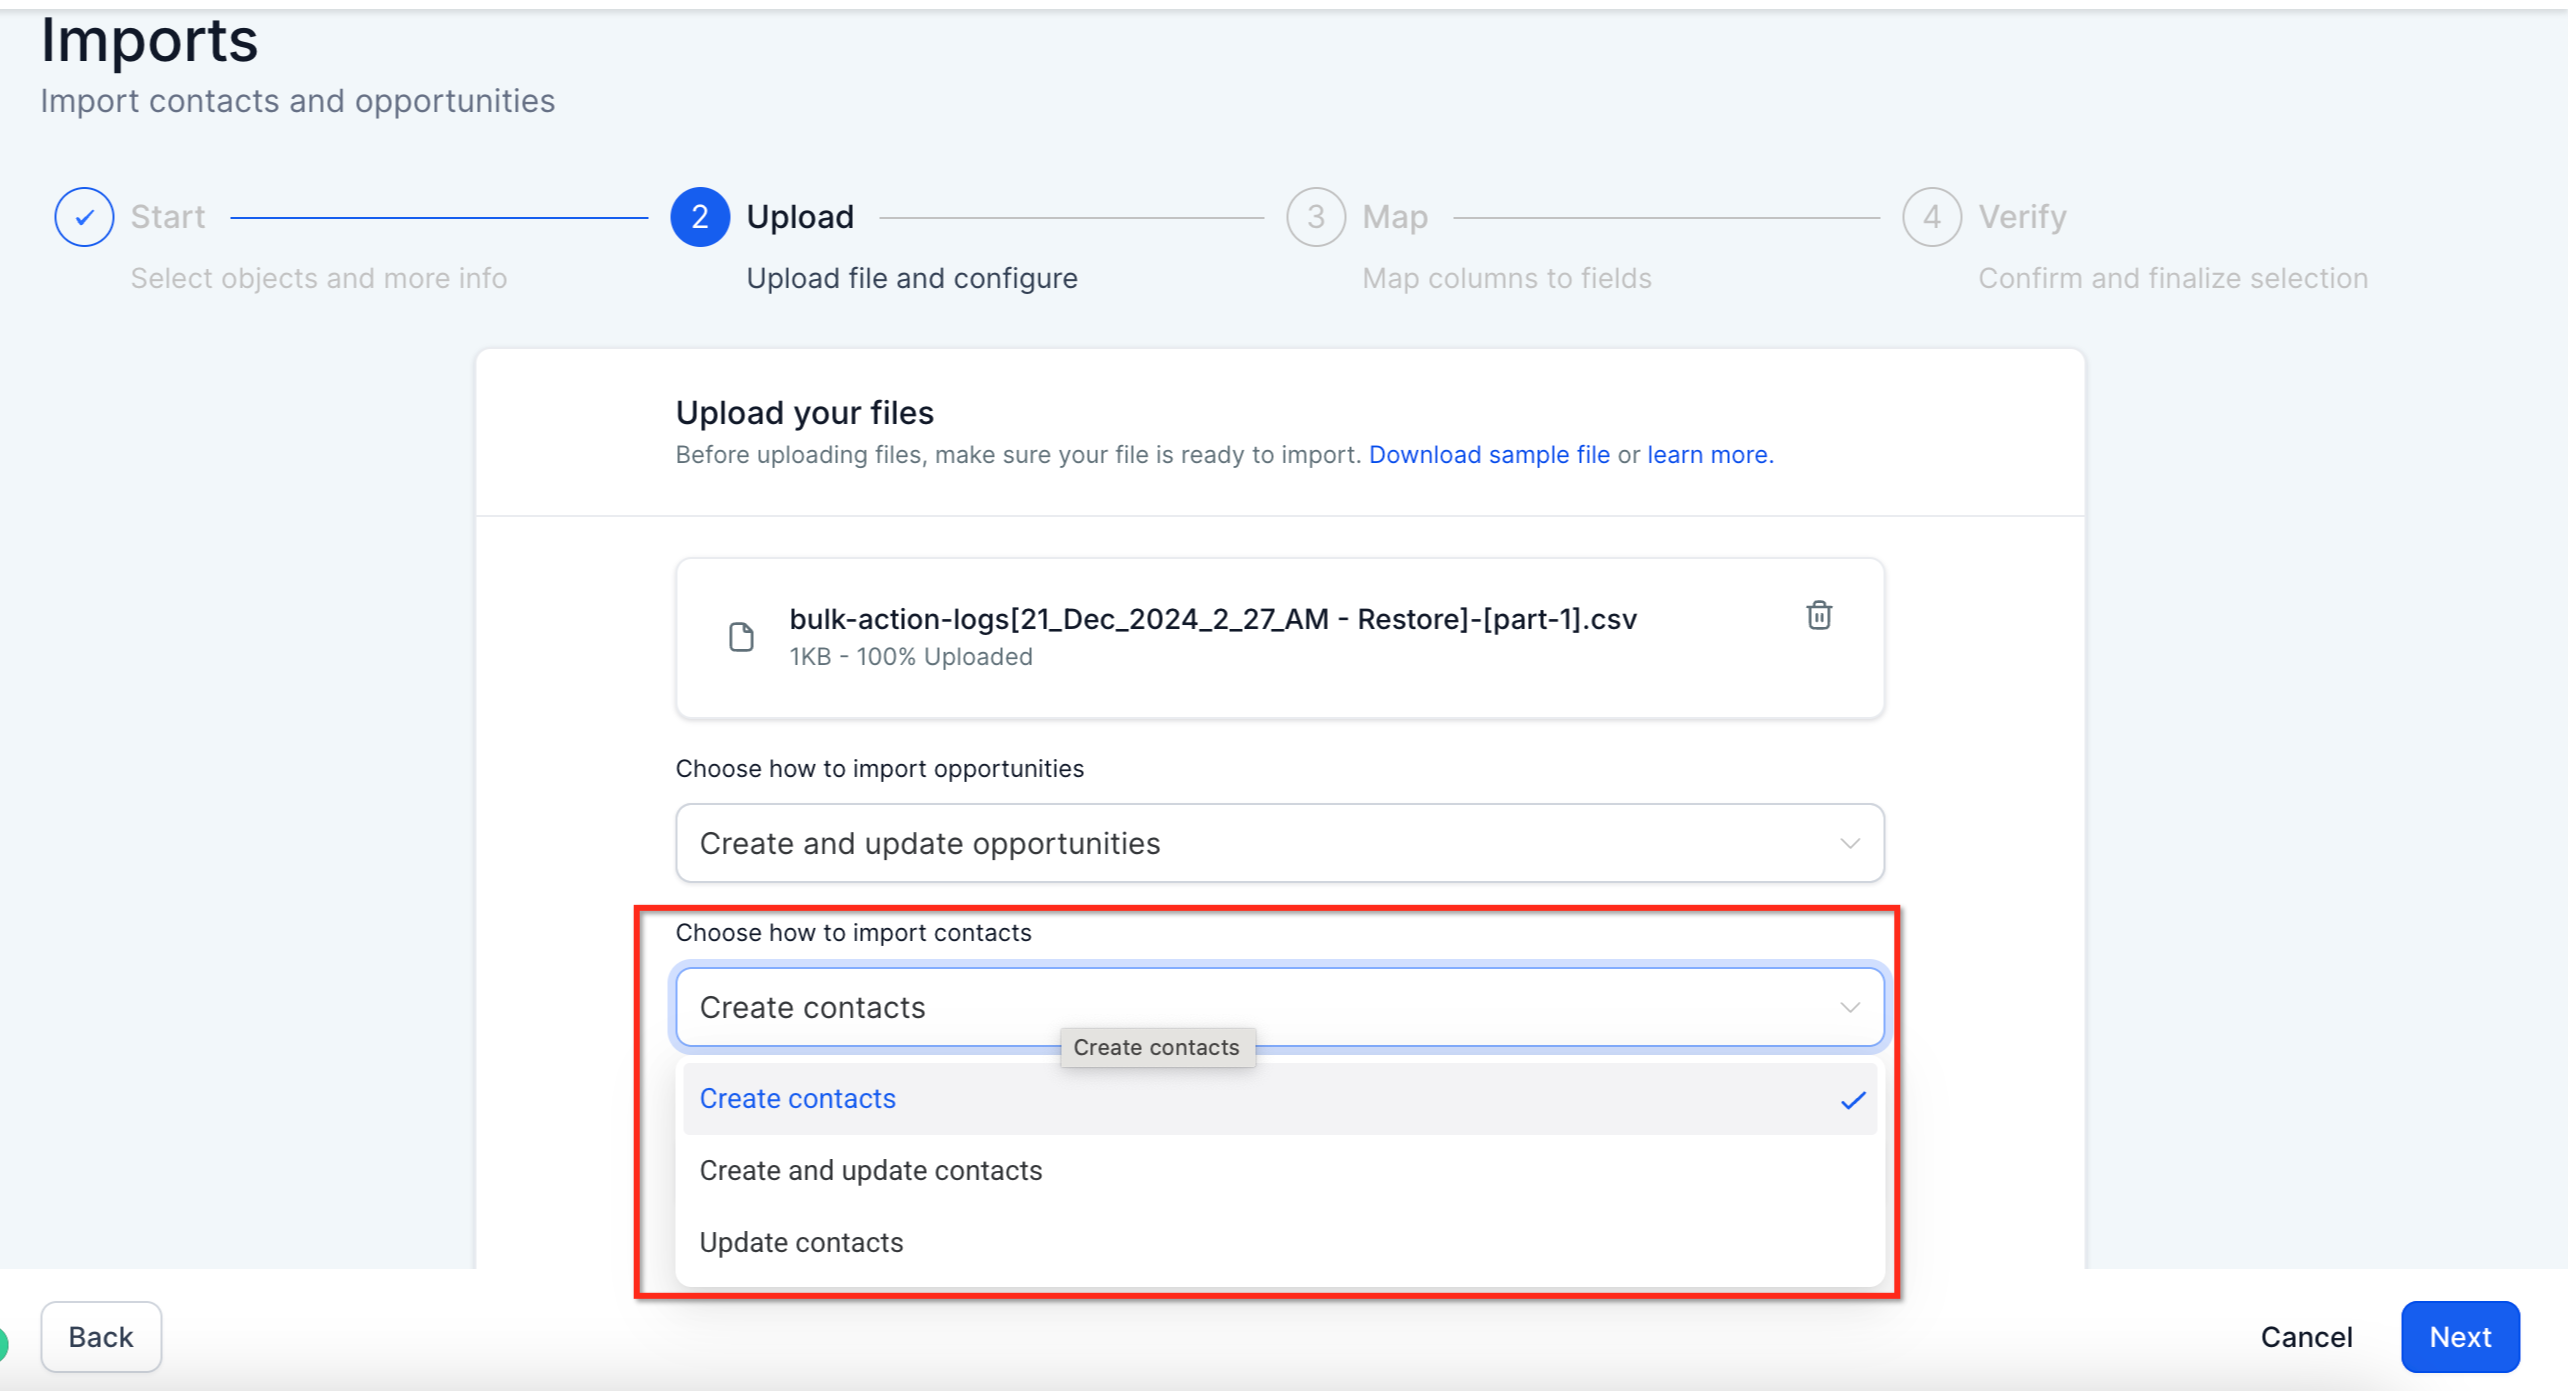
- Press "Choose how to import contacts/opportunities" and pick Create, Update, or both.
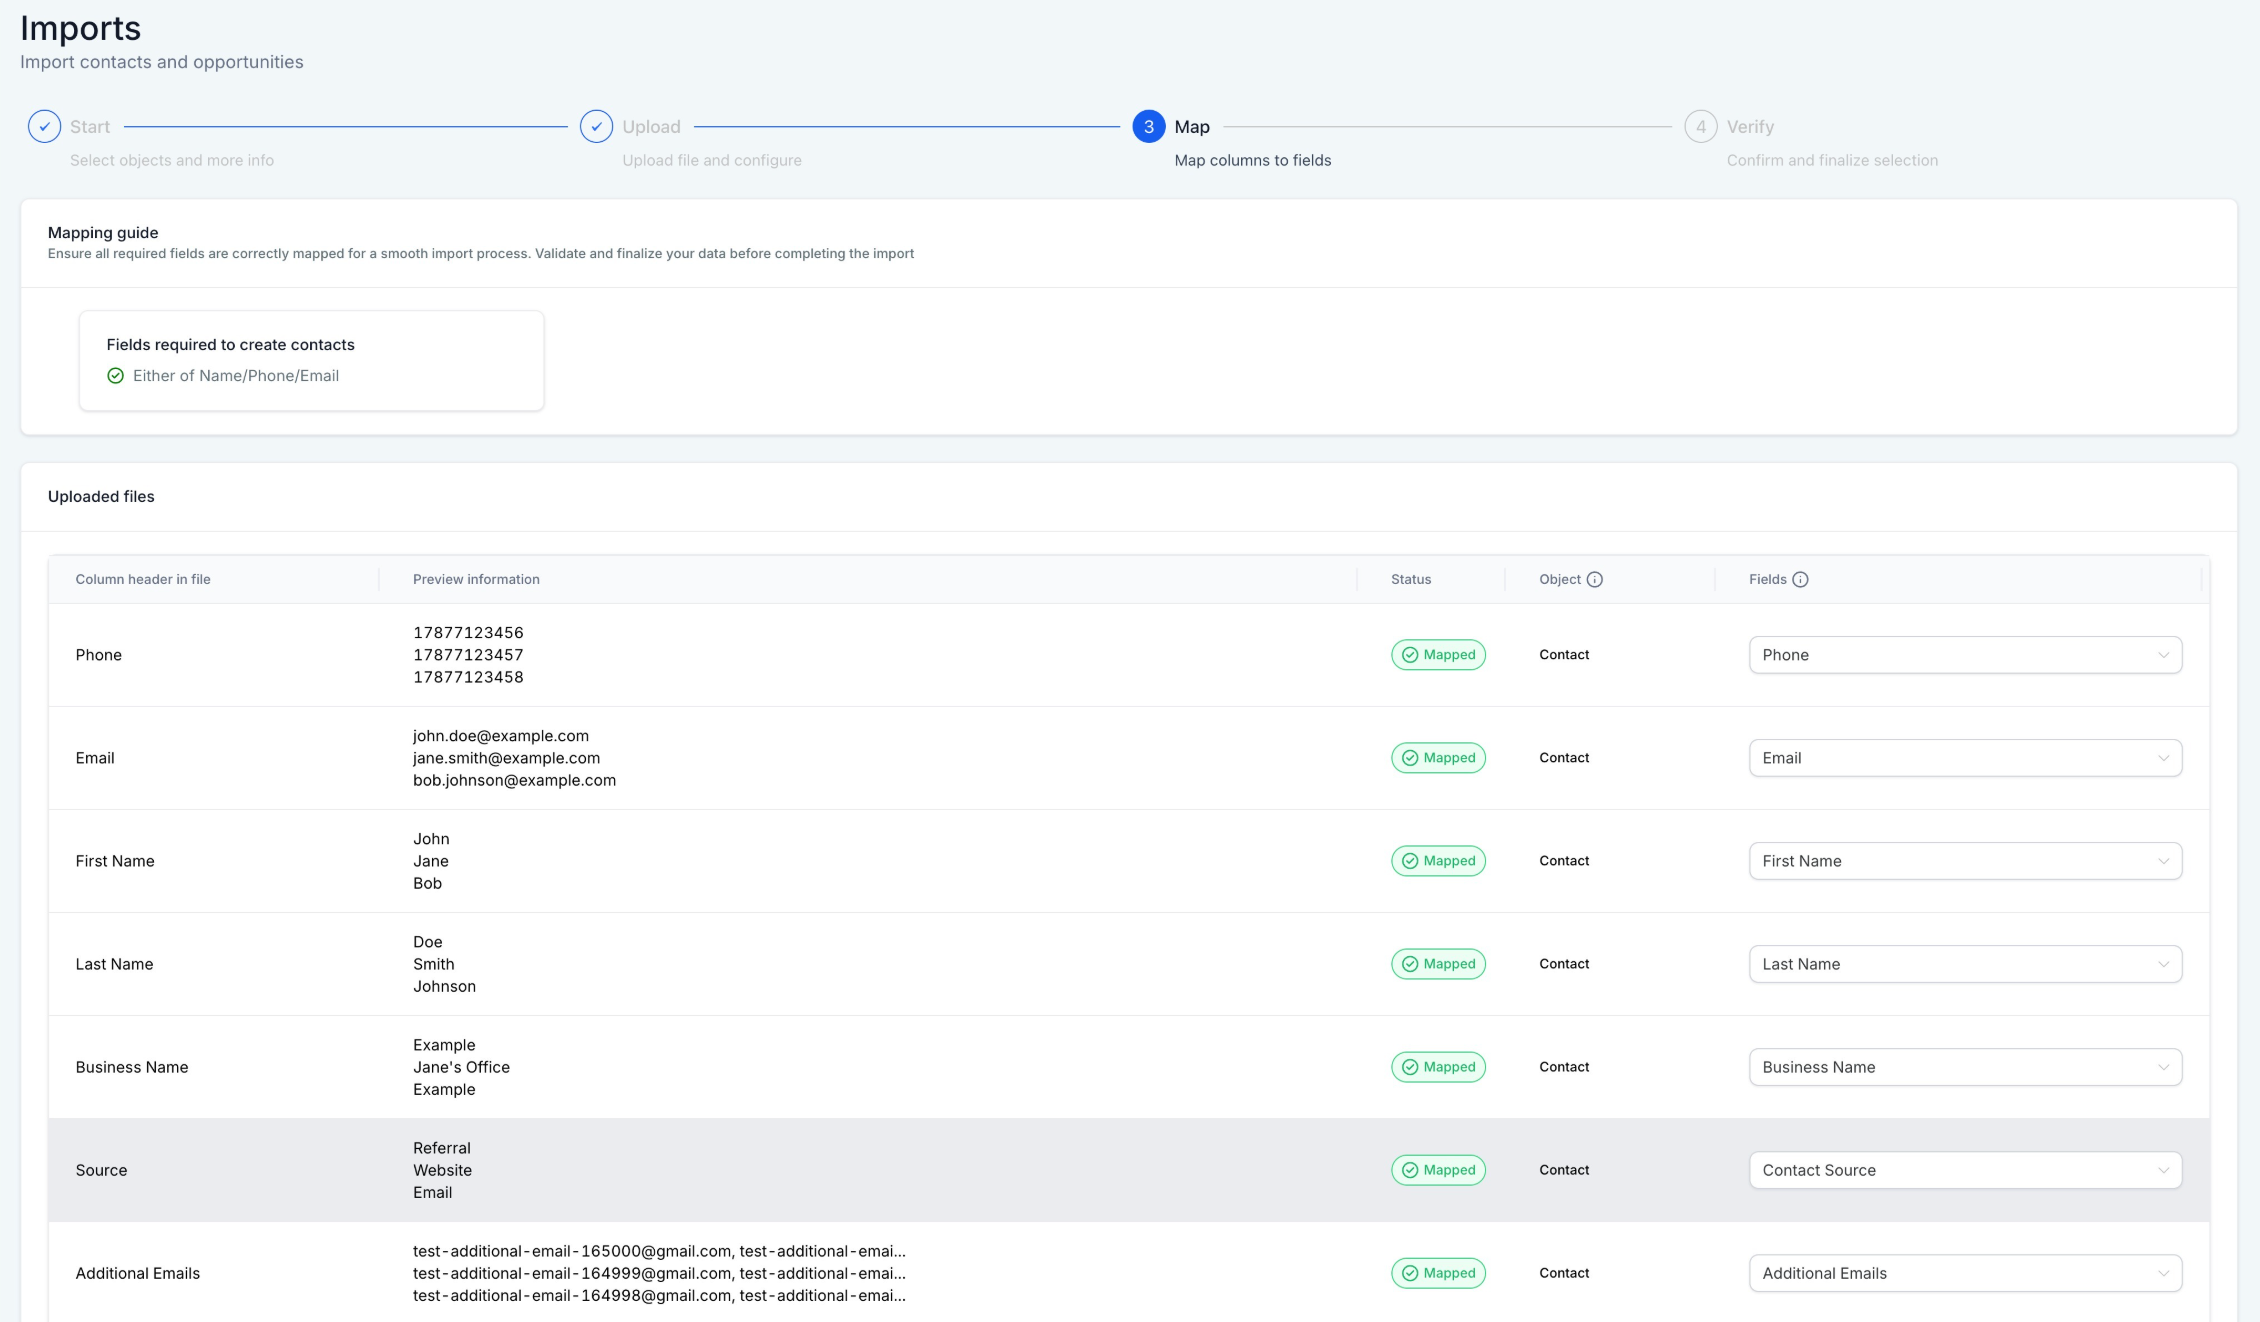
- Map each CSV column to the appropriate HighLevel field, ensuring all mandatory fields are mapped.
- Check the "Don't update Empty Values" box if existing records should keep their current data when the CSV column is empty.
- Leave any columns unmapped and check the box at the bottom to skip importing those fields.
- Optionally select to create a Smart List, add contacts to a Workflow, or apply a new Tag during the import.
- Mark the mandatory confirmation checkbox for all contacts/opportunities and start the import.
Monitor import status
- Navigate to the Contacts and Opportunities Bulk Actions page.
- Find your import entry in the list of bulk actions.
- Click the "Show Stats" button to view progress and success counts.
- Open the Error tab, download the error log, and review details for any failed rows.
07What it looks like in HighLevel
08Settings that matter
- Don't update Empty Values. When selected, fields that are empty in the CSV will not overwrite existing data in the record.
- Confirm all contacts/opportunities for import. A required checkbox that must be selected before the import can begin, confirming user intent.
09Things to know before you rely on it
- CSV files must be smaller than 30 MB; larger files need to be split.
- Only a single sheet/tab is allowed in the CSV.
- The first row cannot be blank and must contain column headers.
- Each row must include at least one required identifier: name, email, or phone.
- Phone numbers must not contain parentheses or dashes; they should be plain digits.
- Notes imported via CSV are limited to one note per contact with a maximum of 5000 characters.
10If something goes wrong
- Duplicate contact or identifier. Remove or combine duplicate rows in the CSV, then re import.
- Invalid email or phone. Correct the formatting of the email or phone values and retry the affected rows.
- Missing identifying information. Add a valid name, email, phone, or Contact ID to each row before importing.
- Invalid field value. Match the value to the correct HighLevel format or option for that field.
- Owner not found. Use the exact user name or email address of an existing HighLevel user.
- Contact not found or update failed. Verify the Contact ID, email, or phone matches an existing record, then retry.
- Partial or bulk action failure. Correct only the rows that failed and re import those rows.
- Processing error. Review the CSV formatting for issues and retry the import.
11How it connects to the rest of HighLevel
- Learn how to perform bulk actions on contacts and smart lists. Bulk actions for contacts
- Step by step guide to importing contacts using a CSV file. Import contacts CSV
- Troubleshooting guide for CSV bulk imports. CSV import troubleshooting
Michael's take

I find the bulk CSV import useful for adding many contacts or deals into HighLevel. I start by cleaning the CSV. Remove duplicates, fix phone formats, and make sure each row has a name, email, or phone. Then follow the import steps.