
01Who this is for
- Marketing managers can quickly target a segment for a campaign without creating separate triggers.
- Sales teams can re engage leads by enrolling a filtered list into a nurture workflow.
- Customer support leaders can move a group of users into a follow up sequence after a product update.
02Bulk adding contacts to a workflow, explained
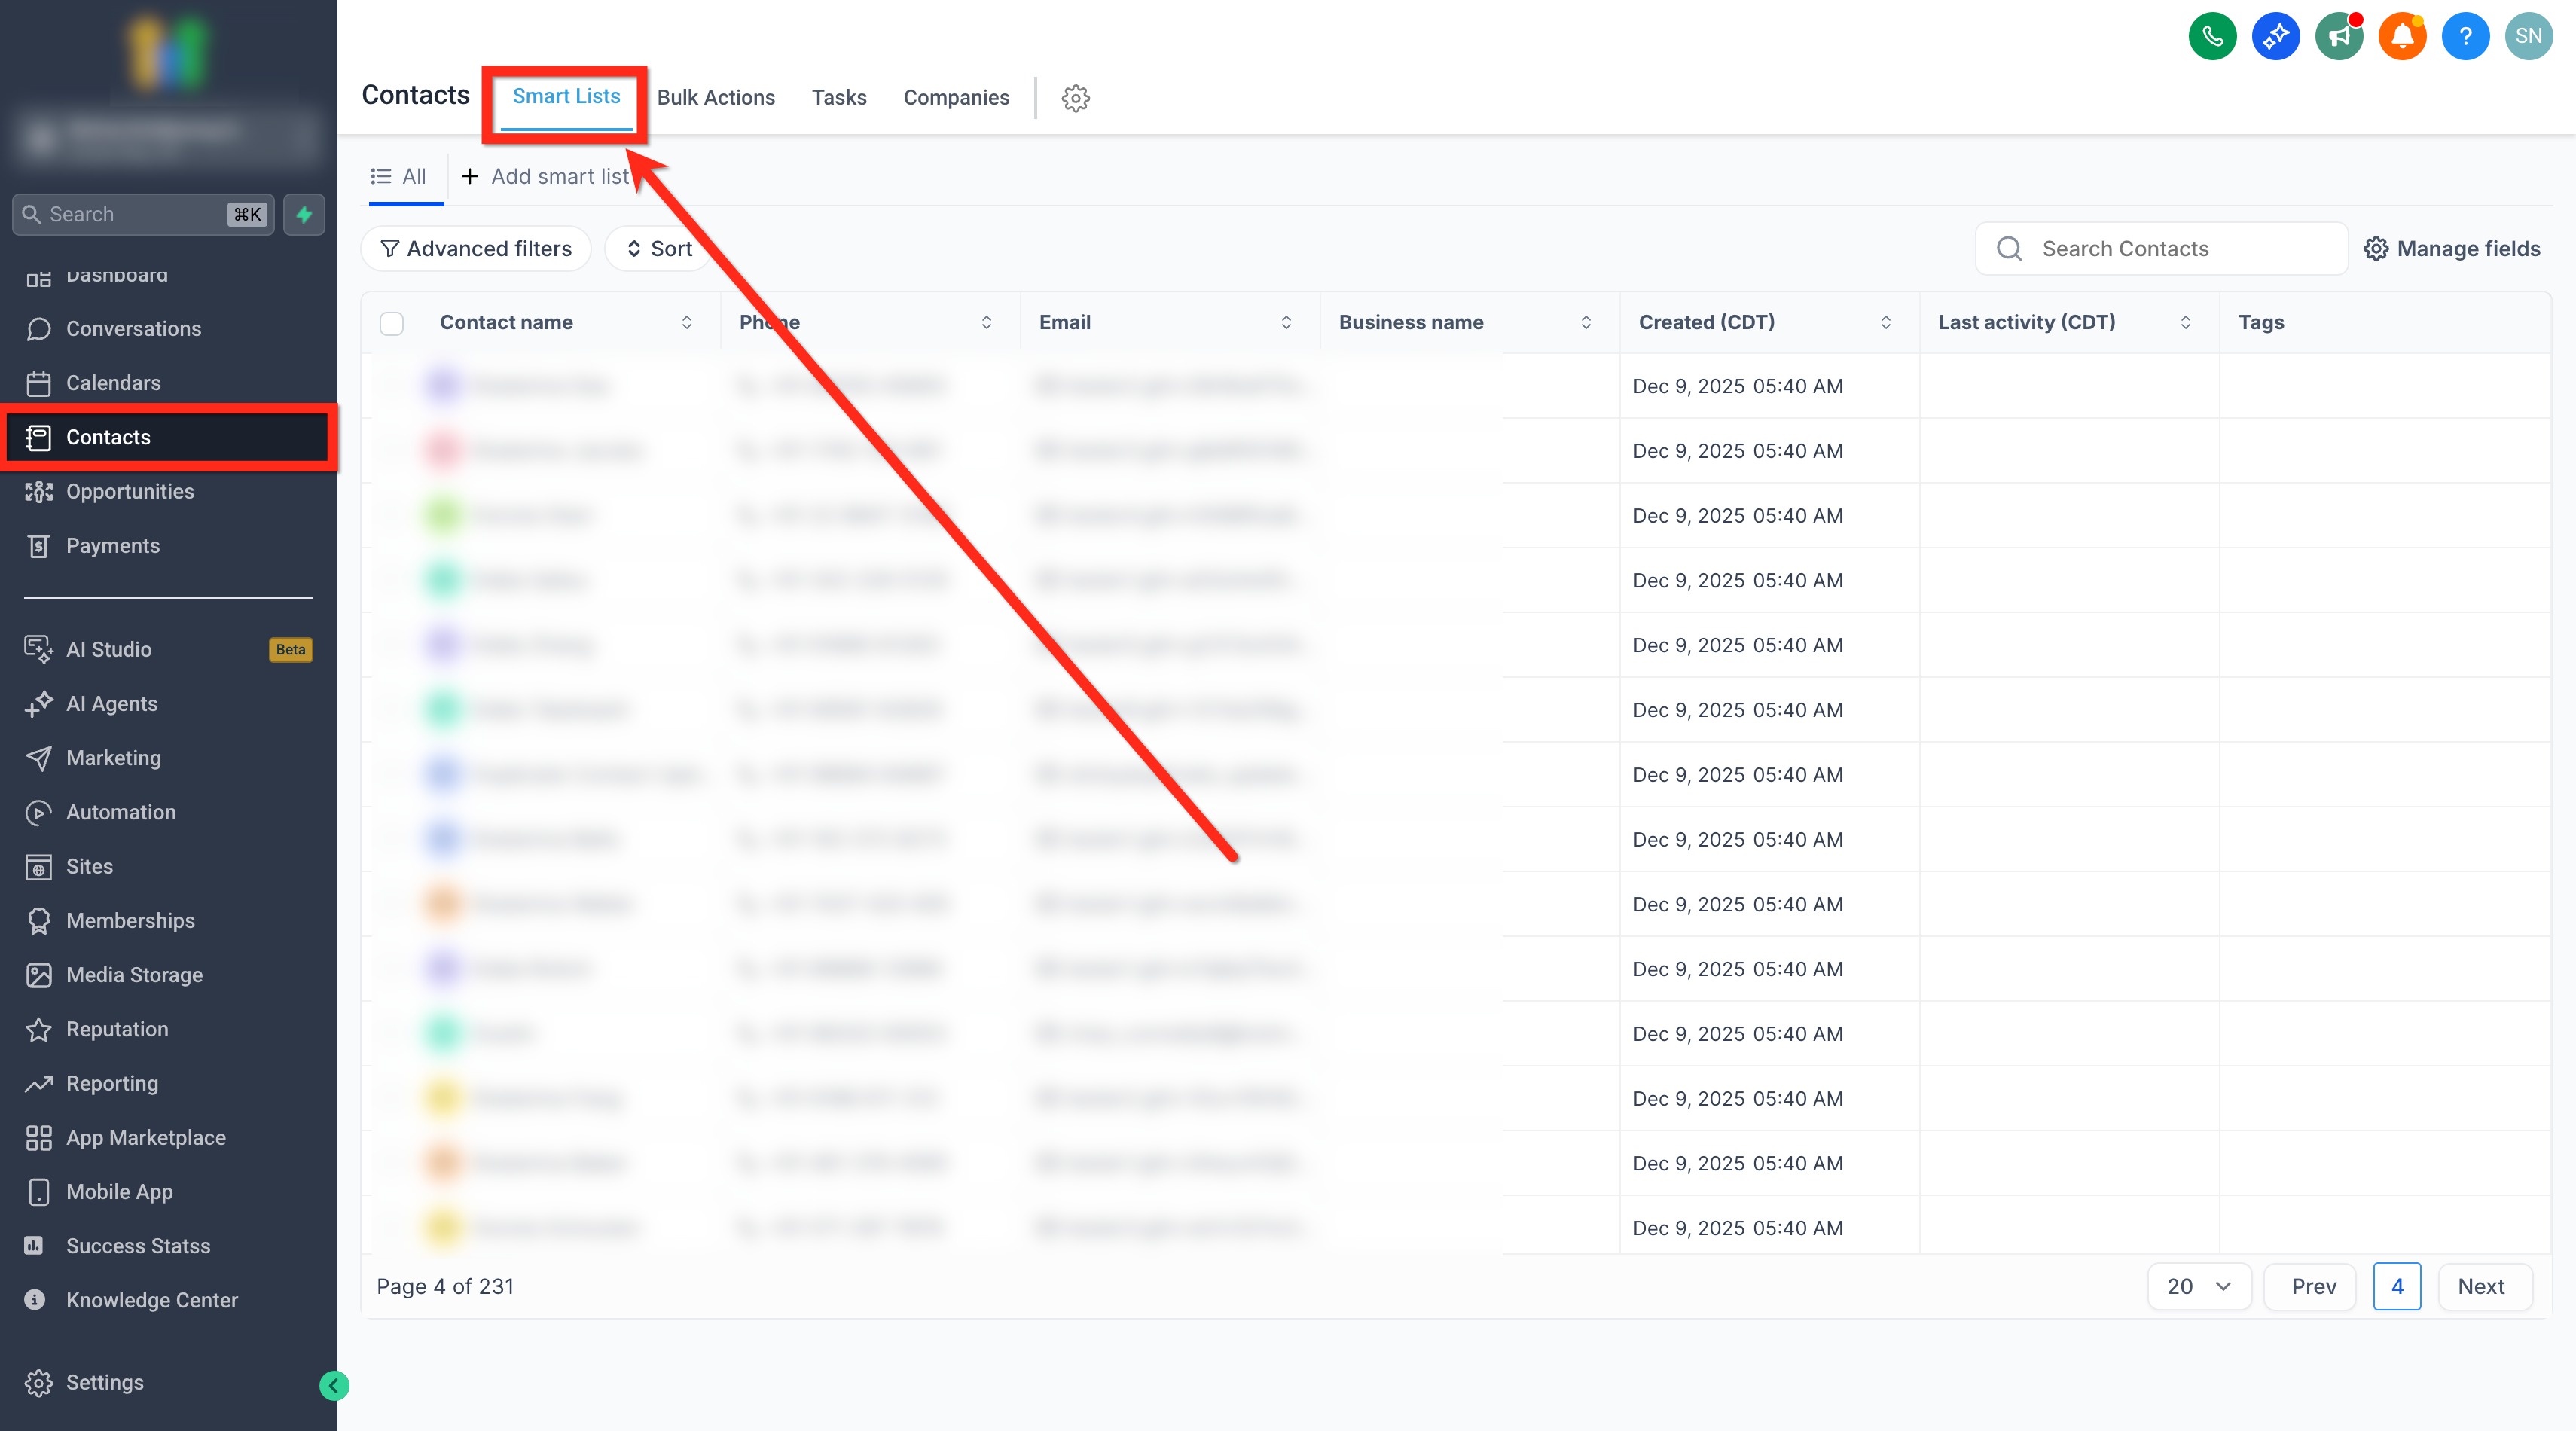
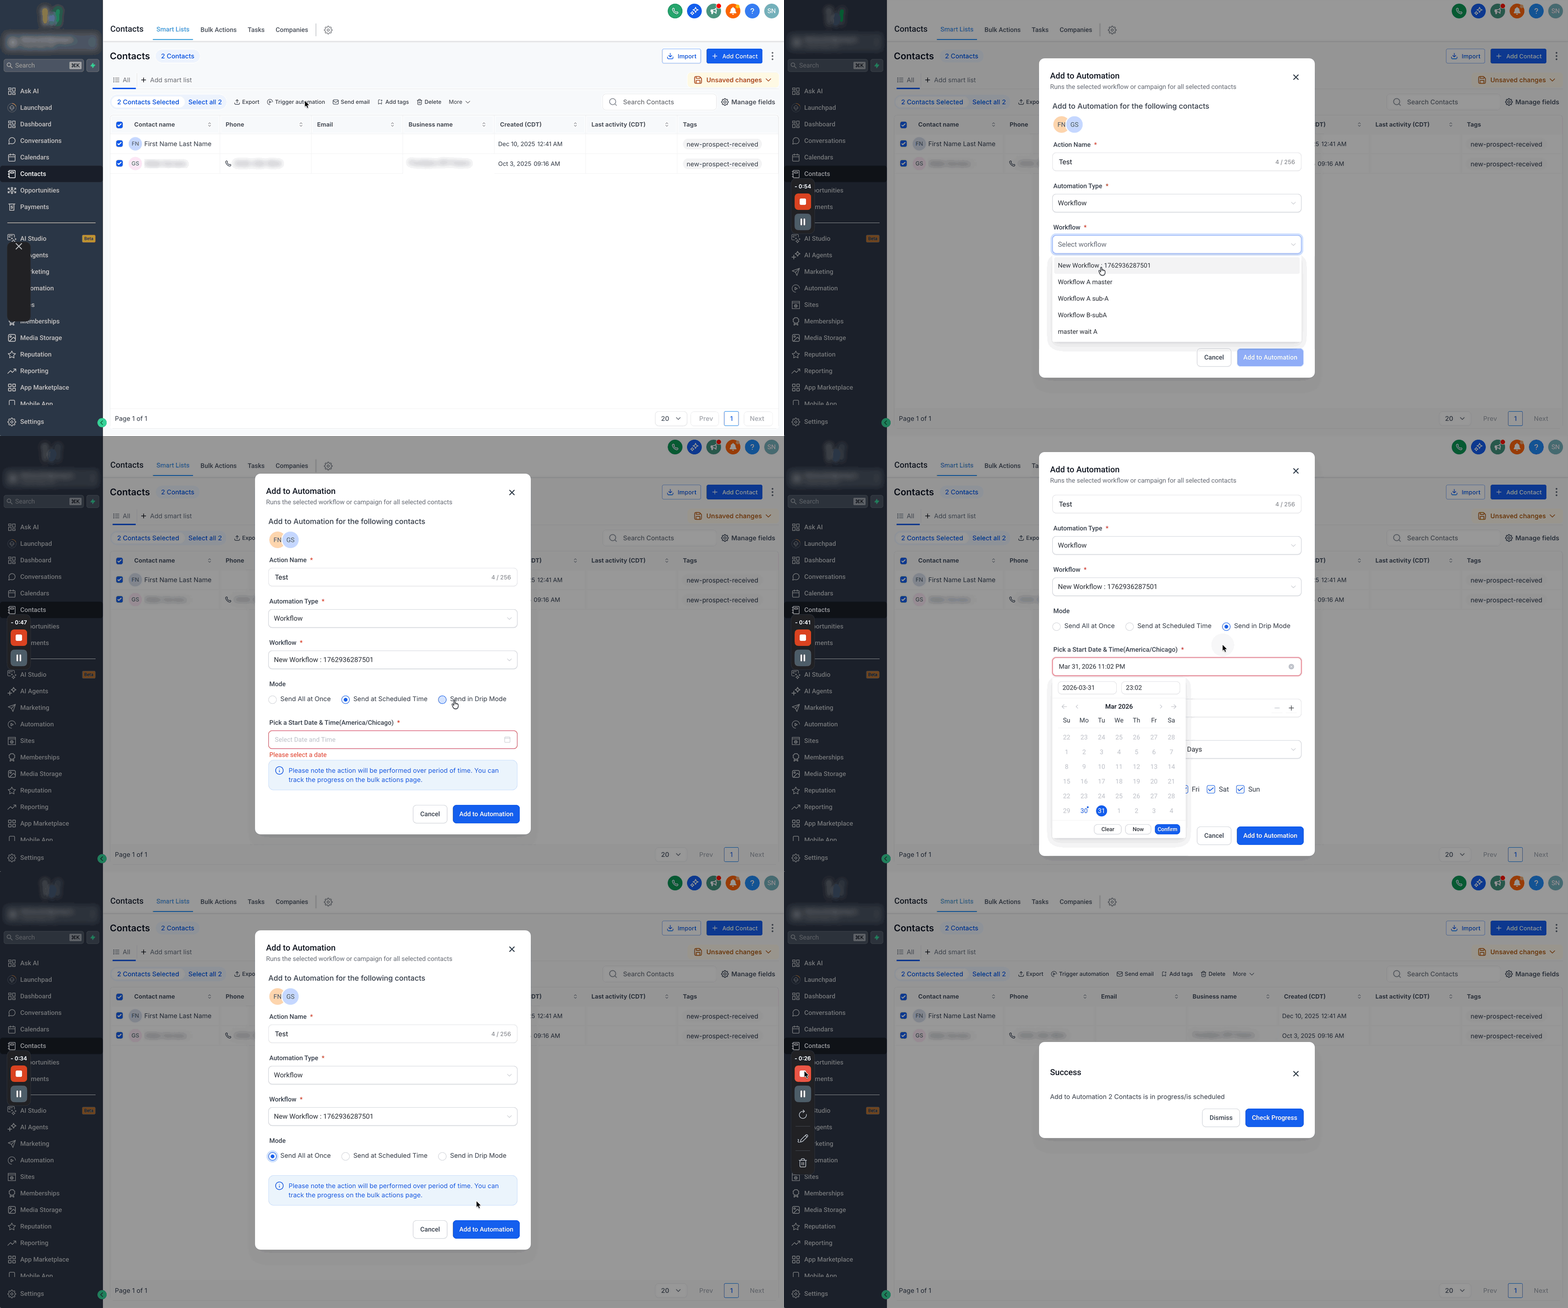
The Add to Automation tool lives on the Contacts page. After filtering contacts, the bulk action toolbar offers a Trigger automation button that opens a dialog. In that dialog you define the bulk action name, select Workflow as the automation type, pick the desired workflow, and set the enrollment mode.
Three enrollment modes are available. Send All at Once adds every selected contact right away. Send at Scheduled Time queues the entire group for a single future date and time. Send in Drip Mode distributes contacts into batches, letting you specify batch size and interval. The action appears on the Bulk Actions page where status, timestamps, and statistics are displayed.
03How businesses use bulk adding contacts to a workflow
- Digital marketing agency. The agency filters contacts by a campaign tag, selects all of them, and uses Add to Automation to enroll the segment into a newly published email workflow. They choose the scheduled mode to align the start with the client’s launch date.
- Real estate brokerage. Agents filter contacts by a property interest field, select the list, and trigger automation in drip mode. The system enrolls a set number of contacts each day, preventing the workflow from overwhelming inboxes.
- Software SaaS startup. The product team saves a Smart List of users who have not logged in for 30 days. They open the list, select all contacts, and add them to a re engagement workflow using the immediate mode.
04The numbers and rules that matter
- Send in Drip Mode requires Pick a Start Date & Time, Number of Messages per Batch, Repeat after (Days, Hours, or Minutes).
05Before you start
- The workflow you want to use must be published.
- Contacts must exist in the account and be viewable in Smart Lists.
06How to set up and use bulk adding contacts to a workflow in HighLevel
Add contacts to a workflow in bulk
- Navigate to Contacts > Smart Lists.
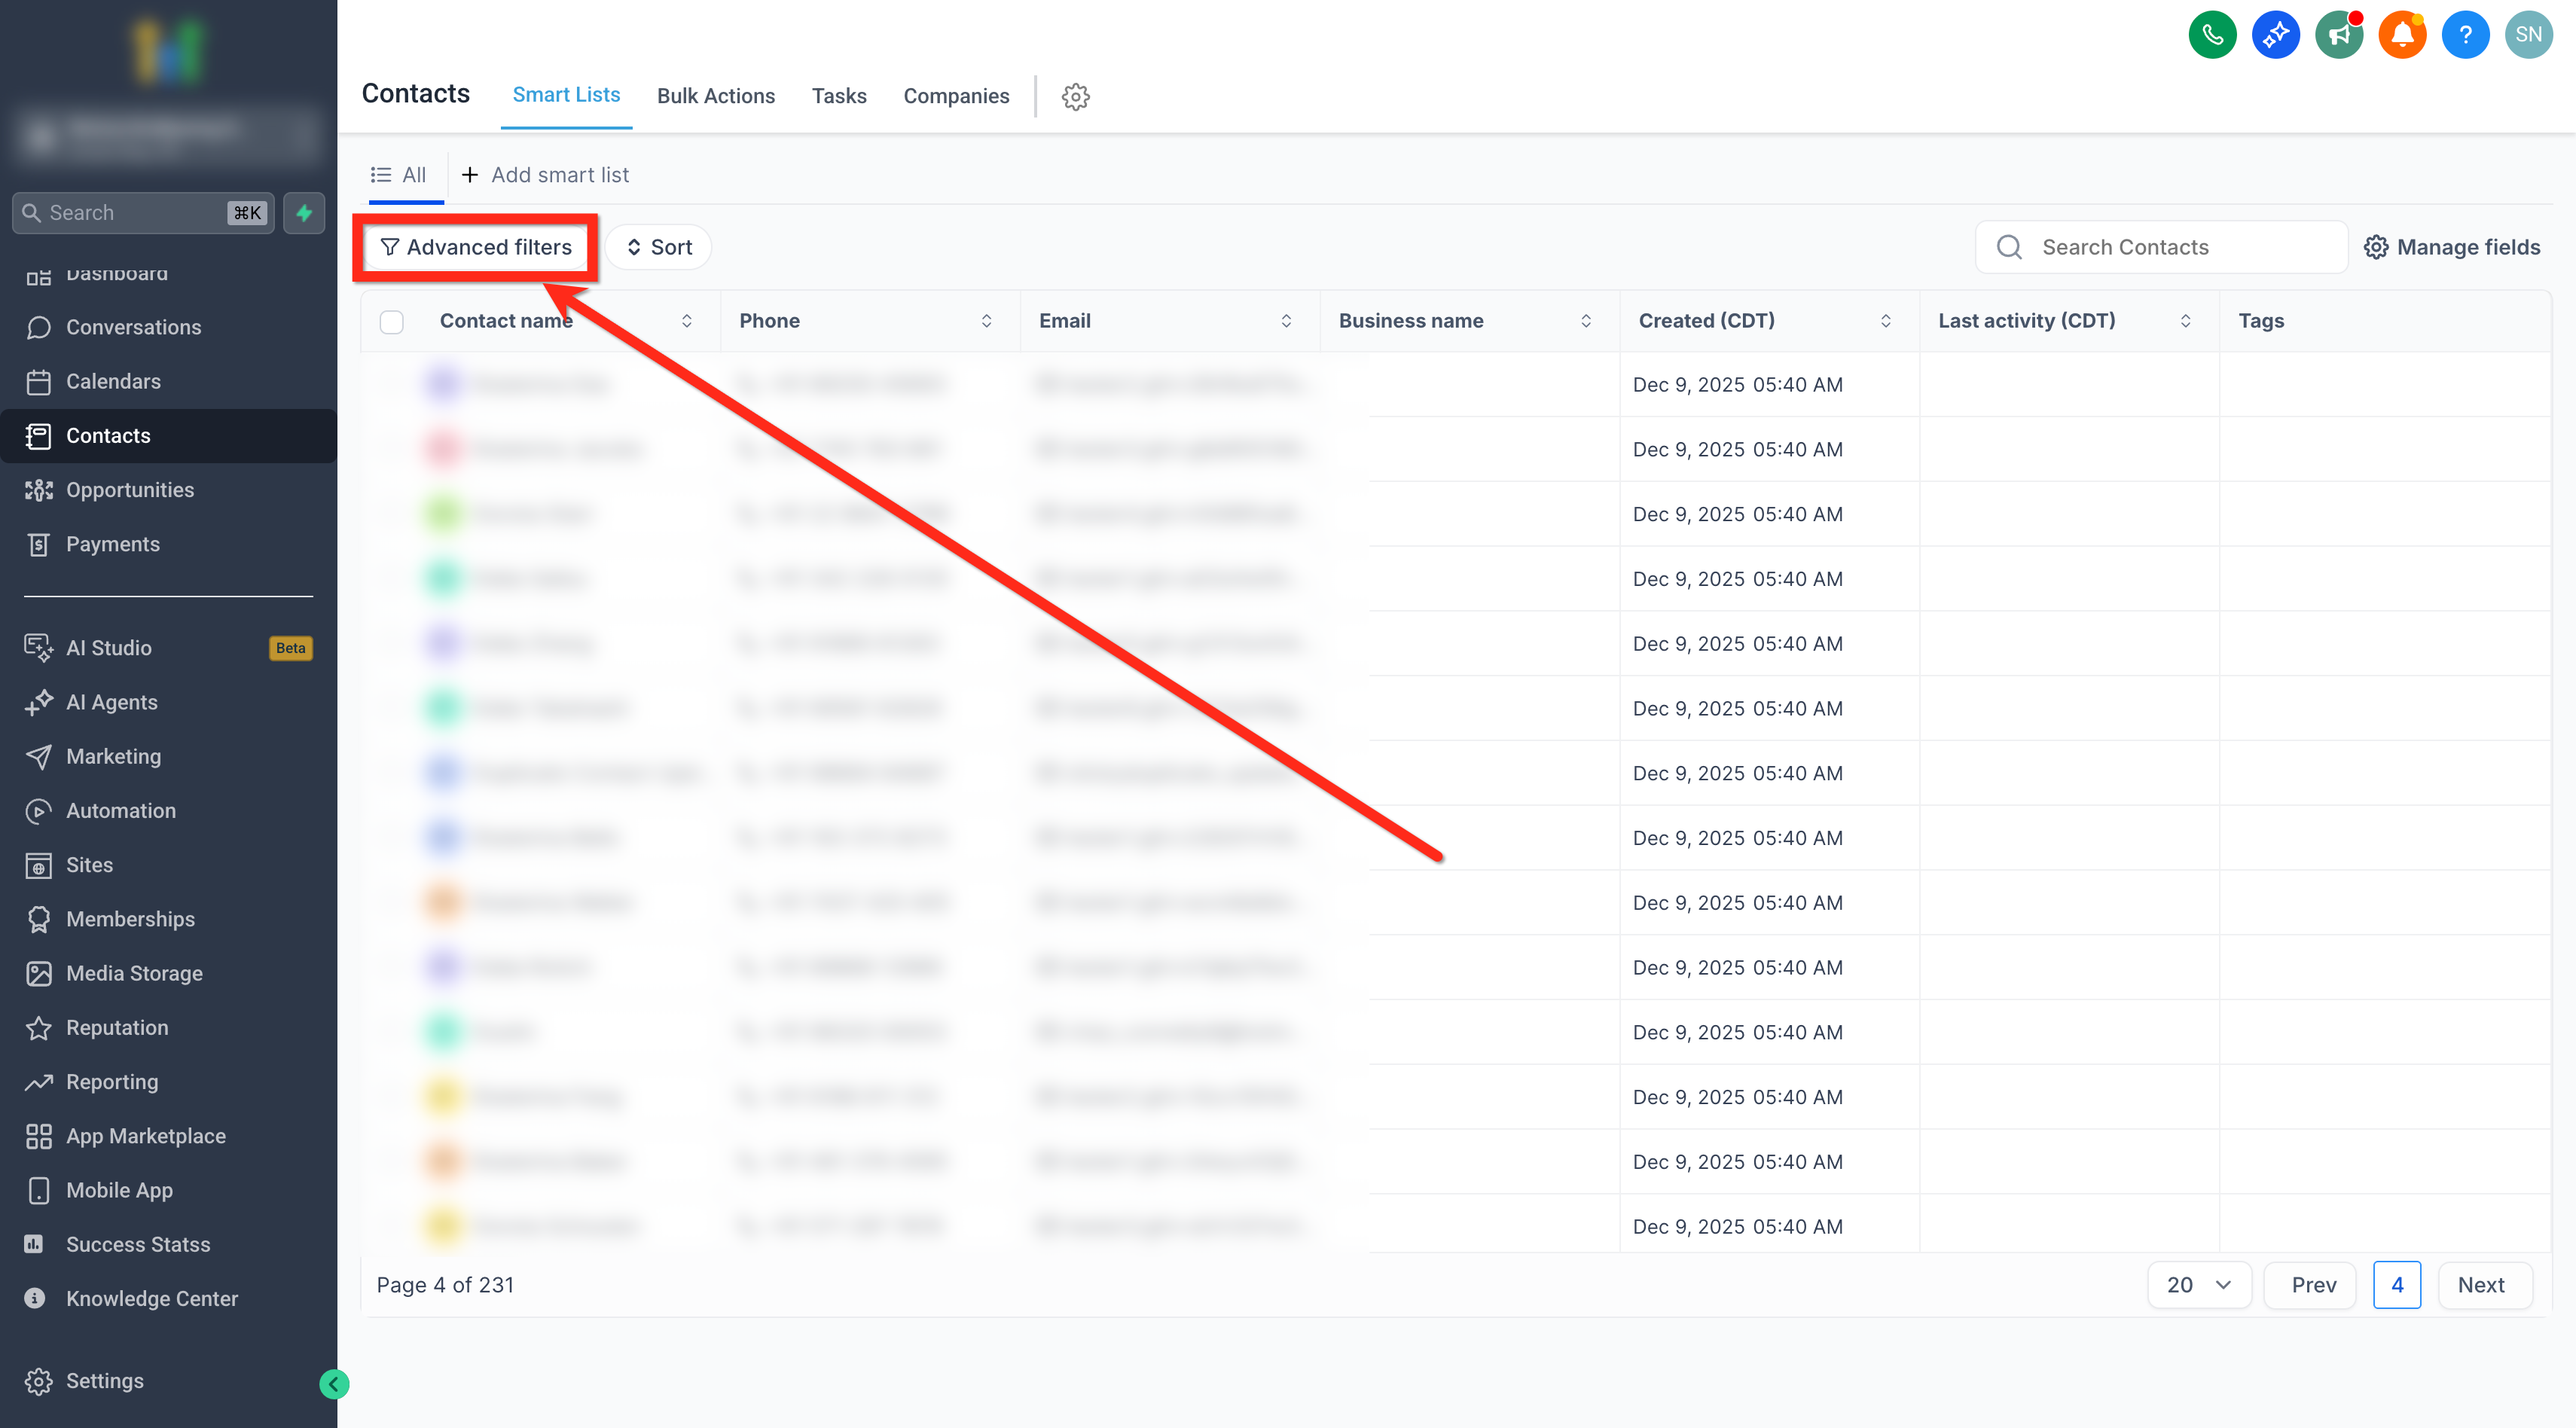
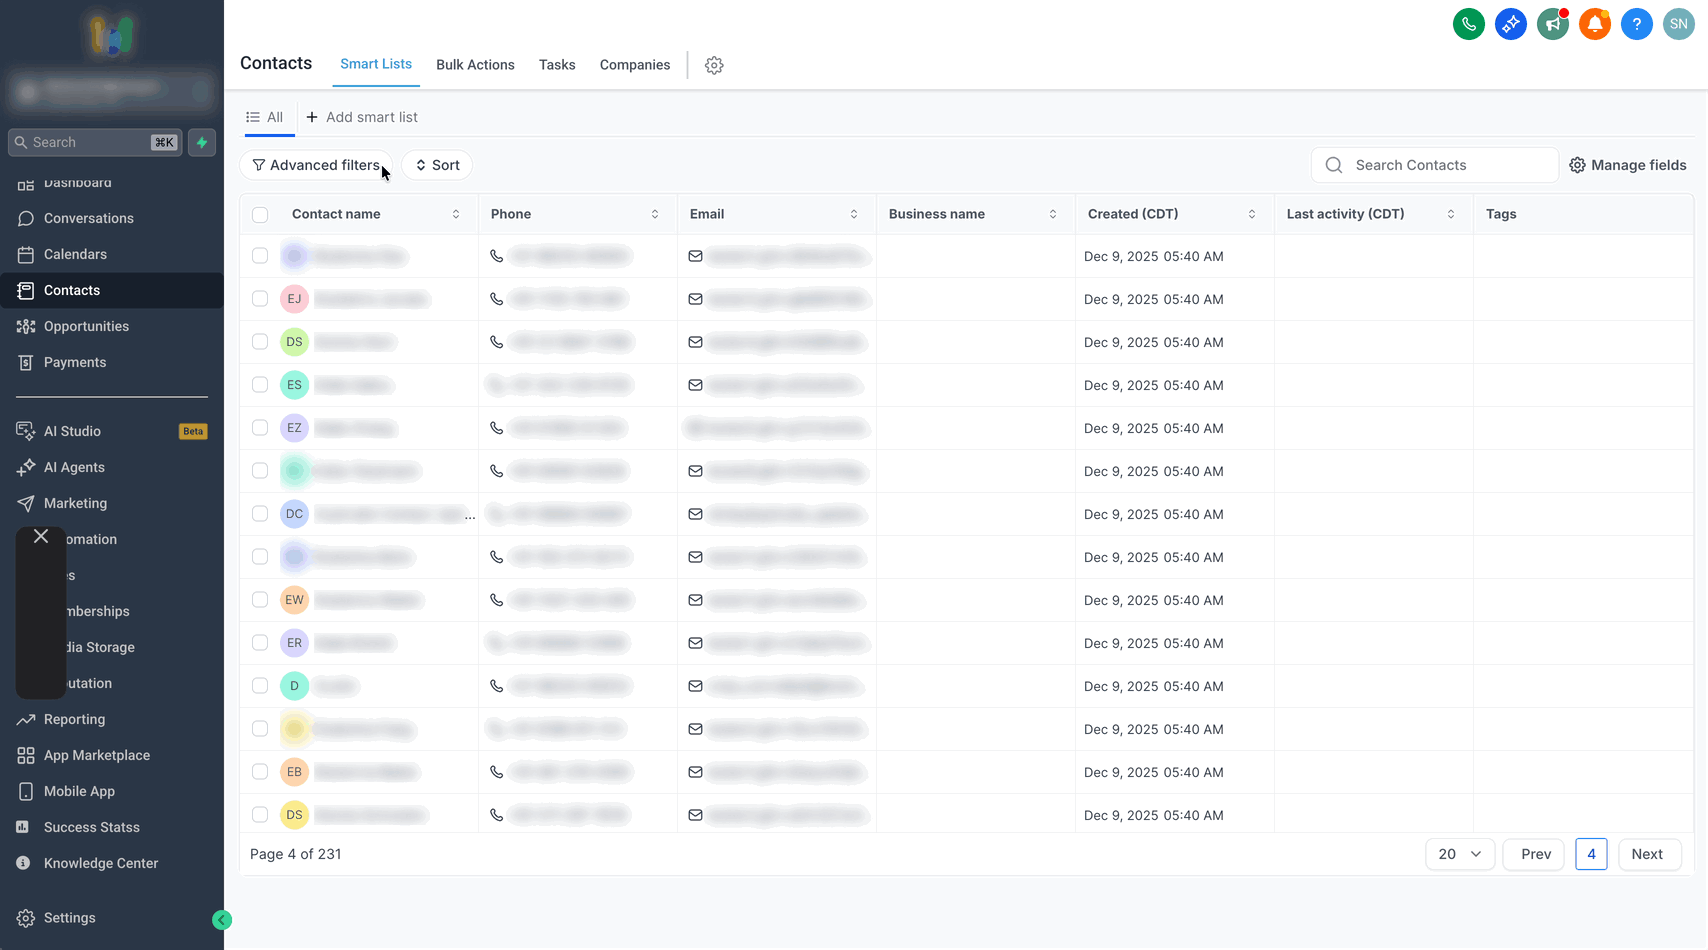
- Open the Advanced Filters panel.
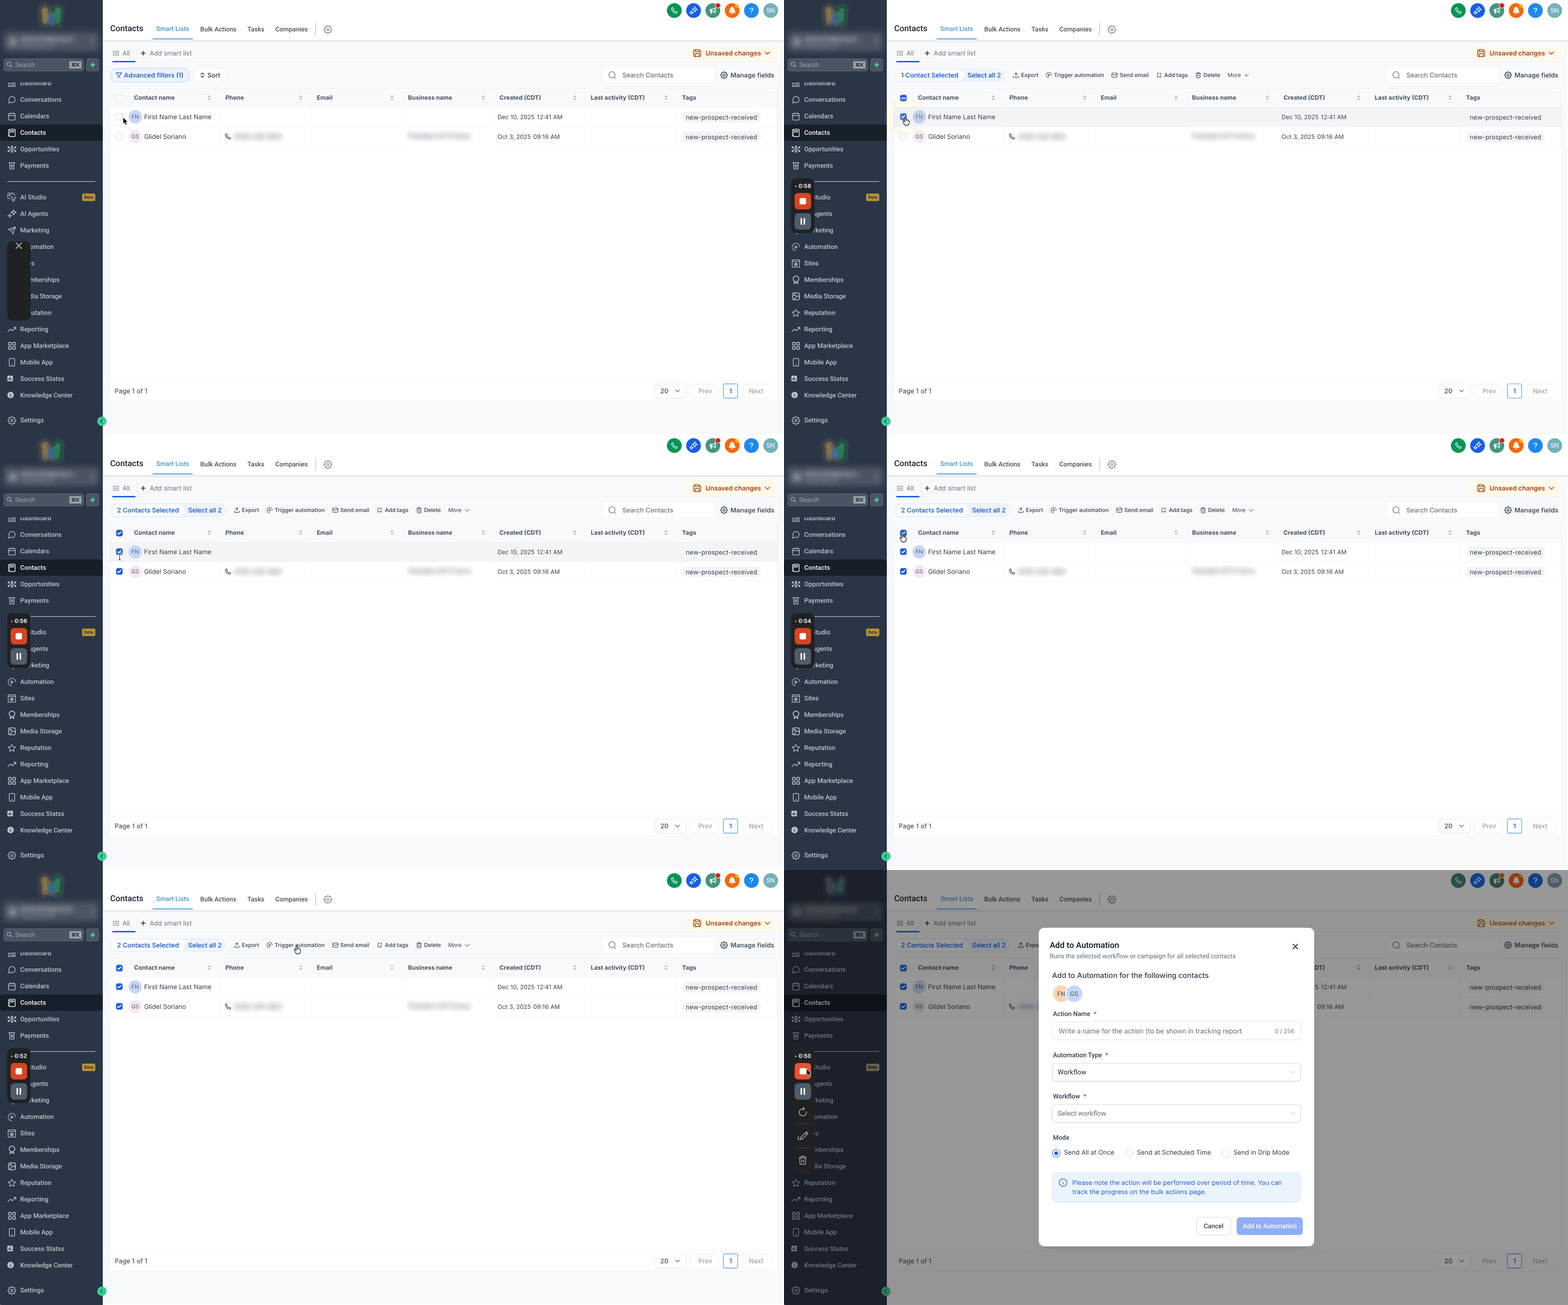
- Search for Tag in the filter search bar and select it.
- Set the operator to Is, choose the tag value, and click Apply.
- Select individual contacts with the checkboxes or click Select all.
- Click Trigger automation on the bulk action toolbar.
- In the Add to Automation dialog, enter an Action Name, set Automation Type to Workflow, choose the workflow, select a Mode, and click Add to Automation.
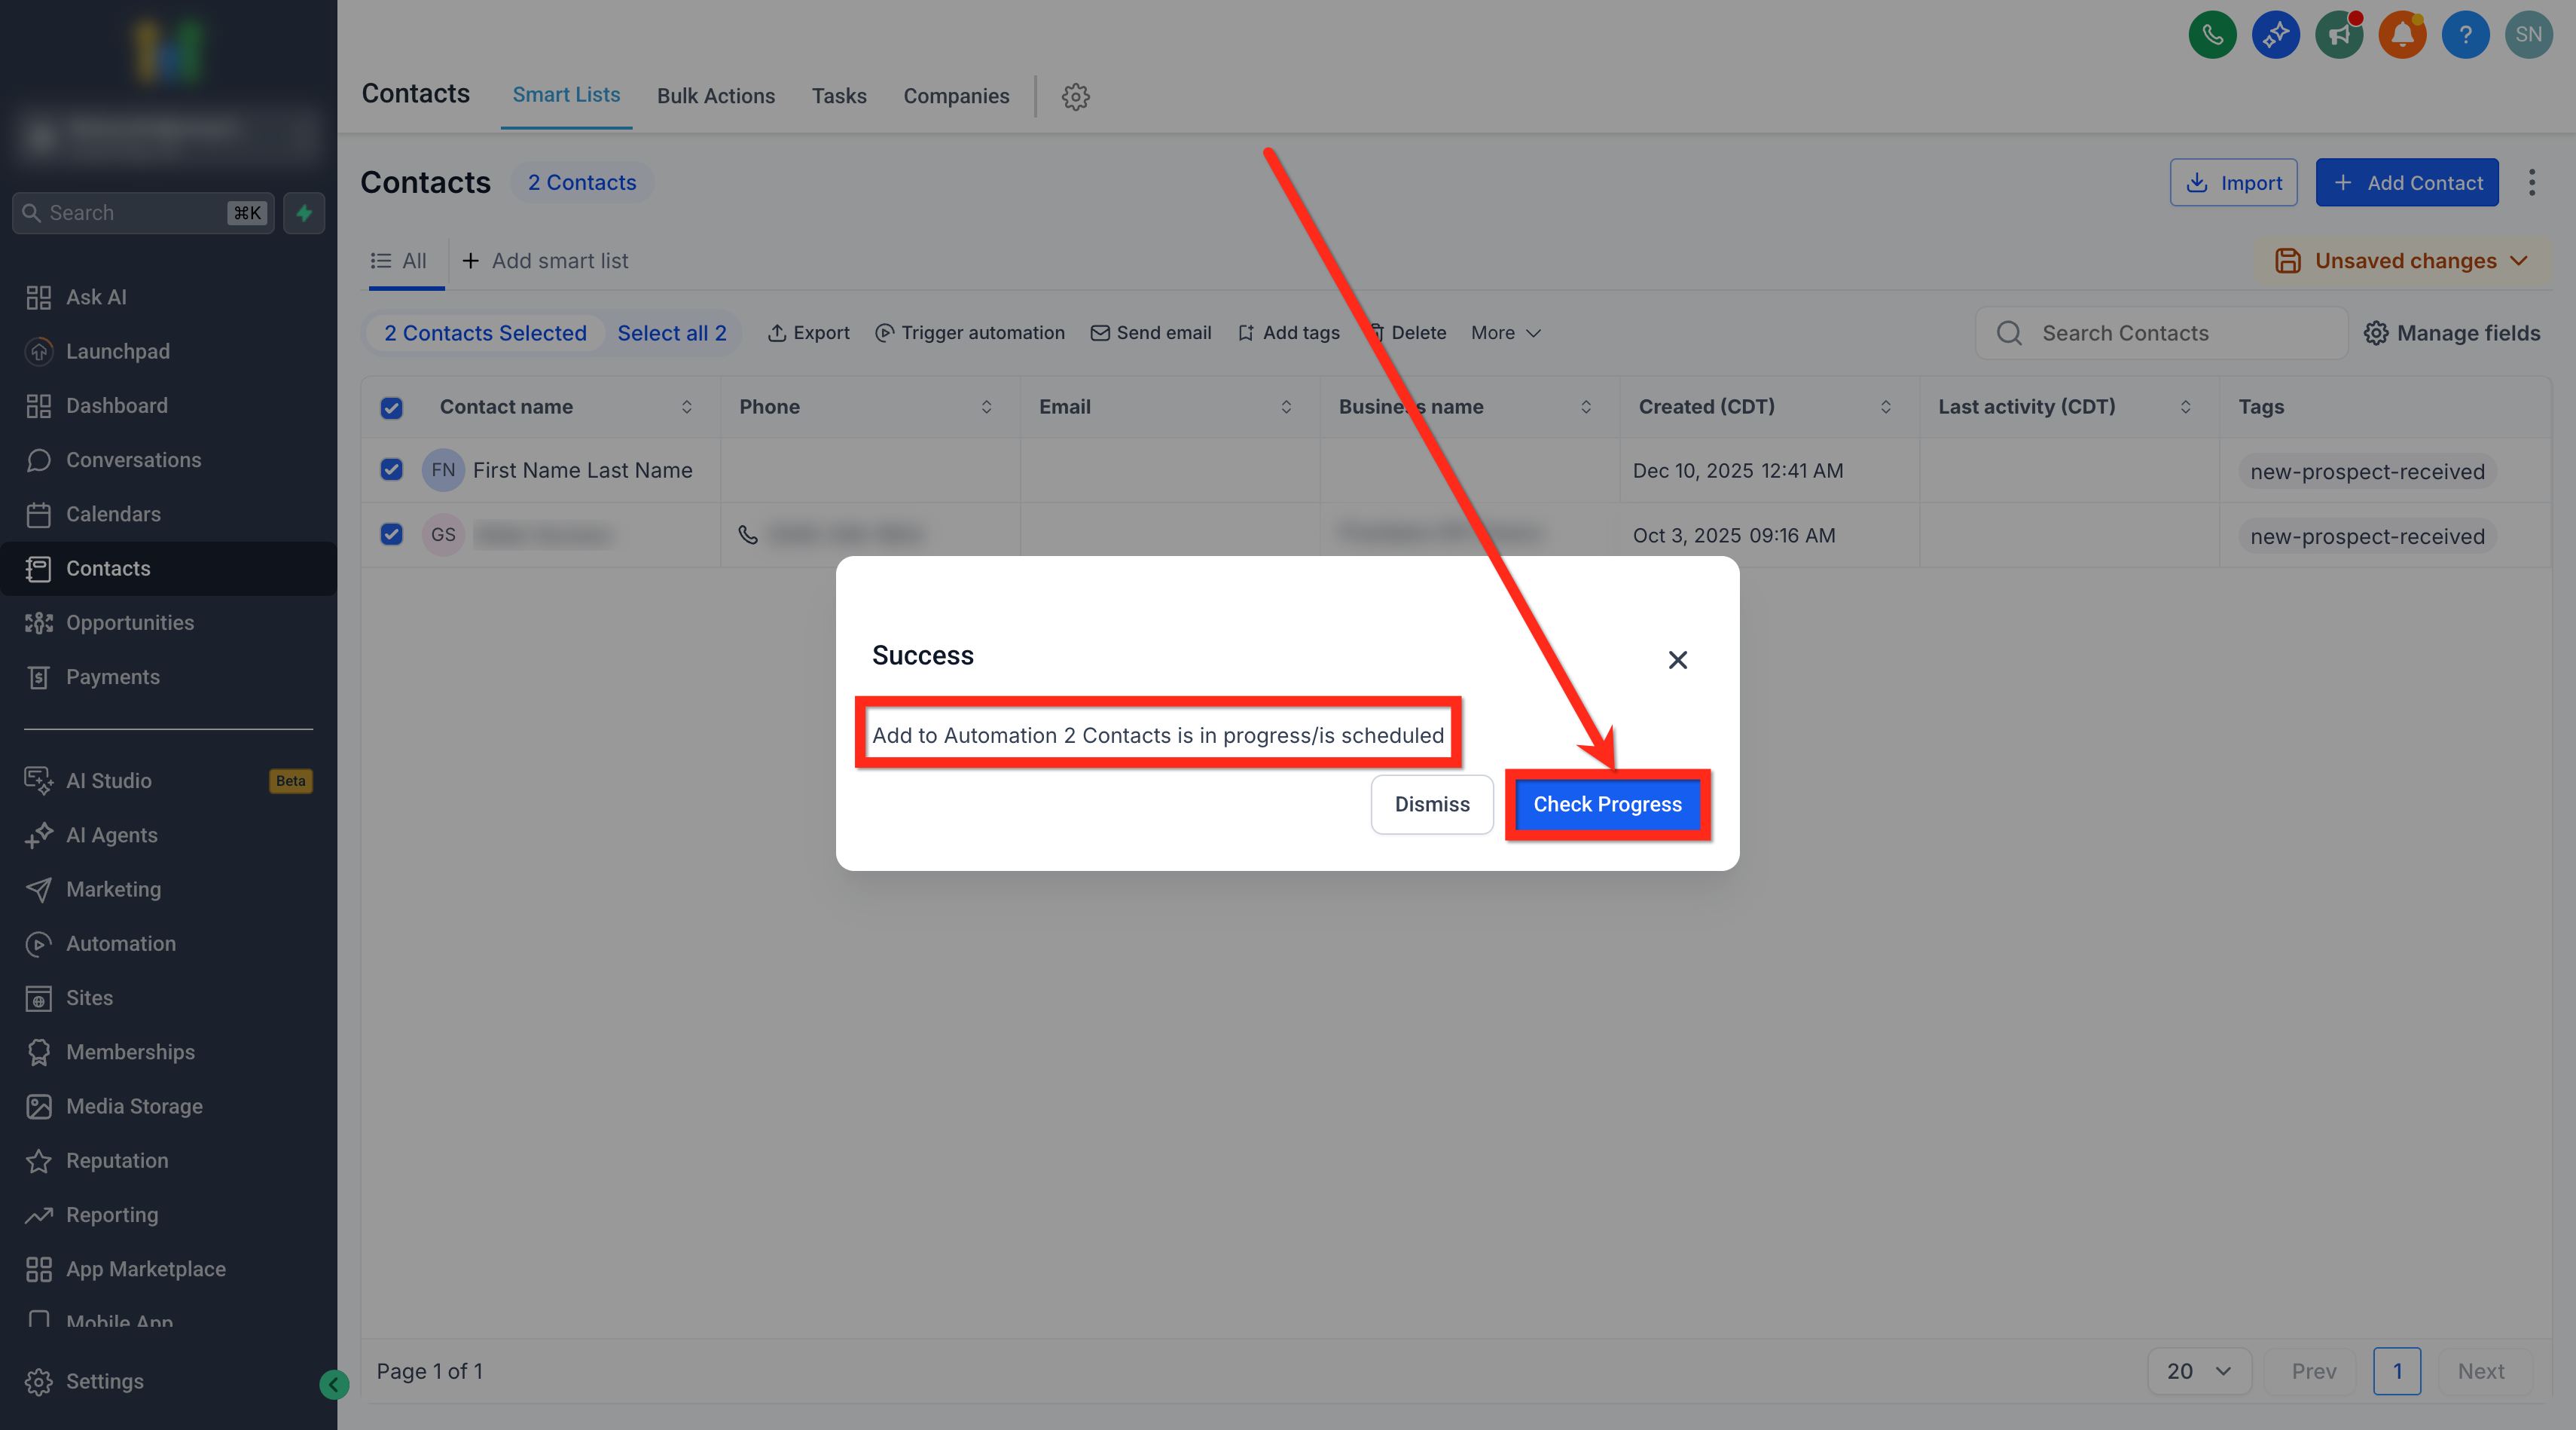
- Click Check Progress to view the Bulk Actions page or Dismiss to return to Contacts.
07What it looks like in HighLevel
08Settings that matter
- Action Name. Provides a label for the bulk action that appears in the tracking report.
- Automation Type. Specifies that the bulk action will enroll contacts into a workflow.
- Workflow. Selects which published workflow the contacts will be added to.
- Mode. Controls when and how contacts are enrolled: right away, at a scheduled time, or in drip batches.
- Pick a Start Date & Time. Sets the exact moment enrollment begins for scheduled or drip modes.
- Number of Messages per Batch. Defines how many contacts are added in each drip batch.
- Repeat after. Determines the interval between drip batches using days, hours, or minutes.
09Things to know before you rely on it
- Only published workflows appear in the workflow selector.
- The default mode is Send All at Once when no mode is chosen.
- All timestamps on the Bulk Actions page reflect the account’s timezone.
10How it connects to the rest of HighLevel
- Bulk actions for contacts & smartlists Bulk actions overview
- HighLevel guide to bulk importing contacts and opportunities via CSV CSV import guide
- HighLevel pricing and plans Pricing details
Michael's take

When you need to move a hundred contacts into a new nurture series, bulk adding can simplify the process and lets you line up the start time with a launch. The drip mode is handy when you have a massive list and want to avoid flooding the workflow or your audience.
If you only have a handful of contacts or the timing isn’t critical, the feature adds complexity you may not need. In that case enrolling contacts via the normal triggers or a quick manual add might be simpler.