
01Who this is for
- Founders who need to move an existing client list into the platform quickly, because bulk upload saves manual entry.
- Marketing teams that run campaigns and require a clean, segmented contact list ready for smart lists and workflows.
- Sales managers who want to load new opportunities together with contacts to seed the pipeline in one step.
02Importing contacts, explained
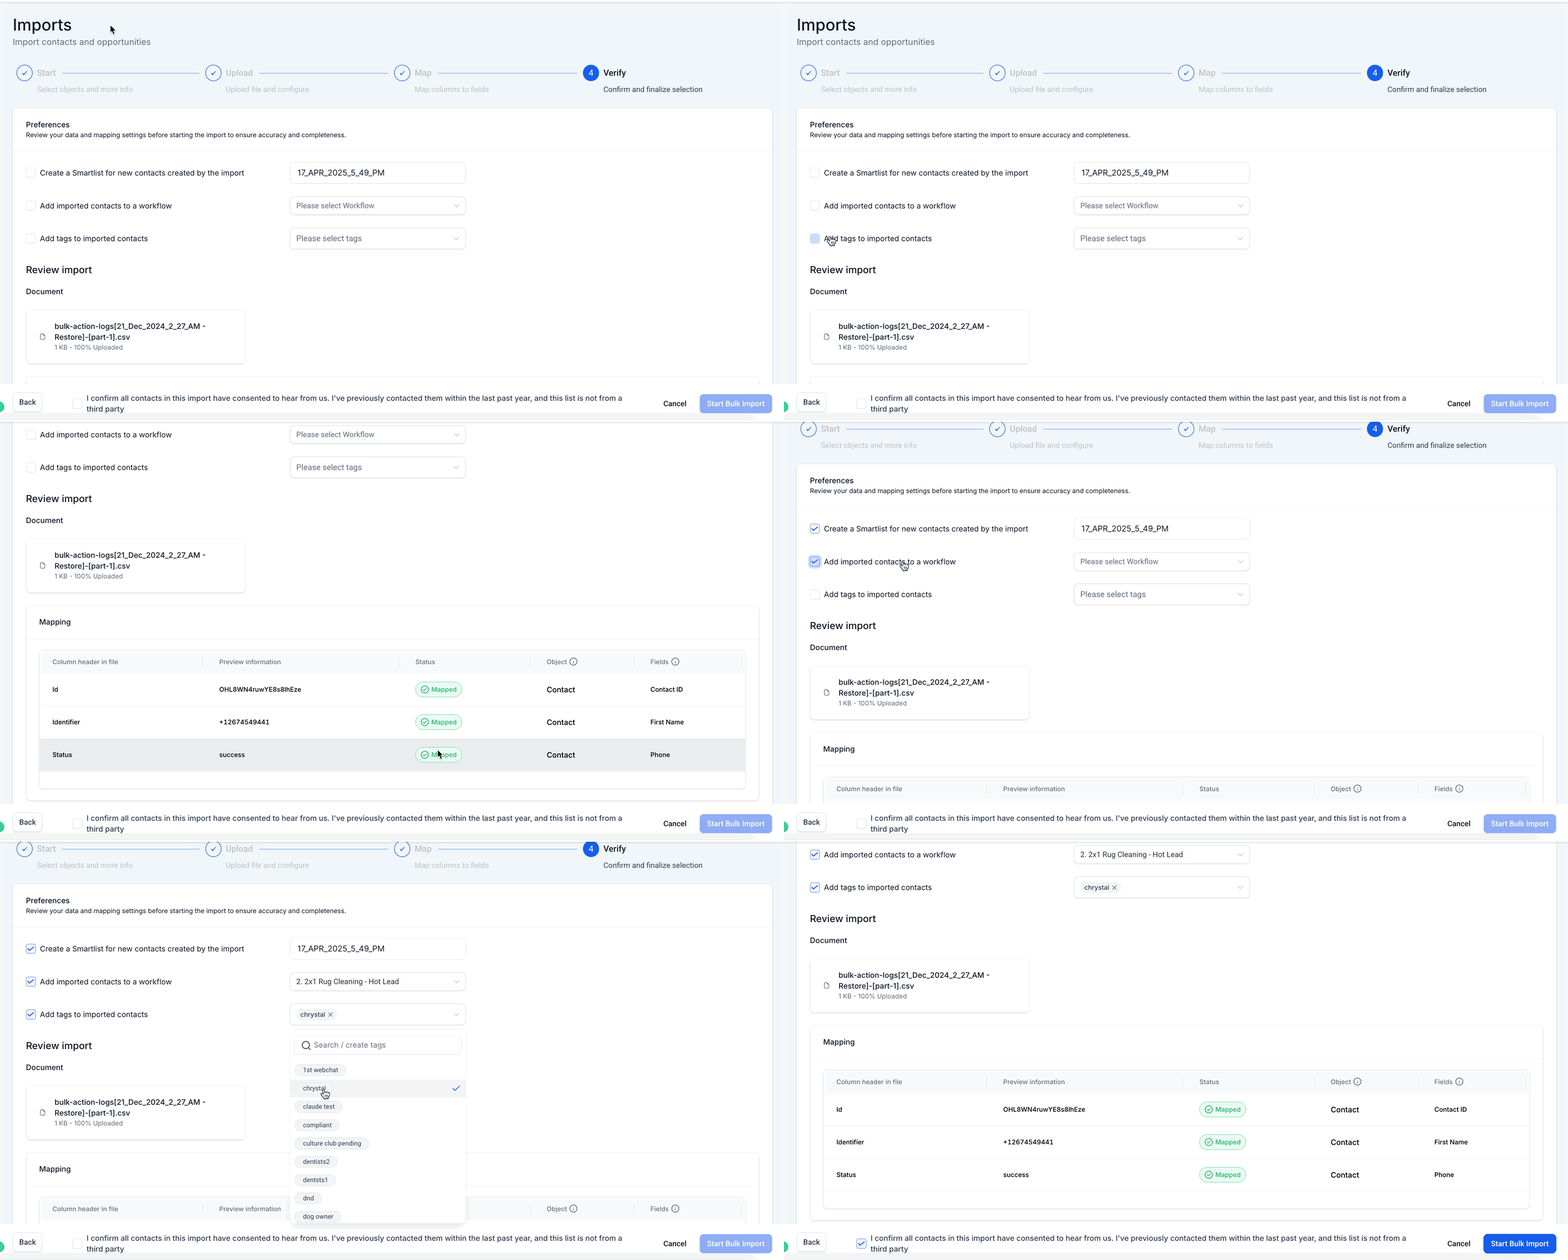
The CSV import tool accepts only .csv files. After the file is uploaded you map each column to a standard or custom field in HighLevel. The system checks for existing records based on Contact ID, then Email, then Phone, so updates do not create duplicates. You can also choose to import opportunities at the same time, linking each row to a pipeline stage.
The feature lives on the Contacts page. From there you start the import, select contacts only or contacts plus opportunities, upload the file, set mapping preferences and launch the process. Progress and any errors appear on the Bulk Actions page where you can download an error log.
03How businesses use importing contacts
- Real estate agency. Upload a CSV of property owners and leads, map the address and phone fields, and tag the imported contacts as "new lead". The agency can then add the contacts to a nurturing workflow that runs daily.
- Dental practice. Import a list of patients with appointment dates, map the date field, and create a smart list that shows upcoming appointments. The practice can add the contacts to a reminder workflow automatically.
- SaaS startup. Load a CSV that contains both user details and trial subscription information, select the option to import contacts and opportunities, and map the subscription columns to opportunity fields. The startup gets leads directly into its sales pipeline.
04The numbers and rules that matter
- File size limit is under 30 MB.
- At least one required field per row: Name, Email, or Phone.
05Before you start
- User must have Admin access.
- CSV file must be under 30 MB, contain a single sheet, and start with a header row.
- At least one required field, name, email or phone, must be present in each row.
06How to set up and use importing contacts in HighLevel
Import contacts using a CSV file
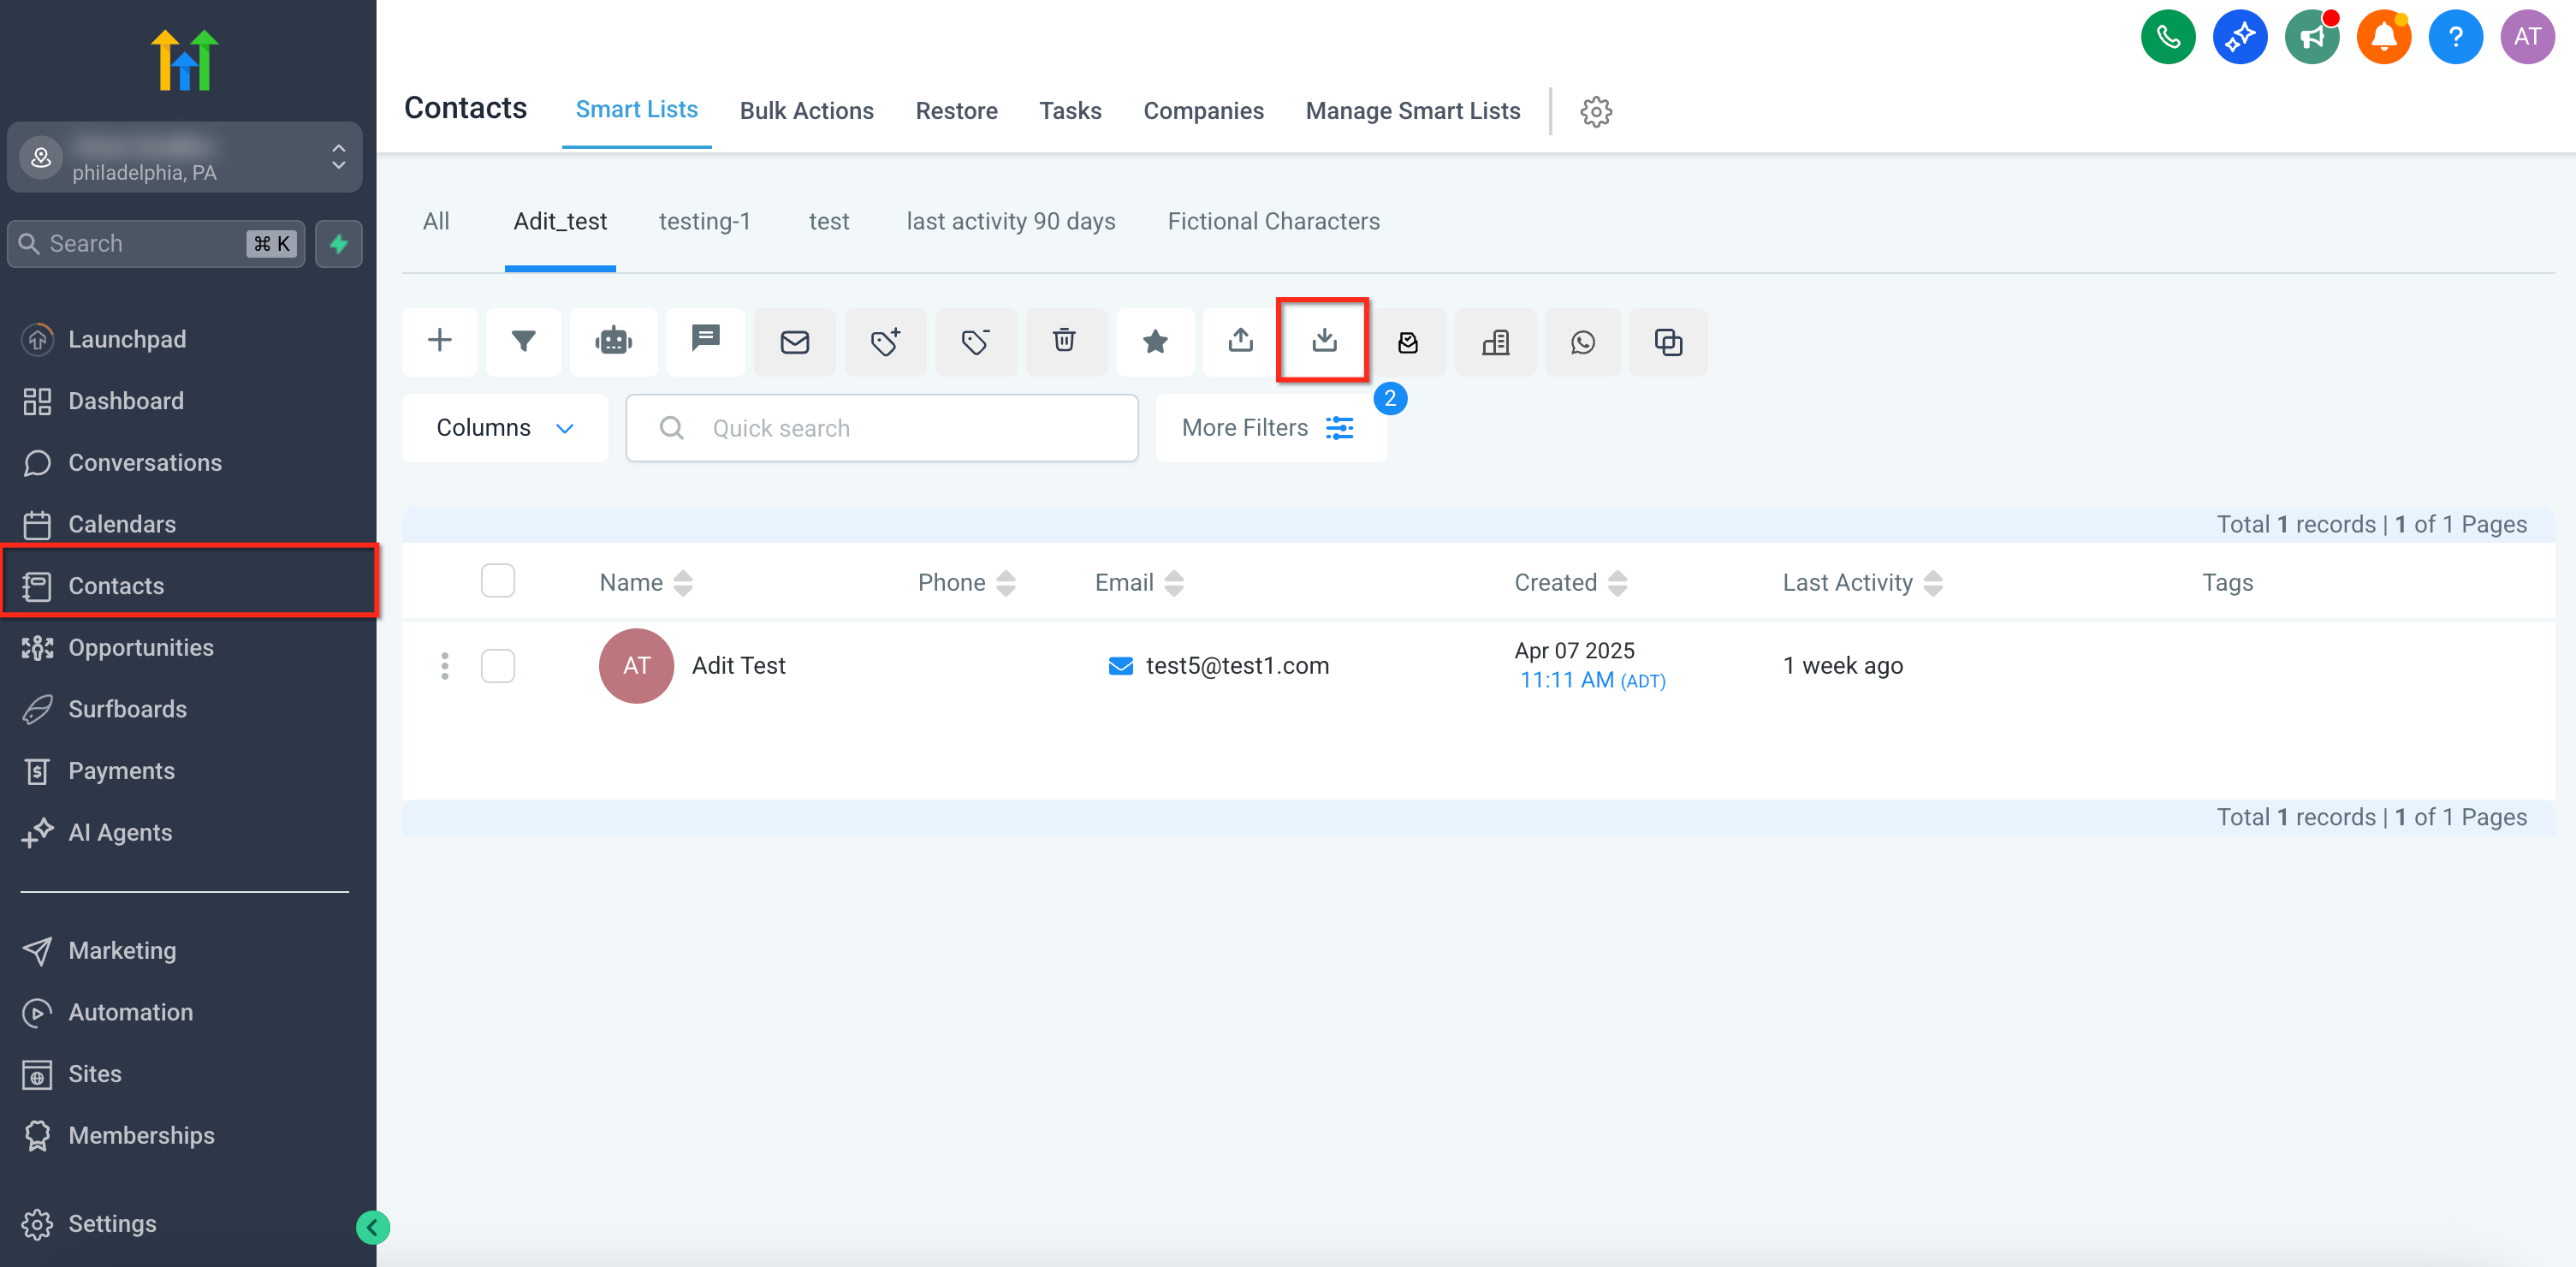
- Navigate to the Contacts tab and click the Import Contacts button.
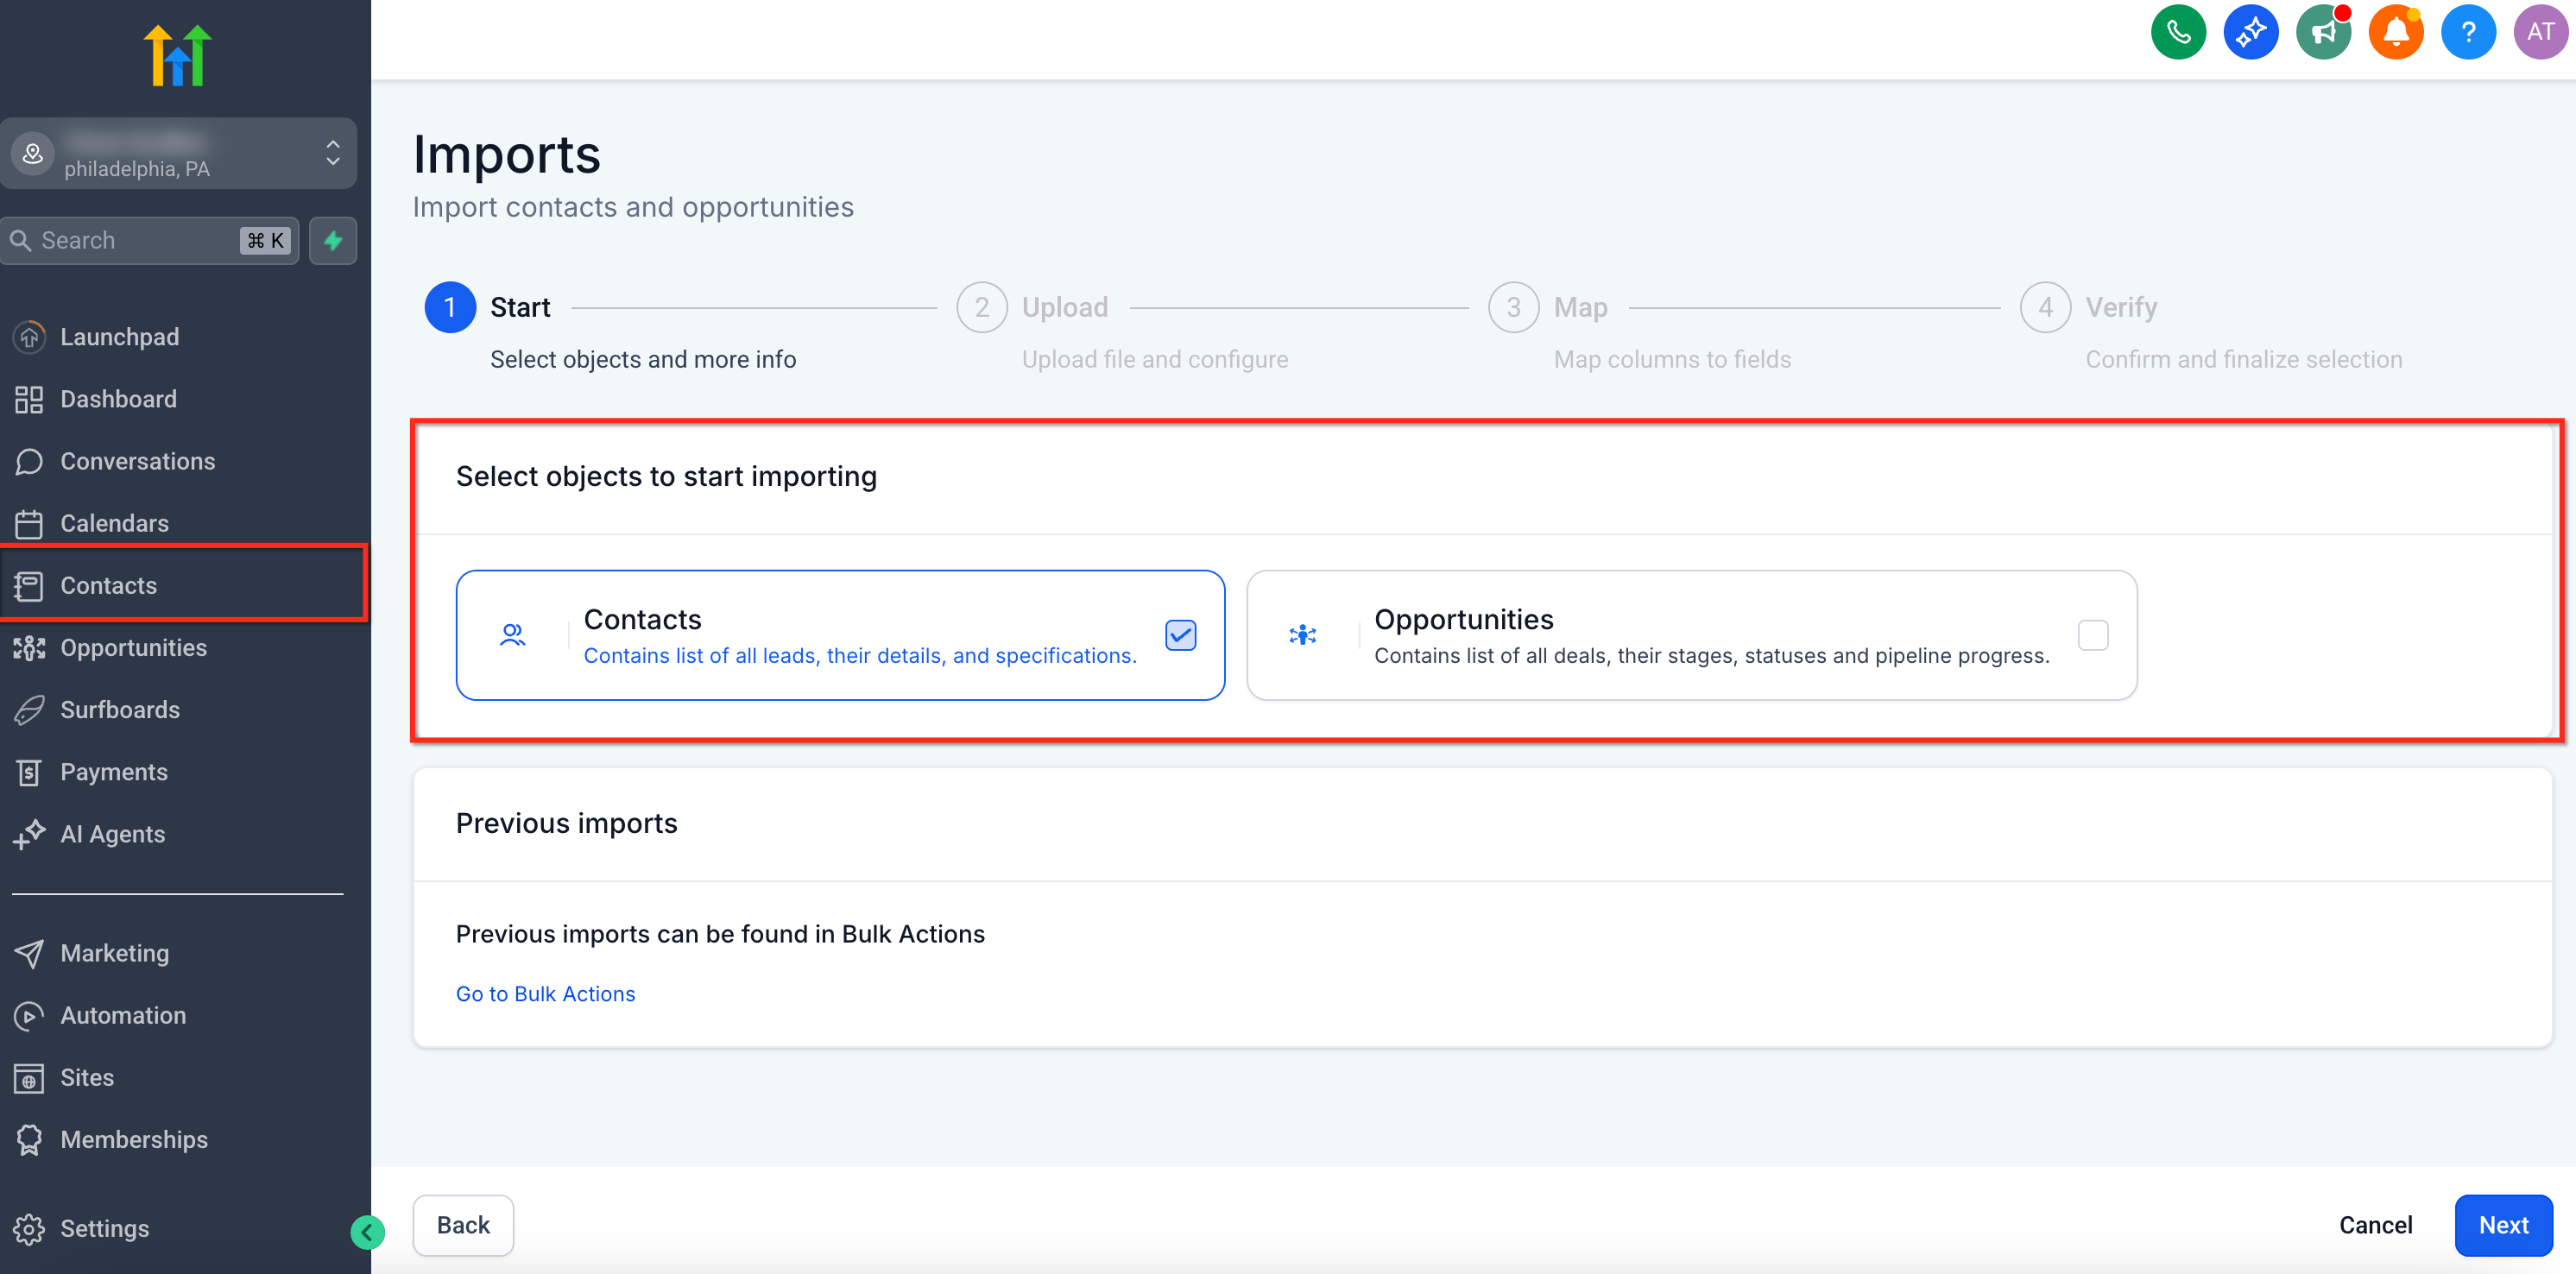
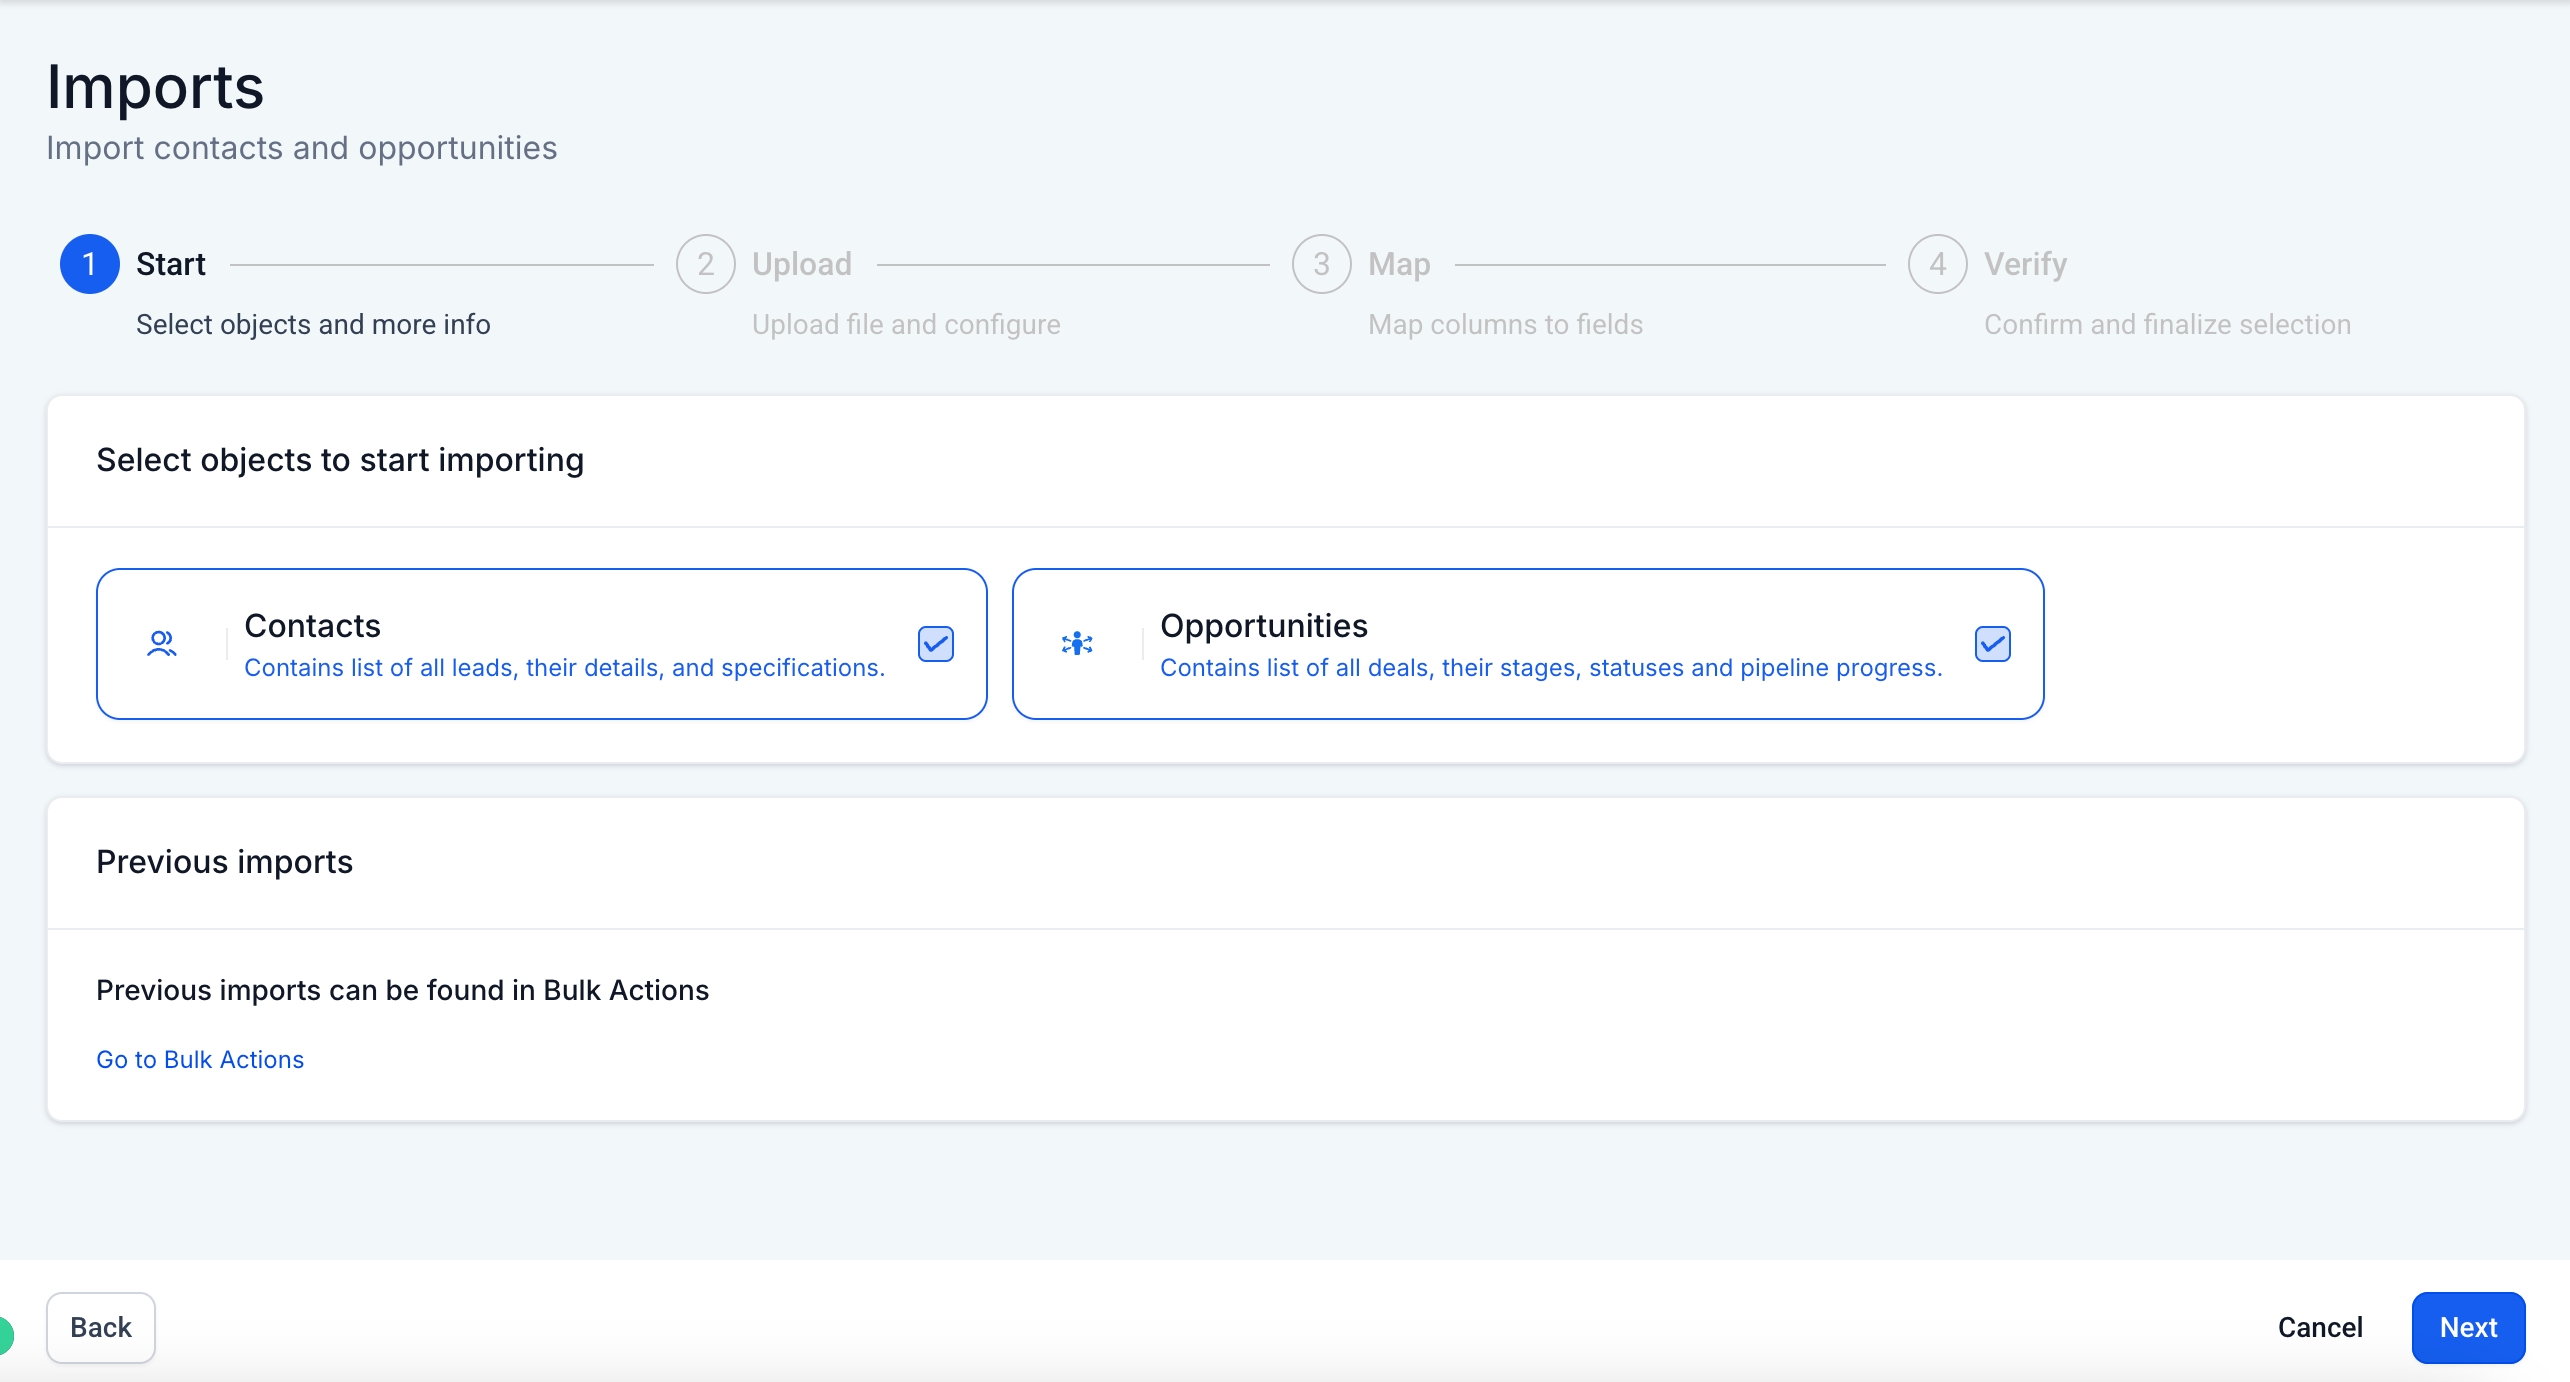
- Choose whether to import only Contacts or both Contacts and Opportunities.
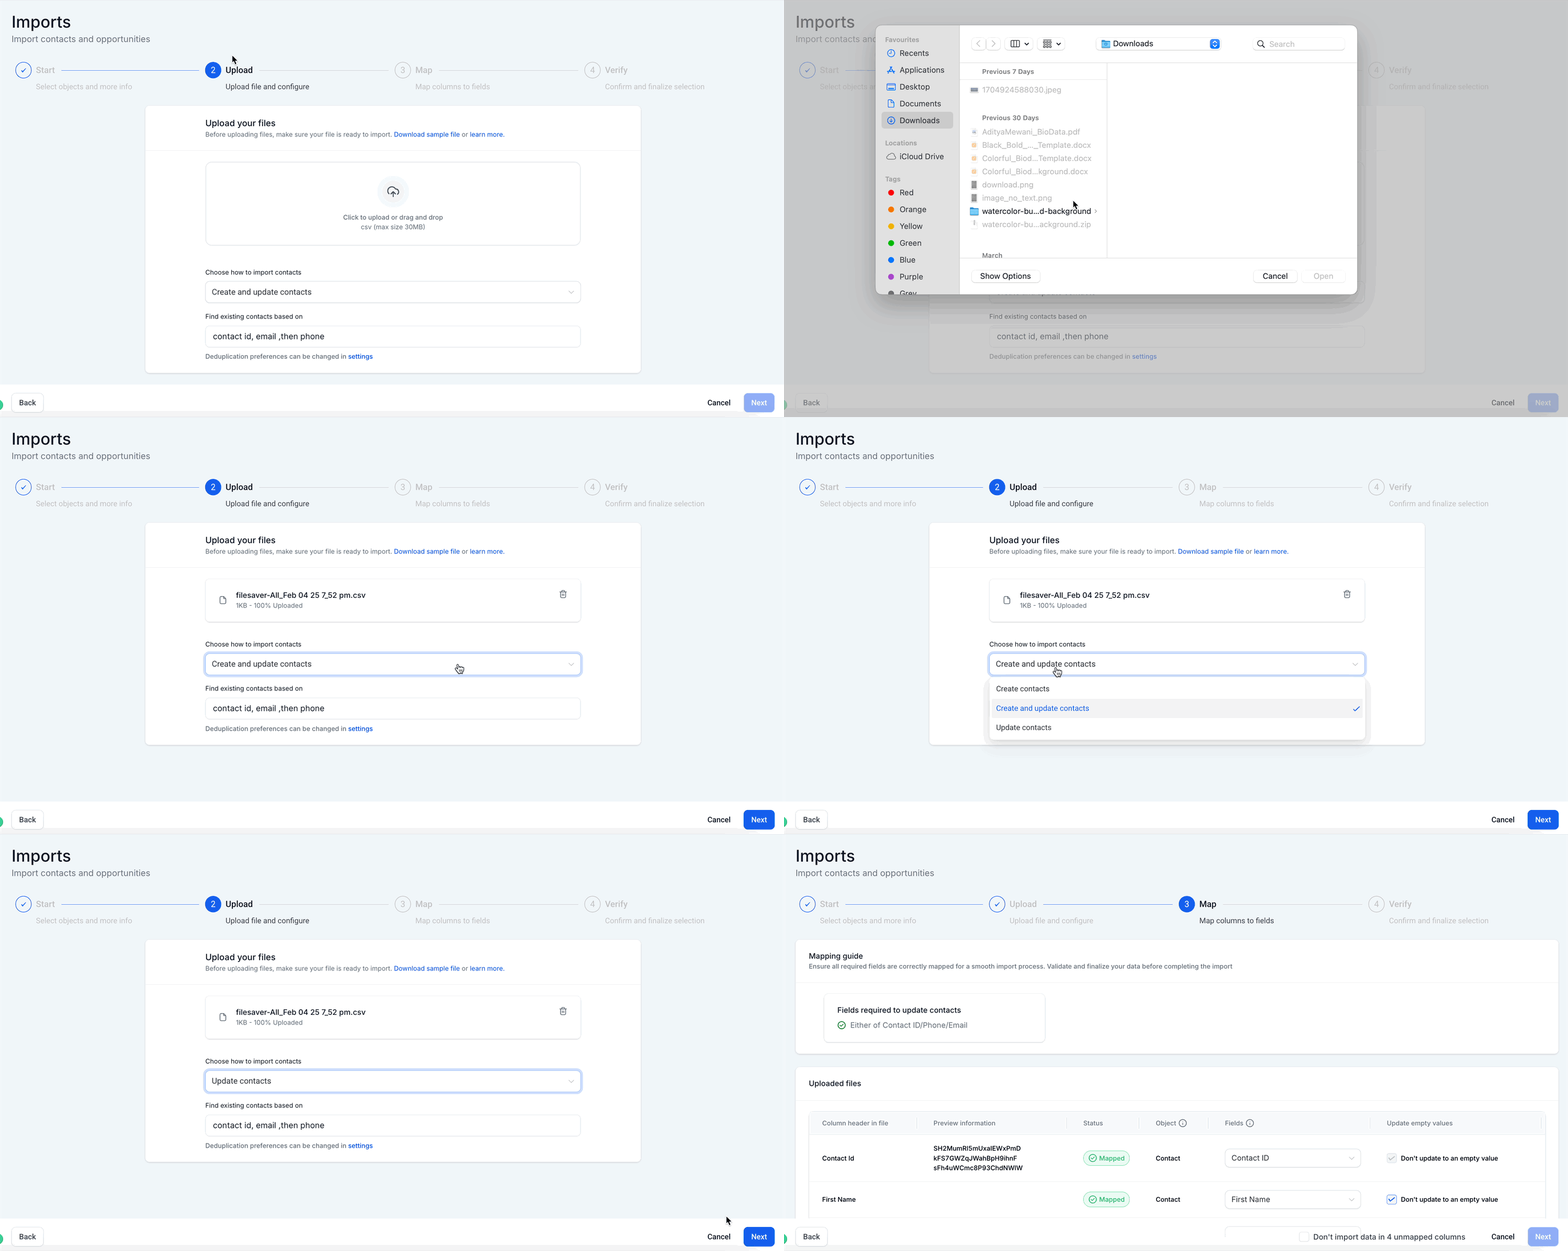
- Press Next, then select the CSV file from your computer and indicate if you are adding new contacts or updating existing ones.
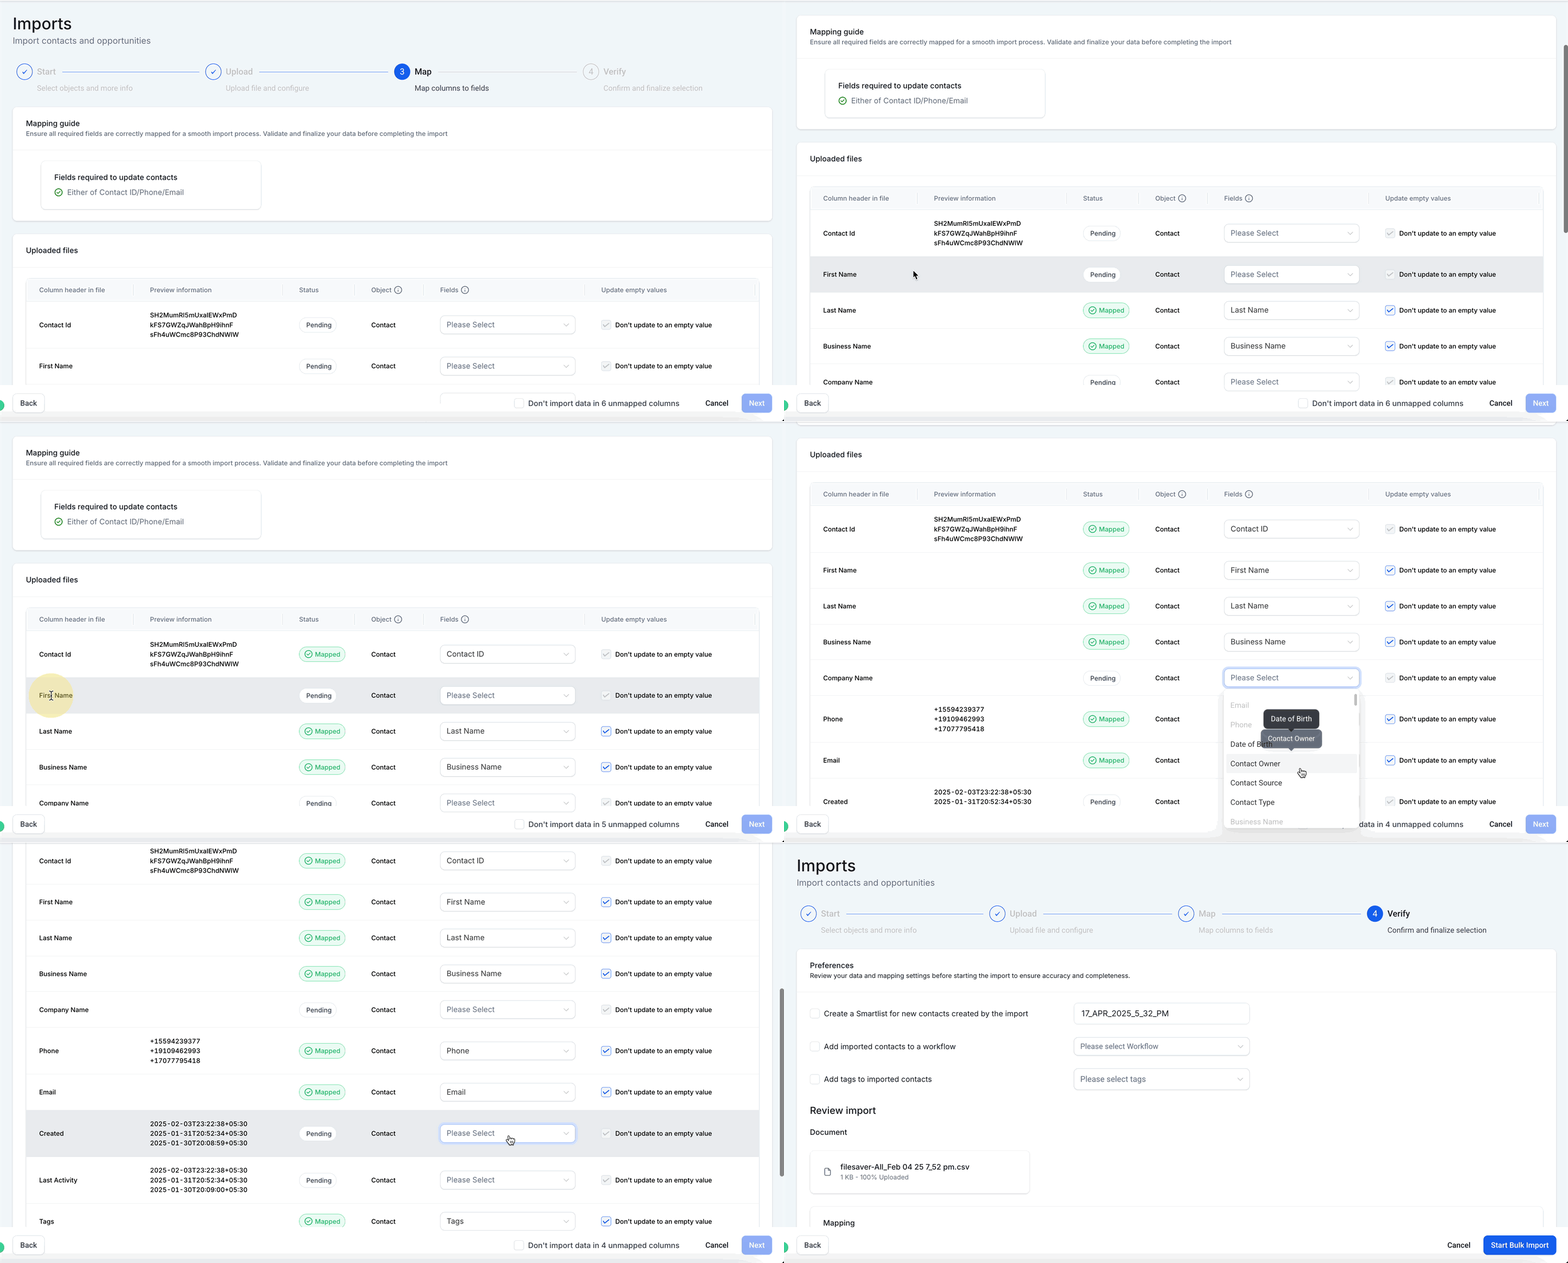
- Match each column in the file to the corresponding field in HighLevel; check the "Don't update Empty Values" box if you do not want blanks to overwrite existing data.
- If you need to import data into custom fields, create those custom fields in HighLevel before completing the import.
- Review all field mappings, ensure mandatory fields are covered, and confirm any optional actions such as creating a SmartList, adding to a workflow, or applying tags.
- If you wish to import opportunities as well, check both Contacts and Opportunities before proceeding and ensure opportunity columns are present in the CSV.
- Start the import by clicking the Import button.
- Open the Bulk Actions page to watch the import progress and view statistics.
- If errors occur, click the Error tab to download the error log and review details.
- When the import finishes, verify that contacts appear in the contact list and that any opportunities are visible in the pipeline.
07What it looks like in HighLevel
08Settings that matter
- Don't update Empty Values. When selected, fields that are empty in the CSV will not overwrite existing values in the contact record.
- Allow Duplicate Contacts (Contact Deduplication Preferences). Controls how the system matches incoming rows to existing contacts; it determines whether duplicates are prevented based on Contact ID, Email or Phone.
09Things to know before you rely on it
- Only CSV (.csv) files are accepted; Excel or Google Sheets are not supported.
- File size must be smaller than 30 MB; larger files need to be split.
- The CSV must contain a single sheet and the first row cannot be blank.
- At least one of Name, Email or Phone is required for each contact row.
- Headers in the CSV must match existing system fields; mismatched headers will not be imported.
- Special characters such as spaces, dashes or letters are not allowed in phone numbers.
10How it connects to the rest of HighLevel
- Manage contacts and smart lists Contact management
- Run bulk actions and view import logs Bulk actions
- Troubleshoot CSV import errors Import troubleshooting
Michael's take

Importing contacts is a solid way to get large lists into HighLevel quickly.
Skip it if you don’t have Admin rights or a properly formatted CSV.