
01Who this is for
- Founders who want to fine tune landing pages without opening the code editor.
- Design teams that need a quick way to adjust copy, colors or button styles on AI generated sites.
02Visual edits, explained
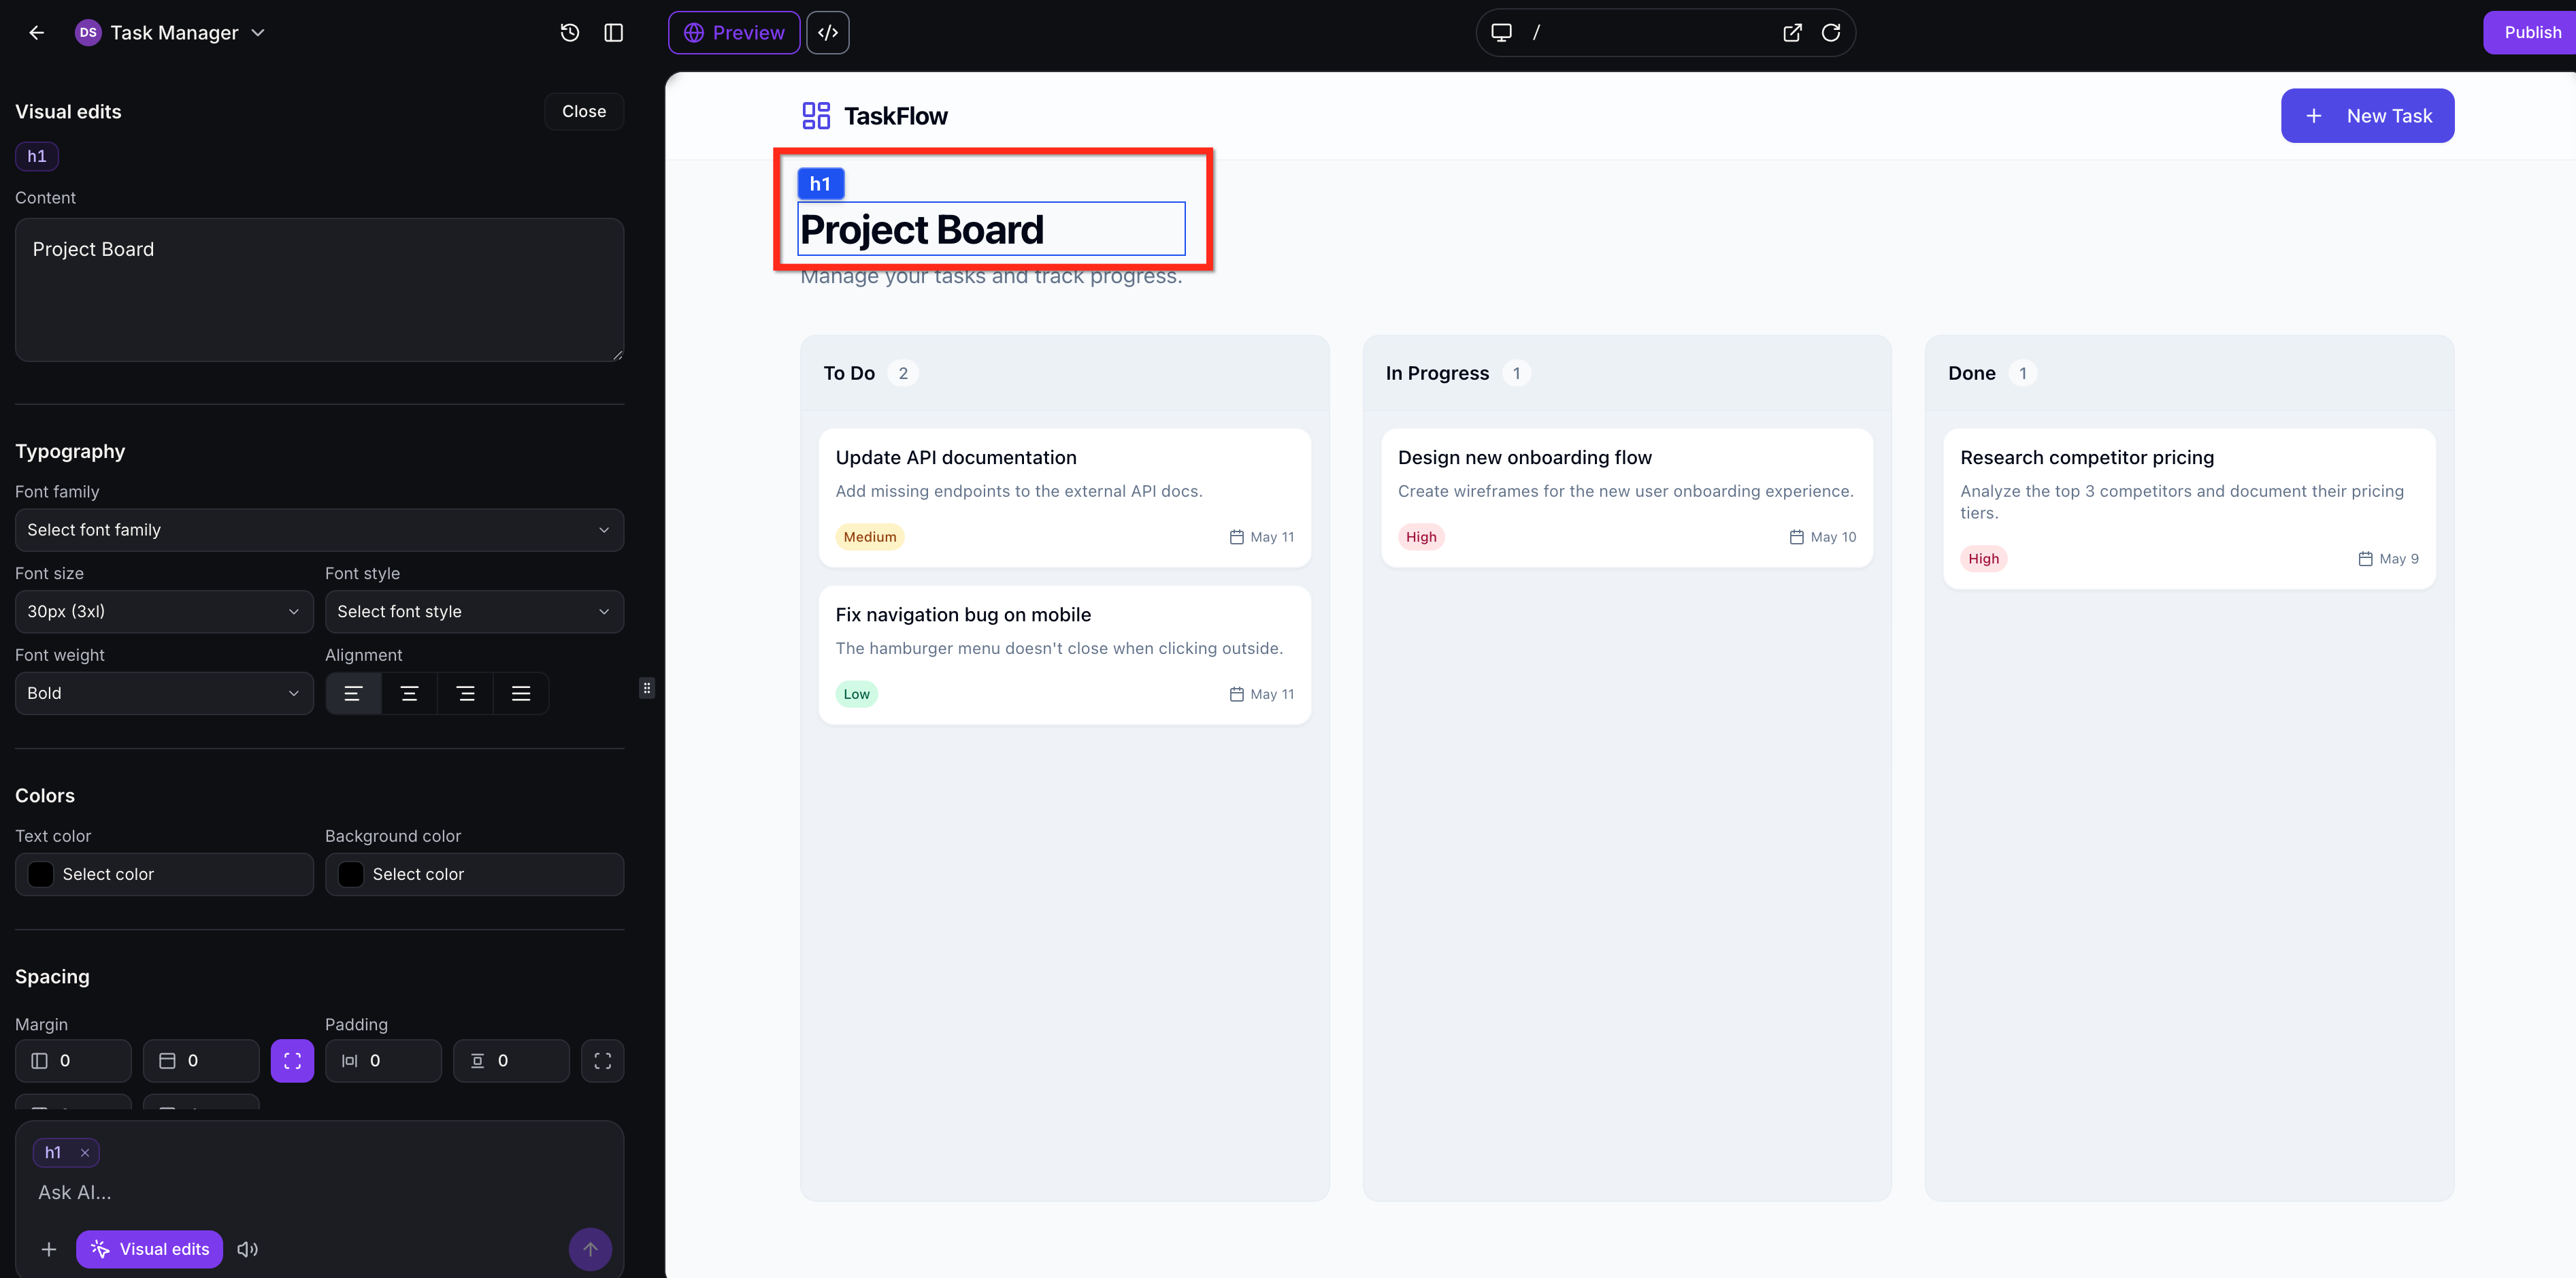
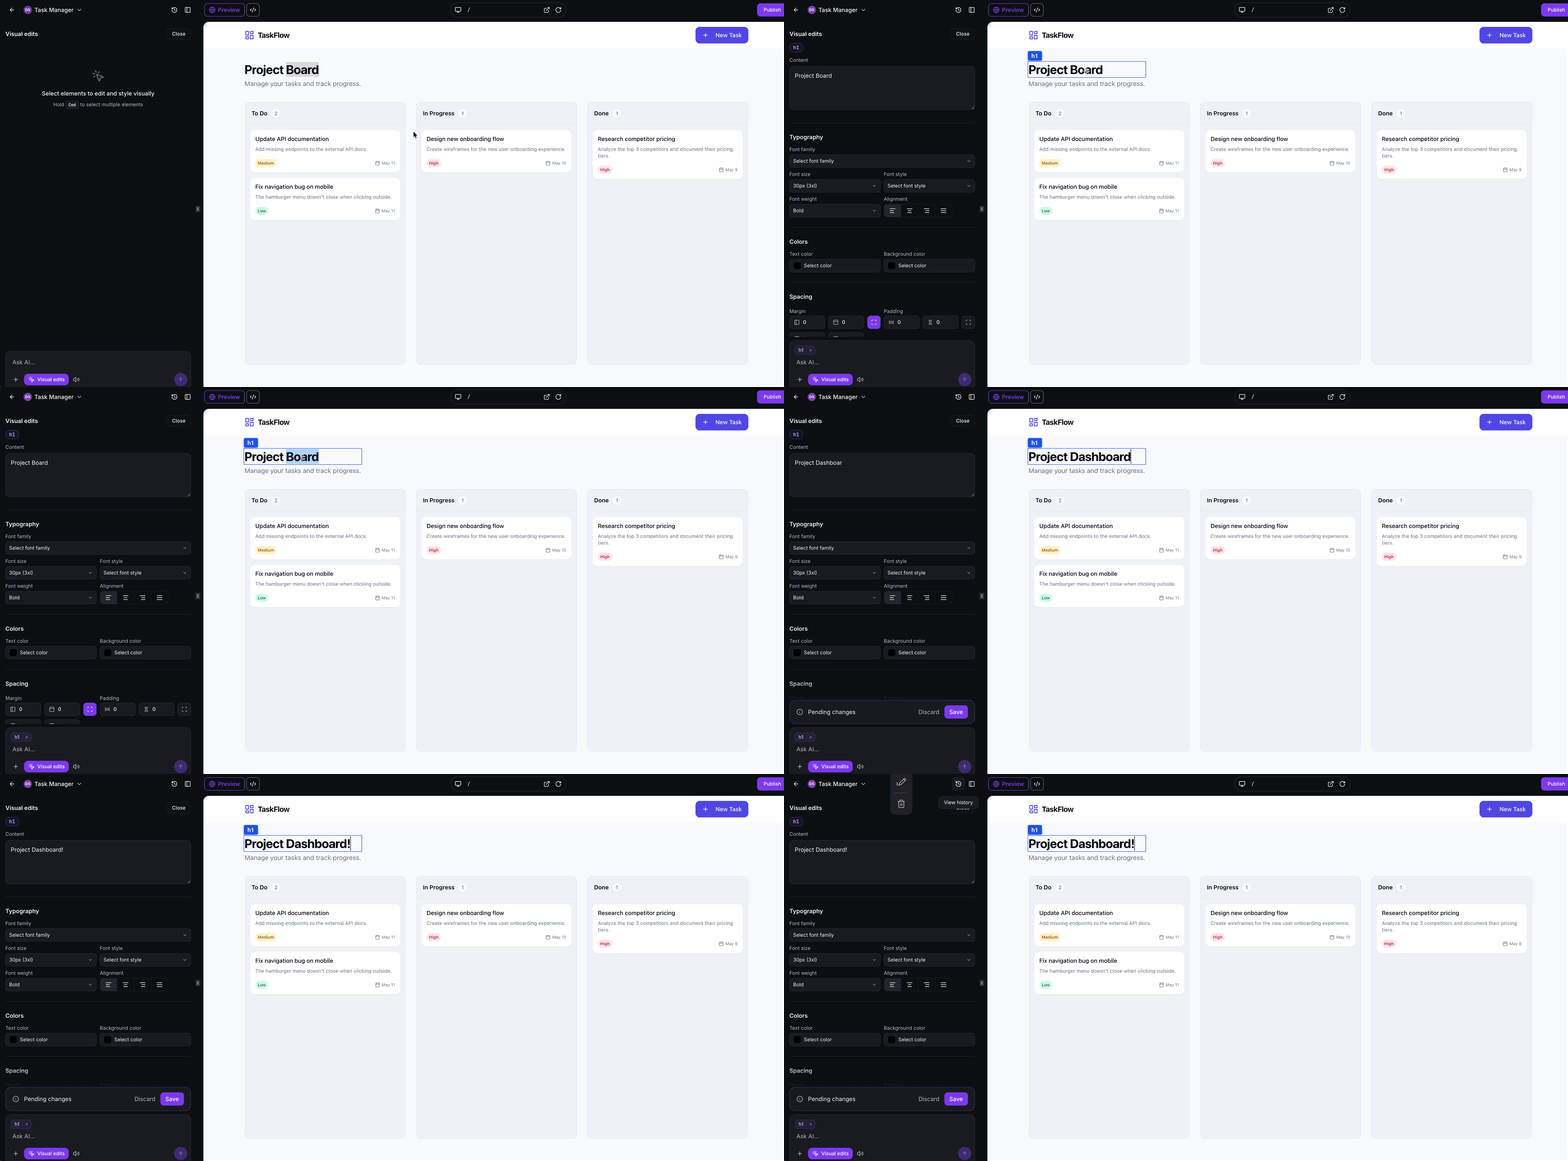
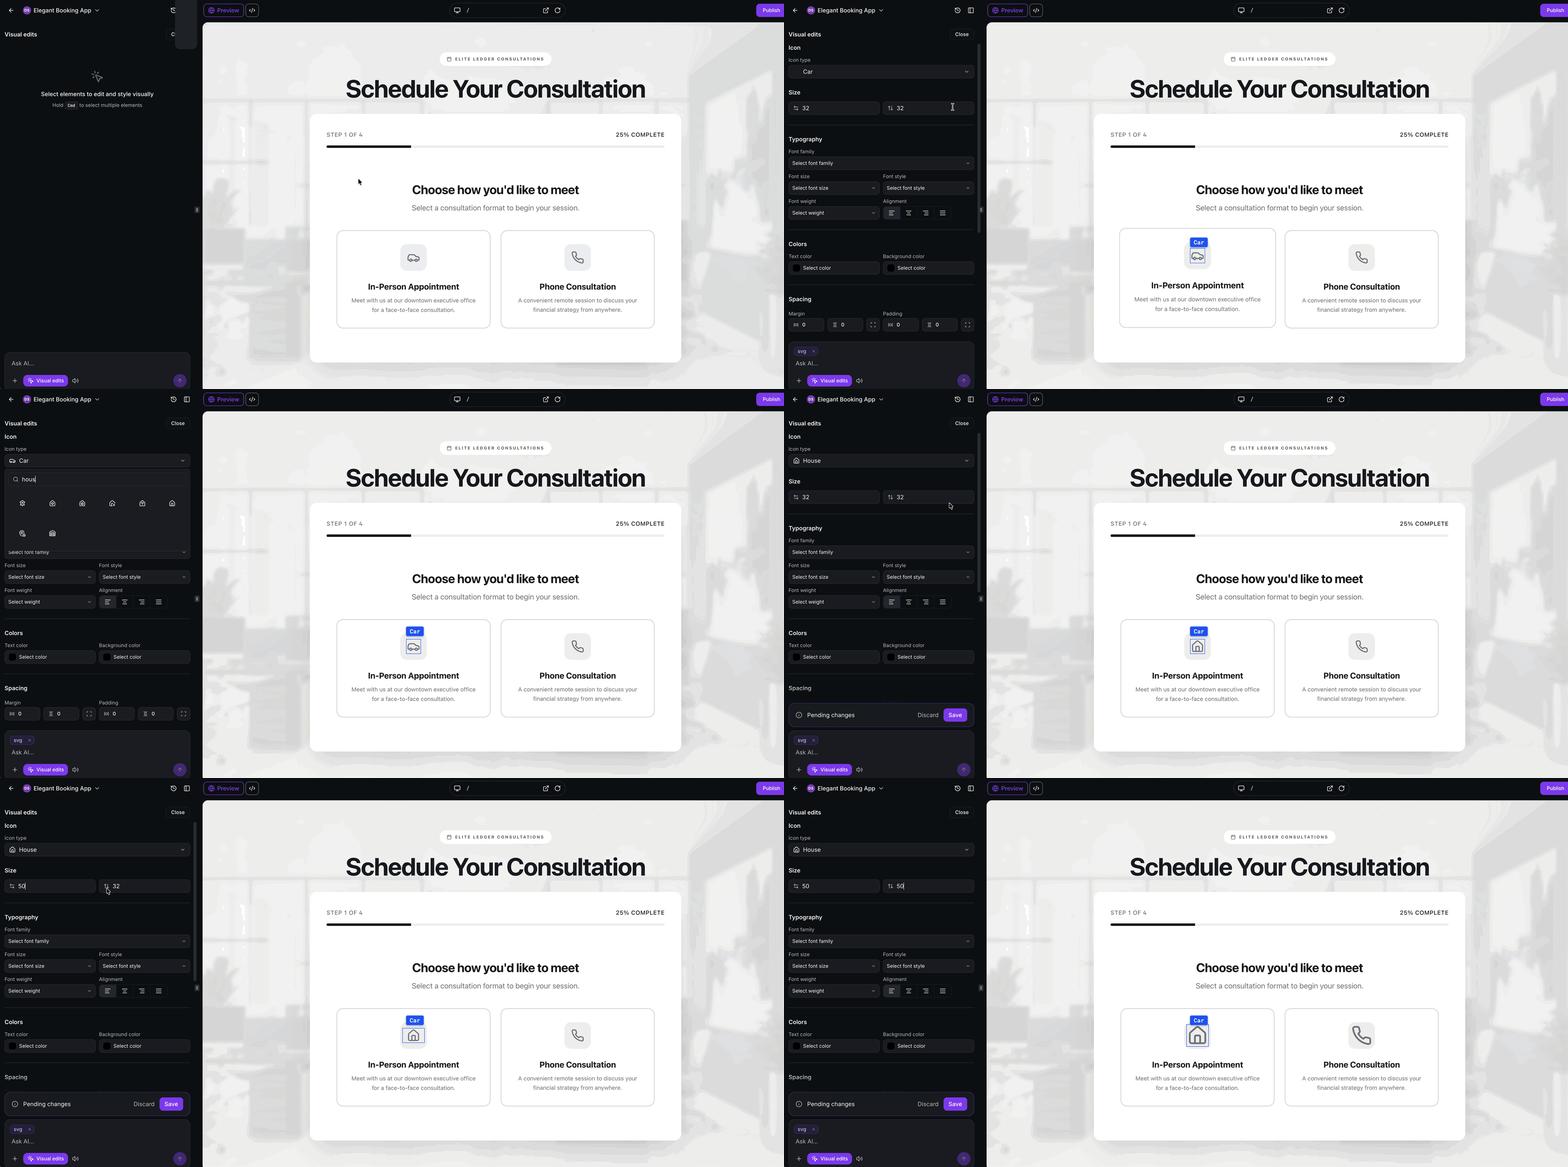
Visual Edits is a feature inside the AI Studio builder that makes the preview interactive. After turning on Visual Edit mode, any selectable element, headings, buttons, images, icons, containers, opens a contextual panel with the controls that apply to that element. You can edit text inline, swap icons, replace images, adjust spacing, margins, padding and colors, or send a targeted prompt for AI generated changes.
The edits are shown only in the live preview. No AI tokens are spent for direct visual changes, and nothing is written to the underlying project until you click Save. Leaving the editor without saving discards the changes. The feature lives in the AI Studio builder interface, accessed via the Visual Edits button in the bottom left prompt area.
03How businesses use visual edits
- SaaS landing page. Open the AI Studio project, enable Visual Edit mode, click the headline to edit the copy, adjust the button color using the panel, and then save the changes so the landing page reflects the new messaging.
- Local service website. Select an image on the services section, replace its URL and update the alt text through the Visual Edits panel, resize an icon next to a contact button, and save the edits to publish the updated visuals.
- Ecommerce product page. Choose a product description text, double click to edit the copy, modify the surrounding container's padding via the spacing controls, and discard the change if the layout does not match the design before saving.
04The numbers and rules that matter
- Editable elements include headings, text, buttons, images, icons, containers, and sections.
- Icon library contains 1,600+ Lucide icons.
05Before you start
- Open an AI Studio project and click into the project you want to update.
06How to set up and use visual edits in HighLevel
Enter visual edit mode
- Open AI Studio and click the project you wish to modify.
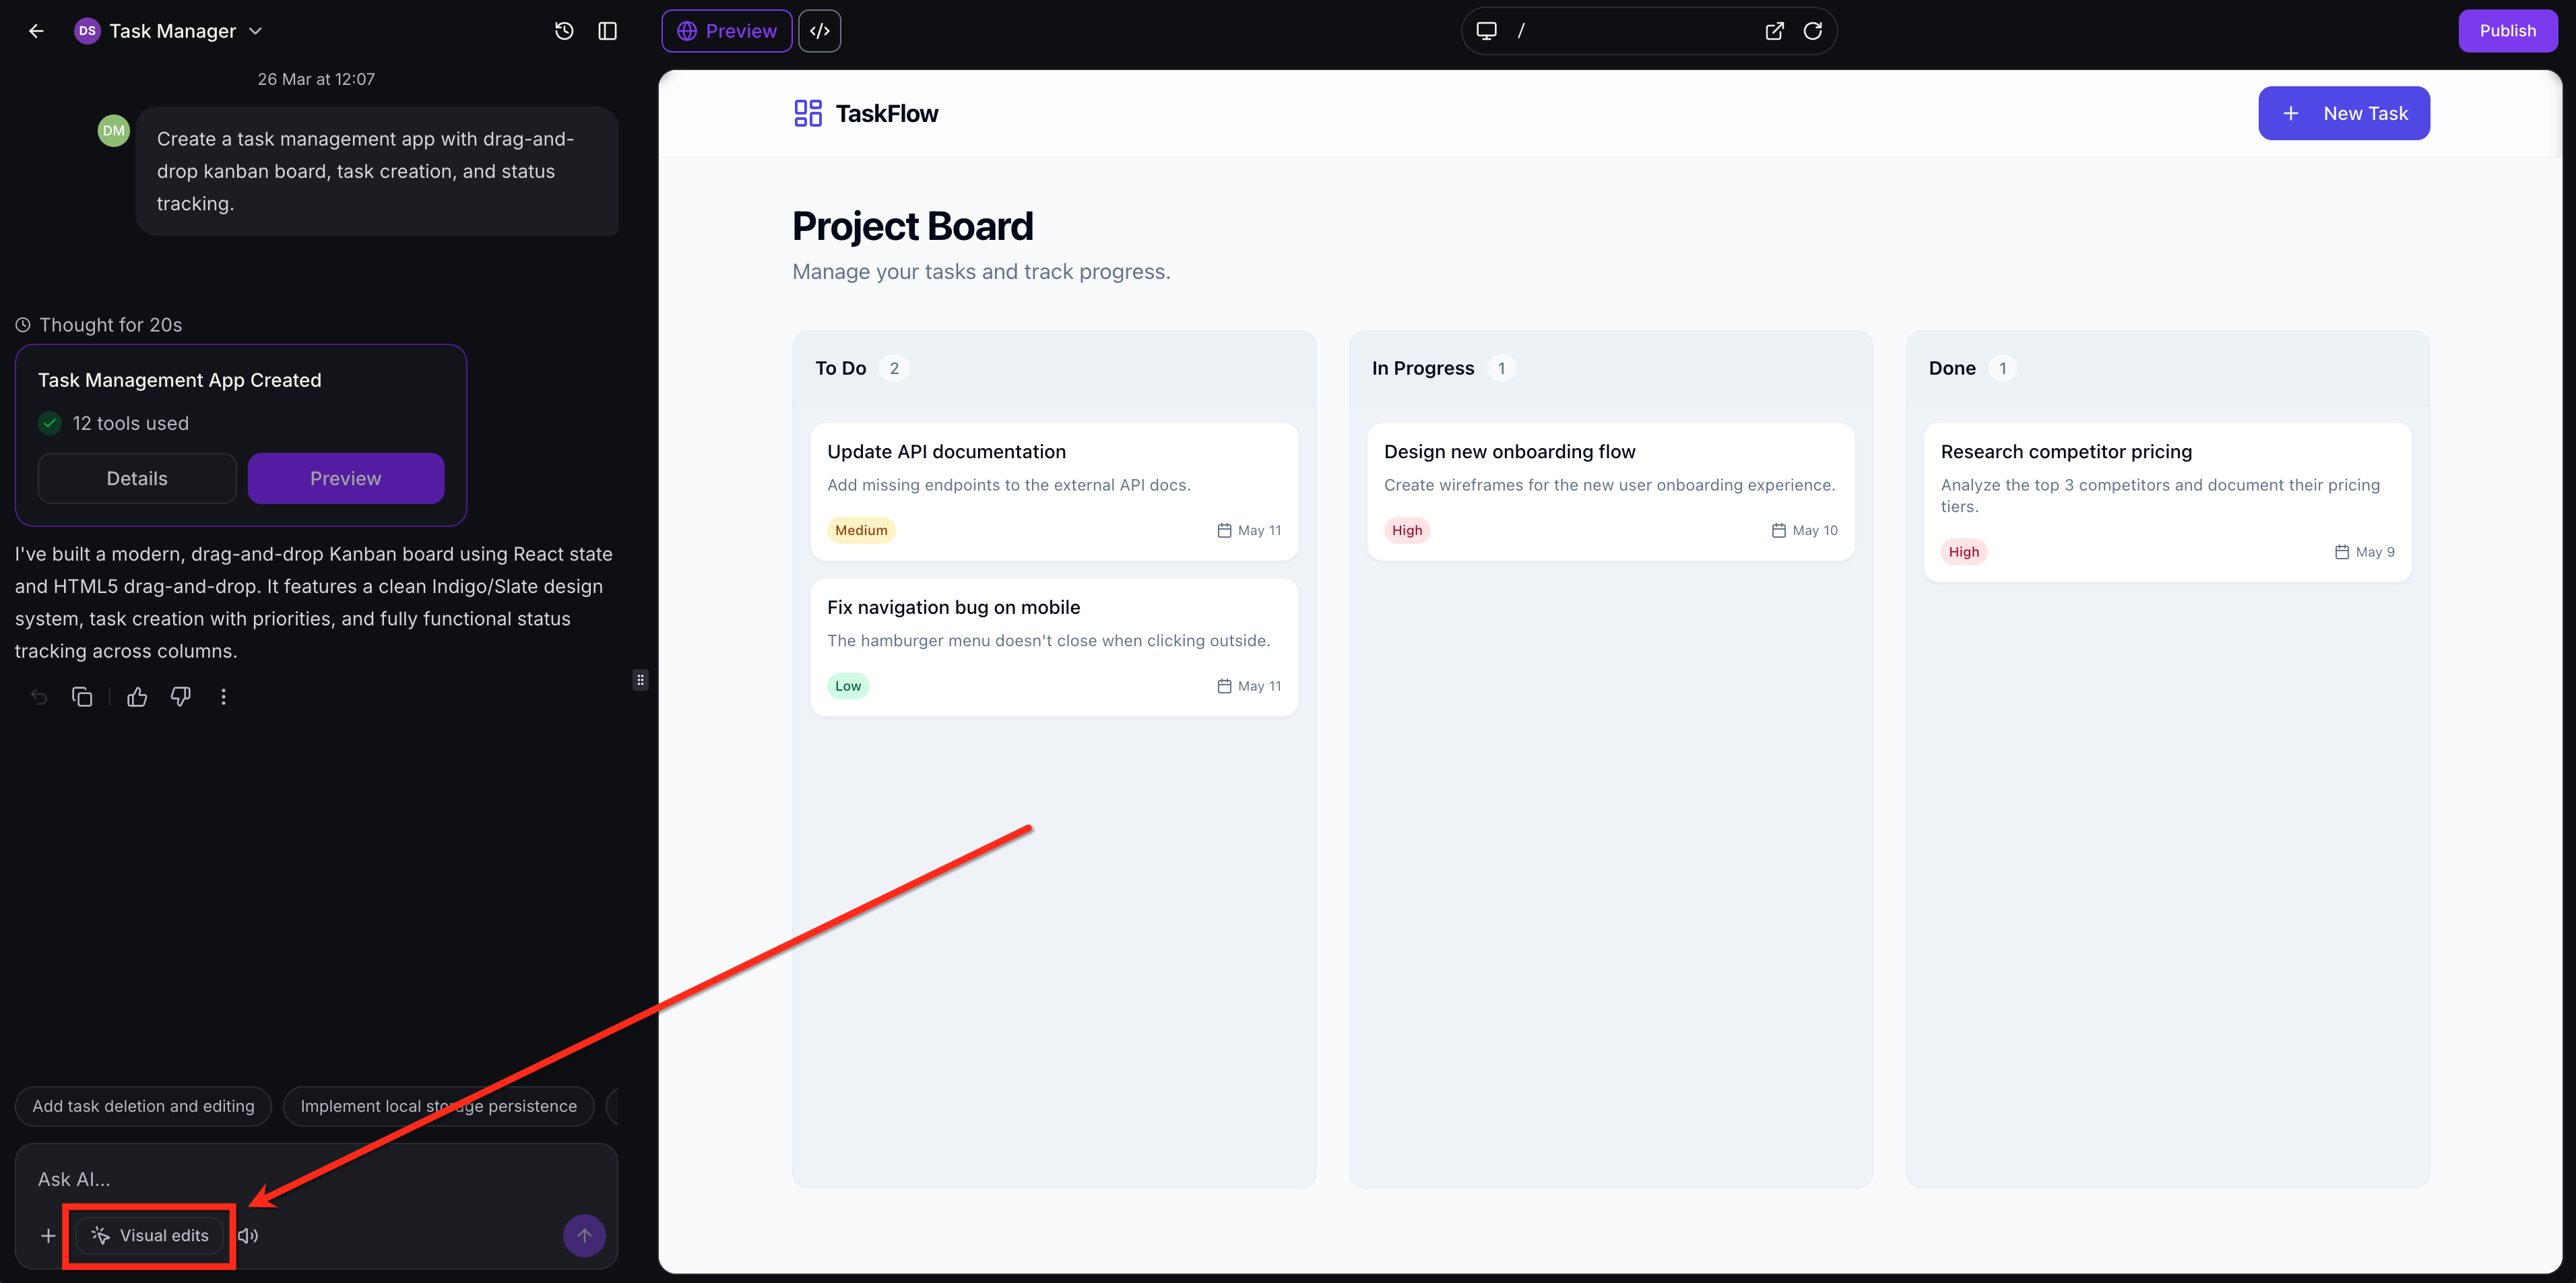
- Click Visual Edits in the prompt area at the bottom left of the builder.
- Click an element in the preview to start editing.
Make visual edits
- Click any element in the preview to open the Visual Edits panel.
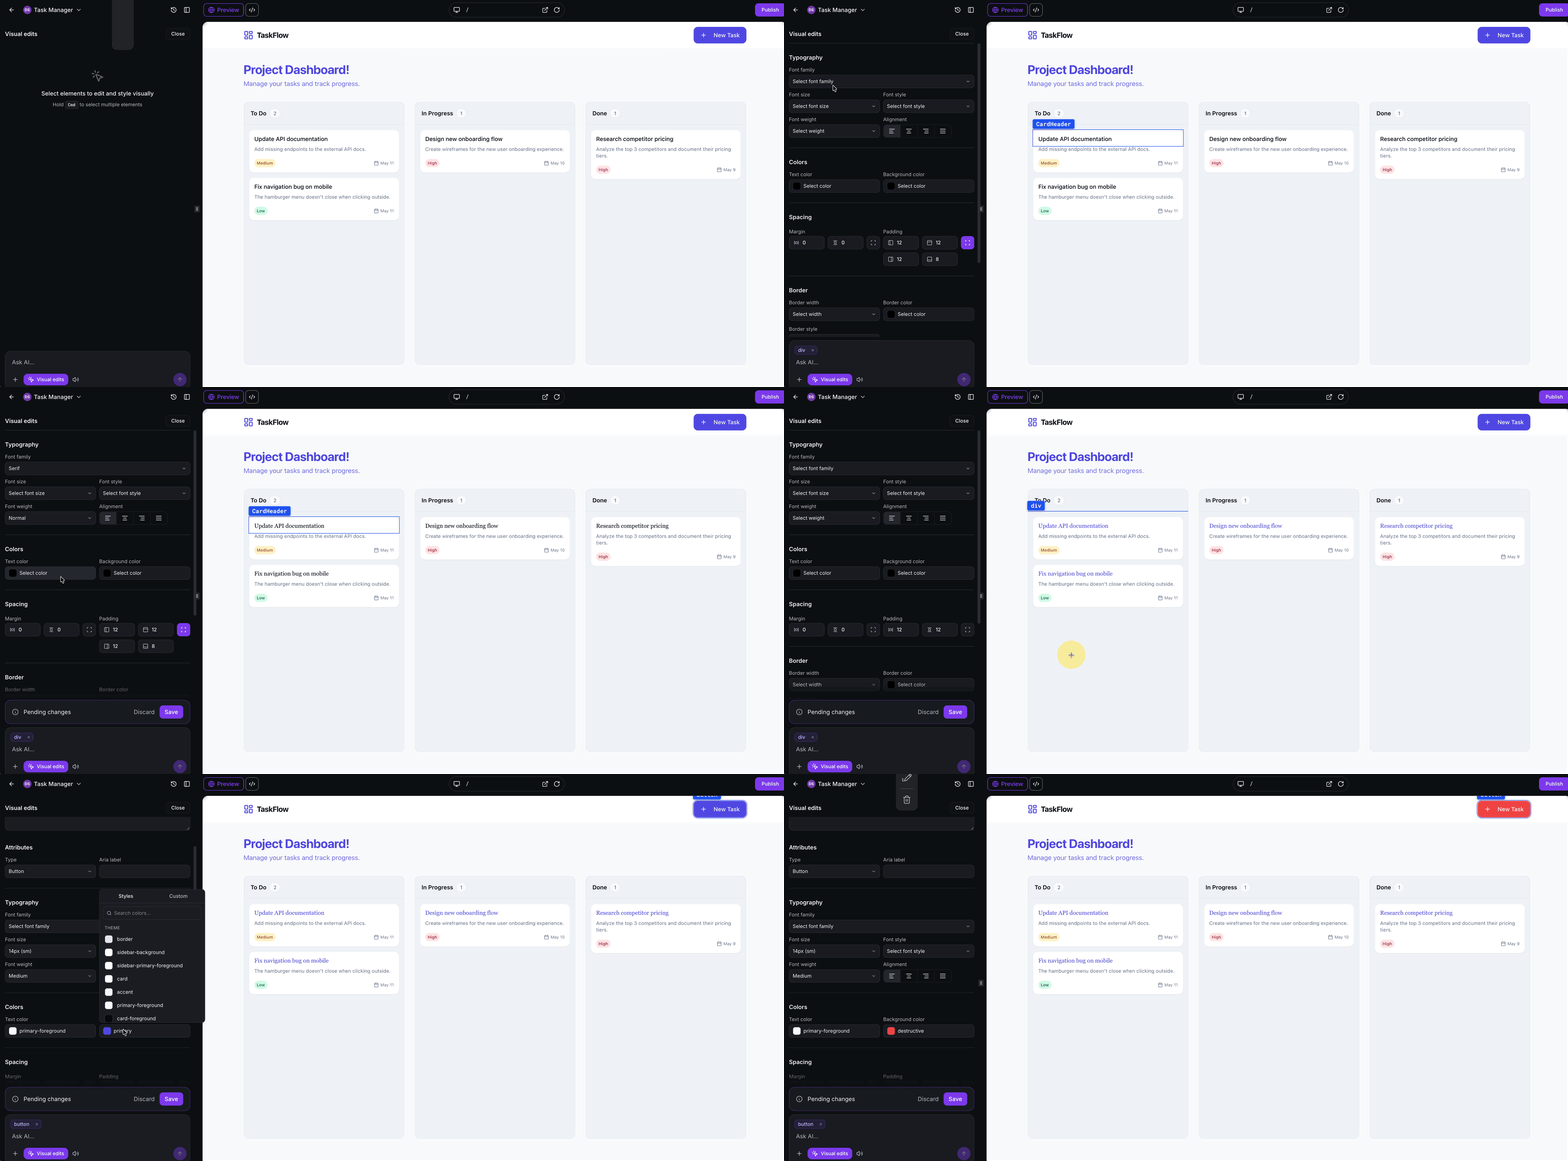
- Use color and spacing controls that appear for the selected element.
- Double click a text element and type directly on the page to change copy.
- Select an icon, search the icon library, choose a replacement or resize it.
- Select an image and change its URL, alt text, or layout using the dropdown.
- Select one or more elements and enter a prompt in the Visual Edits prompt area to describe the change you want to make.
Save or discard edits
- Click Save to apply the edits to the project.
- Click Discard to remove unsaved changes and restore the previous version.
- Leave visual editor mode without saving to automatically discard any edits.
07What it looks like in HighLevel
08Things to know before you rely on it
- Direct visual changes made through the editing controls do not consume AI tokens.
- The AI model is only invoked when you explicitly send a prompt; otherwise edits are applied locally until saved.
09How it connects to the rest of HighLevel
- Learn how to add custom domains, clone projects, and preview publishing in AI Studio. AI Studio in HighLevel
- See the pricing tiers for AI Studio and usage limits. AI Studio pricing
- Find out how to edit code directly in AI Studio's built in editor. Code editor in AI Studio
Michael's take

Visual edits feel like a small convenience that can become a real shift when your AI generated site is almost done but still needs that final polish. The ability to tweak copy, colors, and layout without leaving the preview saves a step and keeps the momentum going.
A local bakery that wants a quick seasonal landing page will love this. They can swap out a hero image, adjust button colors to match a holiday theme, and change the tagline right in the preview, then save once they’re happy.