
01Who this is for
- Agency owners who manage multiple client accounts benefit by reusing proven agent configurations, cutting setup time.
- Marketing teams that run similar campaigns across locations can ensure each subaccount uses the same AI prompts and triggers.
- Support departments that rely on Knowledge Base linked agents can deploy identical assistants to new branches without rebuilding connections.
02Managed Agents in snapshots, explained
Managed Agents stored in Snapshots act as reusable assets. When a snapshot is created, HighLevel captures the agent’s structure, prompts, triggers, skills, connected Knowledge Bases and its version (Draft, Staging, Production). The snapshot can then be shared or loaded into other subaccounts.
The snapshot workflow is accessed from Agency View under Account Snapshots. In the asset selector, Managed Agents appear under the Agent Studio category. Loading, refreshing and conflict checking are performed through the same Snapshot interface, allowing agencies to move agents between accounts without leaving the platform.
03How businesses use Managed Agents in snapshots
- Marketing agency. The agency creates a Snapshot of a lead capture Managed Agent, then loads that Snapshot into each client subaccount. After loading, the agency tests the agent and publishes it, delivering a uniform chat experience across all clients.
- Real estate brokerage. The brokerage packages a property listing Managed Agent together with its required Knowledge Base in a Snapshot. Loading the Snapshot into new office subaccounts preserves the Knowledge Base link, allowing each office to use the same listing assistant.
- Health clinic network. The network bundles an appointment scheduling Managed Agent and related custom values into a Snapshot. The Snapshot is loaded into each clinic location subaccount, where the agent is tested and activated for patient booking.
04How to set up and use Managed Agents in snapshots in HighLevel
Create a snapshot that includes a Managed Agent
- Open the source subaccount and verify the Managed Agent has the desired configuration.
- Review the agent’s dependencies and include any required Knowledge Bases, workflows, or Custom Values before creating the Snapshot.
- Switch to Agency View.
- Navigate to Account Snapshots.
- Click Create New Snapshot.
- Enter a descriptive name for the Snapshot.
- Select the source subaccount that holds the Managed Agent.
- Proceed to the asset selection step.
- Expand the Agent Studio category.
- Select the Managed Agent or Agents to include.
- Select any supporting assets such as Knowledge Bases, workflows, or Custom Values.
- Review the selected assets for completeness.
- Click Create to save the Snapshot.
Load the Managed Agent into another subaccount
- From Agency View, open Subaccounts.
- Locate the destination subaccount.
- Open its three dot menu and choose Manage Client.
- In the Actions menu, select Load Snapshot.
- Pick the Snapshot that contains the Managed Agent.
- Confirm the destination subaccount when prompted.
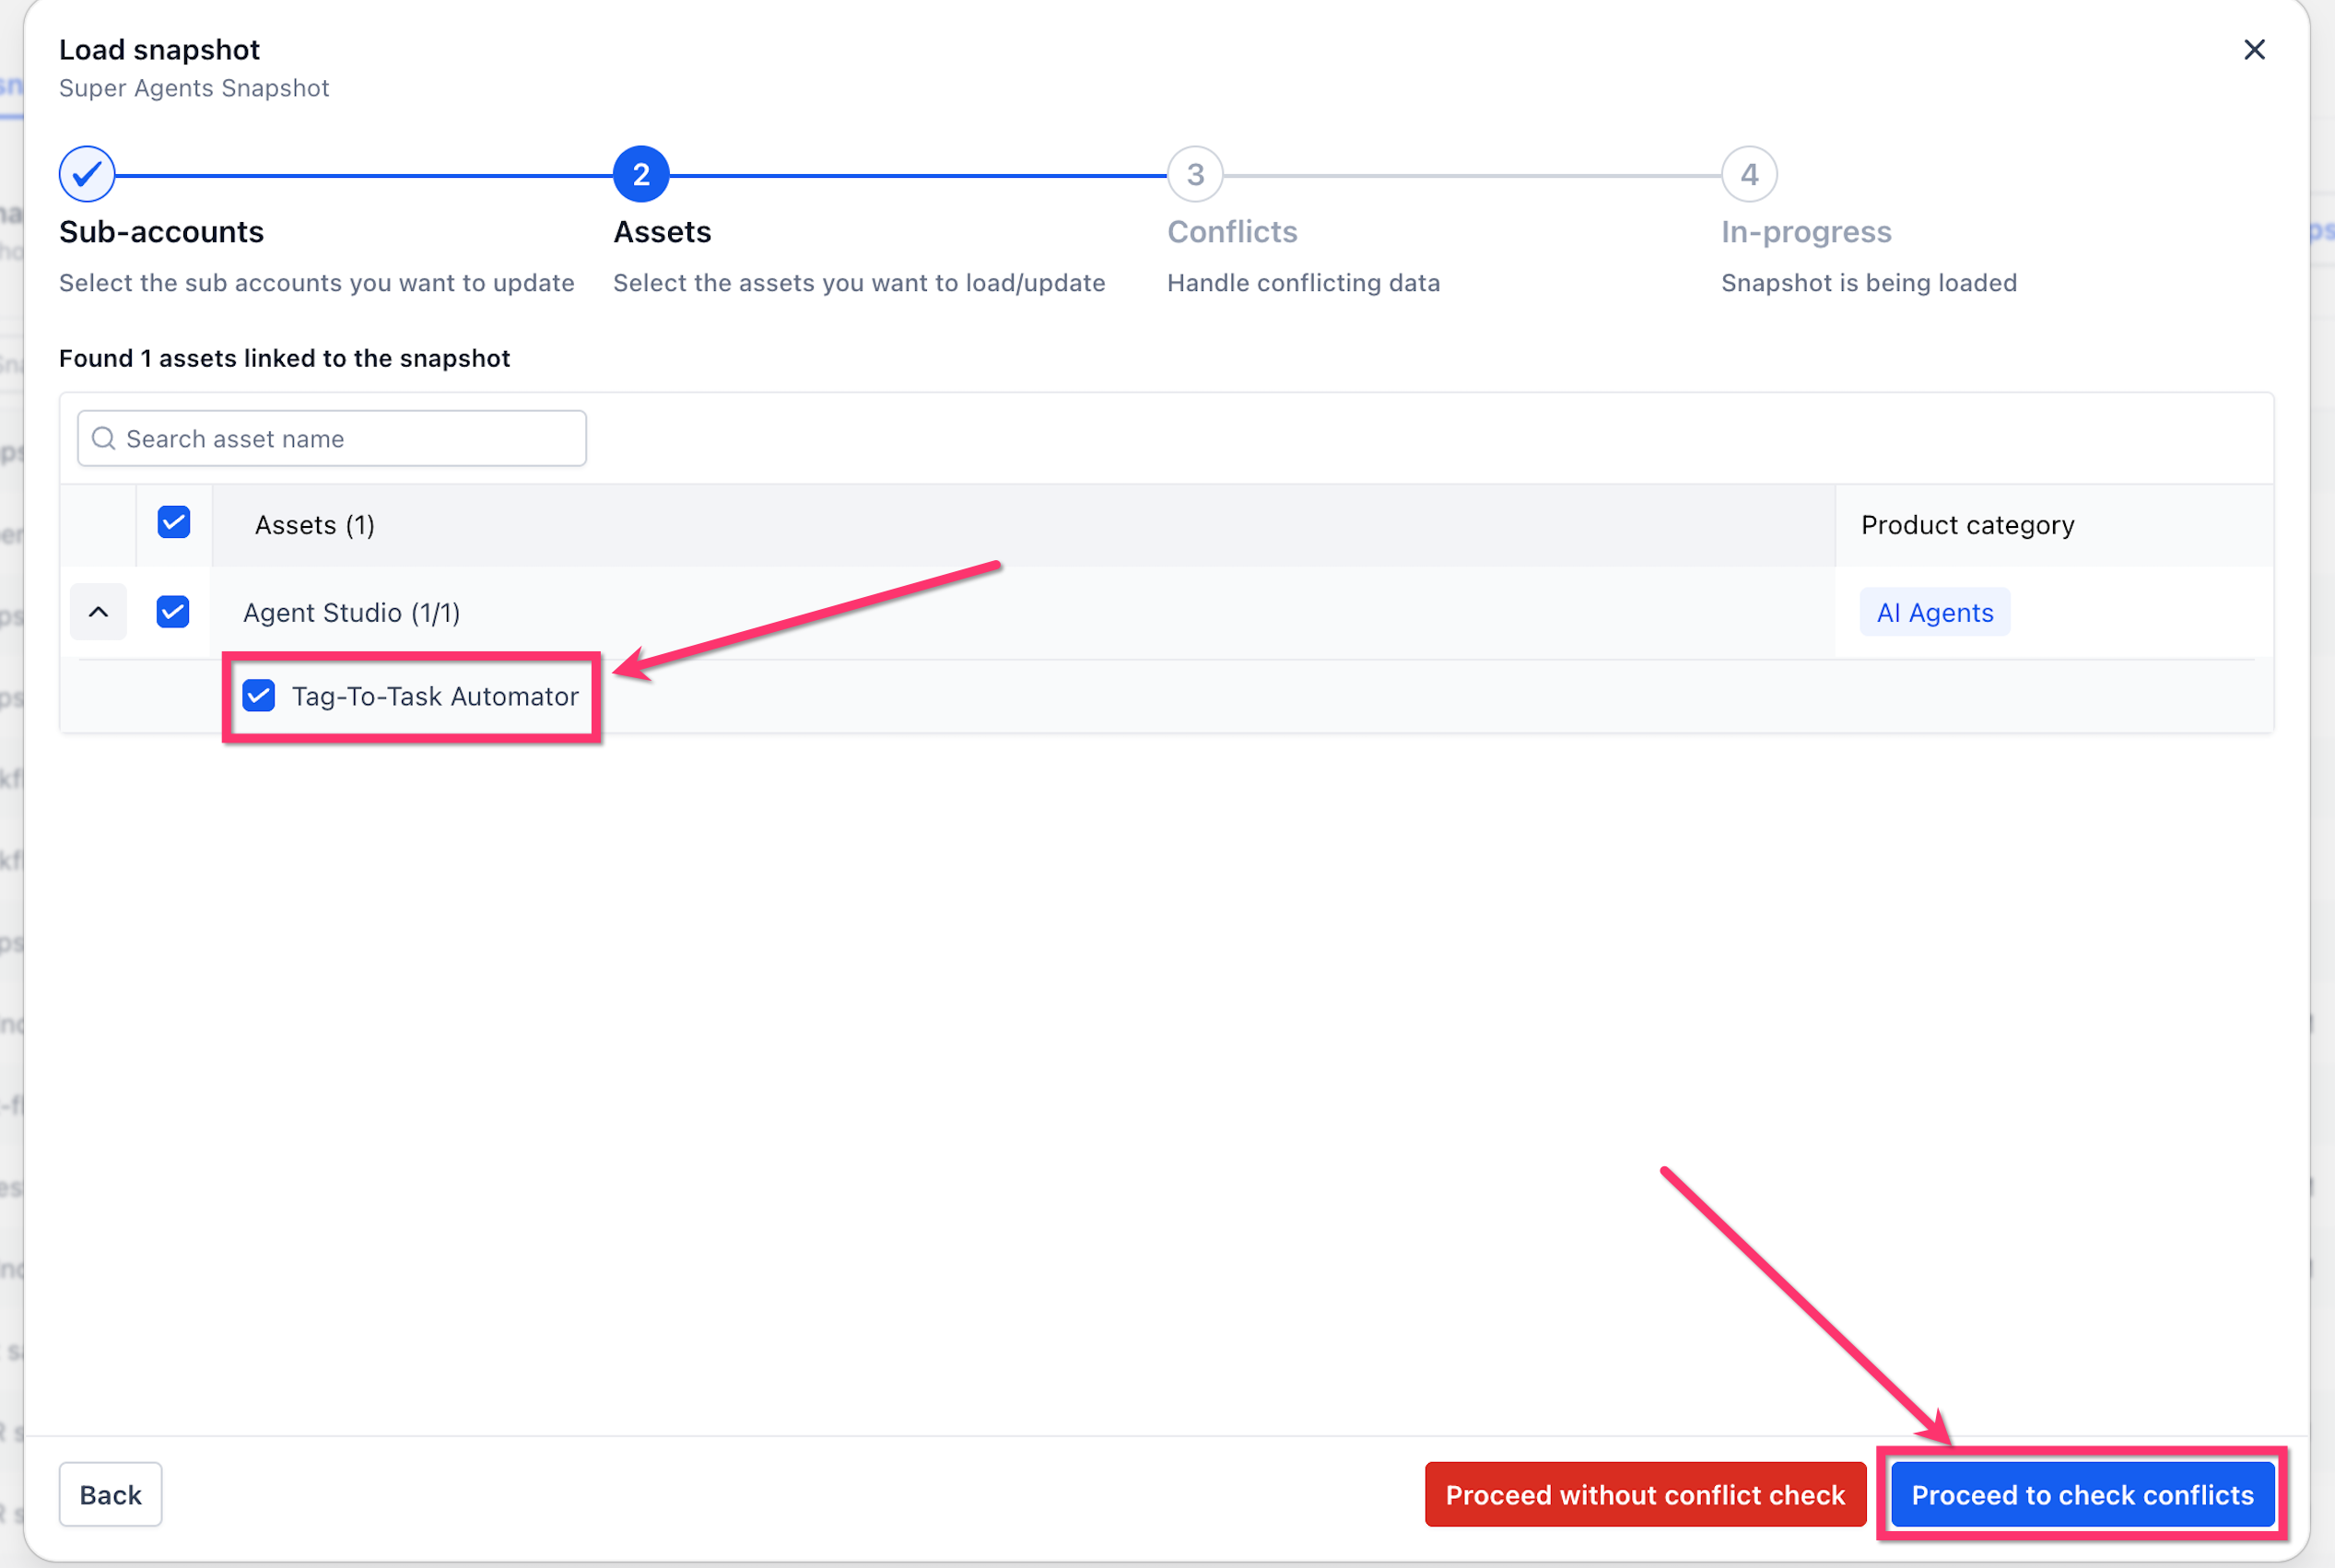
- At the Assets step, expand Agent Studio.
- Select the Managed Agents you want to load.
- Click Proceed to check conflicts to review overlaps, or click Proceed without conflict check to skip review.
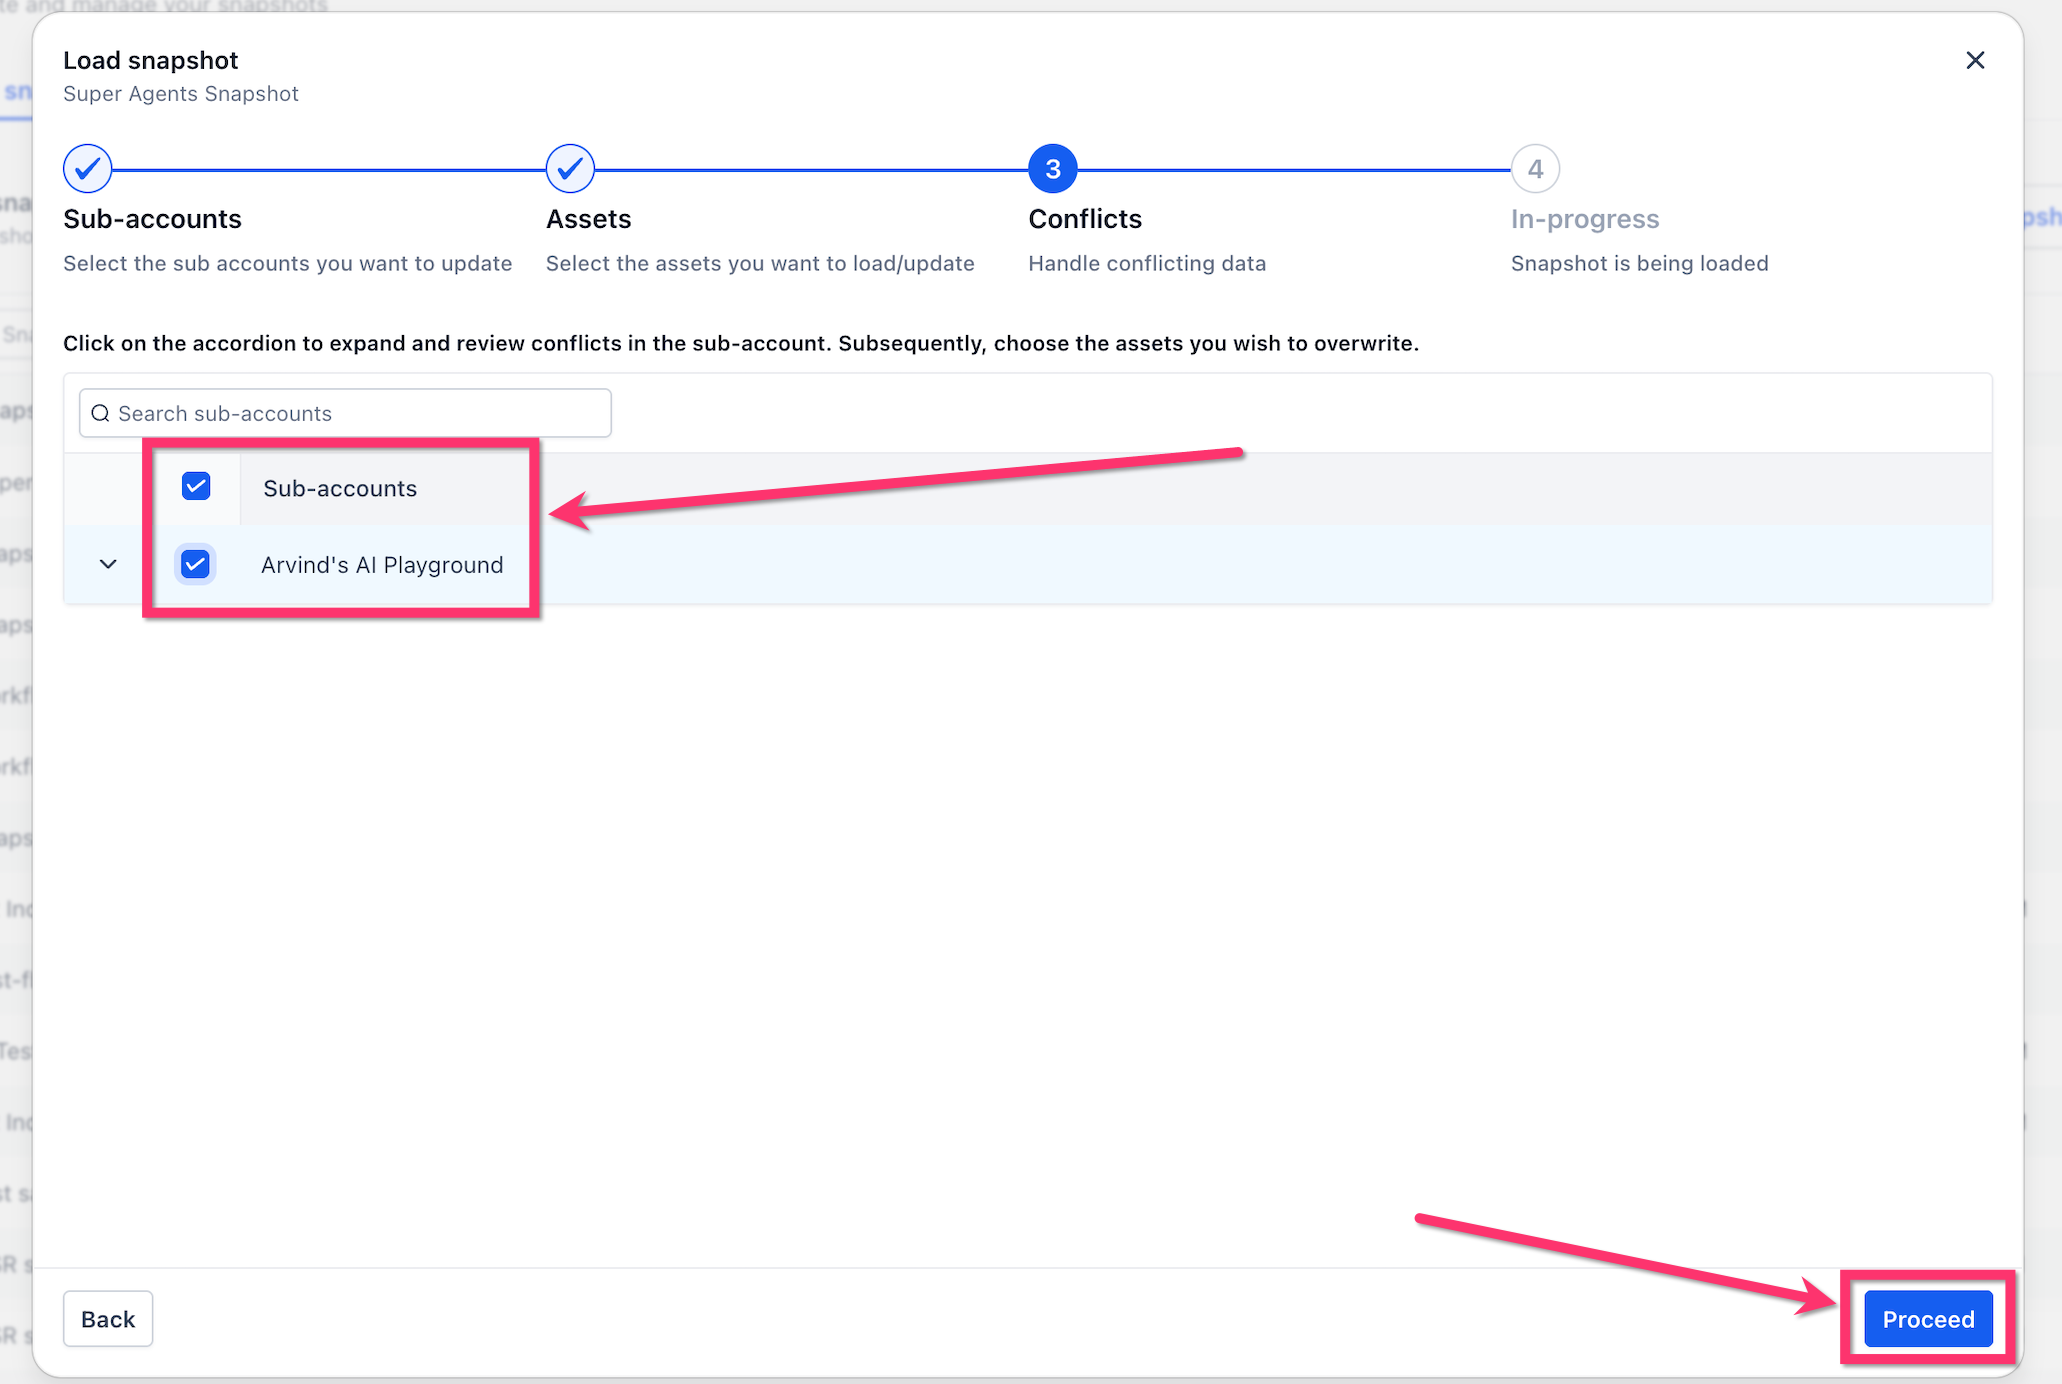
- If checking conflicts, expand the destination subaccount and examine the listed items.
- Click Proceed to start loading and wait for the process to finish.
Refresh a Managed Agent snapshot after updating the source agent
- Make the required changes to the agent in the original source subaccount.
- Return to Agency View > Account Snapshots.
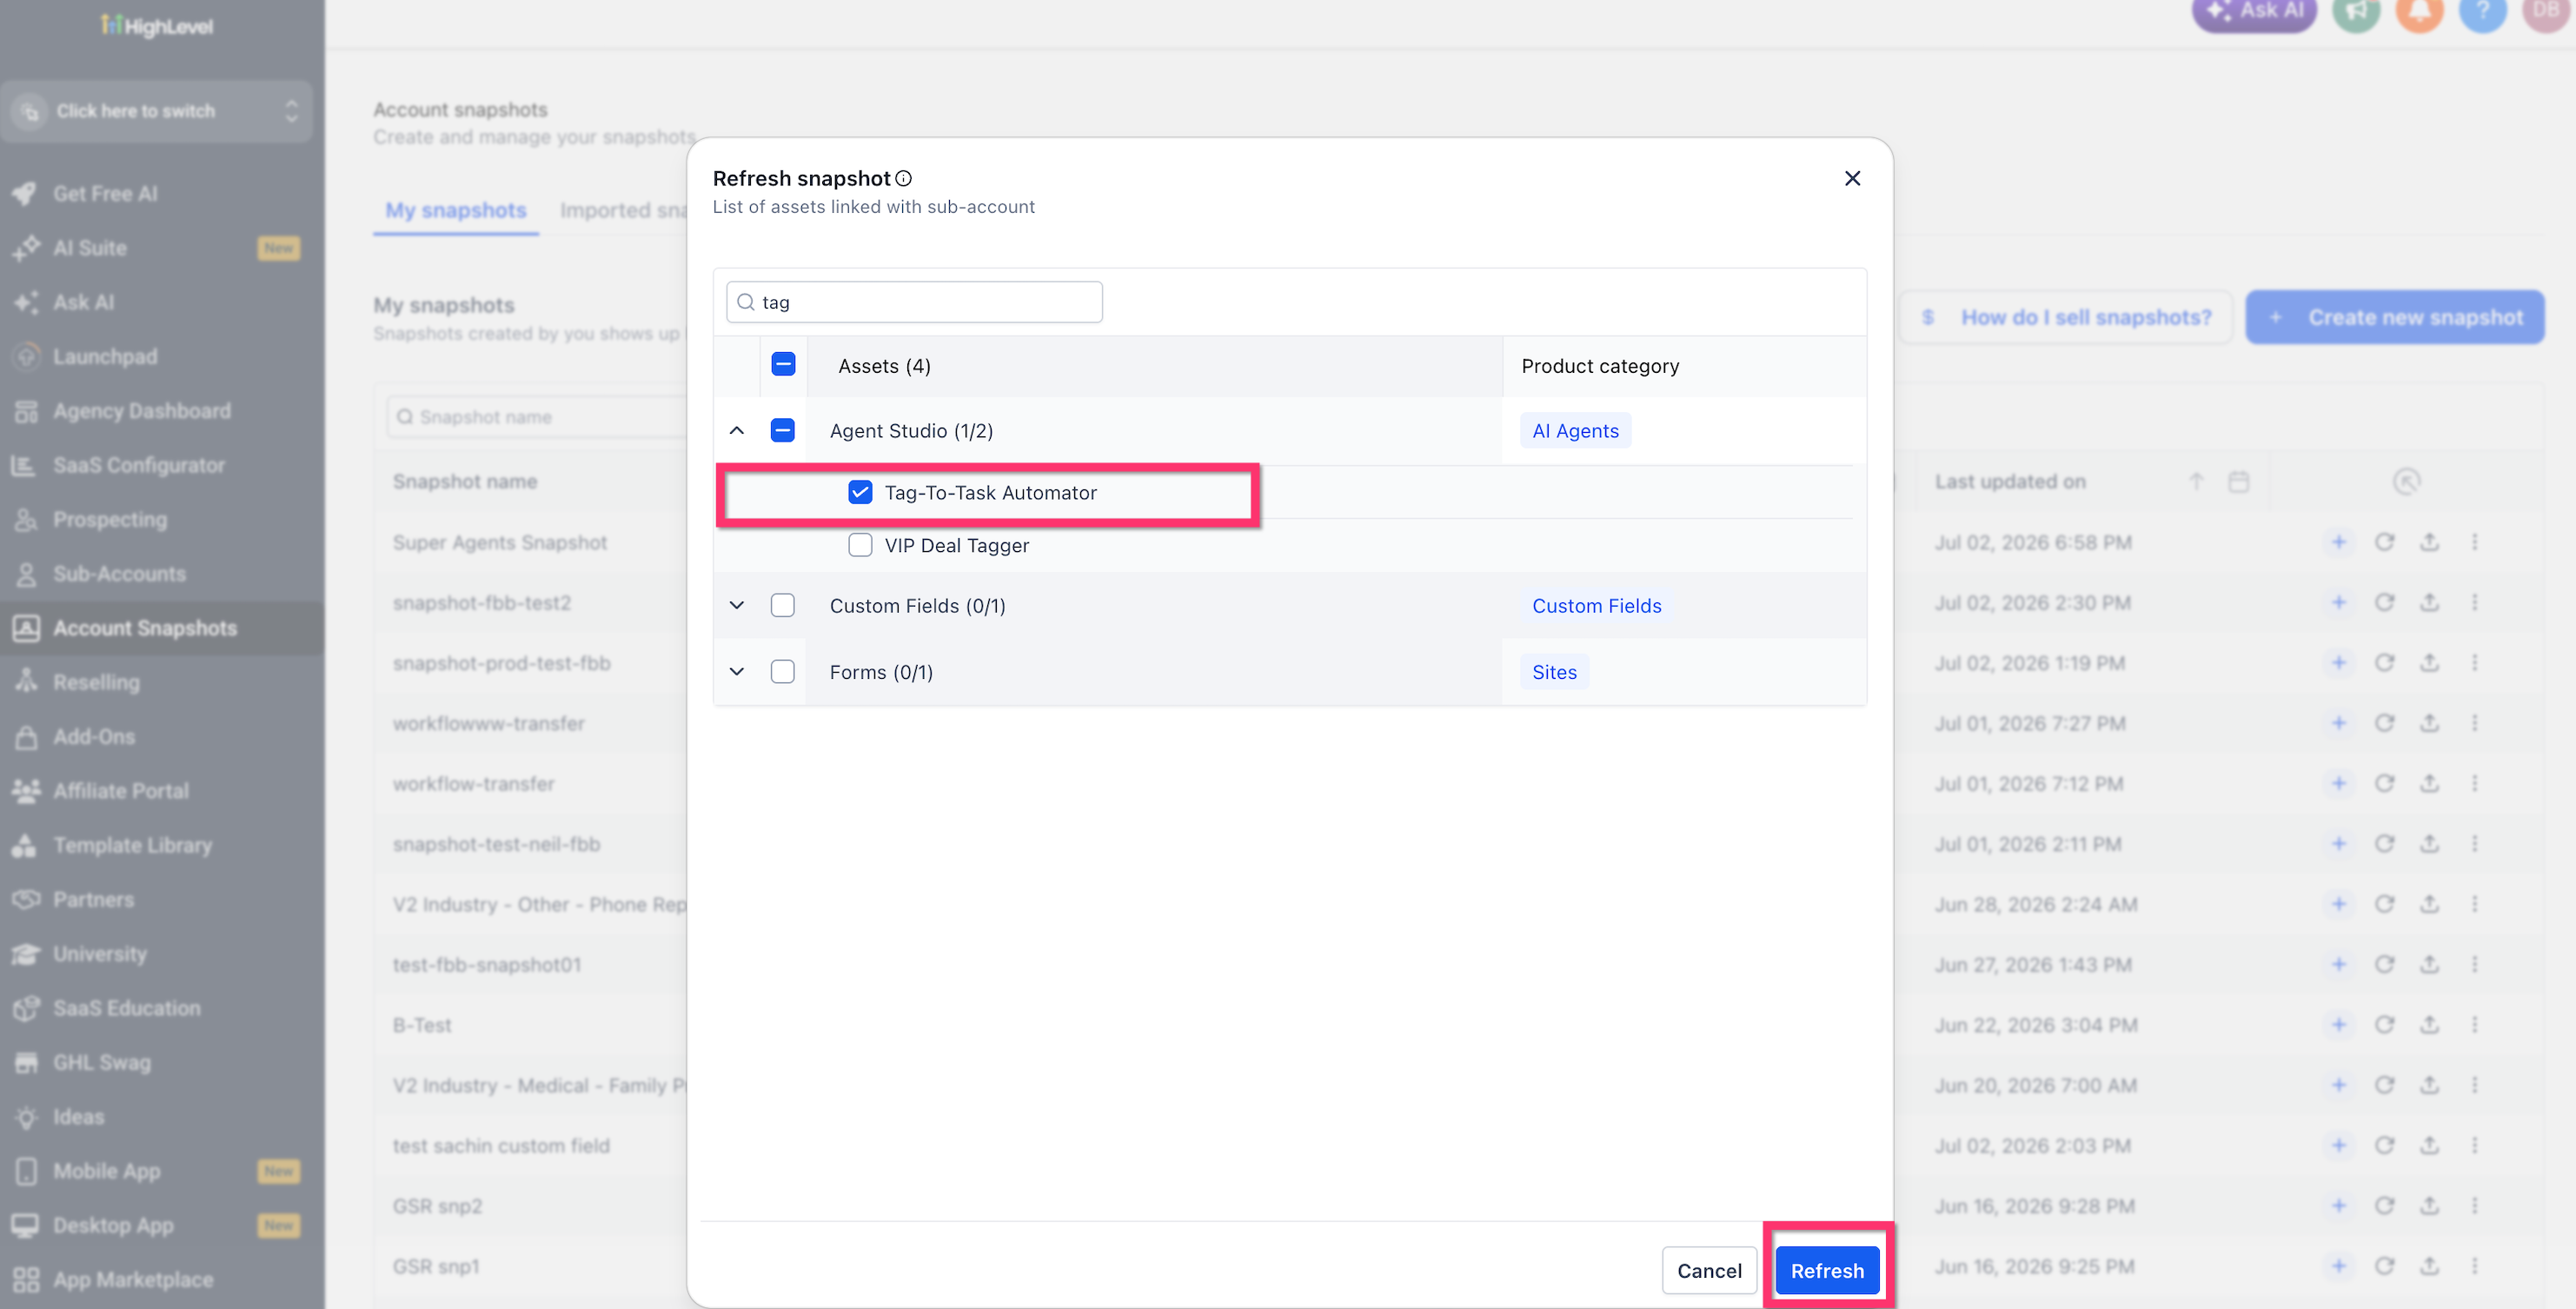
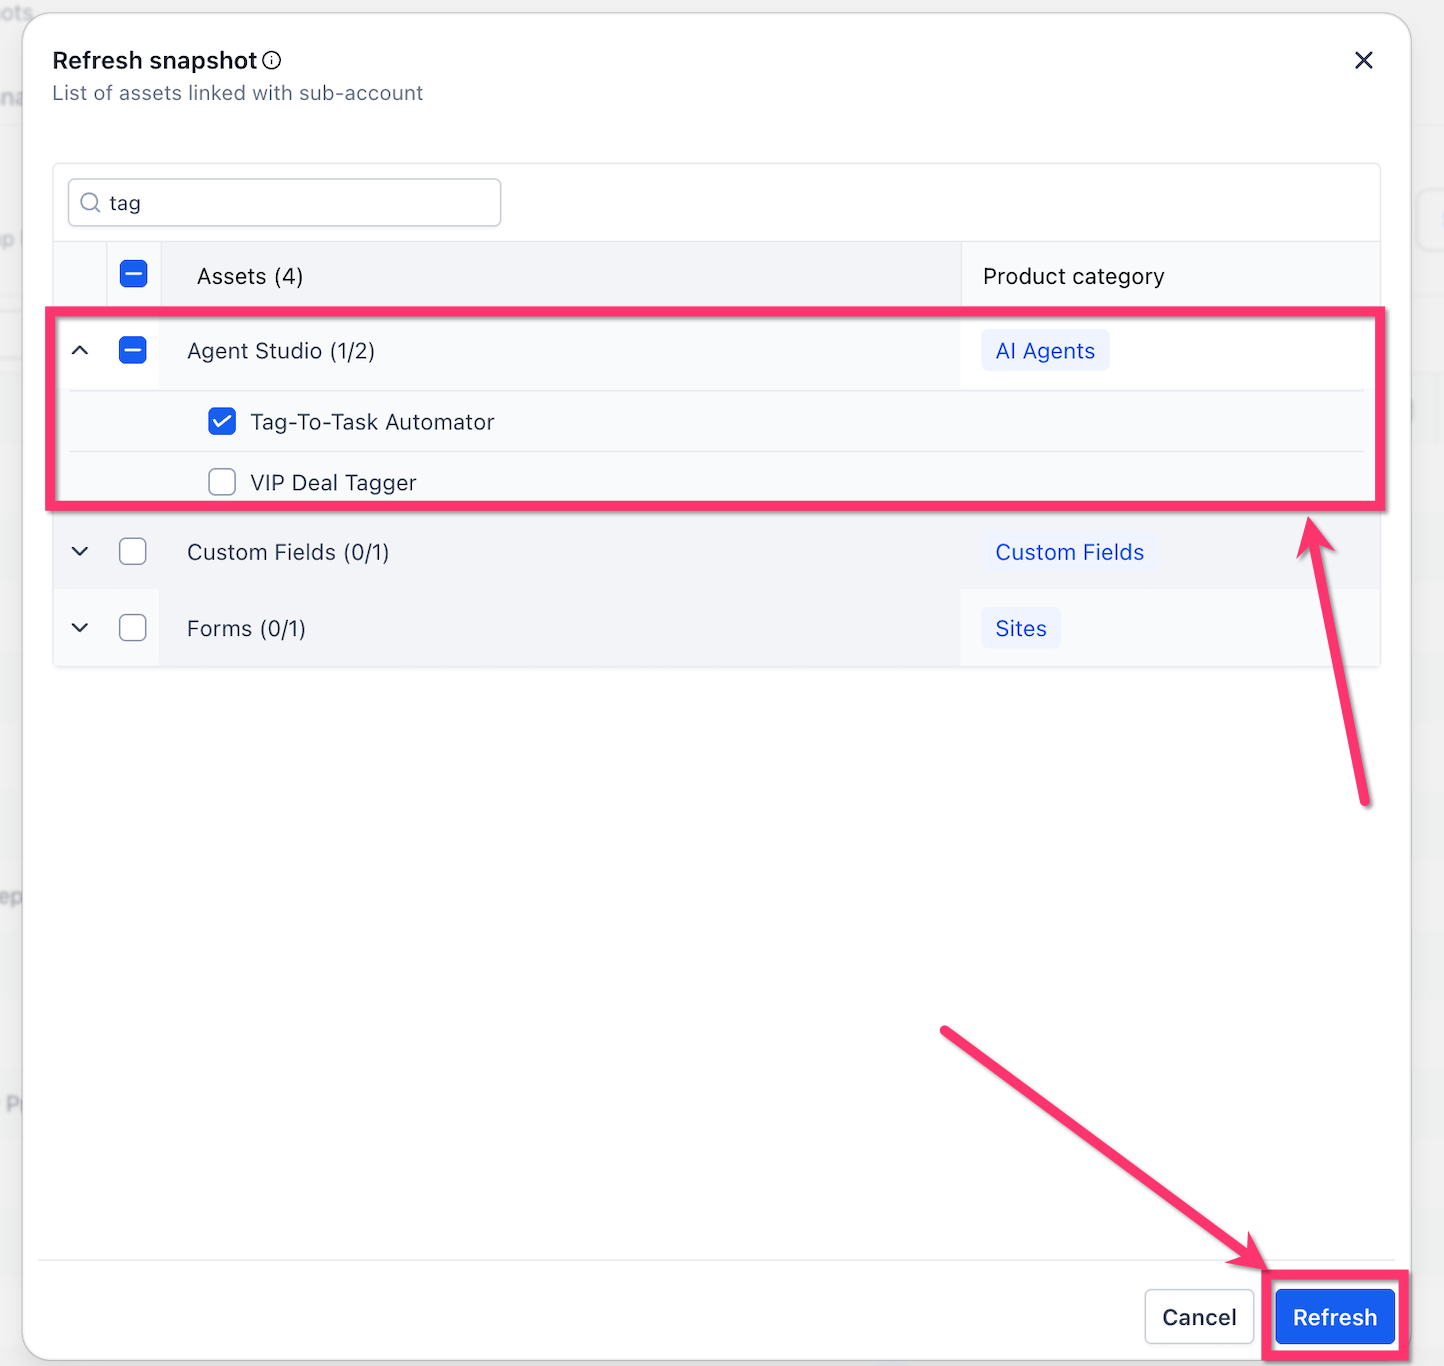
- Locate the existing Snapshot and click its Refresh icon.
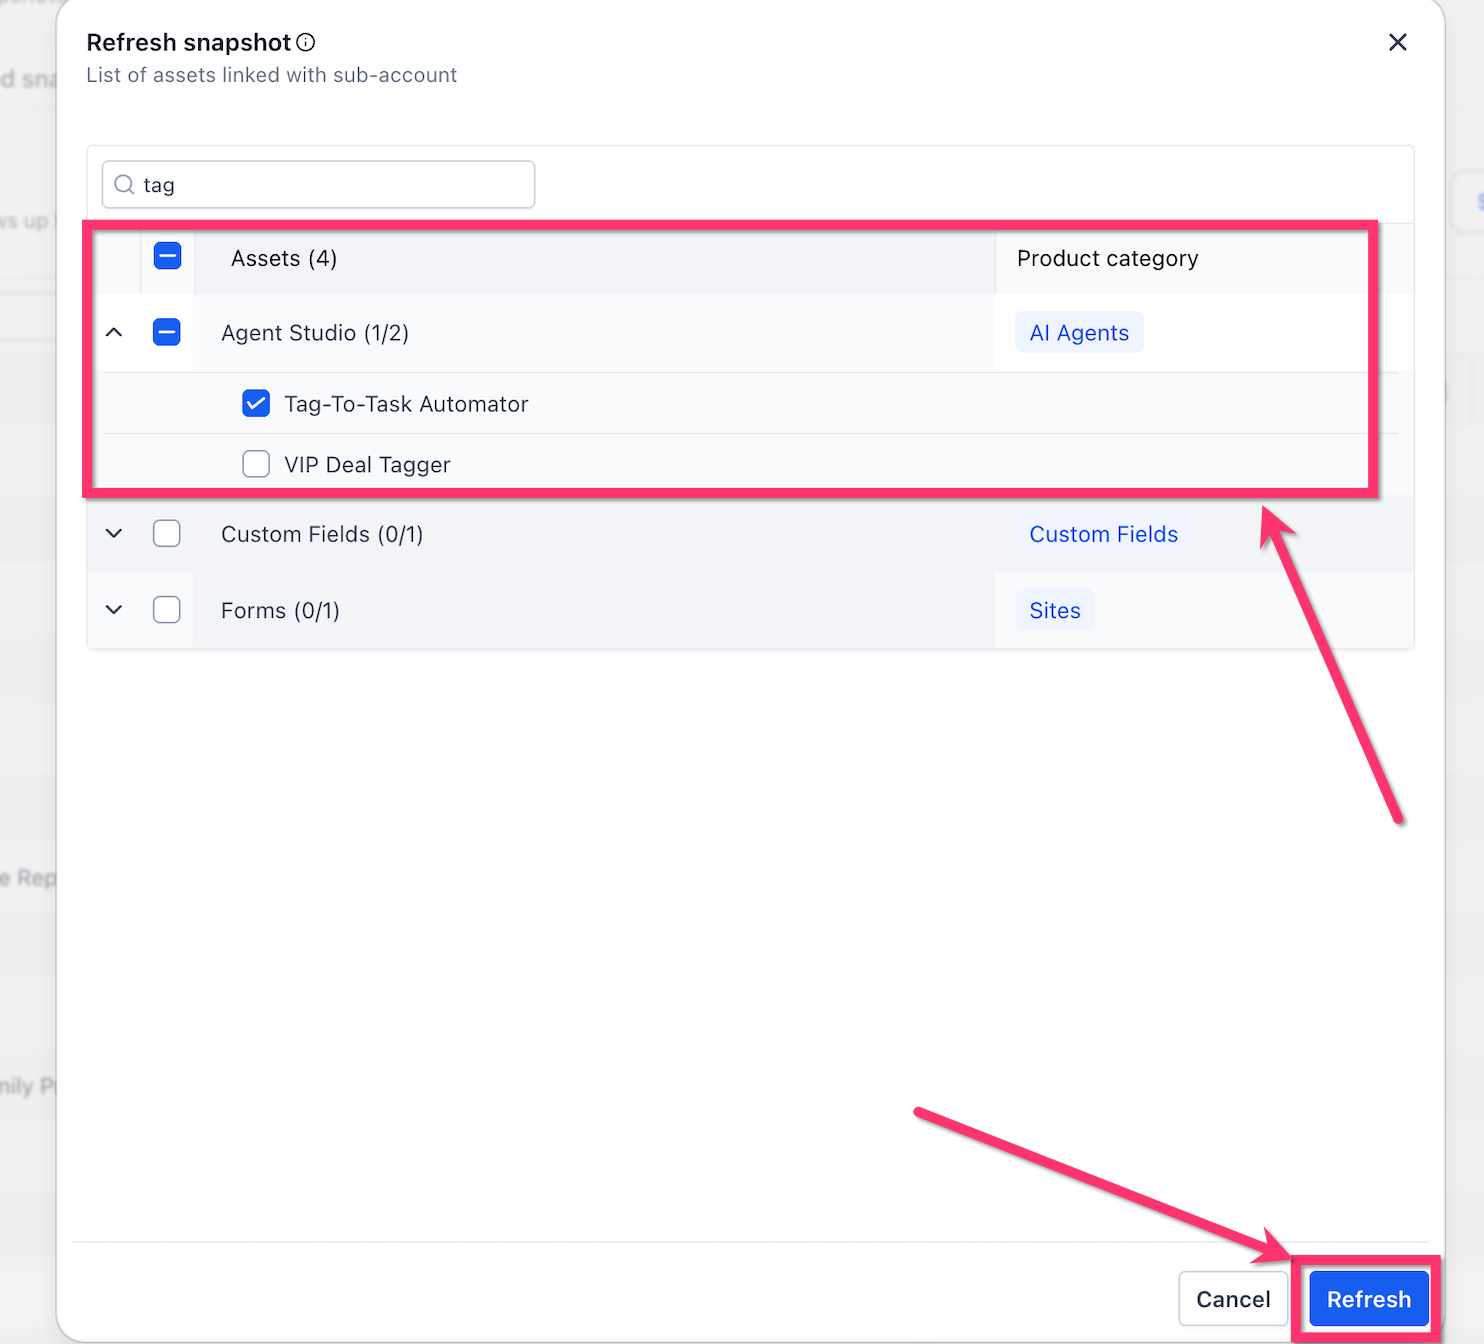
- Expand the Agent Studio category.
- Select the updated Managed Agent.
- Select any new or modified supporting assets.
- Click Refresh.
- Wait for HighLevel to finish fetching the selected assets.
Verify the Managed Agent in the destination subaccount
- Open the destination subaccount.
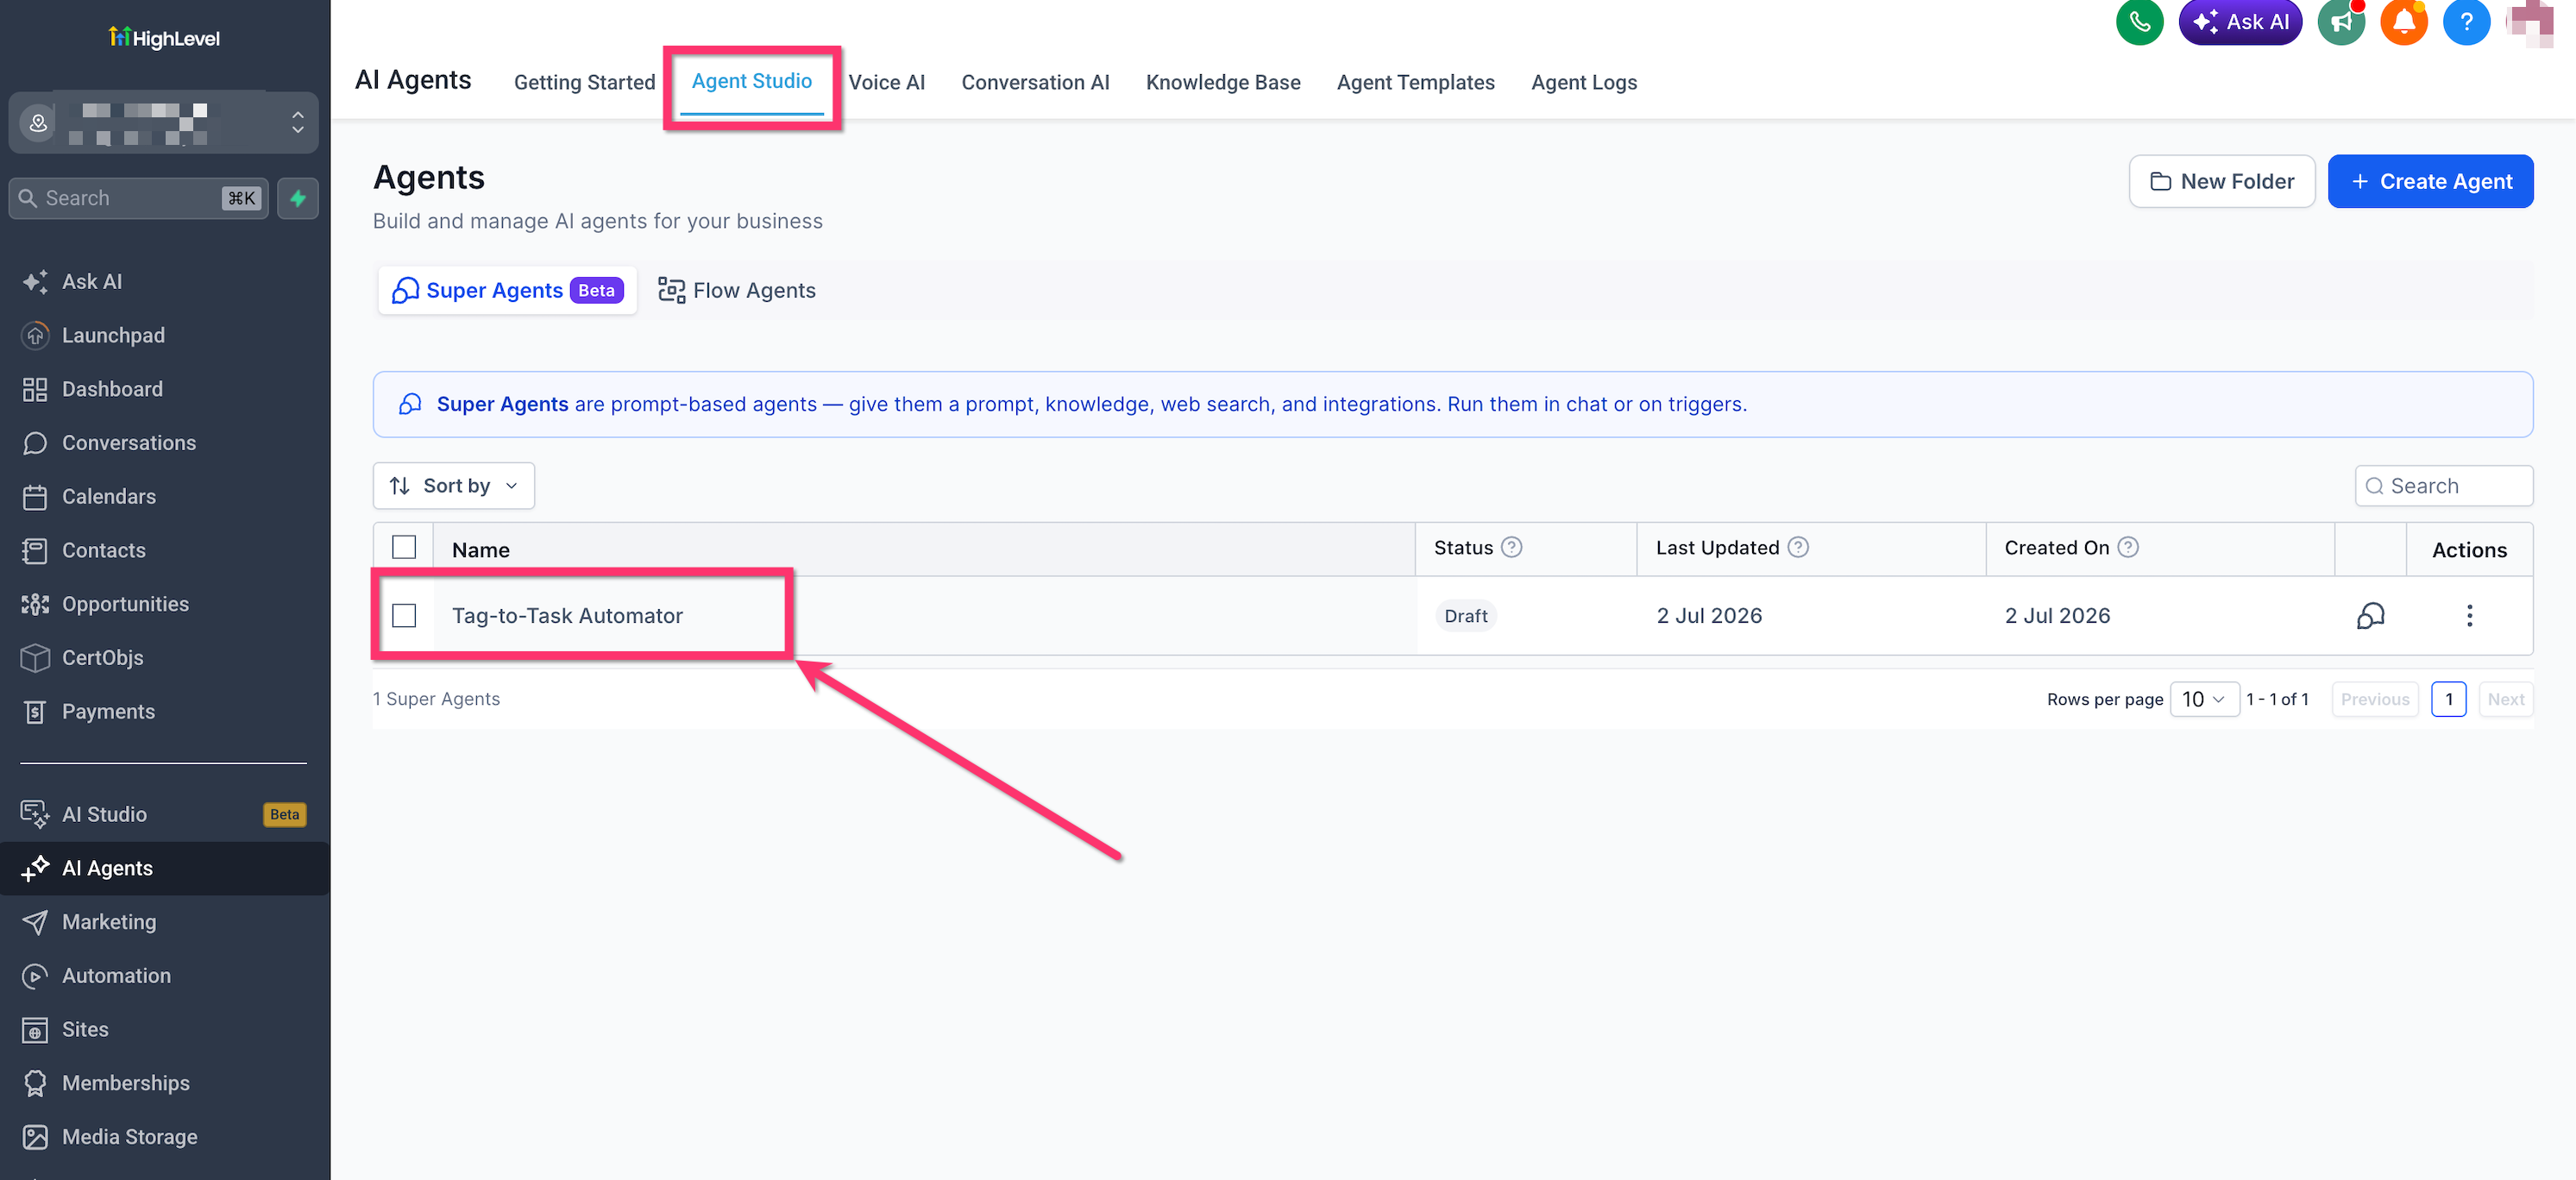
- Navigate to AI Agents > Agent Studio.
- Open the Managed Agents tab.
- Confirm that the transferred agent appears in the list.
- Open the agent and review its name, description, triggers, skills, capabilities, Knowledge Base configuration, instructions, and required integrations.
- Test the agent in the destination account.
- If any required integrations, permissions, or credentials are missing, configure them in the destination subaccount.
- Publish or activate the agent when it is ready for use.
05What it looks like in HighLevel
06Things to know before you rely on it
- Snapshots do not update automatically when the source Managed Agent changes; you must refresh the Snapshot to capture updates.
- Integrations, third party connections, credentials and other account specific resources are not transferred and must be set up in the destination subaccount.
- Conflict checking is optional but recommended when the destination account may already contain a similar agent or an earlier version.
- Managed Agents appear under the Agent Studio category in the Snapshot asset selector.
07How it connects to the rest of HighLevel
- Overview of Flow Agents in Agent Studio Flow agents overview
- Set up and Use Managed Agents in Agent Studio Managed agents setup
- HighLevel pricing and plans Pricing
Michael's take

When you have a set of AI Agents that work well for a specific service or industry, packaging them in a Snapshot can simplify deploying the same agents to new client accounts.
If your clients need highly customized integrations or each account has unique credentials, the feature may not deliver enough value. You’ll still have to redo the connection work after each load, which can reduce the efficiency gain.