
01Who this is for
- Founders who need a reliable way to collect client data without complex branching.
- Small business owners running appointment booking flows that must capture email, phone and confirm details in order.
02Sequential nodes, explained
The Sequential Node is a single node that houses a series of processing nodes. When the node receives input from a trigger or another node, it executes each processing node from top to bottom. Each processing node performs a specific task such as capturing input, calling an API, or running an internal action.
All outputs from the processing nodes become runtime variables that are available to later steps. After the last step finishes, the Sequential Node sends its combined output to the next node in the agent flow. The node lives in Agent Studio under the Nodes panel where you can drag it into a flow and configure its steps.
03How businesses use the Sequential Node
- Real estate lead capture. A real estate team adds an Email Address node, a Phone Number node, and a Text Input node inside a Sequential Node. The collected email and phone are stored as variables and later used in an API Call that creates a lead in their CRM.
- Fitness class sign up. A gym creates a Single Choice node to let users pick a class, then adds an Action node that registers the user for that class in the platform. Variables from the choice step fill the action fields.
- Ecommerce order confirmation. An online store builds a Sequential Node with a Text Generation node to draft a thank you message, then adds an Email Address node to capture the customer email and an Action node that sends the generated text as an email.
04Before you start
- A trigger must be configured to start the agent before adding a Sequential Node.
05How to set up and use the Sequential Node in HighLevel
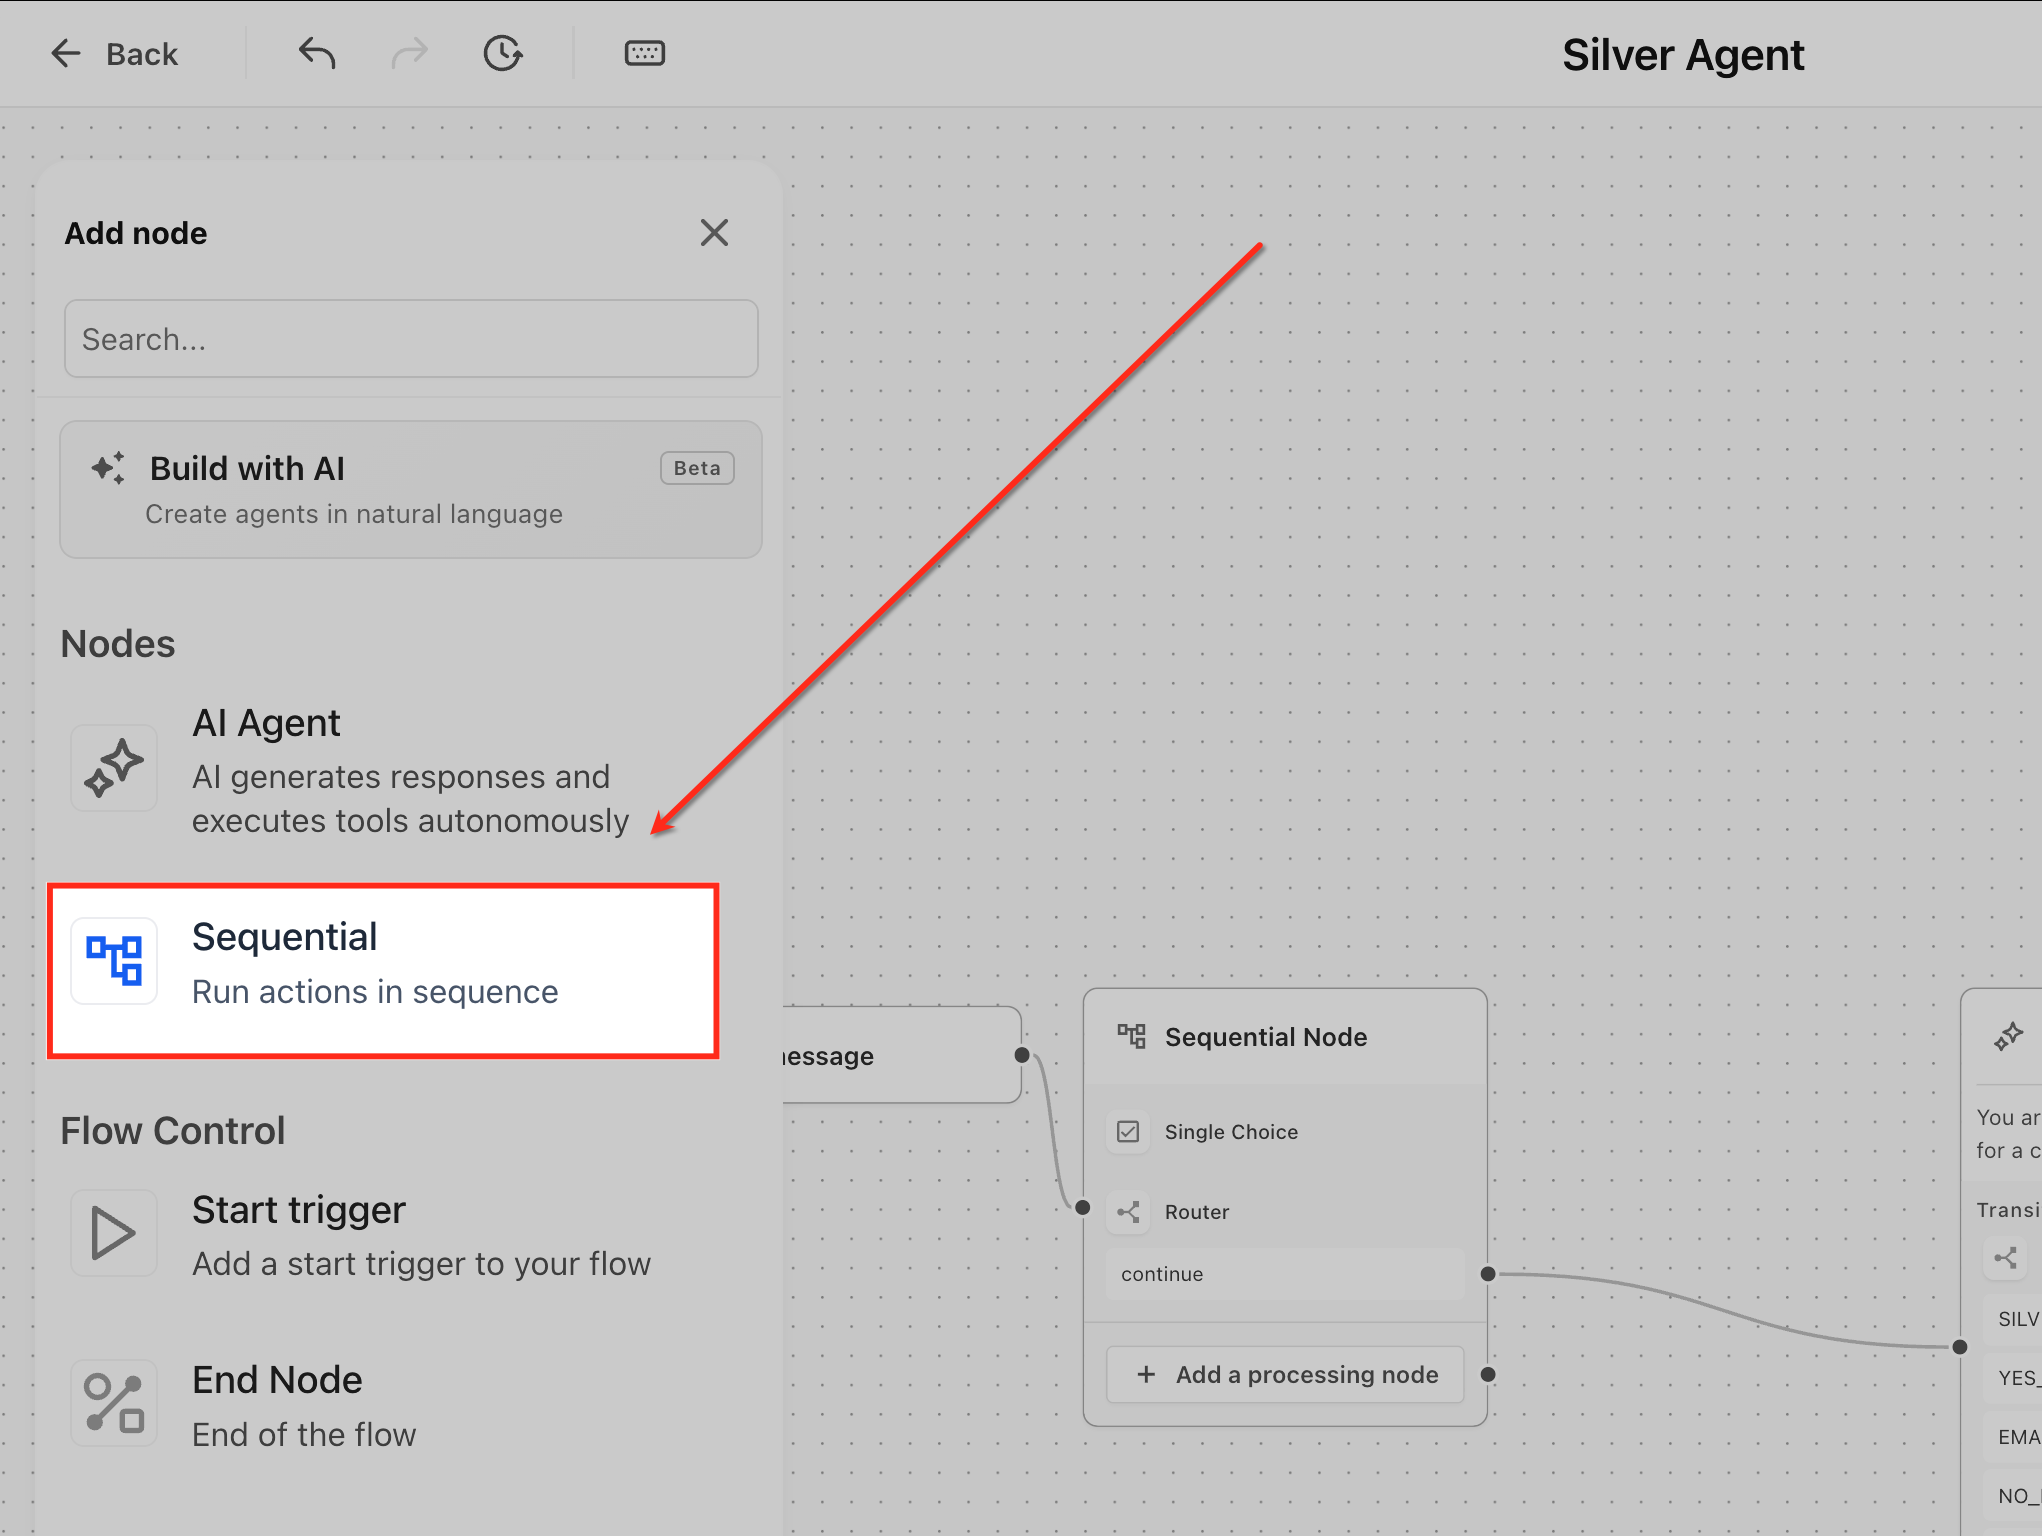
Configure Sequential Node
- Add the Sequential Node from the Nodes panel and attach it to a trigger or previous node.
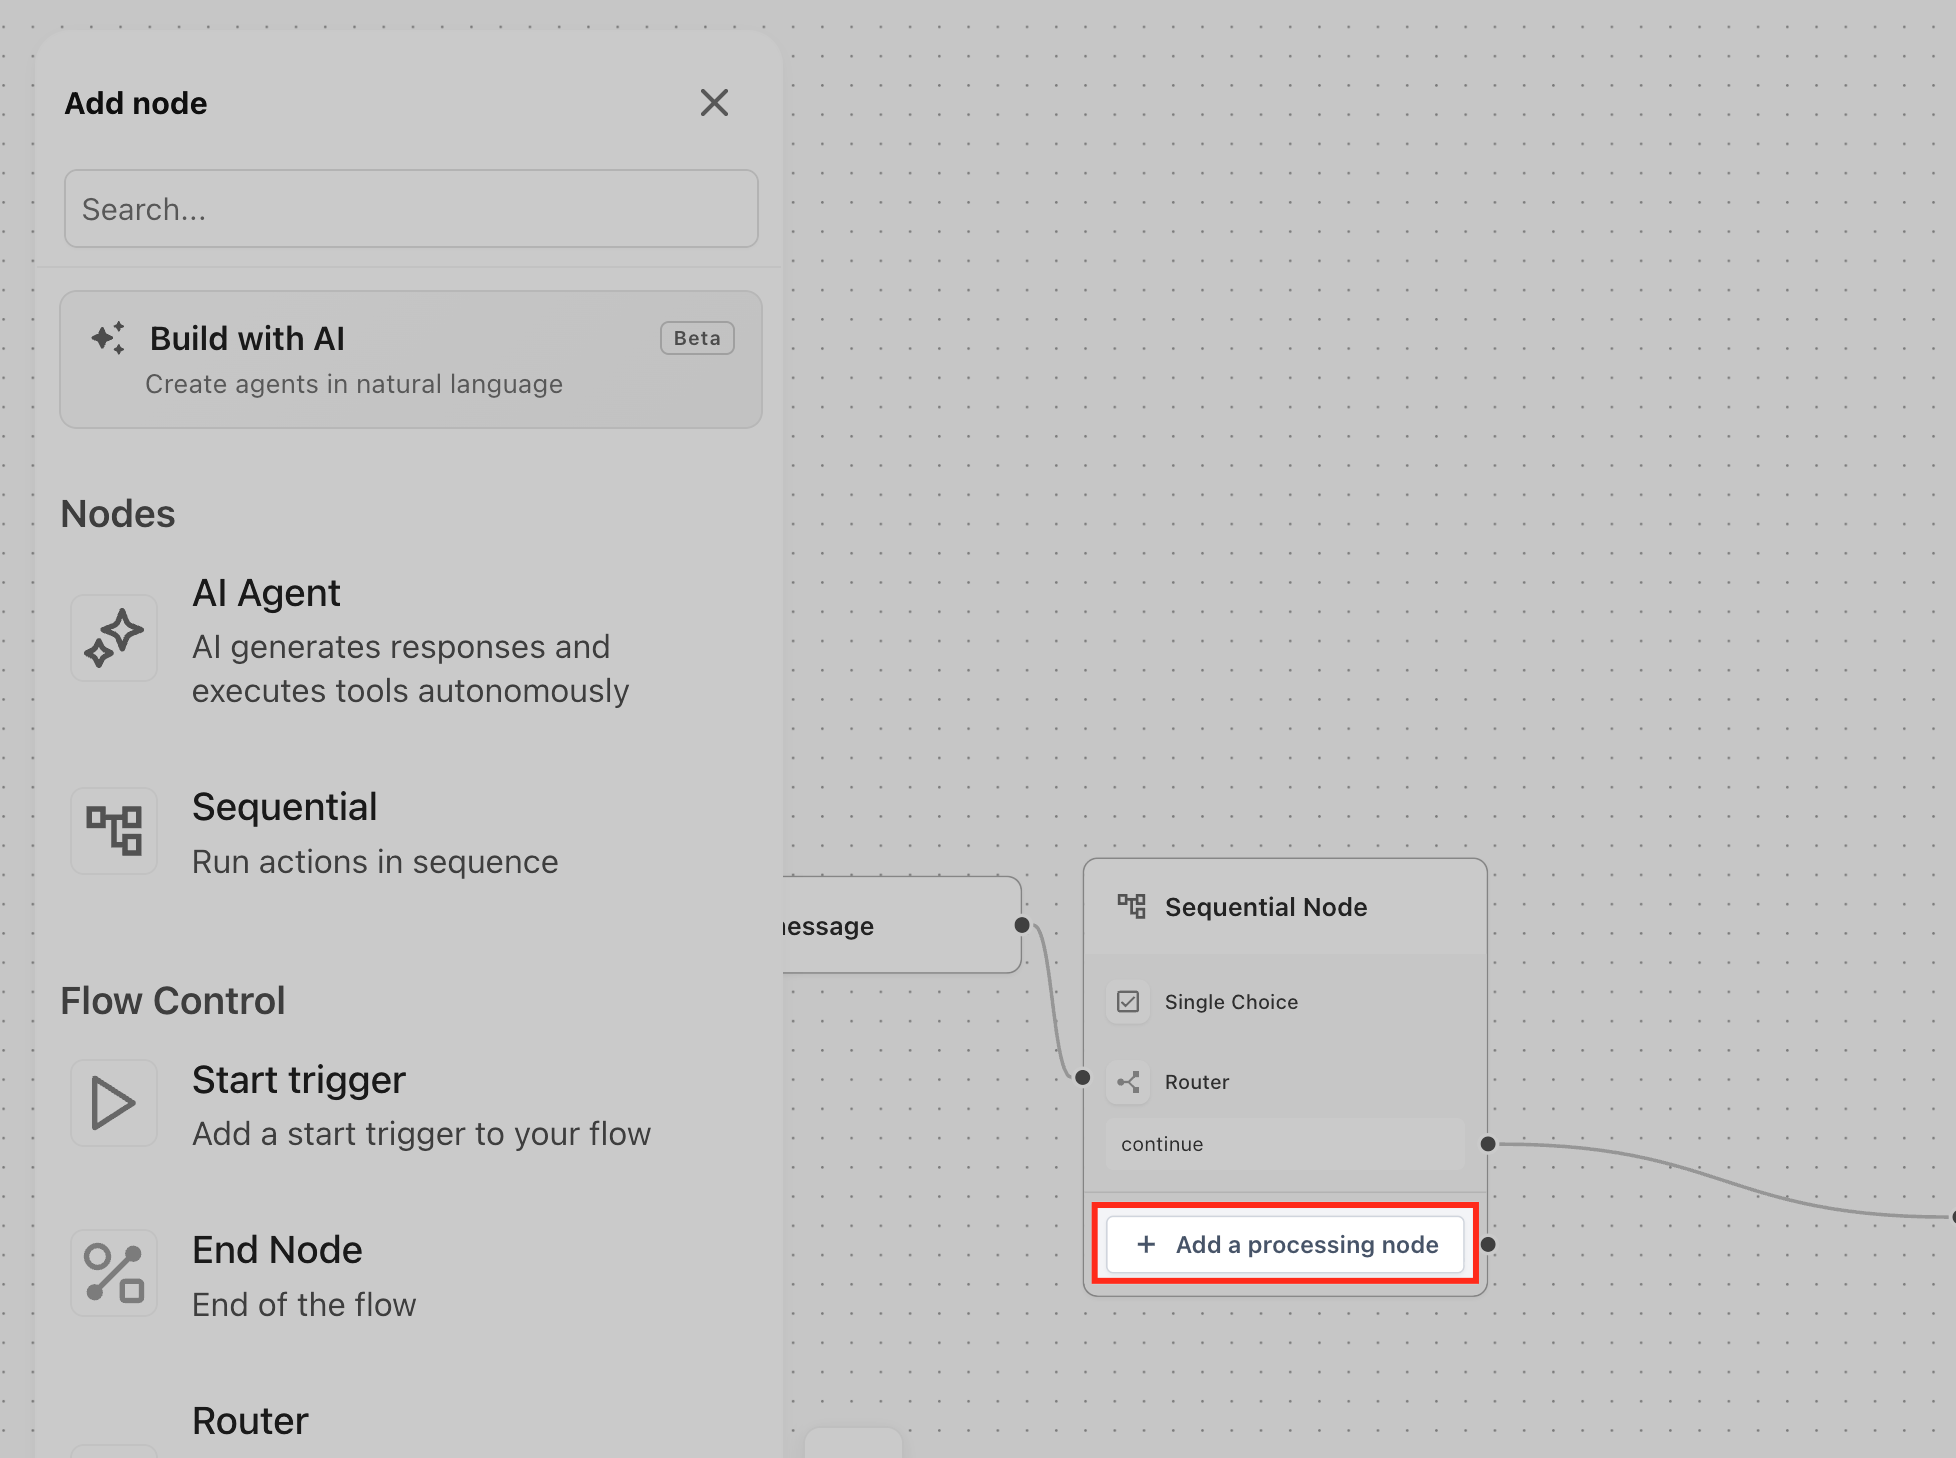
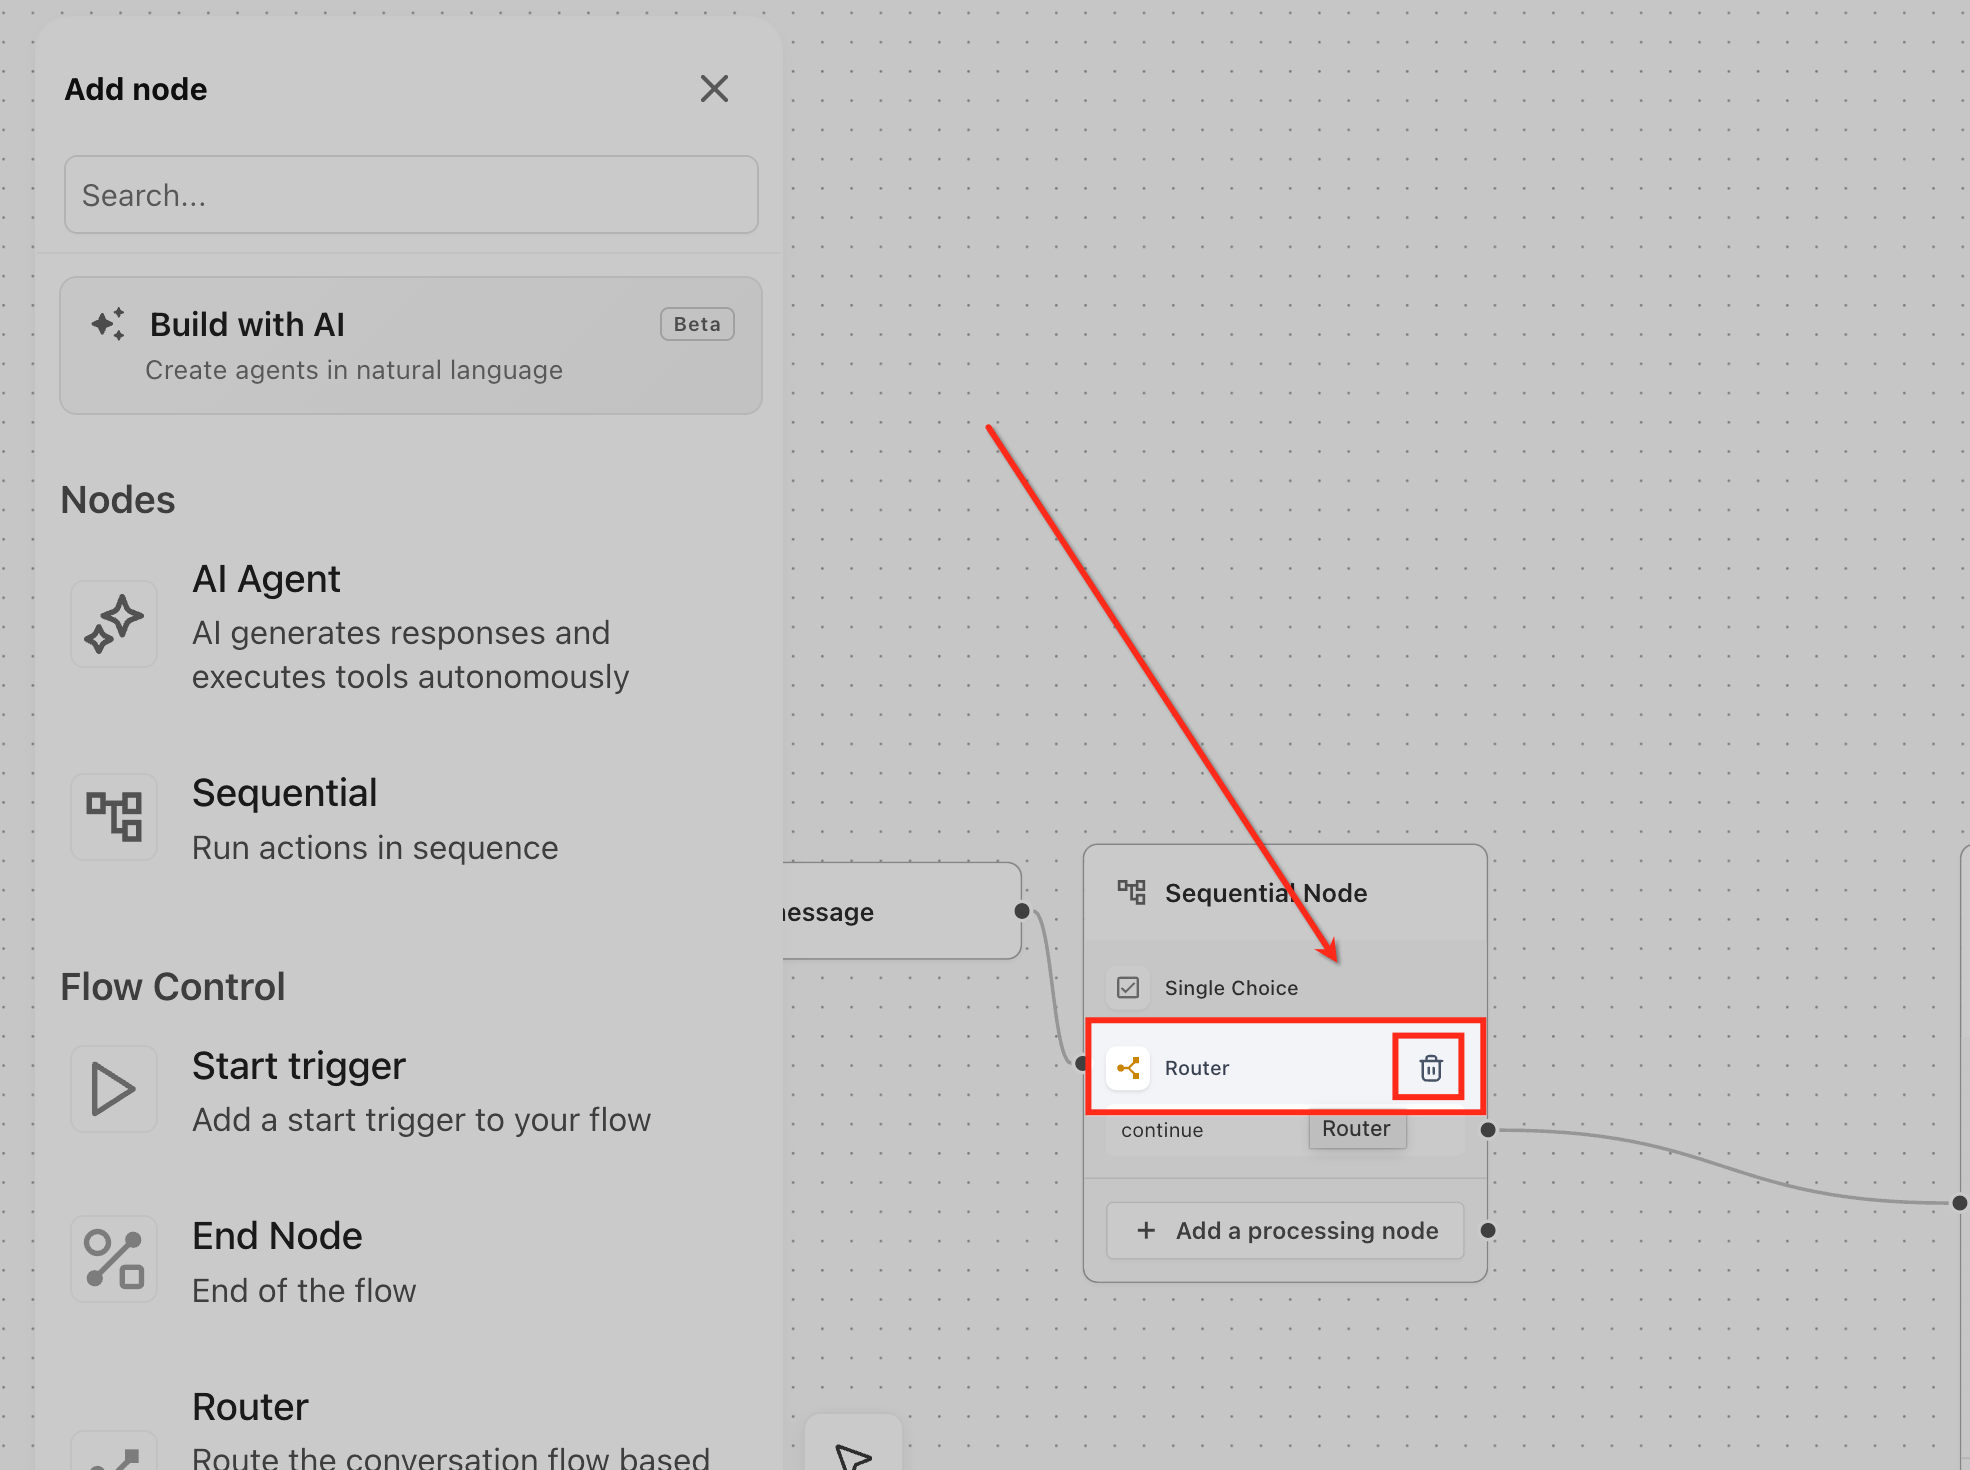
- Click “Add a processing node” to begin building the sequence of steps.
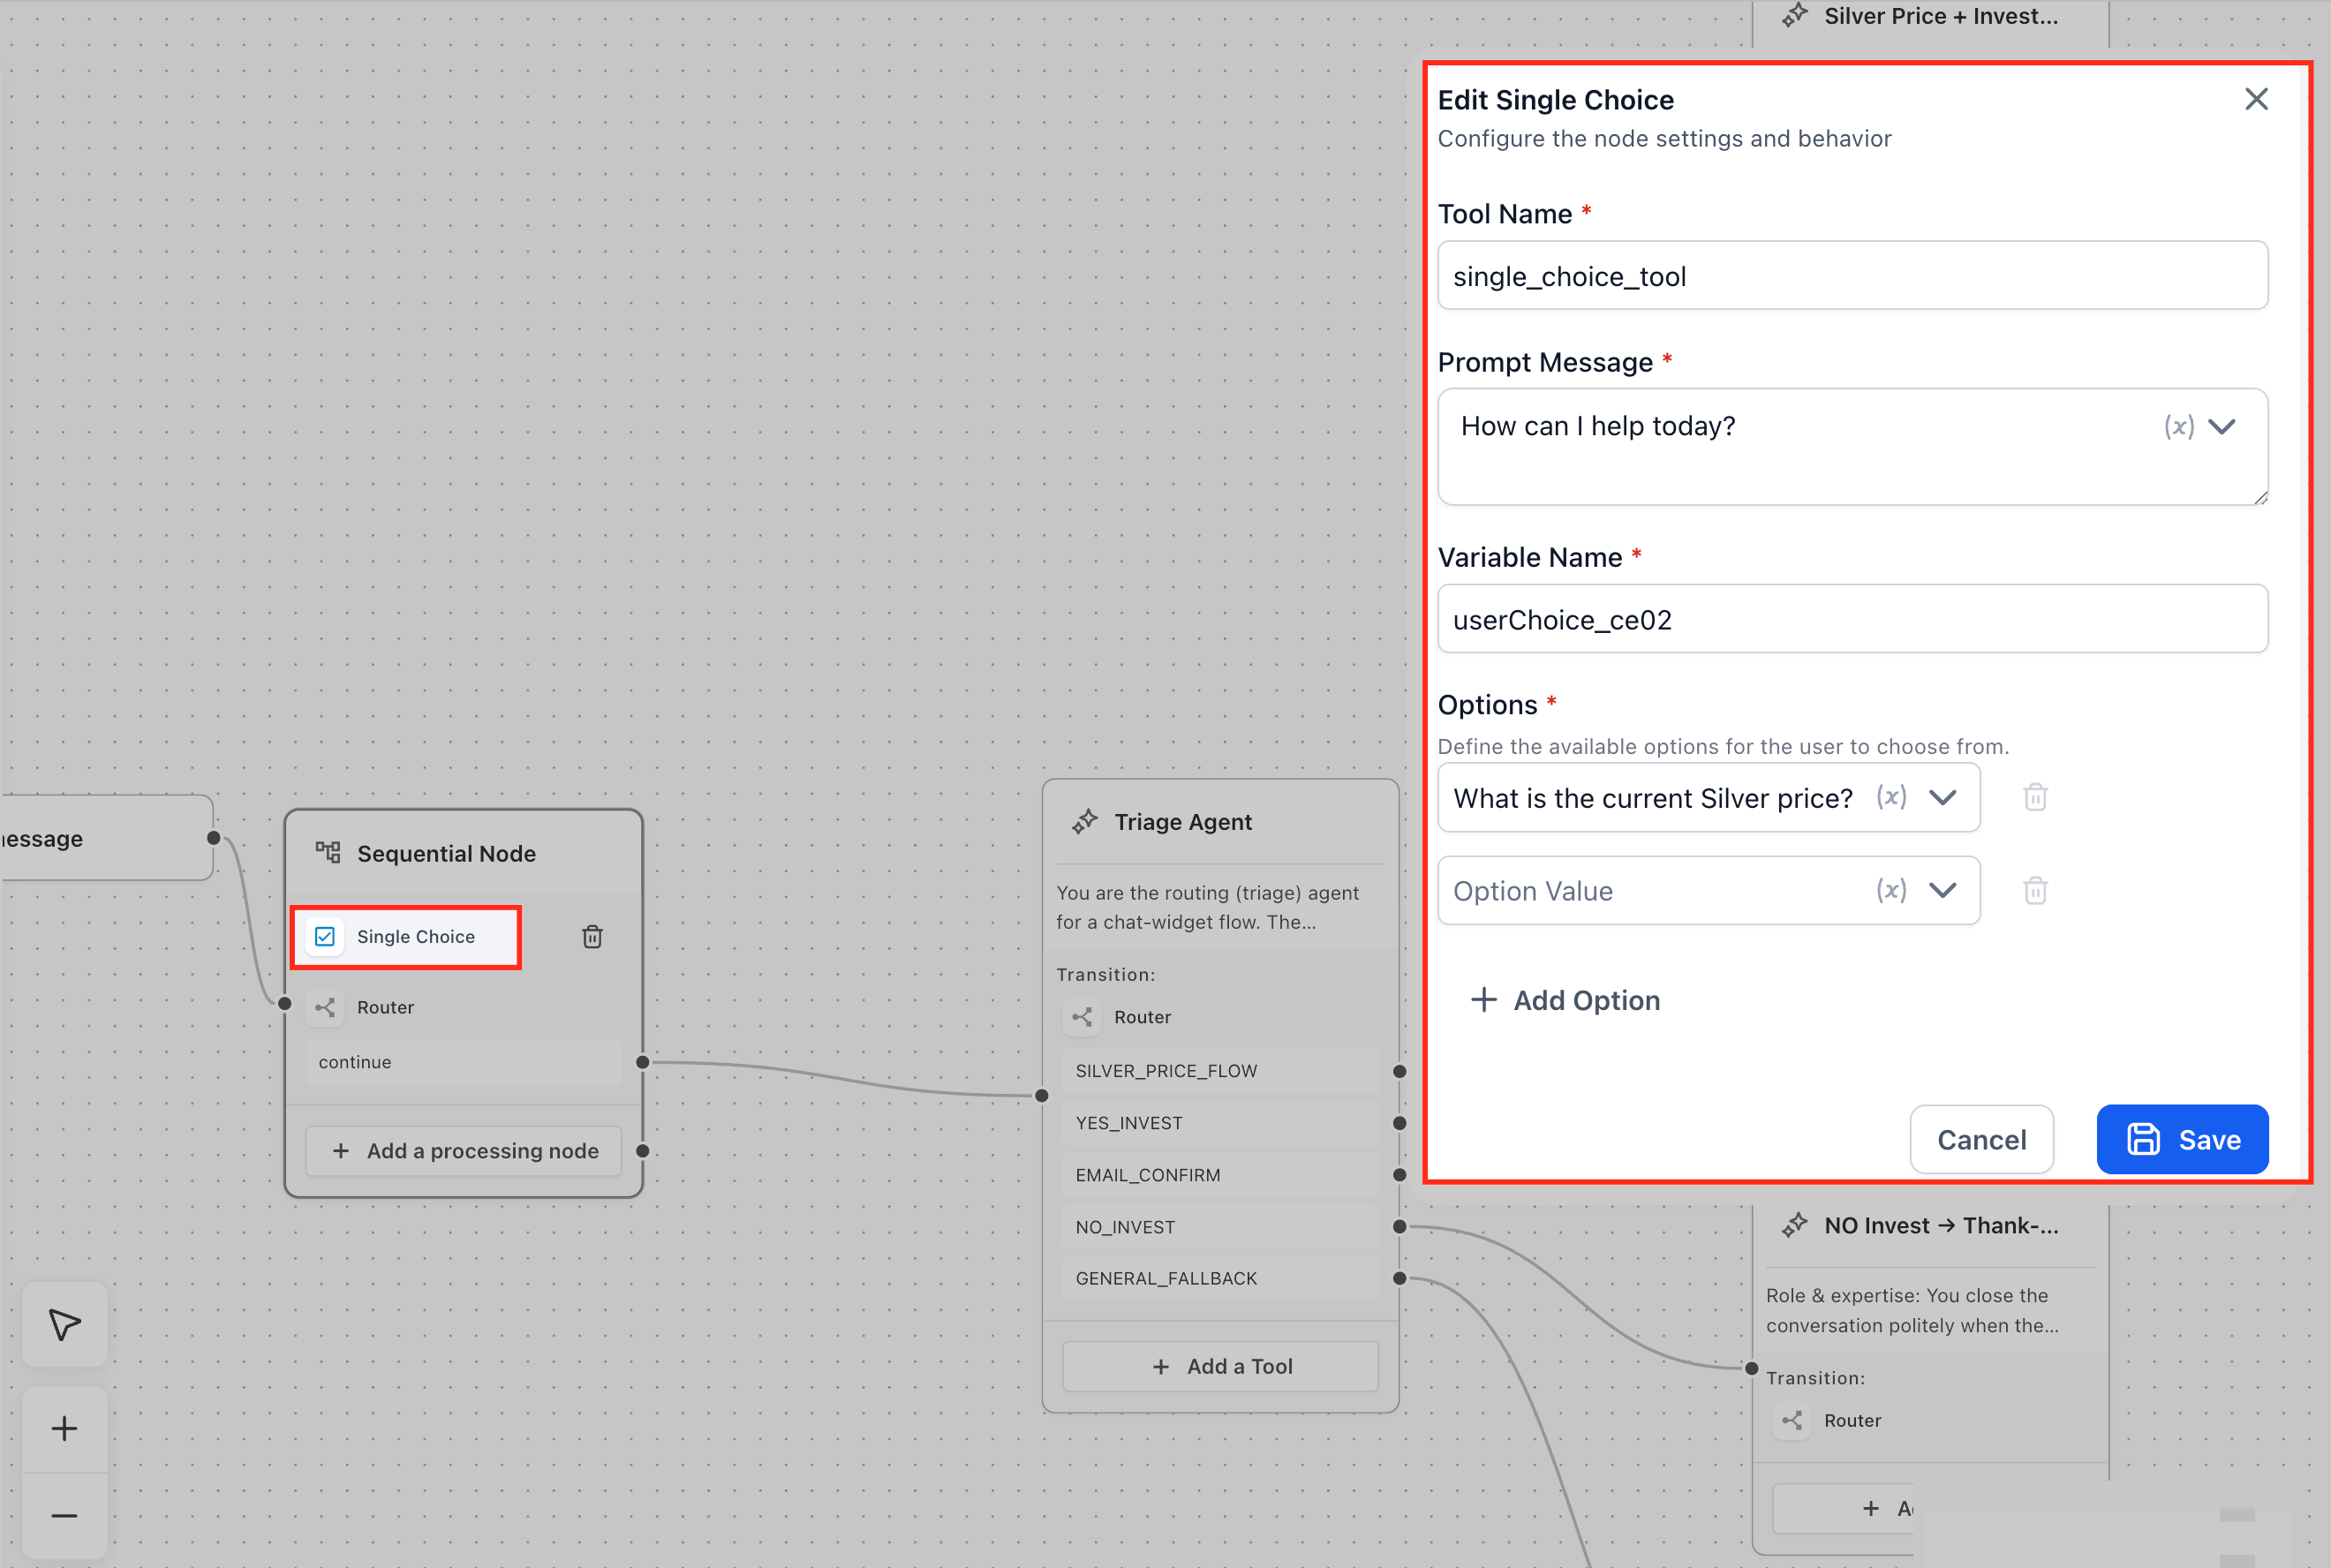
- Open each processing node and set its prompt, validation rules and any error messages.
- Drag or reorder the processing nodes so they appear in the exact order you want them executed.
- Use the {} variable picker to insert runtime variables from earlier steps into later step fields.
- Add an Actions or API Call processing node, fill in required fields such as endpoint, headers or request body, and reference variables as needed.
- Link the Sequential Node to the next node in the overall agent flow.
06What it looks like in HighLevel
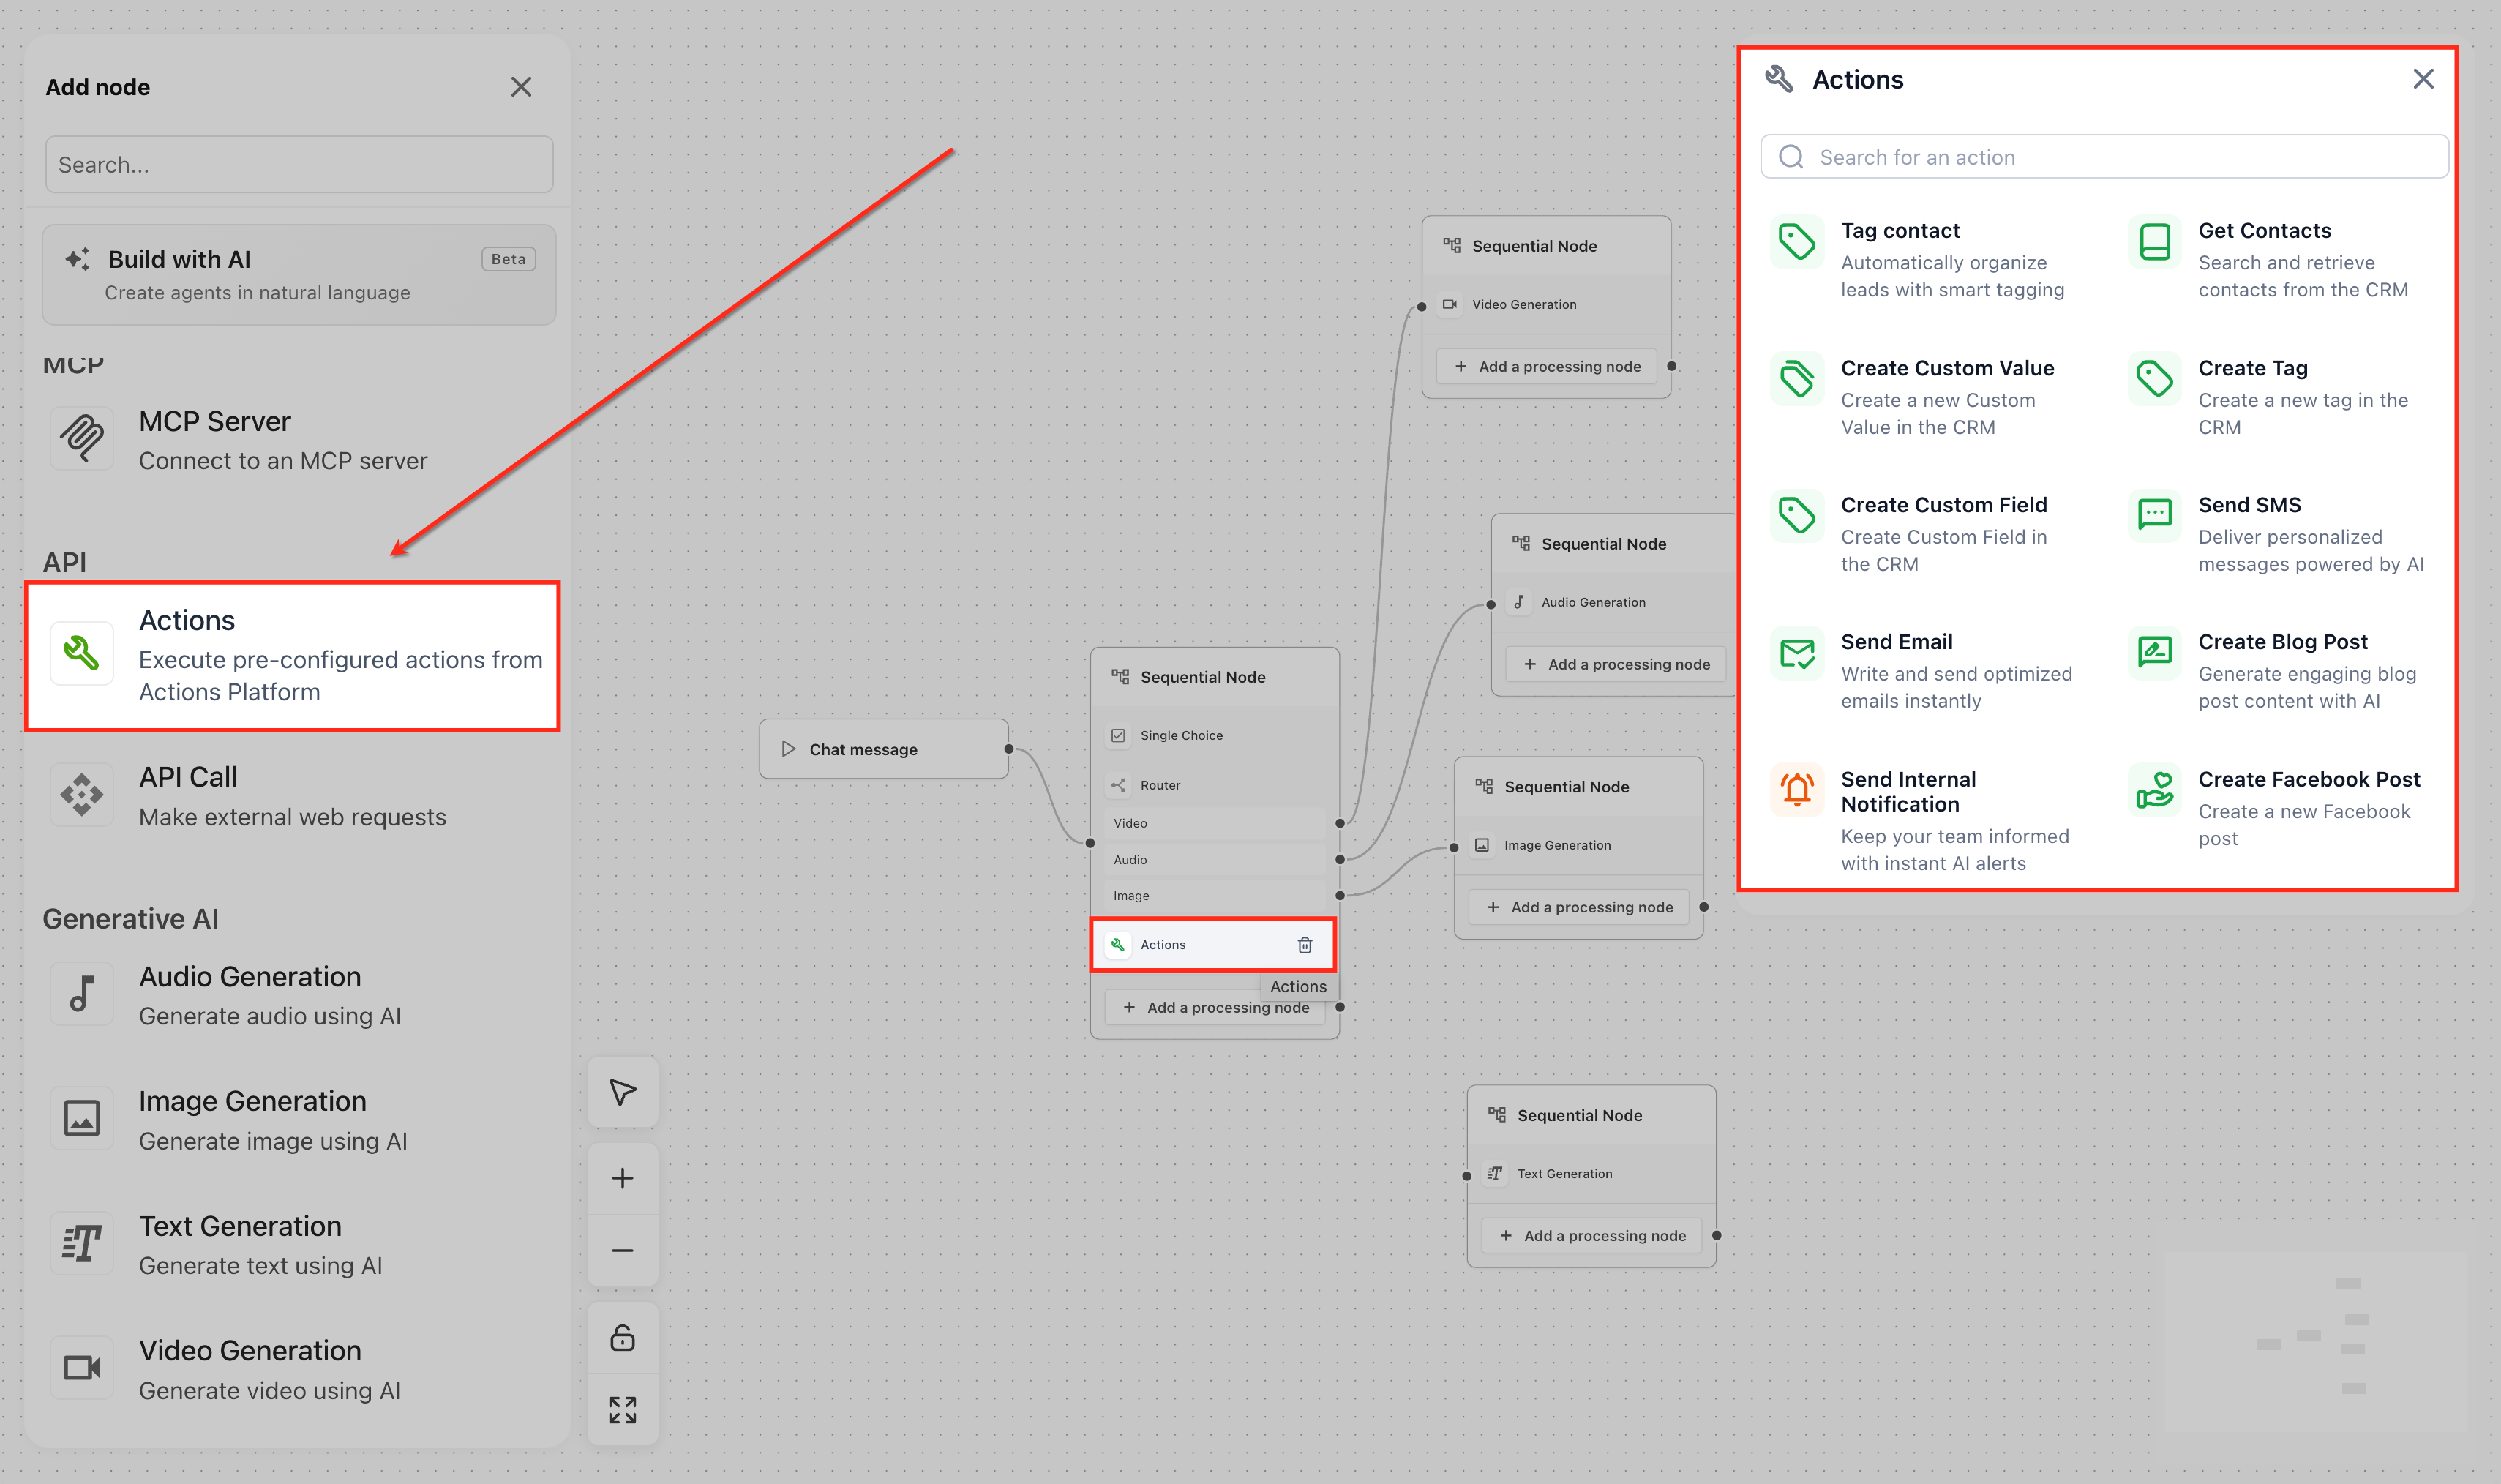
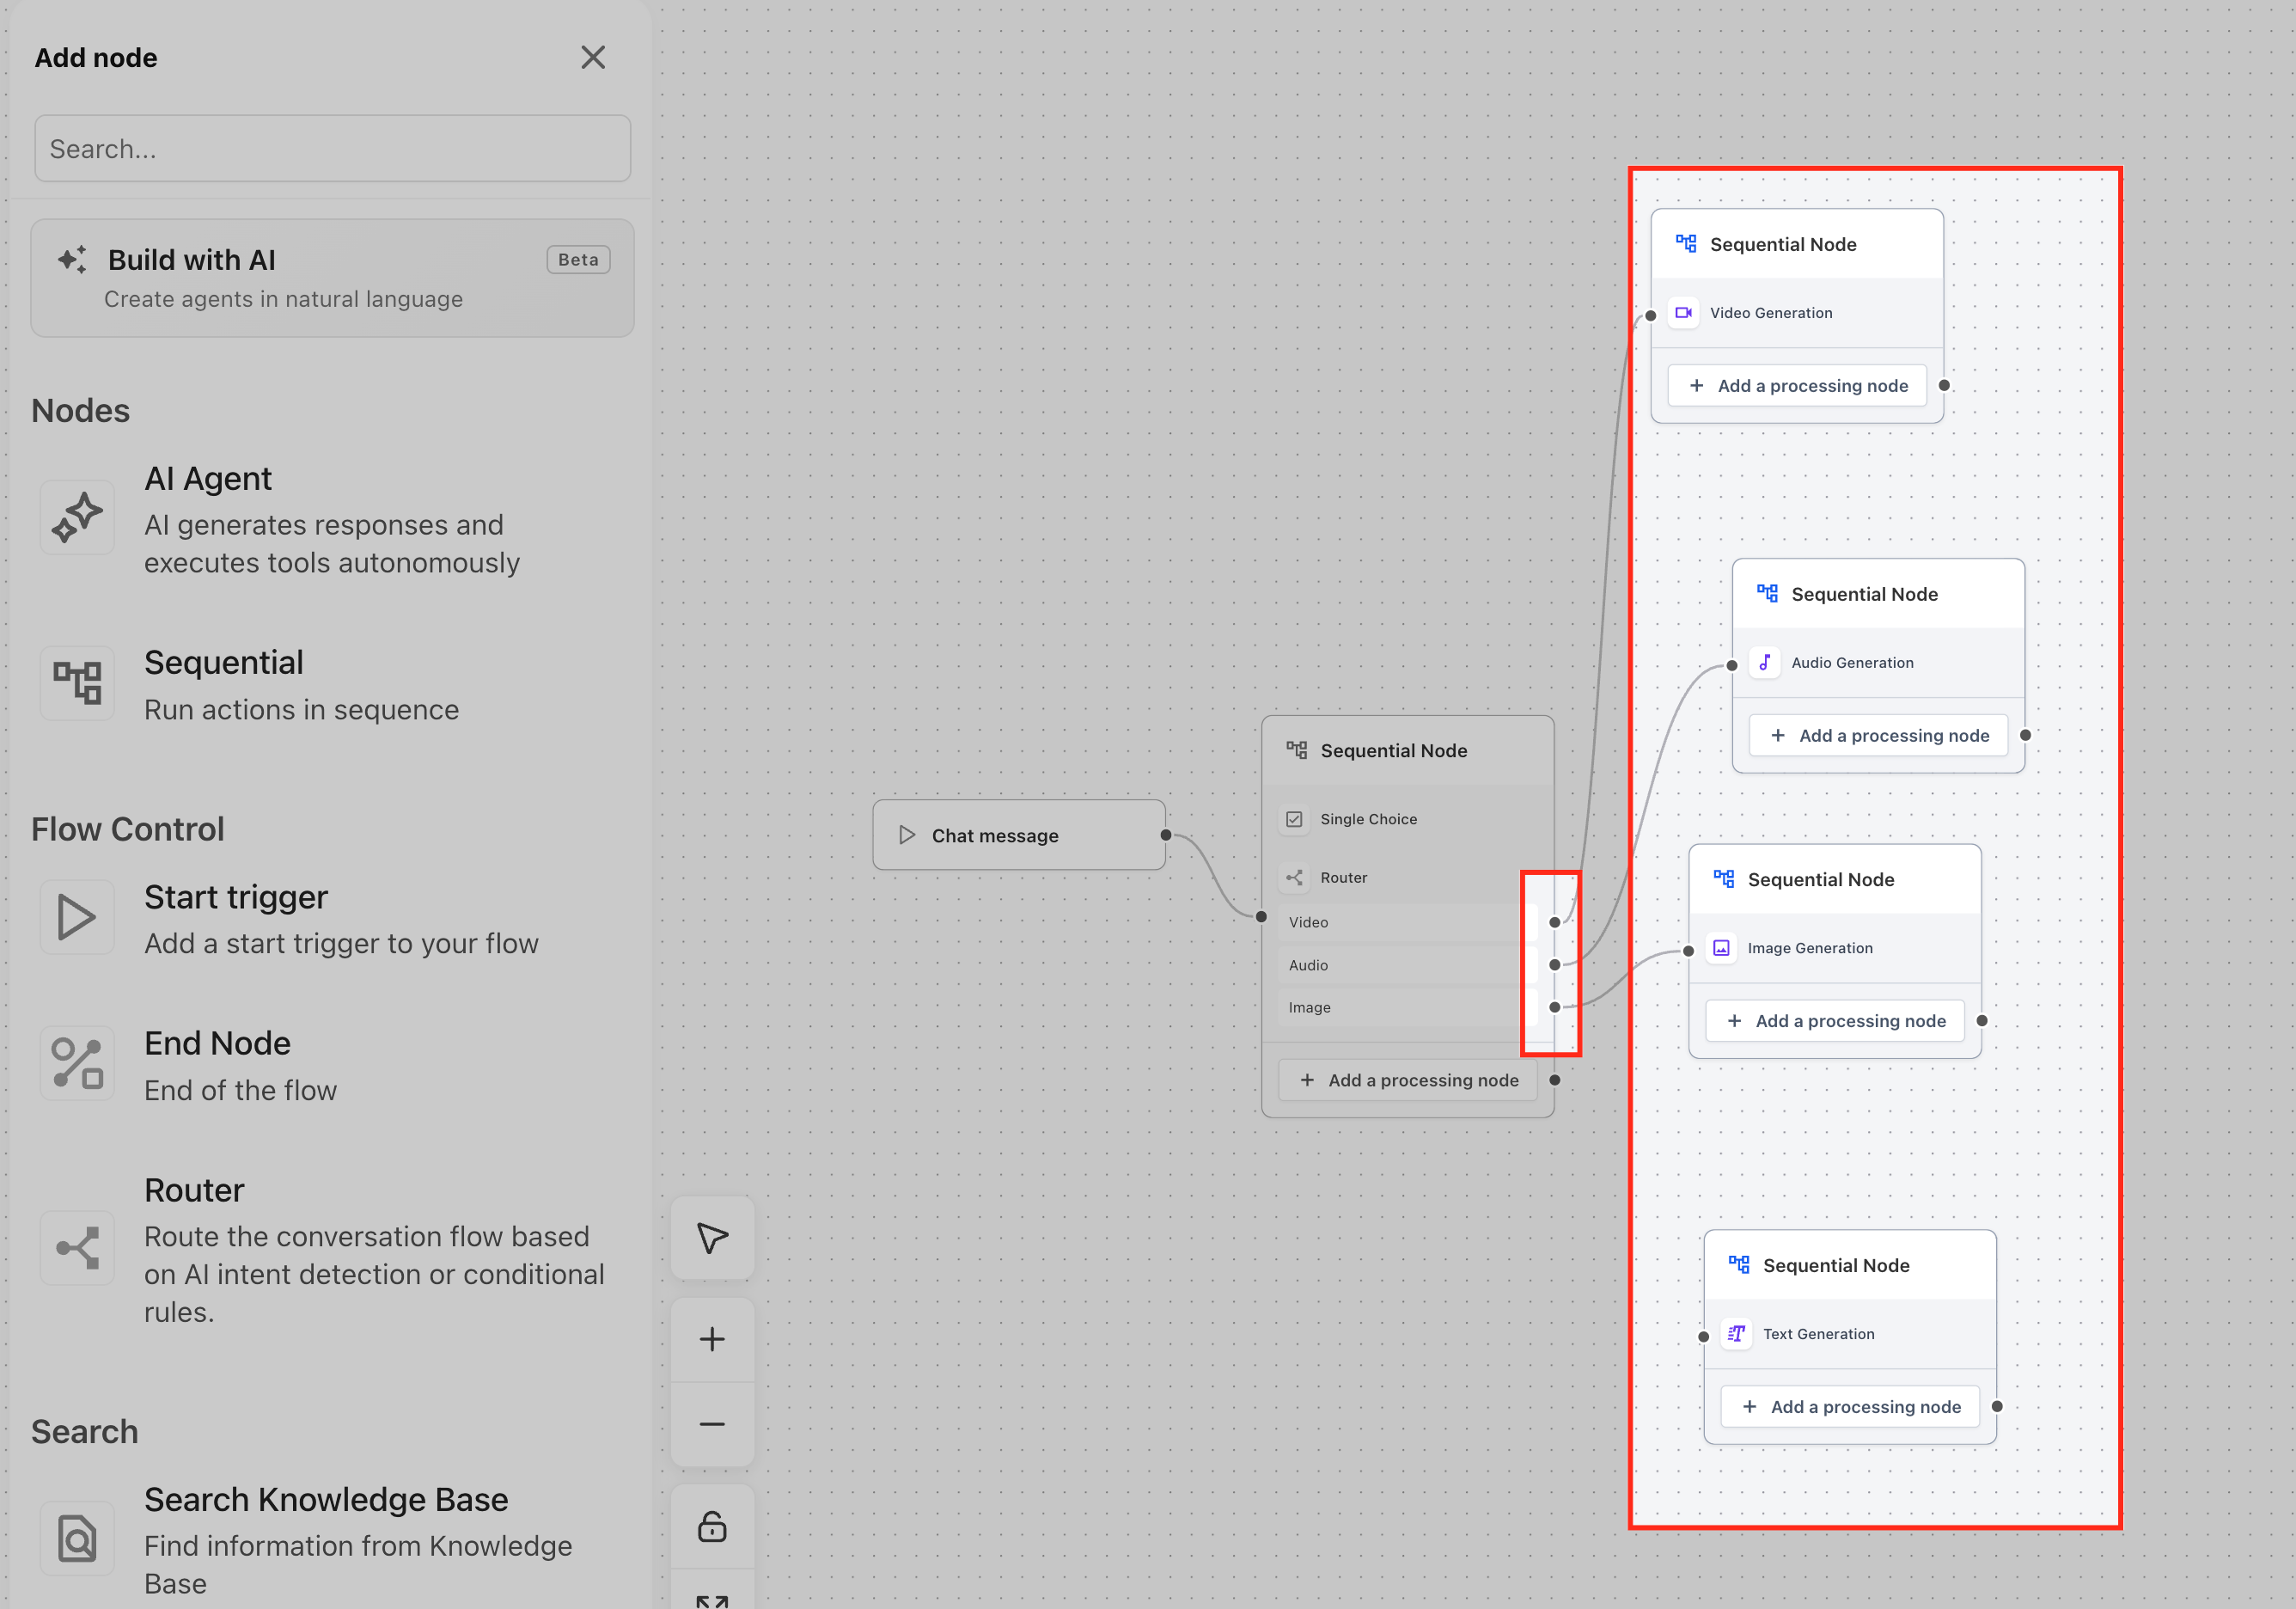
07Settings that matter
- Prompt message. The text shown to the user when the processing node asks for input.
- Error message. The response displayed if the user’s input fails validation.
- Validation rules. Criteria that input must meet, such as email format or phone number structure.
- Endpoint. The URL that an API Call node sends its request to.
- Headers. Key value pairs added to an API Call request for authentication or content type.
- Request body. The payload sent with an API Call, which can include variables from previous steps.
08Things to know before you rely on it
- Rearranging steps after they are added may not be supported or can be difficult; plan the order before saving.
- API Call steps return raw responses without any AI interpretation; additional logic must be handled in later steps.
09How it connects to the rest of HighLevel
- Create, test and publish flow agents in Agent Studio Flow agents setup
- Set up custom values and variables in Agent Studio Custom variables
- Manage existing flow agents in Agent Studio Manage agents
Michael's take

I find the Sequential Node handy for repeatable processes like gathering contact info and then sending it to a CRM. All in one block.