
01Who this is for
- Founders of subscription businesses who need to update member status automatically when a payment succeeds or fails.
- Ecommerce owners who want to send immediate confirmation messages after a one time purchase.
- Support managers who require alerts whenever a payment attempt does not go through.
02Payment received workflow triggers, explained
The Payment Received trigger monitors all payment activity recorded in the HighLevel platform, including one time invoices, recurring charges and Text2Pay links. When a payment matches the defined criteria, the trigger launches the attached workflow right away.
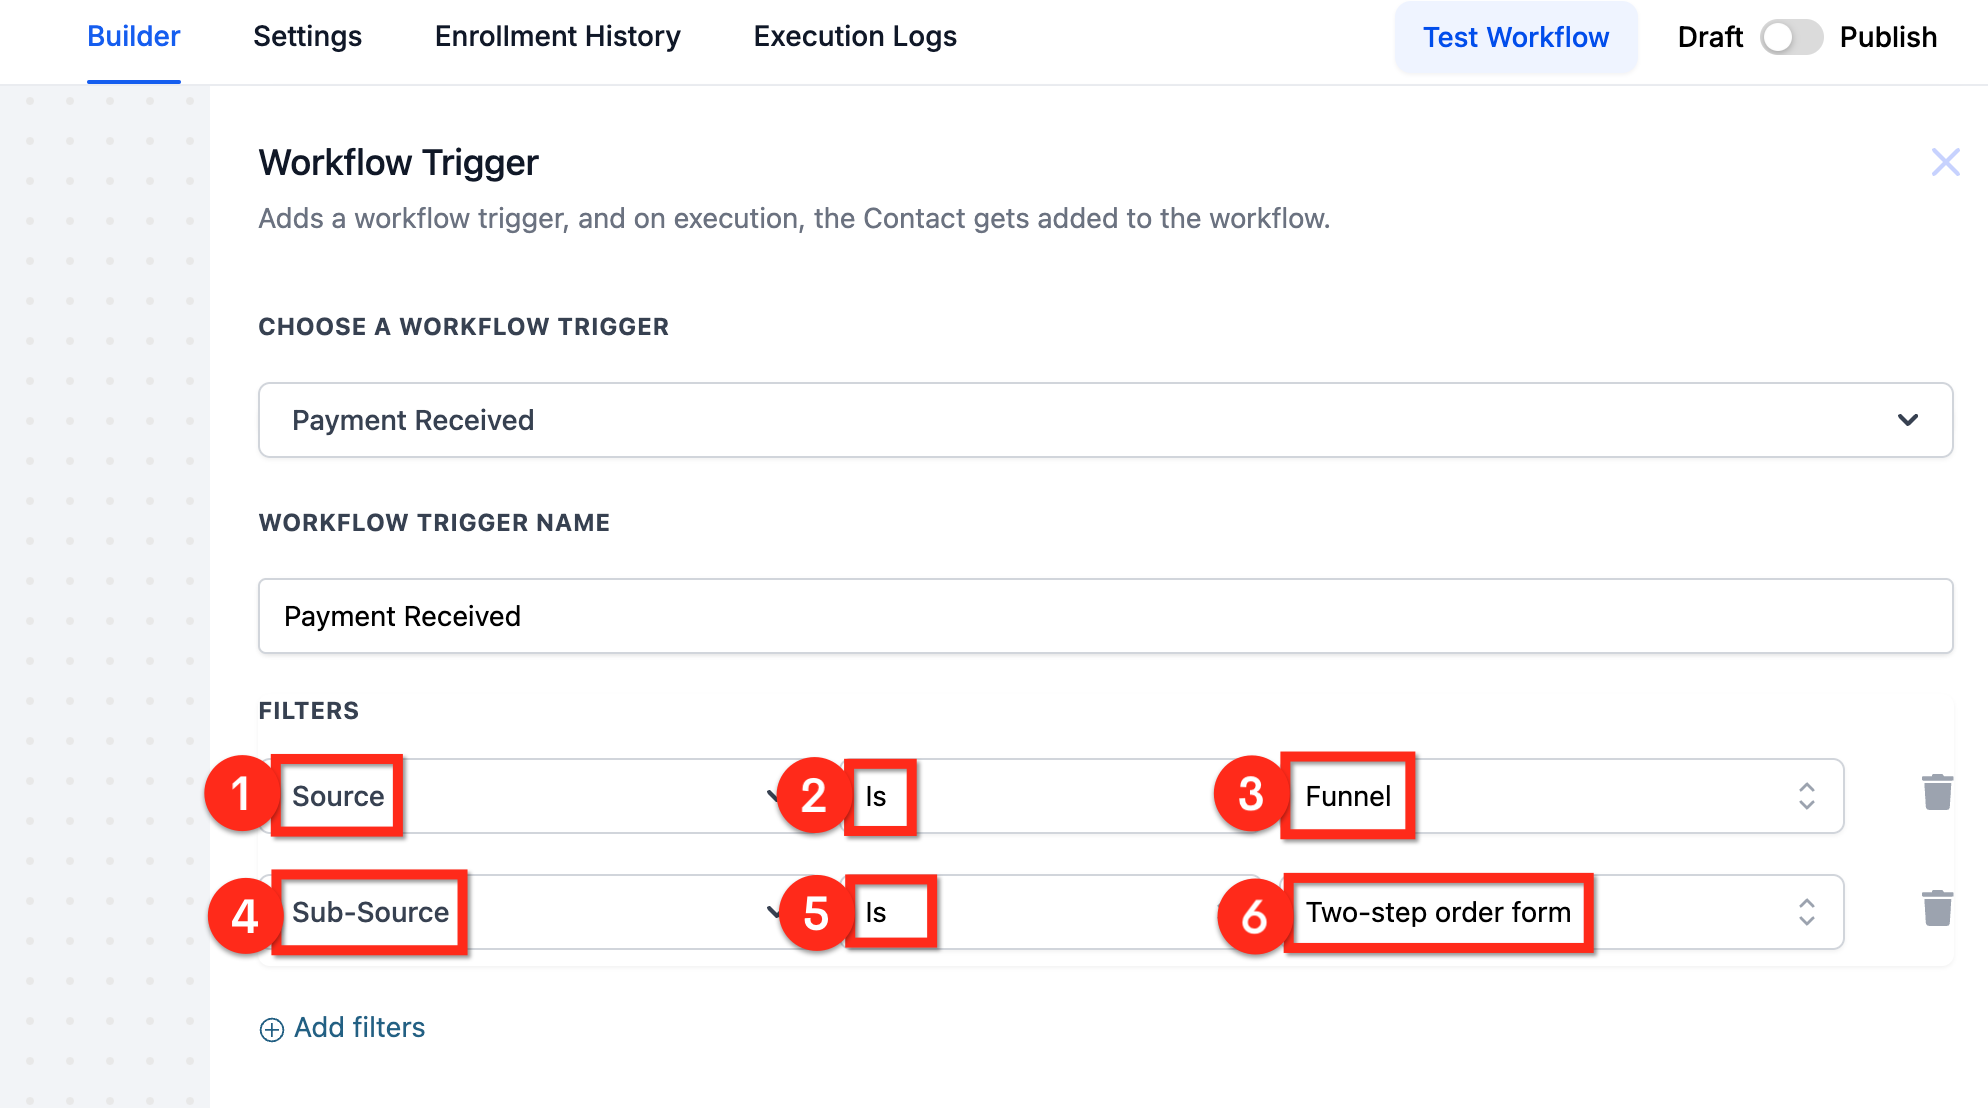
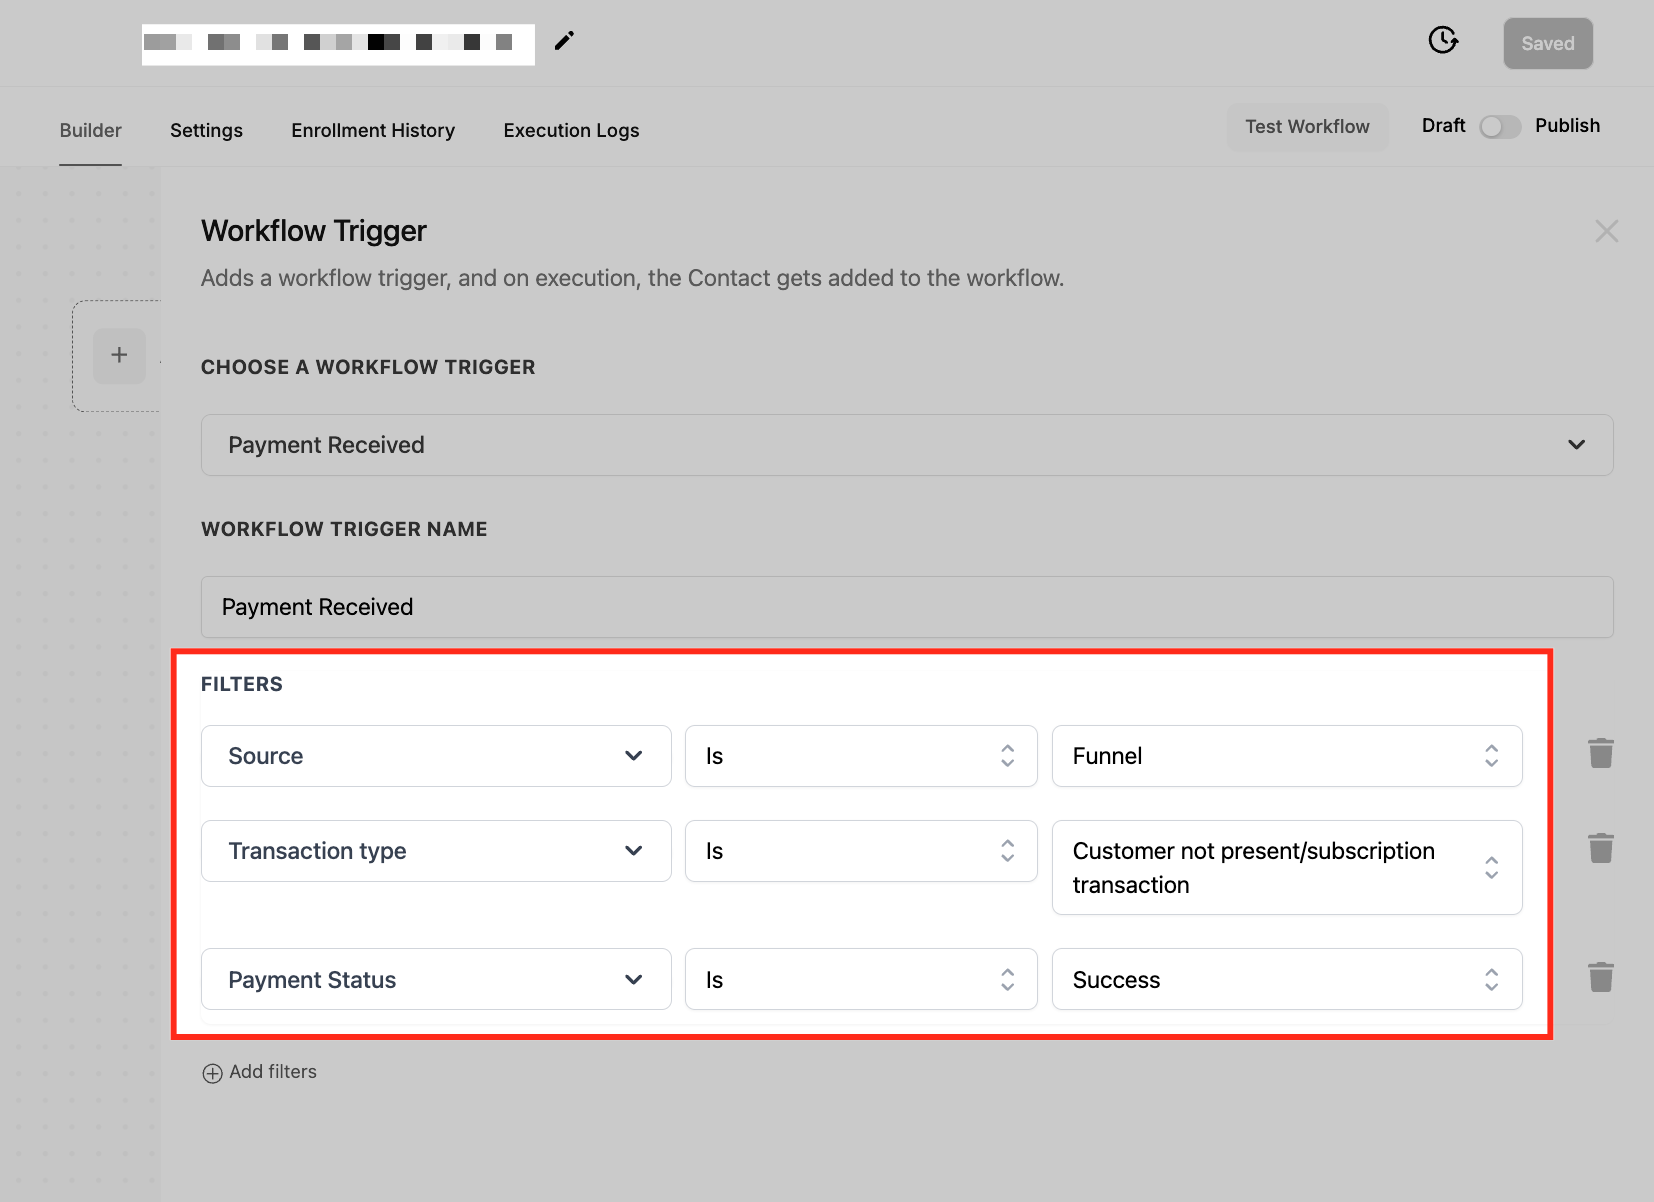
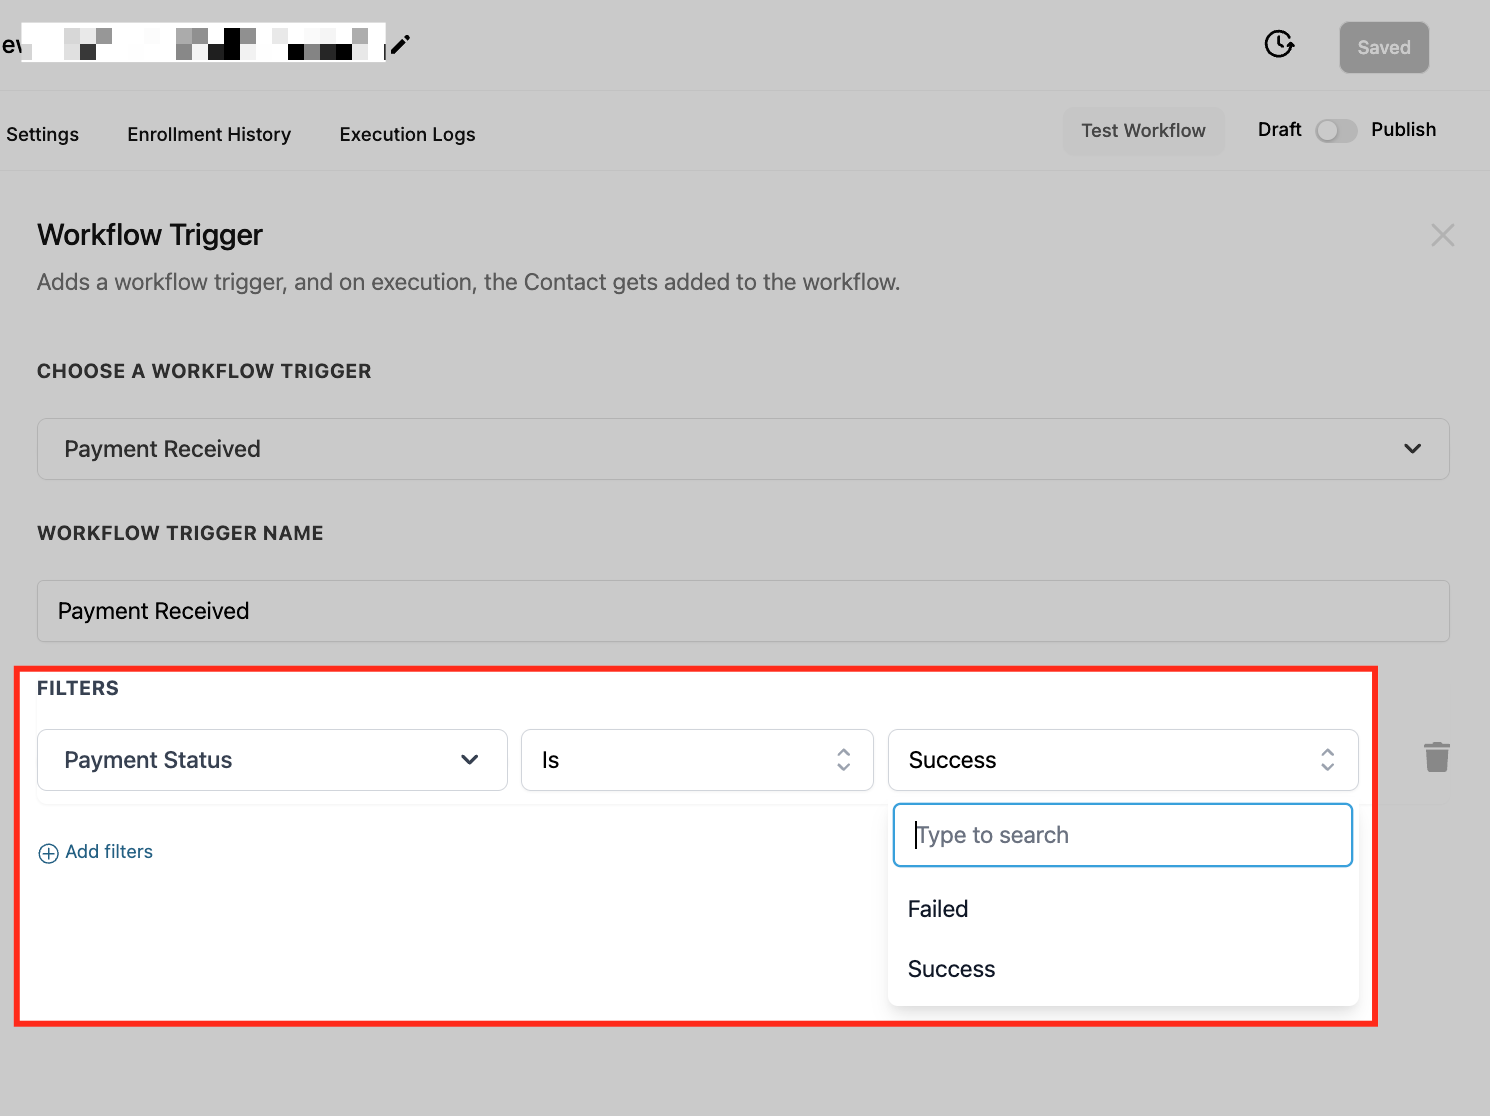
Filters let you limit the trigger to specific payment sources, sub sources, transaction types, products, calendars or payment status. Sub filters refine those choices further, such as selecting only two step order forms under the Funnel source. If/else conditions can split the workflow based on payment attributes like amount, status or product.
Once the trigger fires, any workflow action can reference a set of custom values that describe the transaction, customer and invoice details. These placeholders (for example {{payment.total_amount}}) can be placed in emails, SMS, notifications or external webhooks.
03How businesses use payment received workflow trigger
- SaaS subscription service. A workflow is created with the Payment Received trigger filtered to Funnel/Website source and a subscription transaction type. An if/else branch checks payment status; successful payments update the member’s active status while failures send an internal alert.
- Online retail store. The store adds the trigger with a filter for One time invoice source and a specific product name. When the payment succeeds, the workflow sends a confirmation email that includes {{payment.invoice.url}} and updates the order record.
- Coaching business using Text2Pay. The coach configures the trigger with Payment Source set to Text2Pay link. Upon receipt, the workflow sends a personalized SMS using {{payment.customer.first_name}} and logs the transaction amount for reporting.
04The numbers and rules that matter
- Available filter categories: Payment Source, SubSource, Transaction type, Calendar, Global Product, Price, Payment status.
- SubSource options include Text2Pay link, One time invoice, Recurring template, Funnel/Website (One step order form, Two step order form, Upsell).
- If/Else options include Product, Funnel/Website, Calendar, Source, Payment status, Amount with operators such as is, is not, greater than, less than, etc.
- Custom Values like {{payment.source}}, {{payment.customer.email}}, {{payment.total_amount}}, {{payment.transaction_ID}} are available for use in messages and notifications.
05Before you start
- A workflow must already exist in HighLevel before adding the Payment Received trigger.
06How to set up and use payment received workflow trigger in HighLevel
Add payment received trigger to a workflow
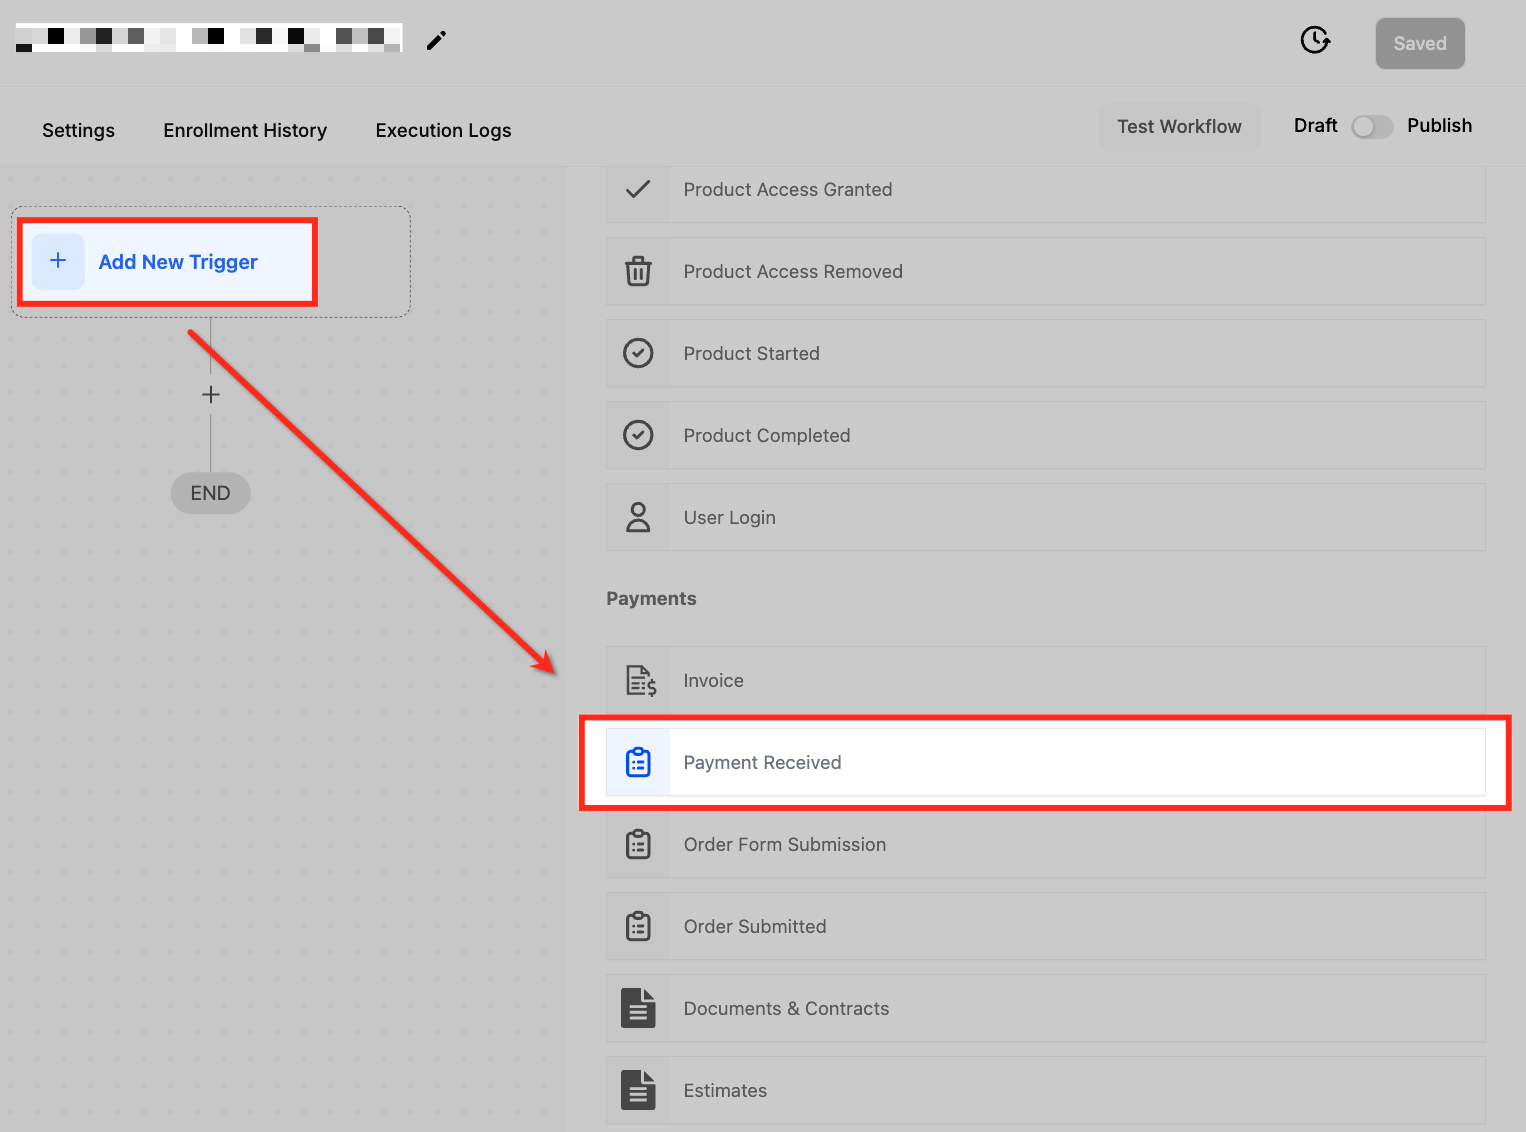
- Open an existing workflow and select the Payment Received trigger from the trigger list.
- Click add filter, choose the desired filter type, then click add filter again to insert a sub filter.
- Add any additional sub filters needed for the trigger.
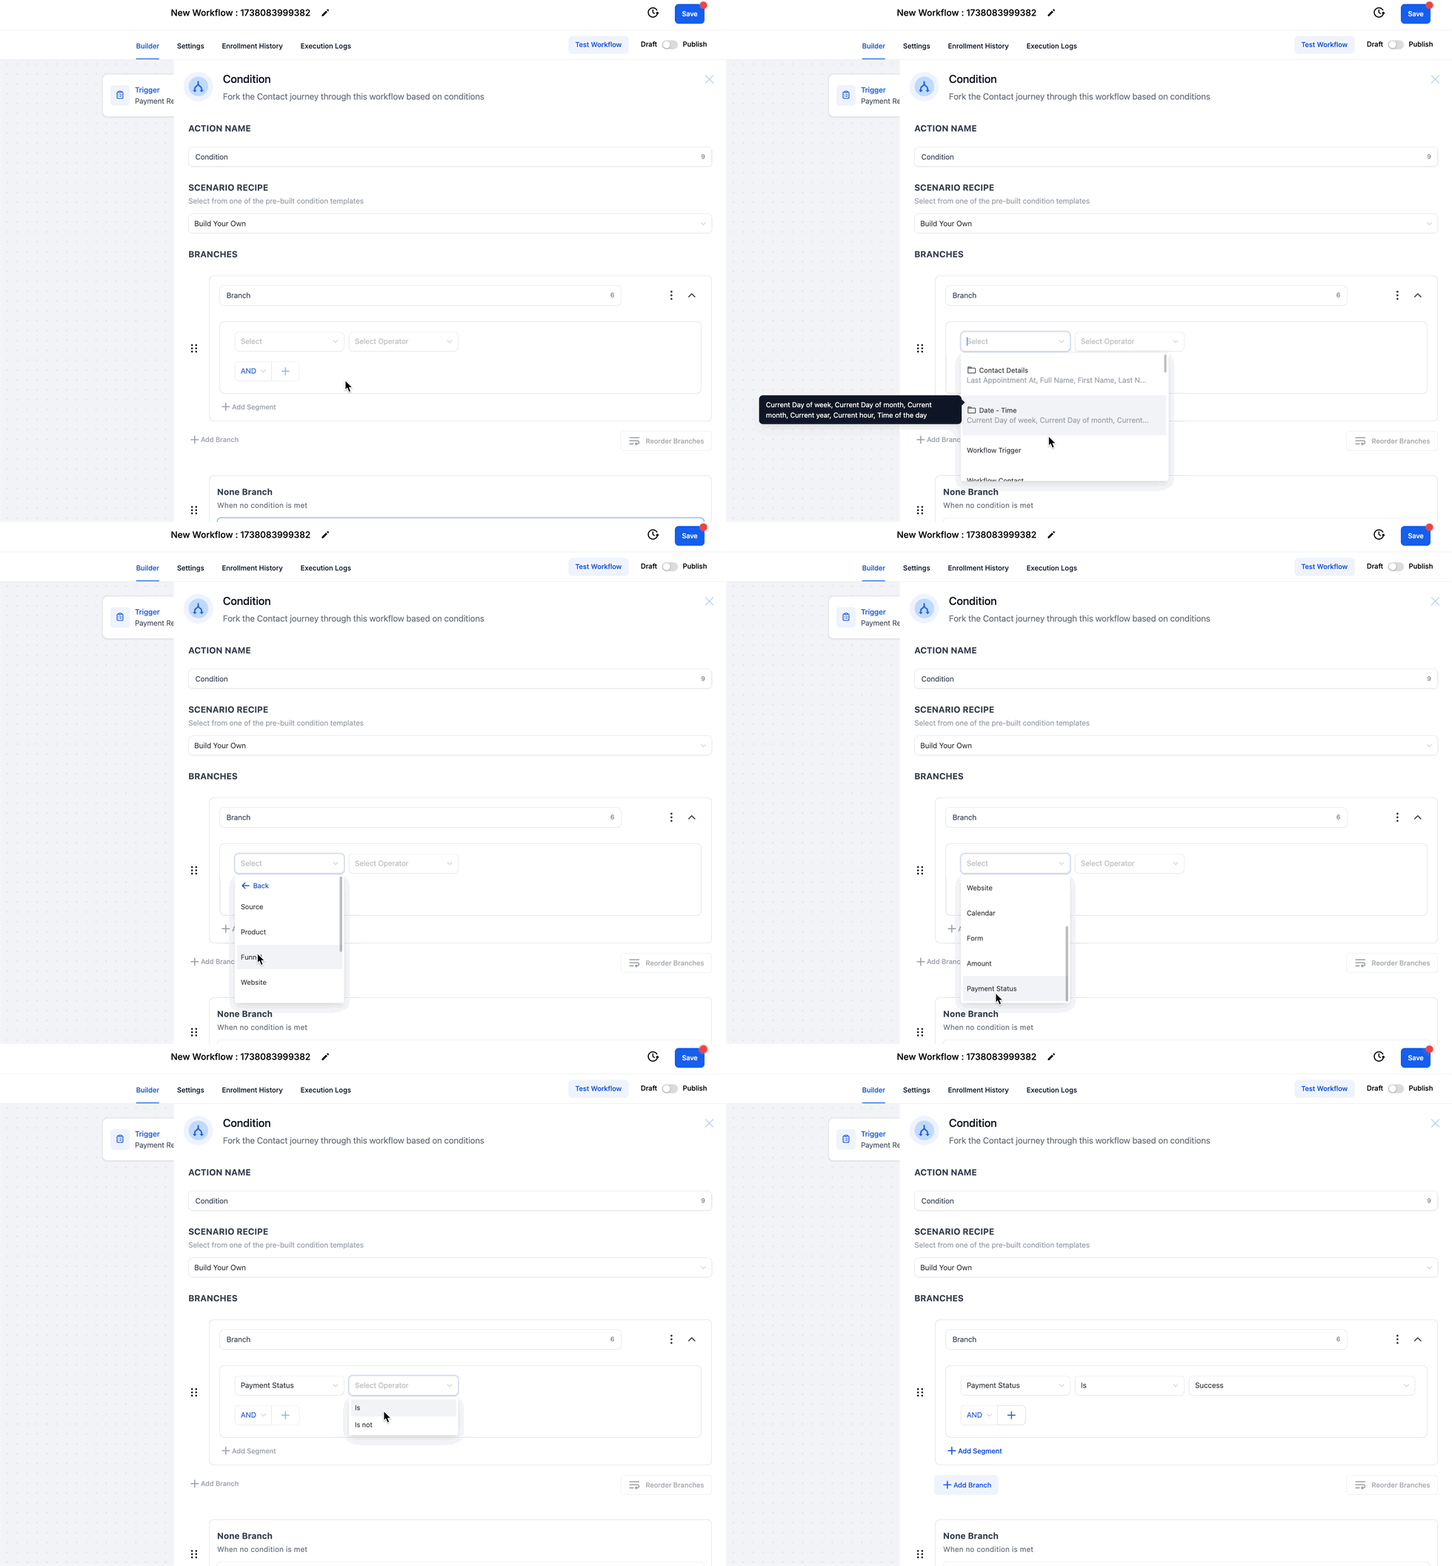
- Optionally add an If/Else condition to branch the workflow based on payment attributes.
07What it looks like in HighLevel
08Settings that matter
- Payment Received trigger. Activates the workflow whenever a payment event that meets the defined filters occurs.
- Filters. Limit the trigger to particular payment sources, products, calendars or status values.
- Sub, Filters. Provide a second level of selection within a filter, such as choosing a two step order form under the Funnel source.
- If/Else Conditions. Branch the workflow based on payment attributes like amount, status or product.
- Custom Values. Expose payment, customer and invoice details that can be inserted into workflow actions.
09Things to know before you rely on it
- By default the trigger fires for both successful and failed payments; applying the payment status filter narrows this behavior.
- Filters are optional; without them the trigger reacts to every payment recorded in the platform.
- Sub source filters only apply when the selected source supports them, such as funnels or websites.
10How it connects to the rest of HighLevel
- Learn how to create a workflow and add triggers, filters and actions. Workflow creation guide
- Review all available workflow triggers and their descriptions. Triggers overview
- Adjust workflow timing and contact handling settings. Workflow settings guide
Michael's take

Every time a customer pays, you want something to happen without you manually digging into the record. The Payment Received trigger solves that by kicking off a workflow the moment a payment lands, whether it’s a one time order, a subscription renewal, or even a failed attempt. The first setting I would lock in is the payment source filter so the trigger only reacts to the channels you actually use, like your funnel or Text2Pay link.
Once the source is nailed down, you can add the right if/else branches. For example, send a thank you email on success or alert support on failure. That quick automation keeps customers informed and your team on top of issues, turning a raw payment event into a smooth experience.