
01Who this is for
- Founders who need to automate lead capture and follow up without writing code.
- Marketing teams that want to coordinate email, SMS and task actions in one place.
- Support managers looking to route new tickets or appointments through predefined steps.
02Workflow Builder, explained
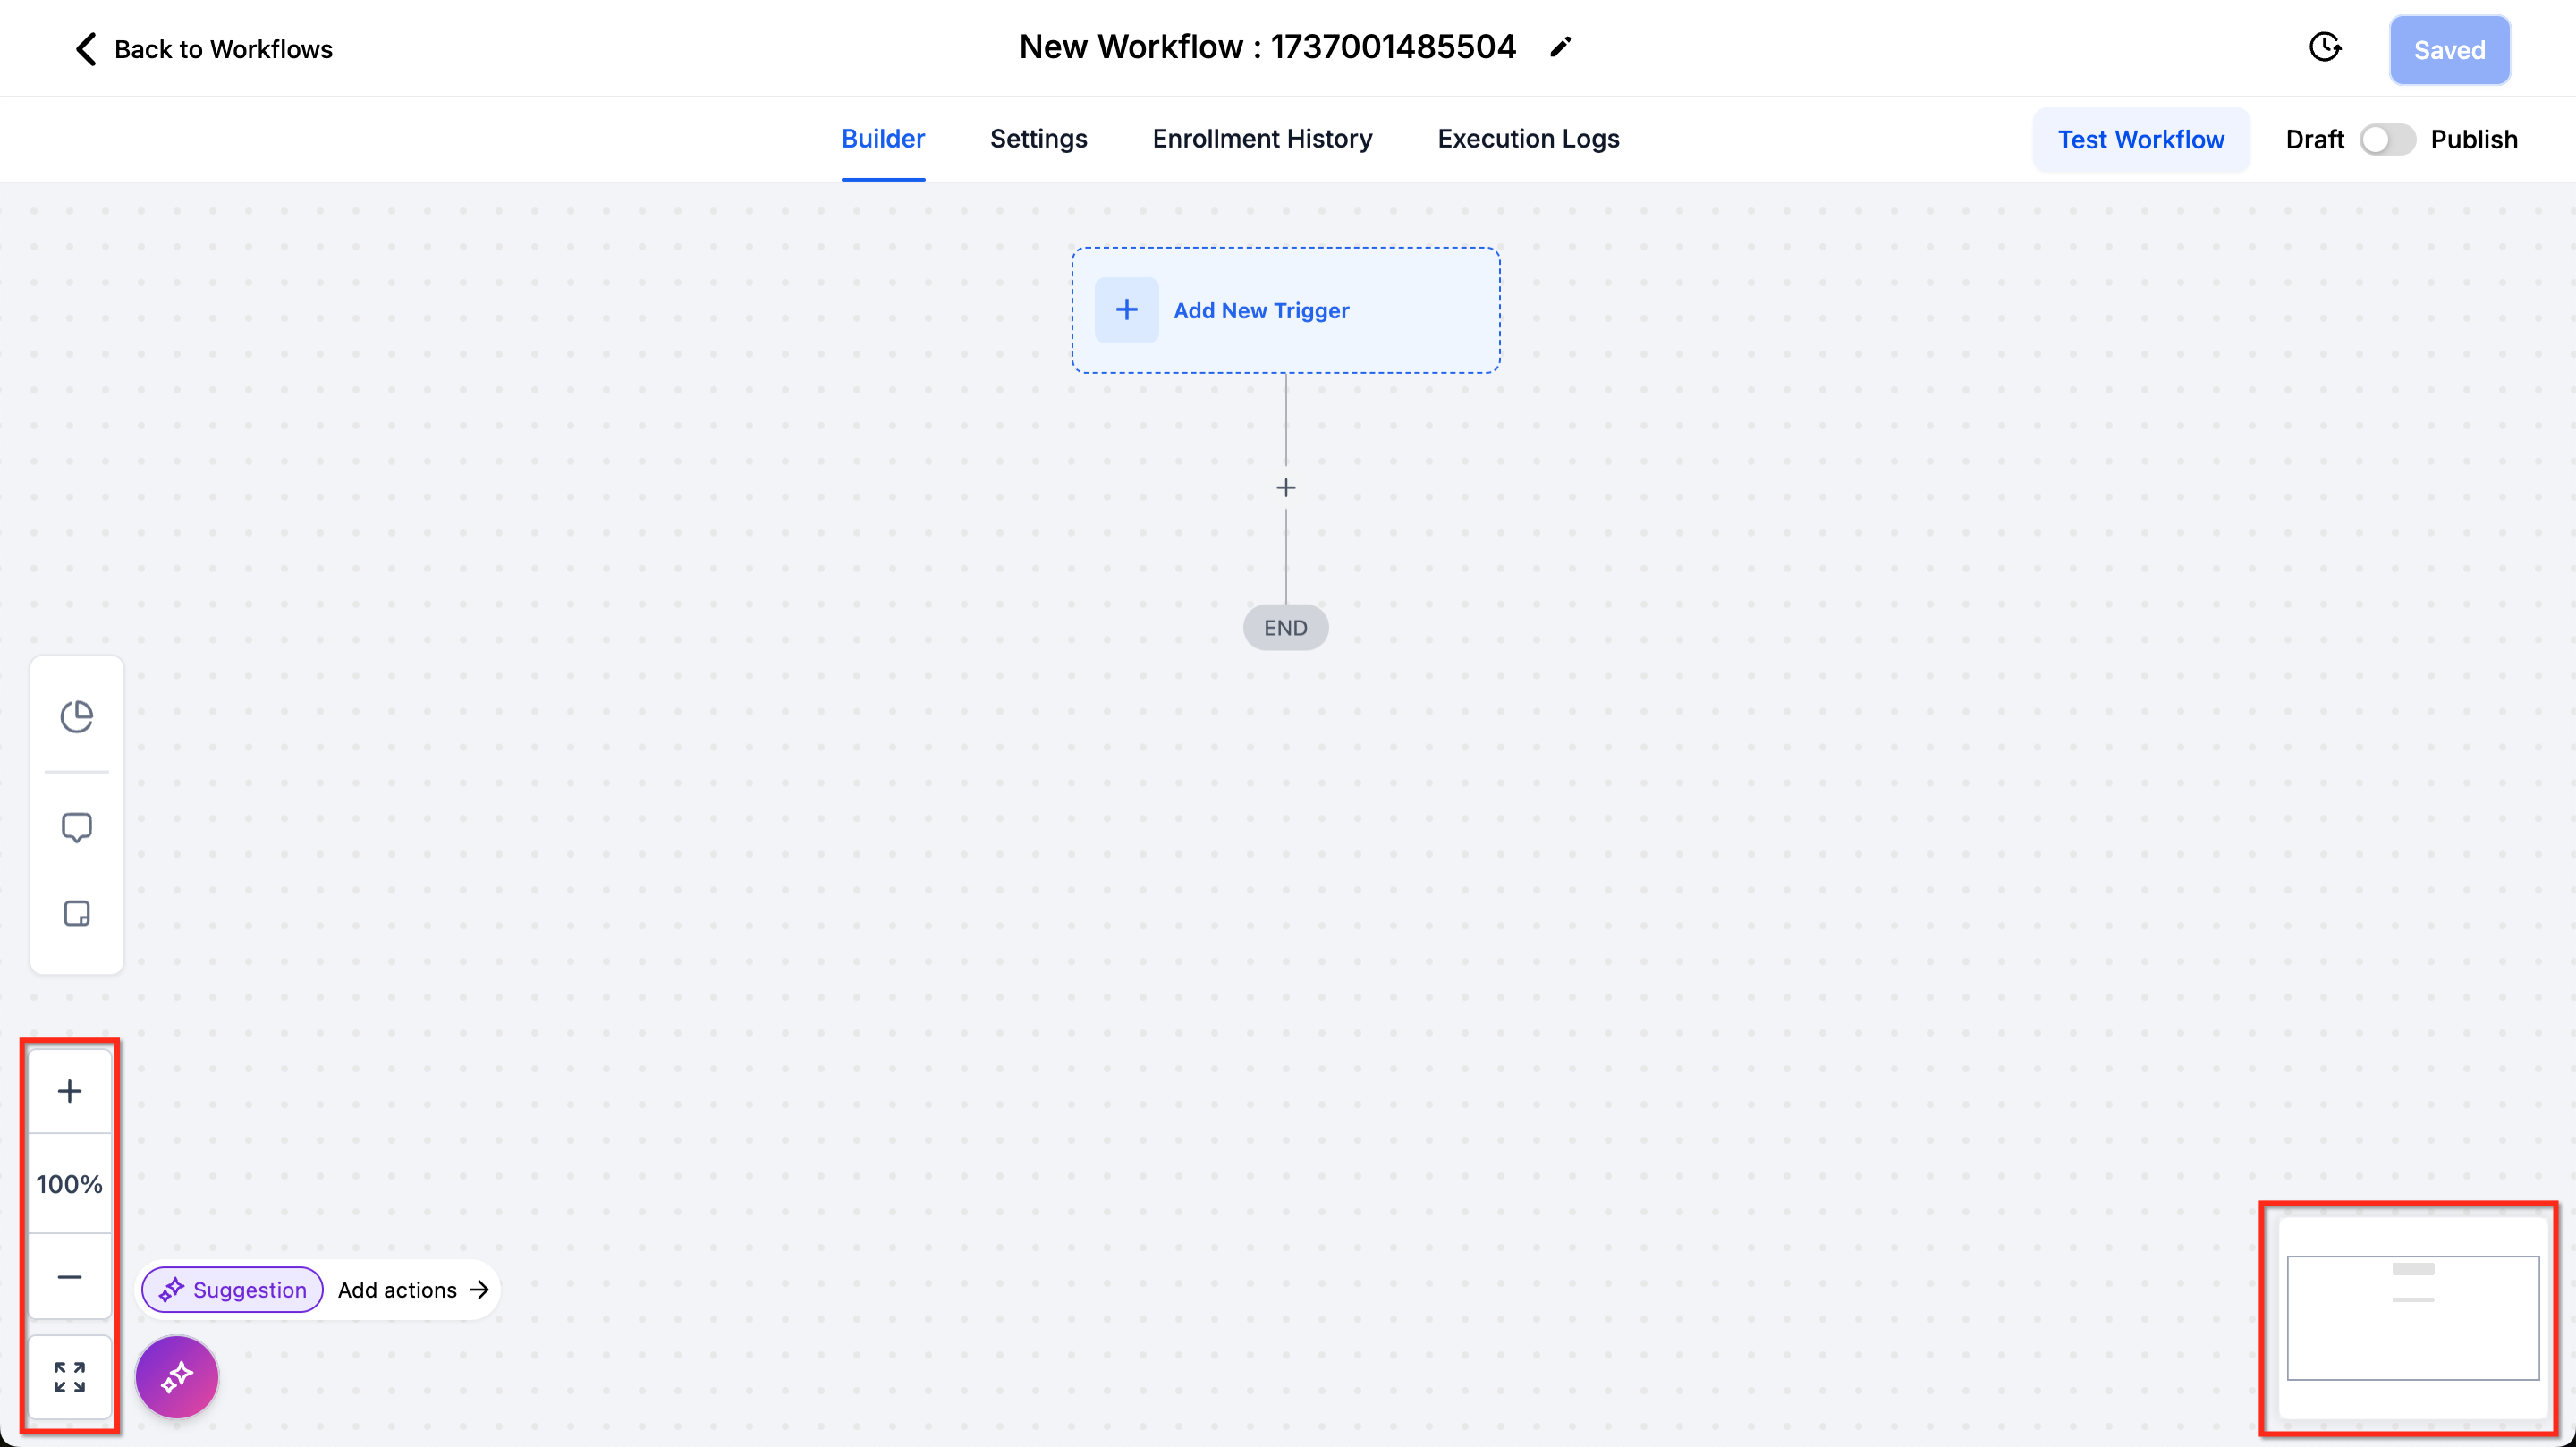
The Workflow Builder is a visual canvas where you assemble triggers and actions to automate contact journeys. Triggers respond to events such as a new contact or an appointment booking, while actions perform tasks like sending emails or assigning users.
Each node can be moved directly on the canvas, and the layout can be zoomed or fitted to screen. A workflow switcher lets you jump between different automations without leaving the builder.
The builder includes tools for testing a workflow with a selected contact, viewing real time statistics, and accessing version history to revert or compare changes.
03How businesses use the Workflow Builder
- Dental practice. Add a "Contact Added" trigger, then an action to send a welcome email and another to schedule a reminder call. The workflow automatically welcomes new patients and ensures follow up calls are booked.
- Ecommerce store. Create a trigger for "Order Completed" and connect a Google Sheets integration powered action to log the sale. After linking the Google account, configure the sheet fields to capture order details.
- Real estate agency. Set up an "Appointment Booked" trigger, add a conditional action to check property type, and then send a customized SMS. The workflow routes leads to the correct agent based on the condition.
04The numbers and rules that matter
- Hover over a node to reveal a 6 dot drag handle.
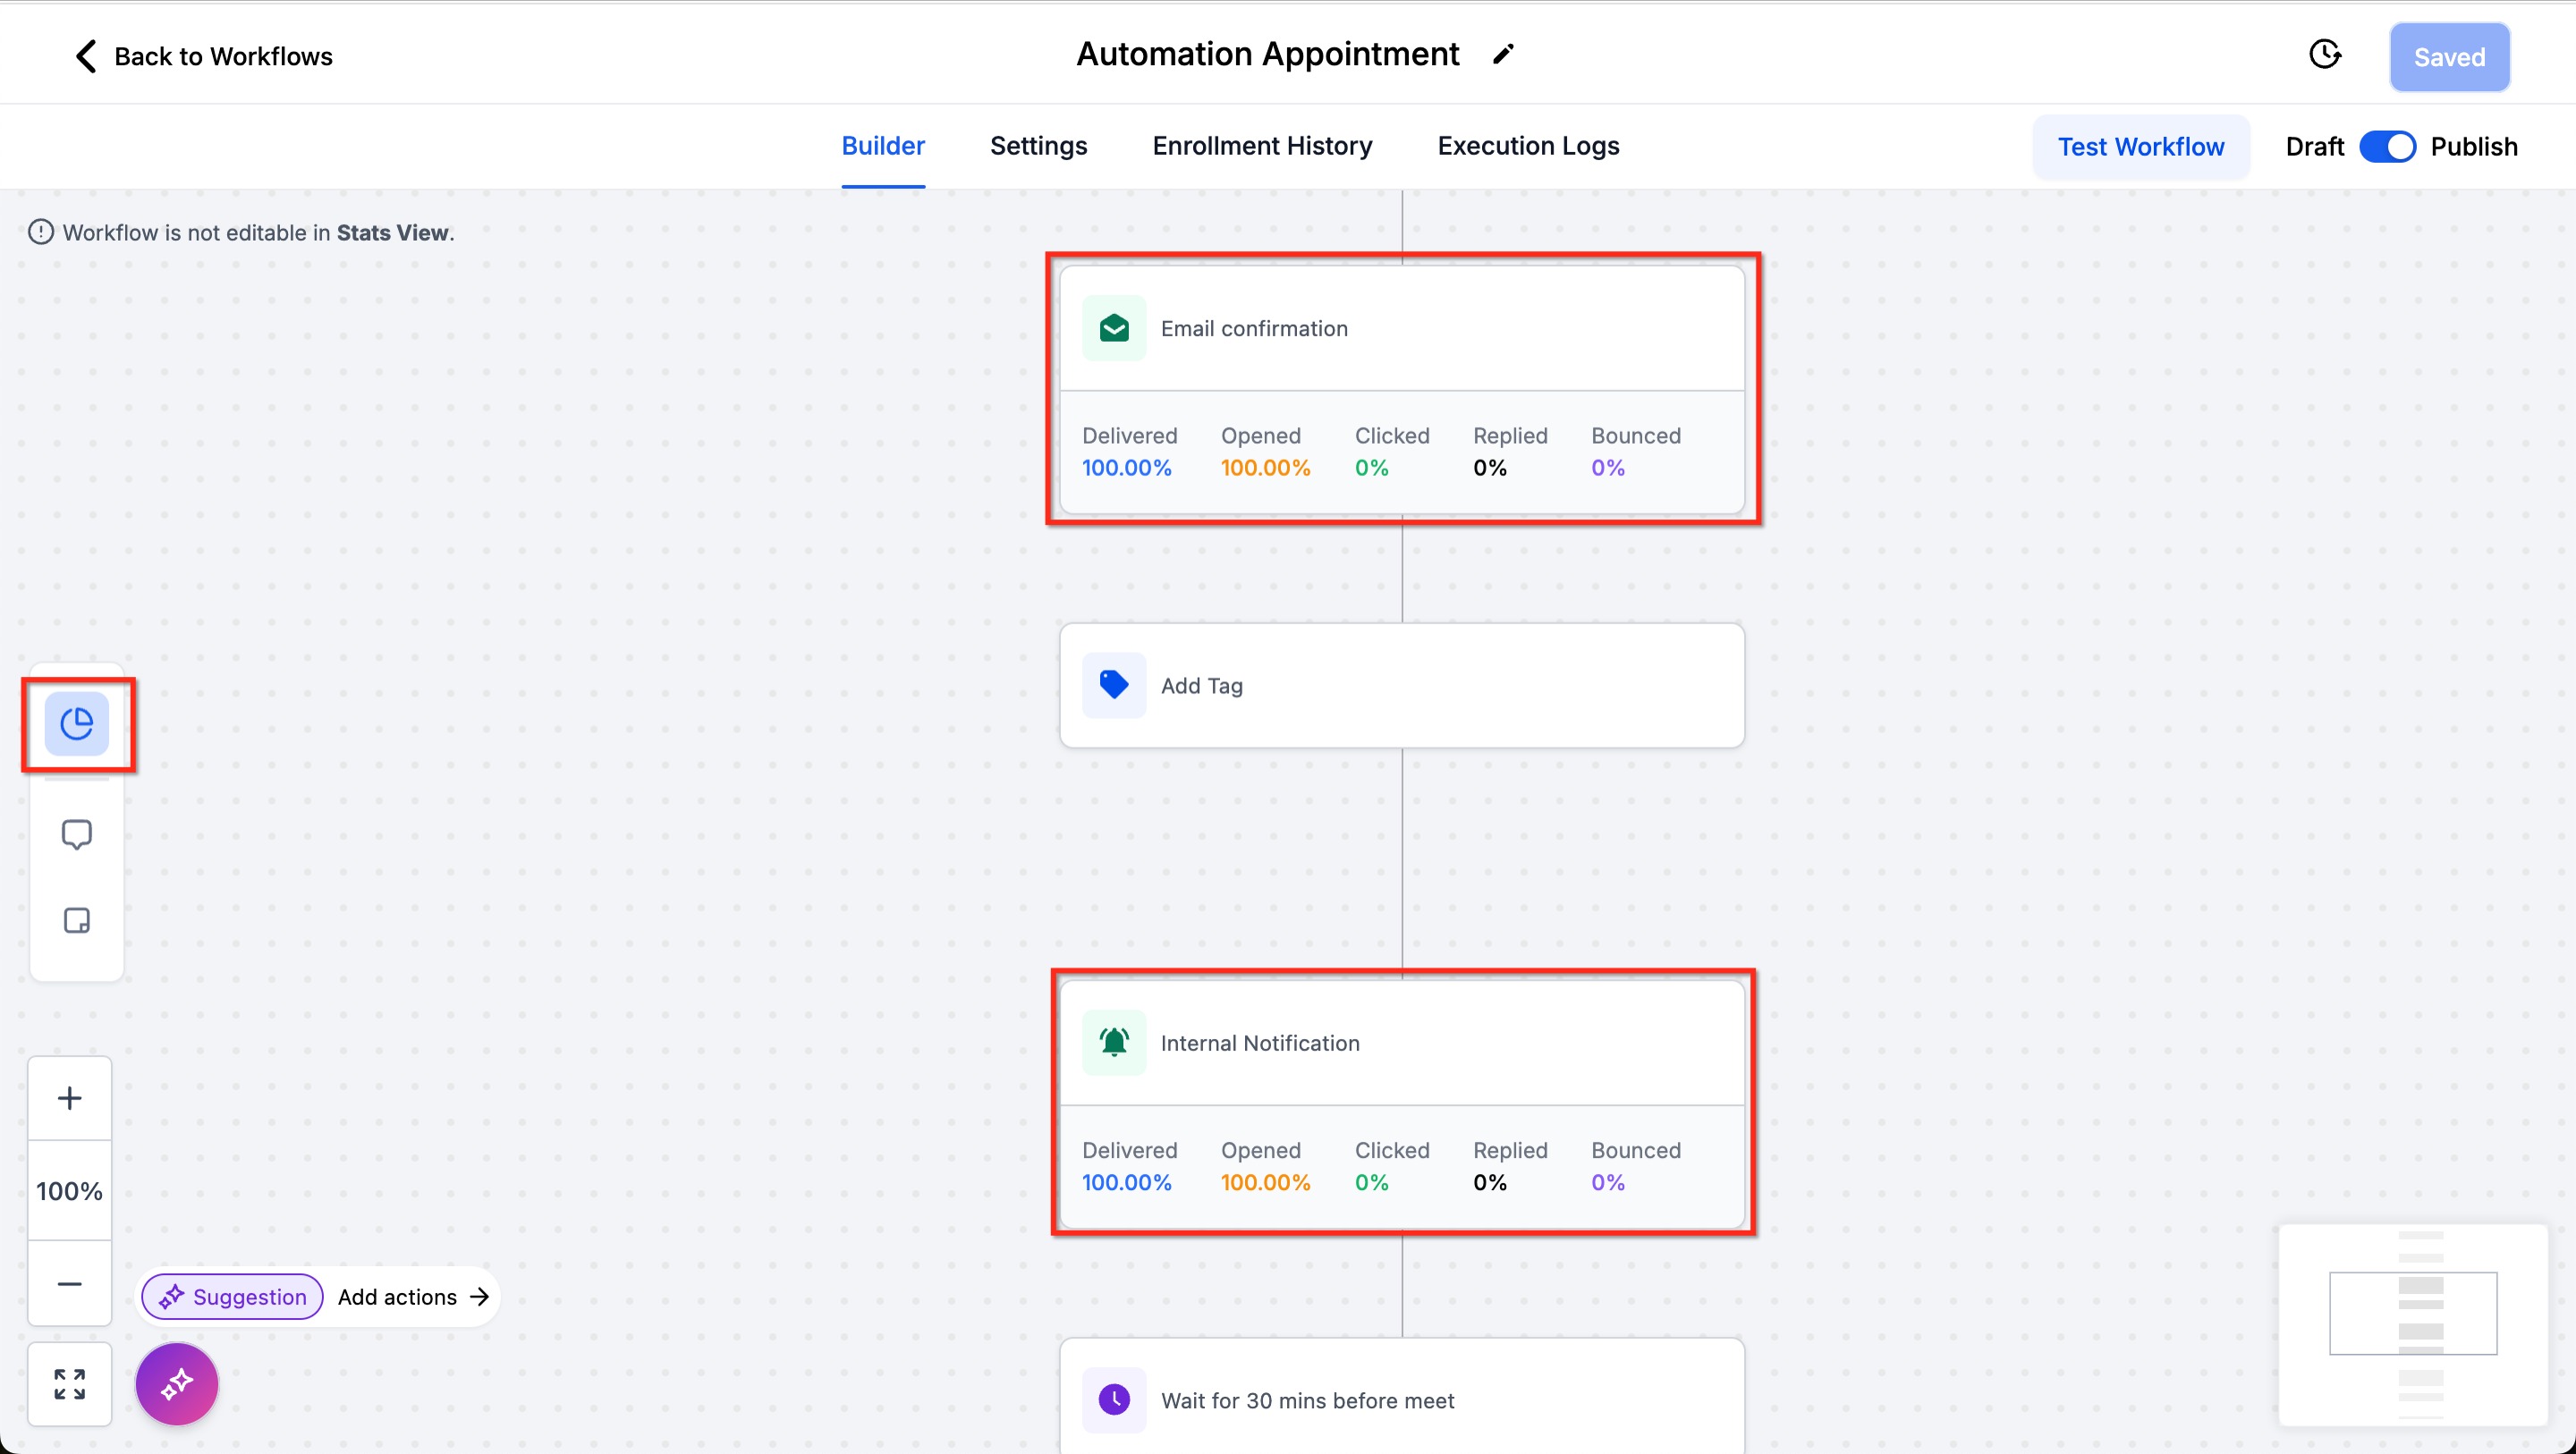
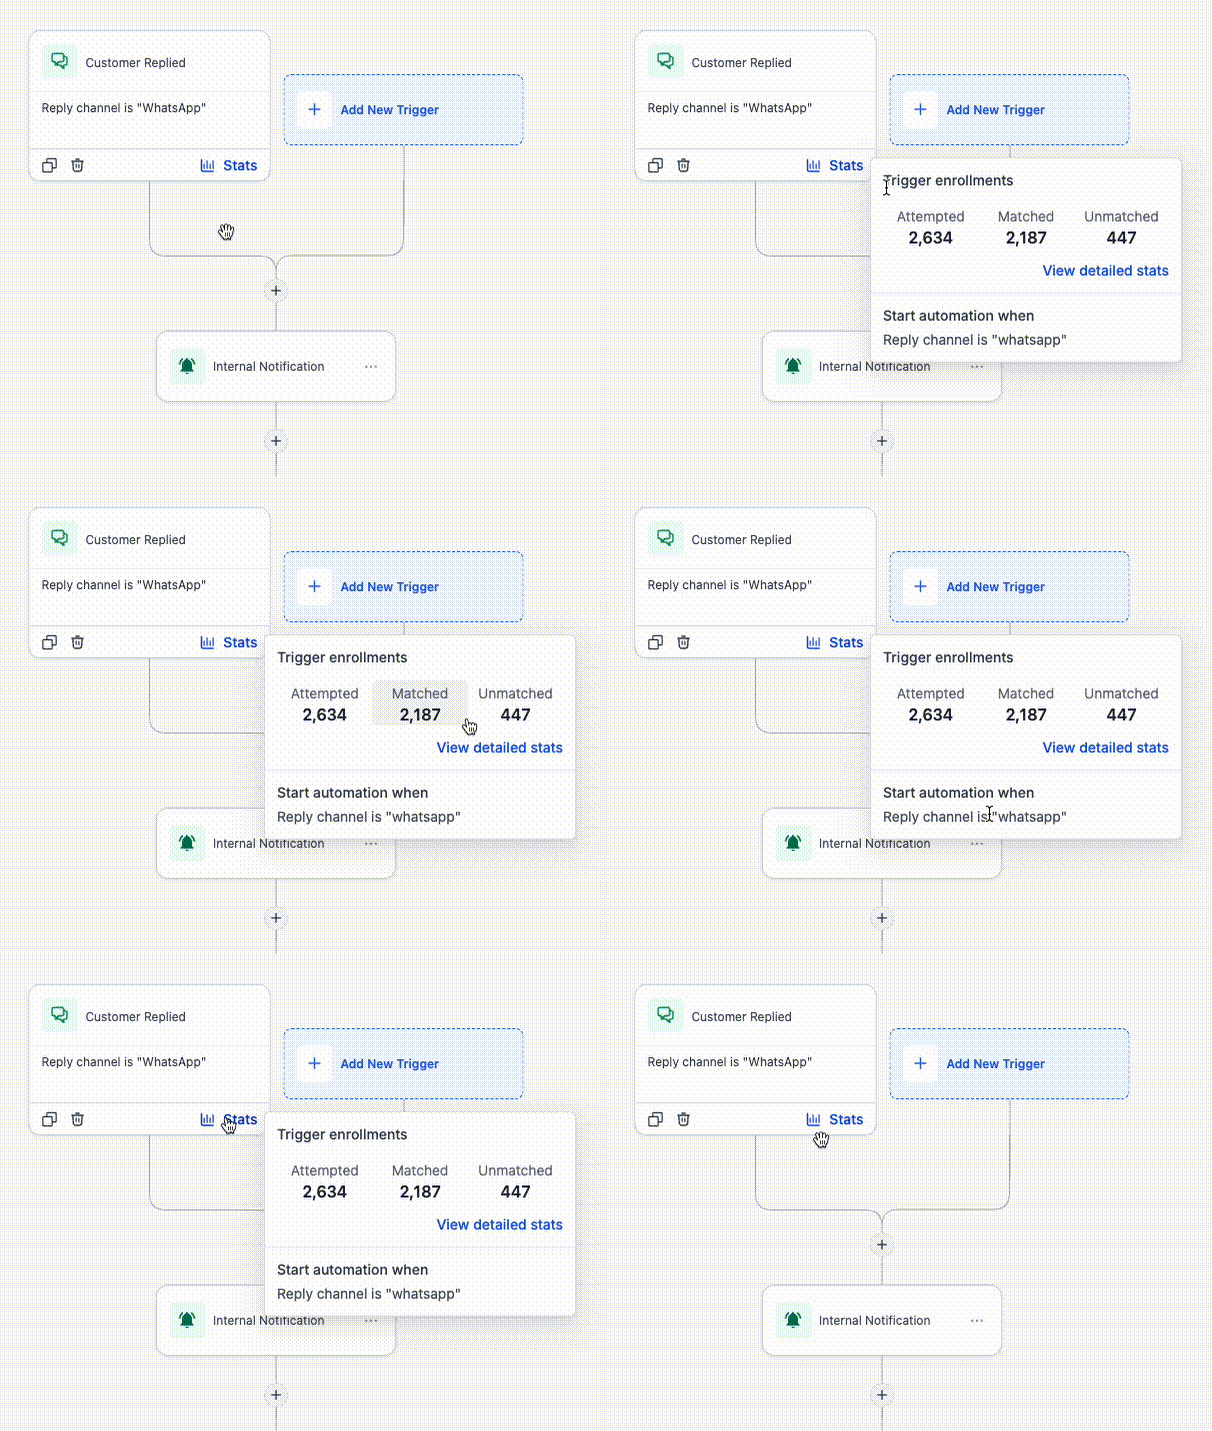
- Stats View shows Attempted, Matched, Unmatched for the last 30 days.
- Test Workflow uses a selected contact and may not be 100% perfect.
05How to set up and use the Workflow Builder in HighLevel
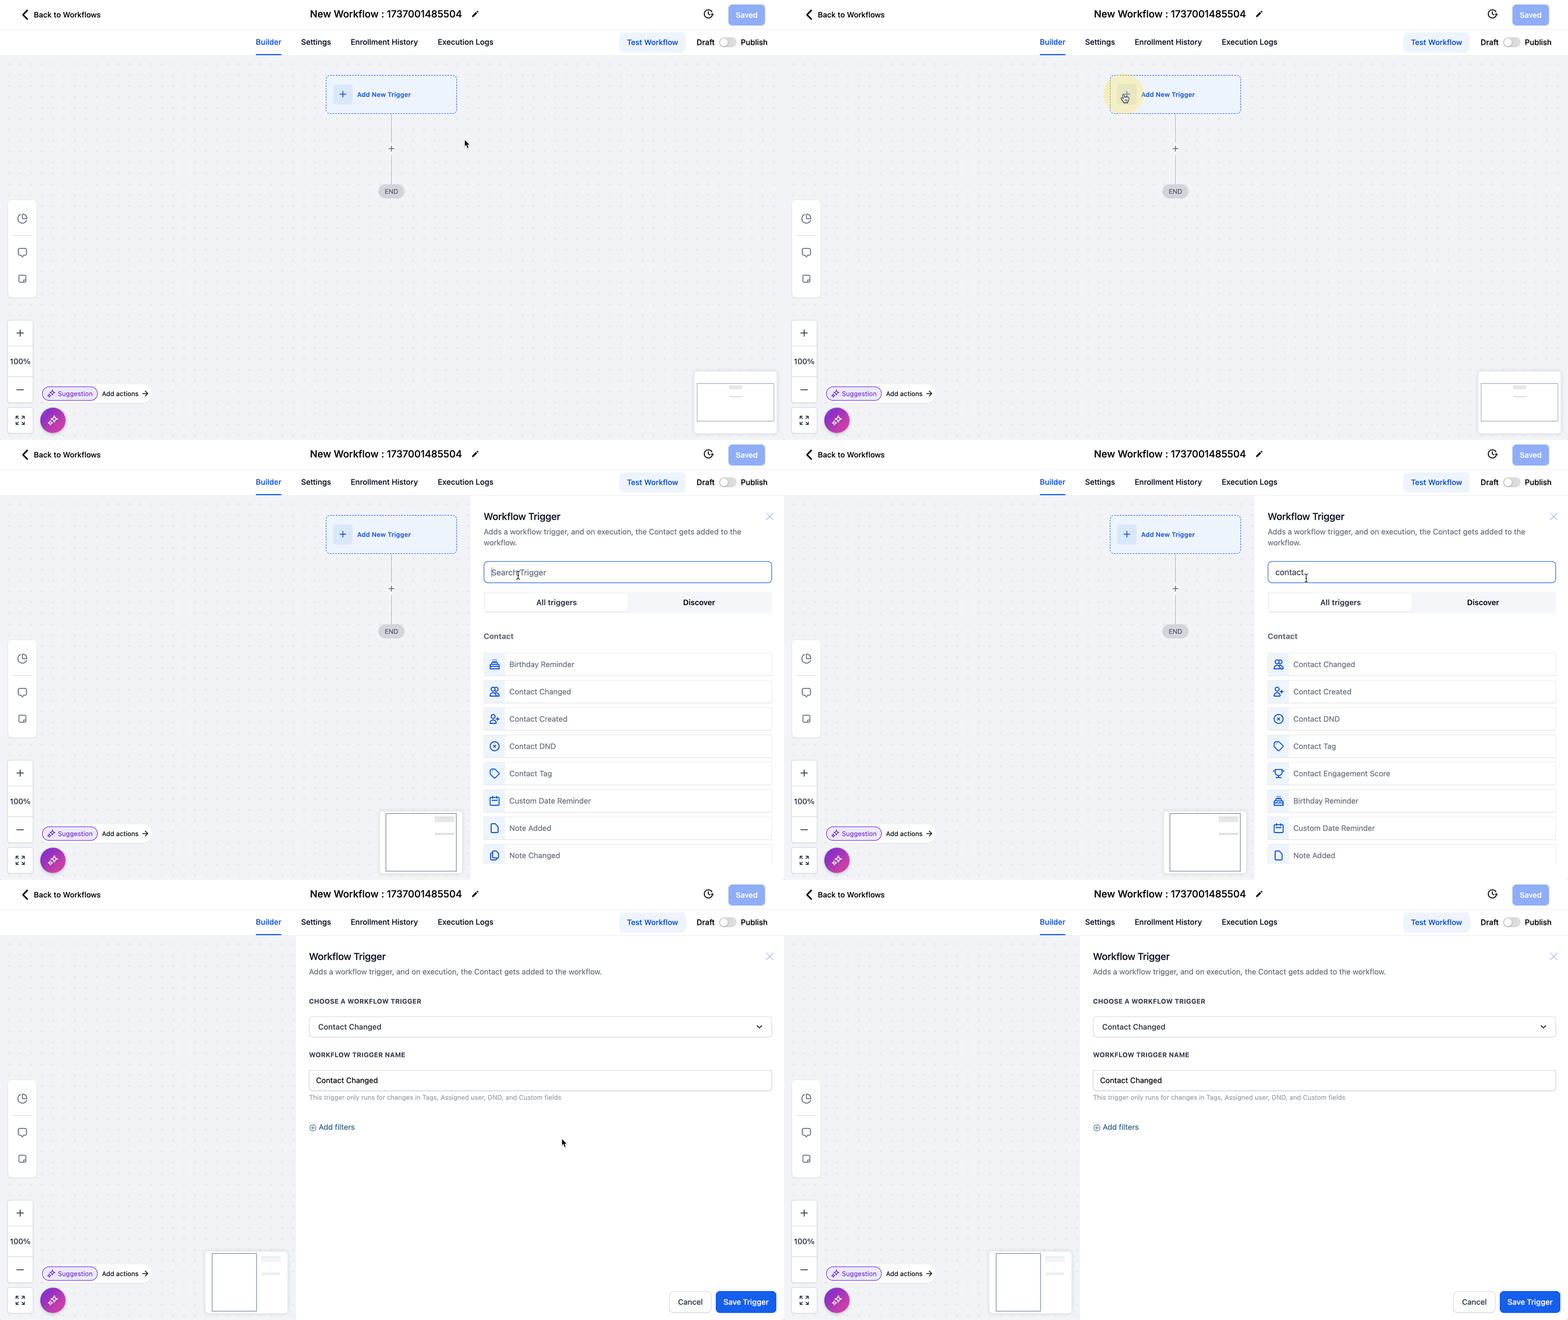
Add new trigger
- Click the Add New Trigger button.
- Select a trigger from the list.
- Configure the trigger’s settings.
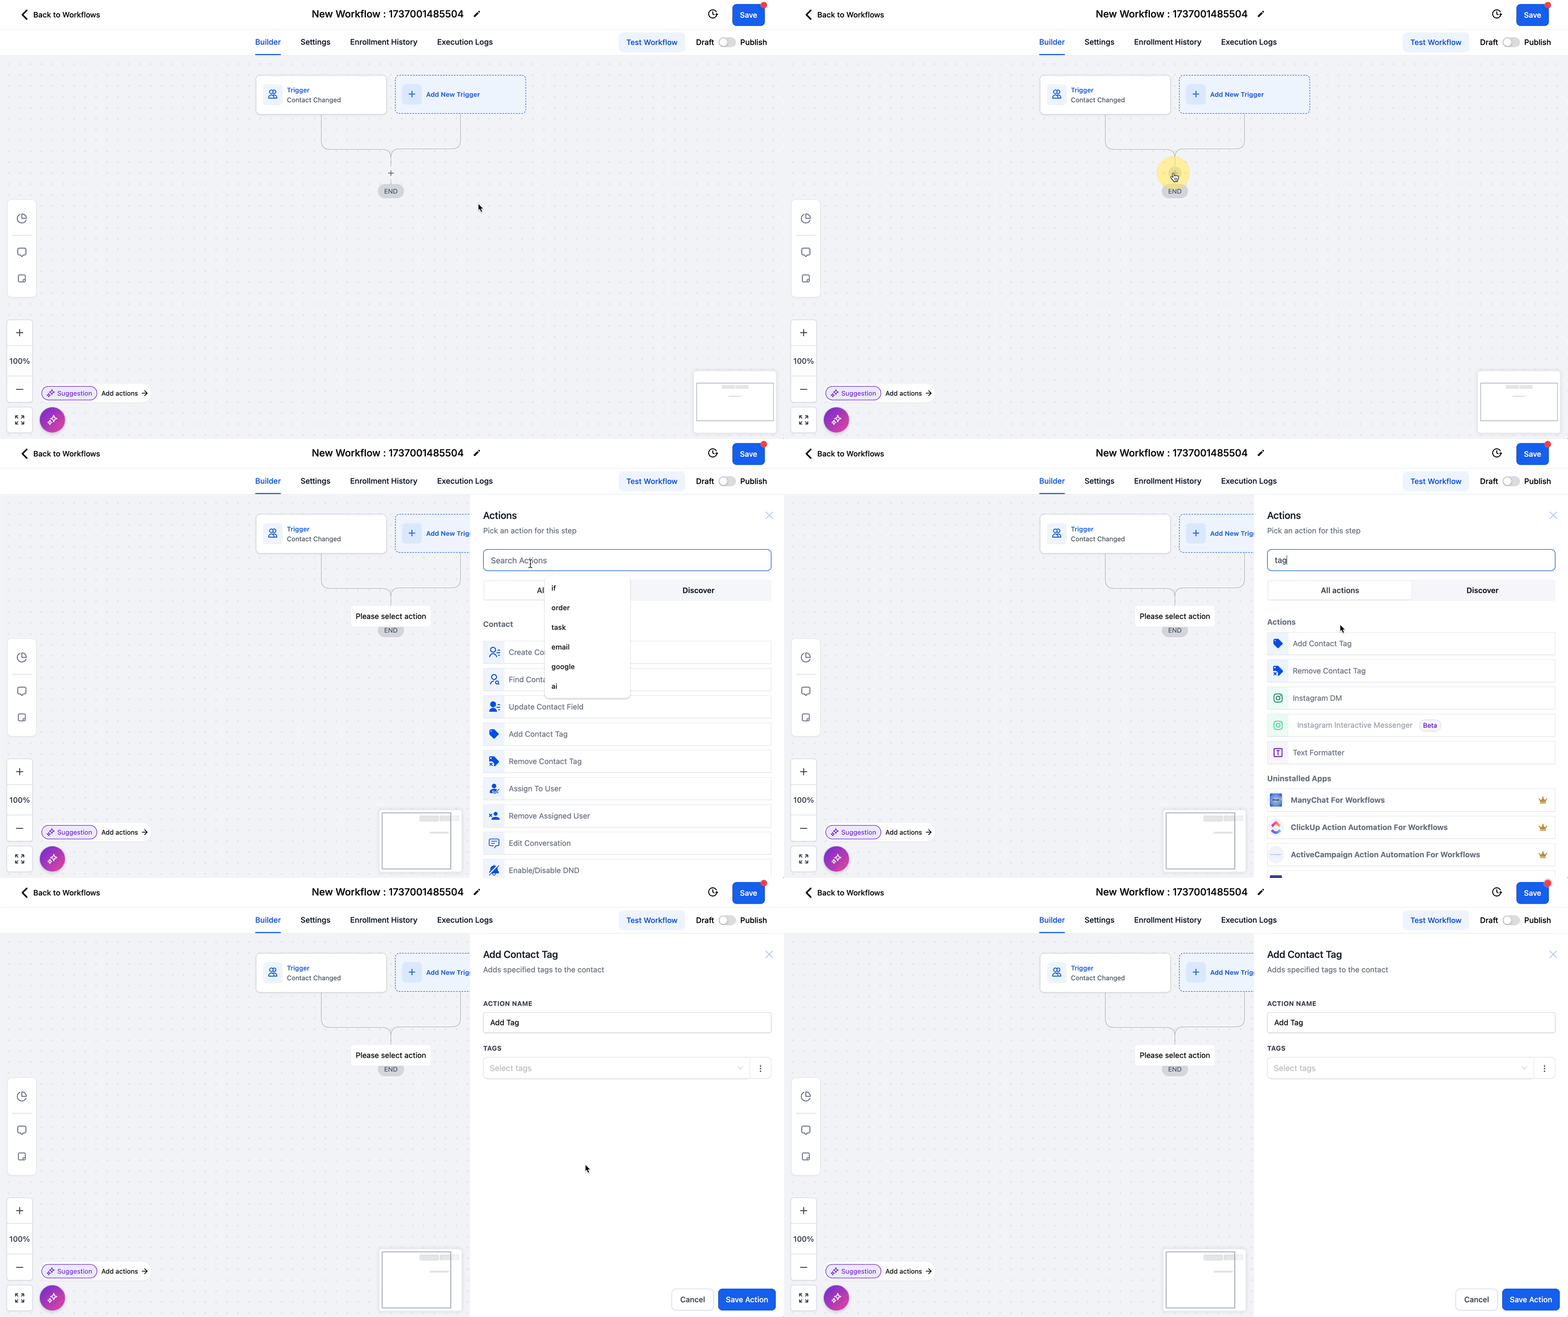
Add new action
- Click the + button on the workflow line.
- Choose an action from the list.
- Enter the required information for the action.
Connect integration powered step
- Insert the integration trigger or action into the workflow.
- Review the previewed fields that are locked.
- Click Connect your account.
- Complete the integration setup in the pop up window.
- Return to the workflow and pick the account from the selector.
- Fill in the now unlocked fields.
Test the workflow
- Click the Test Workflow button.
- Select a contact for testing.
- Click Run Test to execute the workflow.
View version history
- Click the History icon.
- Browse previous versions.
- Press Back to Builder to resume editing.
06What it looks like in HighLevel
07Settings that matter
- Draft/Publish toggle. Switches the workflow between a non triggering draft state and an active published state.
- Stats View. Shows enrollment and performance metrics for triggers and communication actions while you remain in the builder.
- Connect your account. Locks integration powered steps until a valid external account is linked, then unlocks the fields for configuration.
08Things to know before you rely on it
- Testing a workflow with a contact may not reflect live behavior, especially when the same contact is reused for multiple tests.
- If a connected account is removed or becomes invalid, the step returns to a locked state and must be reconnected before saving.
- The canvas cannot be edited while Stats View is active.
- Trigger statistics cover only the last 30 days.
- Visual loops are prevented, but non visible loops can still be created and should be checked manually.
- Changing a Wait action does not alter the waiting period for contacts already in that step.
09If something goes wrong
- Test workflow fails. Review each trigger and action to ensure all required fields are completed.
- Error saving workflow. Make sure every trigger and action has all mandatory information filled in.
10How it connects to the rest of HighLevel
- Start building workflows with a full list of triggers and actions. Workflow creation guide
- Learn how to set up an inbound webhook trigger for external integrations. Inbound webhook trigger
- Adjust workflow timing and contact handling with the workflow settings overview. Workflow settings guide
Michael's take

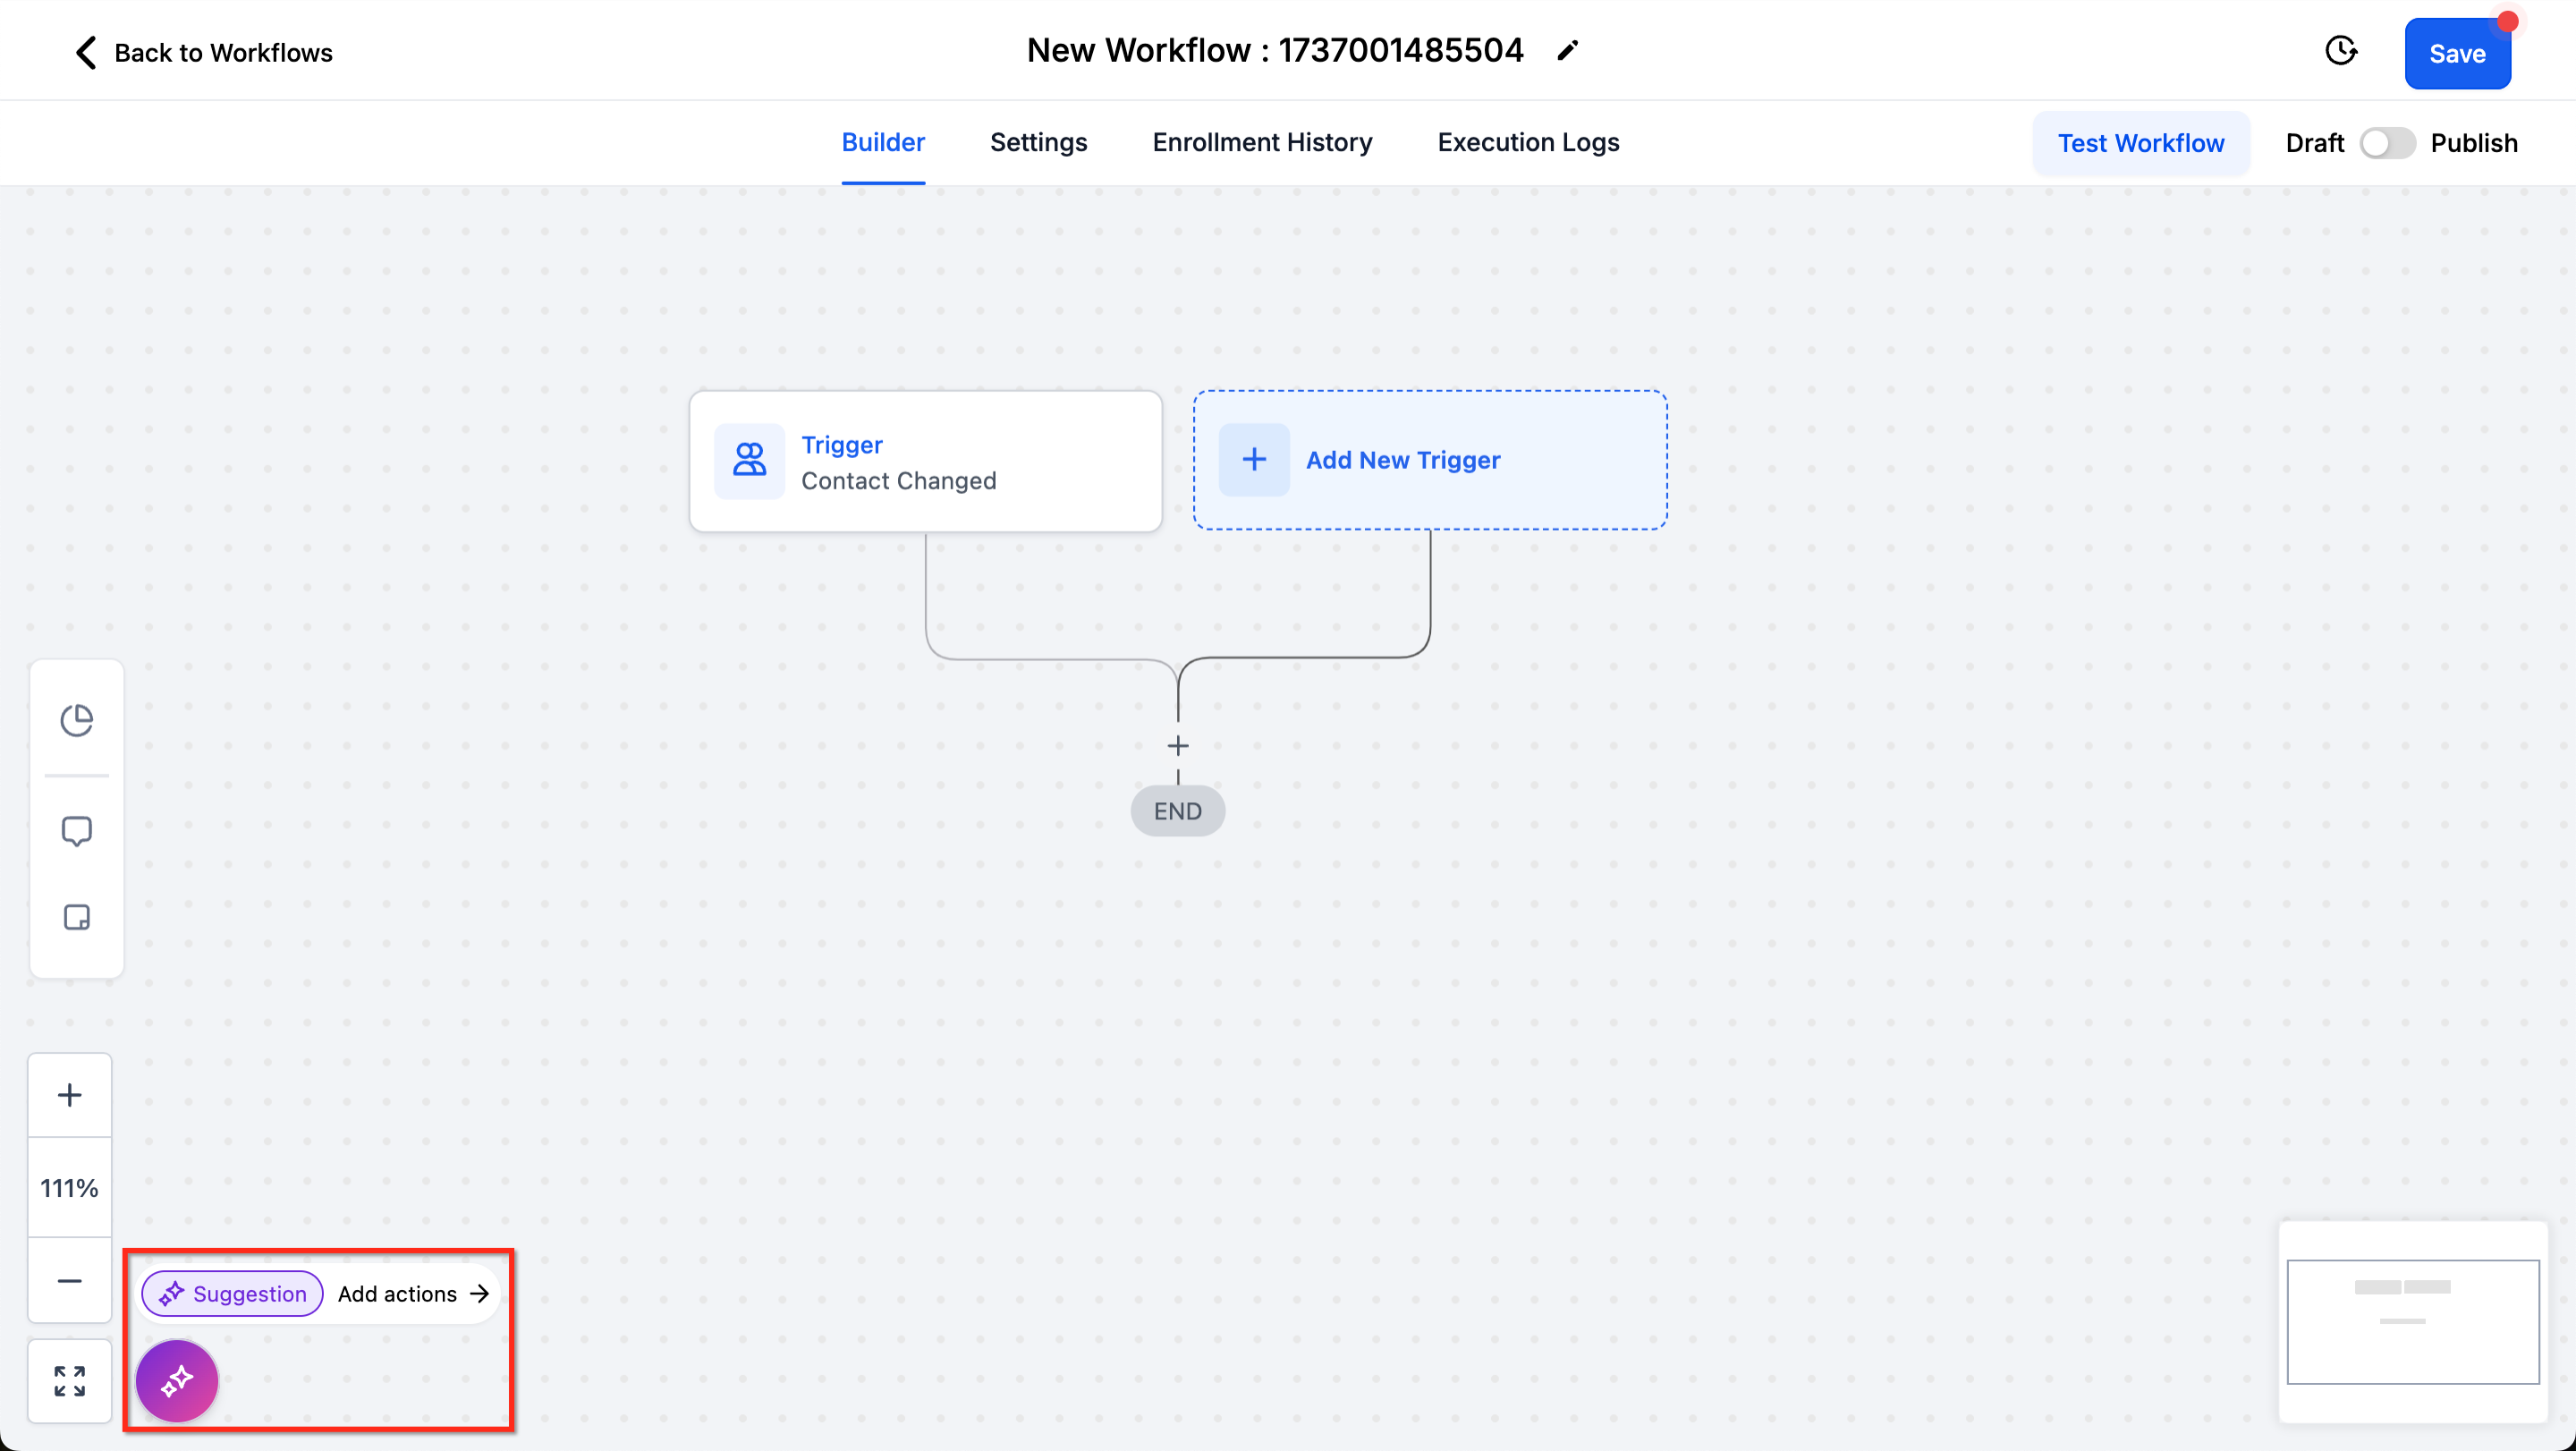
The Workflow Builder feels like a small convenience that can become a real shift when you need to map out multistep automations. It gives you a clear picture of how leads move through your system and where you might lose them.
A coaching business, for example, can use a single workflow to welcome a new client, schedule a reminder SMS before their first session, and then add them to a follow up email series. The visual layout makes it easy to see the whole journey and adjust it as the program evolves.