
01Who this is for
- Founders of service based businesses who collect client information via online forms and need automatic follow up.
- Small agencies that require a signed contract to trigger internal processes such as onboarding.
02Jotform triggers and actions, explained
The integration adds Jotform as a source and destination inside the Workflow Builder. When a form response arrives, a webhook can fire a HighLevel workflow. For documents that contain e signatures, HighLevel polls Jotform every five minutes and starts the workflow once the signature is recorded. An action called Create Submission lets the workflow write values into a selected Jotform form.
All settings are accessed while building a workflow. The Jotform API key is entered during the connection step, after which the platform loads the list of available forms and the fields that can be mapped. The triggers and action behave according to their delivery method, webhook for new submissions and polling for signed documents, and they expose the supported field types for mapping.
03How businesses use Jotform triggers and actions
- Real estate brokerage. The brokerage creates a Jotform for property viewing requests. When a visitor submits the form, the New Submission trigger starts a workflow that assigns the lead, sends a follow up email, and logs the request in HighLevel.
- Insurance agency. The agency uses Jotform to collect policy applications that include an e signature. The New Signed Document trigger polls for the completed signature, then launches a workflow that creates a policy record and notifies the underwriting team.
- Online course provider. After a student completes a registration form in HighLevel, the provider adds a Create Submission action that writes the student's details into a Jotform used for offline attendance tracking.
04The numbers and rules that matter
- Create Submission supports 15 standard Jotform input types.
- Supported fields: Full Name, Email, Address, Phone, Short Text, Long Text, Number, Dropdown, Single Choice, Multiple Choice, Yes/No, Star Rating, Scale Rating, Date Picker, Time.
- Unsupported fields: File Upload, Signature, Appointment, Payment, Product List, Input Table, Fill in the Blanks, Spinner, Emoji Slider, Image Choice, Captcha, Widgets (including Terms and Conditions, Checklist, Configurable List, Multi Text List, Dynamic Text Box, and Calculation).
05Before you start
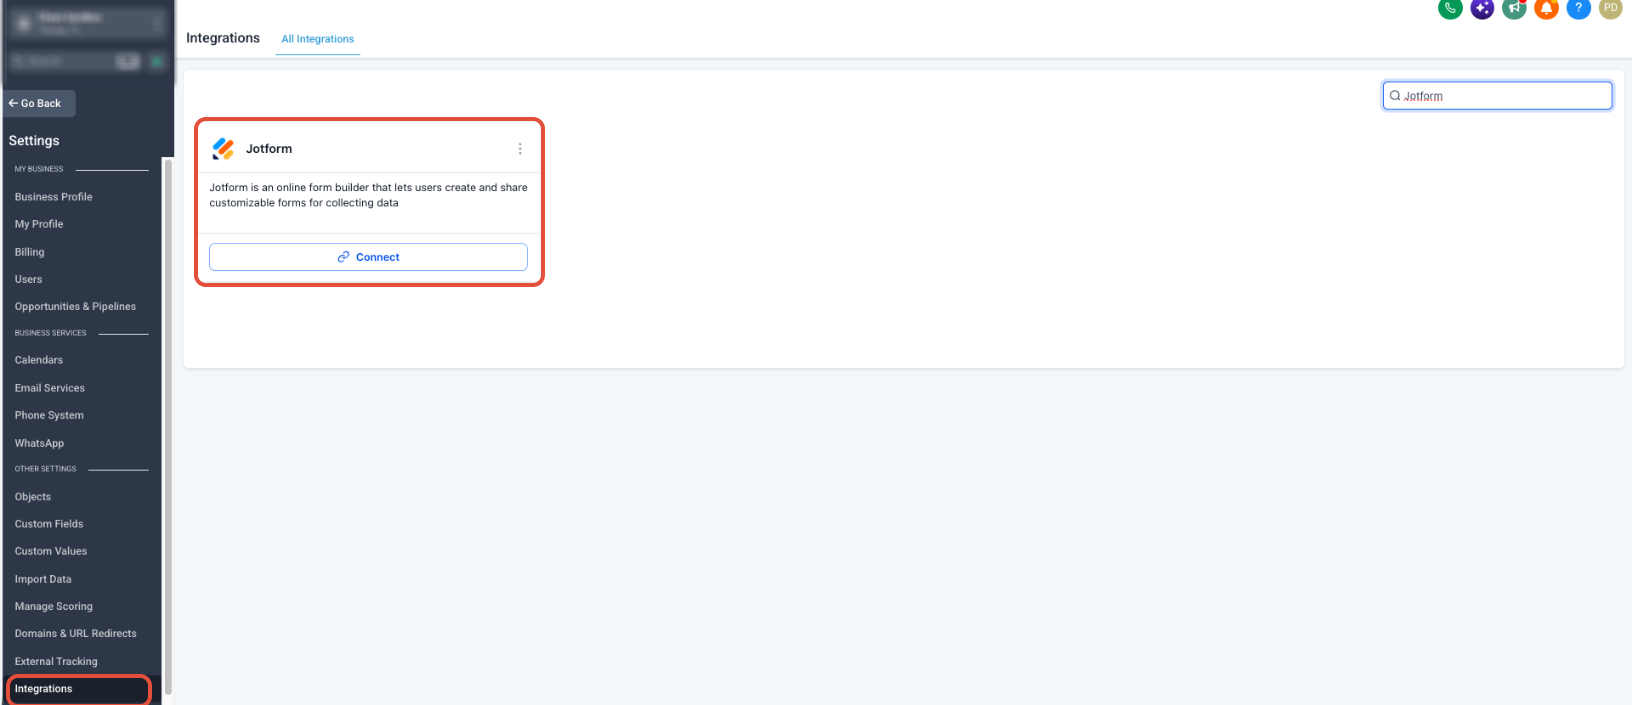
- A Jotform account must be linked to the specific HighLevel subaccount.
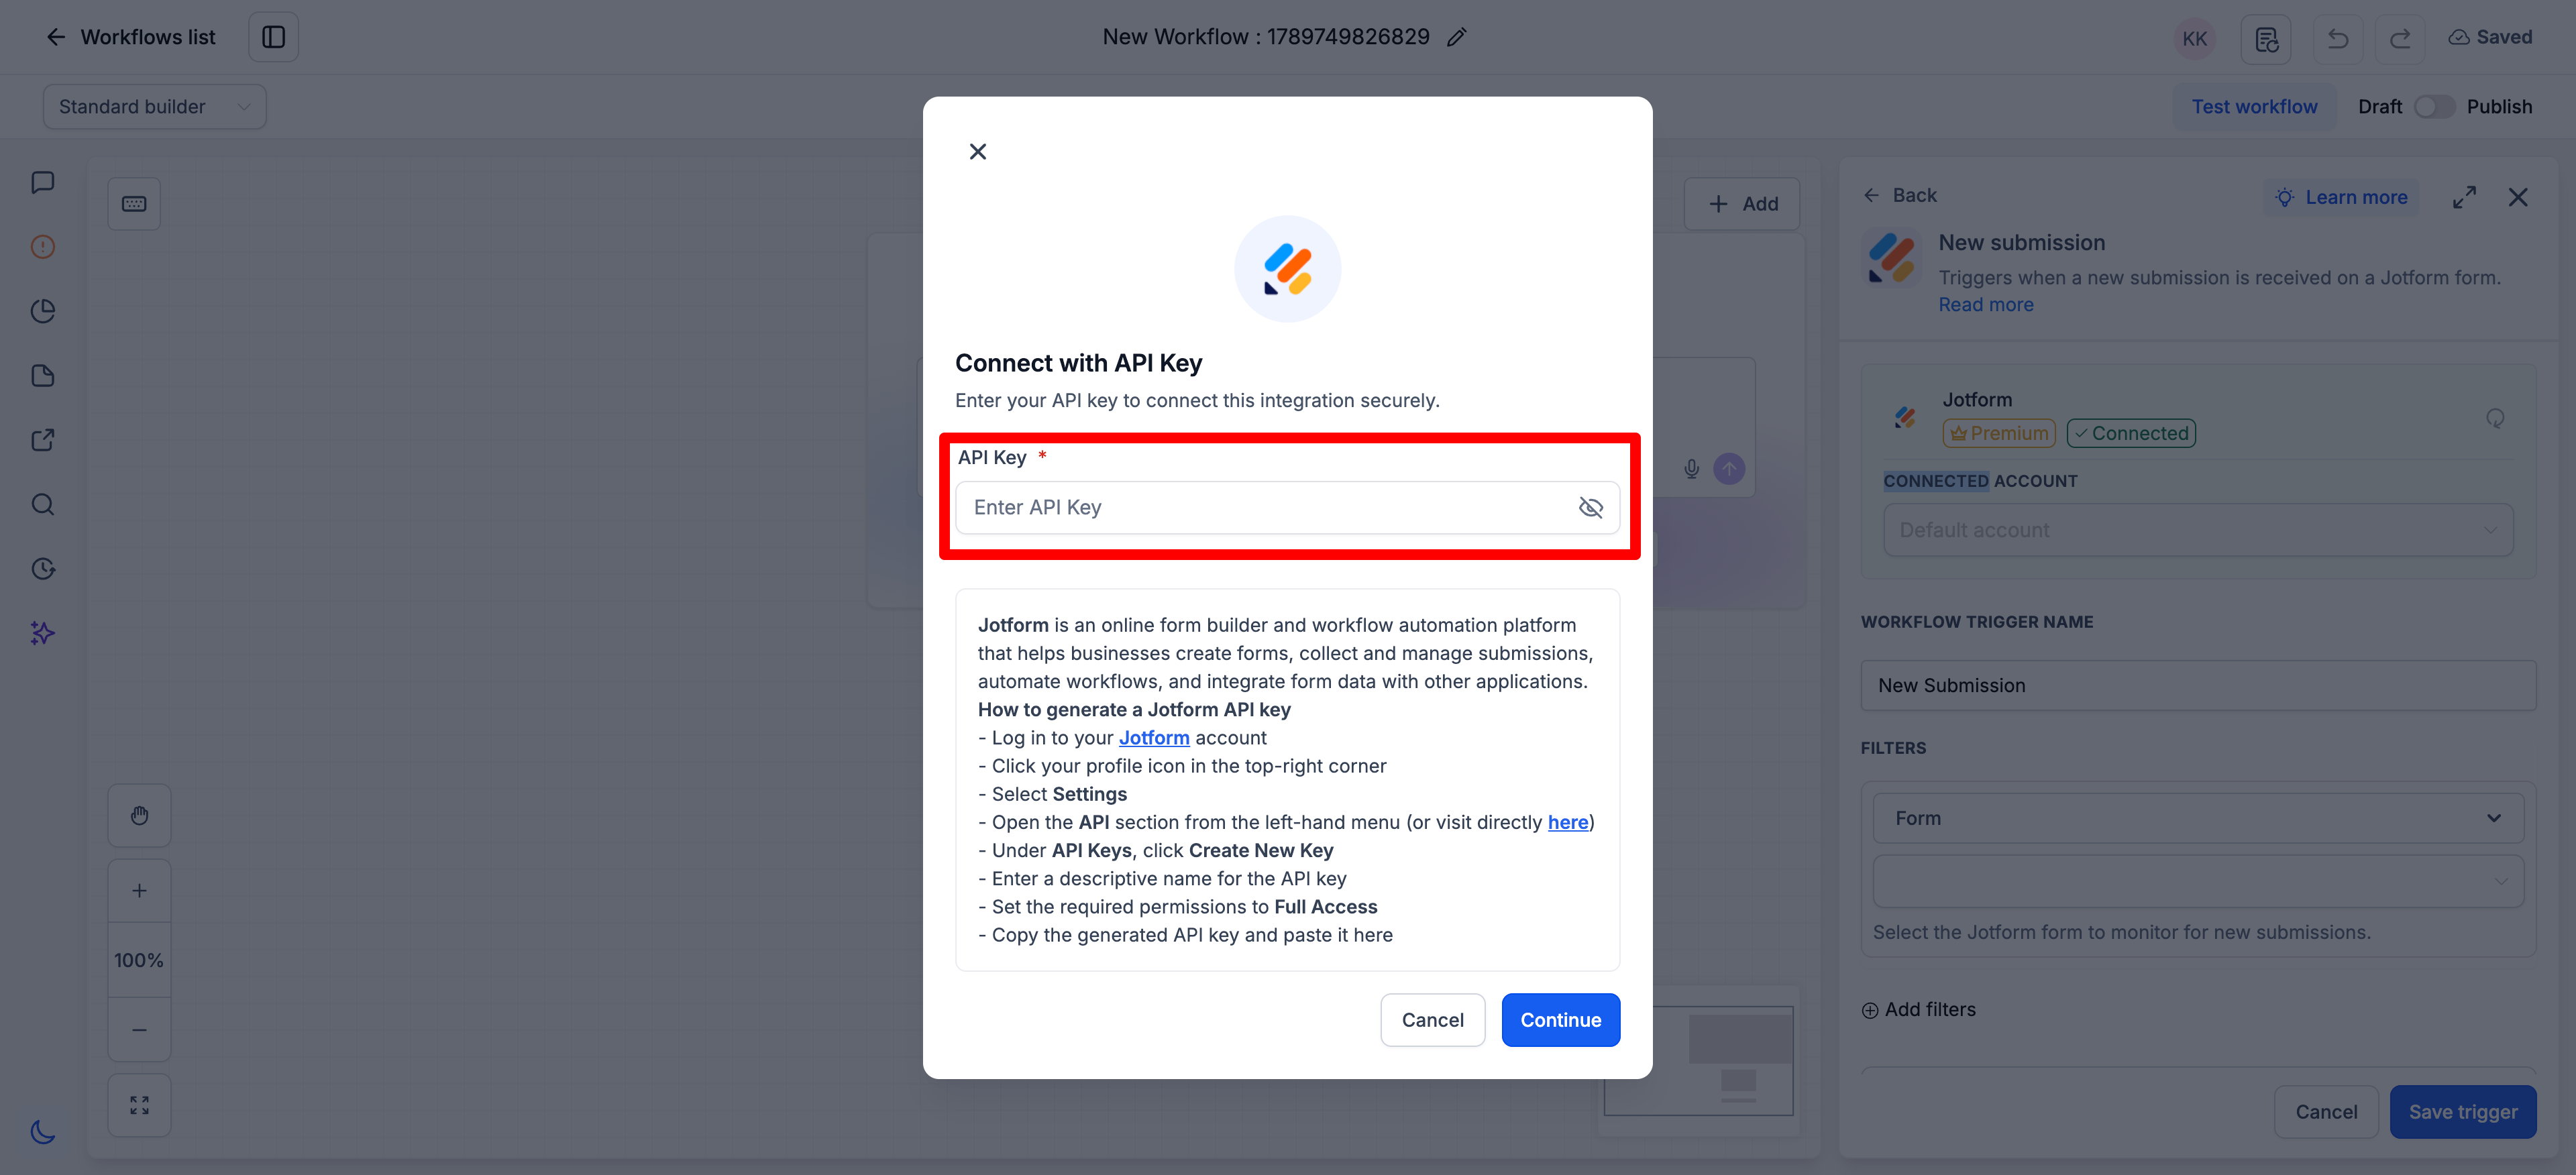
- The Jotform API key is required for the connection.
06How to set up and use Jotform triggers and actions in HighLevel
Connect Jotform from Workflow Builder
- Open Automation > Workflows from the Subaccount view.
- Start a new workflow or edit an existing one.
- Select Add New Trigger for a trigger or the + button for an action location.
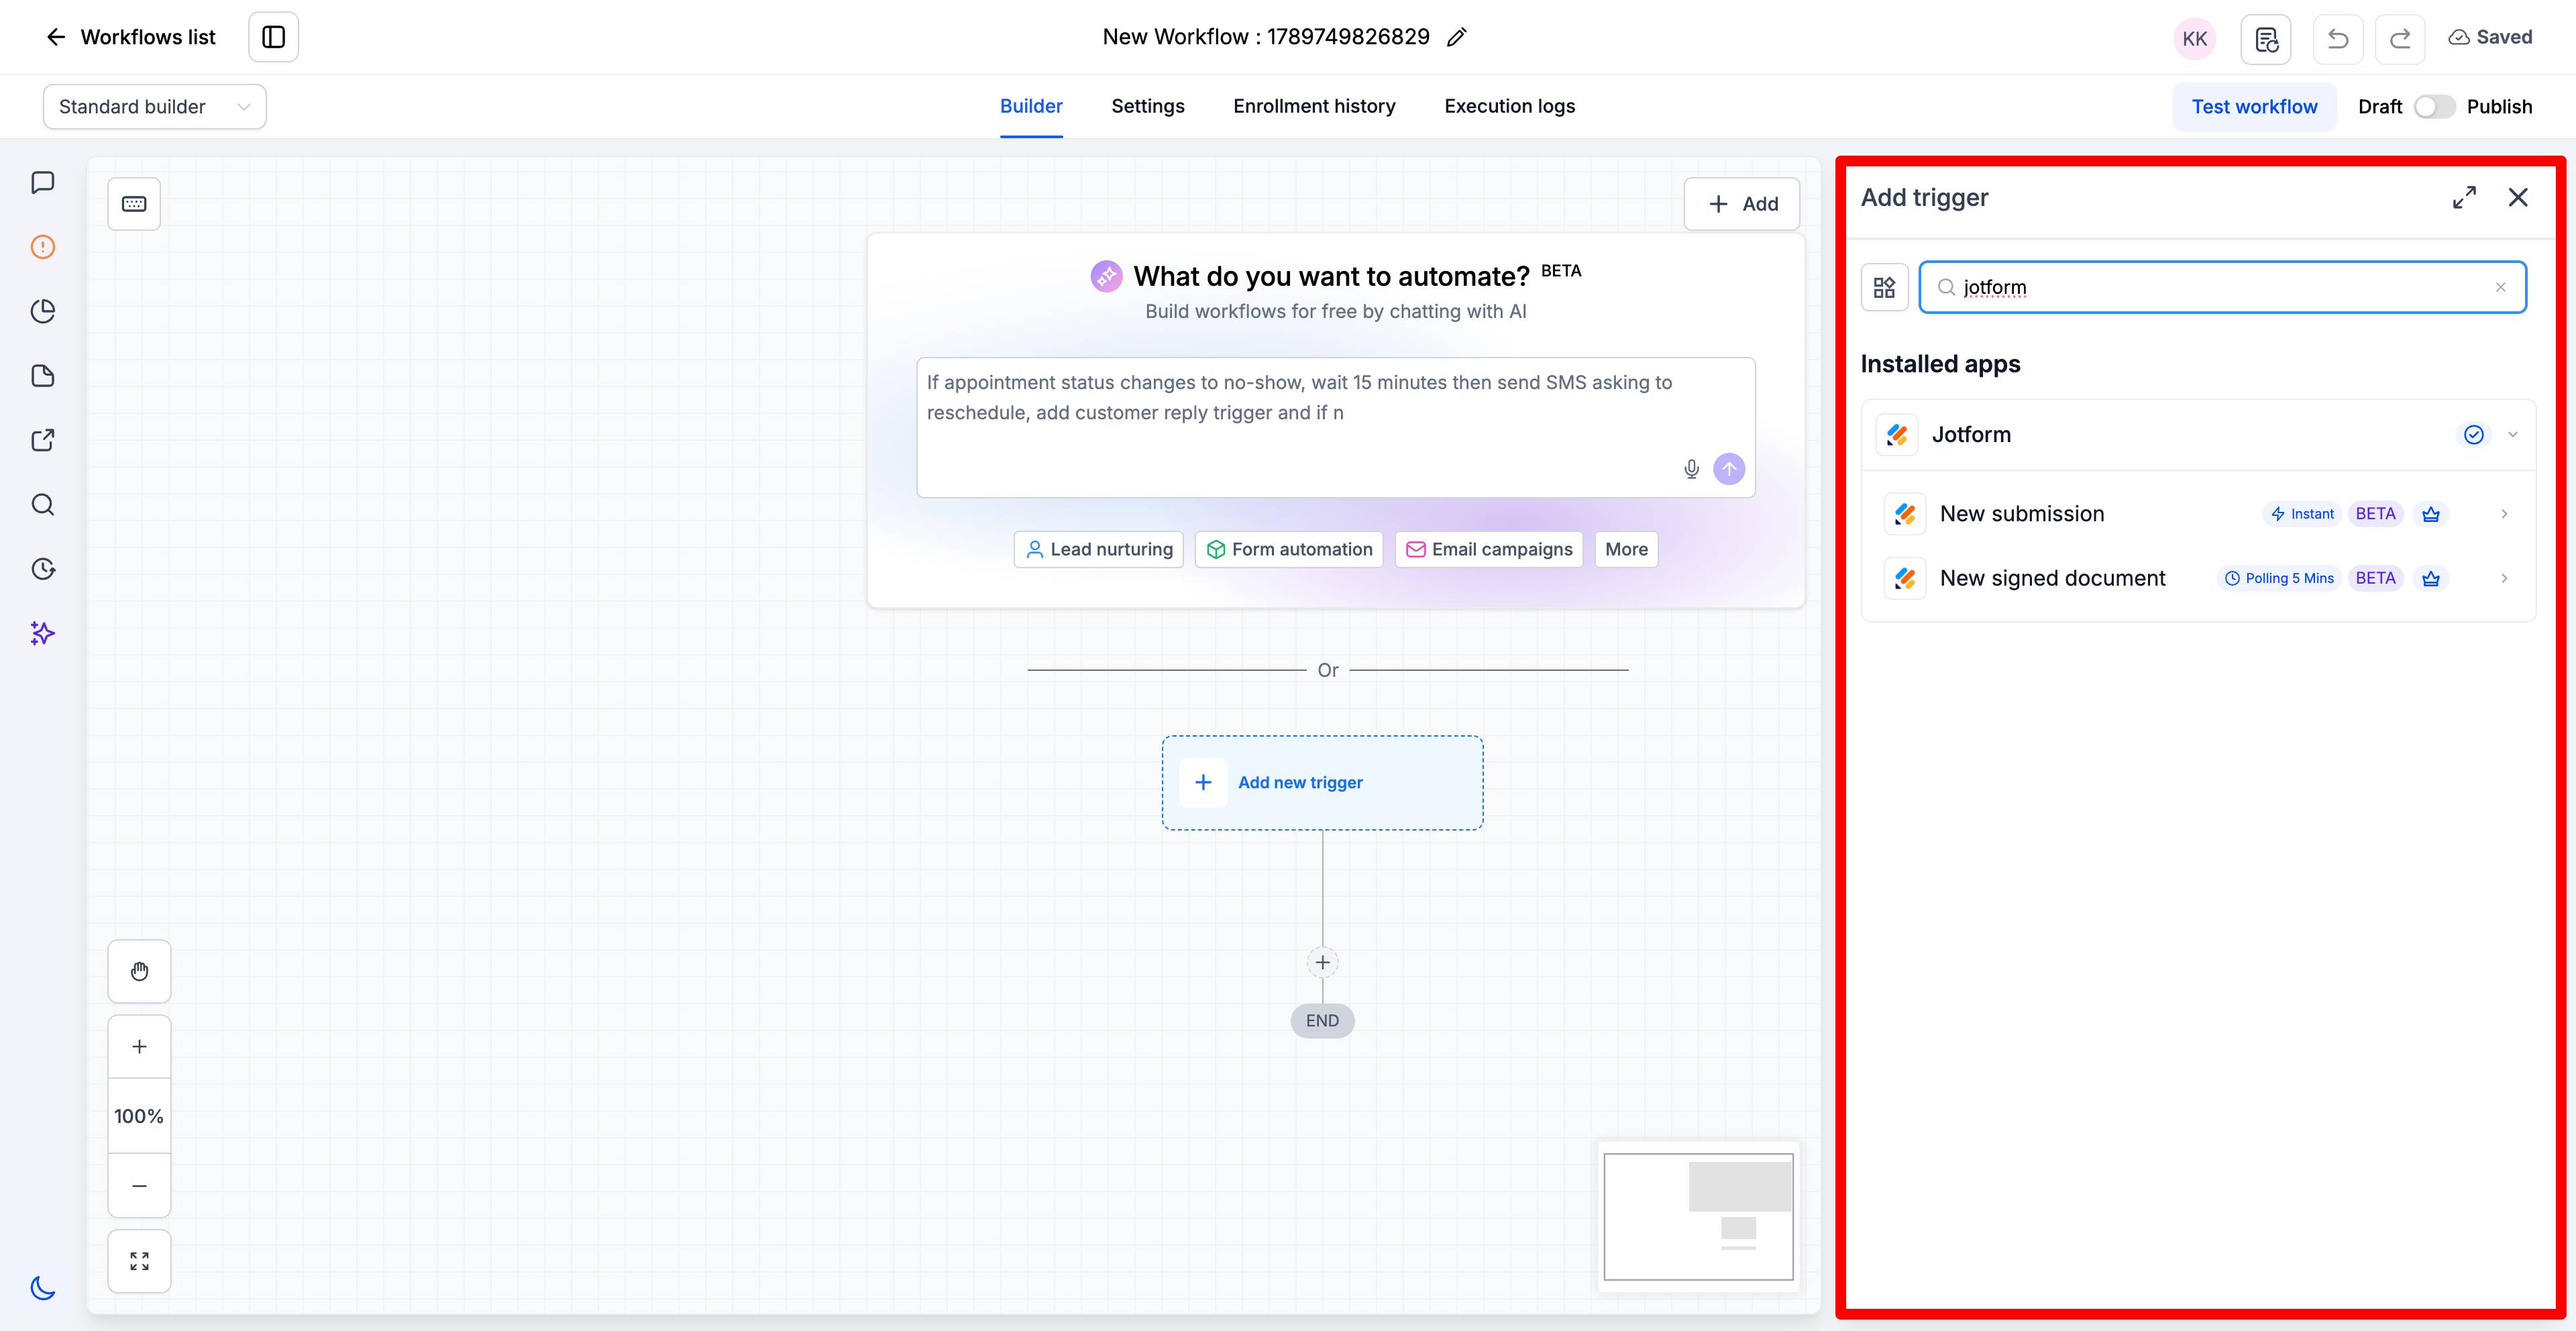
- Search the catalog for Jotform.
- Choose the needed Jotform trigger or action.
- If no account is linked, click Connect your account.
- Enter the Jotform API key and finish the connection.
Set up a New Submission trigger
- Navigate to Automation > Workflows and open or create a workflow.
- Click Add New Trigger.
- Search for Jotform and pick New Submission.
- Link the Jotform account if it is not already linked.
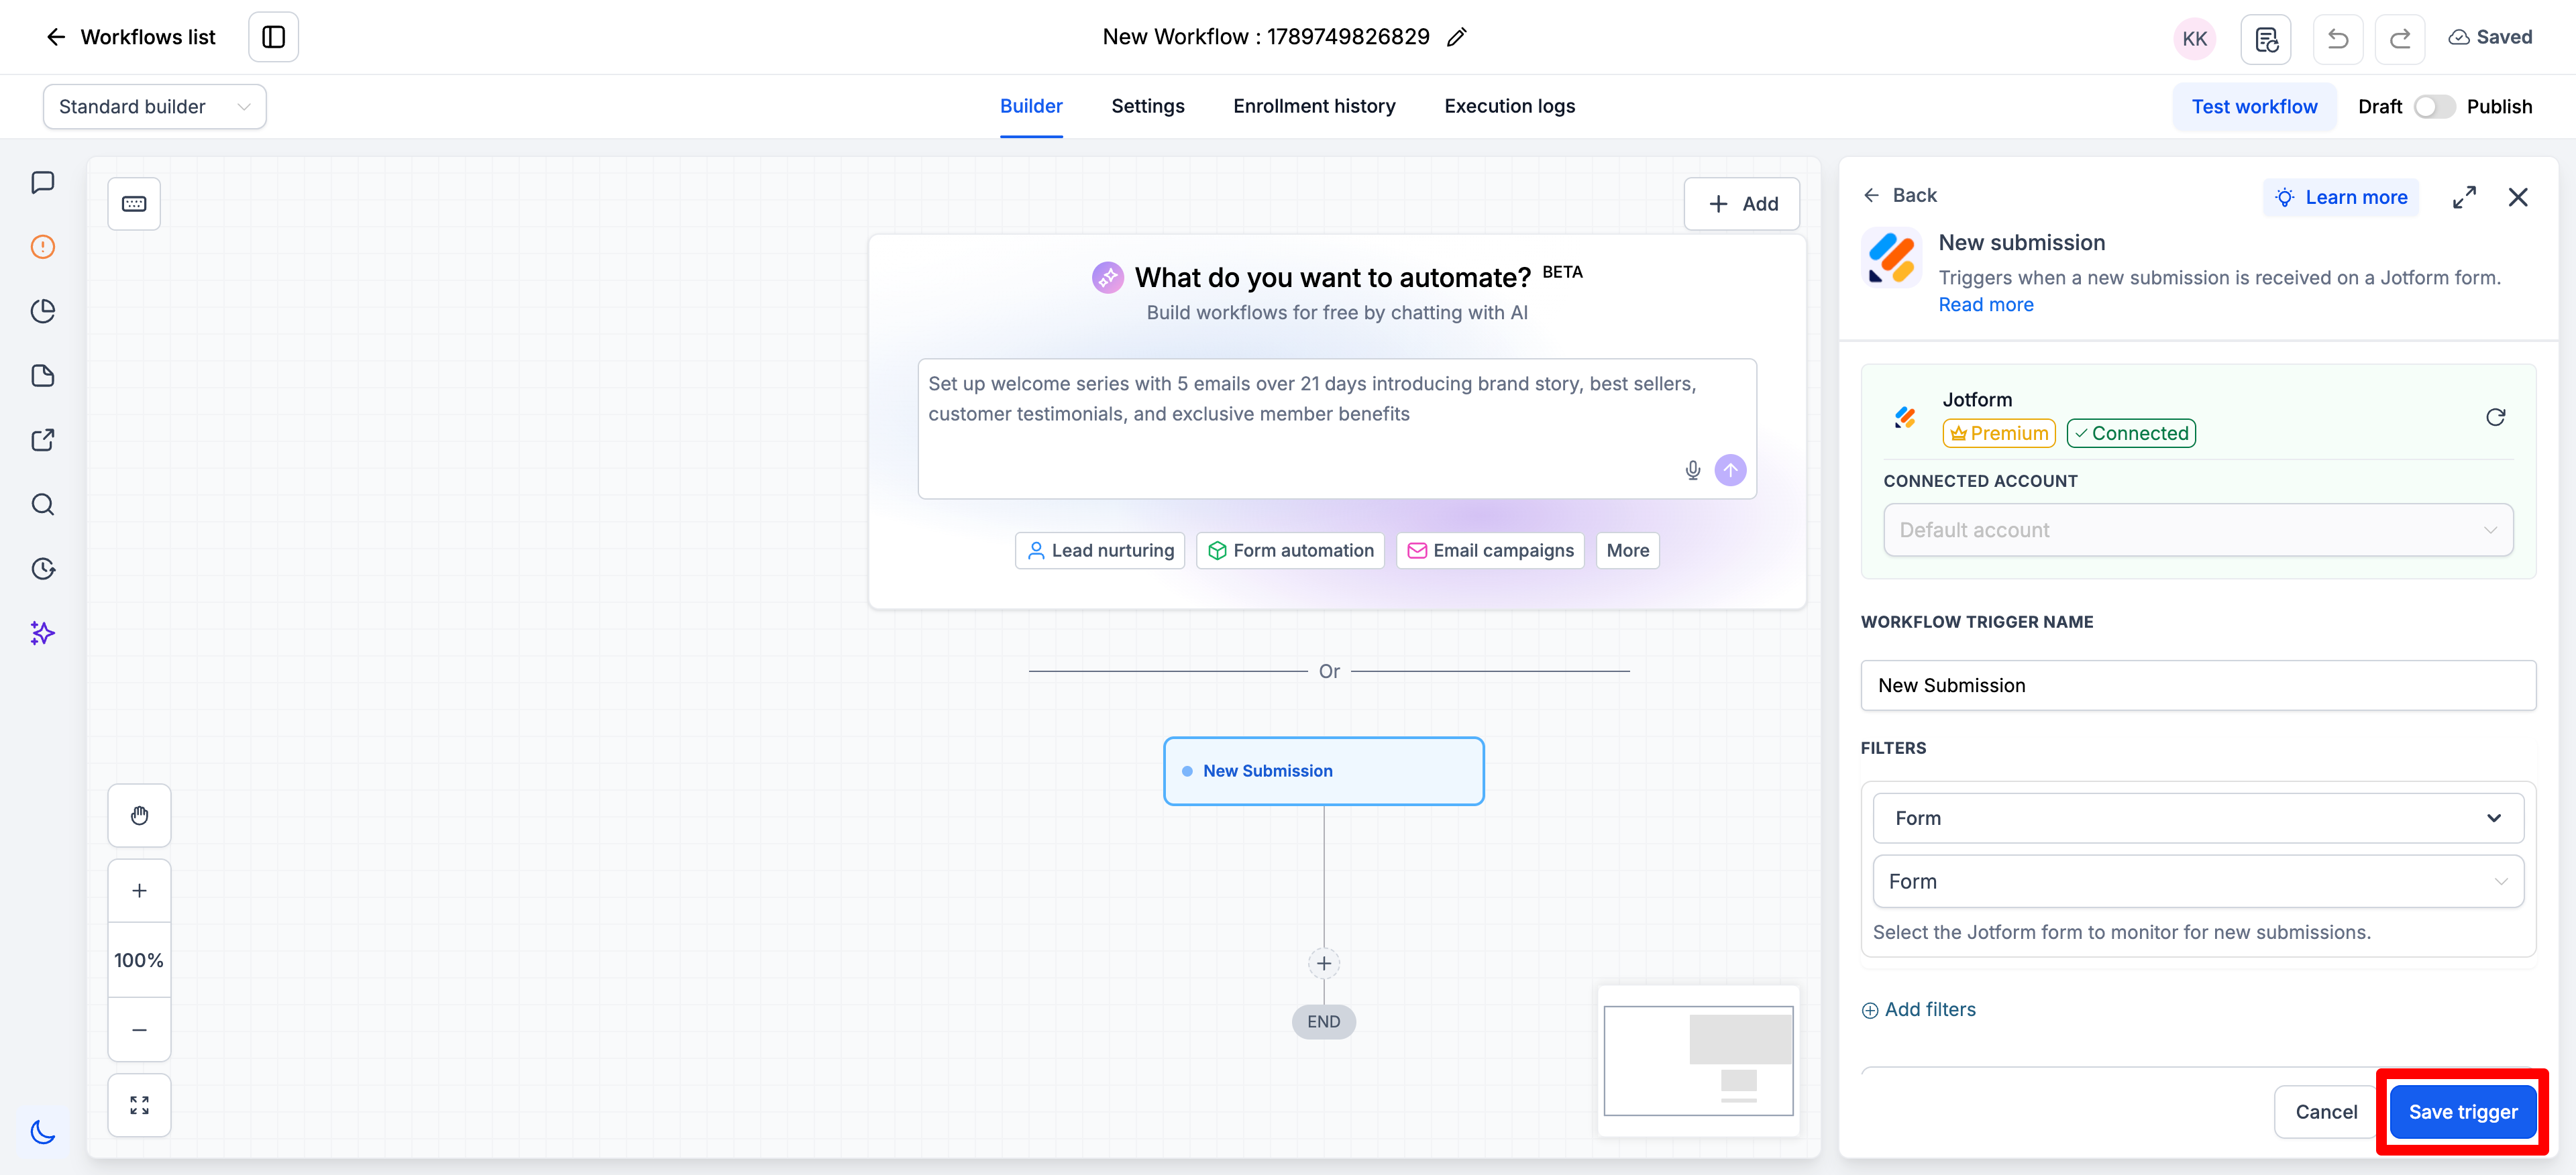
- Provide a name for the trigger and fill in the required settings.
- Select the form that will generate the submission event.
- Press Test Trigger and examine the sample data returned.
- Save the trigger configuration.
- Add the subsequent workflow actions and publish when ready.
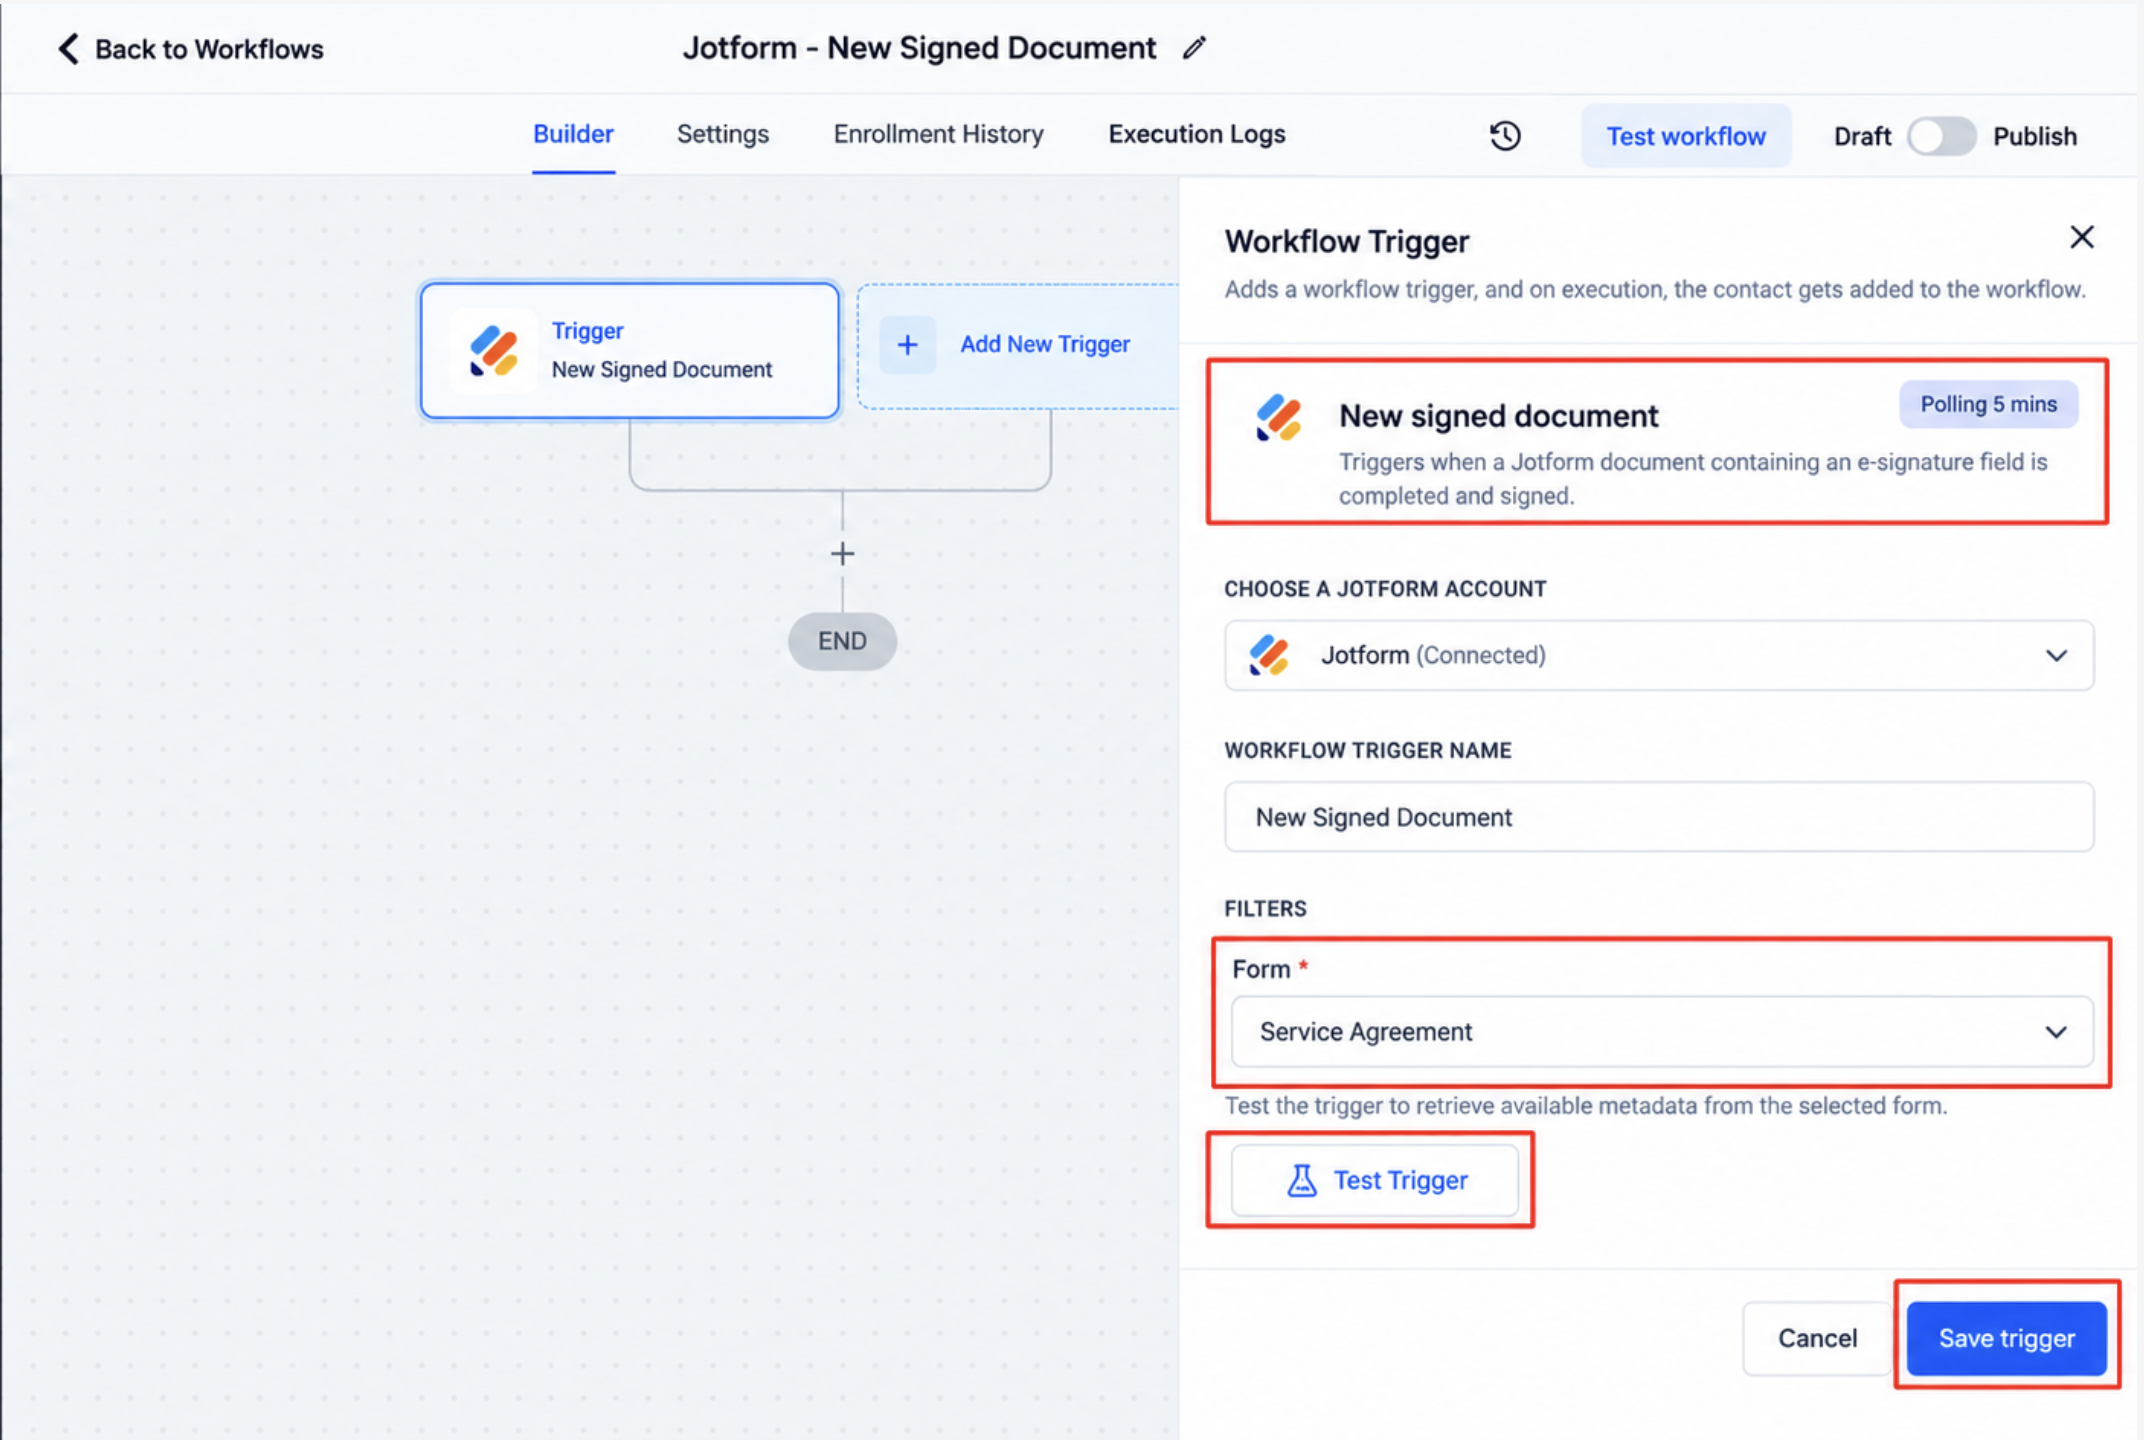
Set up a New Signed Document trigger
- Go to Automation > Workflows and open or create a workflow.
- Click Add New Trigger.
- Search for Jotform and select New Signed Document.
- Connect the Jotform account if needed.
- Enter a trigger name and complete the required fields.
- Choose the form or document that contains the e signature field.
- Click Test Trigger to pull available metadata.
- Save the trigger.
- Add downstream actions and publish the workflow.
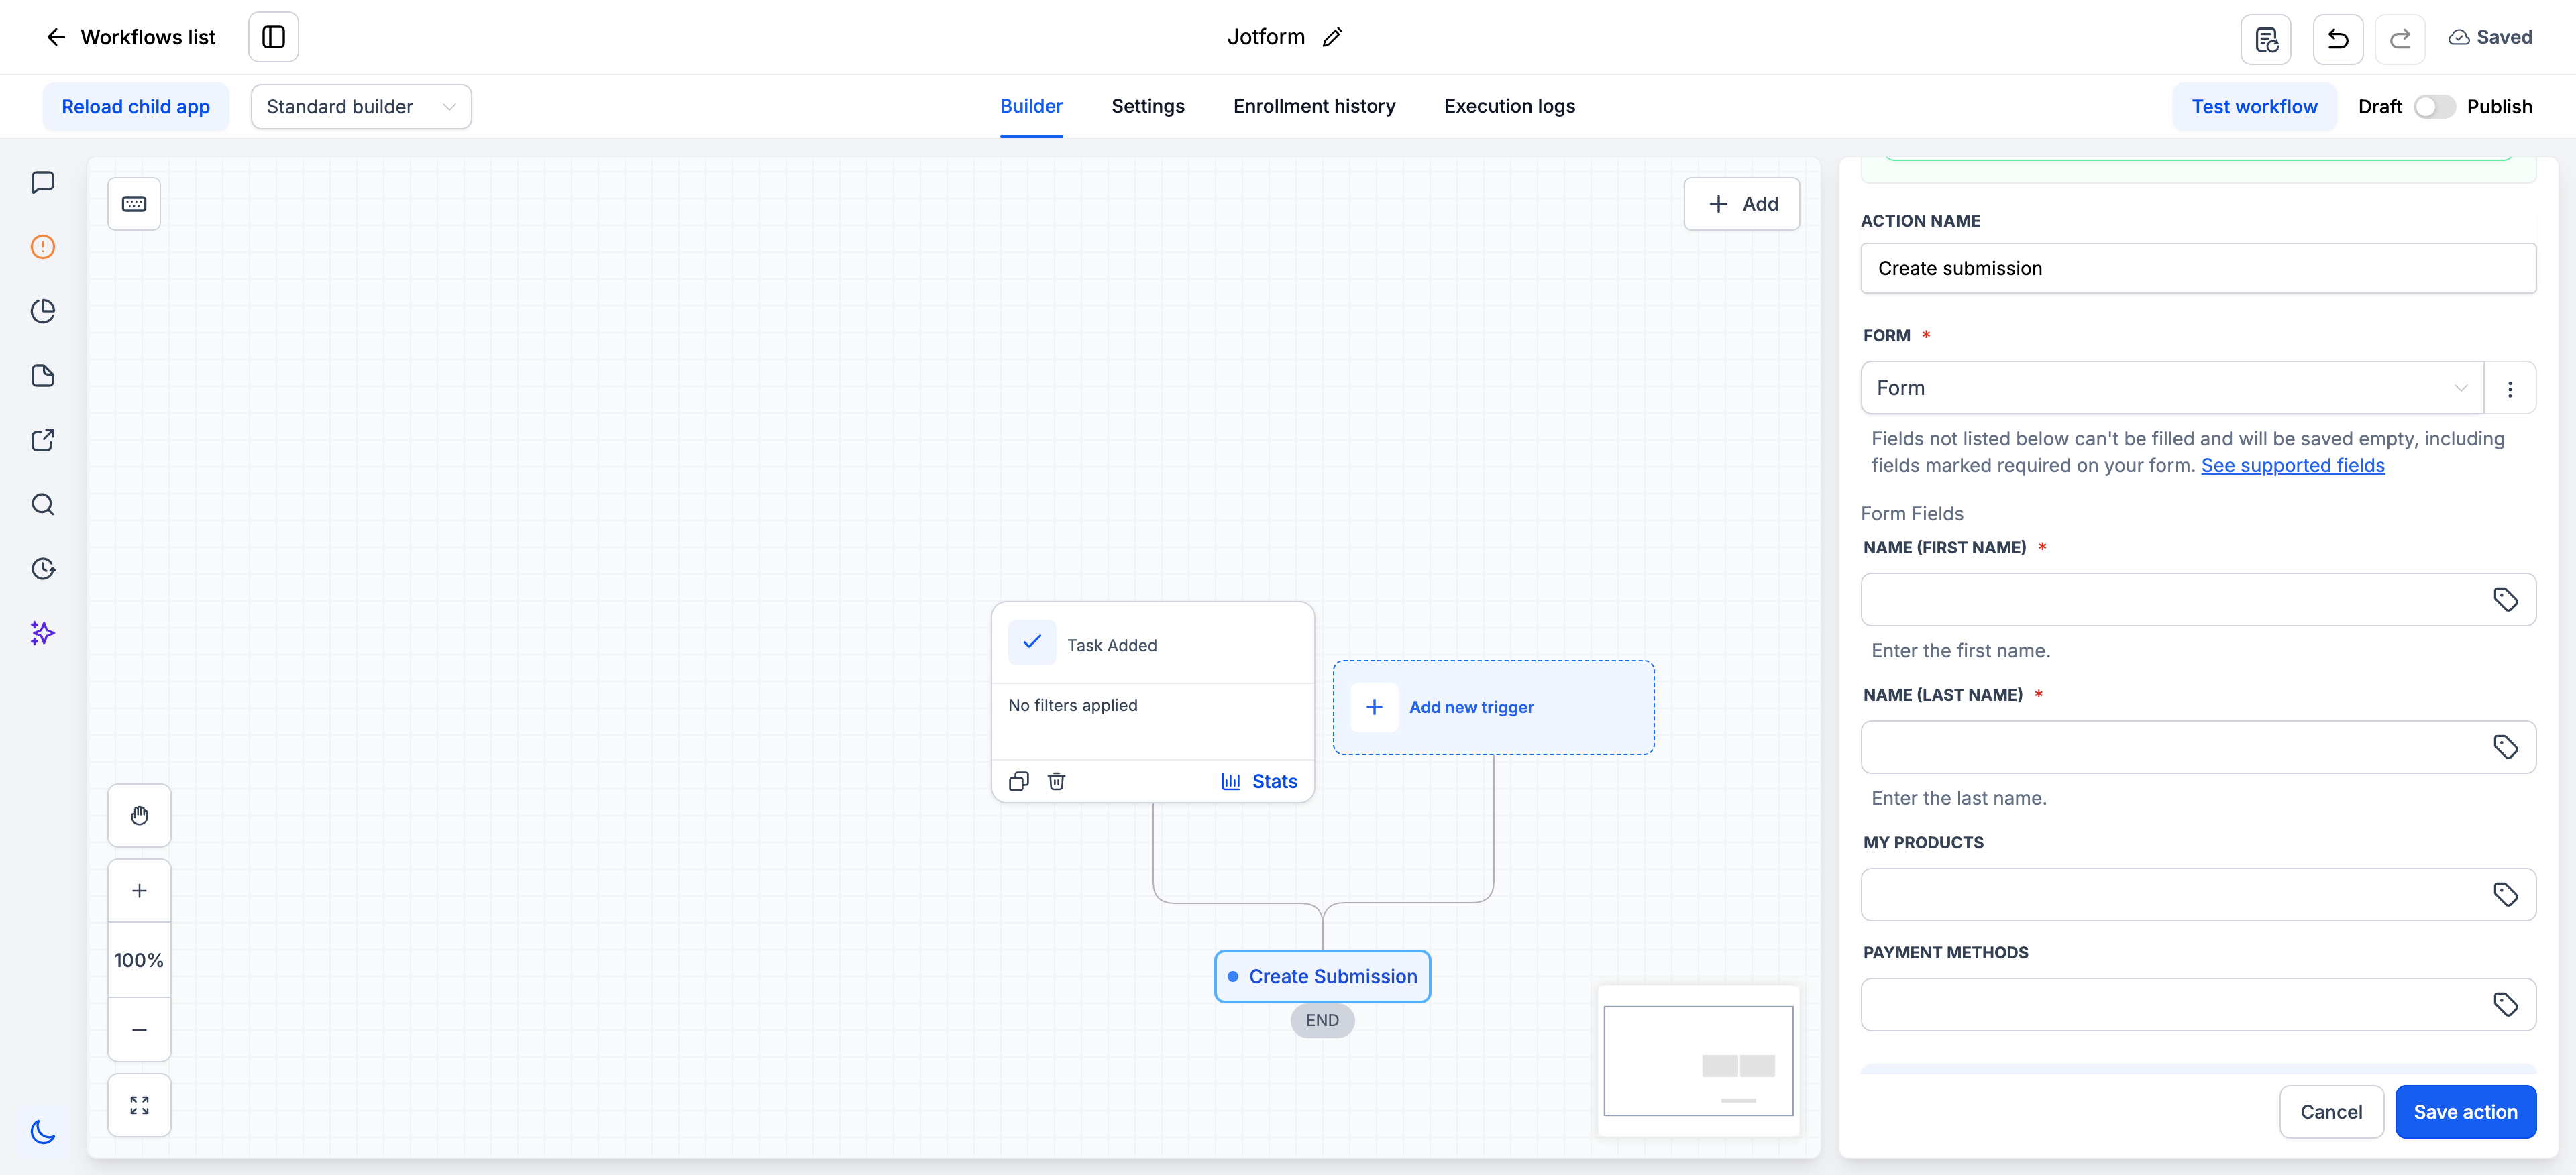
Add a Create Submission action
- Open Automation > Workflows and edit the target workflow.
- Click the + button at the point where the Jotform action should run.
- Search for Jotform.
- Select Create Submission from the results.
- Connect the Jotform account if it is not already linked.
- Pick the destination Jotform form for the new submission.
- Allow HighLevel to retrieve the list of supported fields.
- Map each field using static text or a workflow custom value.
- Apply YYYY MM DD format for date fields and HH:MM for time fields.
- Review the mappings and save the action.
- Publish the workflow when the automation is complete.
07What it looks like in HighLevel
08Settings that matter
- Jotform API key. Identifies the Jotform account that HighLevel will use for triggers and actions.
09Things to know before you rely on it
- A Jotform account must be linked before any trigger or action can run.
- New Submission uses a webhook and fires immediately; New Signed Document relies on polling roughly every five minutes, so a short delay may occur.
- Create Submission can only populate 15 standard Jotform input types; unsupported fields are omitted and left empty.
- Required fields that are unsupported are still left blank without causing an error in the workflow.
- The action does not generate payments, signatures, or appointment reservations.
10How it connects to the rest of HighLevel
- Learn the basics of building automations in HighLevel. Workflow basics
- Review the pricing tiers for Workflow Pro features. Pro plan pricing
- Find out how to enable and rebill premium workflow features. Enable premium
Michael's take

The first thing I would get right is the Jotform connection itself. Make sure the API key is entered and the account is linked before you start building any triggers.
Once the connection is solid, I would set up a New Submission trigger for any lead capture form and immediately test it so the metadata shows up. That way the rest of the workflow can pull values like email or phone without extra steps.