
01Who this is for
- Founders who need a quick picture of how their automation pieces fit together, so they can plan changes safely.
- Agency admins who manage multiple client subaccounts and must keep each account’s automation organized and documented.
02Workflow maps, explained
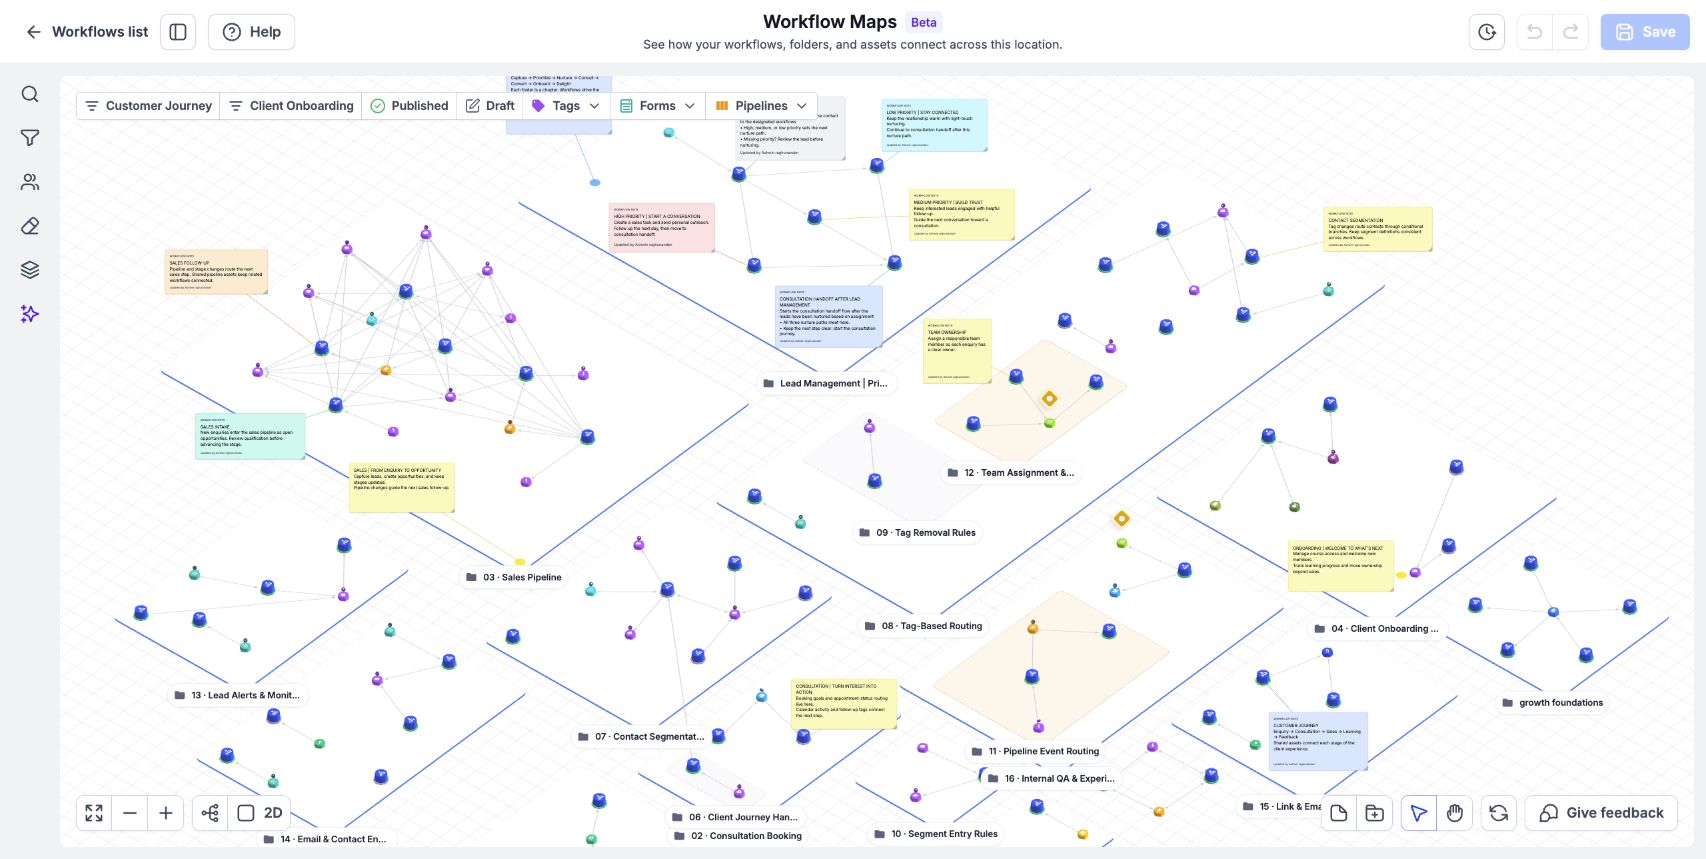
Workflow Maps reads the automations you have already built and displays them as nodes linked by lines. Workflows appear in their folders, while assets such as tags, forms, calendars and pipelines show around them. The map highlights which asset triggers a workflow and which assets a workflow modifies.
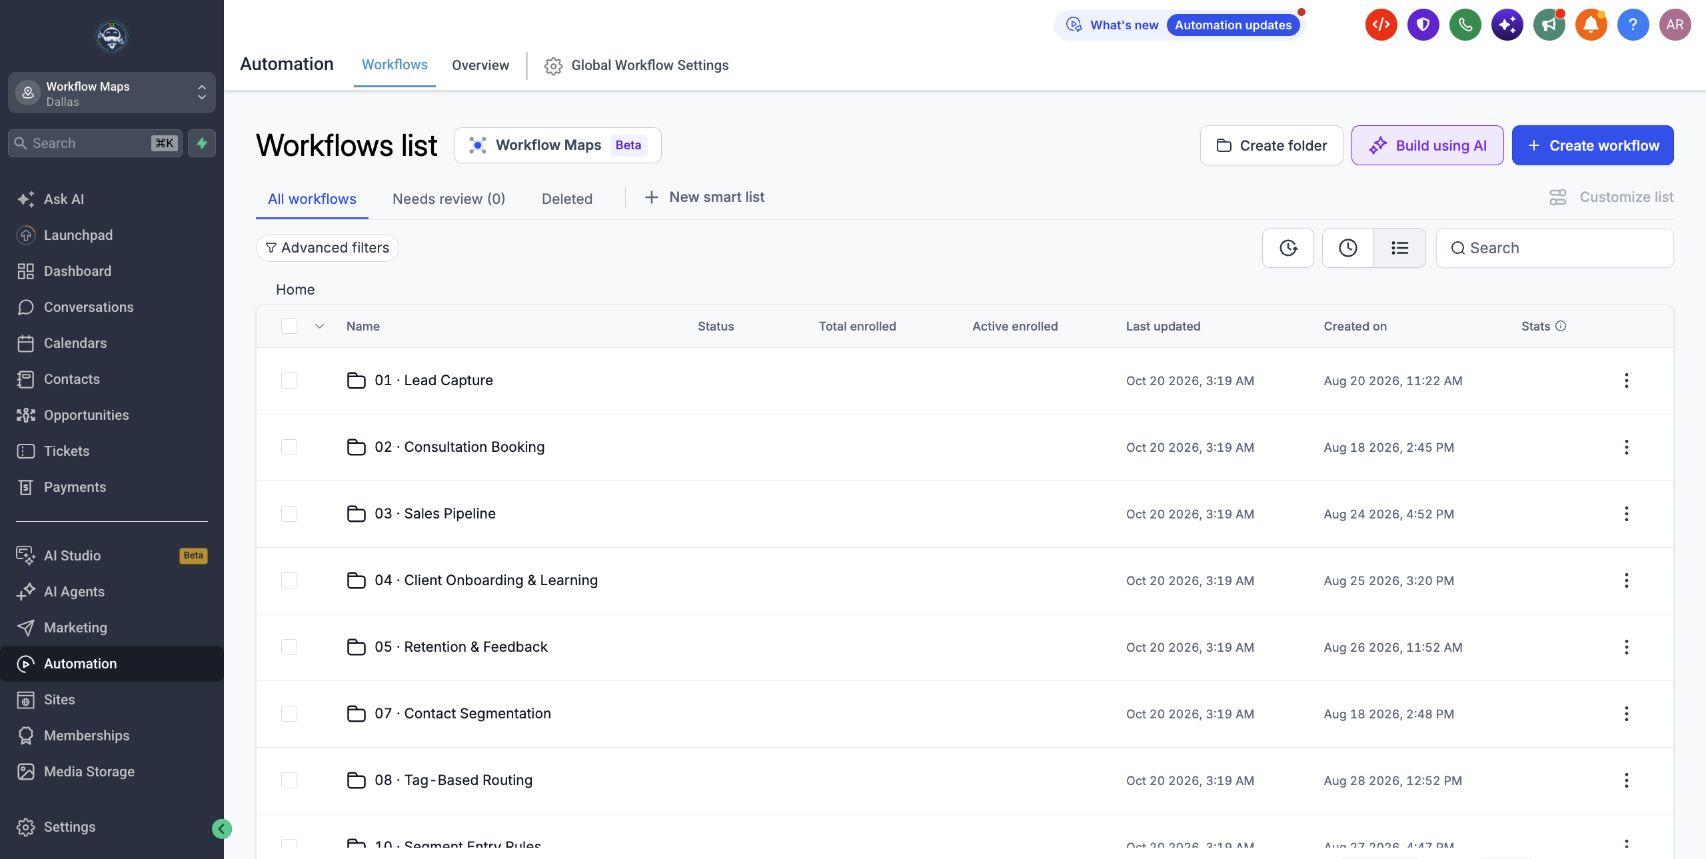
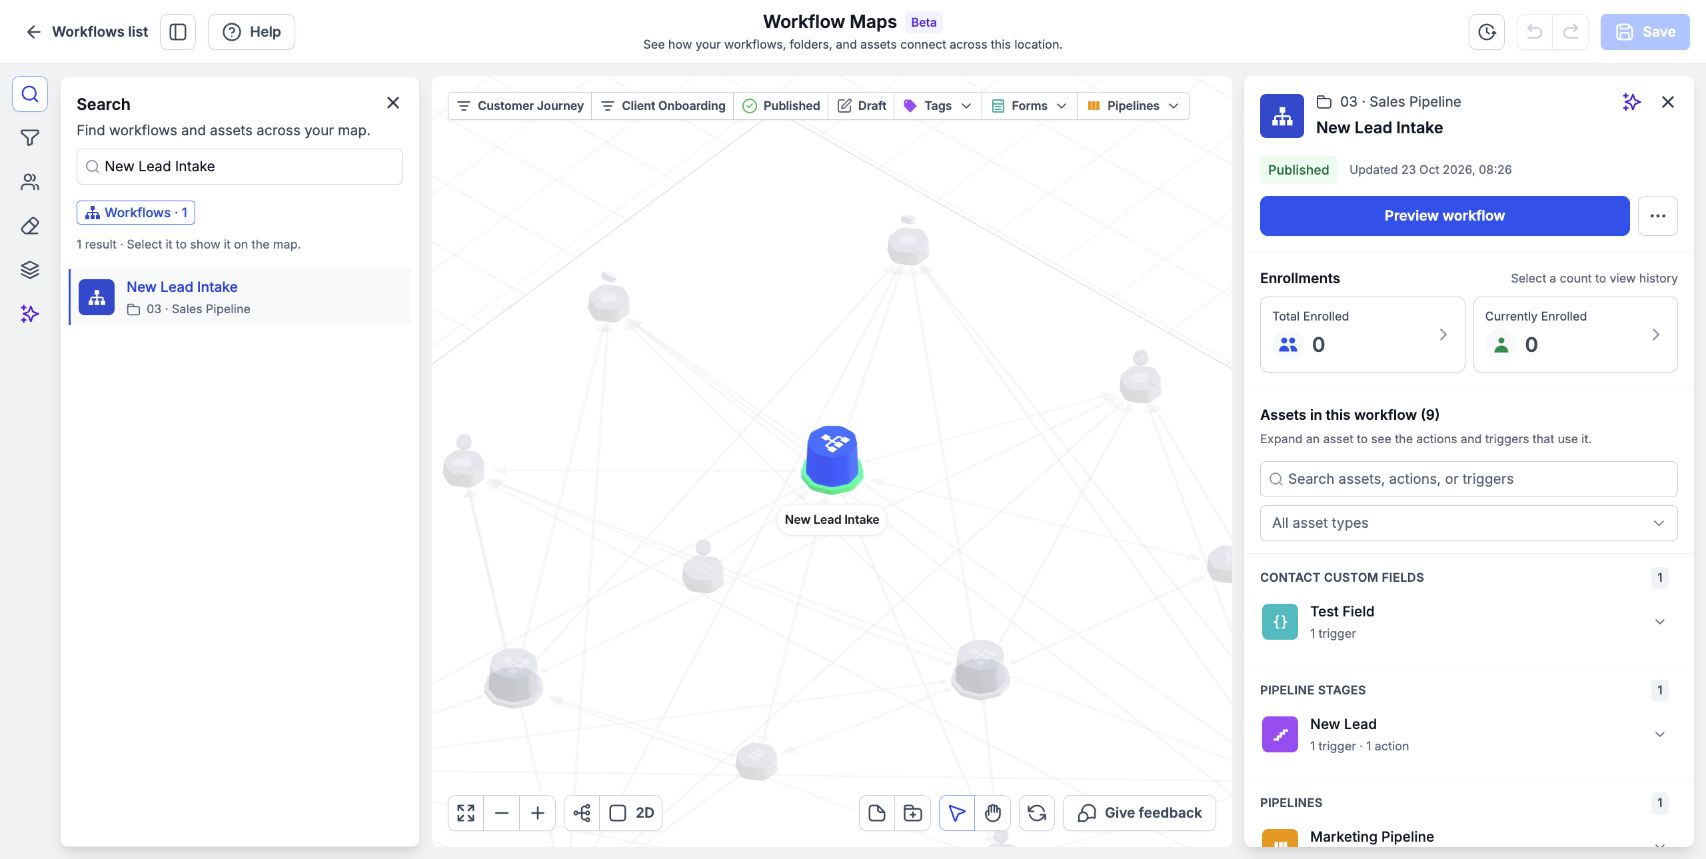
You can open Workflow Maps from Automation > Workflows by clicking the Maps button, or from the builder’s top bar. Each subaccount has its own independent map. From the map you can inspect workflow status, enrollment numbers, and last updated details, as well as preview a workflow or jump into the builder for edits.
03How businesses use workflow maps
- Marketing agency. The agency opens the map to locate every workflow that touches a client’s lead capture form. It reviews the connections, then adds a note beside the workflow explaining its purpose before handing the account to a new team member.
- SaaS startup. The startup selects a tag on the map to see all workflows that add or remove the tag. This lets the product team verify that a planned tag change won’t break any downstream automations.
- Fitness studio. When a member receives an unexpected reminder, the studio searches the contact in the map, follows the workflow path, and inspects the trigger that caused the message.
04How to set up and use workflow maps in HighLevel
Get started with Workflow Maps
- Open the Workflow Maps view from Automation > Workflows.
- Click the Fit control to display the entire map.
- Select a workflow node to view its details.
- Click a linked asset to see which workflows reference it.
- Click a connecting line to examine the trigger or action behind it, zooming first if needed.
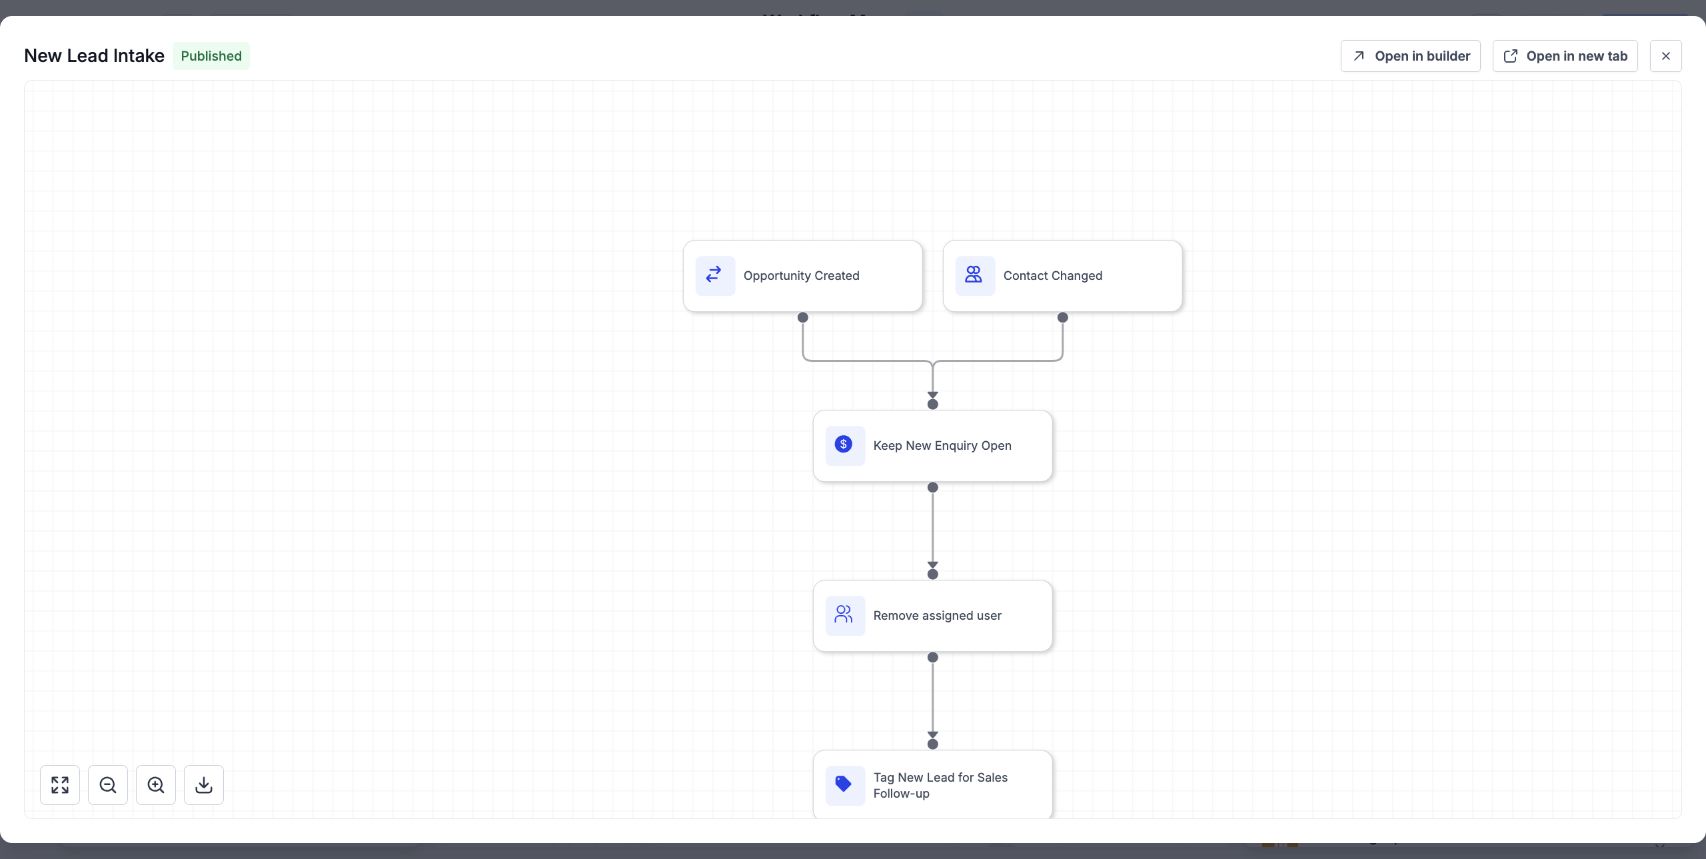
- Use Preview workflow to open the workflow canvas or choose Open in builder to edit its steps.
05What it looks like in HighLevel
06Things to know before you rely on it
- Each subaccount generates its own map; maps are not shared across accounts.
- The map is created automatically from existing workflows; you cannot manually add connections.
07How it connects to the rest of HighLevel
- Learn to navigate, search, and filter workflow maps. Navigate maps
- Add sticky notes to annotate workflows and assets. Sticky notes
- Organize folders and save a custom map layout for the subaccount. Save layout
- Review workflows that contain errors directly from the map. Review errors
Michael's take

When a client’s automations get tangled, trying to figure out which trigger touches which workflow feels like a maze. The first thing I would get right is the map layout. Making sure folders are named clearly and notes are added where the logic is tricky. That visual reference stops endless guesswork when you need to tweak a tag or form.
Once the map is tidy, I’d walk through a few key workflows using the Preview option to confirm everything lines up. It’s a quick sanity check before any client asks why a message went to the wrong person.