
01Who this is for
- Event organizers benefit because they can keep event start and end dates consistent across invitations, calendars, and marketing messages.
- Marketing teams gain by formatting dates for email, SMS, or Slack content, ensuring the timing information looks correct for recipients.
- Sales teams use the comparison feature to check how many days remain until an invoice due date and trigger follow up actions.
02Date/Time Formatter workflow actions, explained
The Date/Time Formatter is a workflow action that manipulates date values. It can reformat a plain date, reformat a date with time, or calculate the day difference between two dates. After the action runs, the new value is saved as a dynamic variable such as {{datetime_formatter.1.date}} or {{datetime_formatter.1.days}} for later use.
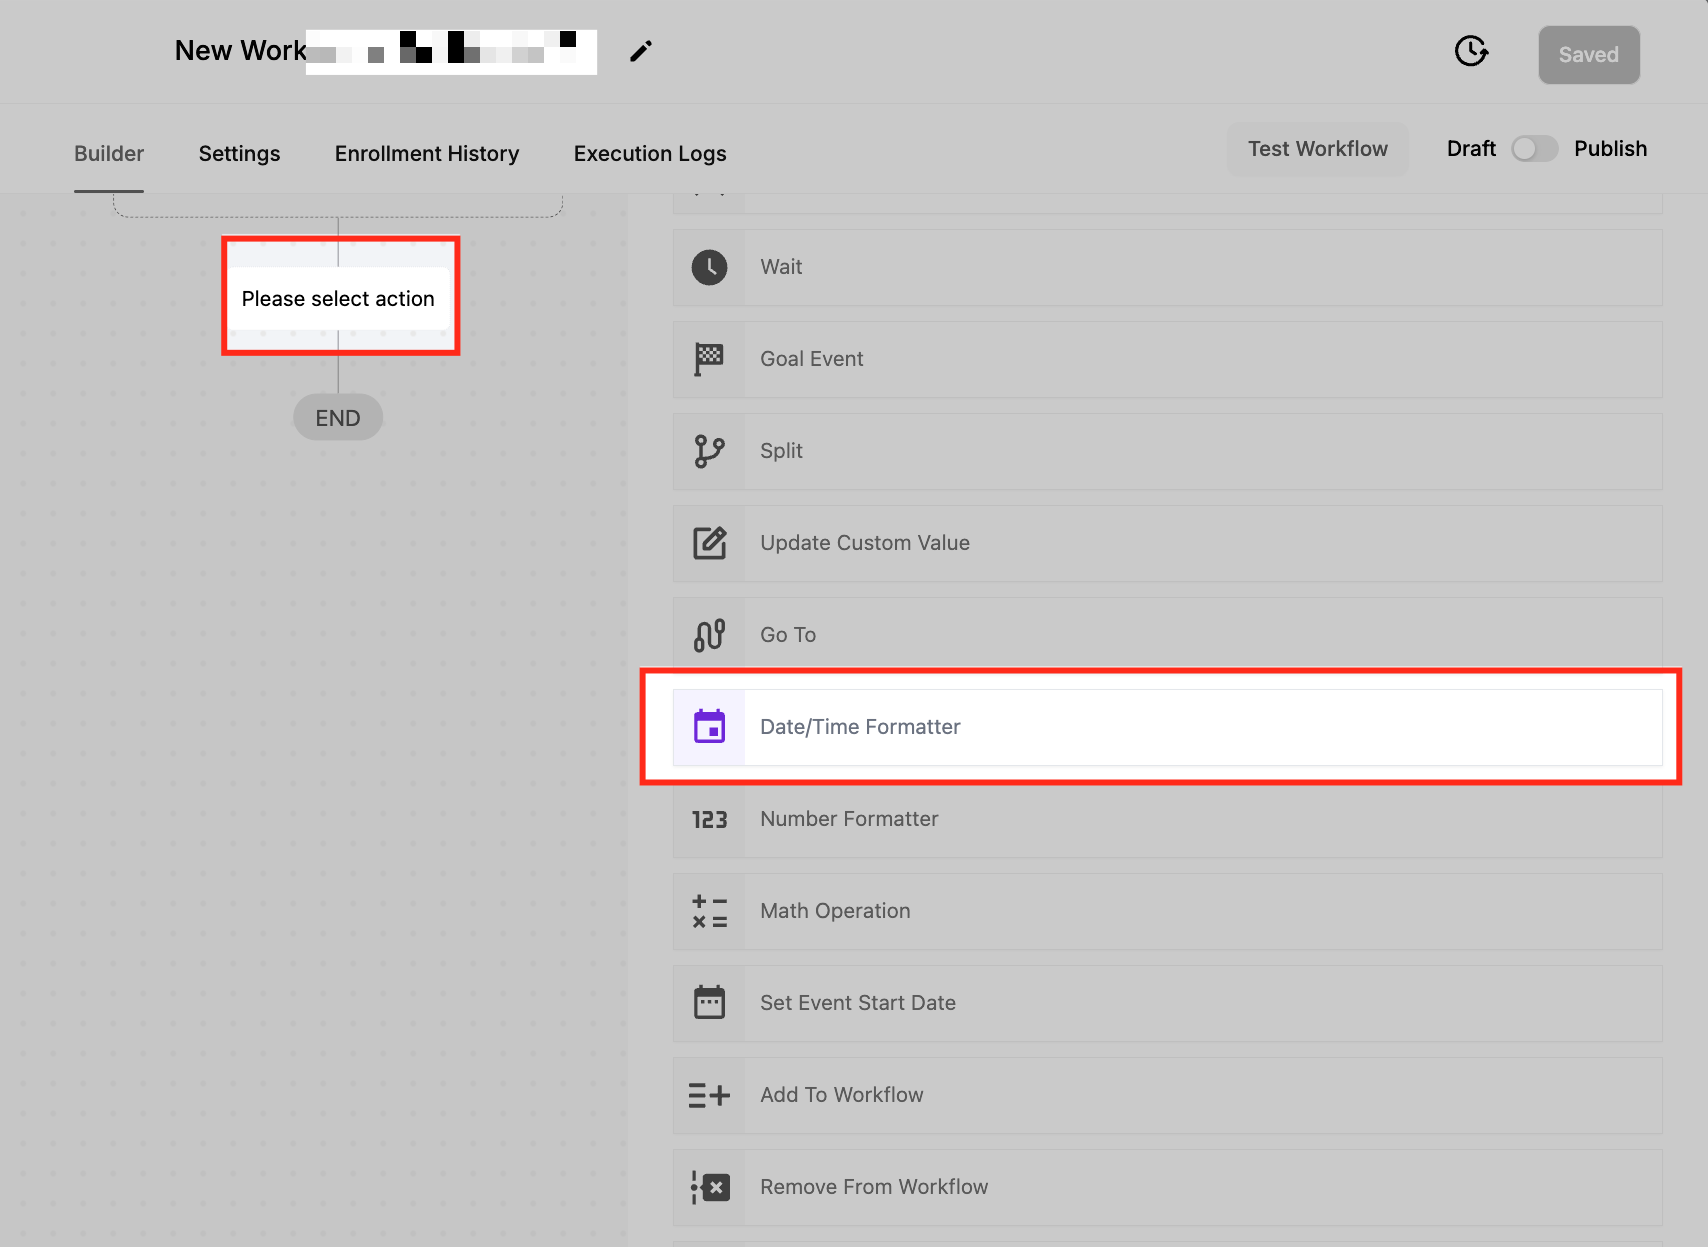
You find the action inside the workflow builder. After opening a workflow, click the plus icon, select “Date/Time Formatter,” then choose the desired mode, Format Date, Format Date Time, or Compare Dates. Each mode asks you to pick a source field, define the original format when needed, and select the target format or the second date for comparison.
The action works in real time as the workflow runs. The formatted result can feed into subsequent actions like sending messages, updating contact fields, or branching logic based on the calculated day count.
03How businesses use date/Time Formatter workflow action
- Event organizer. Select the Format Date Time mode, choose the appointment start field, set the original format if needed, and pick a readable output format. Use the generated variable in email invites to show a friendly date and time.
- Marketing agency. Add a Format Date action, pull the campaign launch date from a custom value, define its current format, and convert it to a month day year style. Insert the variable into SMS messages to notify leads of the launch date.
- Sales team. Use the Compare Dates mode to select a contact’s invoice due date and the Current Date, ensure both formats match, and store the day difference. Reference this variable to trigger a reminder email when the difference reaches zero.
04How to set up and use date/Time Formatter workflow action in HighLevel
Set up Date/Time Formatter action
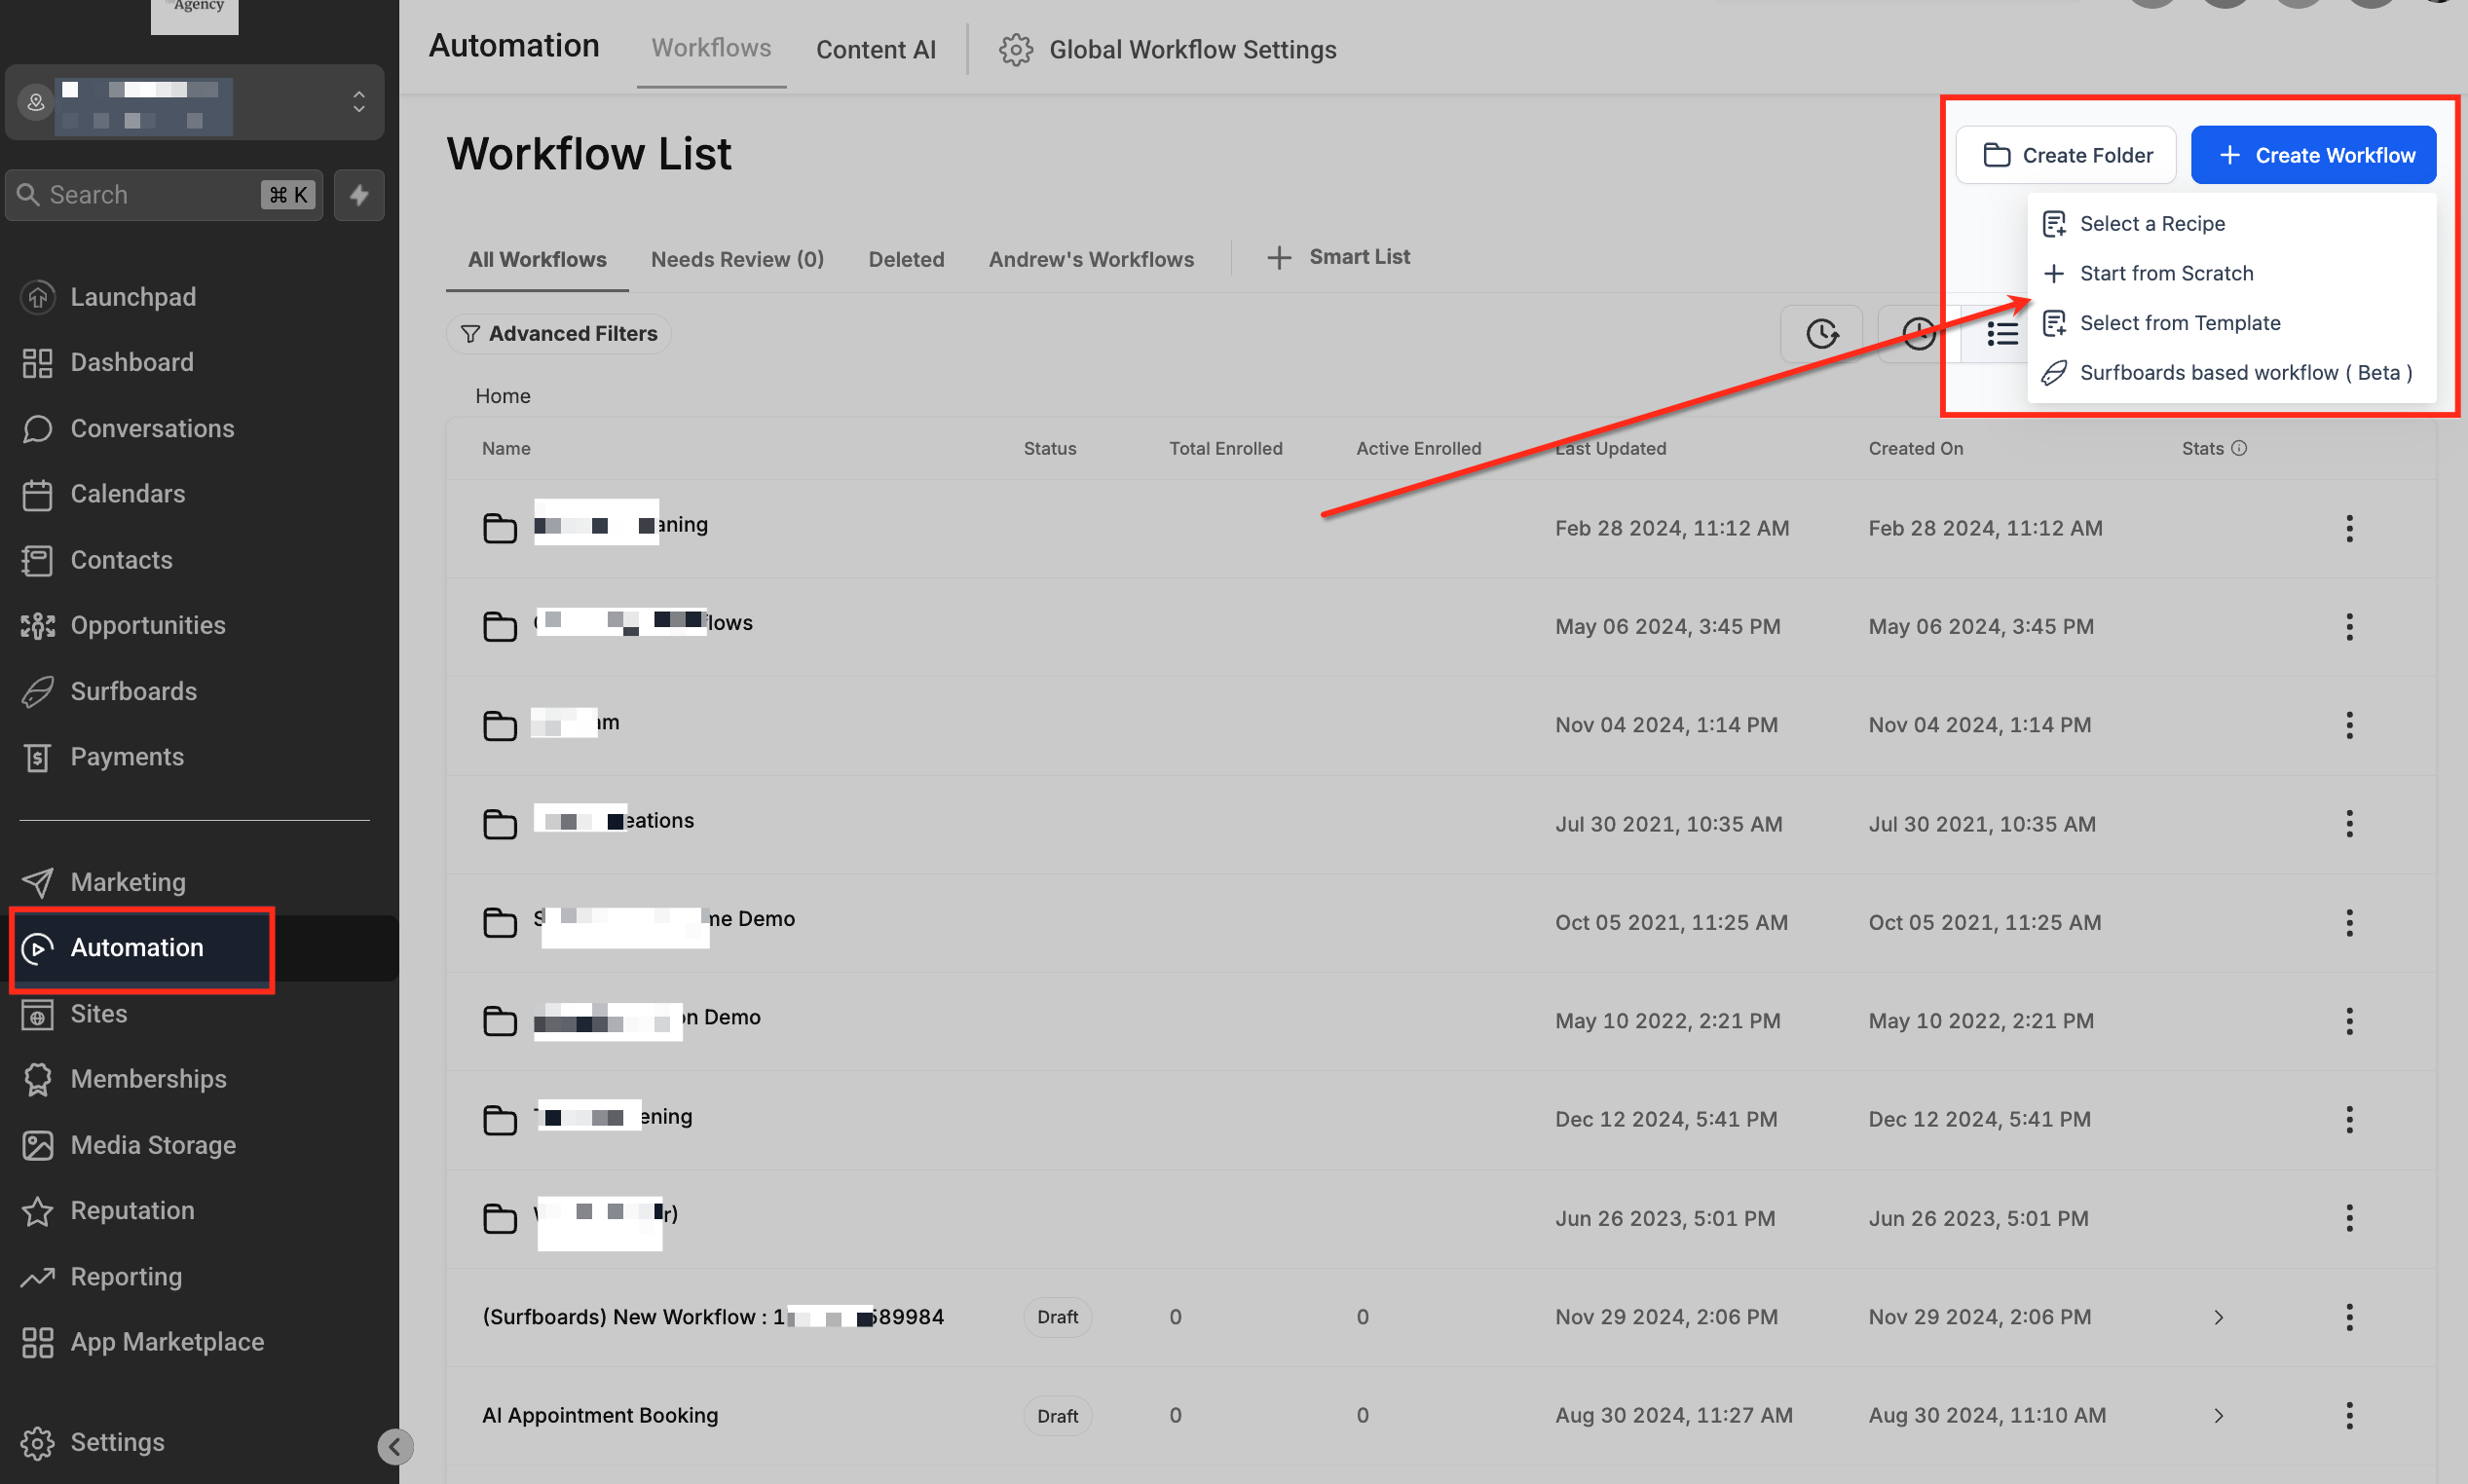
- Open Automation, click Create Workflow, and start from Scratch or open an existing workflow.
- Click the "+" icon to open the list of actions and pick "Date/Time Formatter".
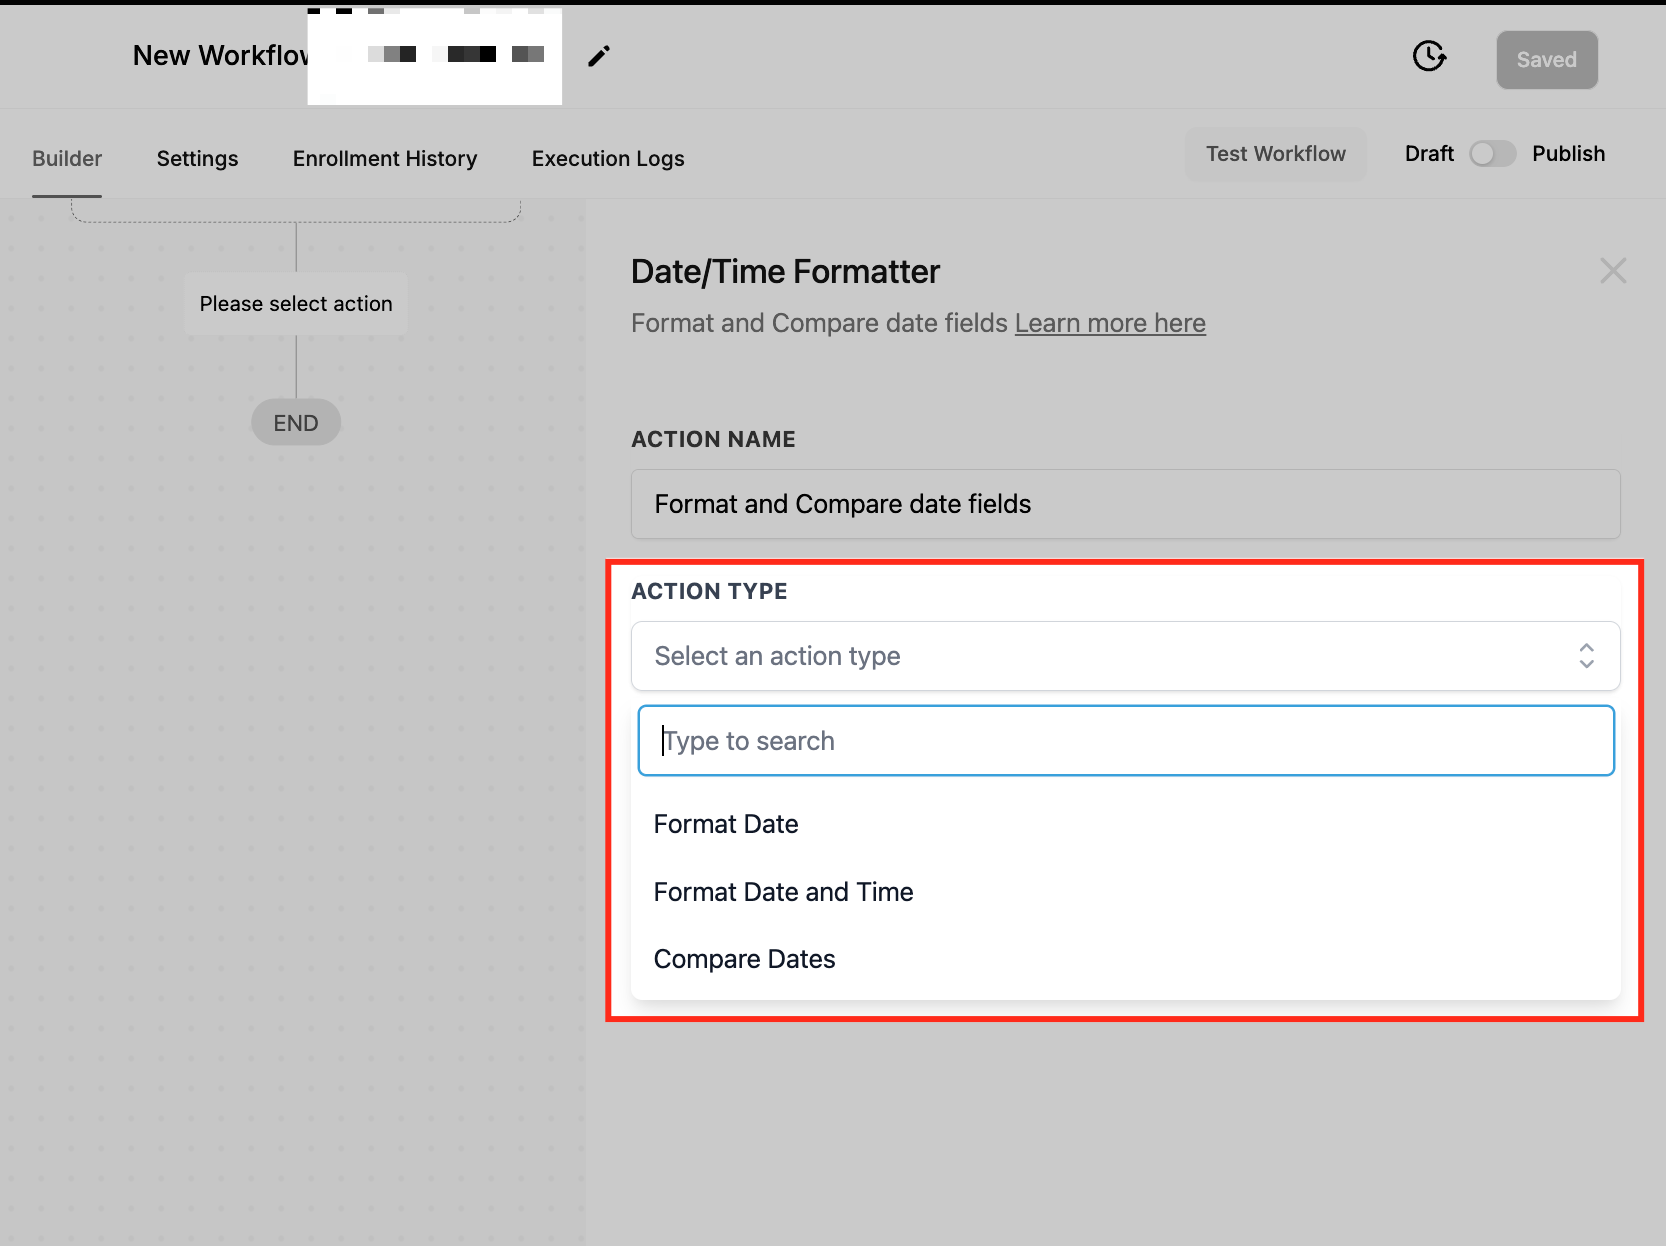
- Choose the action type you need: Format Date, Format Date Time, or Compare Dates.
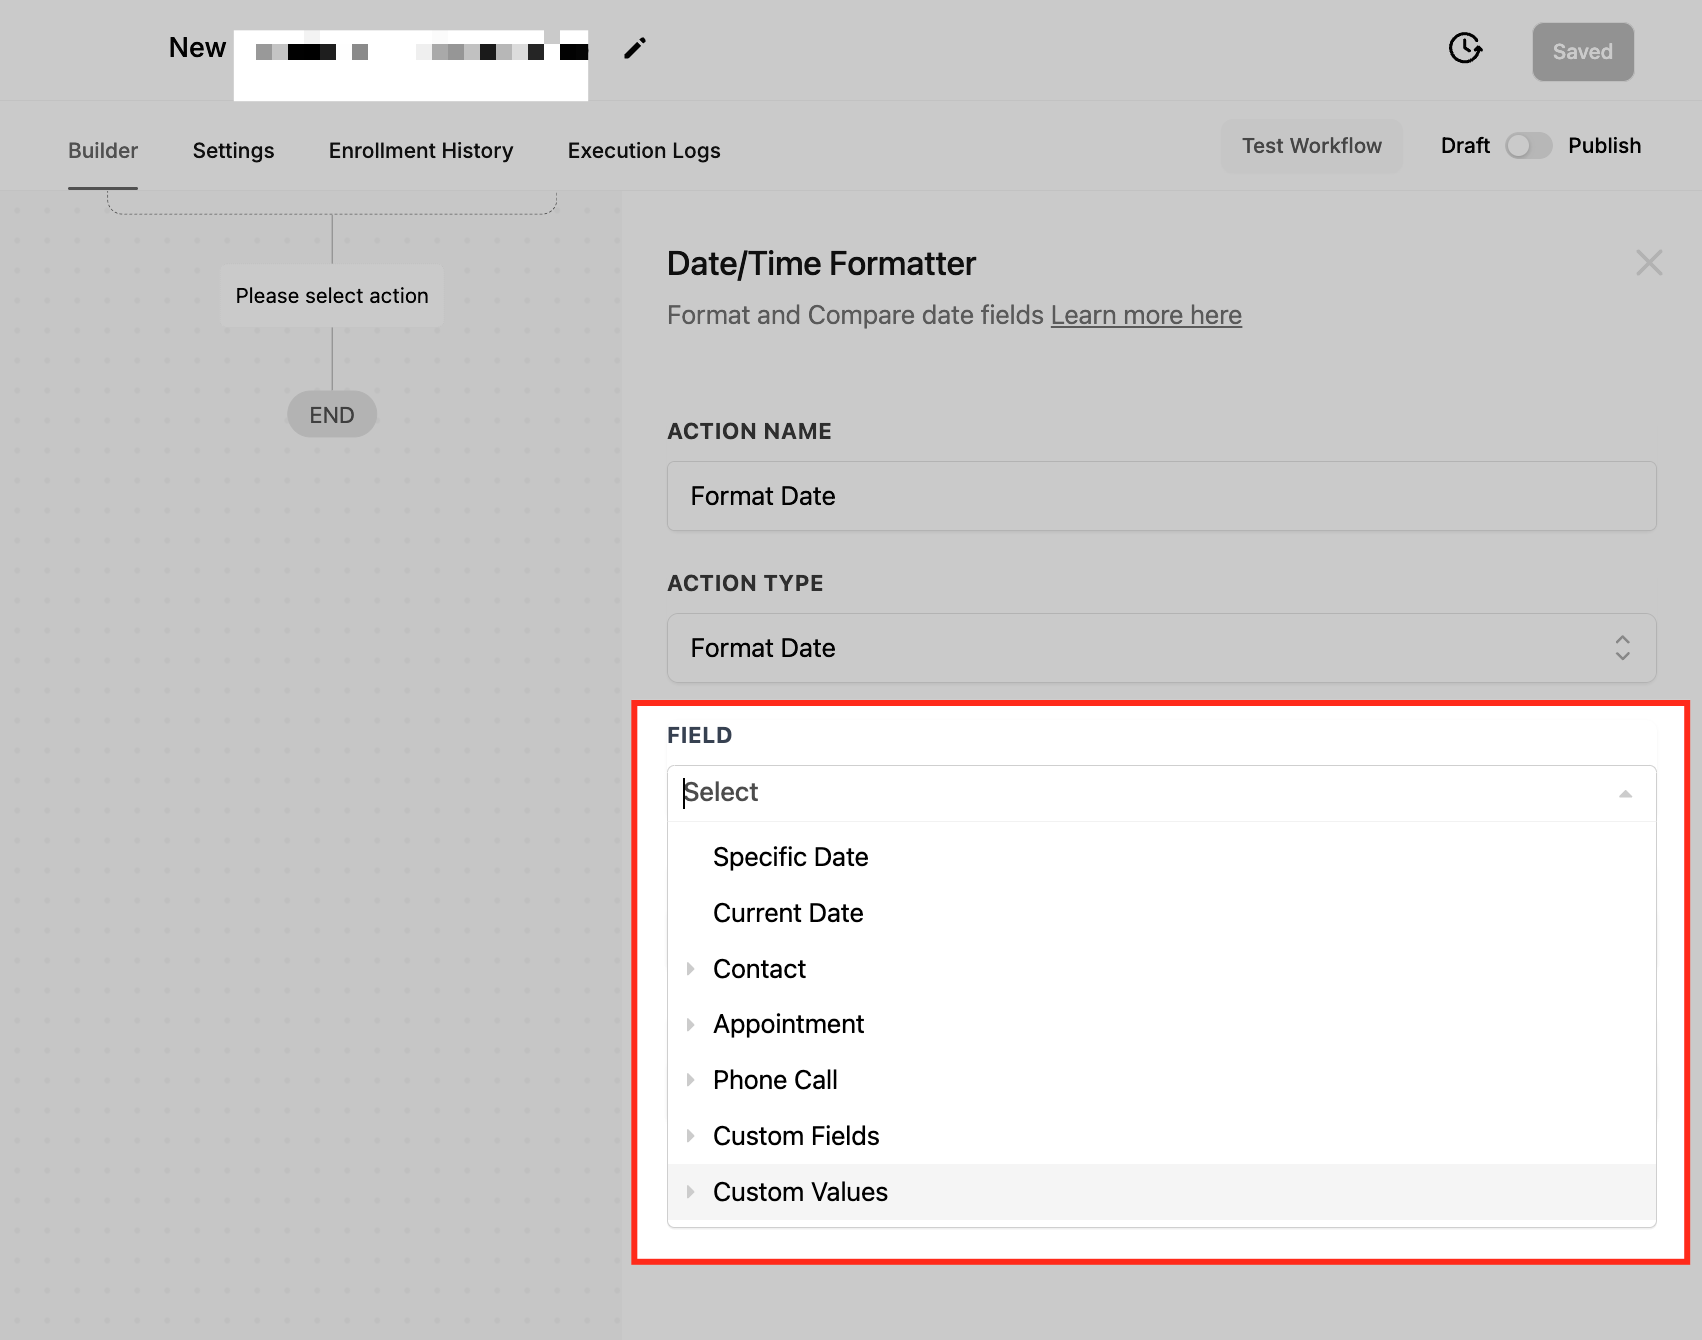
- Select the source date or date time field from options such as Specific Date, Current Date, a contact field, appointment date, custom value, or inbound webhook.
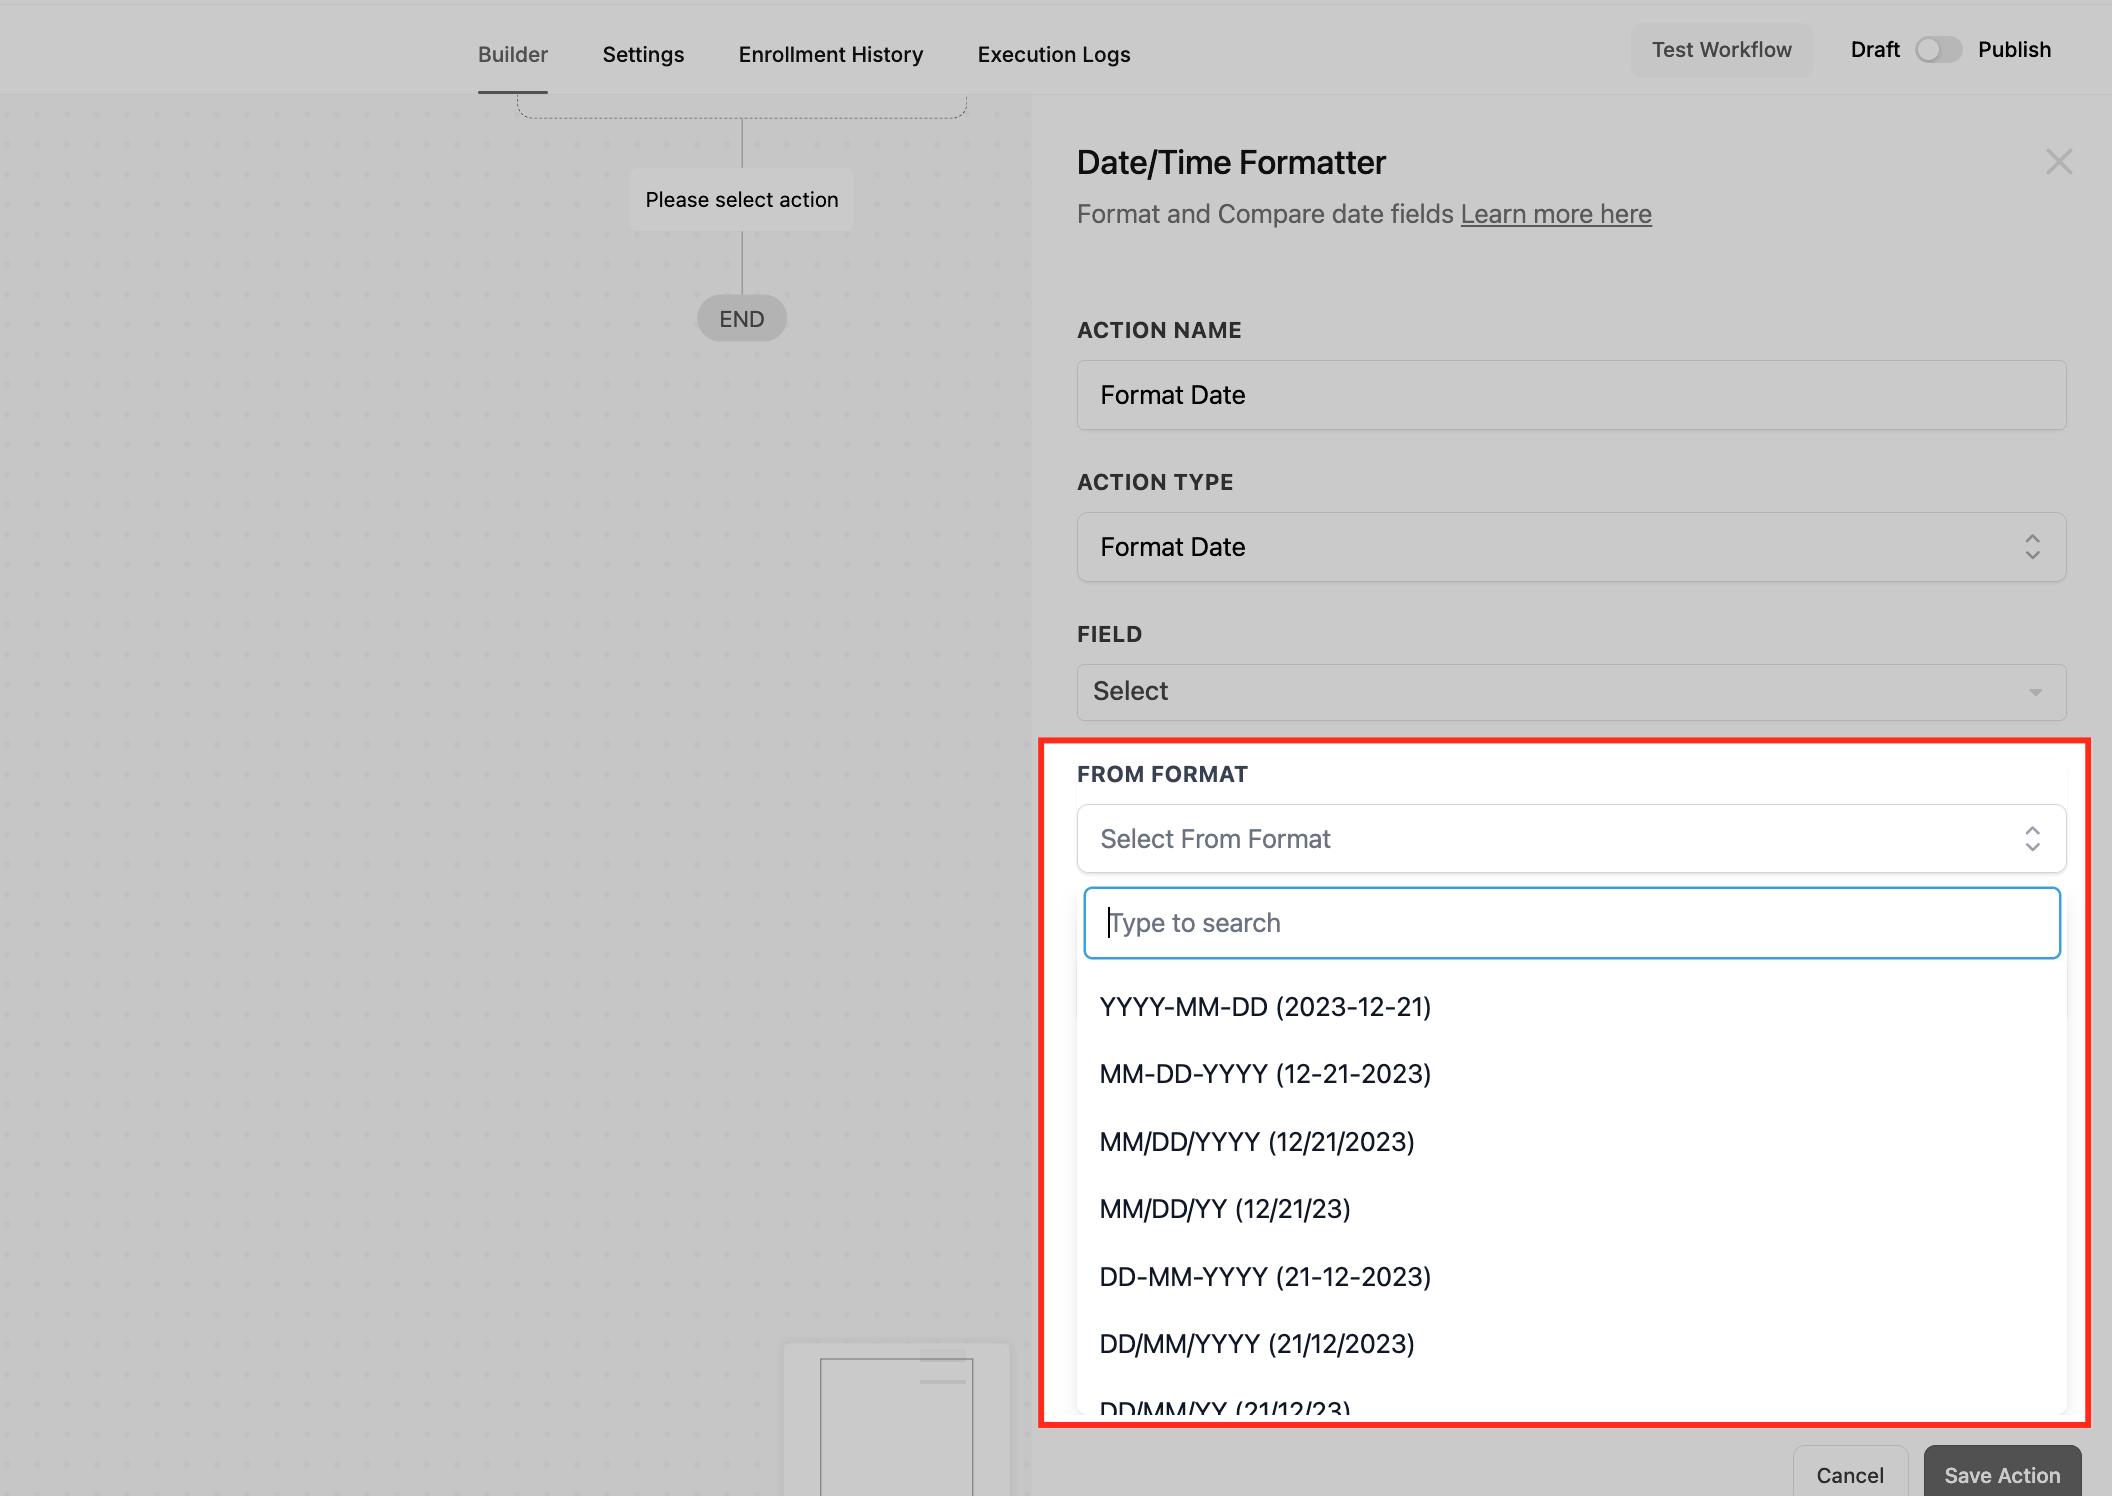
- If the source is a custom value or webhook, manually select the matching From Format; system fields auto detect the format.
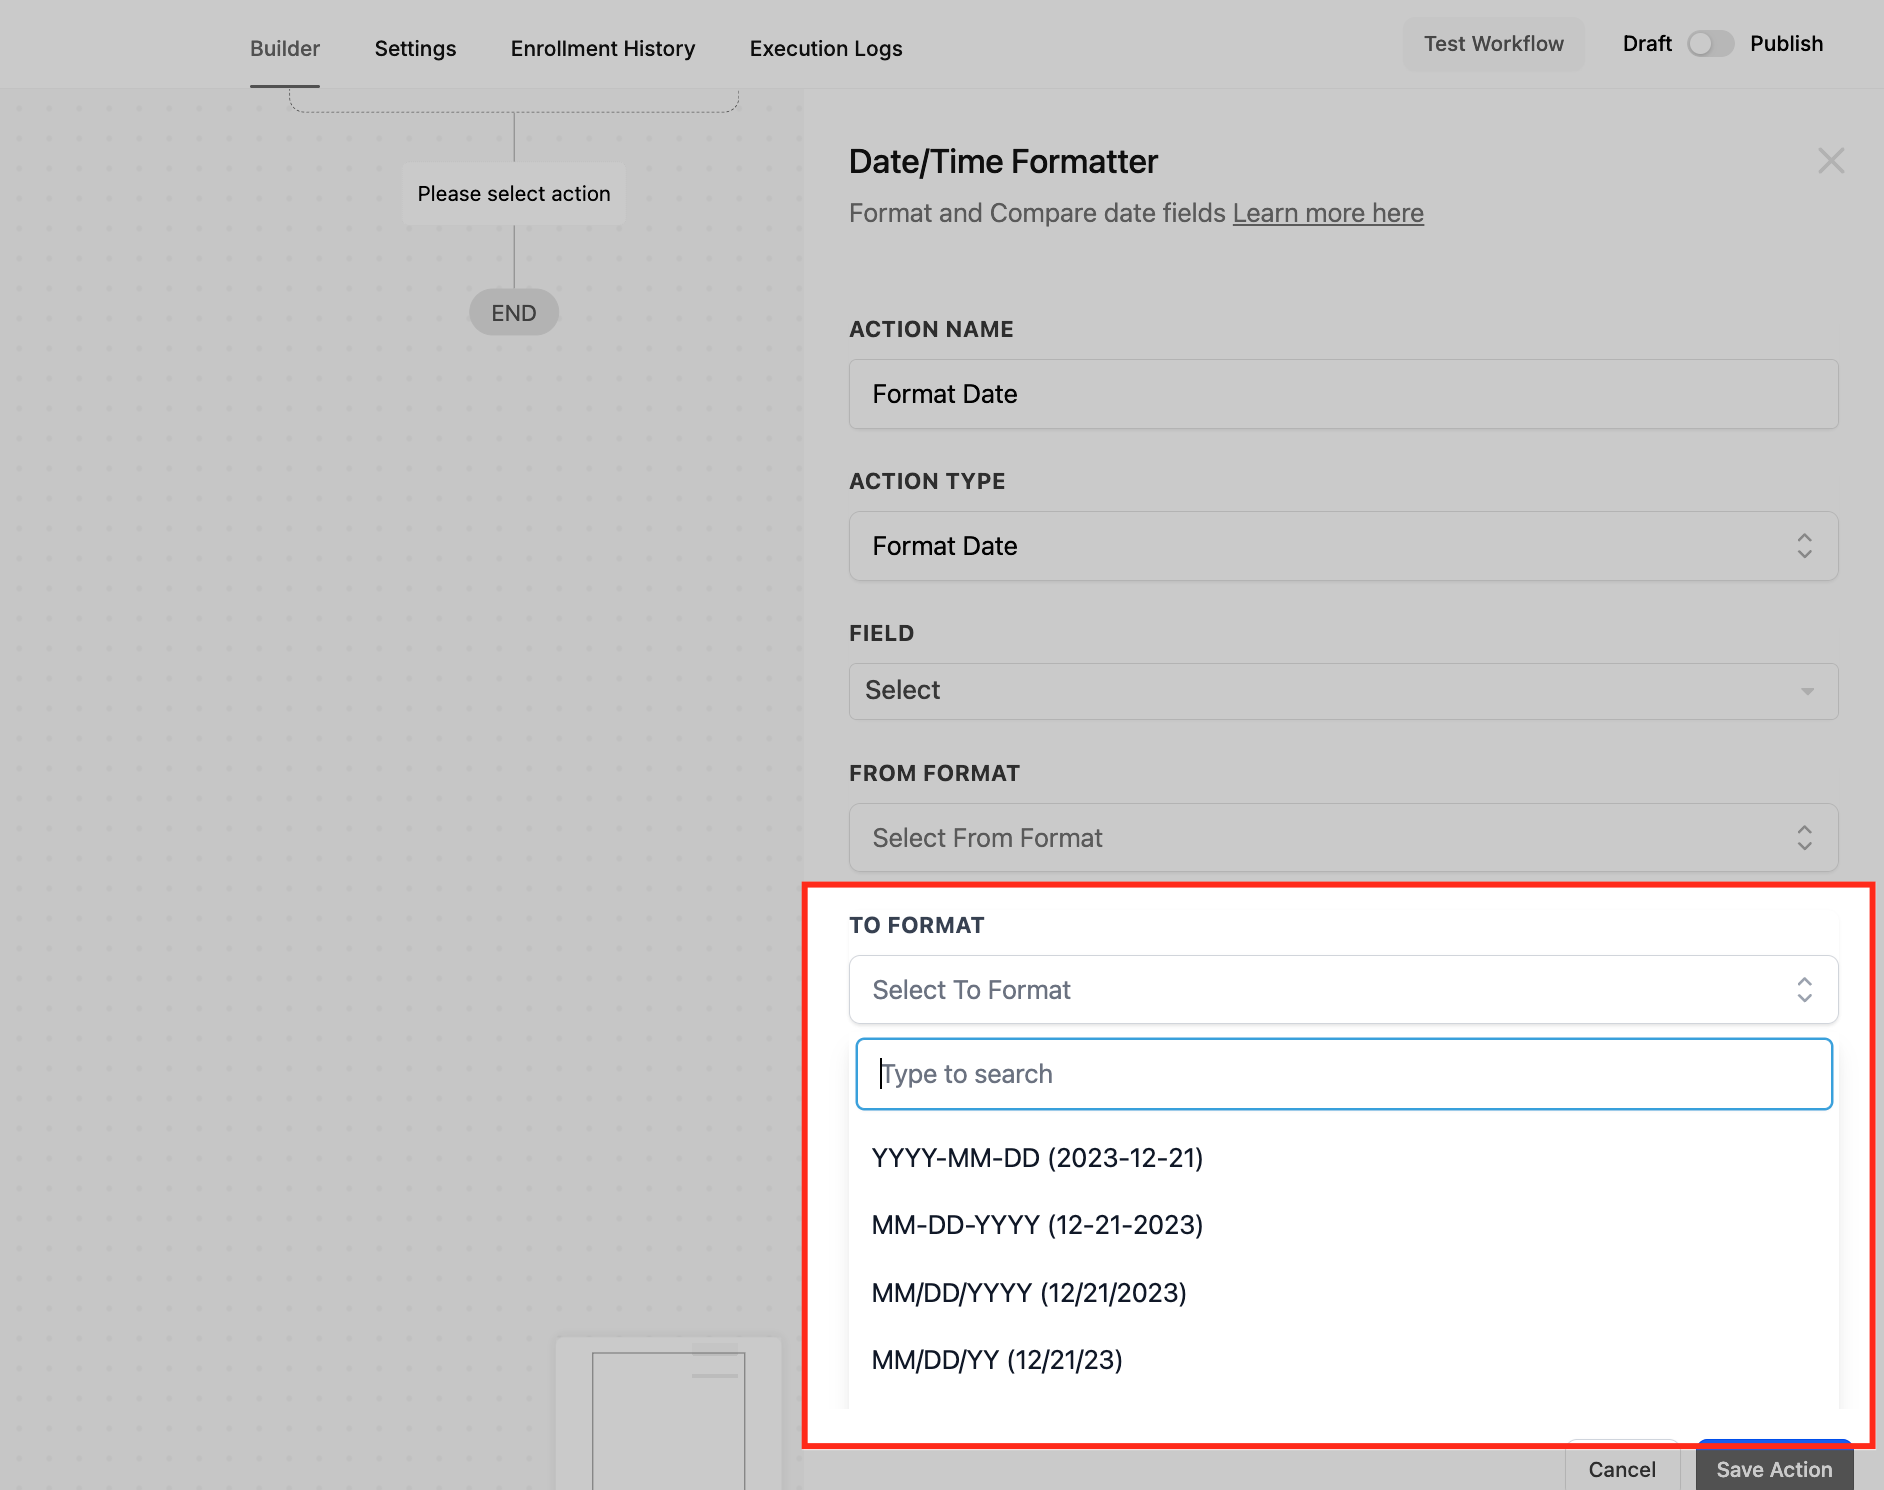
- Pick the desired To Format from the provided list of output formats.
- For Compare Dates, also select the second date source and its format; the action will compute the day difference.
- Save the action; the result is stored in a dynamic variable that can be referenced by later workflow steps.
05What it looks like in HighLevel
06Settings that matter
- Field Selection. Specifies which date or date time value the action will process, using system fields, custom values, or webhook data.
- From Format. Defines the pattern of the incoming date so the action can interpret it correctly; required for custom values and webhook inputs.
- To Format. Sets the pattern for the output date or date time after conversion.
- Start Date Selection. Chooses the first date used when calculating a difference between two dates.
- Start Date Format. Indicates the format of the start date when it is a custom value or webhook input.
- End Date Selection. Chooses the second date for the comparison calculation.
- End Date Format. Indicates the format of the end date when it is a custom value or webhook input.
07Things to know before you rely on it
- Contact Custom fields do not support the Date Time structure.
- When using a custom value or inbound webhook trigger, you must manually select the matching From Format; otherwise the action may not read the date correctly.
- The day difference is calculated as End Date minus Start Date and can be negative if the start date is later than the end date.
08If something goes wrong
- Wrong From Format selected. Verify that the From Format exactly matches the structure of the input date before saving the action.
09How it connects to the rest of HighLevel
- Learn how to create a workflow and add actions. Workflow creation guide
- See the full list of available workflow actions. All workflow actions
- Adjust workflow timing and contact controls. Workflow settings overview
Michael's take

People often pick the wrong "From Format" because they assume the system will guess it. It ends up breaking the workflow and leaves you with blank dates. I recommend double checking the exact pattern of the incoming value, especially when the source is a custom webhook or a manually entered string.
Once you’ve verified the source format, I would set the action, pull the resulting variable, and test it in a simple email step. Seeing the formatted date in a real message confirms everything lines up before you chain more complex logic.