
01Who this is for
- Founders who design complex automation want a clear visual map to keep logic understandable.
- Marketing teams that need quick insight into trigger performance can view stats directly on the canvas.
- Operations staff benefit from sticky notes and default path control when coordinating multiple workflow branches.
02Advanced builder for workflows, explained
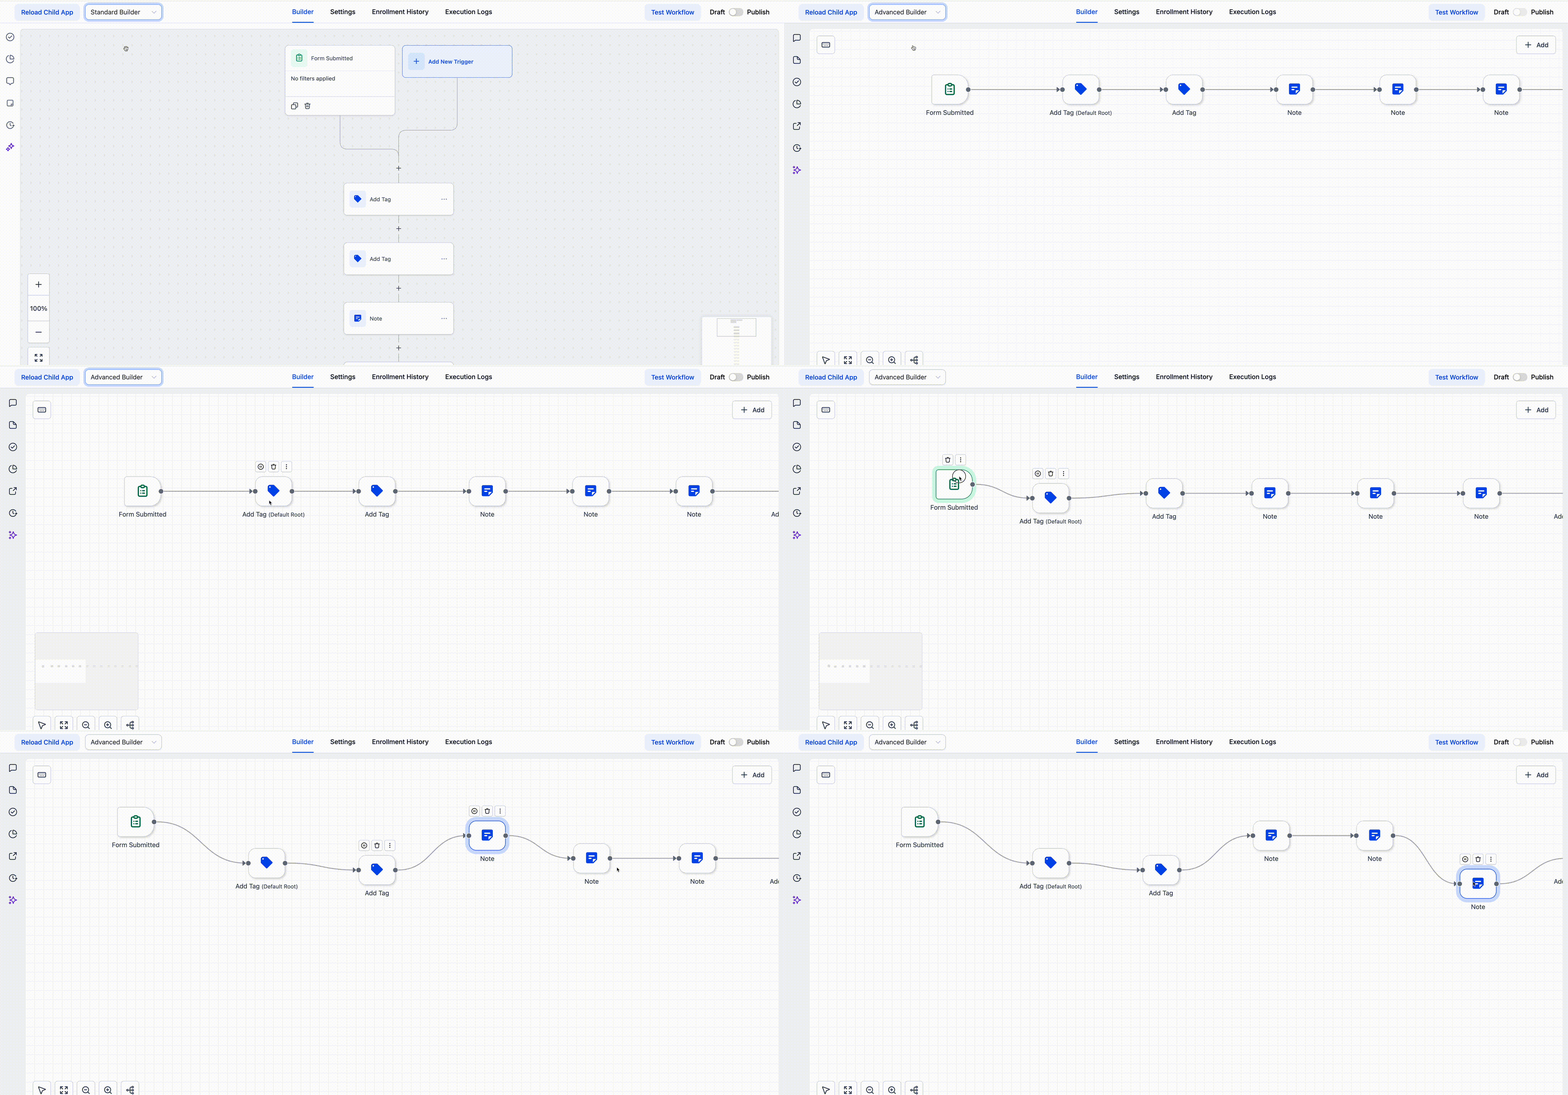
Advanced Builder is a free form visual canvas inside HighLevel’s Workflow Builder. It lets you drag, drop and connect triggers, actions and conditions in a single view. The interface adds a Stats Mode that surfaces enrollment metrics for triggers and delivery data for communication actions.
The builder also supports Sticky Notes with images and links, a Default Path selector for parallel branches, and a right click Quick Actions menu. You can enable or disable any node without rewiring, and move between workflows using the Workflow Switcher without closing the current canvas. All features work on the same workflow; they do not alter how the automation runs.
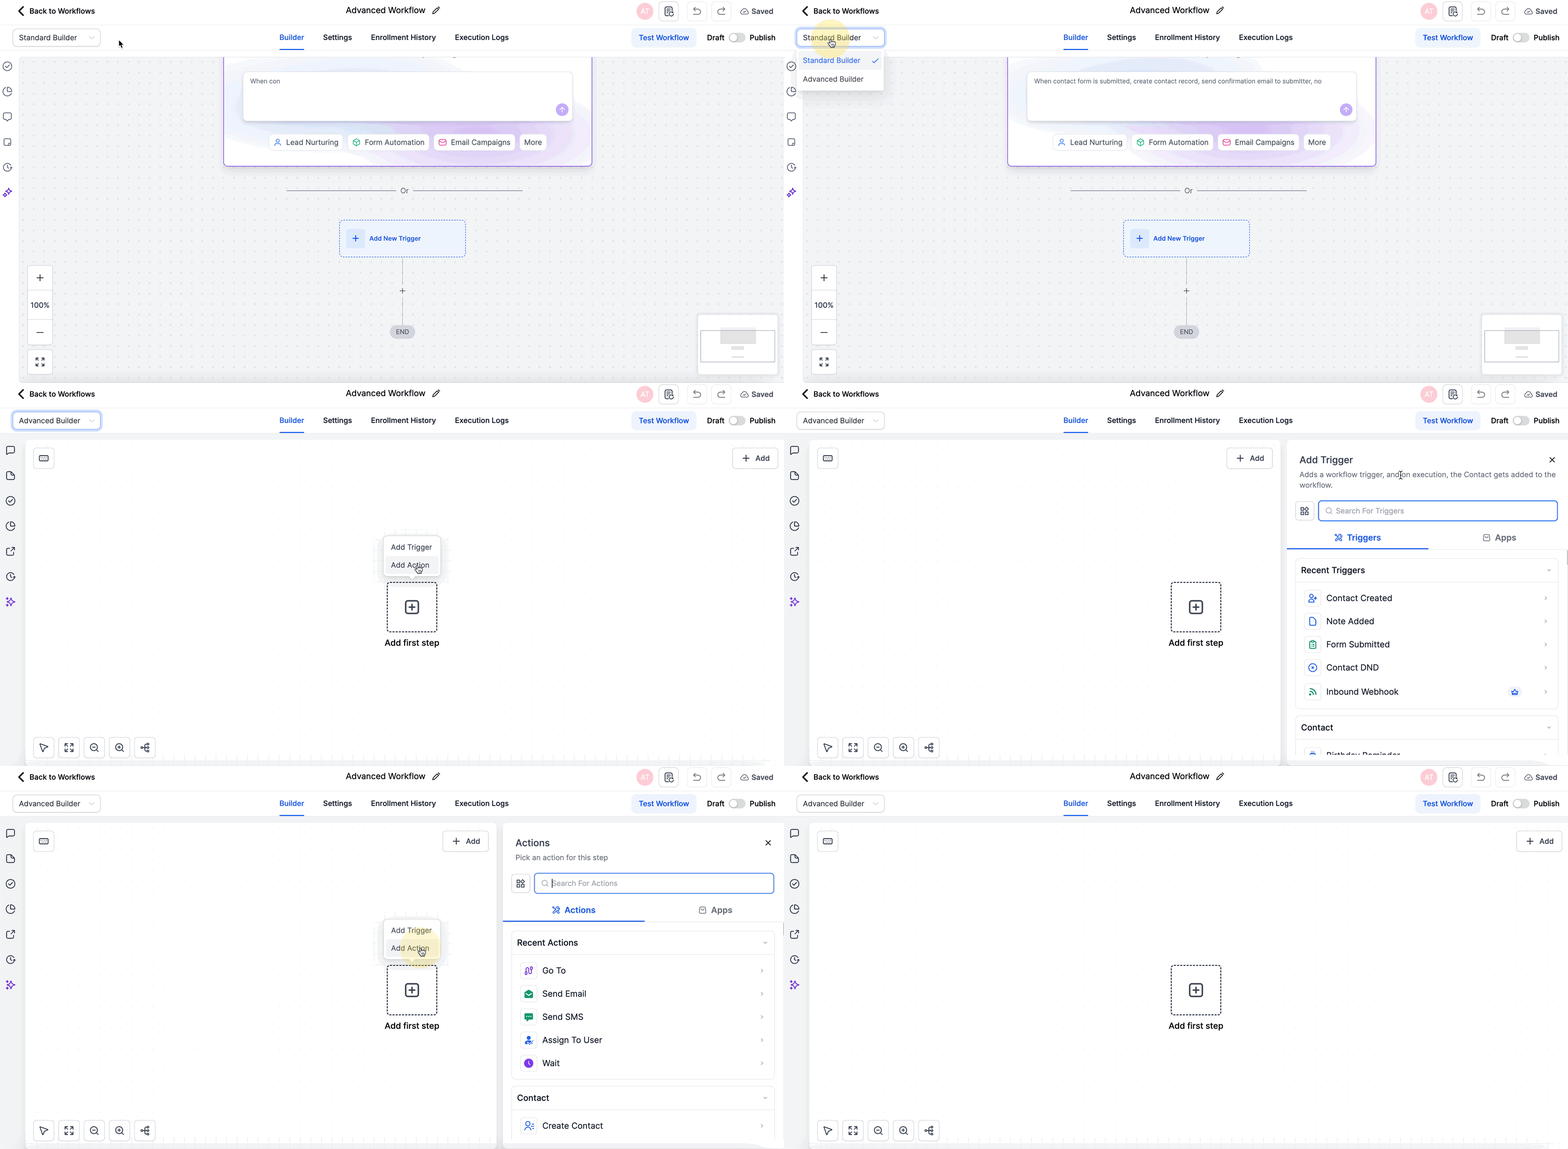
Access the Advanced Builder from any workflow by toggling the view in the top left corner. Switching back to Standard Builder requires removing Advanced only elements such as Trigger Go To connections, delinked nodes and disabled nodes.
03How businesses use advanced builder for workflows
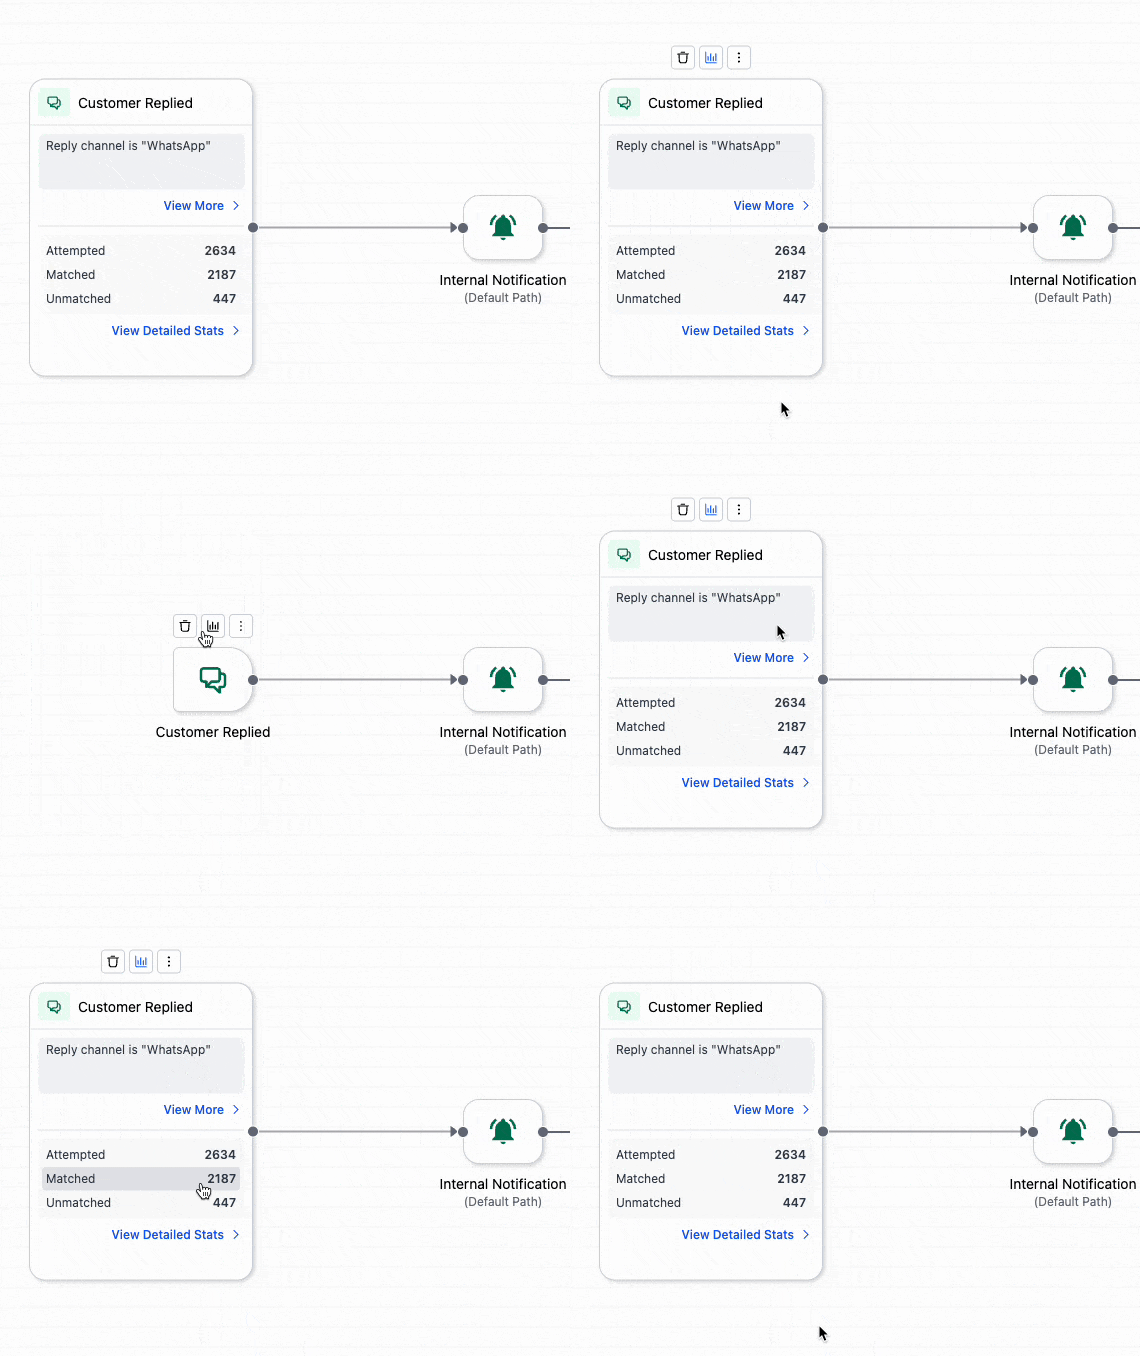
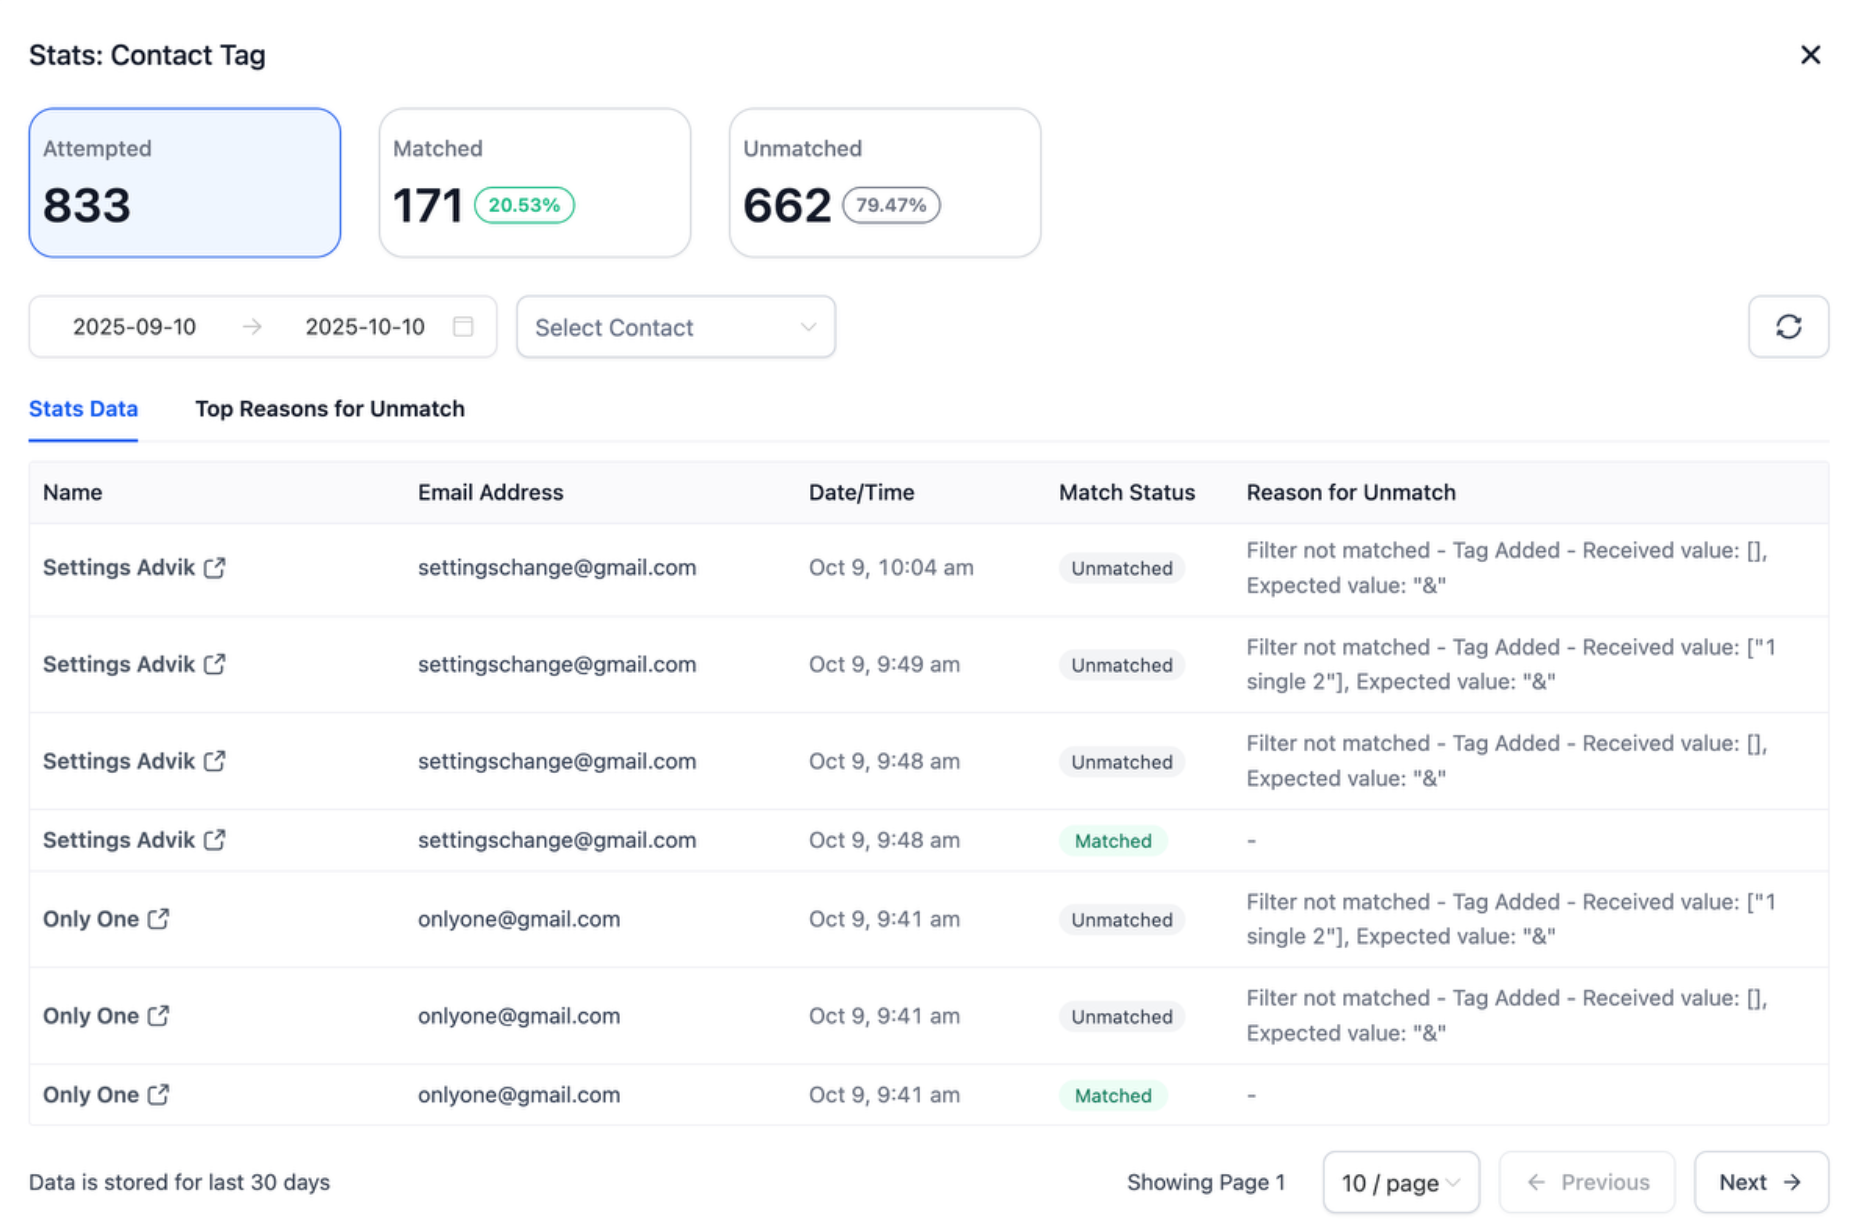
- Inbound marketing agency. The agency opens a lead capture workflow in Advanced Builder, switches to Stats Mode, and clicks a trigger statistic to see how many leads matched the form criteria. This lets the team assess trigger effectiveness without leaving the canvas.
- Ecommerce retailer. The retailer creates a workflow with multiple reminder branches. By selecting the first action of the preferred branch and clicking the branch icon, they set that branch as the Default Path, ensuring test contacts follow the intended reminder flow.
- Co working space. Staff add a colorful sticky note beside a complex decision node to explain the logic for new team members. The note includes an image of the onboarding checklist, providing visual guidance directly on the workflow.
04The numbers and rules that matter
- Trigger Stats includes data from the last 30 days.
05Before you start
- A workflow must already exist in the HighLevel account.
- The user must open the workflow and toggle to Advanced Builder.
06How to set up and use advanced builder for workflows in HighLevel
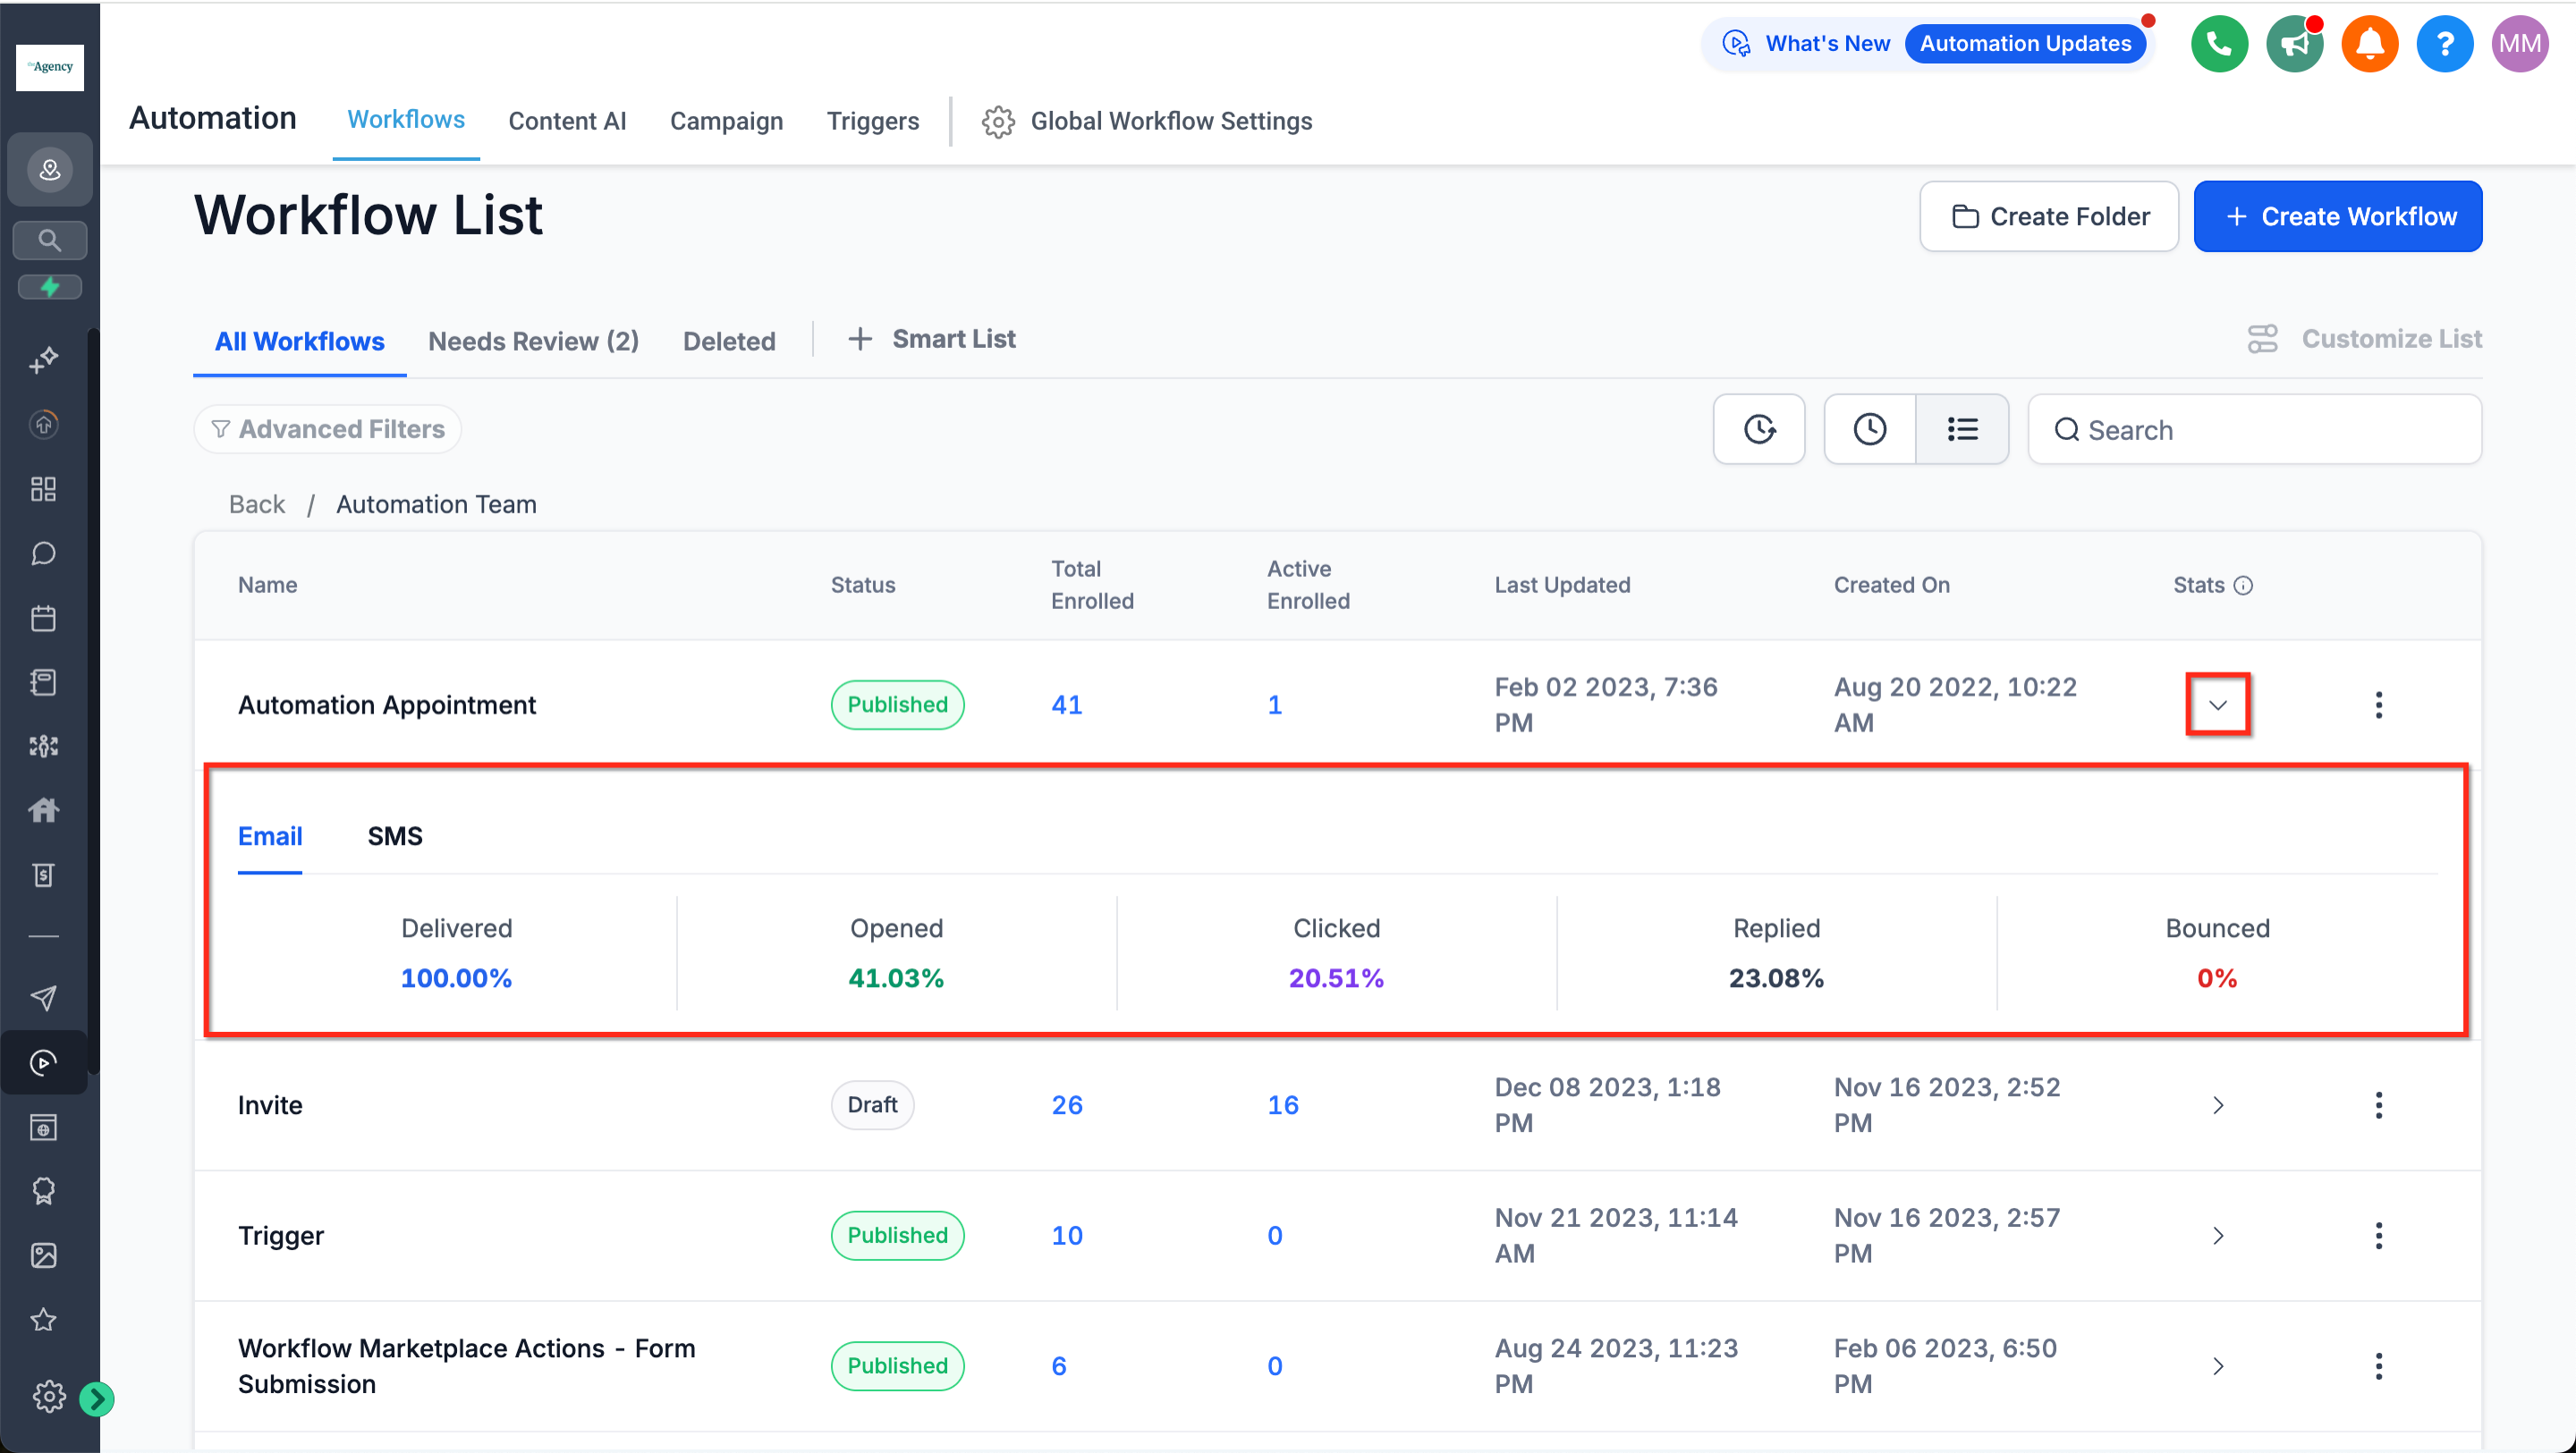
View trigger statistics
- Open a workflow in the Advanced Builder.
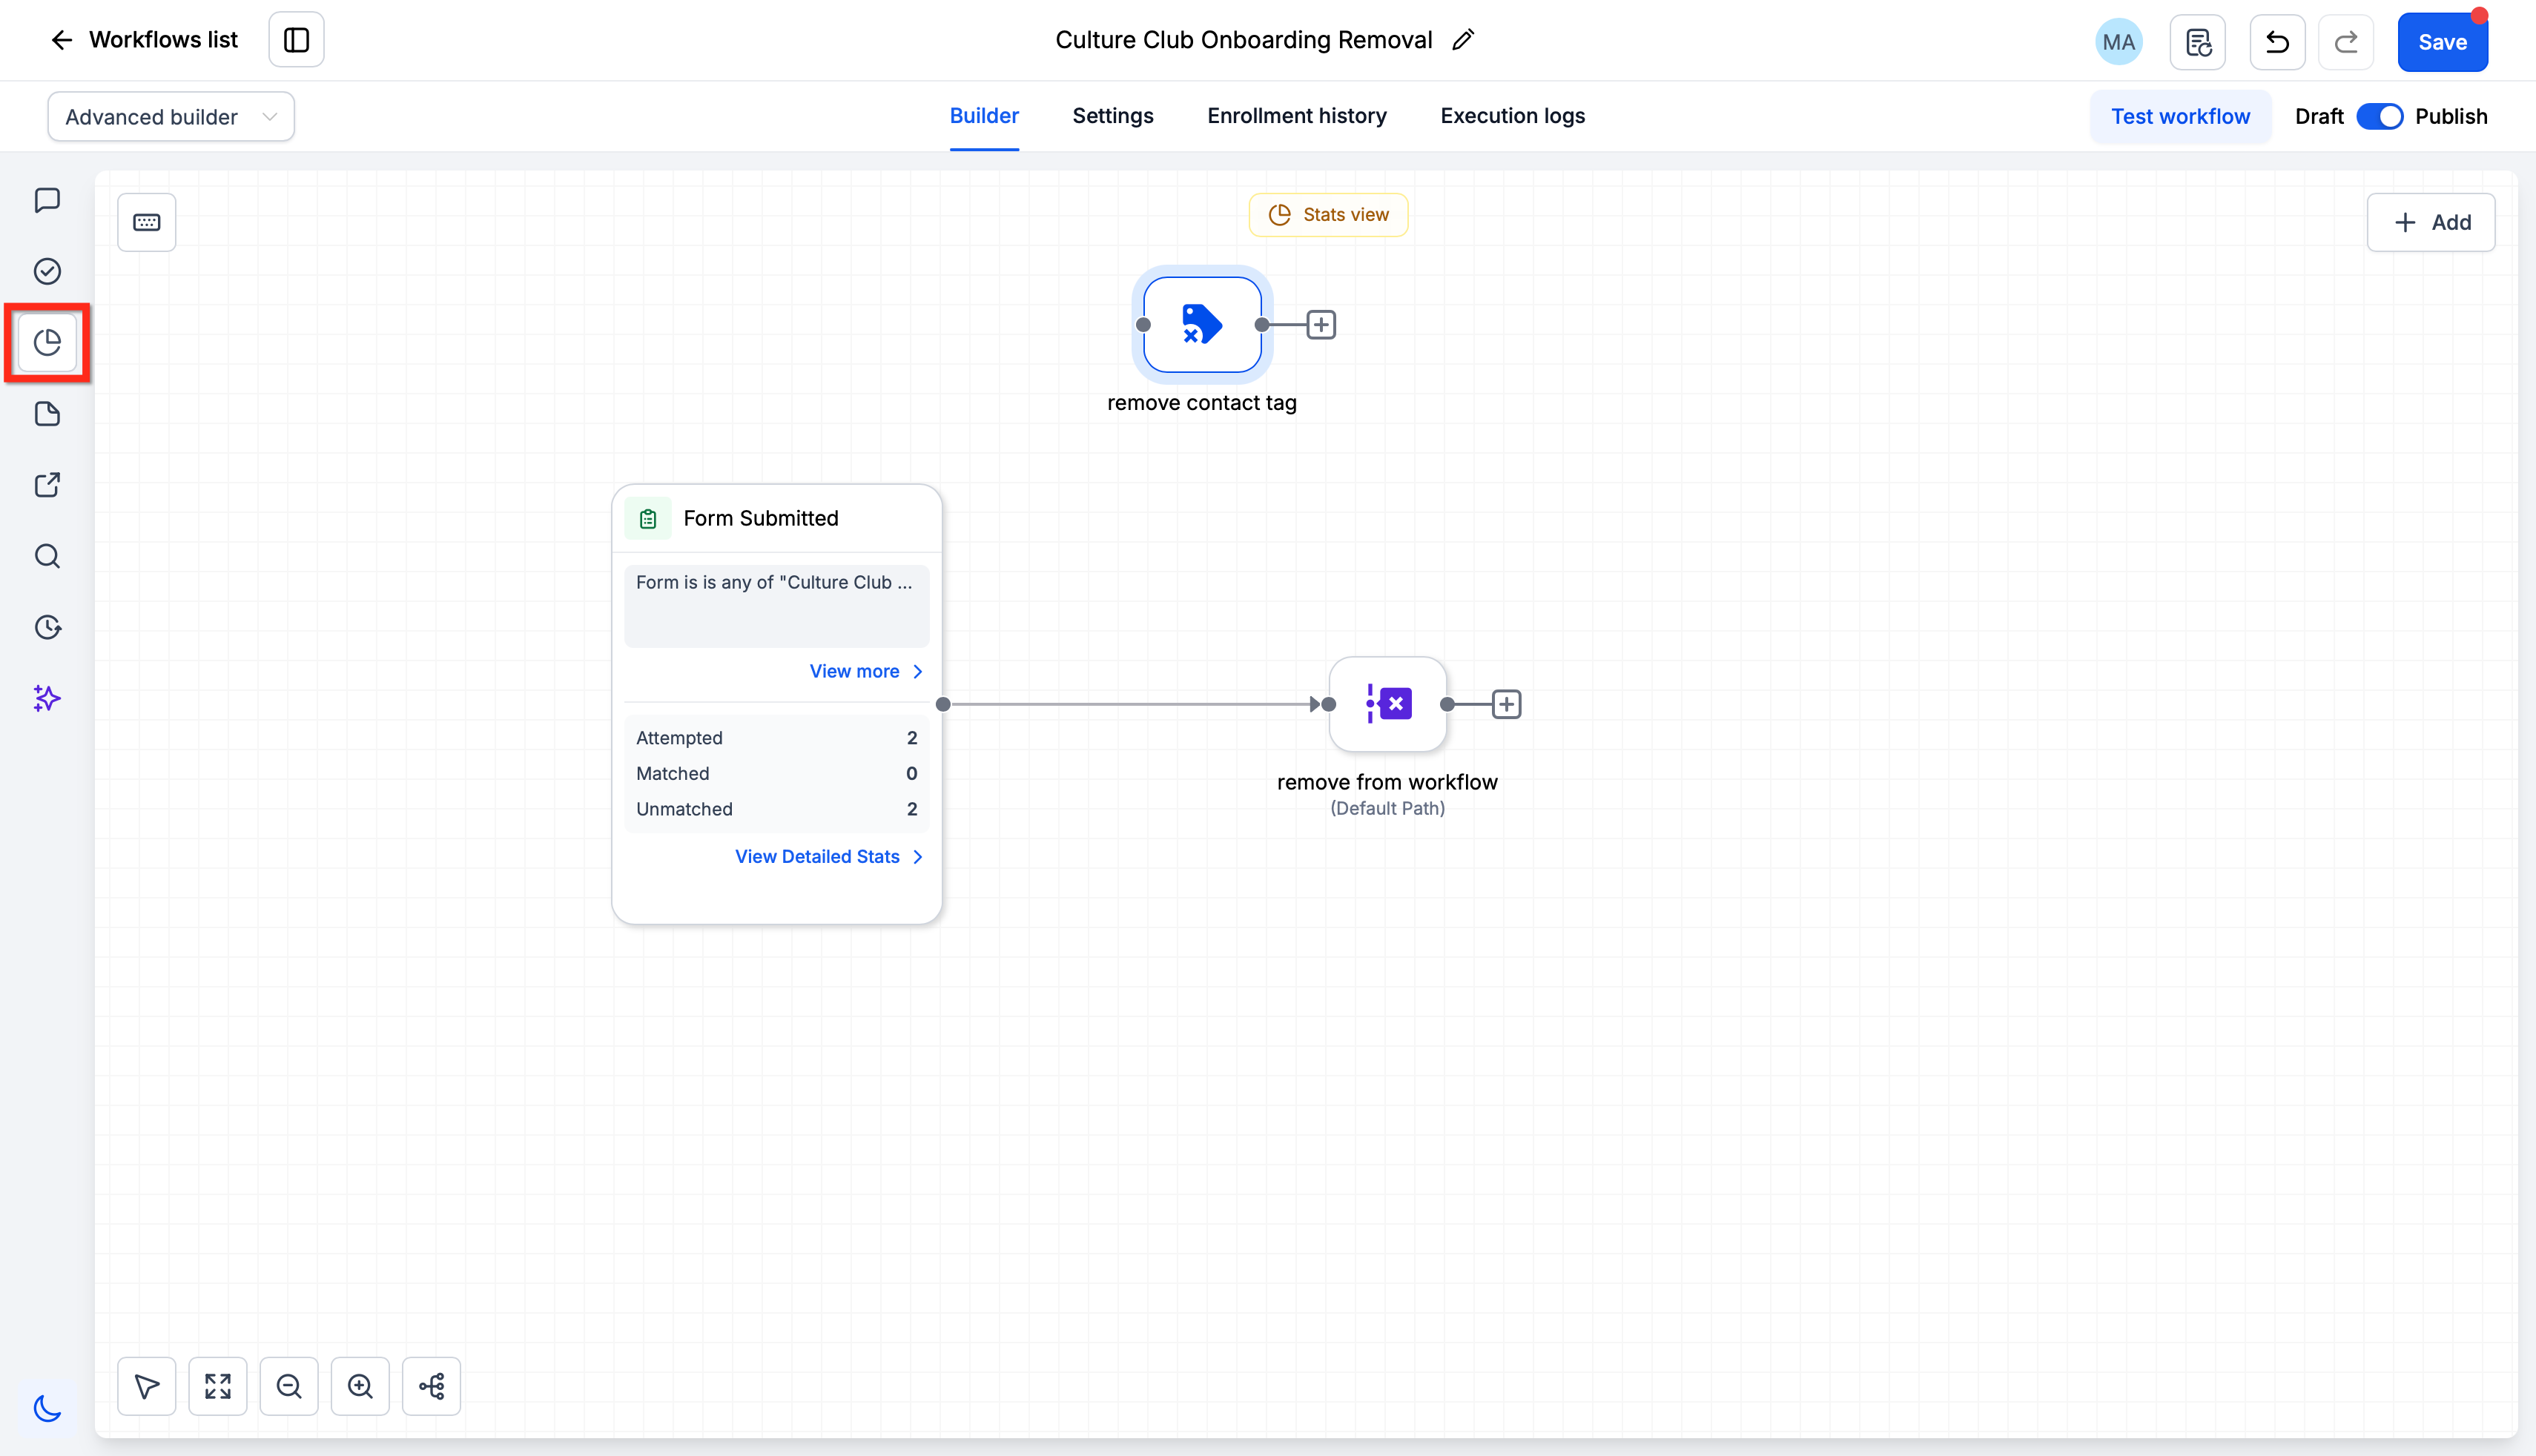
- Toggle to Stats Mode.
- Select a trigger or one of its displayed statistics.
- Read the attempted, matched and unmatched enrollment numbers.
Set a default path for parallel branches
- Open the workflow that contains parallel branches in Advanced Builder.
- On the first action of the desired branch, click the branch icon.
- The branch becomes the Default Path for tests and inbound contacts.
Enable or disable a node
- Hover over the node you want to modify.
- Click the pause icon to disable, or click the play icon to enable.
- The node will be skipped or executed based on its state.
Add a sticky note
- Select the Sticky Notes tool from the left sidebar.
- Pick a color or style and type the note content.
- Drag the note onto the canvas where it adds context.
Switch between workflows
- Open the Workflow Switcher in the left sidebar.
- Locate the desired workflow via the recent list or search.
- Click the workflow name to open it in a new tab while keeping the current canvas.
07What it looks like in HighLevel
08Settings that matter
- Stats Mode. Shows trigger enrollment and communication action performance data on the canvas.
- Default Path. Controls which parallel branch contacts follow when a workflow test runs or when contacts enter from another workflow.
- Enable / Disable Nodes. Allows a node to be temporarily turned off for testing without removing it or breaking connections.
- Sticky Notes. Provides a place to add colored annotations, images or links to document logic on the canvas.
- Workflow Switcher. Enables quick navigation to other workflows without leaving the current builder view.
09Things to know before you rely on it
- Stats View cannot be used while editing the workflow; editing is locked during stats inspection.
- Trigger statistics reflect data from the most recent 30 days only.
- A contact can be enrolled only once per workflow, even with parallel branches.
- When converting back to Standard Builder, all Advanced only features such as Trigger Go To, delinked nodes and disabled nodes must be removed.
10How it connects to the rest of HighLevel
- How to create a workflow with triggers, filters and actions Workflow creation guide
- Understanding workflow settings to control contacts and timing Workflow settings overview
- Start a 30 day trial of HighLevel Free trial
Michael's take

The visual canvas can feel overwhelming at first, especially if you’re used to the linear view. It helps to scan the connectors and use color coded notes to keep the map readable.
The drag and drop autoconnect, Stats View that shows performance without leaving the builder, and right click Quick Actions let you adjust logic, view results and document decisions without switching screens.