
01Who this is for
- Founders who need granular insight into visitor behavior to inform marketing decisions.
- Small business owners running webinars who want to compare audience engagement across different traffic sources.
- Digital marketers managing multiple websites who must isolate performance by device type or location.
02Advanced Filters, explained
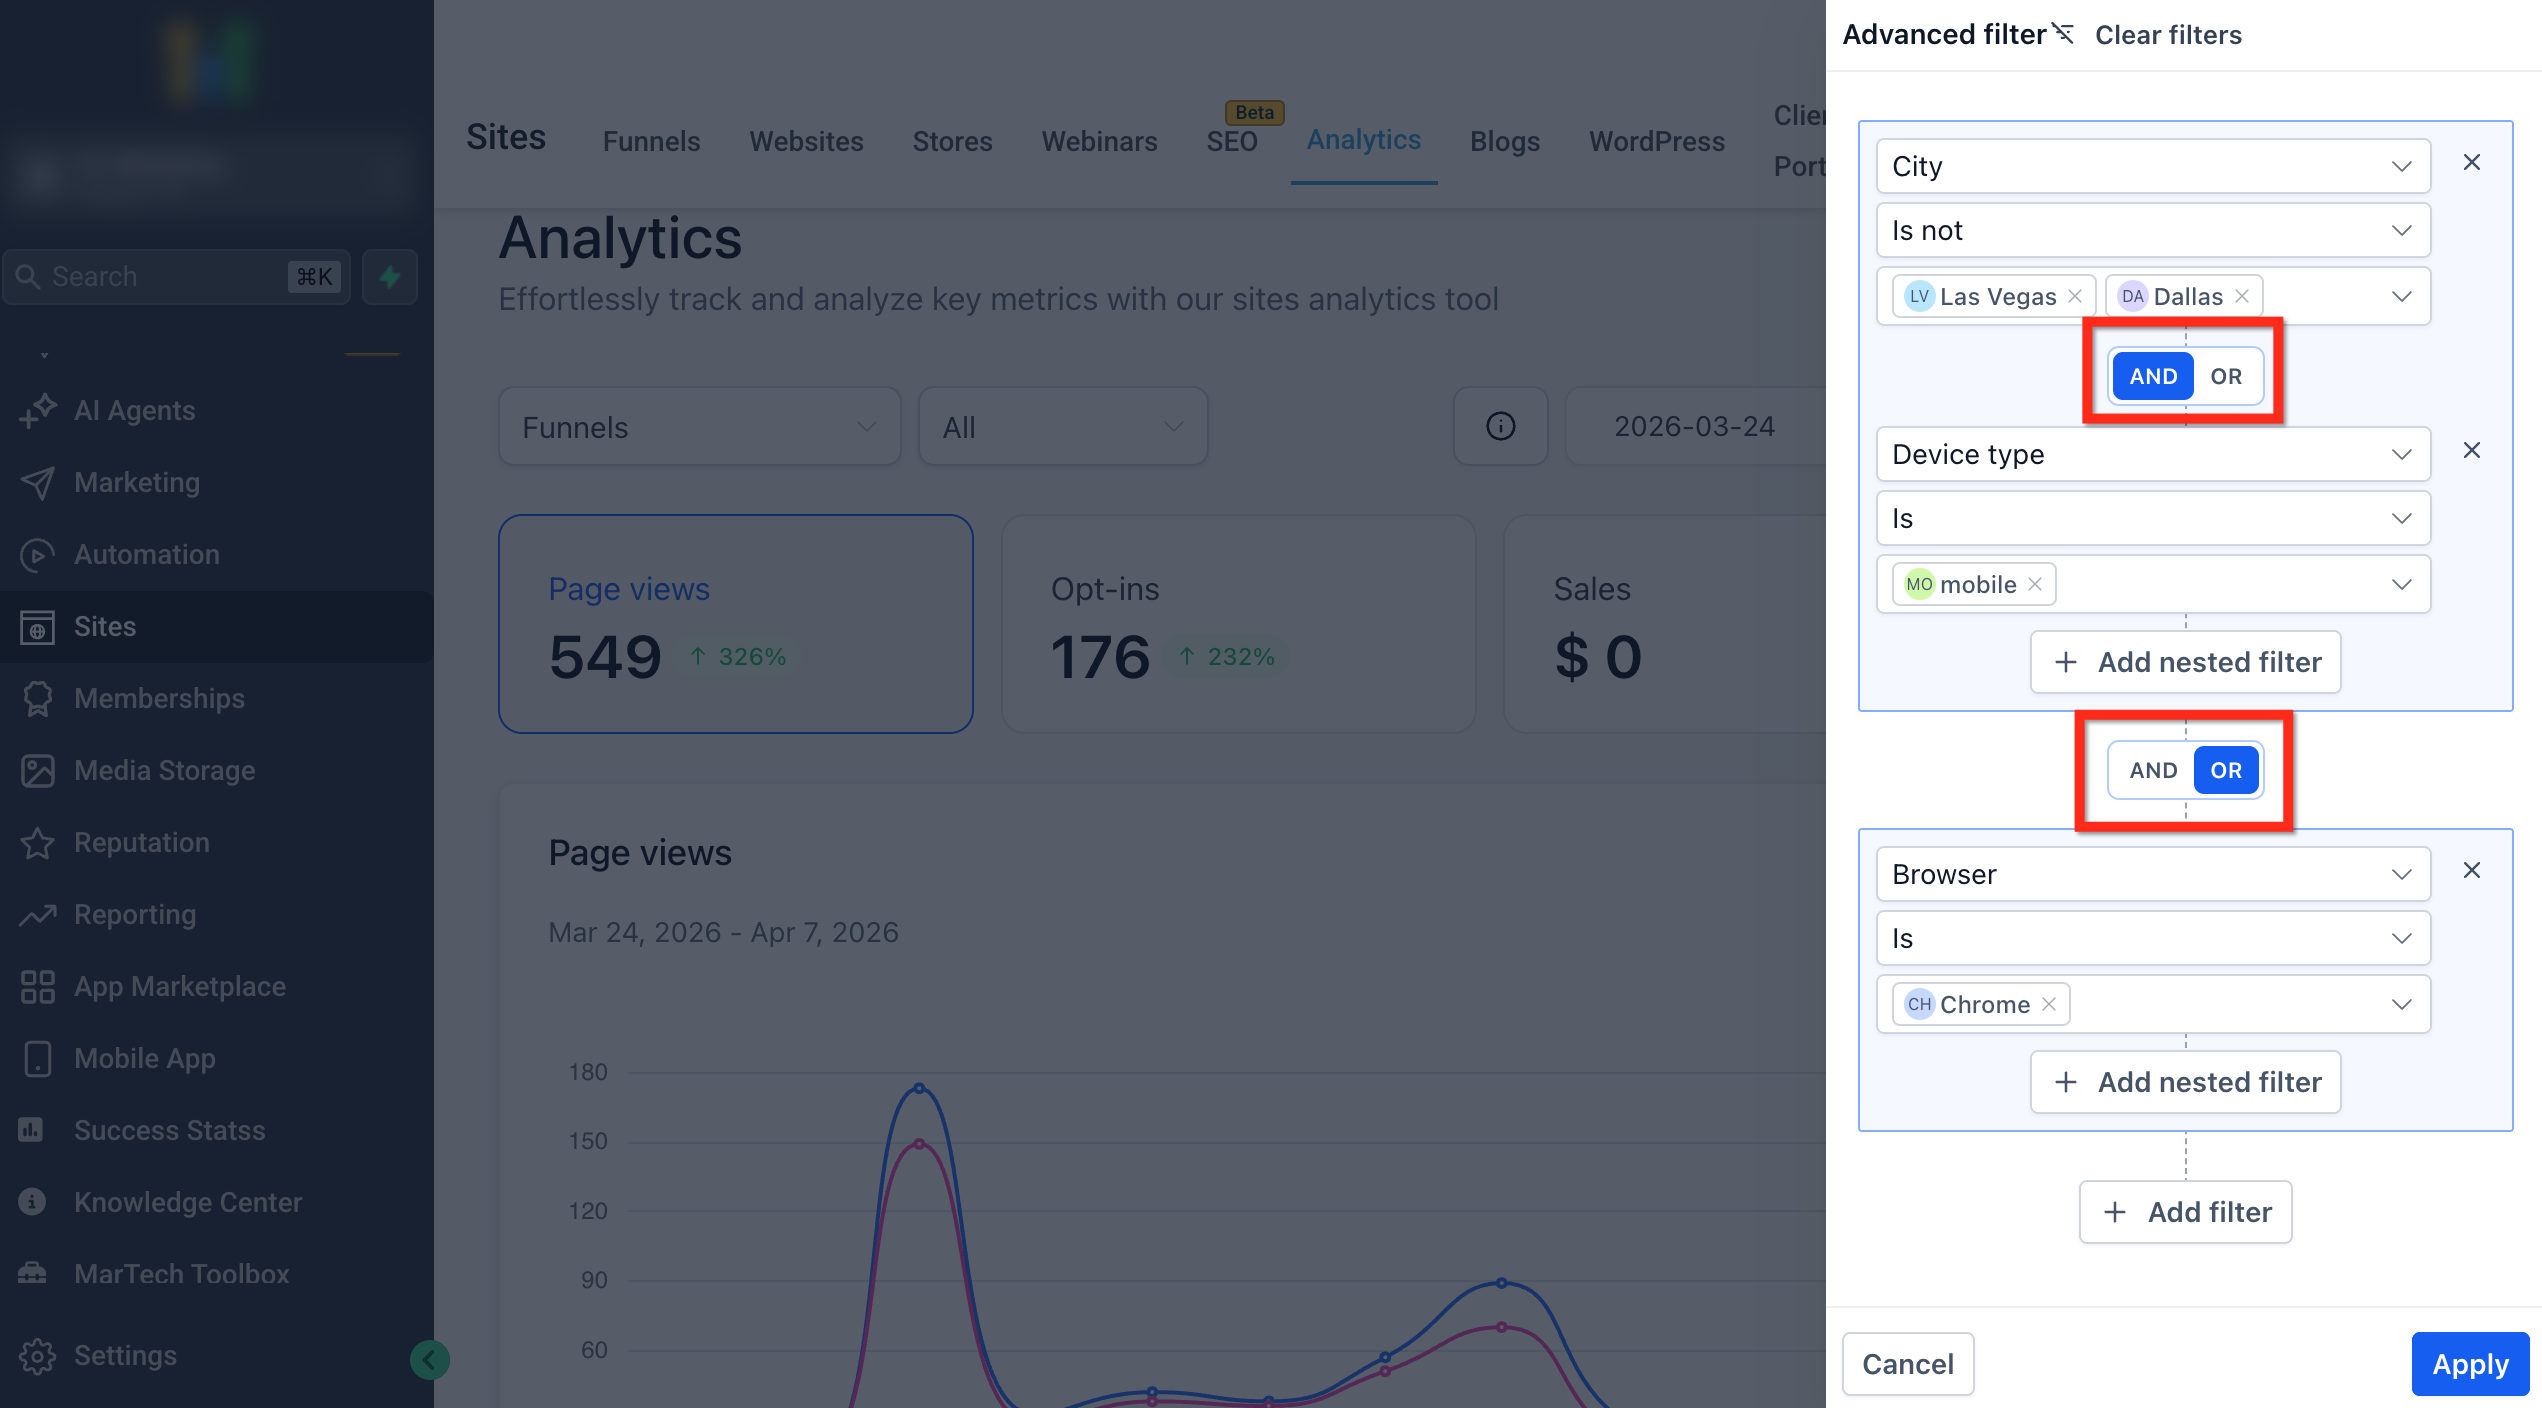
Advanced Filters are an optional layer on the Site Analytics dashboard. They let you pick dimensions, city, country, page title, browser, device type, source or medium, and set conditions that include or exclude specific values. You can stack several filters and group them with nested logic, using AND or OR to dictate how the conditions interact.
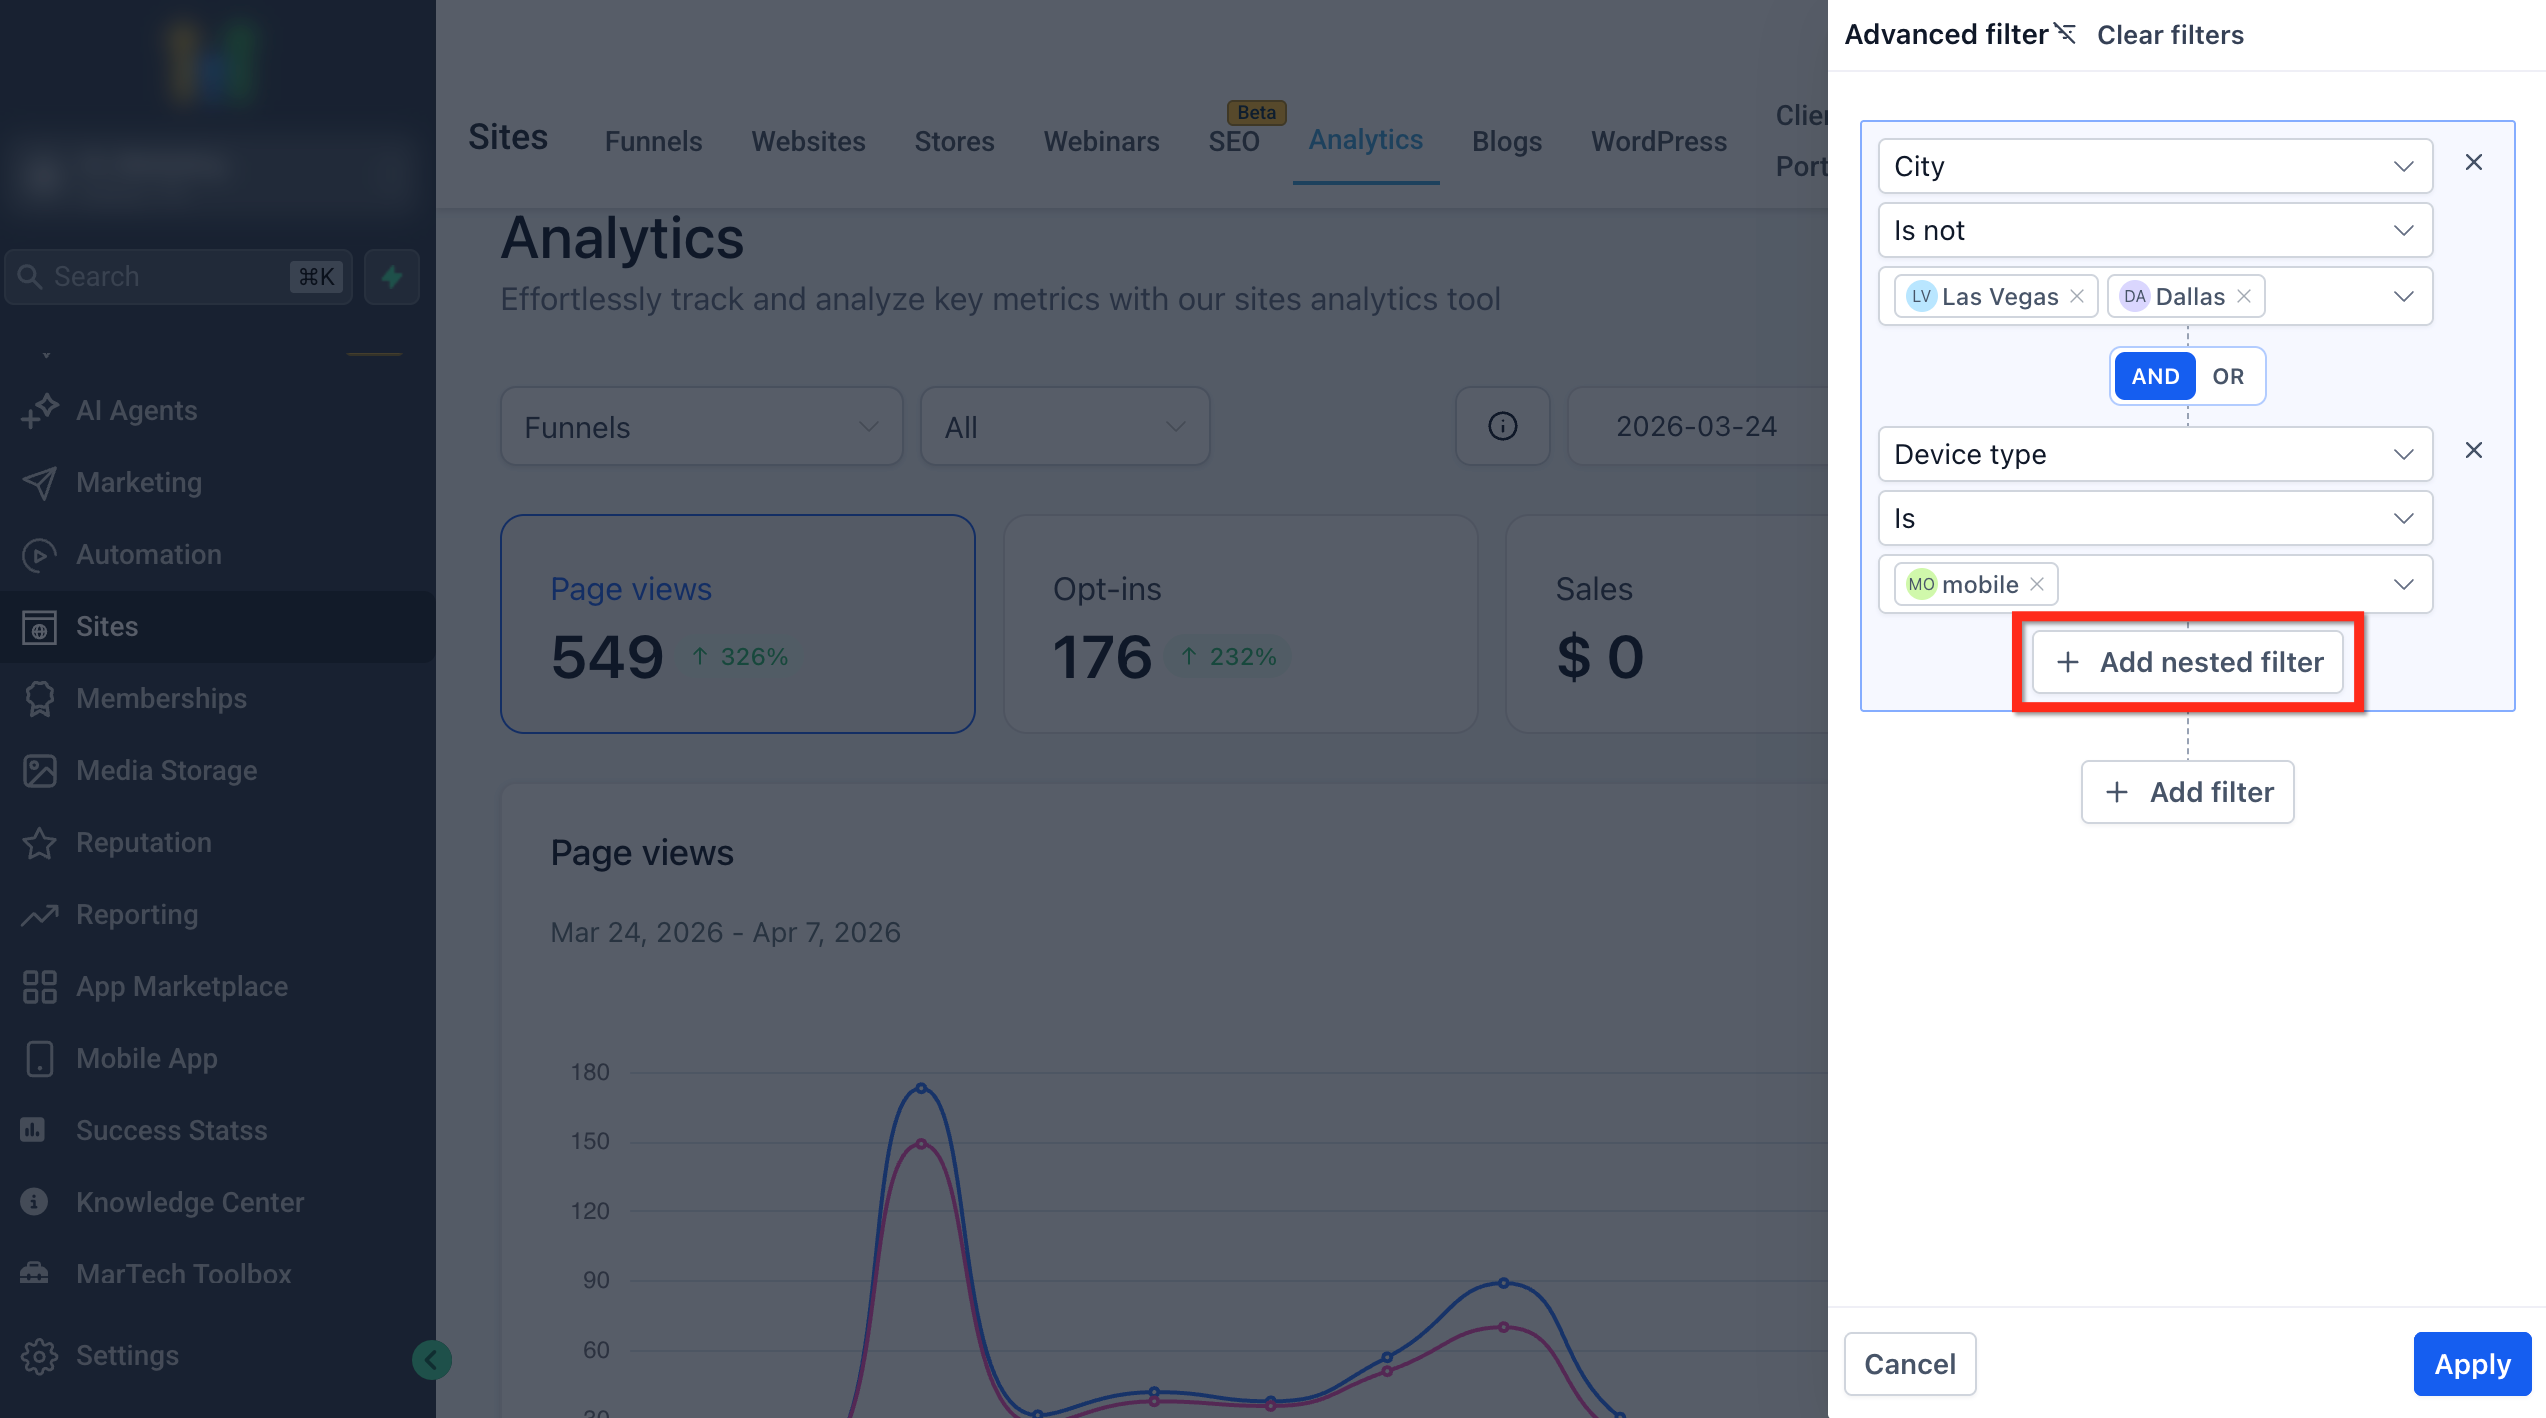
The filter builder lives inside the analytics view for Funnels, Websites and Webinars. After opening the builder, you add each filter, define its field, condition (Is or Is not) and the values to target. Nested filters let you bundle related conditions before attaching them to the broader filter set. When you click Apply, the dashboard refreshes to show only the data that matches the defined criteria.
03How businesses use Advanced Filters
- Ecommerce store. Select the website asset, add a filter for country = United States, then nest a filter for device = Mobile AND browser = Chrome. Apply the filter to see how U.S. mobile Chrome users interact with product pages.
- Online coaching platform. Choose the webinar asset, add a filter for source = Facebook, add another for medium = ad, then nest them with OR logic. Apply to compare traffic that arrived via organic Facebook posts versus paid ads.
- Local service business. Open the funnel asset, add a filter for city = Toronto, then set a second filter for device = Desktop. Apply to view how desktop visitors from Toronto move through the sales funnel.
04The numbers and rules that matter
- Supported asset types: Funnels, Websites, Webinars.
- Filter fields include: City, state or province, country, page title, browser, device type, source, medium.
05How to set up and use Advanced Filters in HighLevel
Create advanced filter
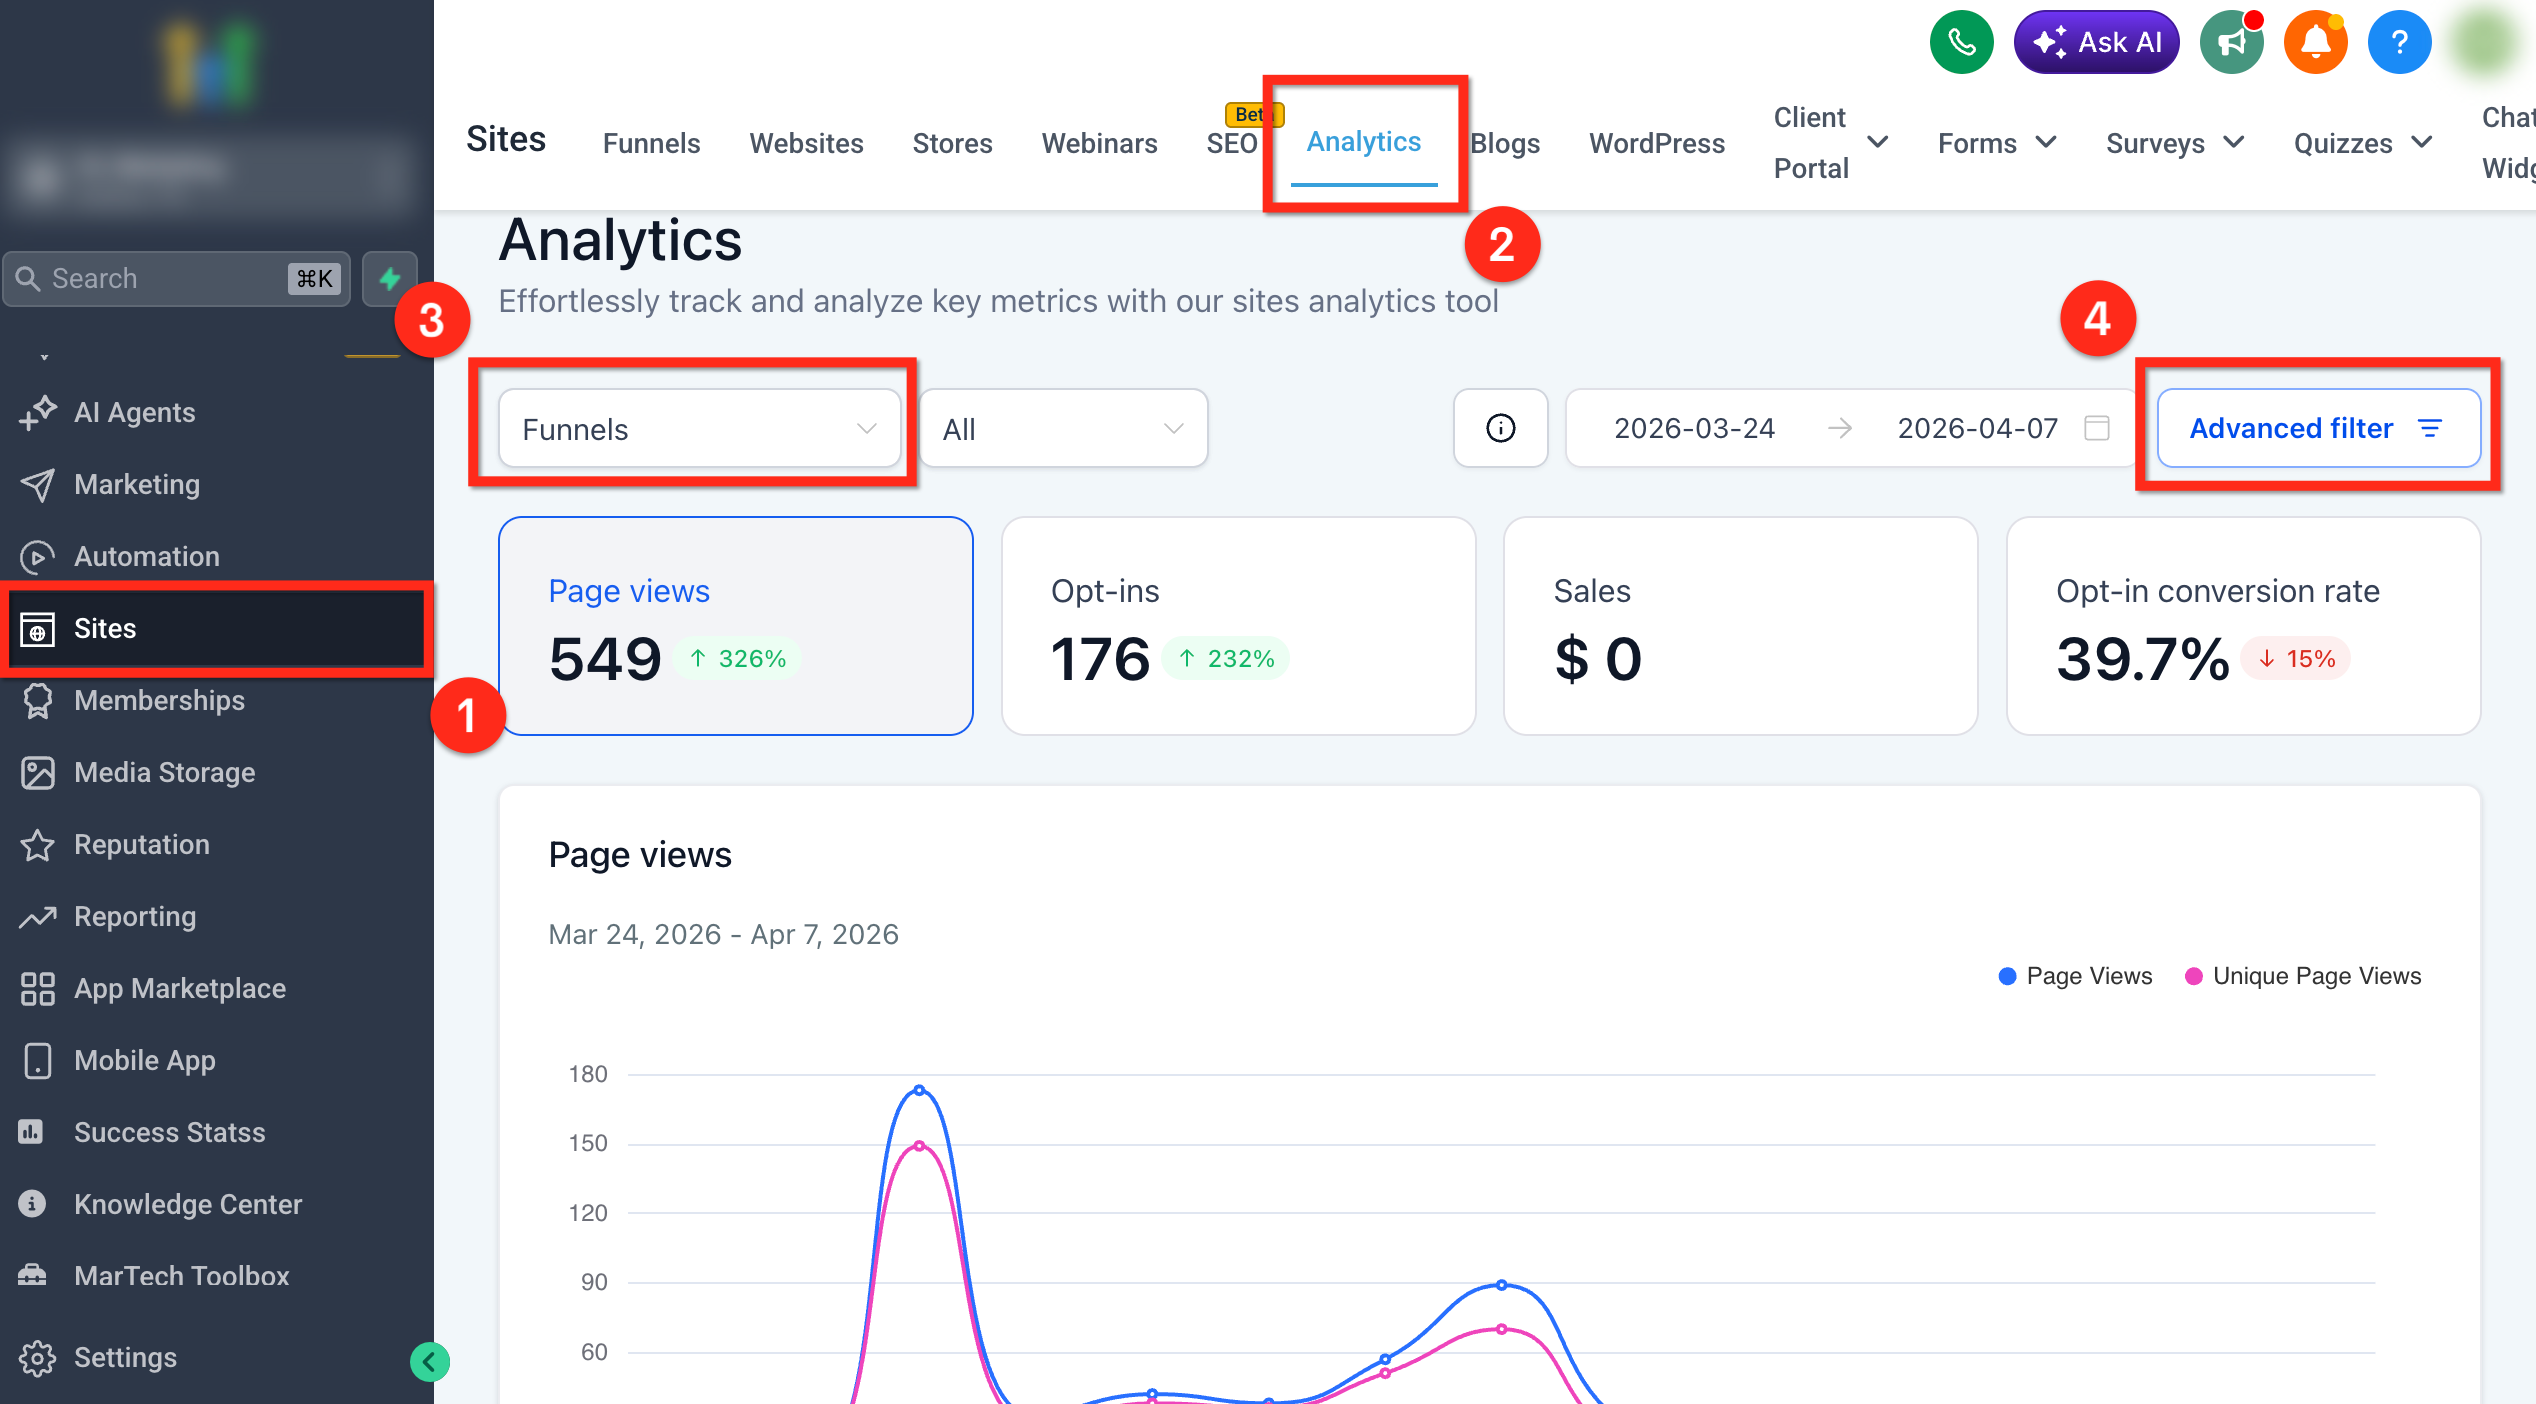
- Click Sites in the left navigation menu.
- Click Analytics in the top navigation bar.
- Select the desired asset type, Funnels, Websites, or Webinars.
- Click Advanced Filter in the top right corner of the analytics dashboard.
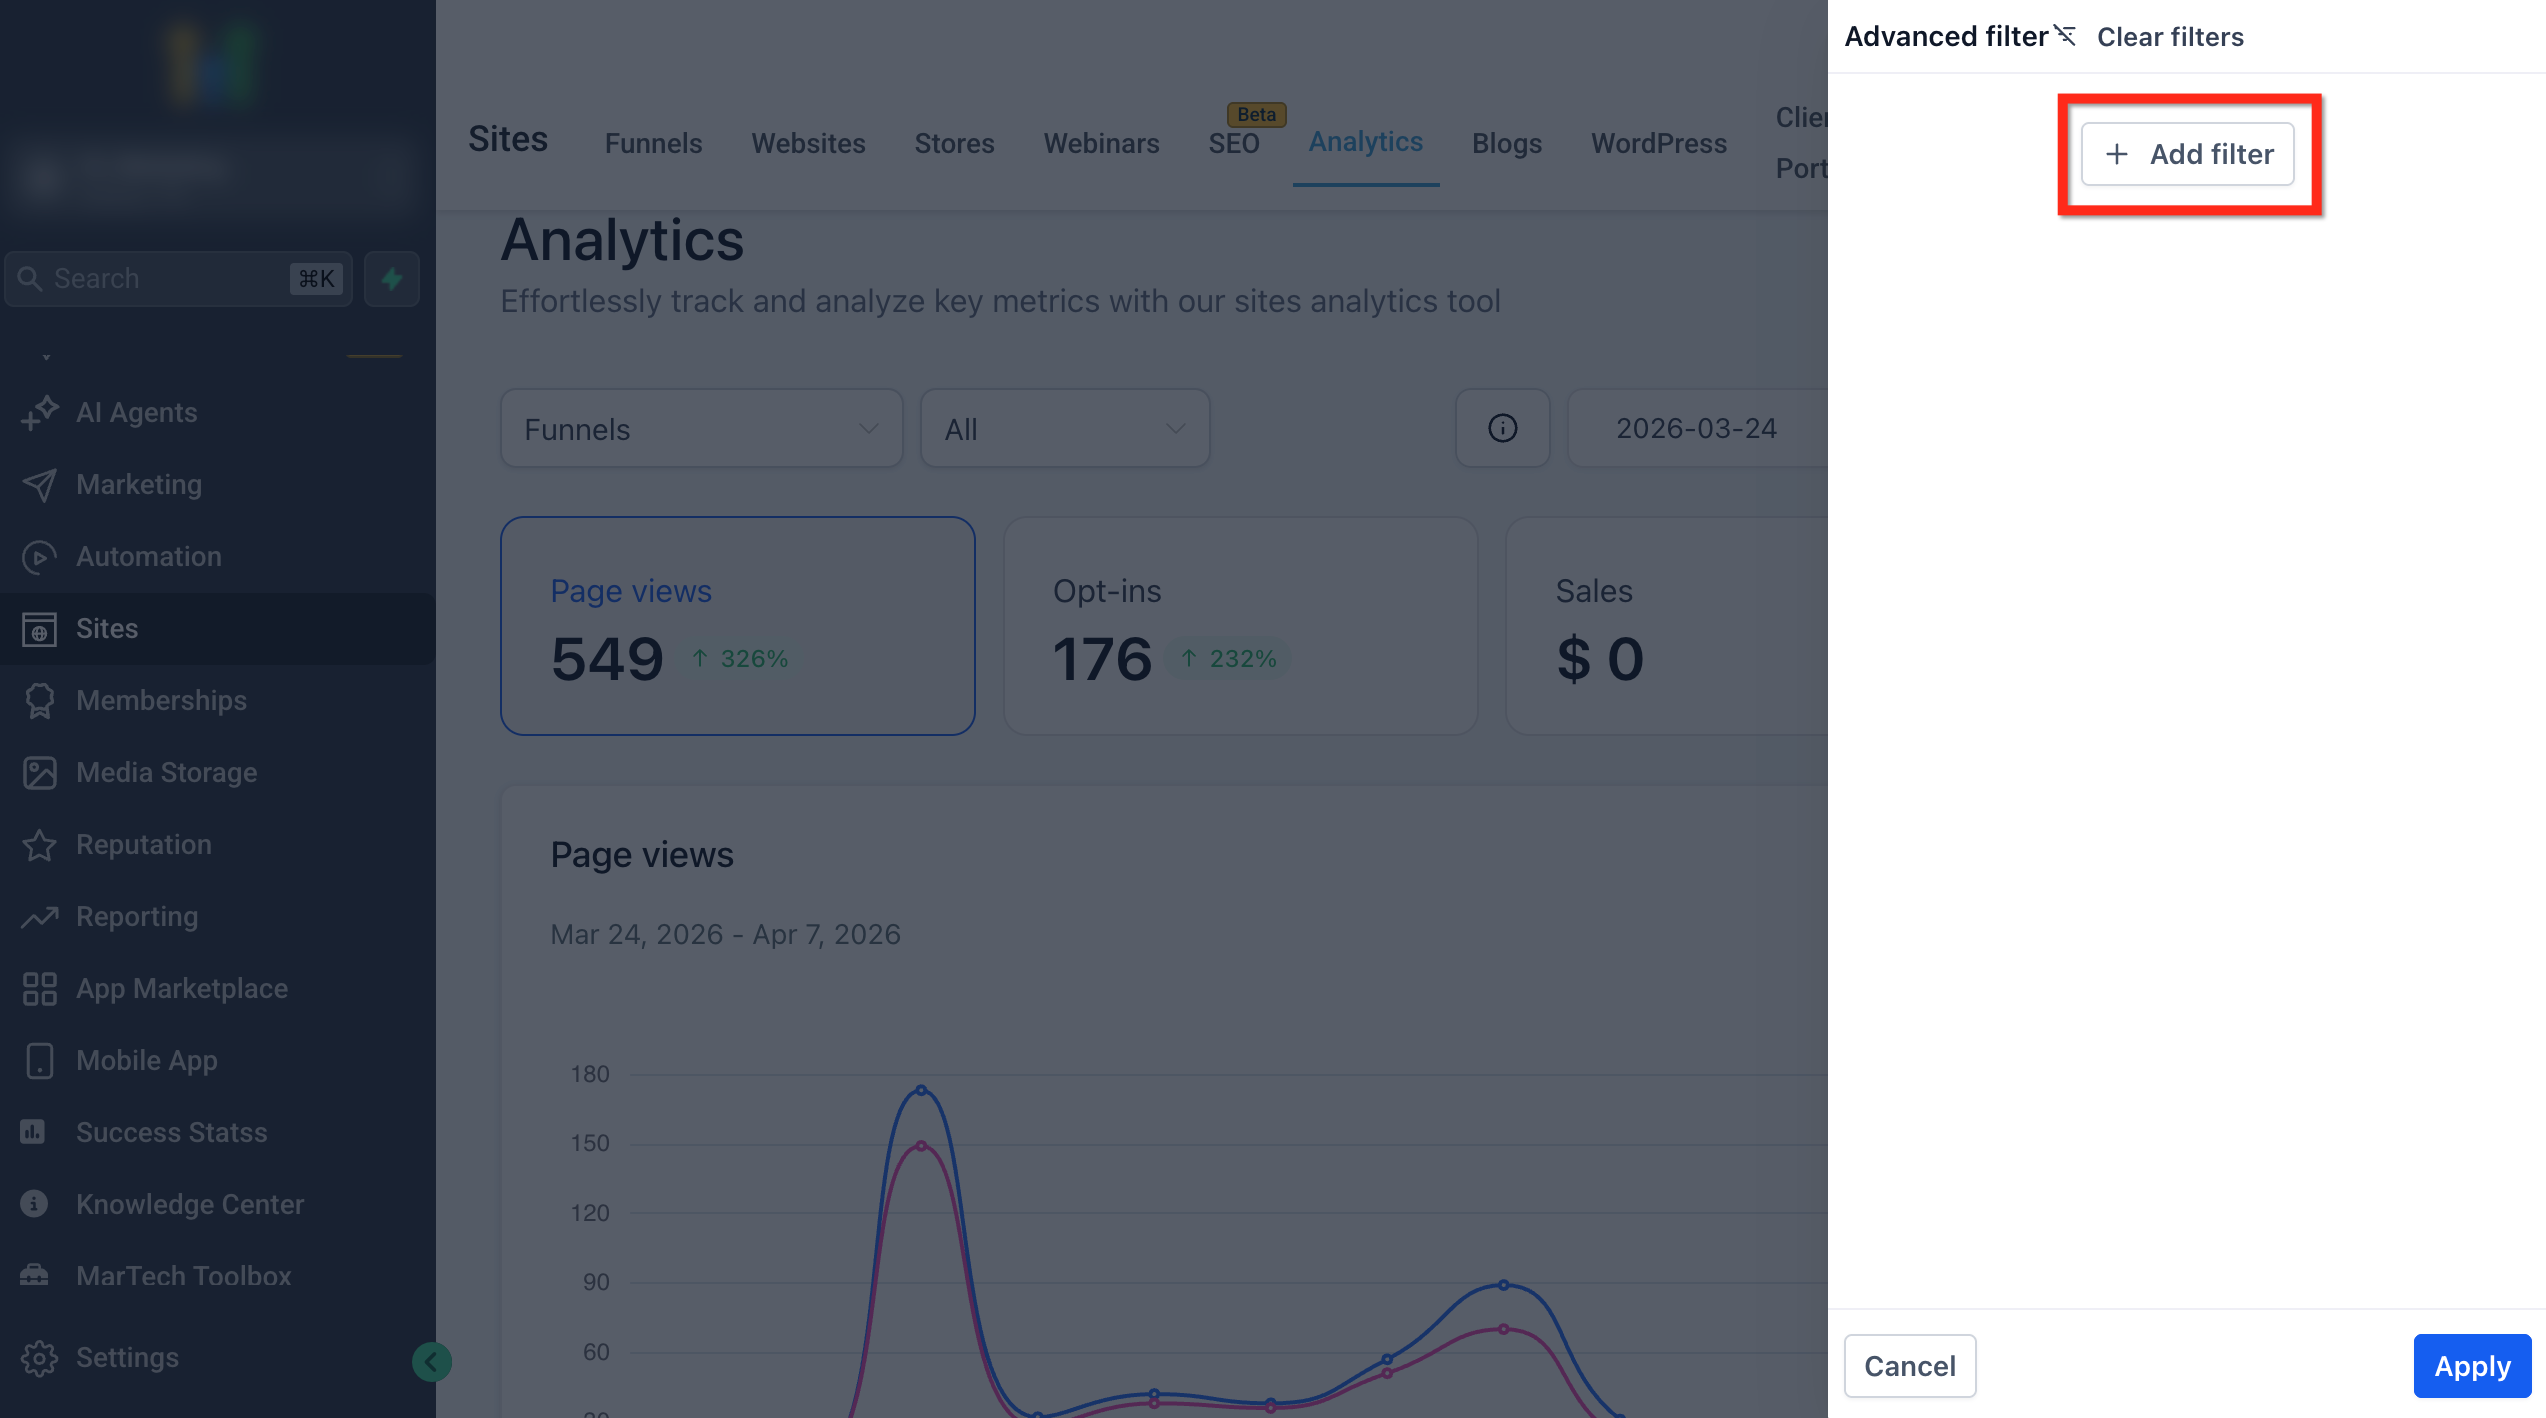
- Click + Add Filter.
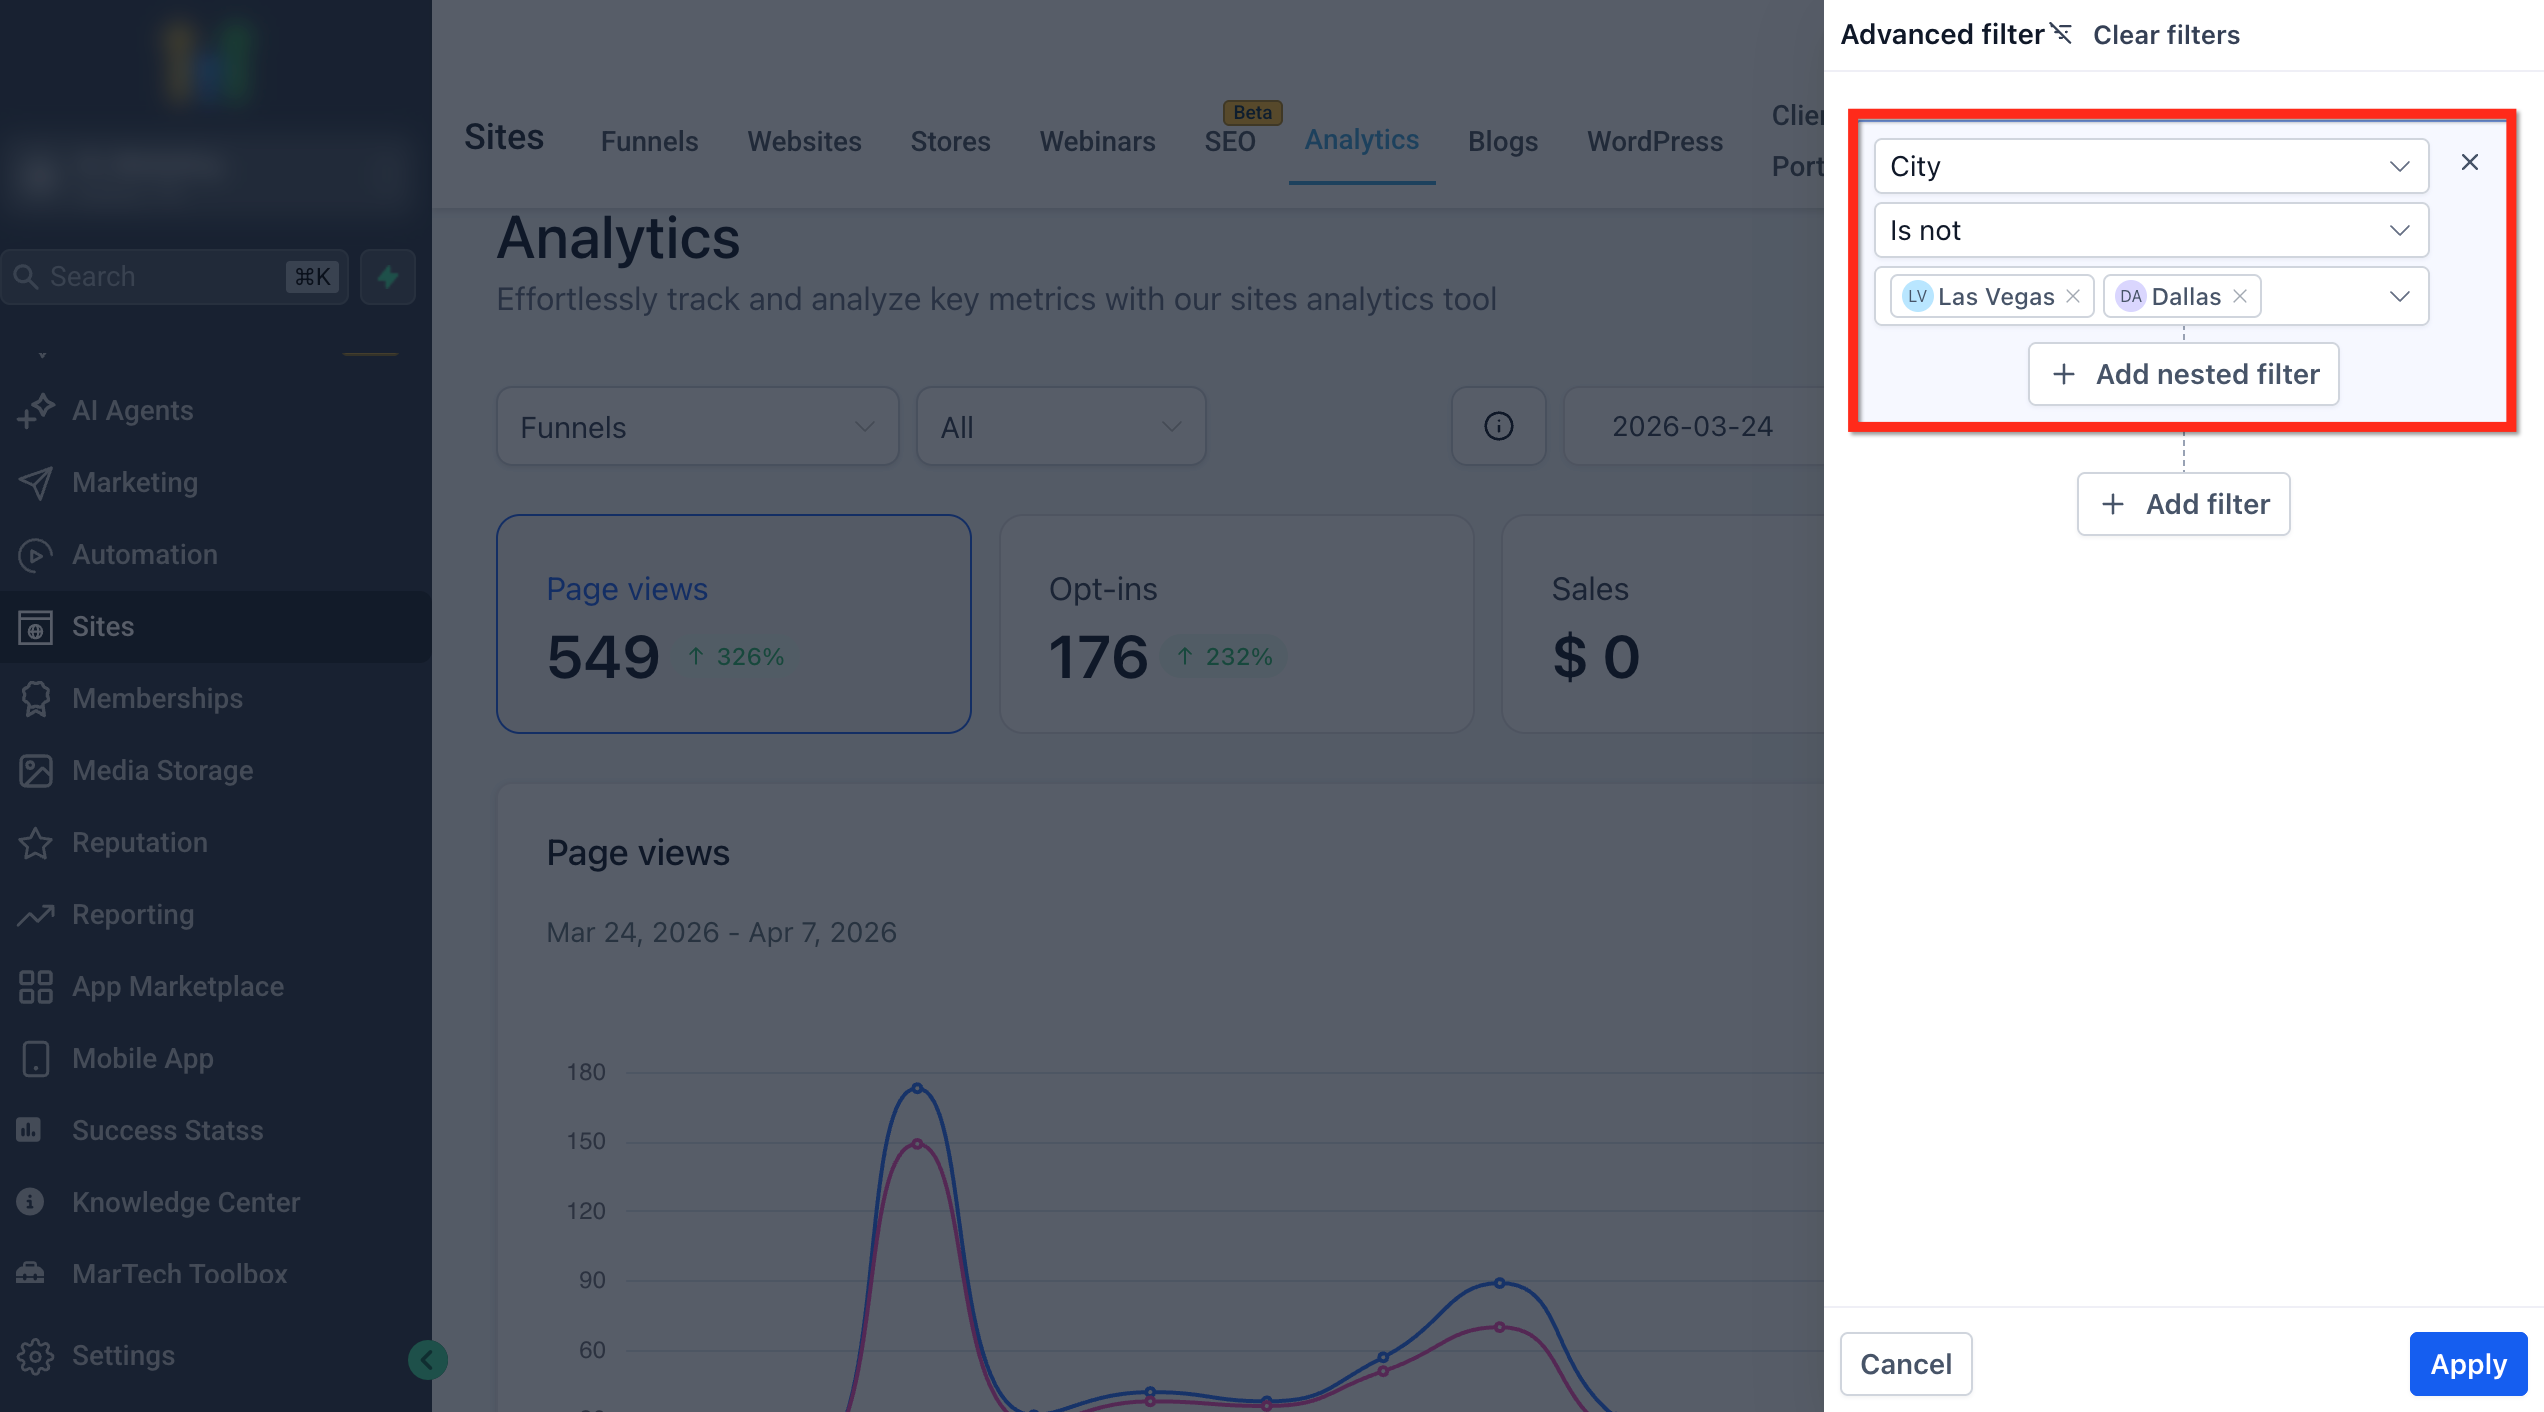
- Choose a filter field, set the condition (Is or Is not), and pick the values to include or exclude.
- Click Add Nested Filter to start a grouped condition set.
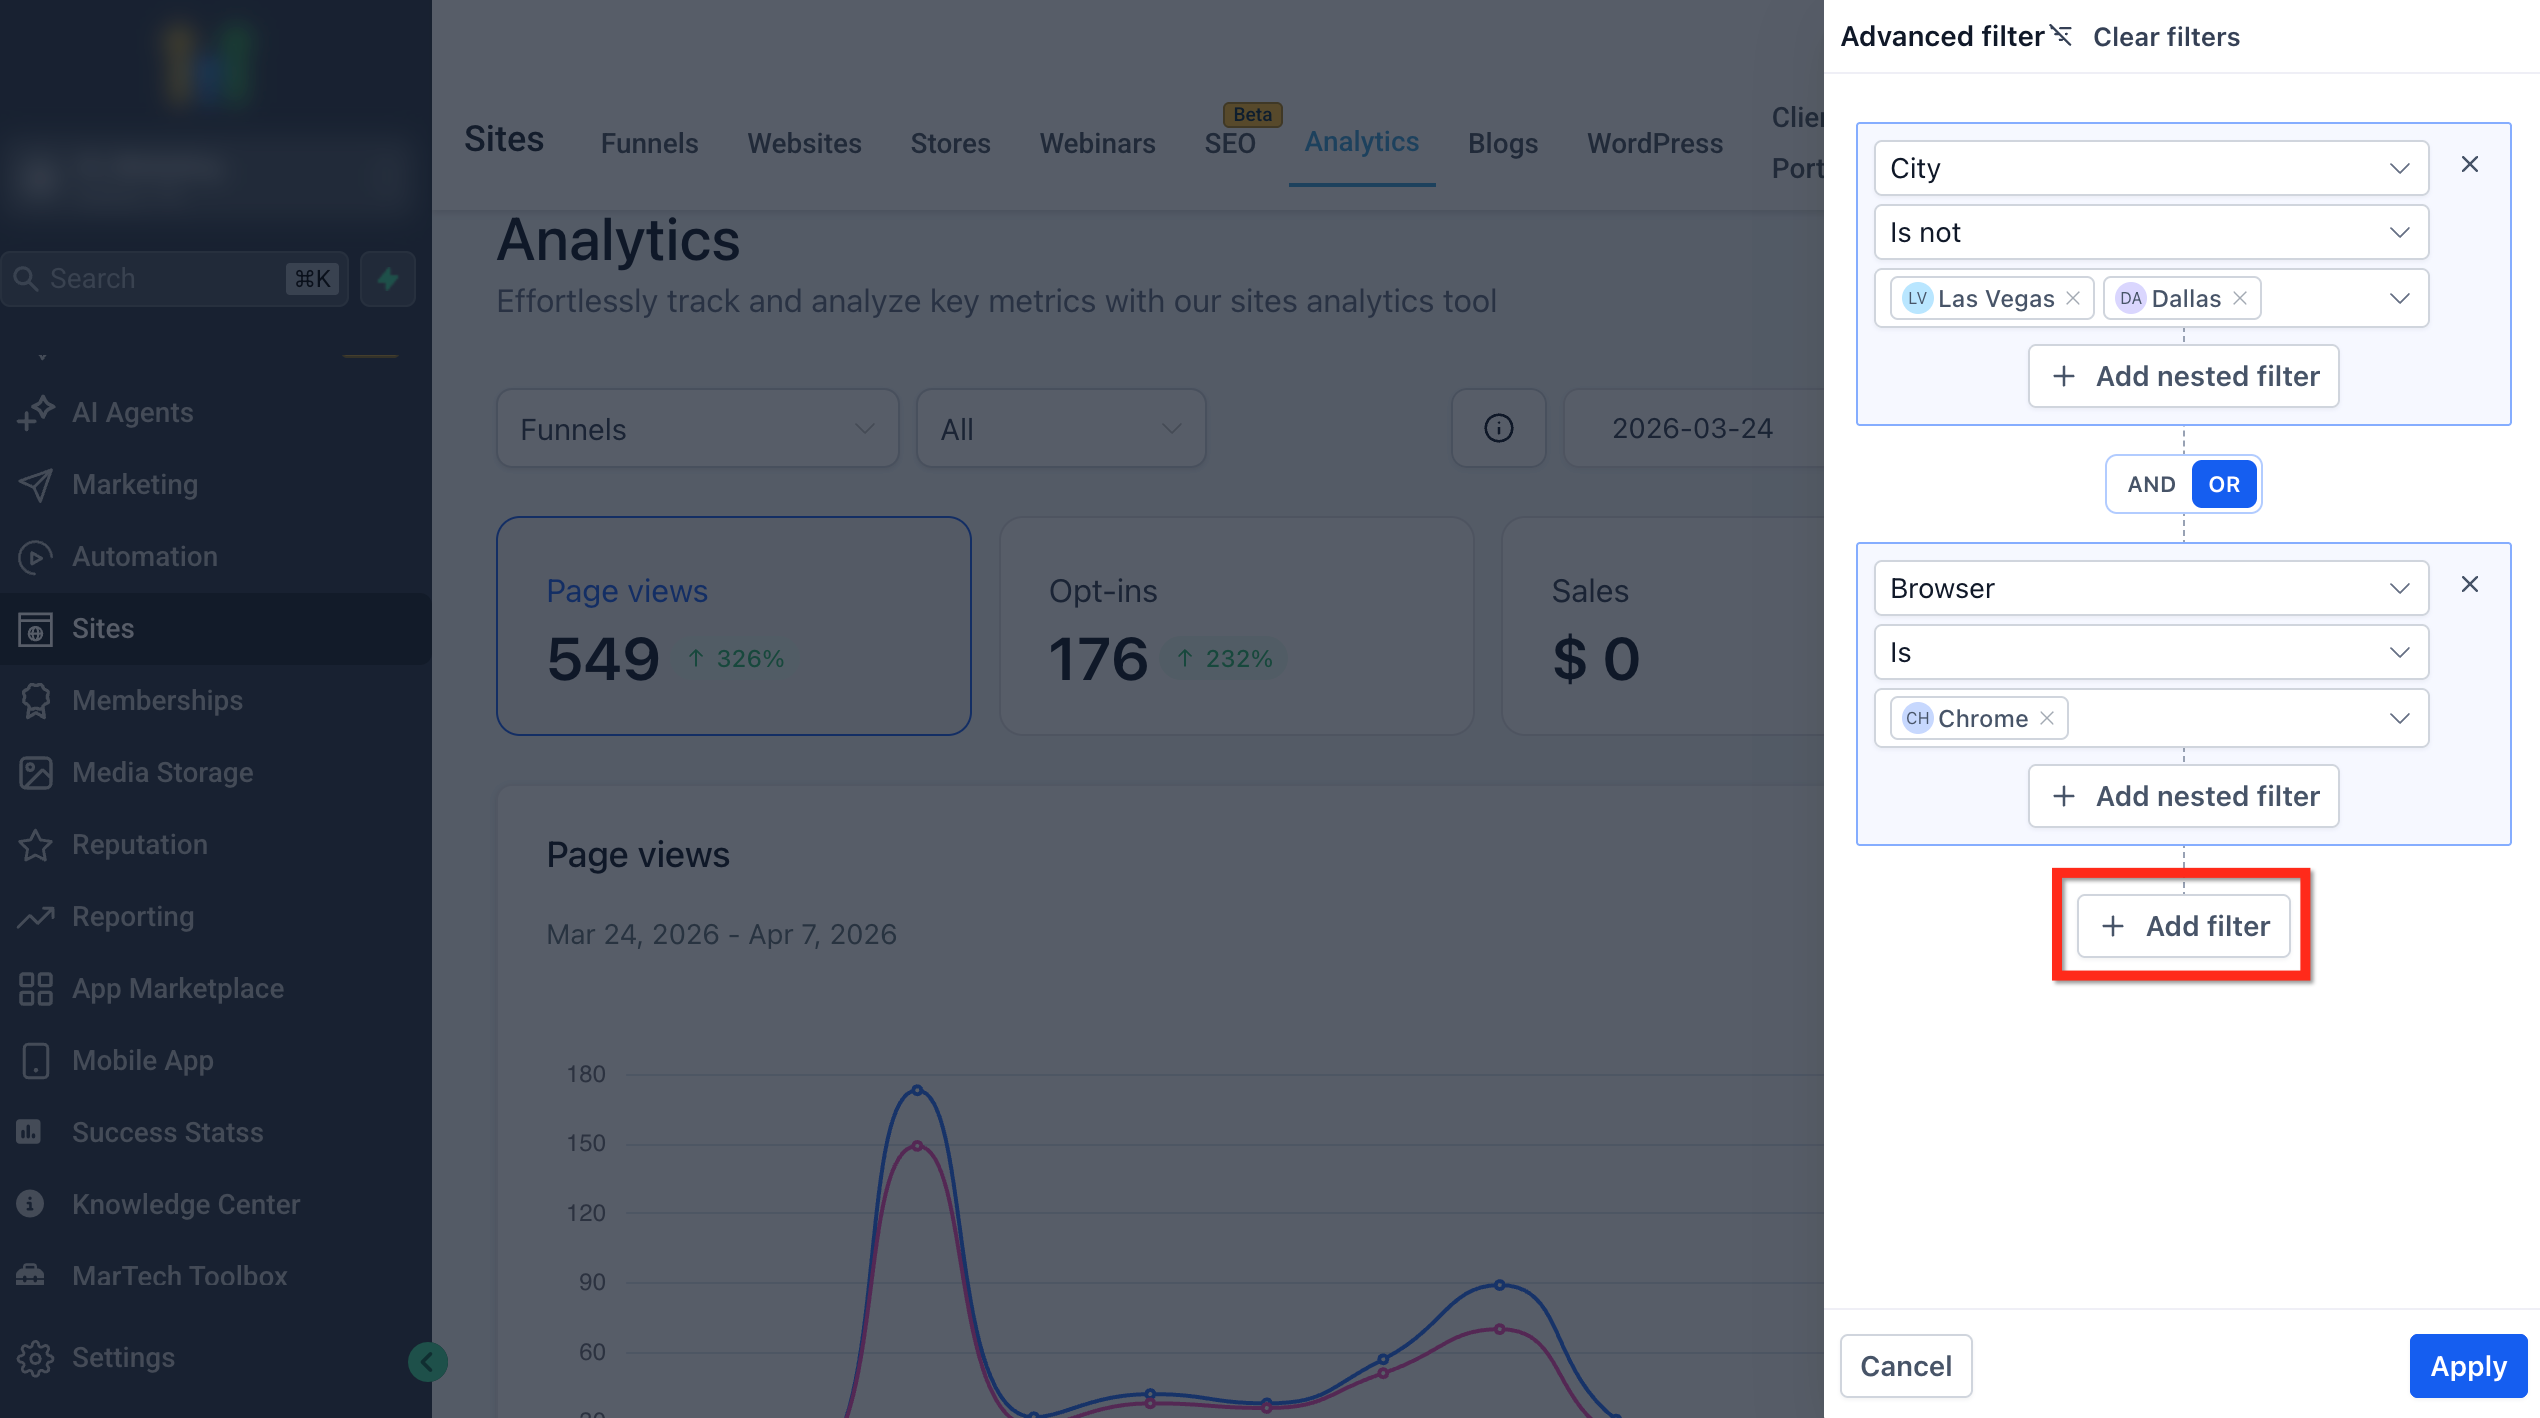
- Select AND or OR to define how the filters combine.
- Click Apply to refresh the analytics view with the new filter applied.
- Remove individual filters or clear all filters when you want to start over.
06What it looks like in HighLevel
07Settings that matter
- AND/OR filter logic. Controls whether multiple filter conditions must all be true (AND) or any can be true (OR) when the analytics data is evaluated.
08Things to know before you rely on it
- Advanced Filters work only for Funnels, Websites and Webinars.
- Filters do not persist after a page refresh or when you leave the analytics page; you must recreate them each session.
09If something goes wrong
- Filters disappear after refreshing the analytics page. Re create the desired Advanced Filters using the filter builder each time you return to the page.
10How it connects to the rest of HighLevel
- Explore geographic breakdowns with country, state and city analytics Geographic analytics
- View browser and client IP details for deeper traffic insight Browser and IP analytics
- Add visual summaries using pie chart visualizations in funnel and website analytics Pie chart visualizations
Michael's take

Advanced Filters are worth the time for any small business that wants to see exactly which visitors are driving results, without pulling raw data into a spreadsheet.
Don’t forget that your filter settings disappear as soon as you refresh or leave the page.